TABLE OF CONTENTS
An Invoice is a time-stamped commercial document that itemizes and records a transaction between a buyer and a seller. If goods or services were purchased on credit, the invoice usually specifies the terms of the deal and provides information regarding the permissible methods of payment.
An Invoice document in Precoro contains the following information:
- Invoice number
- Invoice Issue Date and Invoice Due Date
- Payment terms
- Buyer and seller details
- Reference to the correspondent Purchase Order
- Details regarding the products/services: description, quantity, prices
- Total amount.
How you can benefit from creating original Invoices:
-
Create one flow for the Invoice payment simulation and record the creation process.
-
Track approvals and payments to prevent maverick spending.
-
Track spending that does not require a Purchase Order.
In Precoro, there are several ways you can create an Invoice:
-
Create an original Invoice from scratch without a Purchase Order.
-
Generate the Invoice from an existing Purchase Order, follow this link to see how it works.
How to Manually Create an Invoice
To create a new Invoice manually, follow these steps:
1. Navigate to the Invoice module in the left-side menu and press Create.
2. Fill out all the required fields and click Create.
The Invoice Due Date field will be automatically calculated and filled out based on the Invoice Issue Date, Supplier, and settings you selected in Payment Terms. It applies in both cases when you create a single Invoice or one that is based on a Purchase Order.
See how to Manage Payment Terms and set the needed rules and dates.
When adding a supplier on the document creation page and redacting it on the Draft stage, you can either choose the existing Supplier from the drop-down list or create a new one by clicking the Add New Supplier button.
Also, users with the Supplier Management Role can access the Supplier’s page directly via an active hyperlink.
3. Add items:
- Add Item button allows you to select items from the catalog.
- Add Empty Row allows you to enter the items manually, or Import Items to import items via Excel.
- Import Items allows you to upload items from the file in bulk in two quick steps.
- Update Items allows you to update the added items in bulk in a few quick steps. You can Update items in the Invoice document with Draft and In Revision statuses. Find the step-by-step instructions on items update — here.
Also, you can use the functionality to add items directly through Invoice without having to transfer them to Catalog manually. Find a guide on how to set up and use this function here.
Note that you can enter the negative item values in Invoices. Please learn how this functionality works here.

You can also Approve and Confirm documents with zero total value for the whole document and also send them to integrated partners. Proceed to this article and learn more about Using the Free of Charge function.
Please proceed to this article section to learn how to Add New Items Without Matching.
Also, please see this article on the Split Lines functionality that will help you differentiate the items within the document.
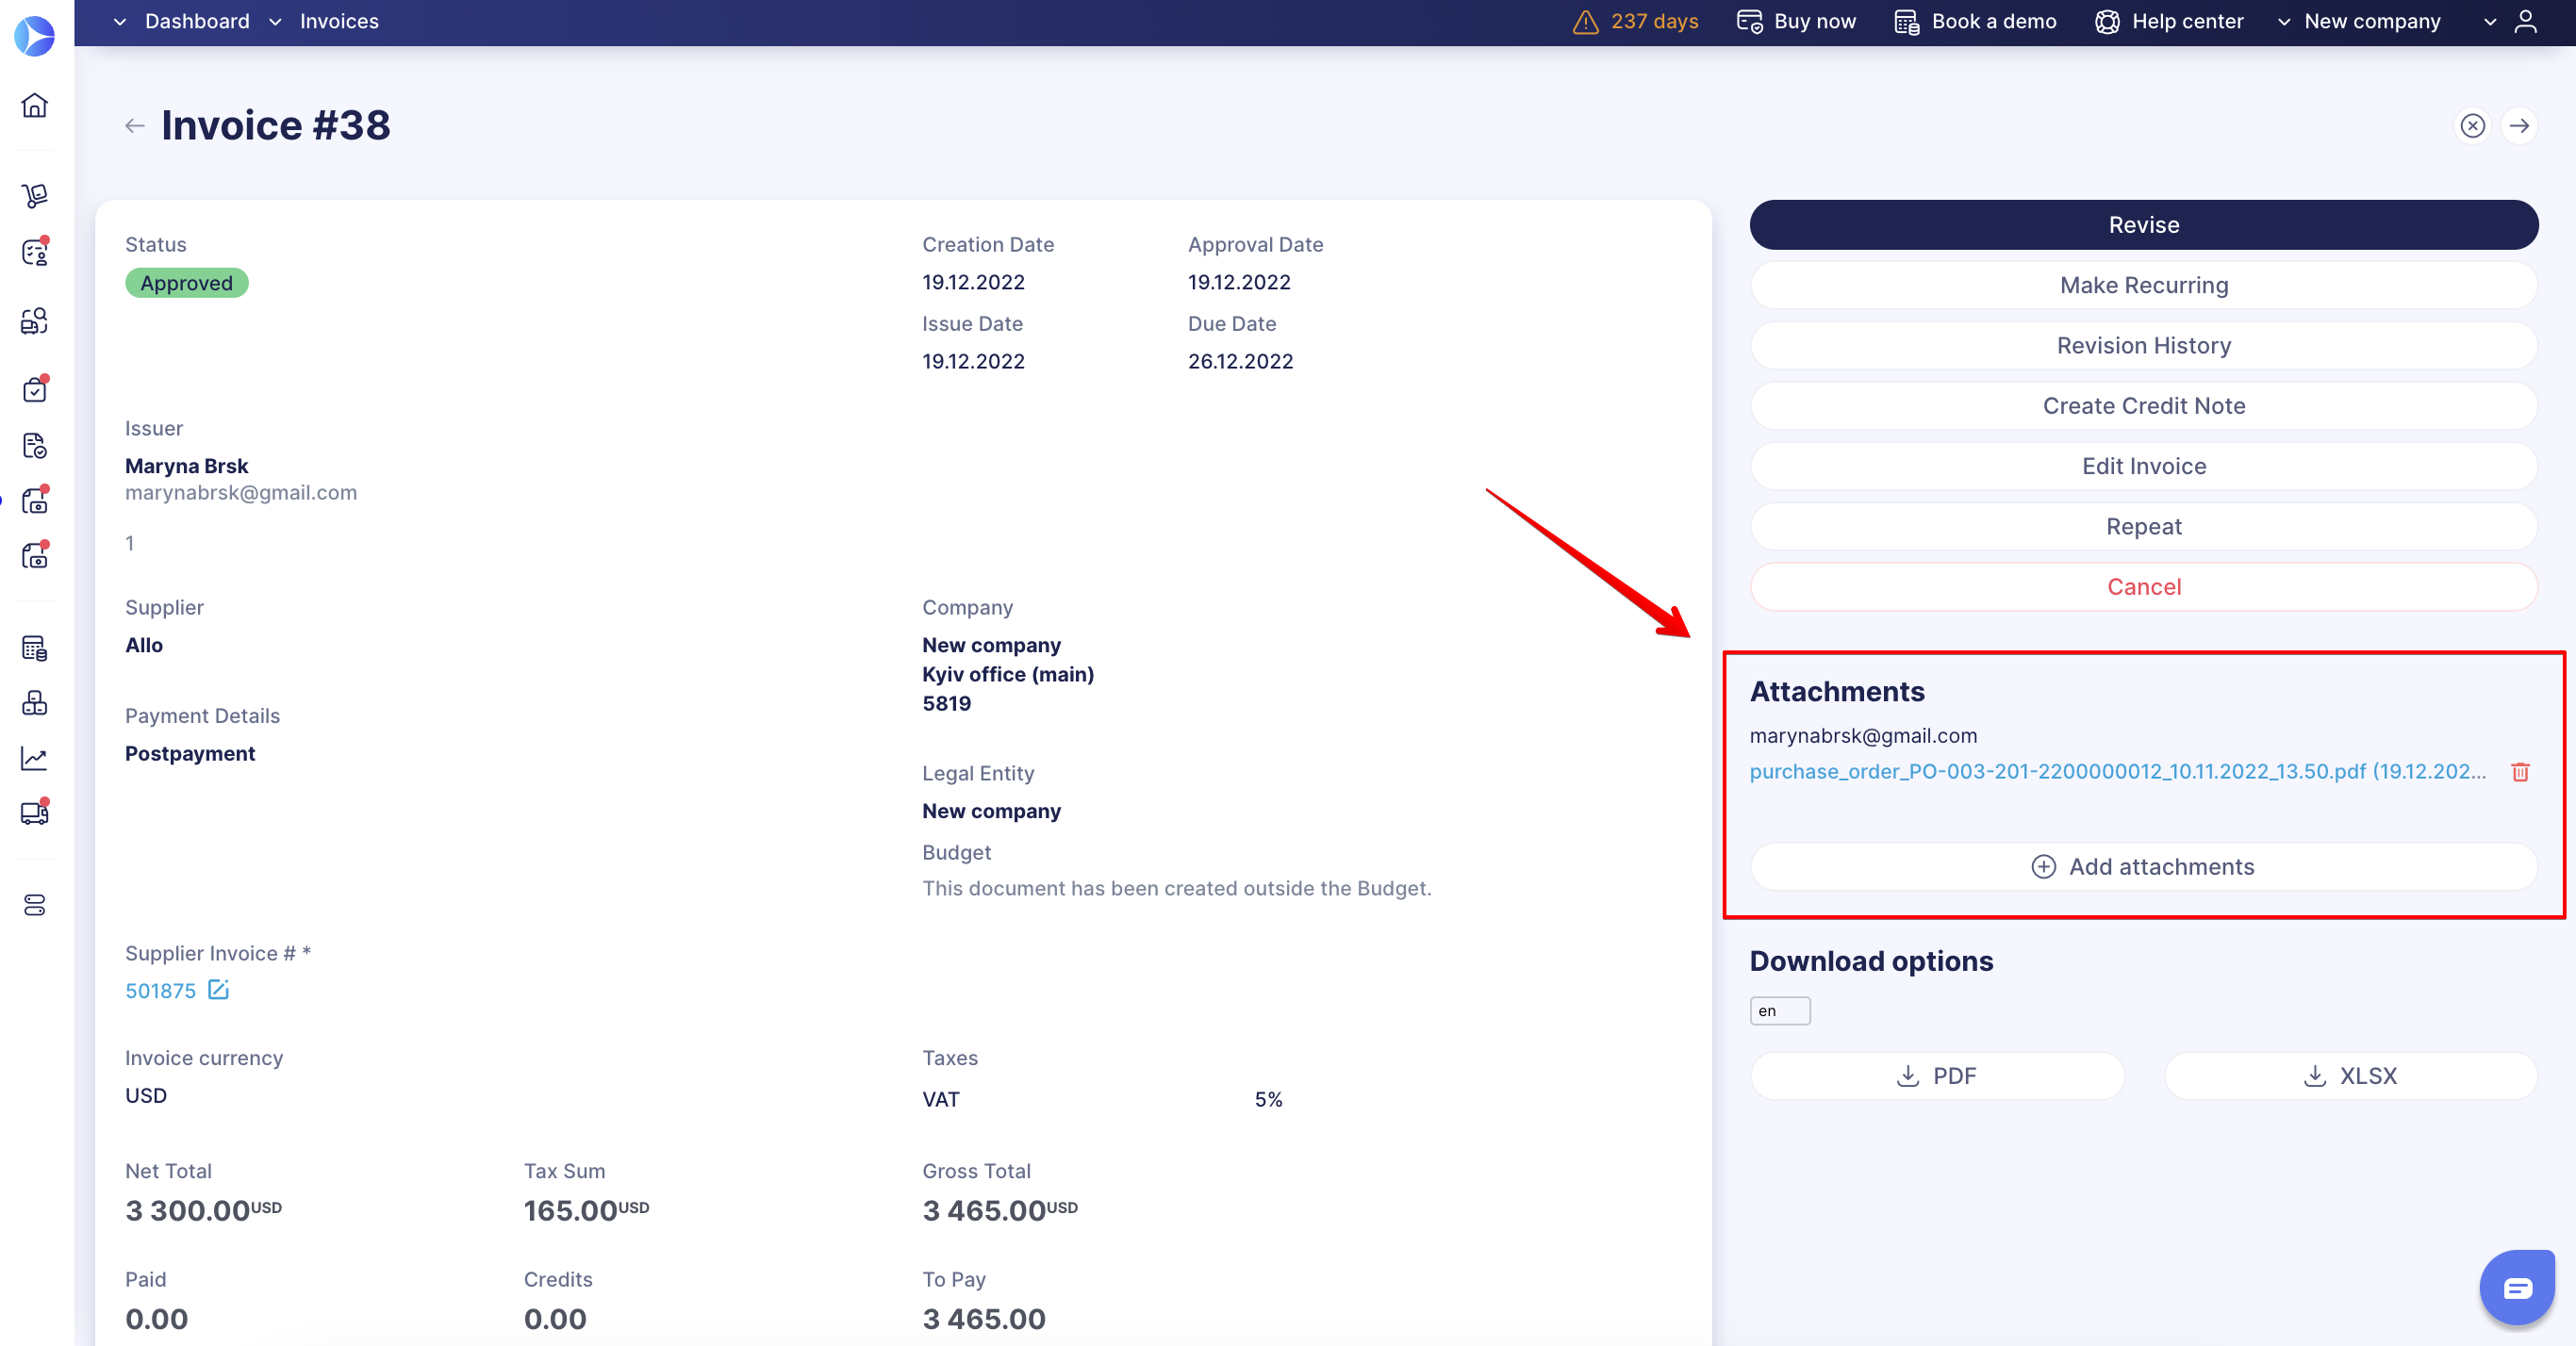
4. You can Add Attachments to your invoices and see them in related Purchase Orders if there are any.
5. If your Invoice is in Draft or In Revision, you can edit the location and supplier for it. You can only choose a supplier who has the same currency as the document you are editing.
Before editing the fields, please read the following article: Field Logic Behavior after Edit and Revise Actions in Documents.
Please note: You cannot edit this information if you create a direct invoice from the Purchase Order. For more details, see How to Create and Track a Purchase Order.
6. Double-check the information and click Confirm.
7. If your process requires approval, the Invoice will be sent to the authorized approvers, and the Invoice’s status will be changed to Pending.
You can compare the changes made in the Invoice using the Revision History button.
In Revision History, you can see all the attachment alterations as well.
Additional information on how to use this function can be found here.
8. You can always download the created document in the XLSX or PDF formats by clicking on the corresponding buttons.
If the document has a related Credit Note, additional Credits, Paid, and To Pay parameters will be added automatically.
How to Add New Items Without Matching
To be able to do that, you should activate an Adding New Items Without Matching setting in the Configuration → Basic Settings → Documents Setup → Invoices.
Please proceed to the Matching Process article in our Knowledge Base to learn more about how it works.
This new setting will allow you to add new item lines to Invoices without triggering the Matching process:
- When you add new item lines with positive prices that are within the set Tolerance Limit.
- When you add new negative item lines, the Matching will always be skipped.
Please visit the corresponding Knowledge Base article to learn more about the Negative Item Lines.
Please note that if the amount of the added item line increases the allowed Tolerance Limit percentage, the Matching process will be triggered.
The Prepaid Amount Display in Invoices
You can see the display of the Prepaid amount from the Purchase Order in the Invoice document on the Pending status as well as on the Approved one.
The Prepaid amount in the Pending Invoice will be displayed in the Paid field.
If the Invoice has a prepaid amount, the To Pay value will be reduced by this prepaid amount: To Pay = Invoice Total - Paid.
If you use the Block Invoice Confirmation without Receipt functionality, then the Invoice Prepaid amount will be displayed on the Pending Receipt status as well.
You will also be able to see the Previous Payments button in the Pending Invoice.
Budget Breakdown in Invoices
When you have added a Budget and activated a Budget Breakdown function to your Invoice document you will see the Budget Breakdown button below the item lines.
More information about the Budget Breakdown function can be found following this link.
Please note that the Budget Breakdown button will display in documents on Draft, Approved, and In Revision statuses.
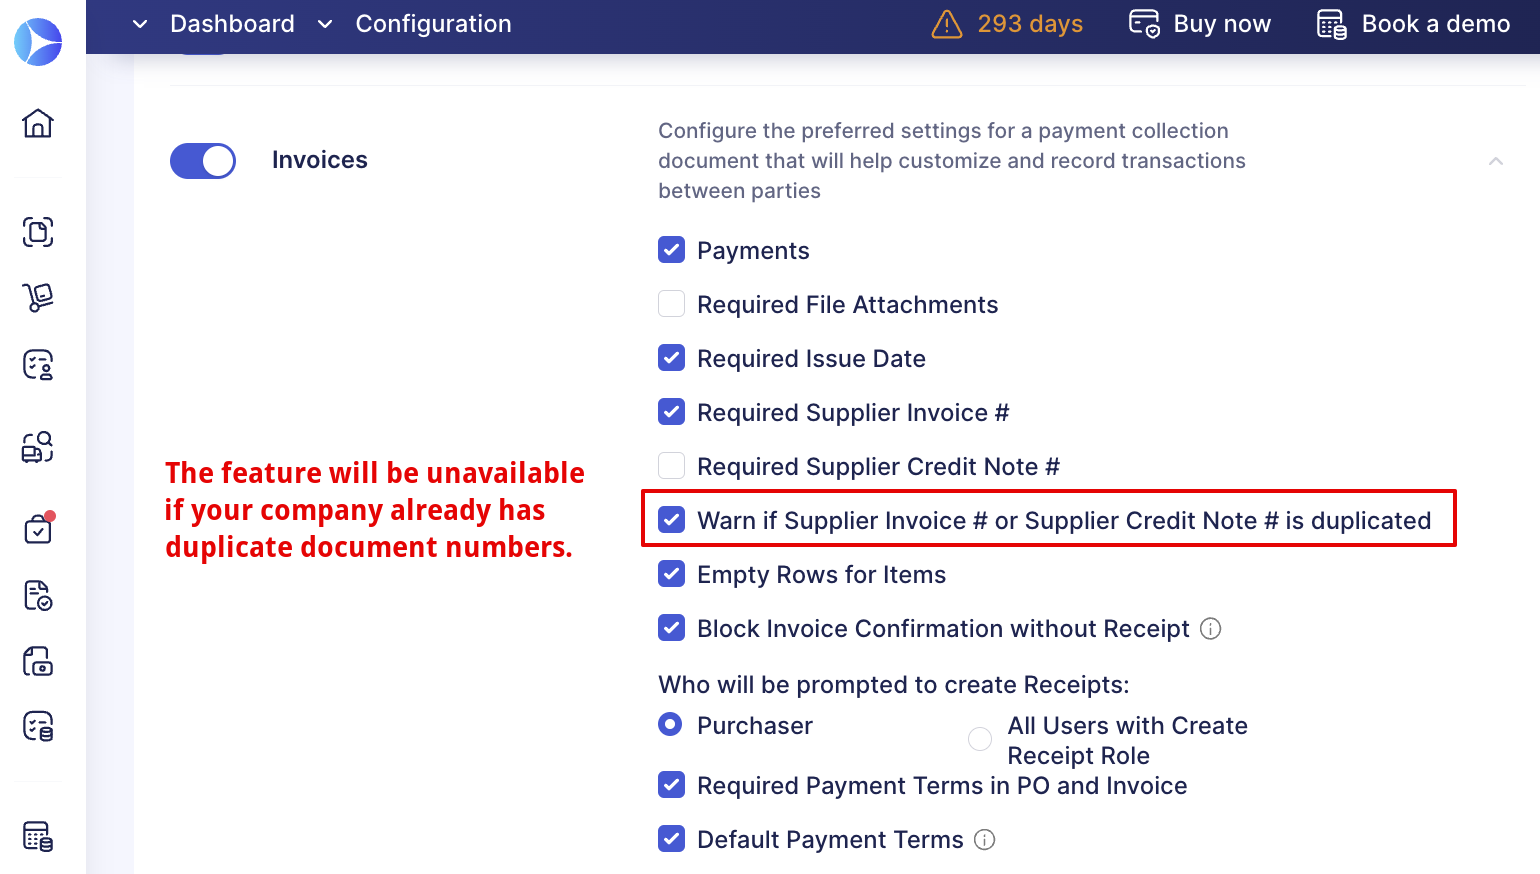
Duplicated Supplier Invoice and Credit Note Numbers
You can activate the Warn if Supplier Invoice or Credit Note # is duplicated function to prevent the creation of duplicate numbers for documents.
3-Way Match Functionality
You can block the document’s Invoice Confirmation without Receipt. After the Receipt creation, the Invoice will be automatically forwarded to the next Step in your Workflow.
Please follow this link to learn how to set up and start using this functionality.
How to Track an Invoice
Track the invoice statuses directly from the Invoice management page. You can gather the basic needed information without having to actually open the document by Status in the corresponding column.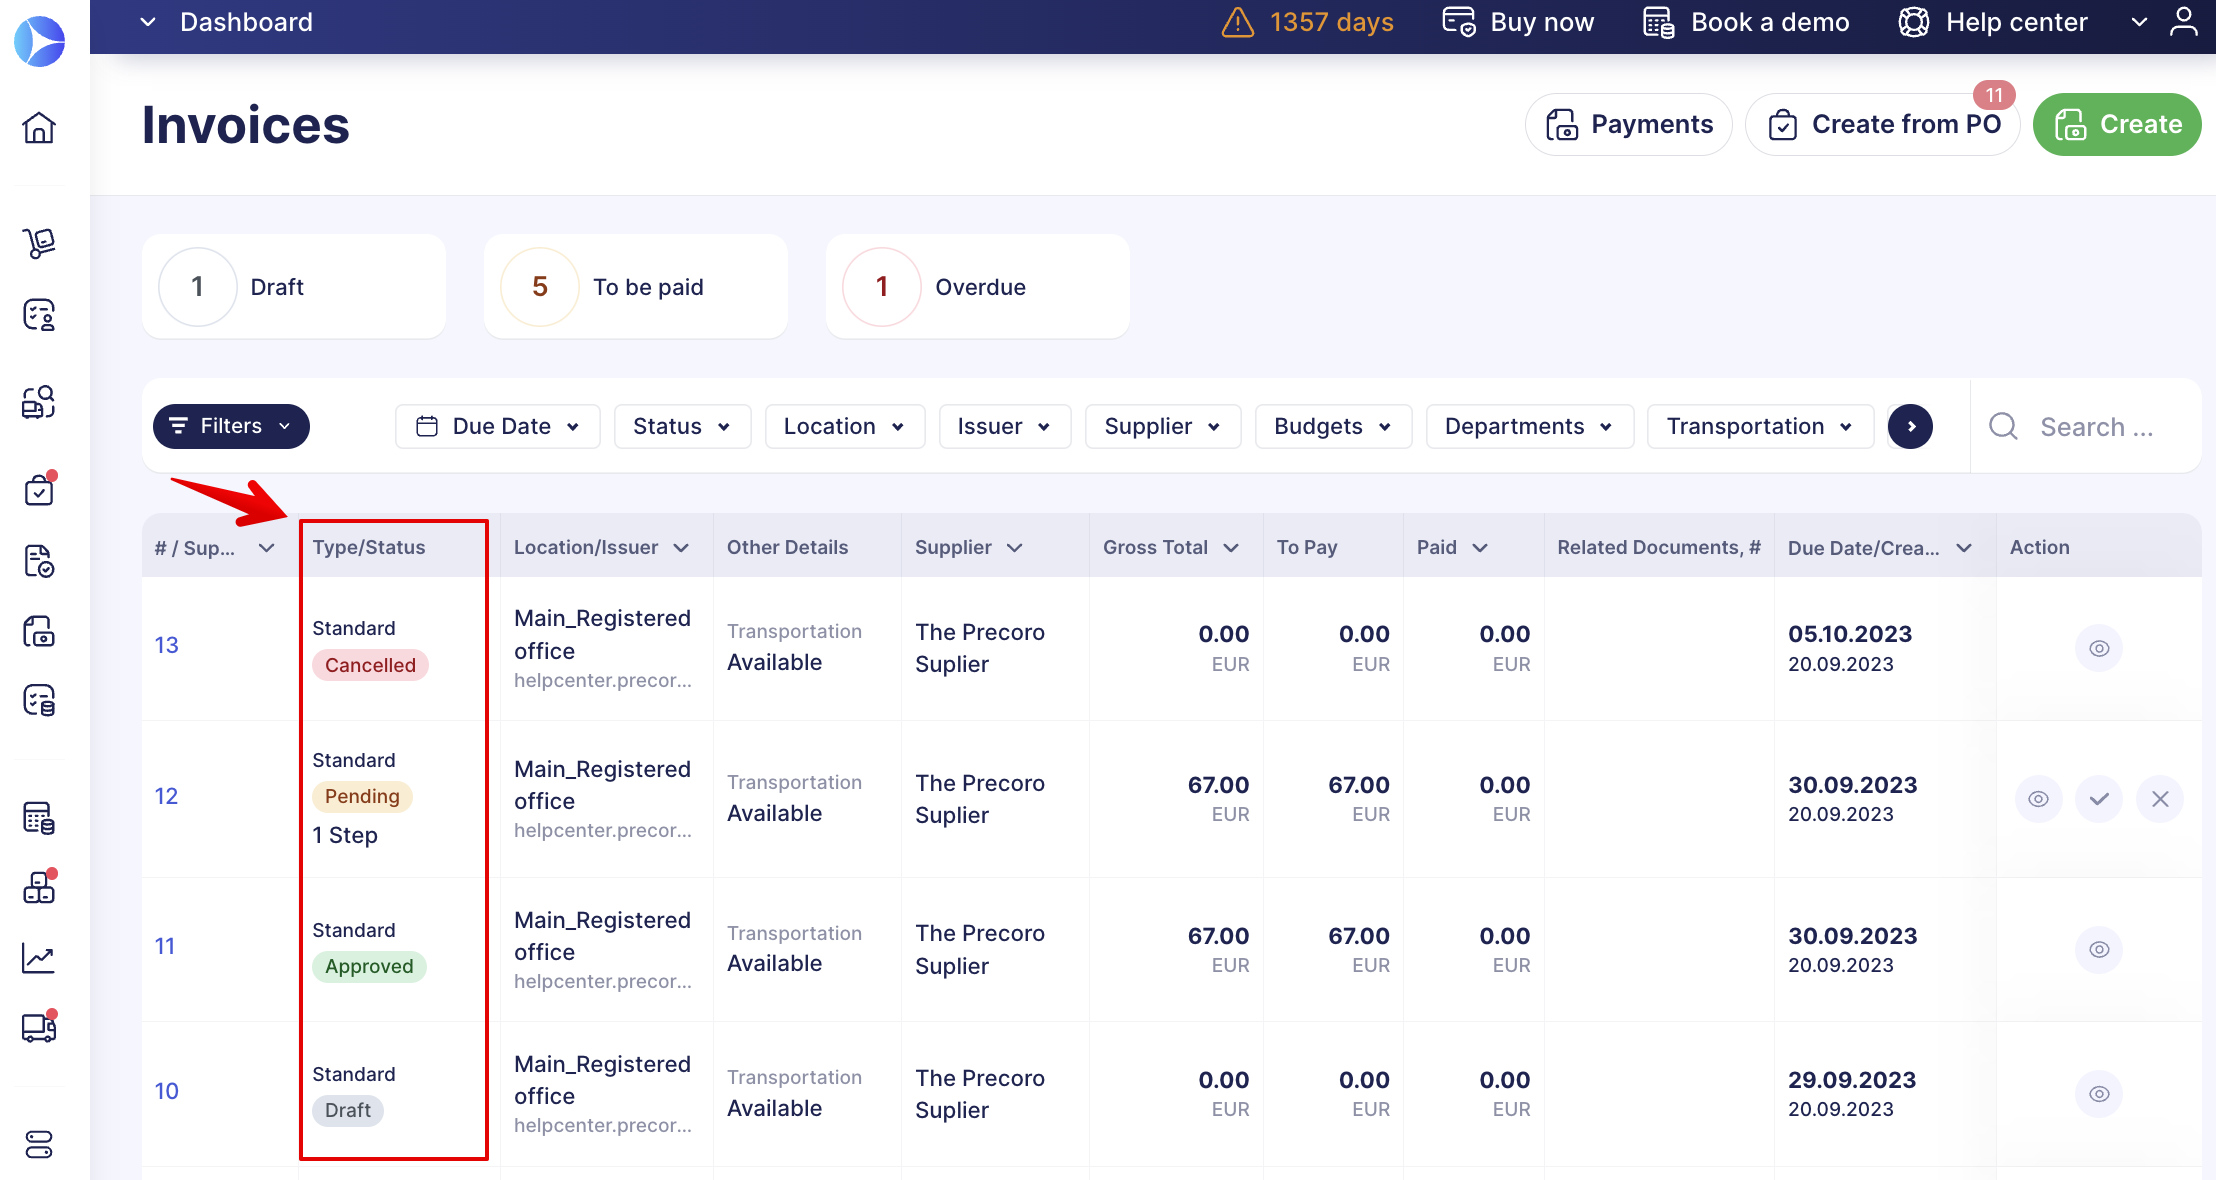
- Draft — the Invoice was created but not submitted yet. The initiator can still edit it and add/modify the items.
- Pending — the Invoice was submitted and sent for approval to the responsible authorizing user.
- Approved — the Invoice was approved by the responsible authorizing user.
- Rejected — the Invoice was not approved by one of the approvers in the approval flow. Therefore, it will not be paid.
- Paid/Partly paid — the Invoice is paid/partly paid.
- Canceled — the initiator revoked the invoice.
- Pending Confirmation — the Invoice created for the PO has some discrepancies, and the PO initiator needs to review these changes and approve them in the PO first. You can proceed with the Invoice only after the differences are approved in PO.
To expedite and optimize searches you can utilize the advanced or fast set of filters available on the document management page.
Fast filters on the panel above the document’s list will help you get the needed results quickly whereas advanced filters will allow you to go through the search more in-depth.
Find more useful information on how to set and use filters in Precoro here.
To use advanced filters for Invoices click Filters and set the parameters you need in the appropriate fields, then click:
- Filter results — to apply the selected filtering parameters.
- Save current filter — to save the selected filtering instantly.
- Reset all filters — to reset the selected filtering parameters.
You can filter results by both Custom Fields for Items and Custom Fields for Documents in Invoices but first, you need to activate them as described in the instructions here.
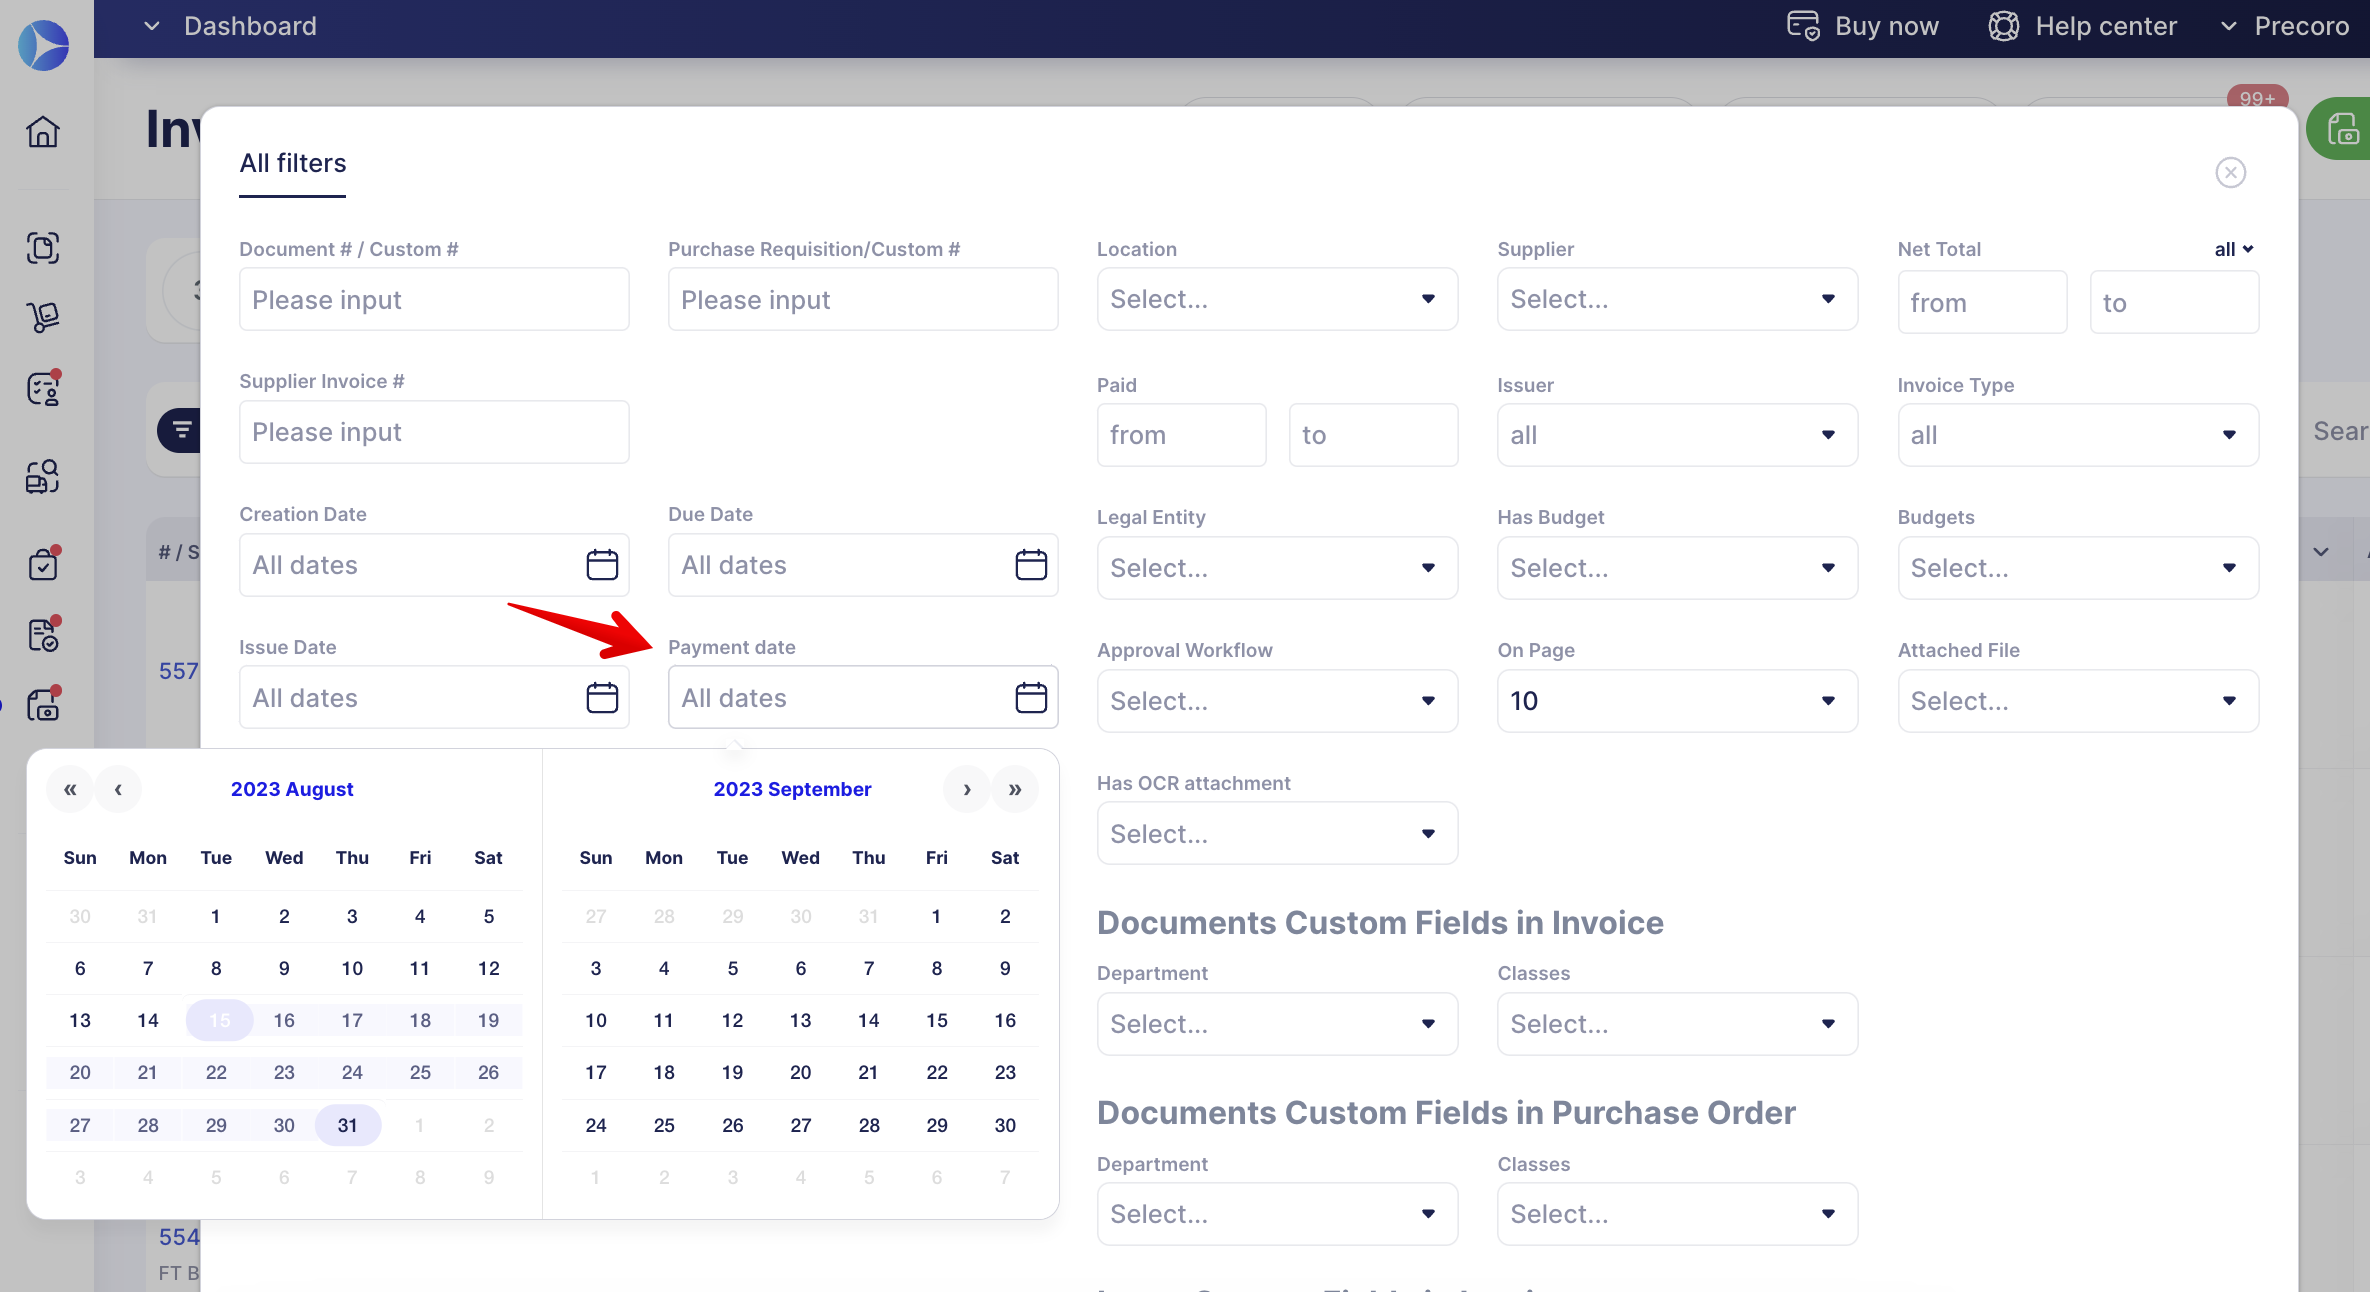
You can also use the specific payment filters to find needed information faster:
- Payment Date filter added on the Invoice management page available in the advanced set of filters where you can select the needed date range:
The Payment Date filter will sort out the information using the Payment date field from Payments: 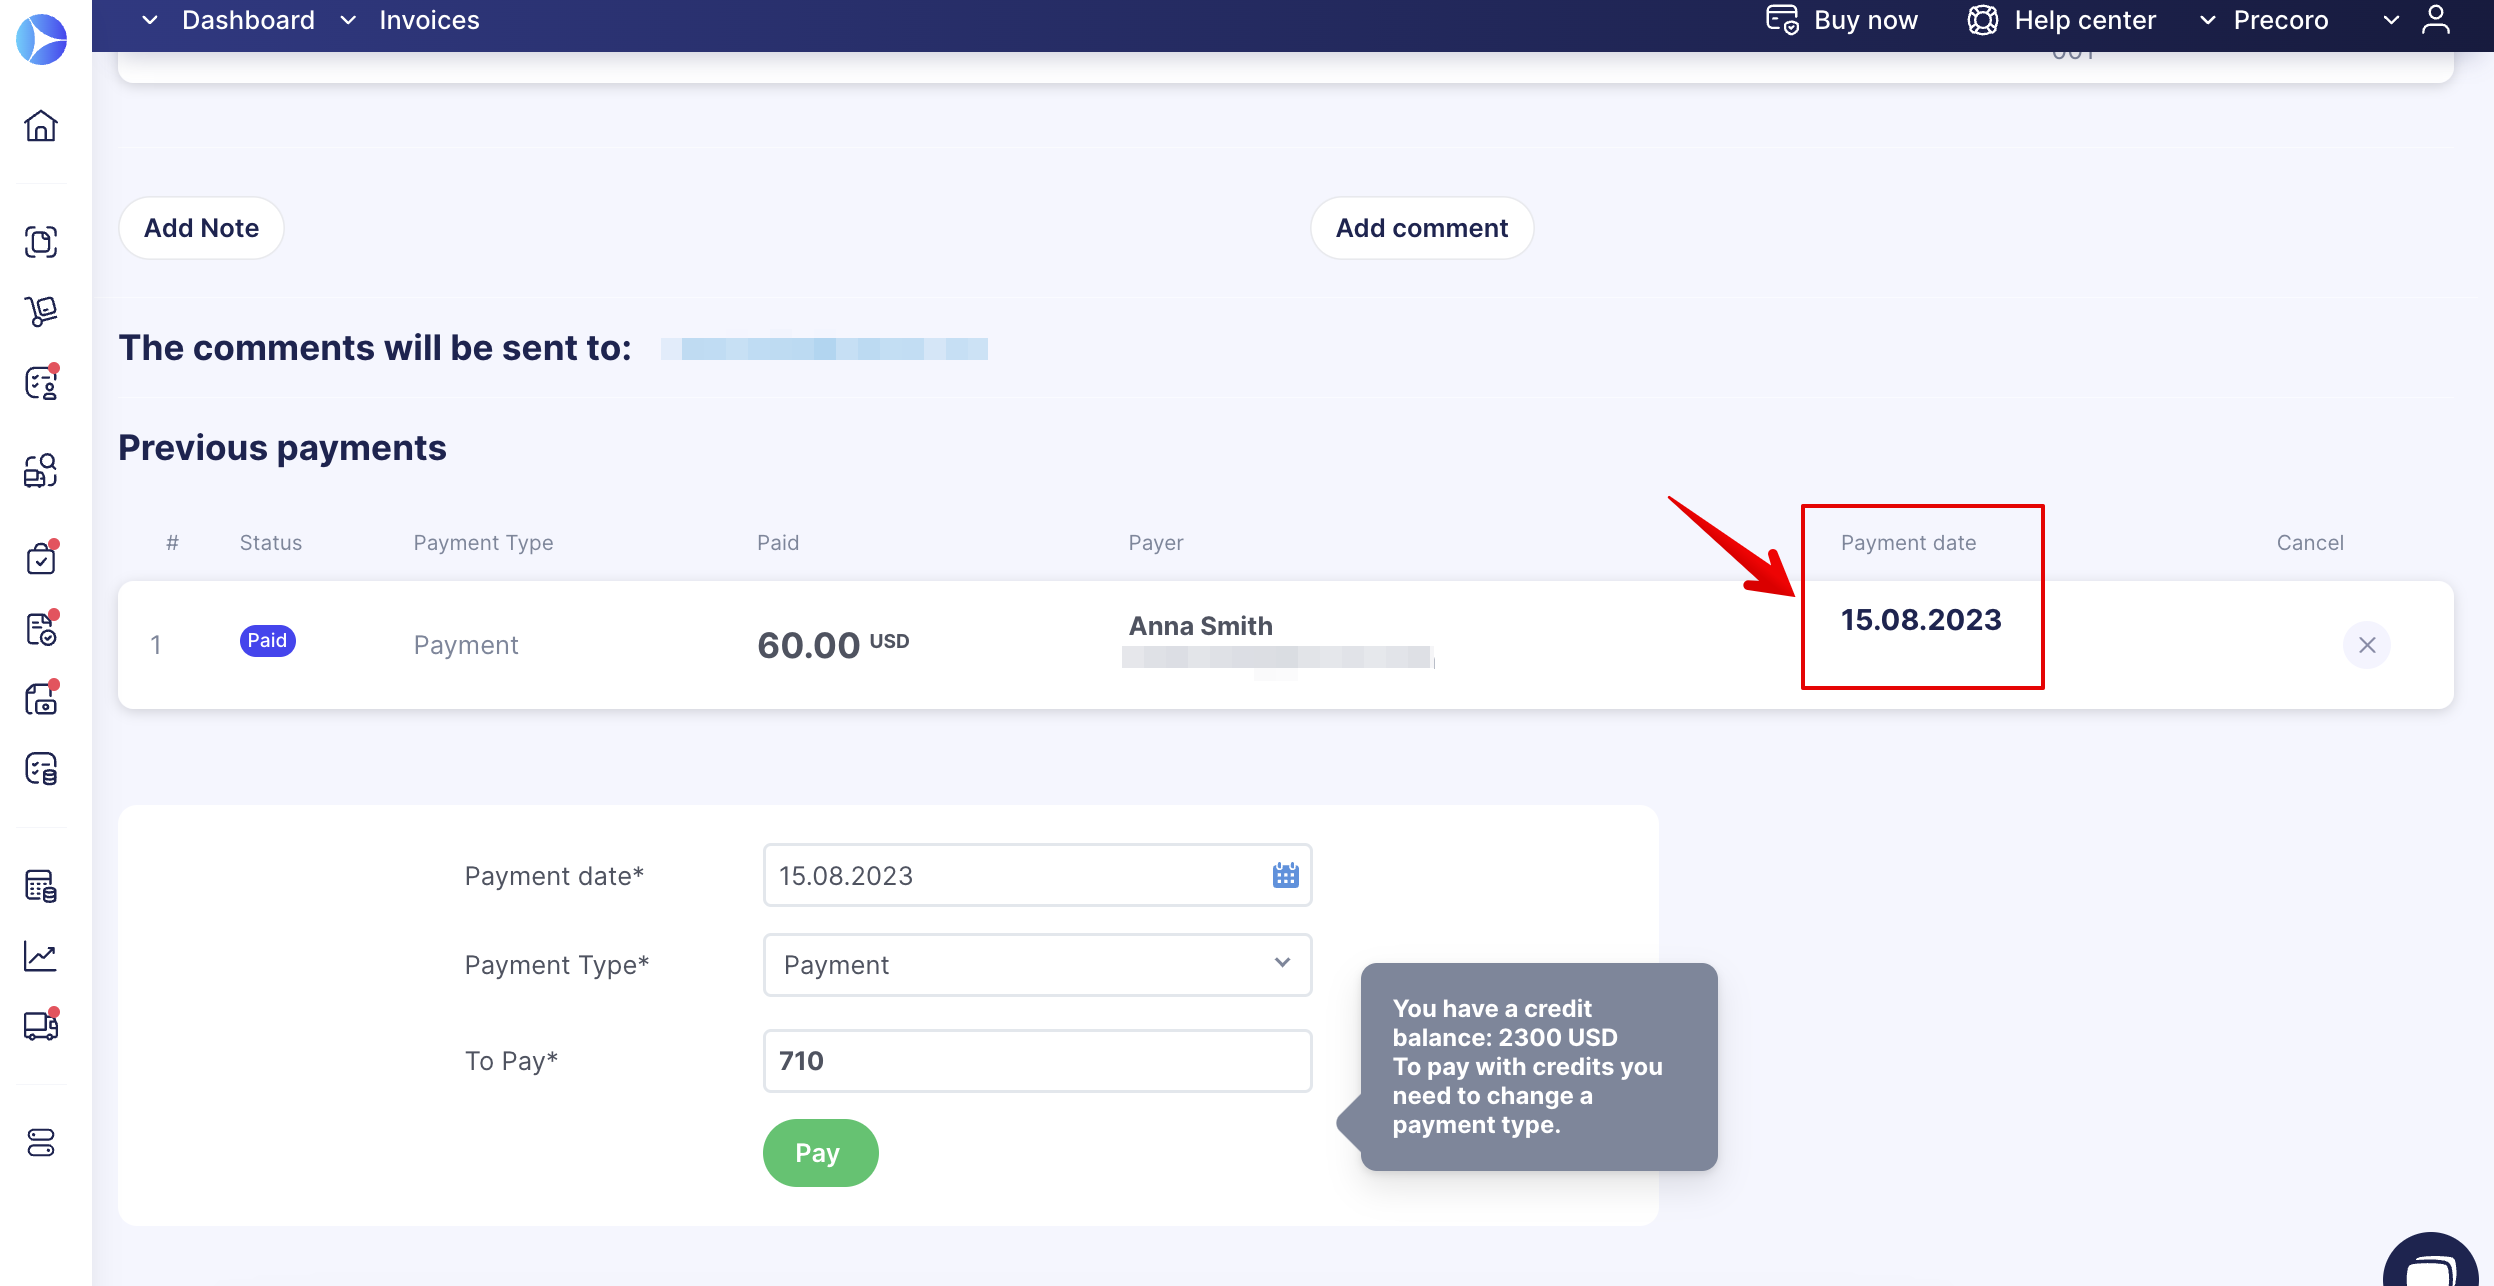
- The Payer filter on the Payments management page in Precoro is available in the advanced set of filters where you can select the needed people from the drop-down list. Also, note that you can add multiple Payers to the filter at once: