Create custom fields for documents and understand their configurations to manage user access and store document details conveniently.
TABLE OF CONTENTS
-
How to Use Custom Document Fields to Limit Access to Documents
-
How to Use Custom Fields for Documents in Approval Workflows
When to Use Custom Fields for Documents
Custom Fields for Documents are configured in your company and assigned to documents to store necessary details, such as the department that makes the requisition or the project for which the order is needed.
Here’s what you can use Custom Fields for Documents for:
-
tracking department or project spending;
-
limiting access to documents to define areas of responsibility;
-
customizing approval workflows;
-
storing necessary information about the document as text, date, or options from a predefined list;
-
creating budgets based on your company’s structure.
How to Create Custom Document Fields
Step 1: Add a New Field
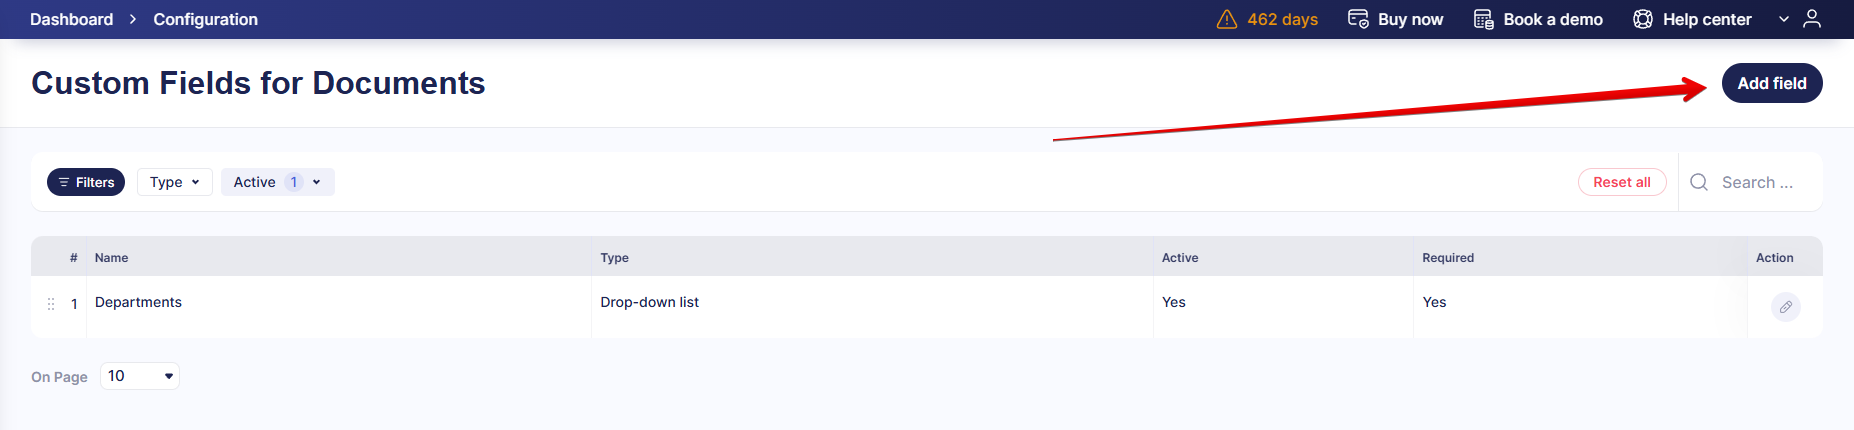
Navigate to Configuration (Configuration for app.precoro.us) → Custom Fields for Documents. You will see a list of all active custom fields for documents created by your company. Press Add field in the top right corner.
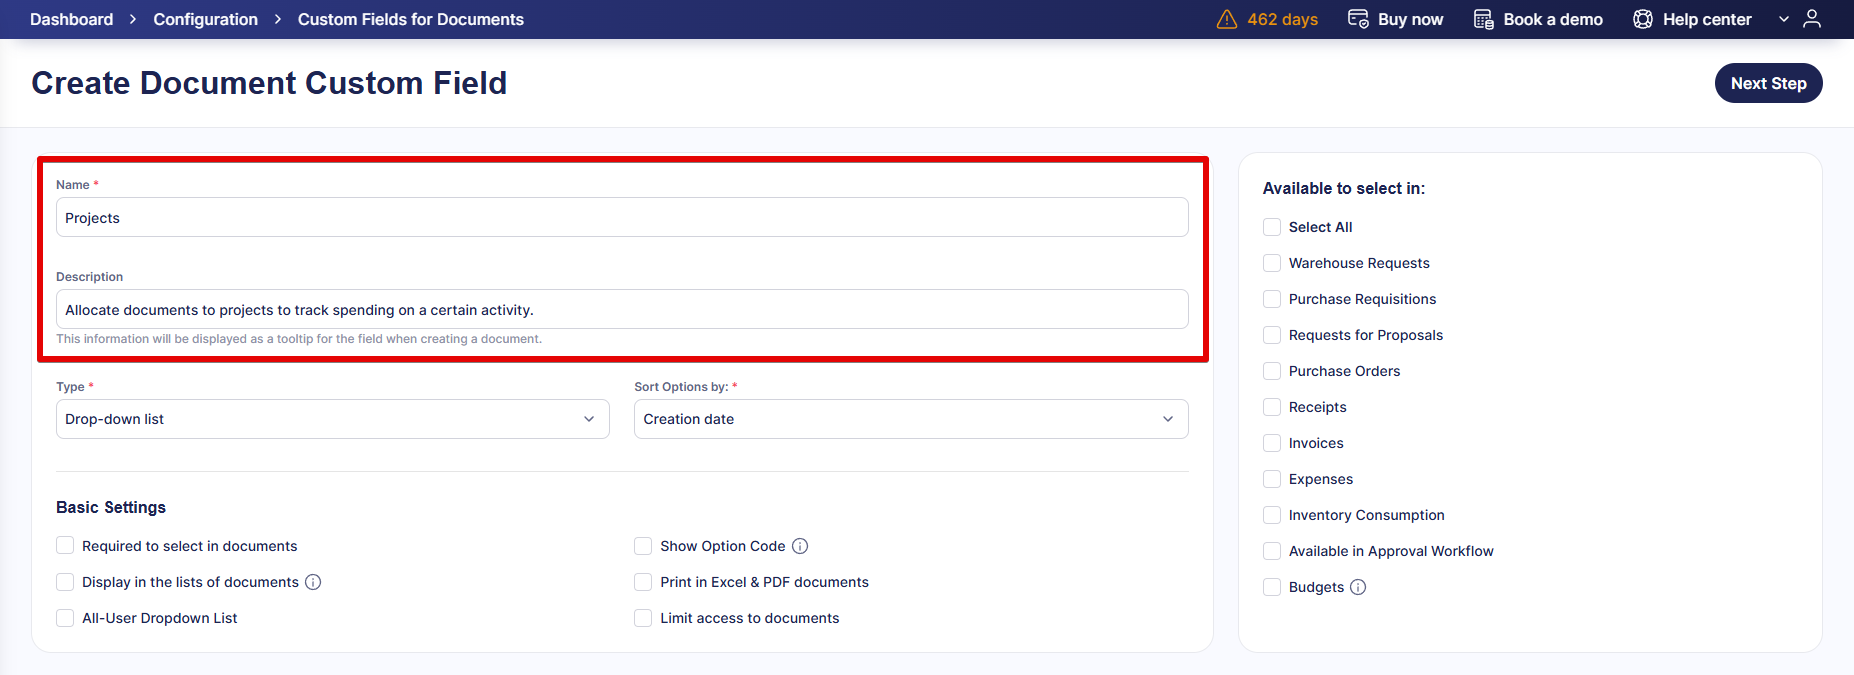
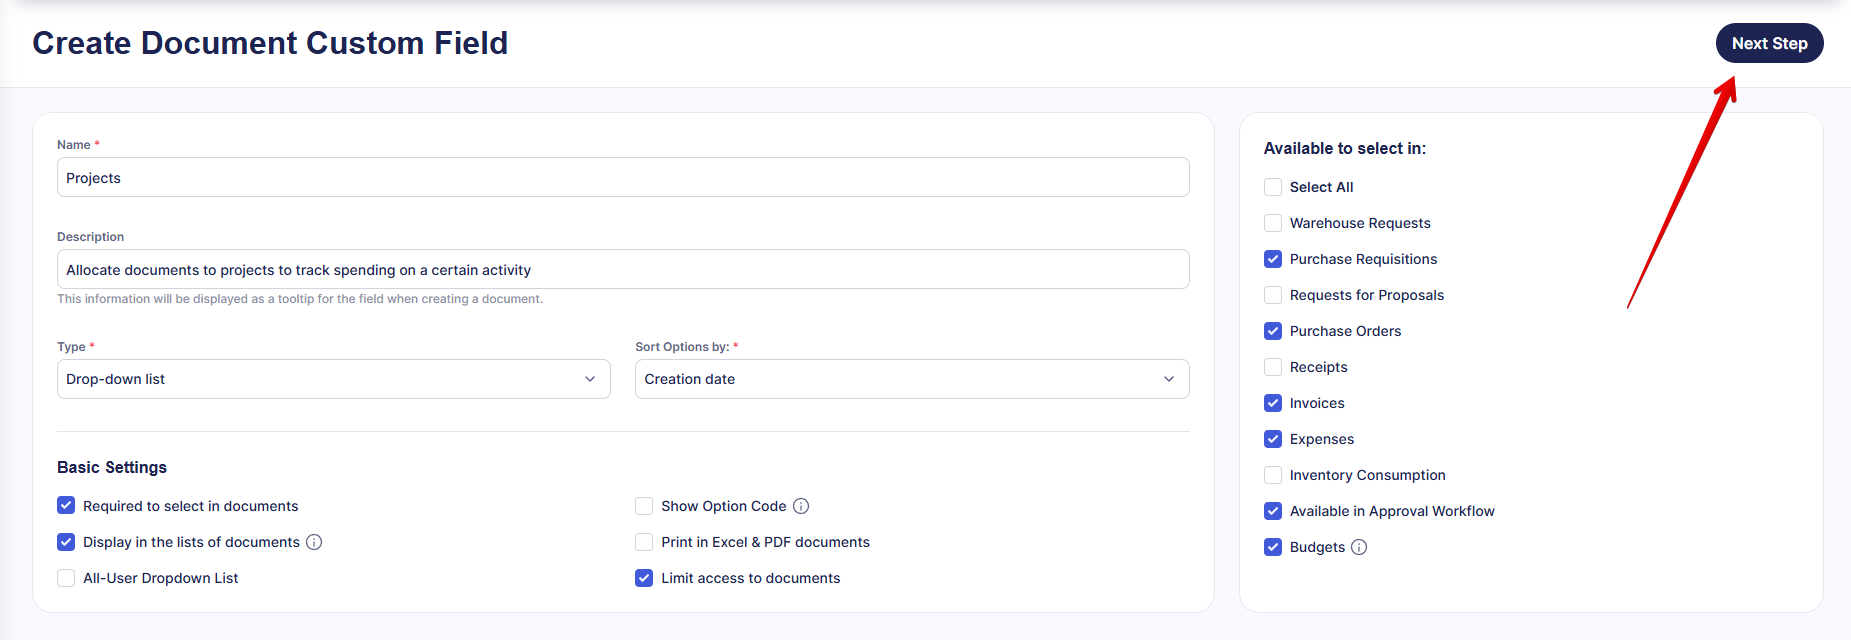
On the Create Document Custom Field page, begin by entering the new field’s Name and Description.
Step 2: Select a Type
Next, you can select one of the following types:
|
Drop-down list |
Allows selecting options from the list predefined for this field. You can add the options after configuring basic settings and availability for the field. Use this type when setting up Departments or Projects. |
|
Text |
Allows entering text information without predefined options. This type can be used for details required in the company’s processes, such as the document's purpose, project stage, etc. |
|
Date |
Suggests to select a date from the calendar. Use this type to save dates beyond Precoro’s standard fields. |
If you choose the Drop-down list type, you can also select the sorting criteria for options.
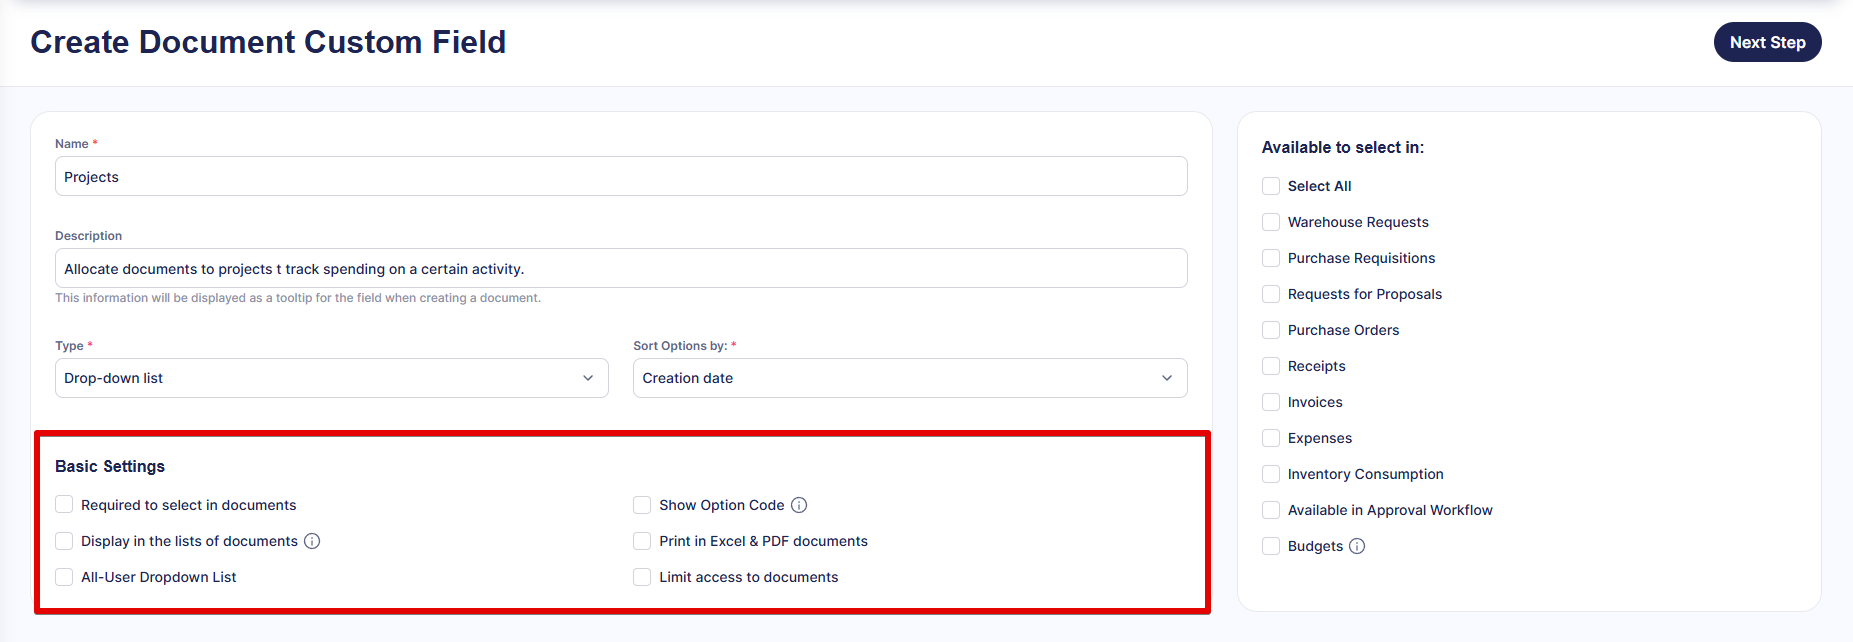
Step 3: Configure Basic Settings
In the Basic Settings section, set the parameters depending on the selected type.
These settings are available for Text and Date types:
- Required to select in documents—makes the field mandatory.
- Print in Excel & PDF documents—adds this field to Excel & PDF versions of the documents.
- Display in the lists of documents—adds the field to the Other details column in document lists.
If you select the Drop-down list type, you will also see these parameters:
- Show Option Code—if you use option codes, they can be displayed in documents, approval workflows, budgets, and user management.
- All-User Dropdown List—makes the field inaccessible in User Management, Approval Workflows, and Budgets.
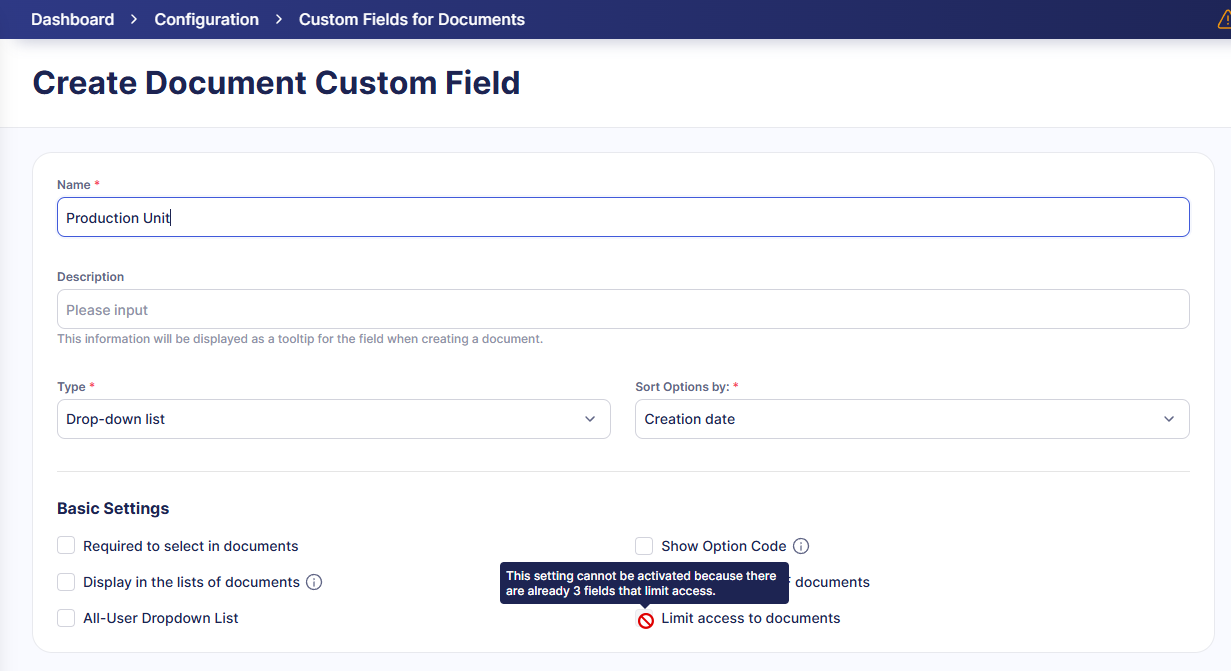
- Limit access to documents—if this switch is on, users will have access only to the documents with options assigned to them in user management.
Please note: you can enable this setting only for 3 Custom Document Fields per company, including deactivated fields.
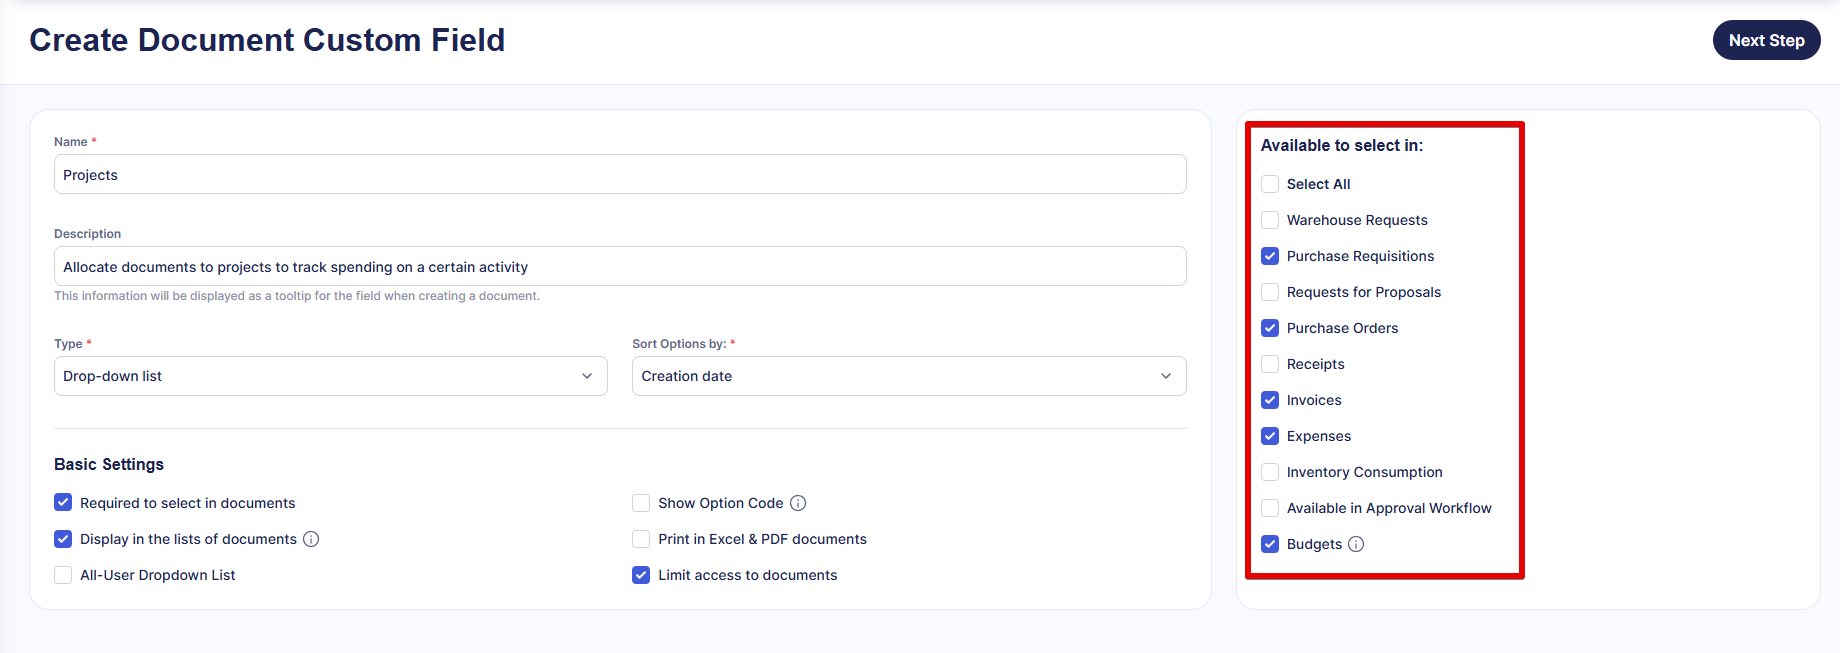
Step 4: Set Availability in Modules
Select which modules you need the field available in. To be included in Budgets, the field must be required and available in Purchase Requisitions, Purchase Orders, Invoices, and Expenses.
-
Available in the Warehouse Requests / Purchase Requisitions / Requests for Proposal Receipts / Invoices / Expenses / Purchase Orders—the field will be available to fill out in the selected documents.
-
Available in Approval Workflow means the field can be used in your approval workflow, as described in this section of the article.
-
Available in Budgets means you can tie your budget to the custom field.
Step 5: Save the Custom Field’s Configuration
Review the configuration; you can save the custom field once everything looks good.
If you created a Text or Date type field, click Save in the top right corner to finalize the process. However, if you are making a Drop-down list field, click Next Step to save the configuration and proceed to add options.
Step 6: Add Options for Lists
You can easily add options via a table in the lower part of the page. You can create an option hierarchy with up to 5 levels. Here’s what you can do in the options table:
- Add new options by filling in the codes and names.
- Add sub-options after clicking the Add sub-level button.
- Edit options using the Edit (pencil) button, including activating and deactivating options.
- Delete options using the Delete (bin) button.
- Expand or collapse sub-levels by pressing the downwards arrow to the left of the option.
Once you set up the list, press Update in the top right to save the changes.
You can also import options via an XLSX template; review this article to learn how.
How to Edit Custom Document Fields
Editing Existing Fields
You can navigate to Configuration → Custom Fields for Documents, open the created field, edit all its settings, and then press Update to save the changes.
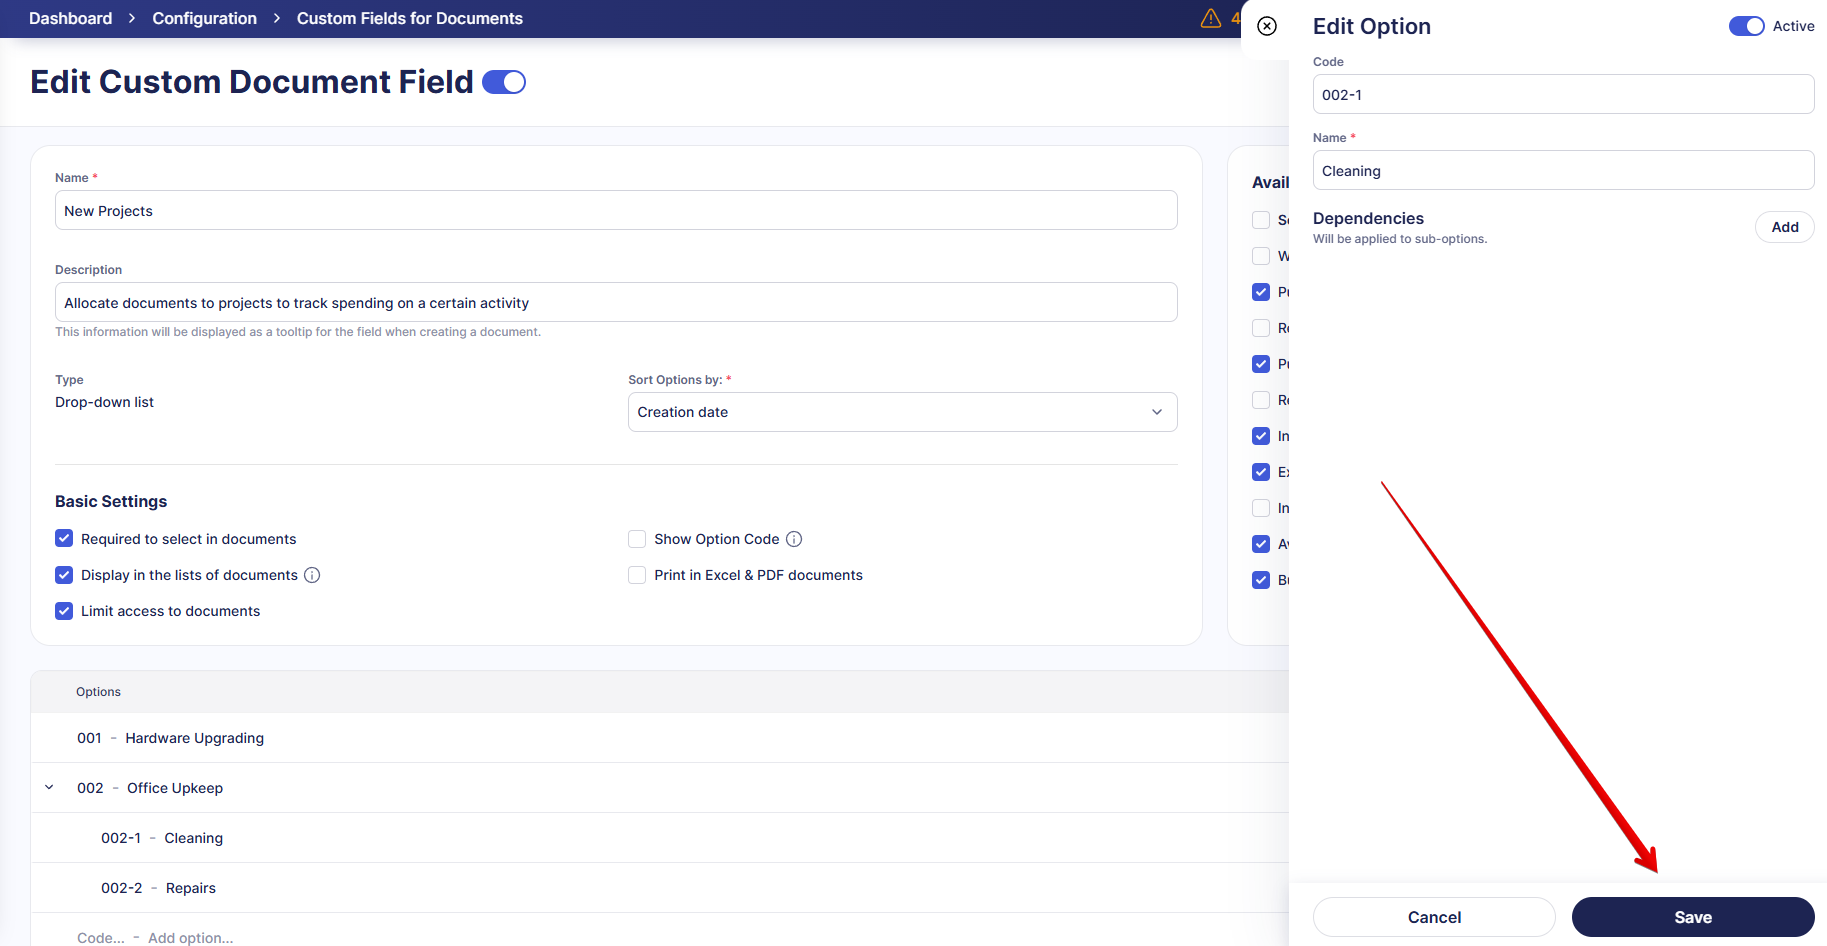
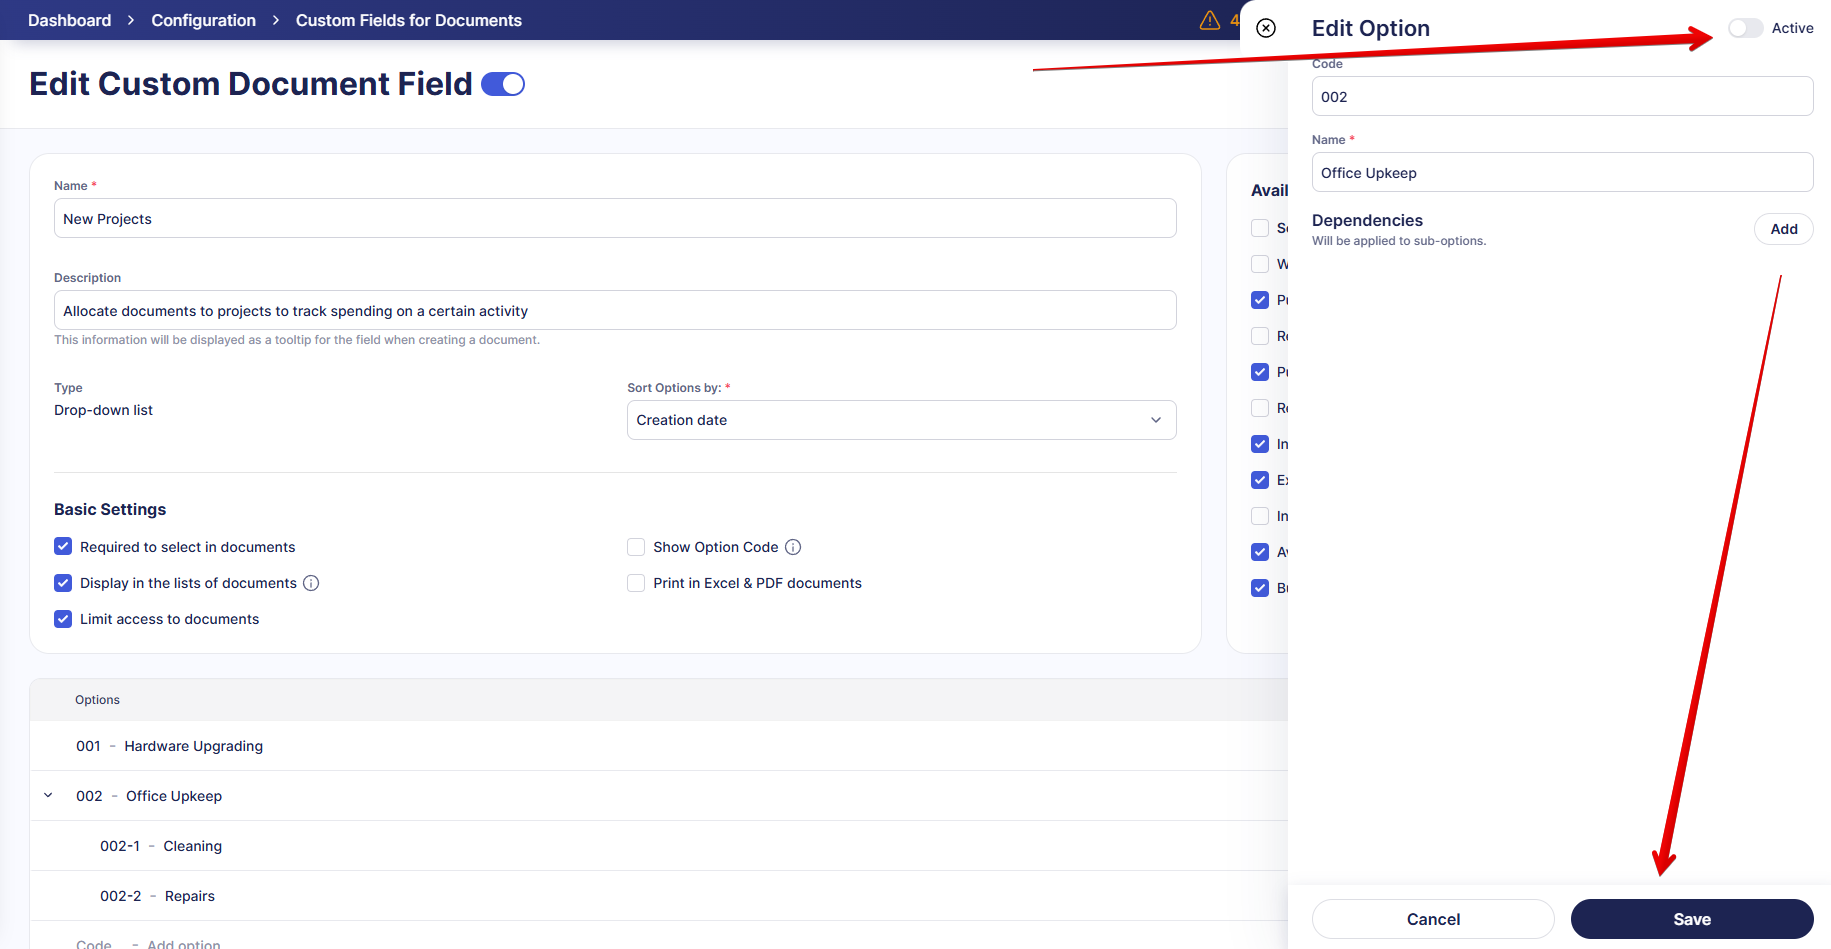
To edit options:
-
Open the created field and find the option you want to change in the list.
-
Click the Edit button (pencil icon).
-
A sidebar will open on the right, allowing you to make necessary changes.
-
Press Save to save the changes or Cancel to discard them.
Please double-check the information if you have active integrations, as name changes can affect the integration work.
Activating, Deactivating, and Deleting Fields and Options
To deactivate a Custom Document Field
Open it, switch off the toggle by its name, and press Update. A field cannot be deactivated if used in budgets or integrated.
Once deactivated, the field will not be shown in the general Custom Fields for Documents list.
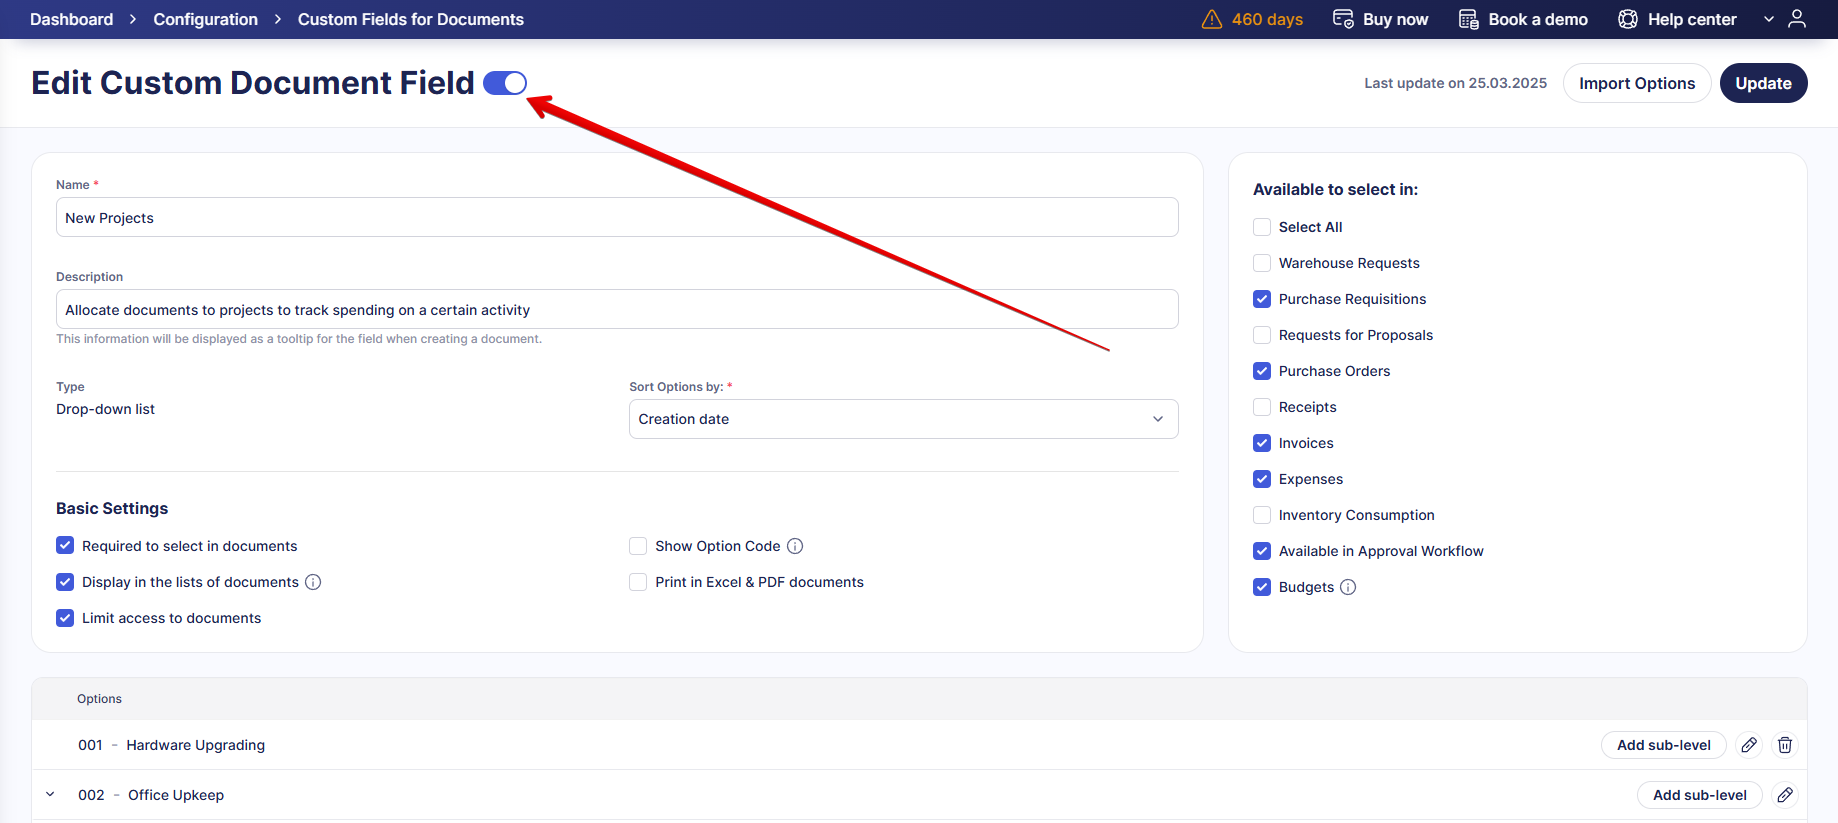
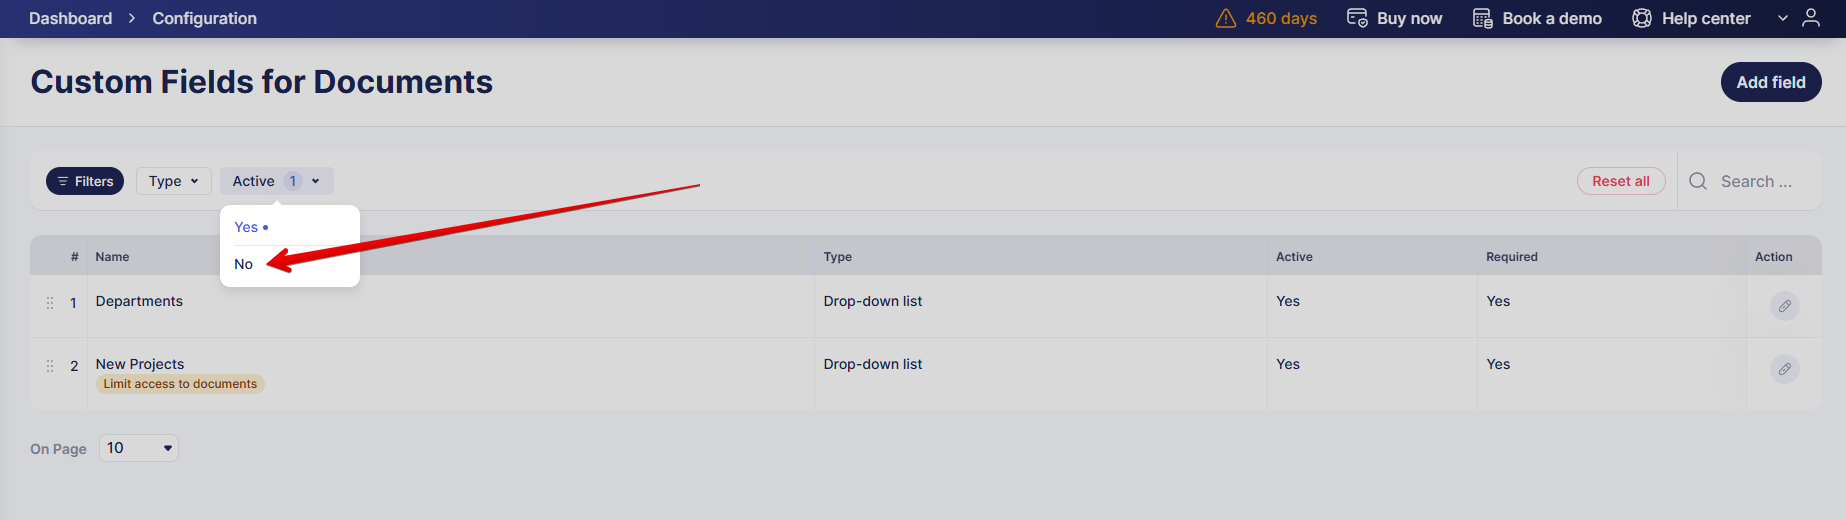
To reactivate a Custom Document Field
-
Open the Custom Fields for Documents page.
-
Find the Active filter and select No.
-
You will see a list of inactive fields. Open the one you need to reactivate.
-
Switch on the toggle by its name, then press Update.
To deactivate a custom field option:
-
Open the Custom Document Field.
-
Find the needed option in the list and click the pencil icon.
-
Switch off the Active toggle at the top of the sidebar.
-
Click Save.
If the deactivated option has sub-options, they will be deactivated as well.
To reactivate the option, simply click Activate in the option list.

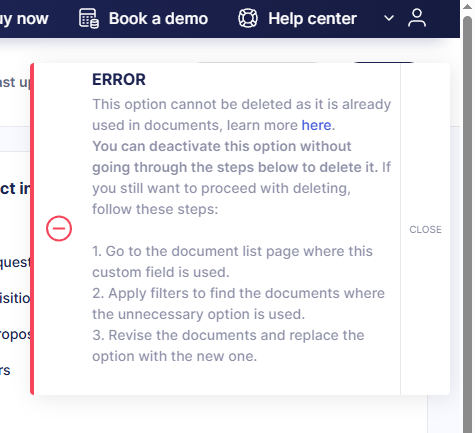
You can also Delete options not used in the documents by clicking the Delete (bin) button opposite the option. If you try to delete an option used in documents, you will see a message explaining why the action is restricted and how to proceed.
How to Use Custom Document Fields to Limit Access to Documents
You can use Custom Document Fields with a Drop-down list type to customize user access. For instance, you may want documents assigned to a specific department to only be visible to members of this department. Here’s how you can do so:
-
Enable the Limit access to documents option in Basic Settings when creating or editing a custom field.
-
Grant necessary access to users. In Configurations → User Management, select the user you want to edit and press Edit (pencil icon). Navigate to the Custom Fields for Documents tab and check all options the user should access.
With this setting, users will only see the documents with Custom Document Fields options specified in User Management. Otherwise, the options selected in User Management only affect which documents users can create/approve.
💡Please note: previously created documents will be available to users even if you deactivate access to their departments/projects.
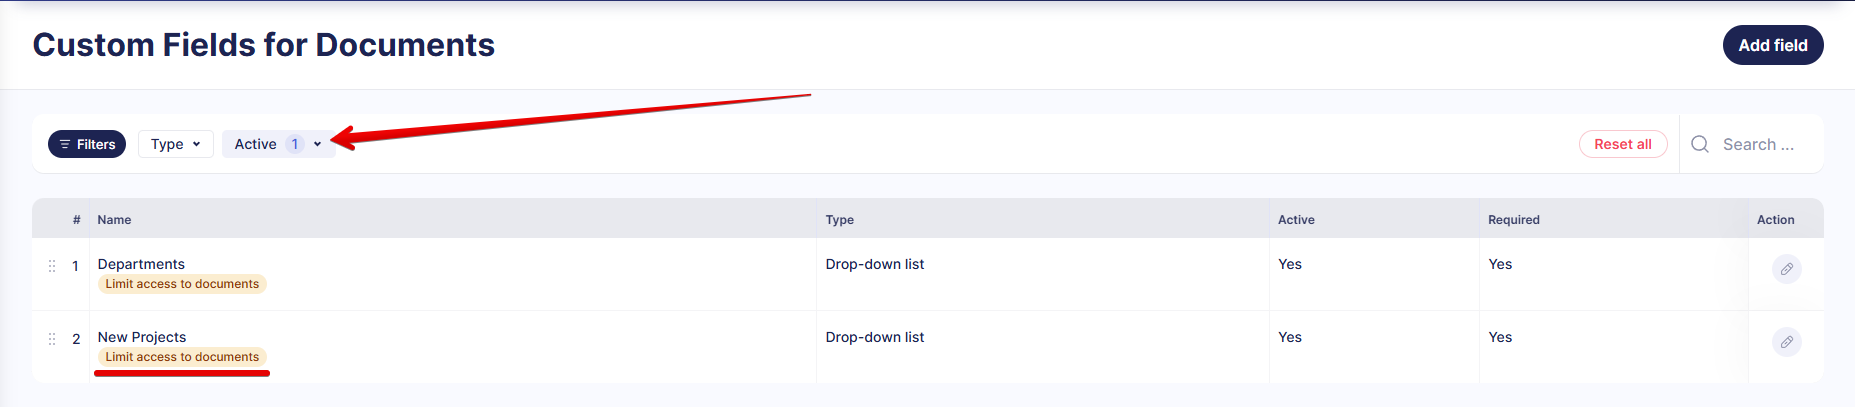
You can only have 3 fields that limit access to documents per company, including deactivated fields. If this limit is reached, you will see a tooltip when trying to enable this option for a new field.
If you see this message, but the list on the Custom Fields for Documents page doesn’t show 3 fields with the Limit access to documents status, please set the Active filter to No to check deactivated fields.
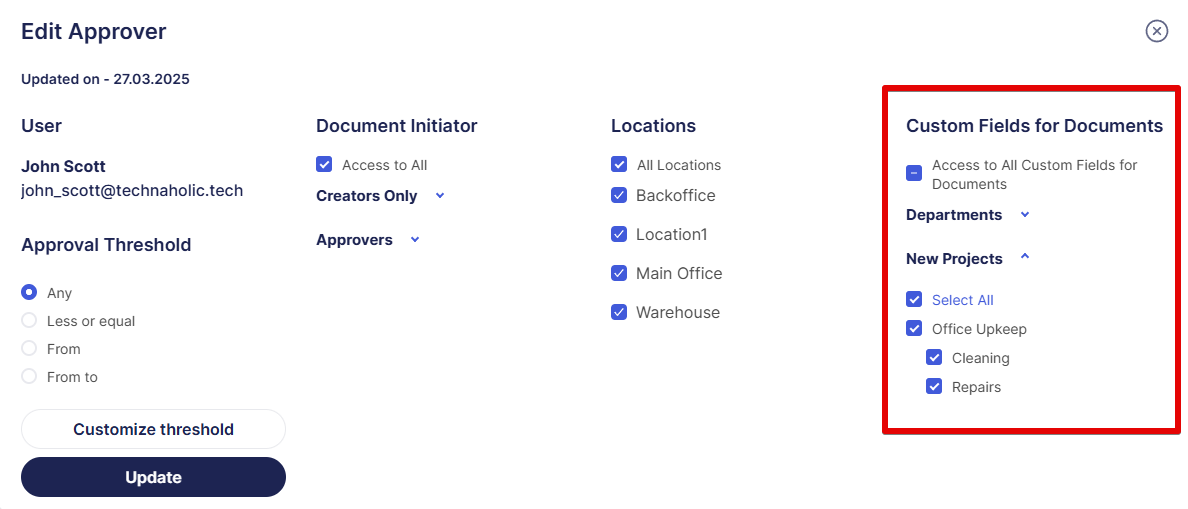
How to Use Custom Fields for Documents in Approval Workflows
When adding or editing an approver, you can select which documents they can approve based on the Custom Fields for Documents options. In this section, you will only see the options specified for the user in User Management. Enable the Available in Approval Workflow setting when configuring the field to use this function.
Frequently Asked Questions