TABLE OF CONTENTS
Documents Available in Precoro Mobile
Currently, you can create these types of documents in the Precoro mobile app:
-
purchase requisition;
-
purchase order;
-
receipt.
You can view, approve/reject, and cancel all types of documents accessible via the app. Please see this article for the full list of available modules and actions.
How to Create Documents
Let’s review the process of creating a document using a purchase order as an example.
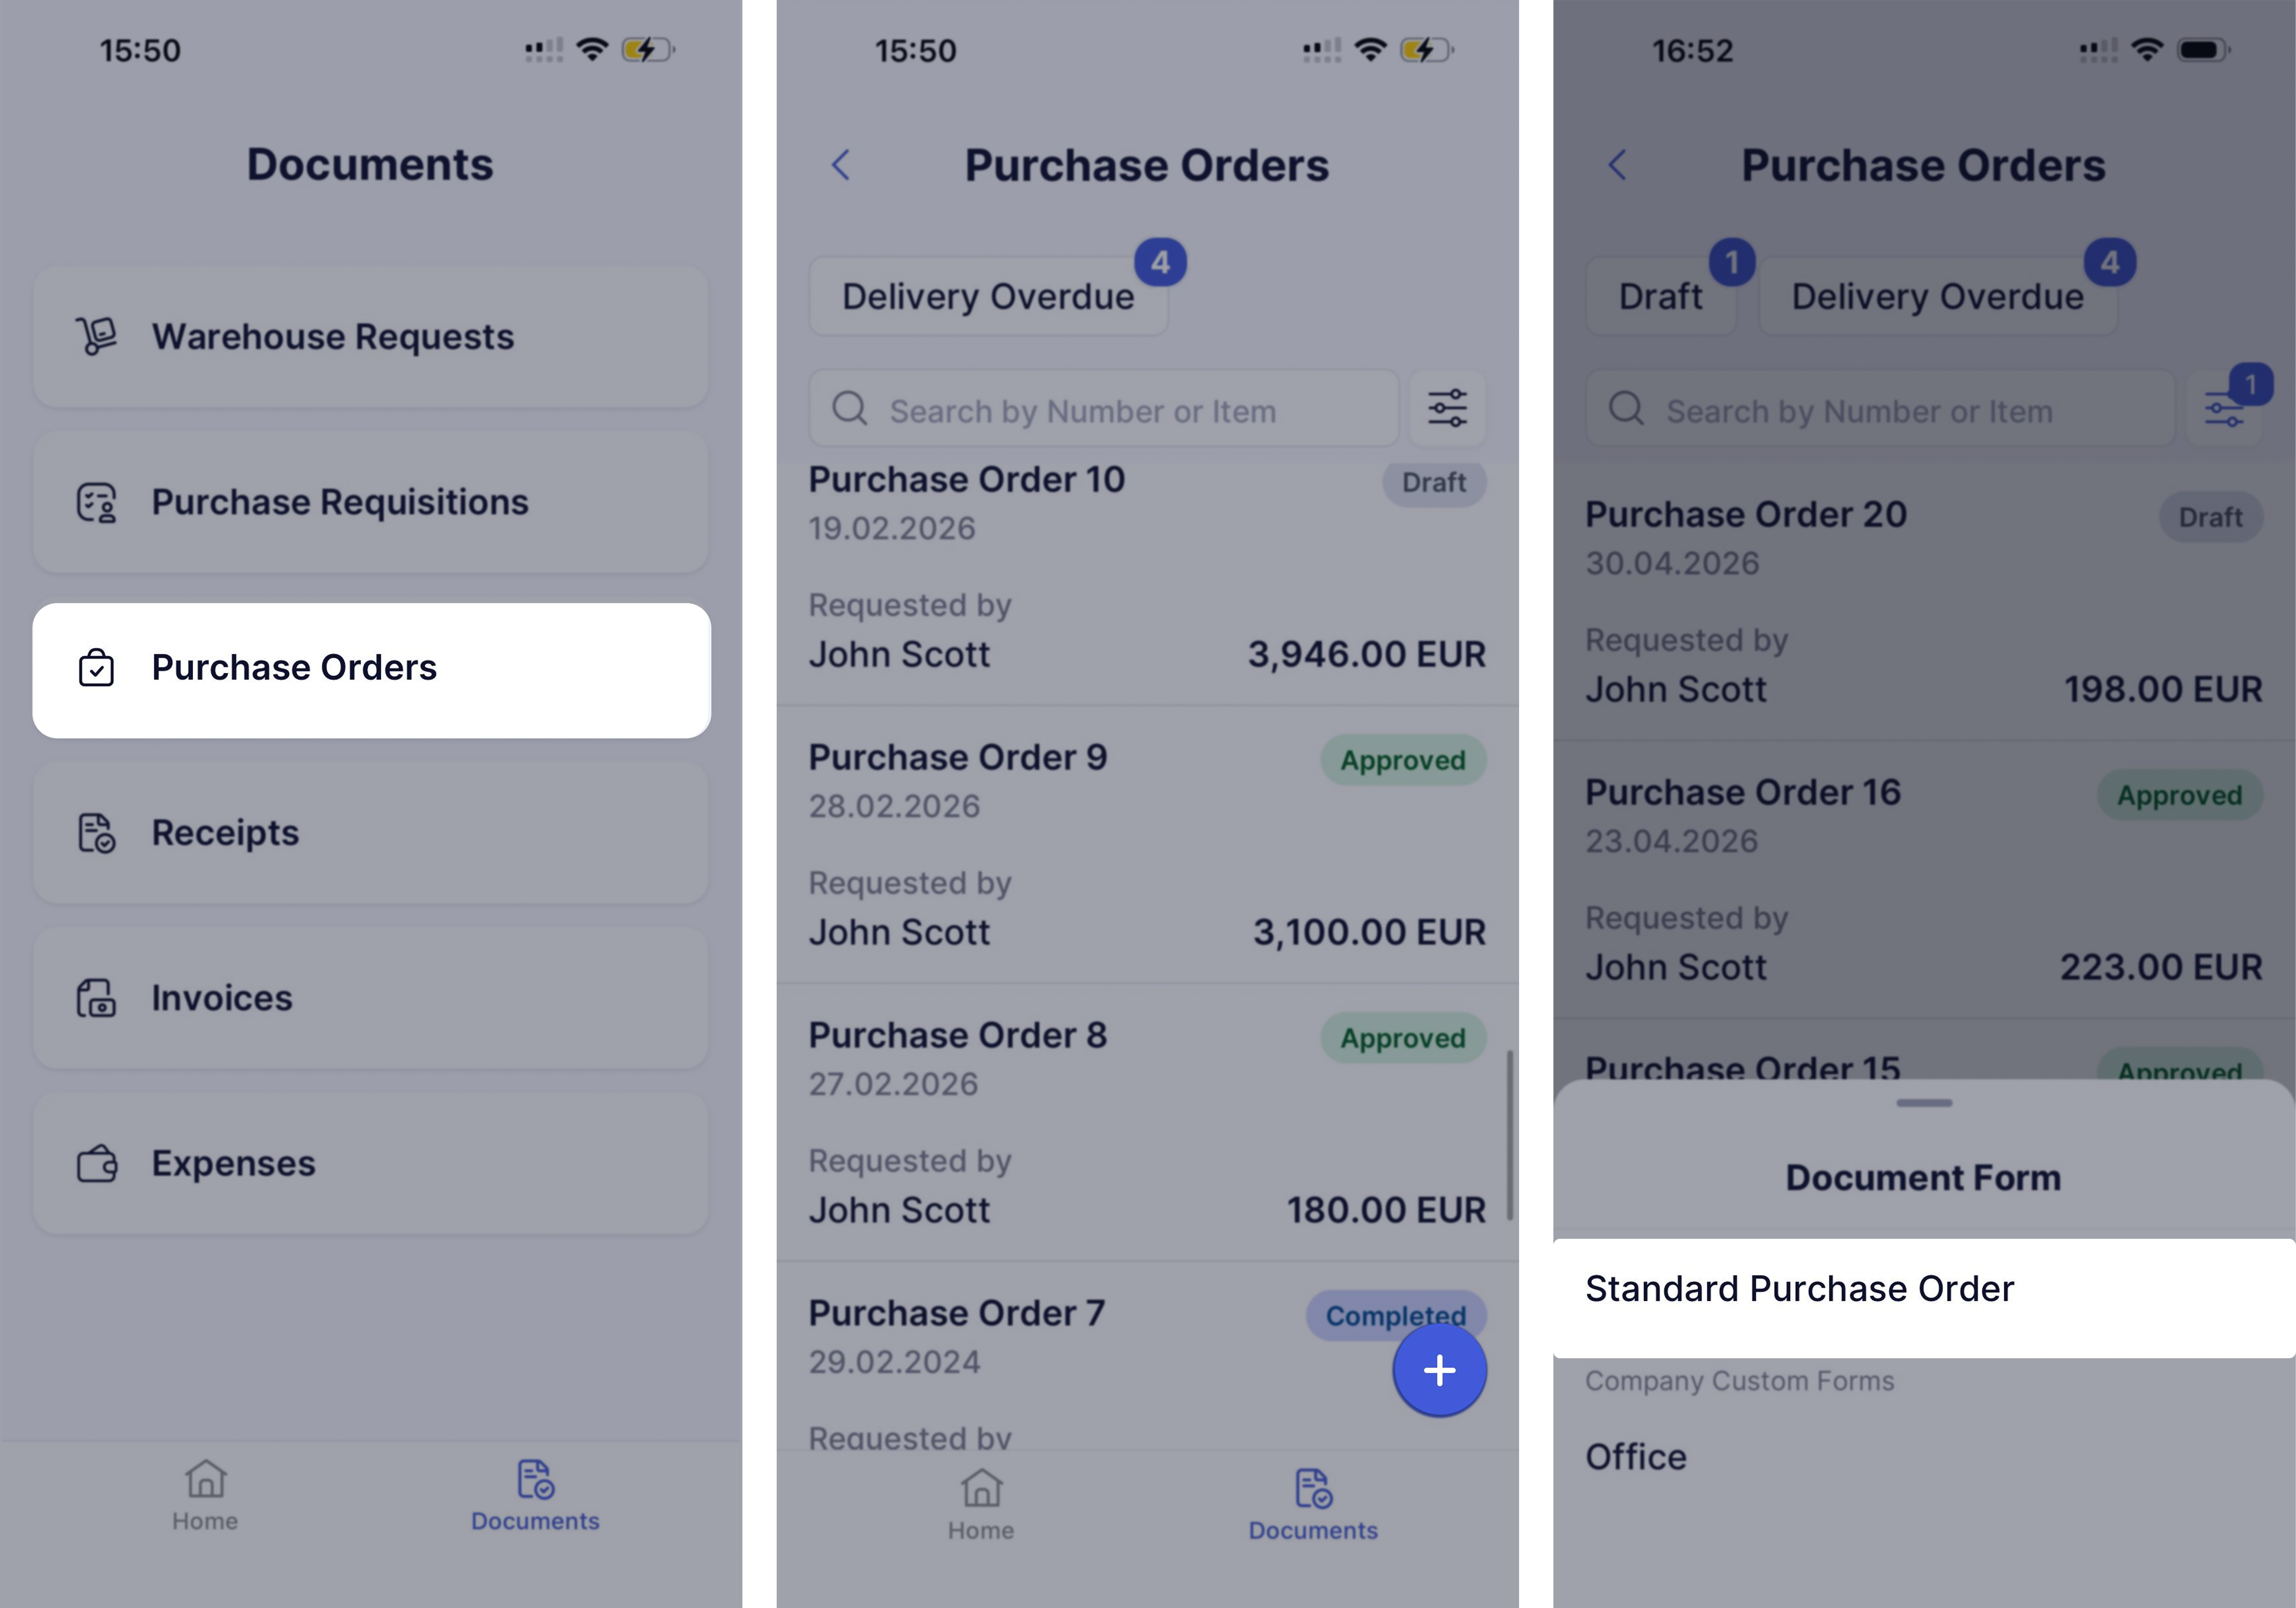
Step 1: Select the Document Type
On the Documents page, select the type of document you want to create; you will be redirected to the corresponding module. Click the + icon to add a new document. If you have custom forms, select one to proceed.
Step 2: Fill Out the Details
Fill out the required standard and custom fields, then click Create. You can also add a note for the supplier while completing this section.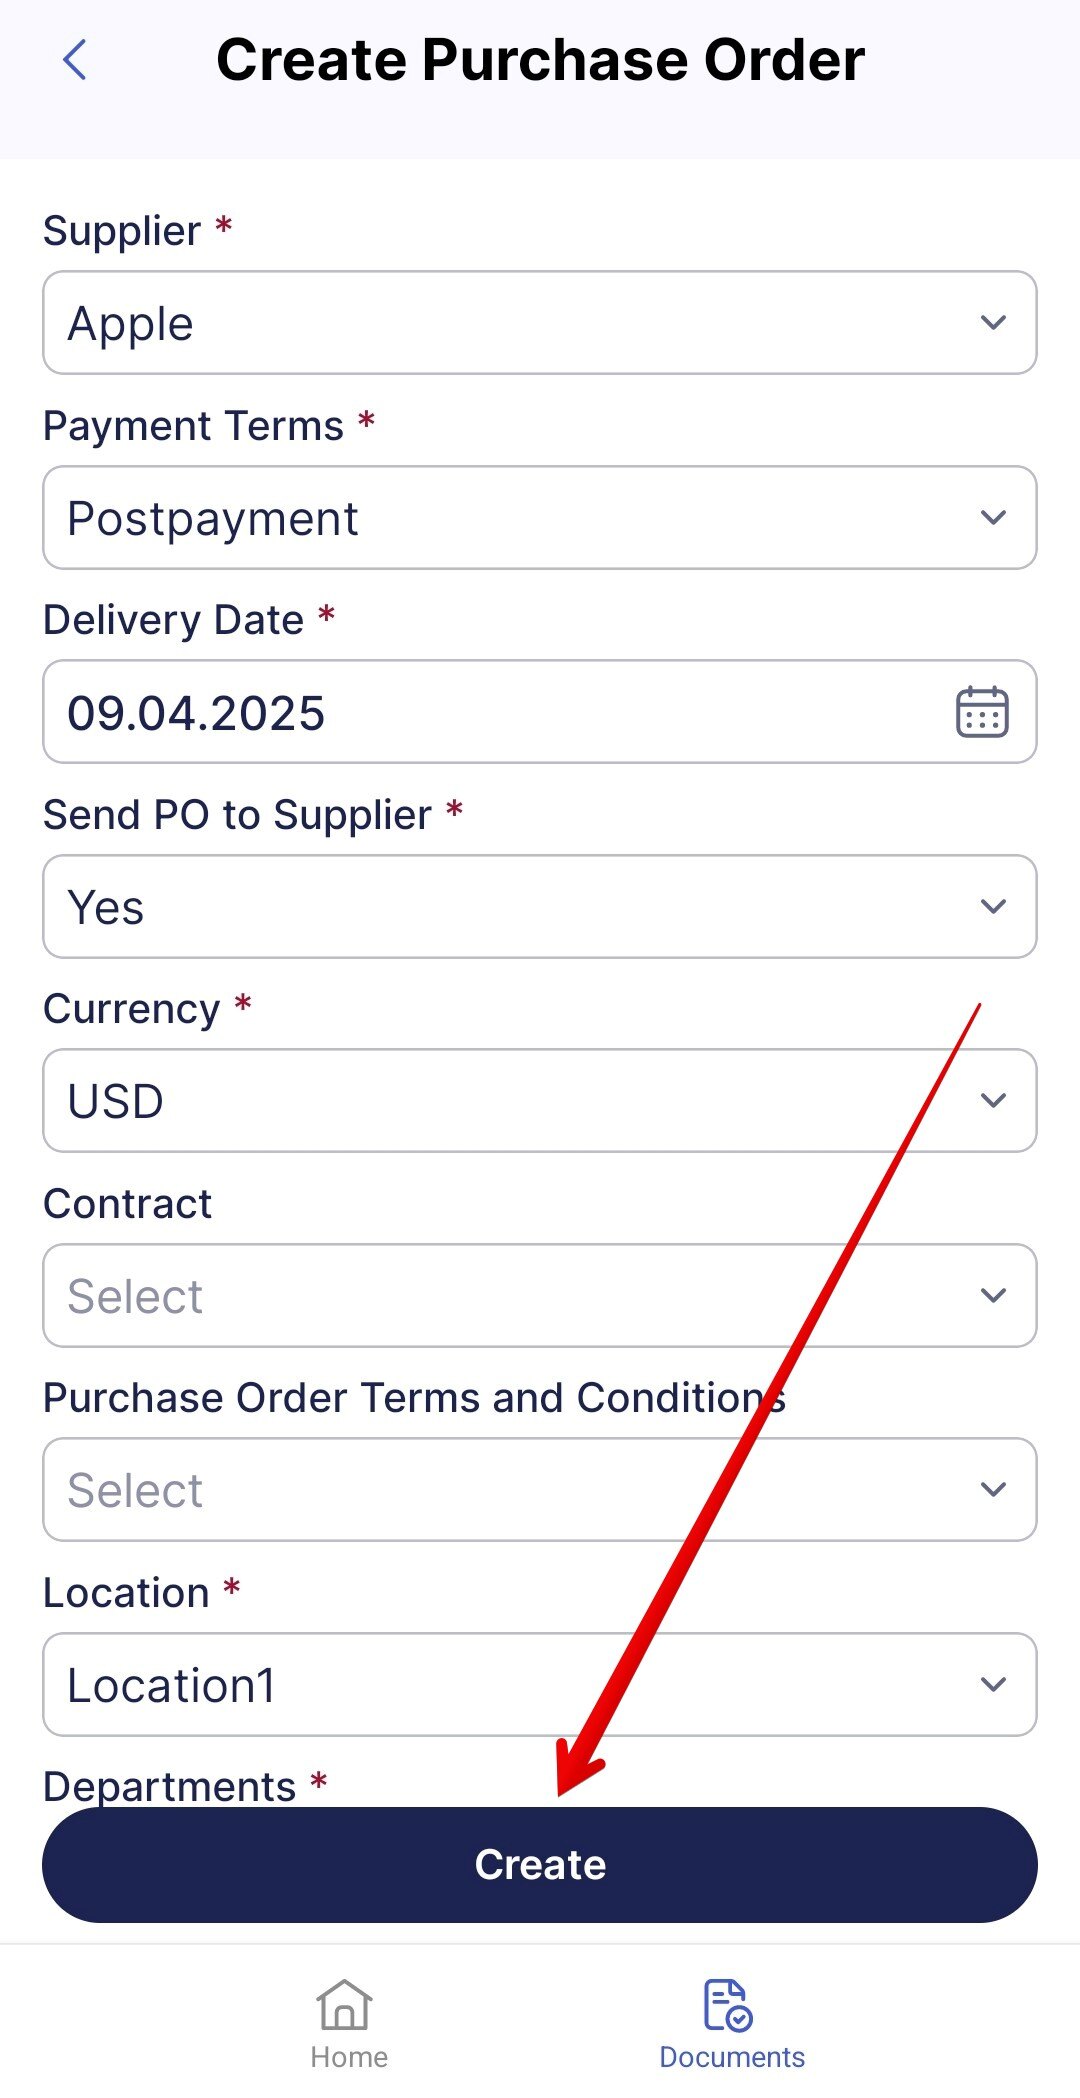
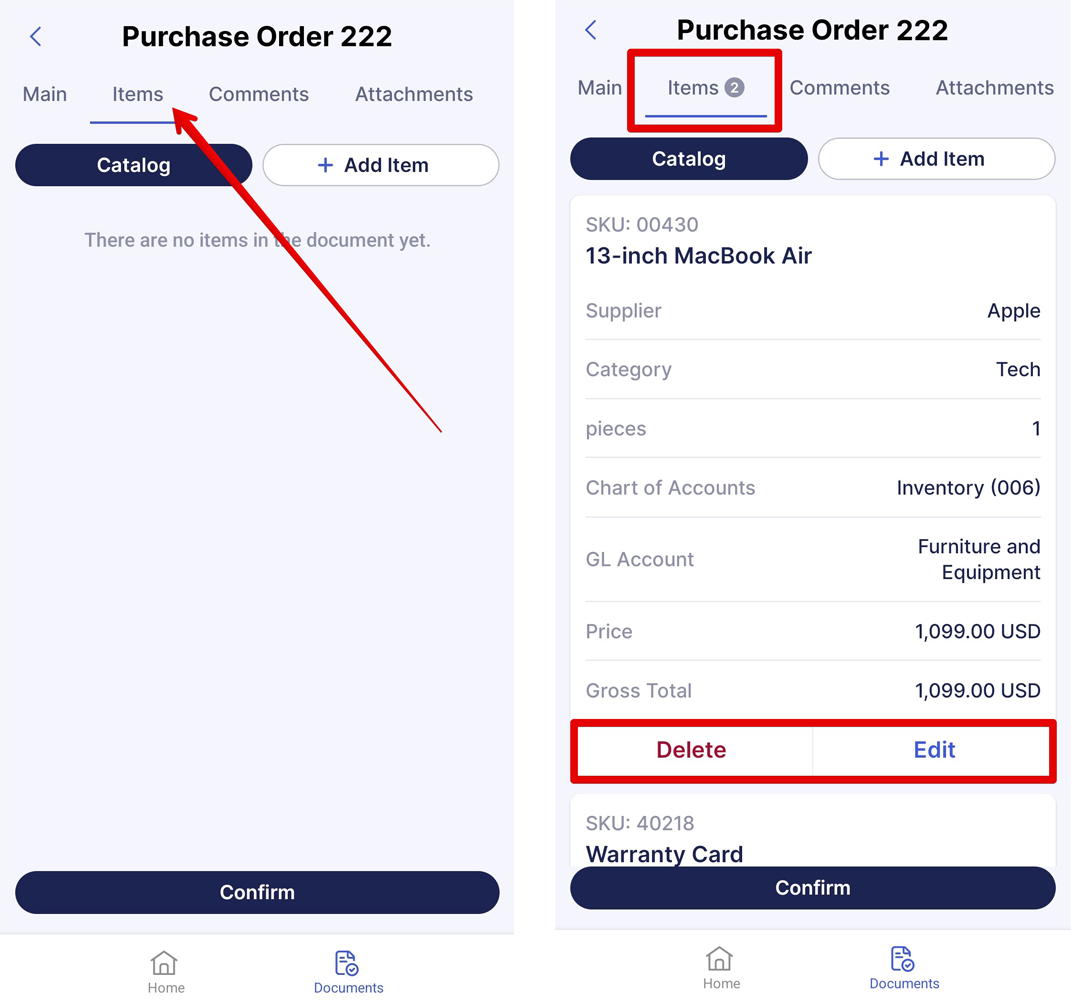
Step 3: Add Items
On the items tab, you can:
- add new items or select items from the Catalog;
- delete and Edit the added items;
- click on the item card to view all details;
- see the number of items in the document near the tab’s title.
Step 4: Add Comments and Attachments
Comments for Precoro users and attachments (both internal and external) can be added on the corresponding tabs.

Step 5: Confirm and Send the Document
Once everything looks good, press the Confirm button at the bottom of the screen.
If your company uses the Approval Workflow feature, the PO status will change to Pending. Once approved, you can send the PO to the supplier from the mobile app: tap the More Actions icon, then select Resend to Supplier. You can also Share, Edit, Revise or Repeat the document.
If automatic PO sending to suppliers is enabled in your company, you do not need to do it manually. Learn more about this feature here. You will still have access to the Resend to Supplier button, in case you need to send the order again.

The Supplier Status field shows the supplier’s progress and the delivery status of emails sent to them. You can see whether the order was not sent, sent, opened, confirmed, failed, or sent to a marketplace for PunchOut orders.
Tap Show more to view the email status for each recipient.

💡 Pro Tip: You can also create documents faster with Quick Actions on the Home page.
Add shortcuts for the documents you create most often, so you can start a new document as soon as you open the mobile app. Learn more here.
Create Documents from PunchOut Catalogs
You can create purchase requisitions and purchase orders from PunchOut catalogs in the mobile app if a PunchOut catalog is configured for that document type.

To create a document from a PunchOut catalog:
- Open the module where PunchOut is configured: Purchase Requisitions or Purchase Orders.
- Сlick the + icon.
- Select Request from [ Marketplace Name ].
- Fill in the required document fields.
- Click Create.
After that, Precoro redirects you to the supplier catalog in your device browser.
While you shop, the document is saved as a Draft in Precoro.
After checkout, you return to the app automatically, with all items added to your draft—including name, quantity, price, unit, and SKU.
You can then edit the fields you are allowed to change, add notes or attachments, and send the document for approval.
Please note: The supplier is set automatically and can't be changed. PunchOut catalogs are configured in the web version (Configuration → Marketplace Configuration), and the PunchOut option appears only for document types that have a catalog set up.
How to Add Receipts
You can create receipts manually or use AI-powered scanning to create a receipt draft from a photo.
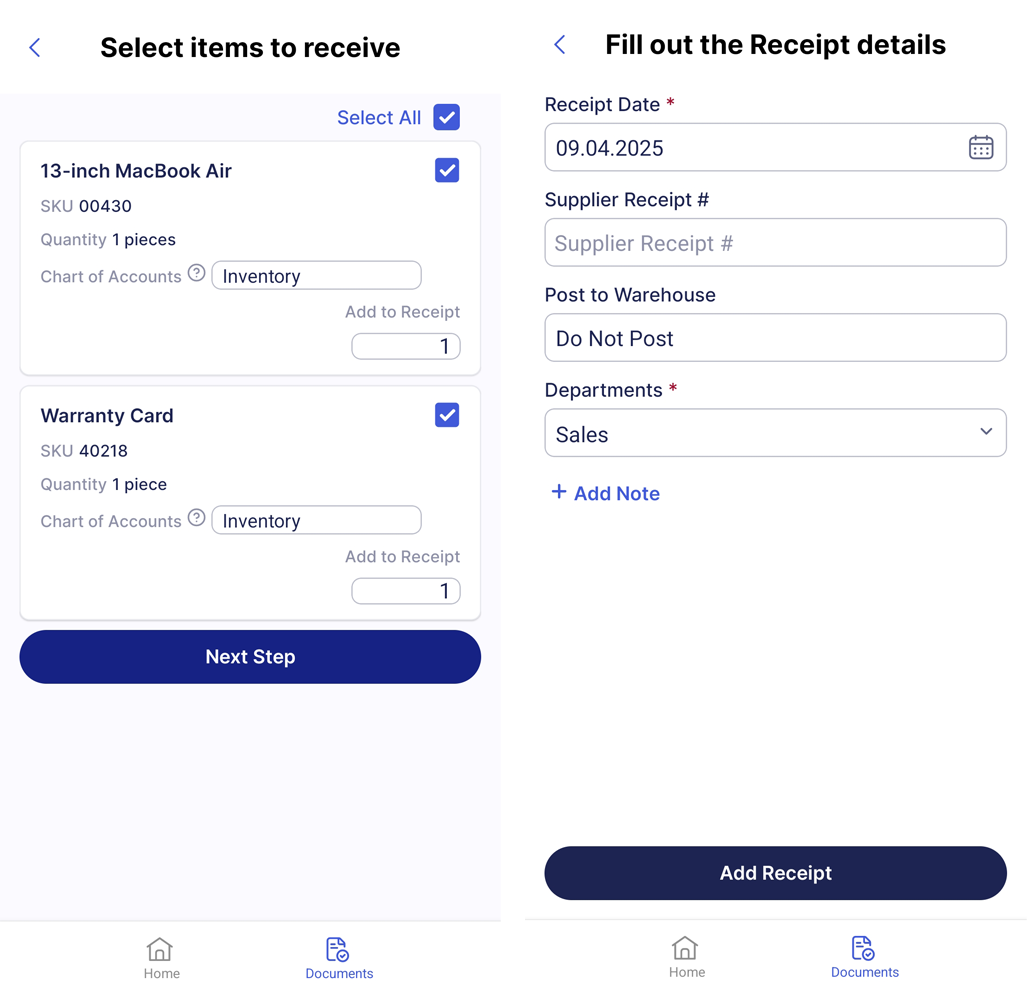
To create a receipt manually:
On the Receipts page, click the + icon, select a PO to which the receipt will be added, and click Add Receipt.

Select the items from the order you want to receive and click Next Step.
Fill out the details and press Add Receipt.
To create a receipt with AI scanning:
- Open the Receipts module in the mobile app.
- Tap + to add a receipt.
- Upload a photo of the receipt for scanning.
- Precoro will extract the data, find a matching Purchase Order (PO), match the items, and create a receipt draft automatically.
- Review the details and confirm the document.
How to Automate Expense Creation with AI
Expense creation can be automated directly from the mobile app using AI-powered receipt scanning.
To create an expense using AI:
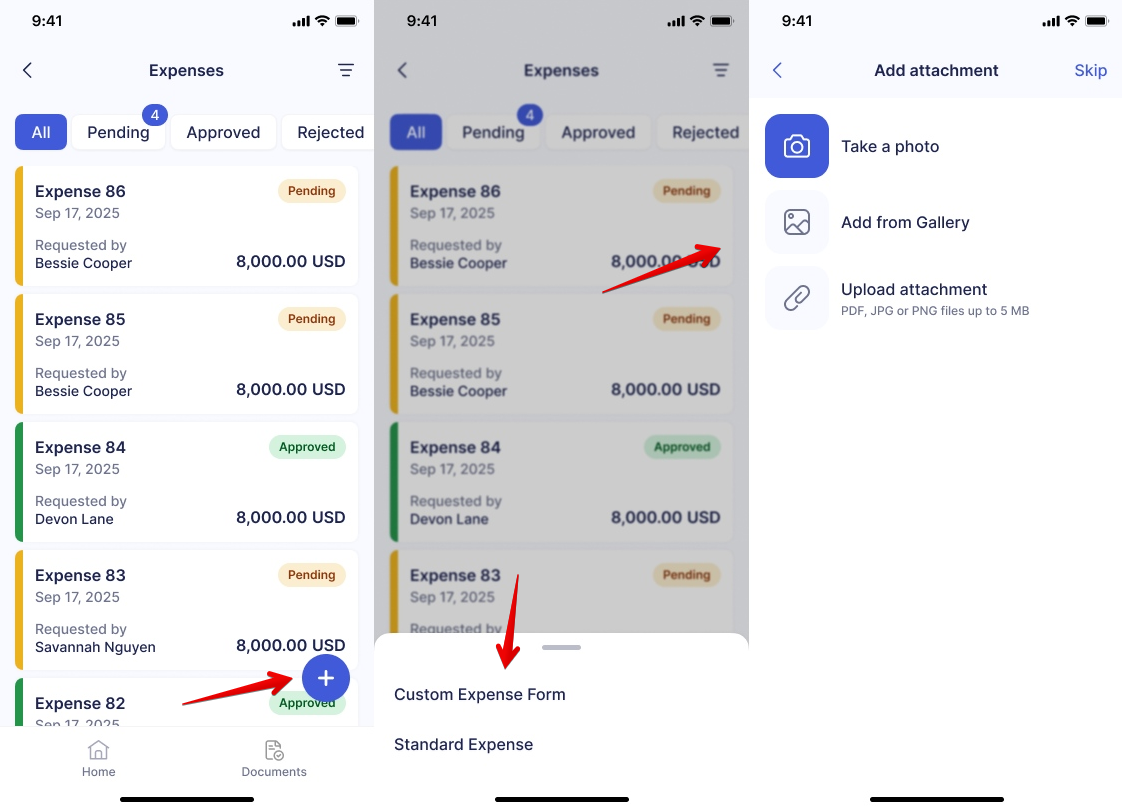
- Open the Expenses page in the mobile app.
- Tap the plus (+) button to add a new expense.
- Upload an expense by:
- Taking a photo
- Selecting an image from the gallery
- Uploading a file
- Precoro will scan the expense and automatically fill in the form.
- Review the pre-filled fields, complete any required information, and submit the draft for approval.
How to Repeat Documents
If you regularly create similar documents — like recurring purchase requisitions or repeat orders — you can duplicate an existing one instead of filling it out from scratch each time.
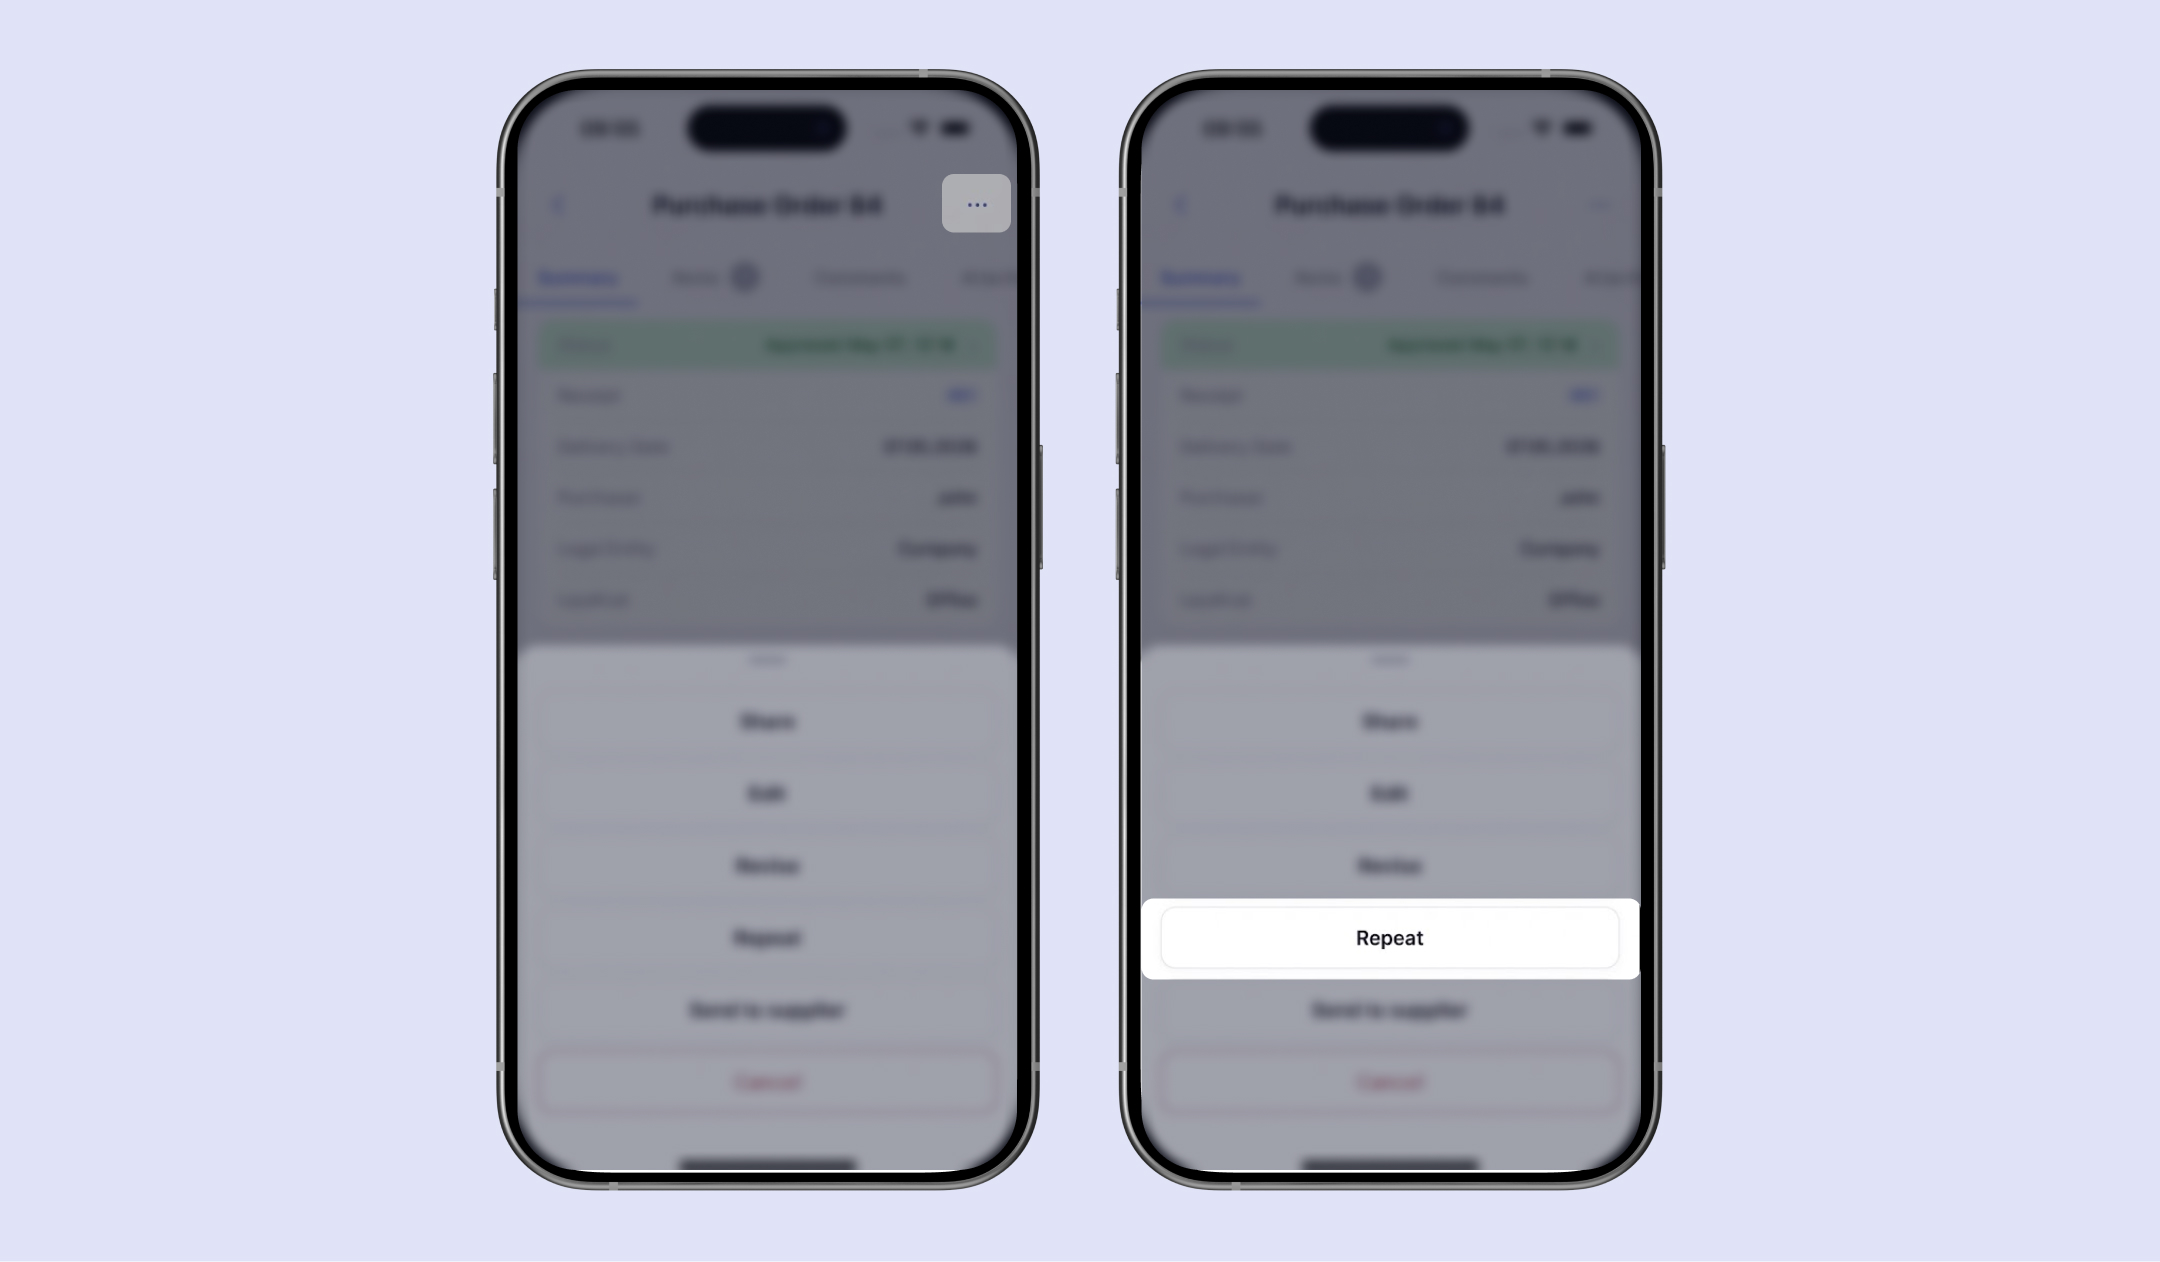
The Repeat functionality is available for all documents you can create in the app:
- Open a document you want to repeat,
- Press More Actions(“...” icon) in the top right corner,
- Press Repeat.
- Check the details, make necessary edits, and confirm the new document.
How to Edit Documents
Editing is available in Purchase Orders, Purchase Requisitions, Receipts, and Expenses.
Here’s how you can use this feature:
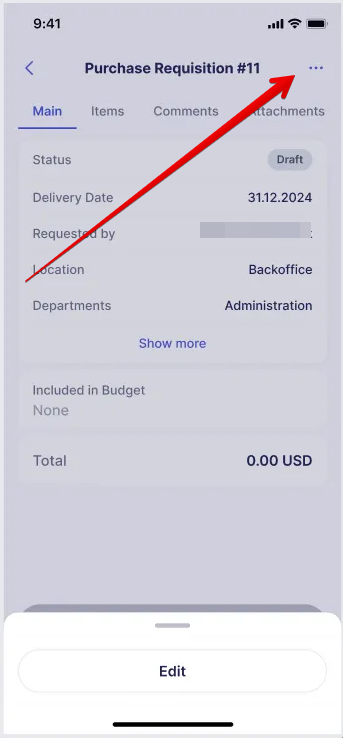
- Open the document you need to edit.
- Click the More Options menu at the top right. At the bottom of your screen, you will see available actions; click Edit. For Expenses on Draft status, you will see the Edit button at the top right of the document page.

- Enter the correct values. Once everything looks good, click Update to save the changes.
Please note that document editing may activate the re-approval process. Learn more about what triggers it here.
In addition to editing documents, you can also revise them on mobile. This feature offers the ability to change items and correct the values of document fields. To revise a document, open it, press “...” in the top right corner, and select Revise.
How to Track Documents
From the Module Page
On any module page, you can use these tools to navigate the document list faster:
-
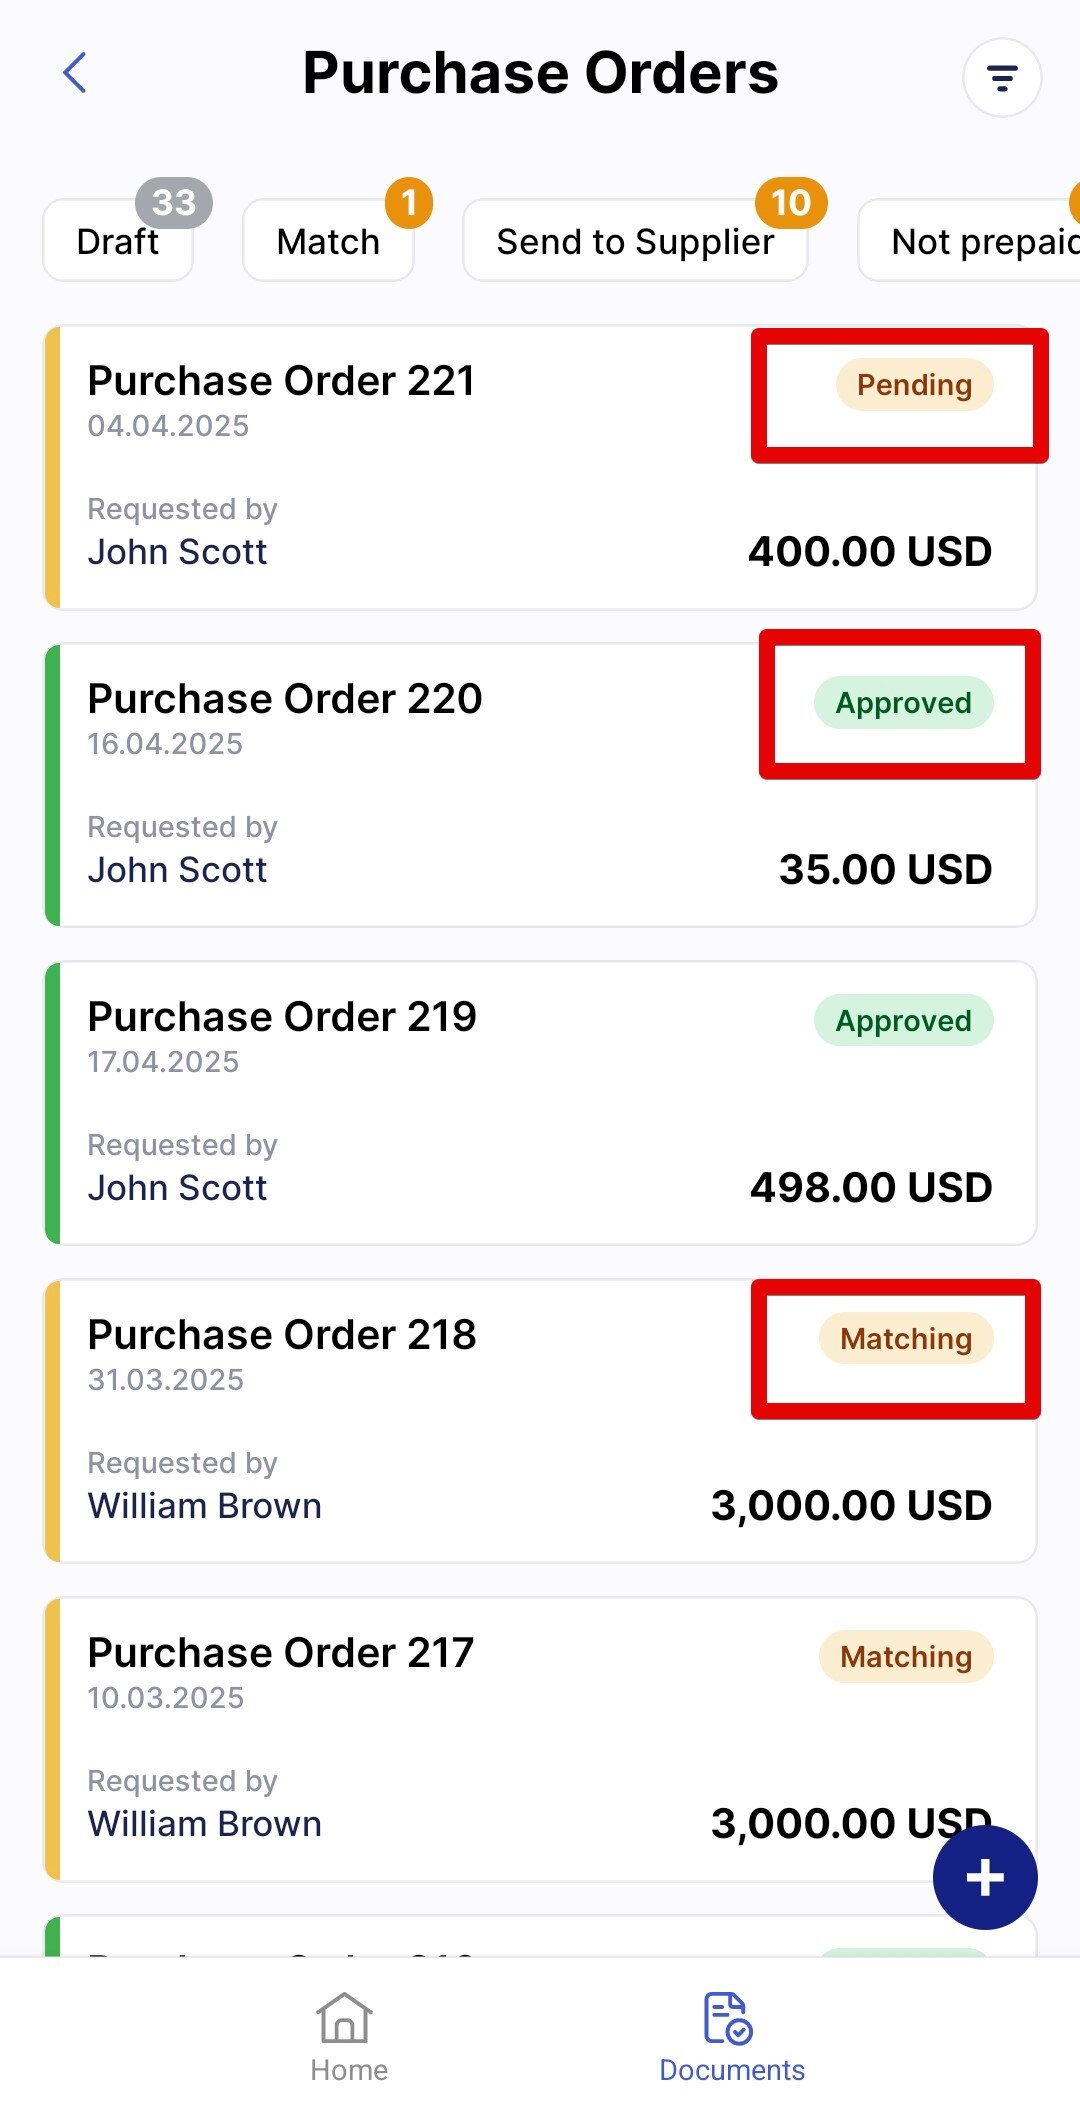
Statuses
Statuses are displayed for every document, allowing you to understand its progress stage at a glance. Learn more about PO statuses here.

-
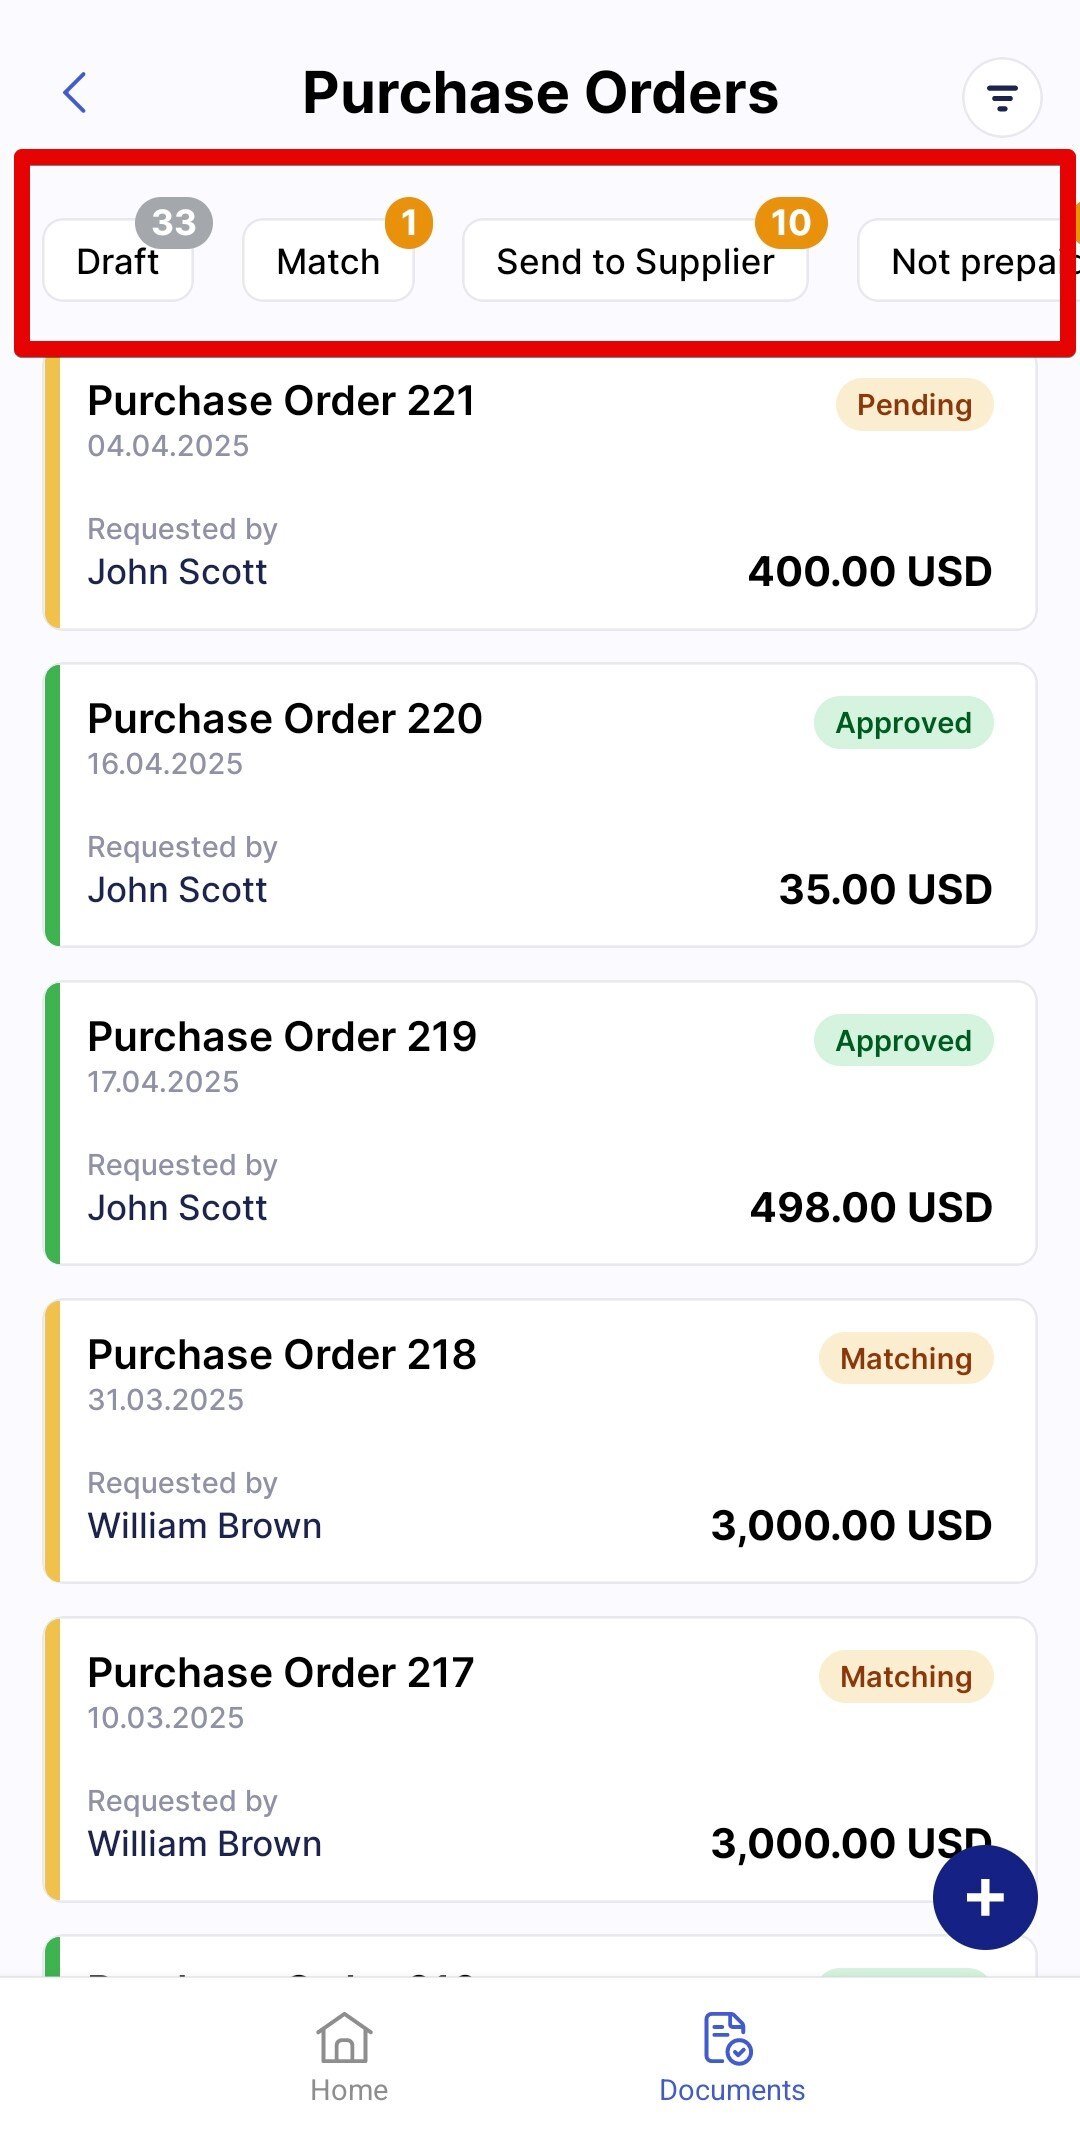
Infocards
Infocards are standard sets of filters to speed up searching. Click the infocard to see only the documents that match the criteria.

-
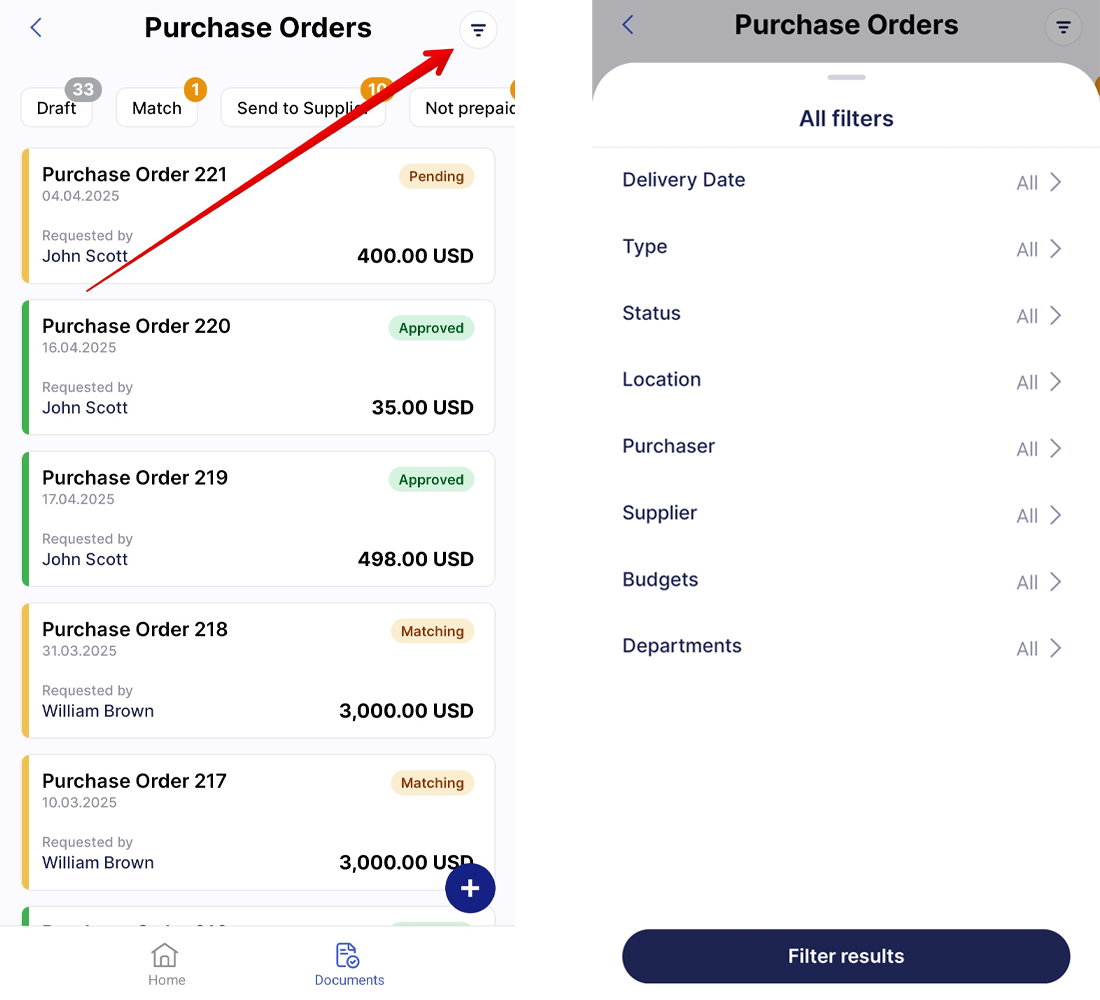
Filters
For a more precise search, click the Filters icon and select the needed parameters.

You can also filter the Purchase Requisitions list by item custom field values. This helps you quickly find requests by details such as a part number, cost center, item category, or any other item-level information used in your company.
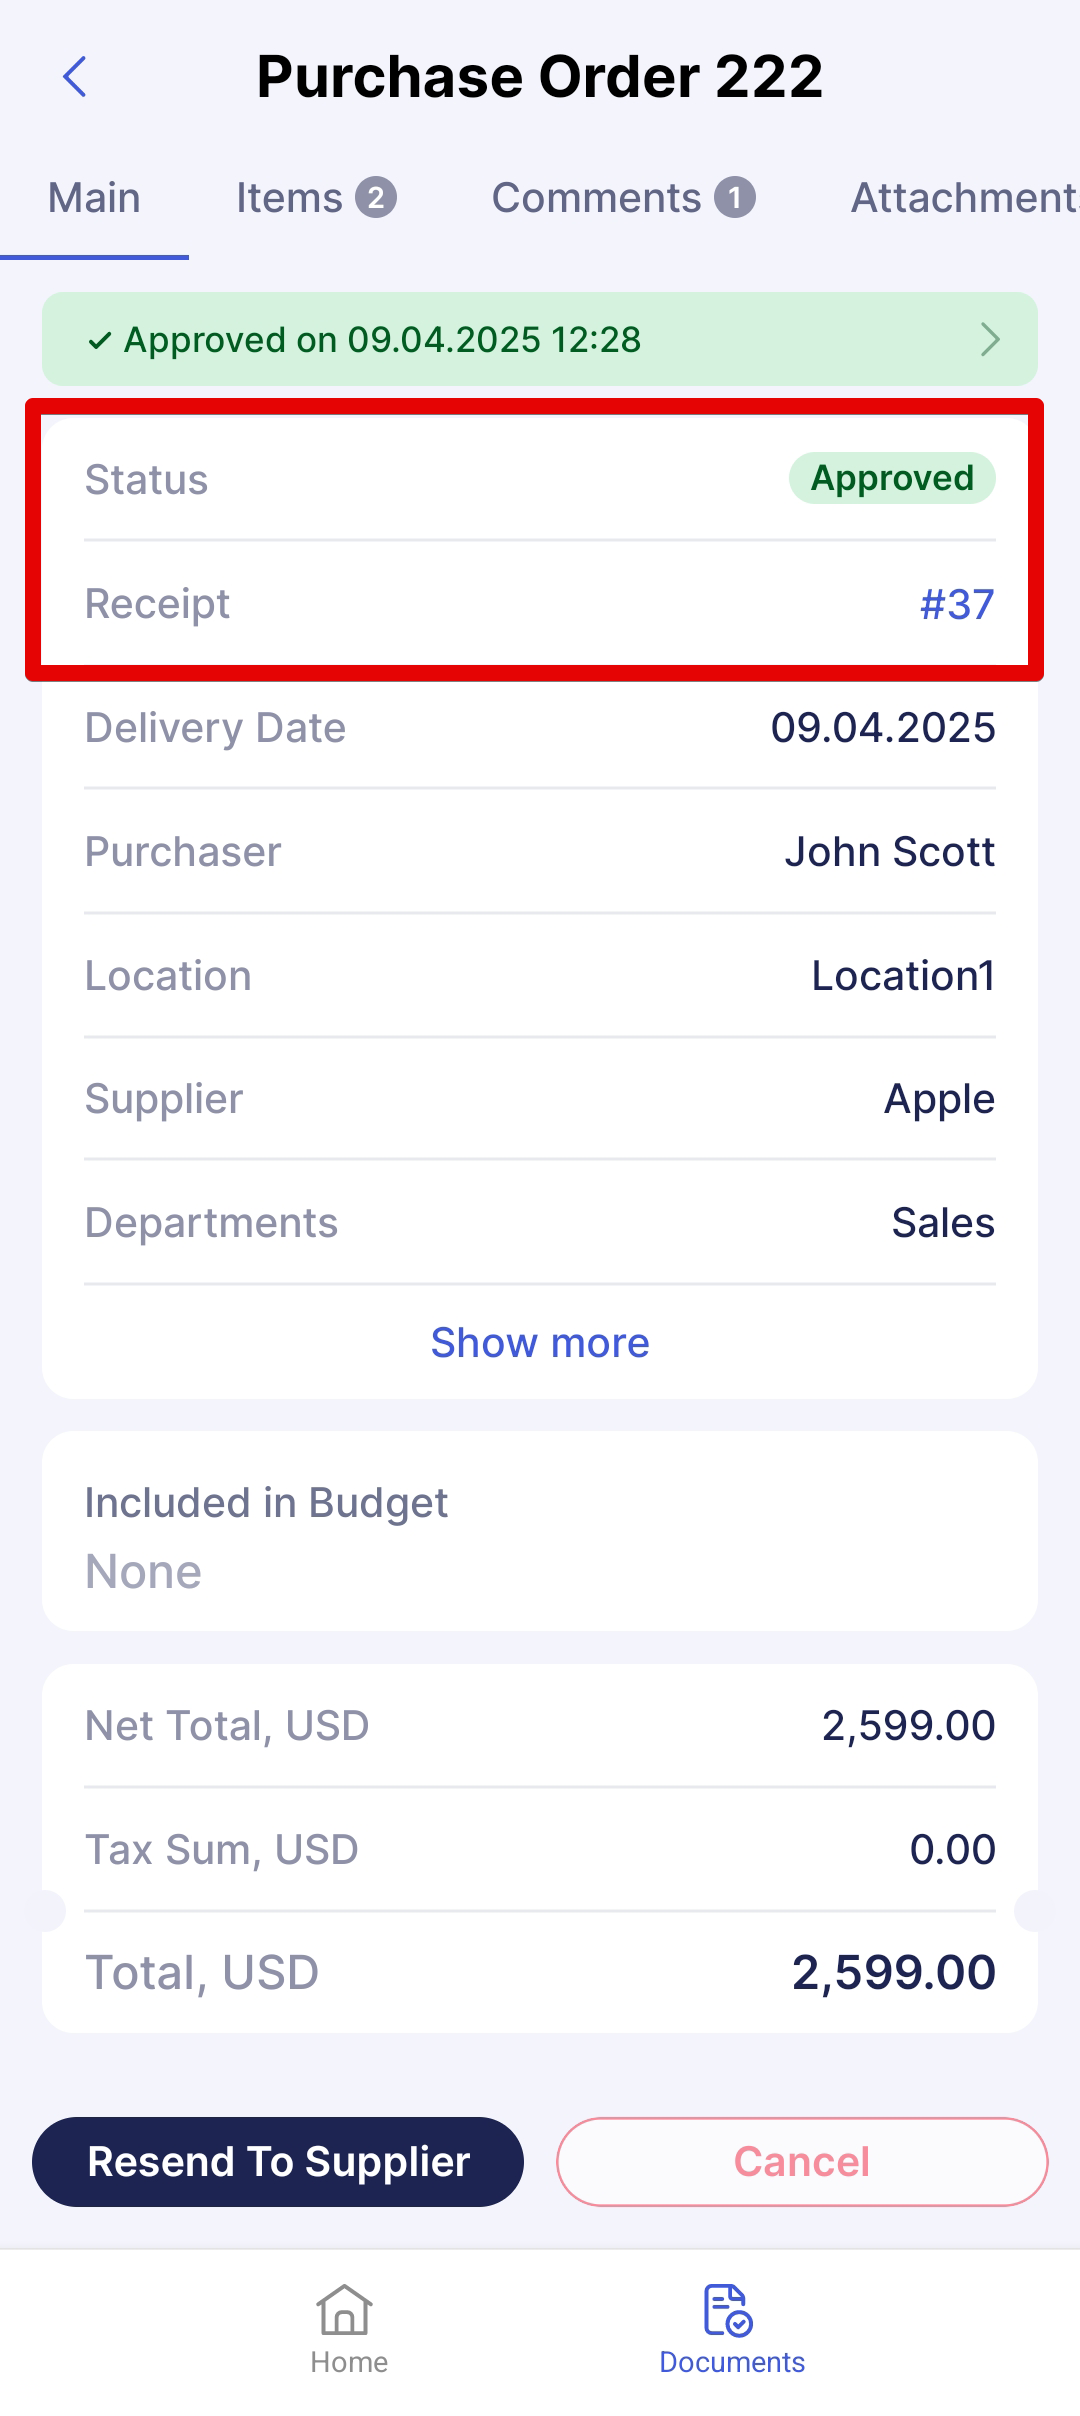
From the Document Page
When viewing a document, you will see its status along with other details. Additionally, if there are related documents, you will see their numbers and links to them.
Manage Payments in the Mobile App
There are two ways to work with payments in the app:
1. Pay suppliers through Precoro Payments
Use it for approved invoices when your company has set up Precoro Payments in the web app. It allows users with the required permissions to create and authorize supplier payments directly from their mobile device.
Please note: To access this feature, please set up Precoro Payments in the web app. To do so, check out this guide and contact our support team to assist you.
Precoro partners with Stripe Payments Company for money transmission services.
2. Mark documents as Paid or Partly Paid
To work with payments in the mobile app, the Payments module must be enabled, the user must have the Invoices / Expenses Pay role, and the document must have Approved or Partly Paid status.
Add Payments
To mark a single document as paid:
- Open the document.
- Press Add Payment at the bottom of the screen.
- Fill in the details.
- Press Pay.
💡 The Payment Amount can be lower than the total amount of the invoice or expense, so the document will move to Partly Paid status. However, the Payment Amount cannot exceed the total amount of the document.
To add payments in bulk:
- Navigate to the Invoices or Expenses module, depending on what type of documents you want to pay.
- Press the Payments icon (see screenshot below).
- Select the documents you want to pay and press Add Payment.
- Fill in the details.
- Press Pay.

Cancel Payments
To cancel a payment from the document page:
- Open a Paid or Partly Paid invoice or expense.
- Go to the Previous Payments section.
- Press Cancel on the required payment.
- Confirm the action.
- The payment status will change to Cancelled, and the document will return to Approved or Partly Paid.
To cancel a payment from the Payments list:
-
Open the required payment.
-
Press Cancel.
-
Confirm the action.