Create documents and track their progress on the go with the Precoro mobile app.
TABLE OF CONTENTS
Documents Available in Precoro Mobile
Currently, you can create these types of documents in the Precoro mobile app:
-
purchase requisition;
-
purchase order;
-
receipt.
You can view, approve/reject, and cancel all types of documents accessible via the app. Please see this article for the full list of available modules and actions.
How to Create Documents
Let’s review the process of creating a document using a purchase order as an example.
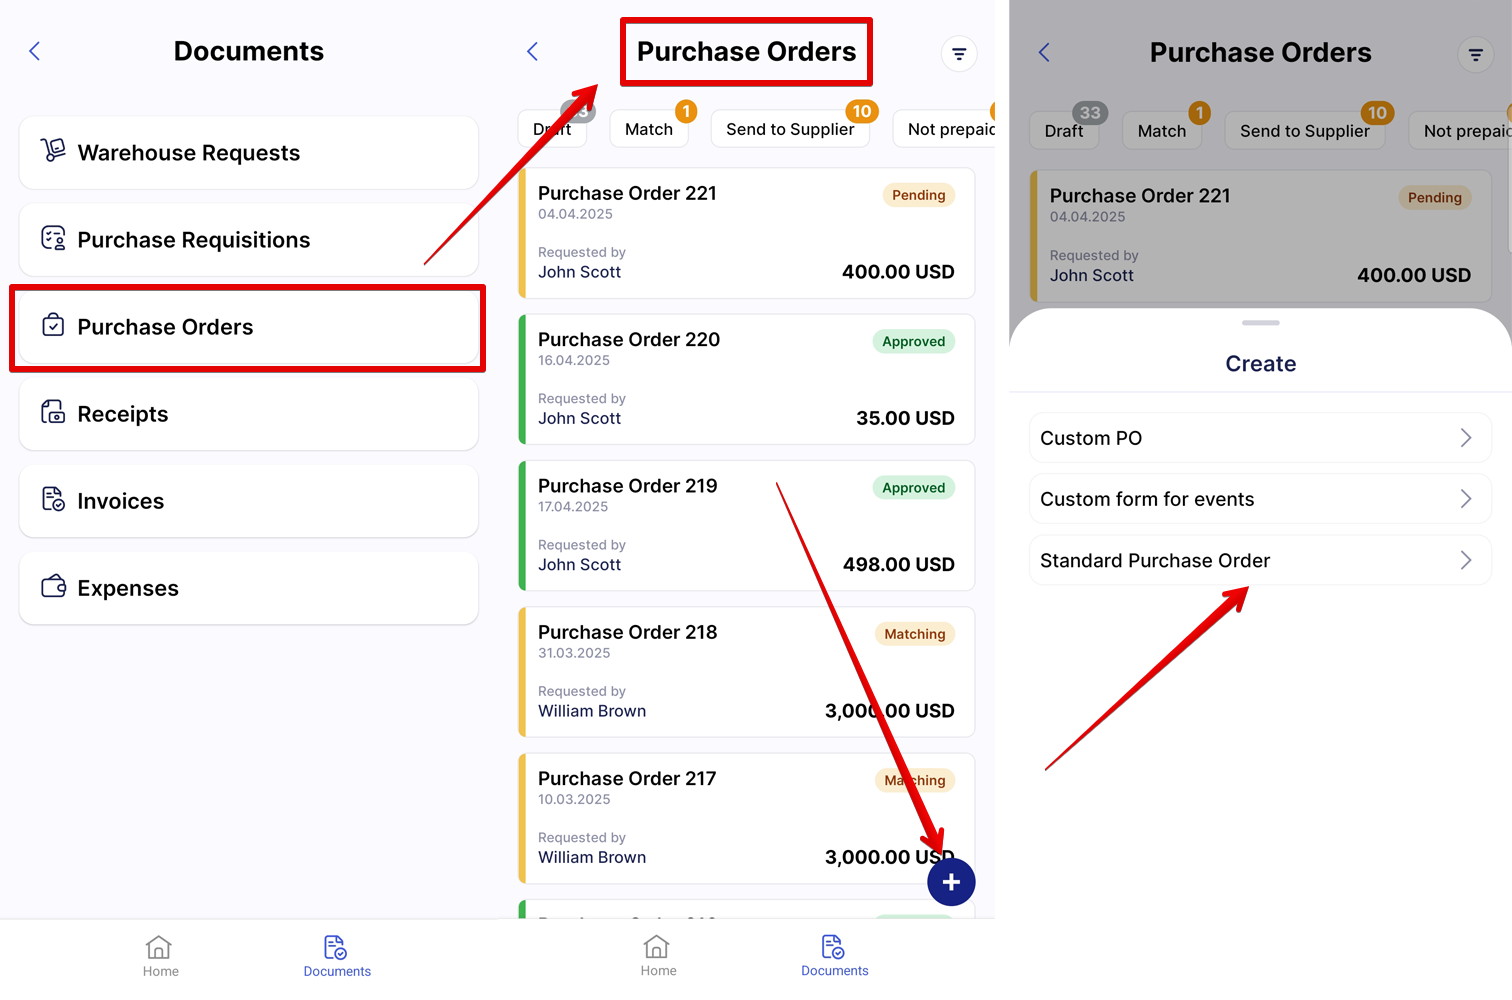
Step 1: Select the Document Type
On the Documents page, select the type of document you want to create; you will be redirected to the corresponding module. Click the + icon to add a new document. If you have custom forms, select one to proceed.
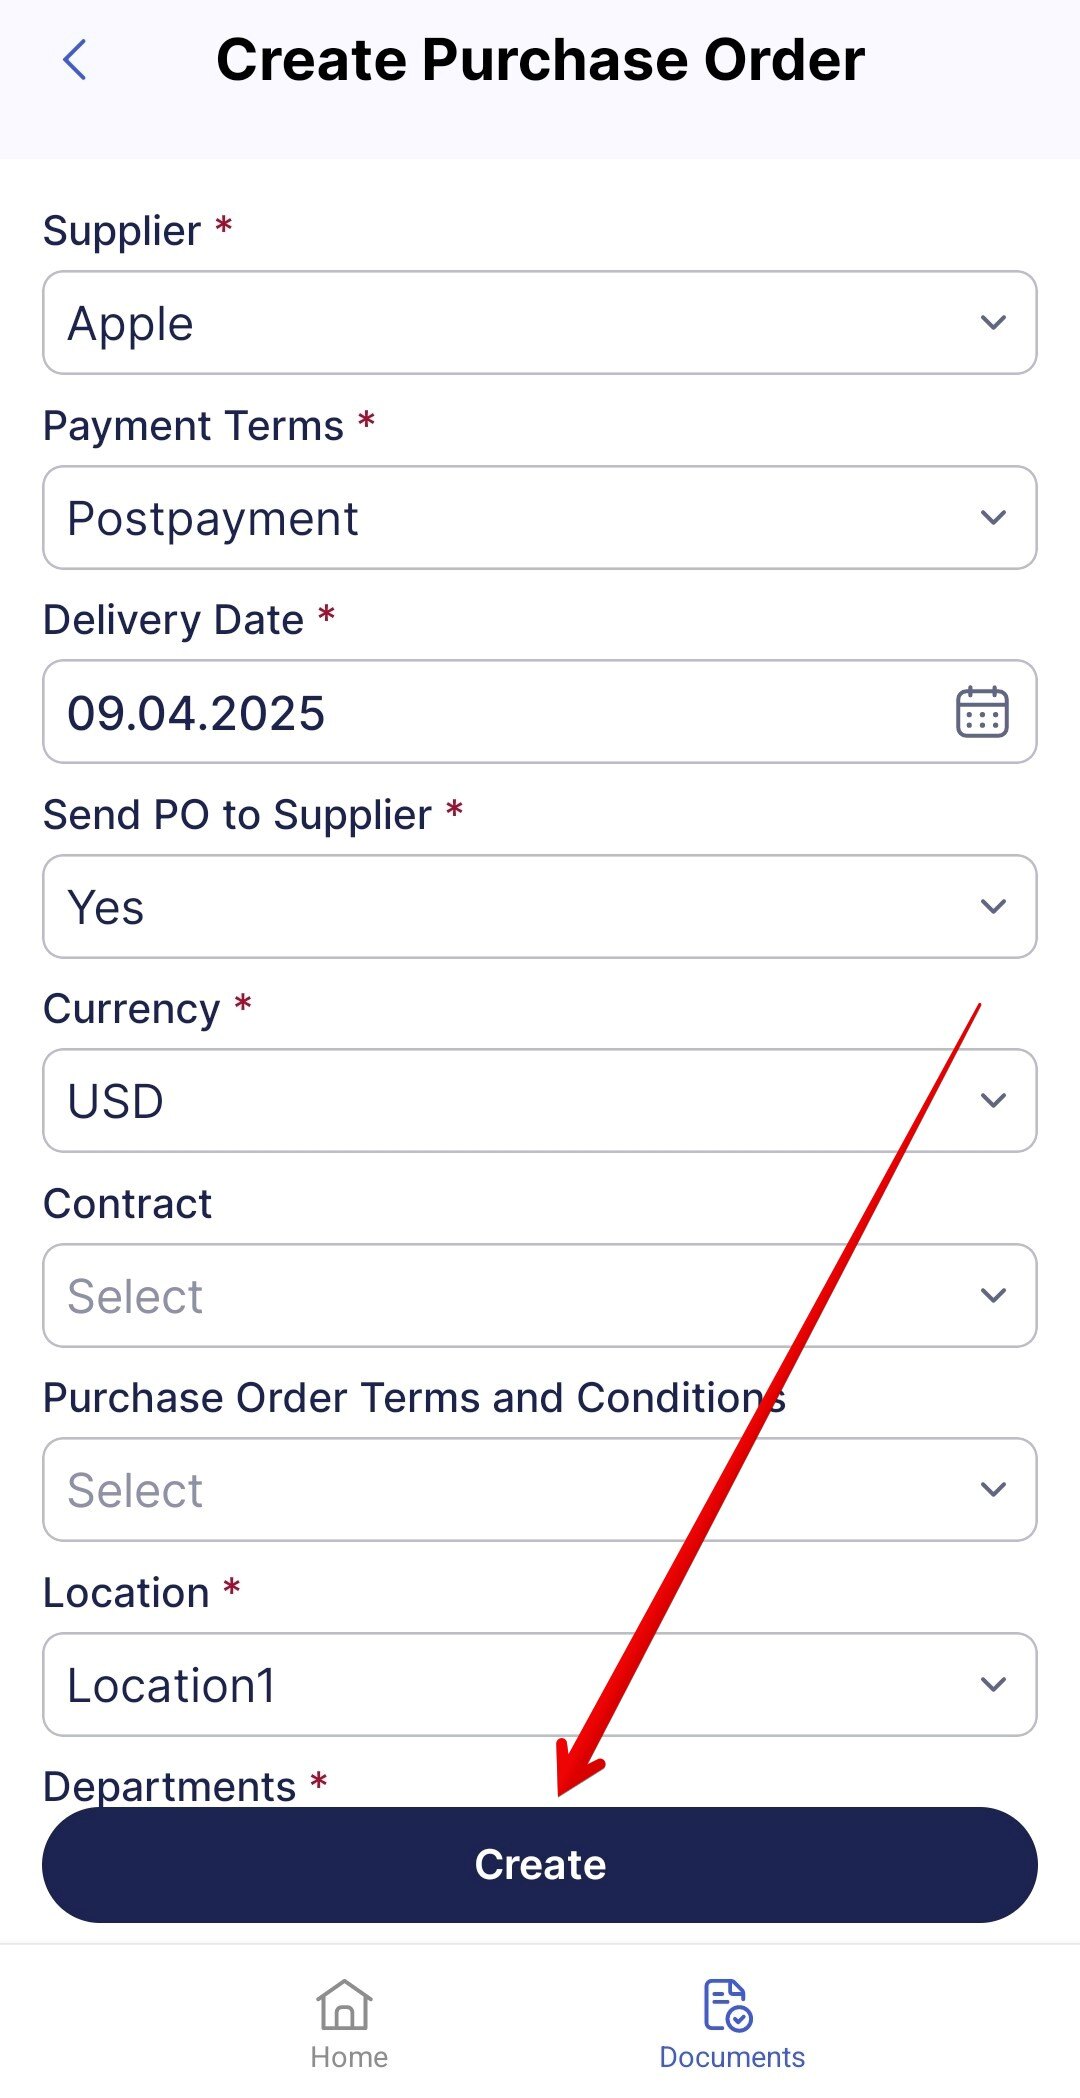
Step 2: Fill Out the Details
Fill out the required standard and custom fields, then click Create. You can also add a note for the supplier while completing this section.
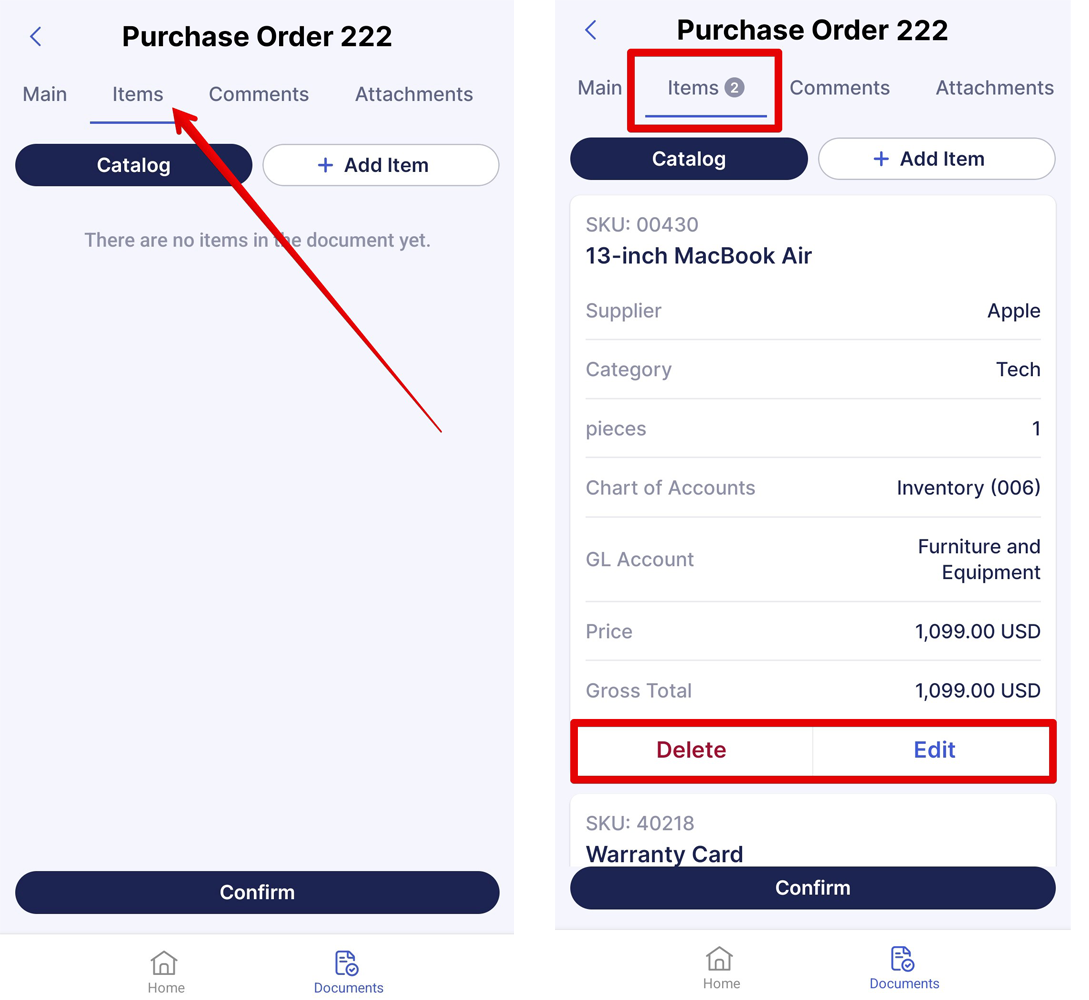
Step 3: Add Items
On the items tab, you can:
- add new items or select items from the Catalog;
- delete and Edit the added items;
- click on the item card to view all details;
- see the number of items in the document near the tab’s title.
Step 4: Add Comments and Attachments
Comments for Precoro users and attachments (both internal and external) can be added on the corresponding tabs.
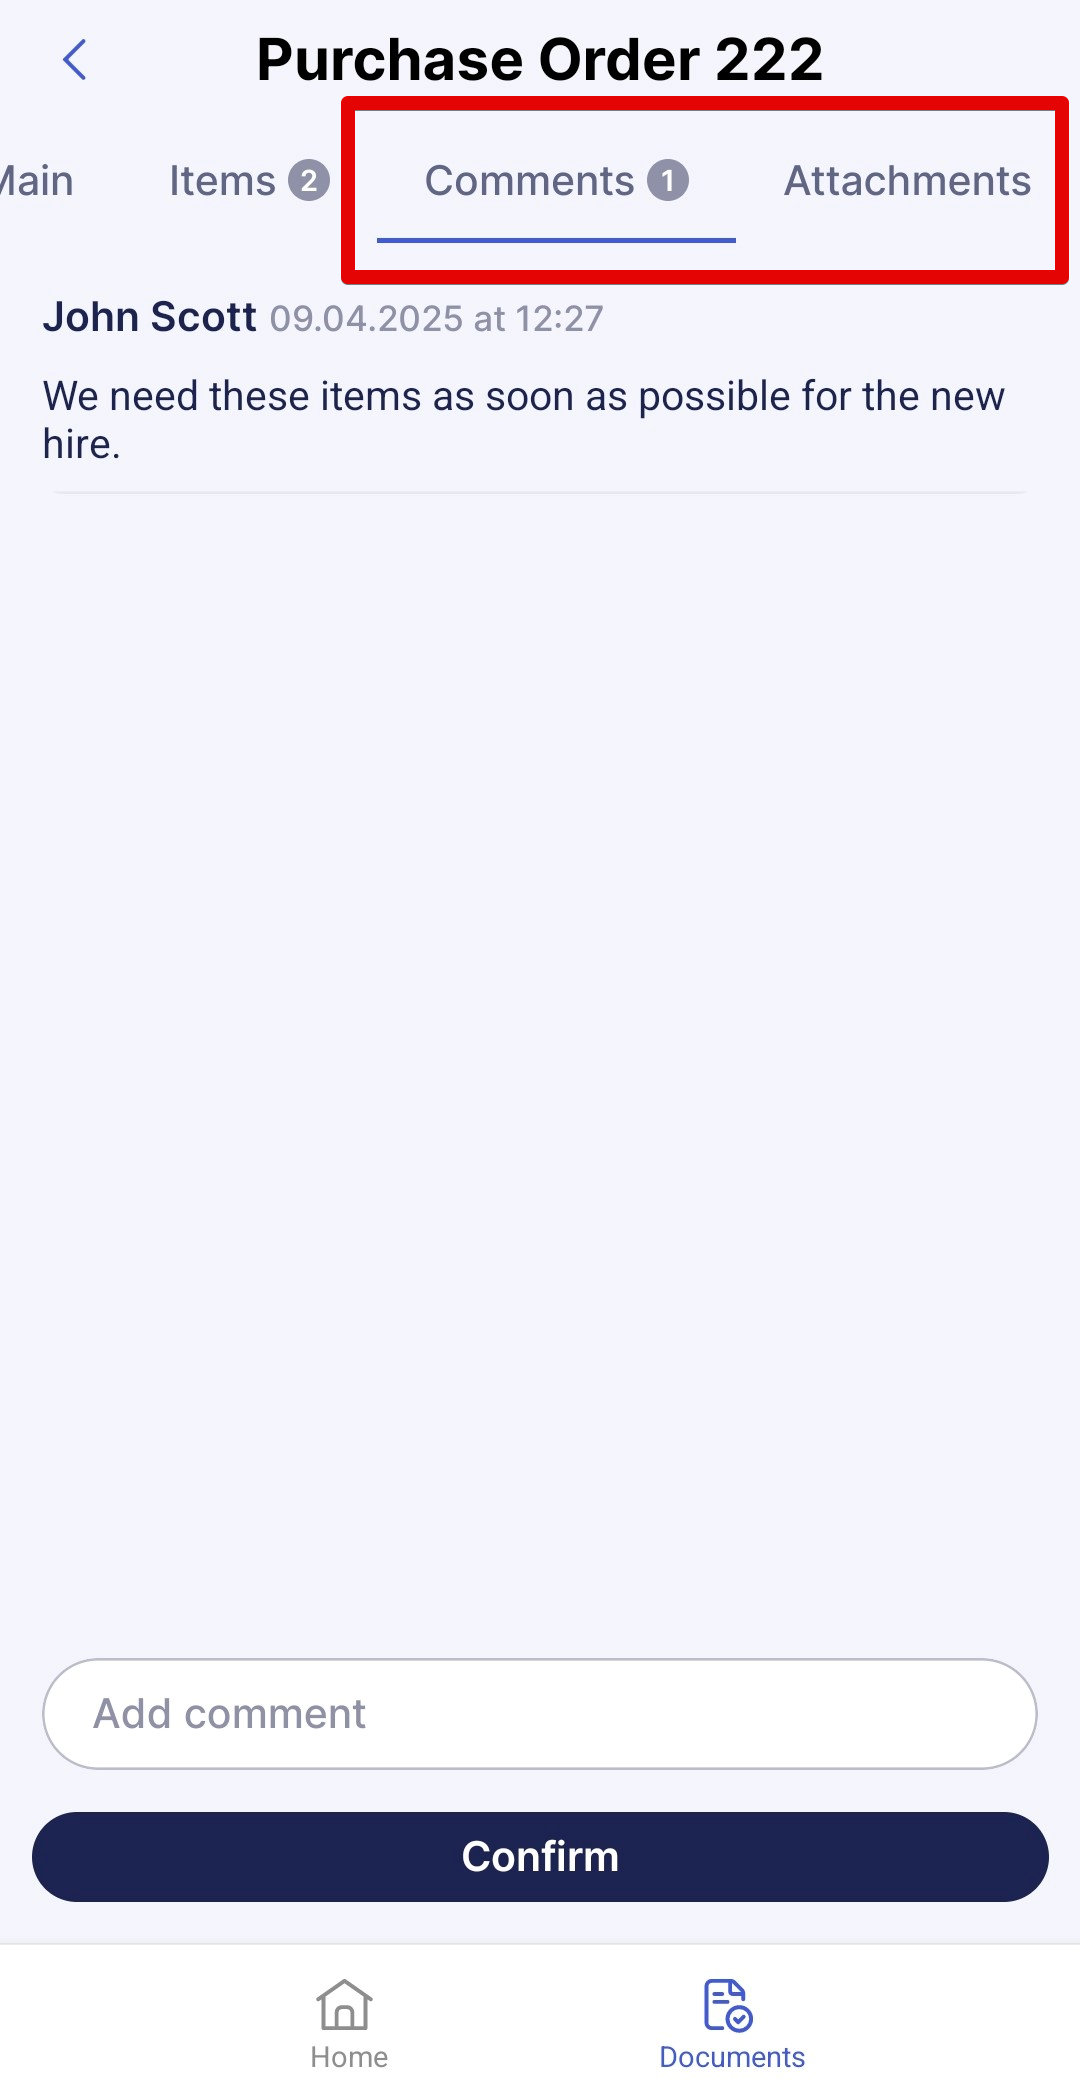
Step 5: Confirm and Send the Document
Once everything looks good, press the Confirm button at the bottom of the screen.
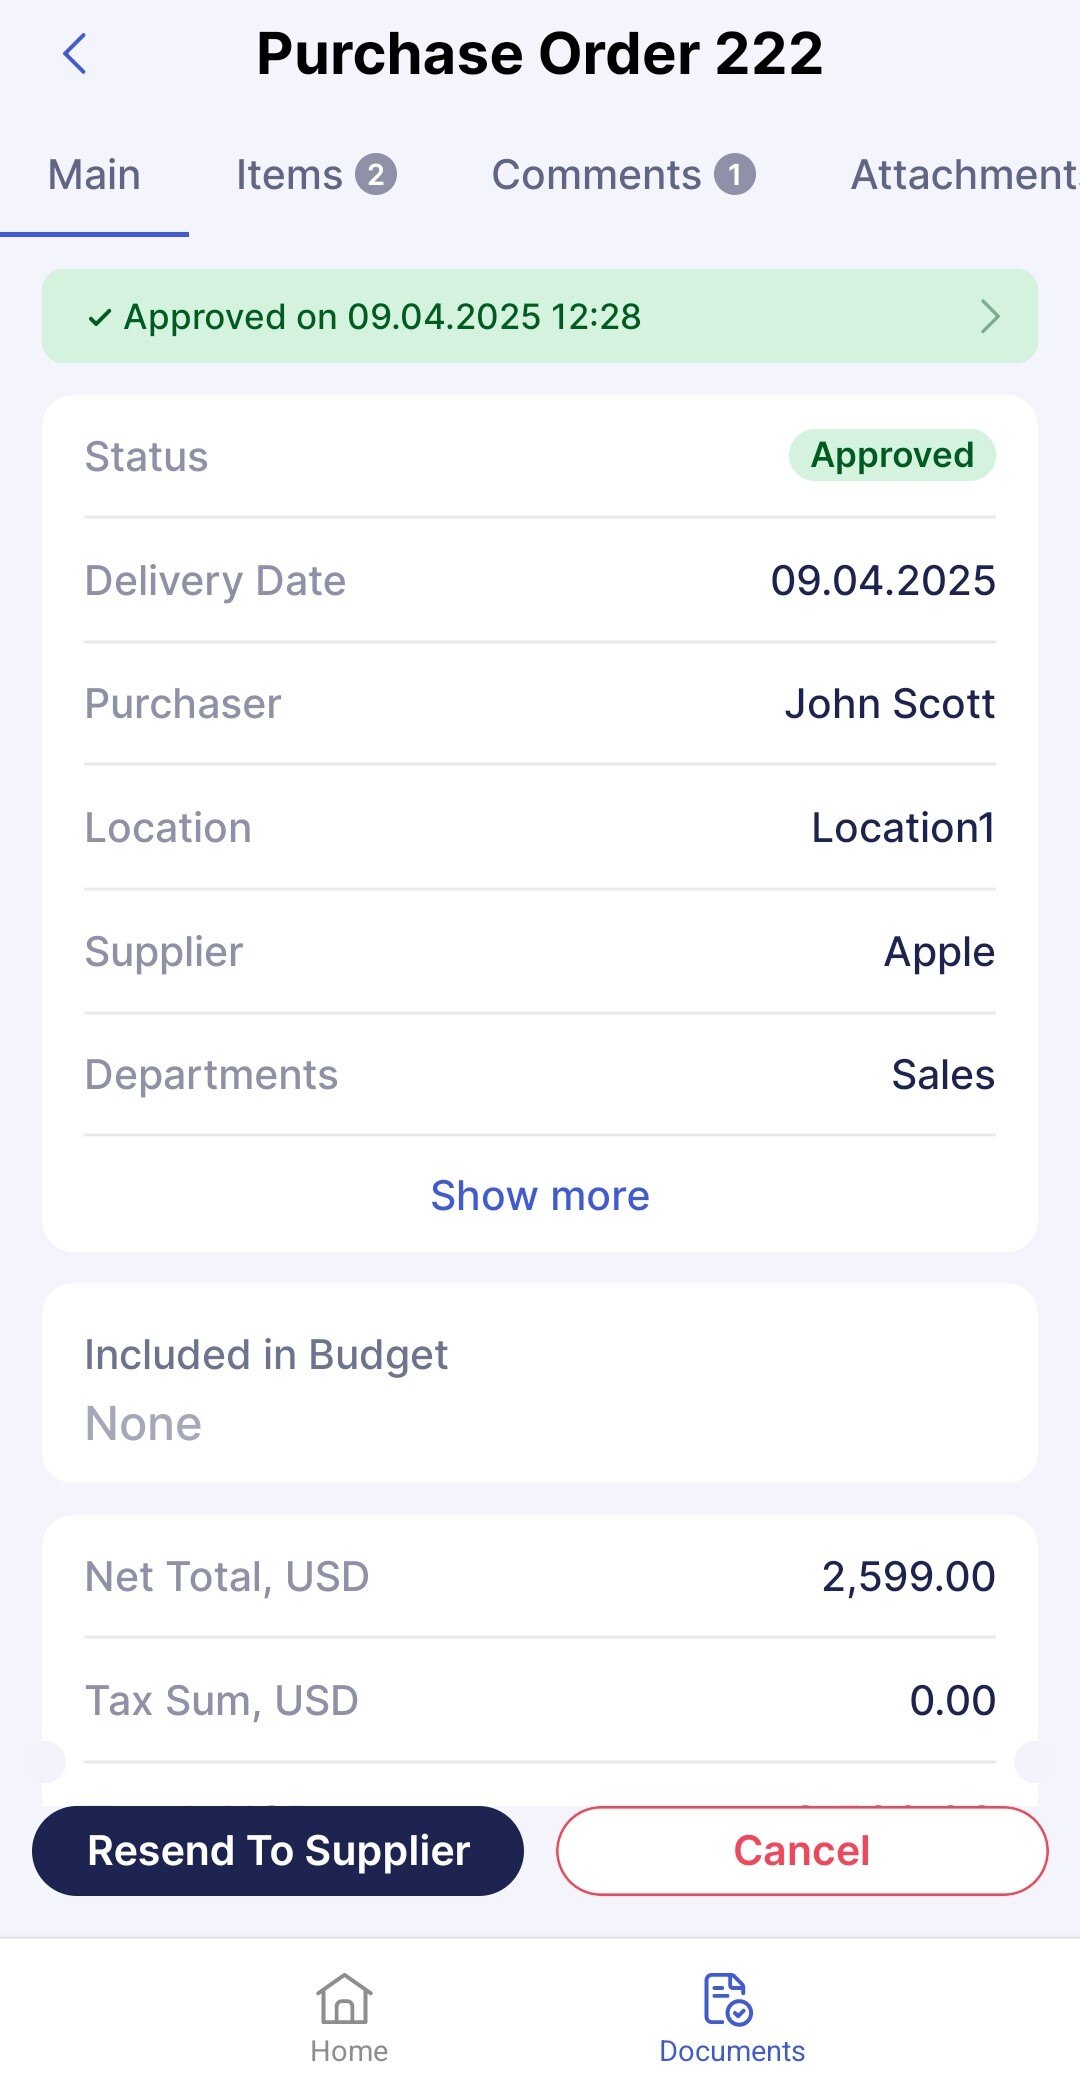
If your company uses the Approval Workflow feature, the PO status will change to Pending. Once approved, you can send the PO to the supplier by clicking the Send to Supplier button at the bottom.
If automatic PO sending to suppliers is enabled in your company, you do not need to do it manually. Learn more about this feature here. You will still have access to the Resend to Supplier button, in case you need to send the order again.
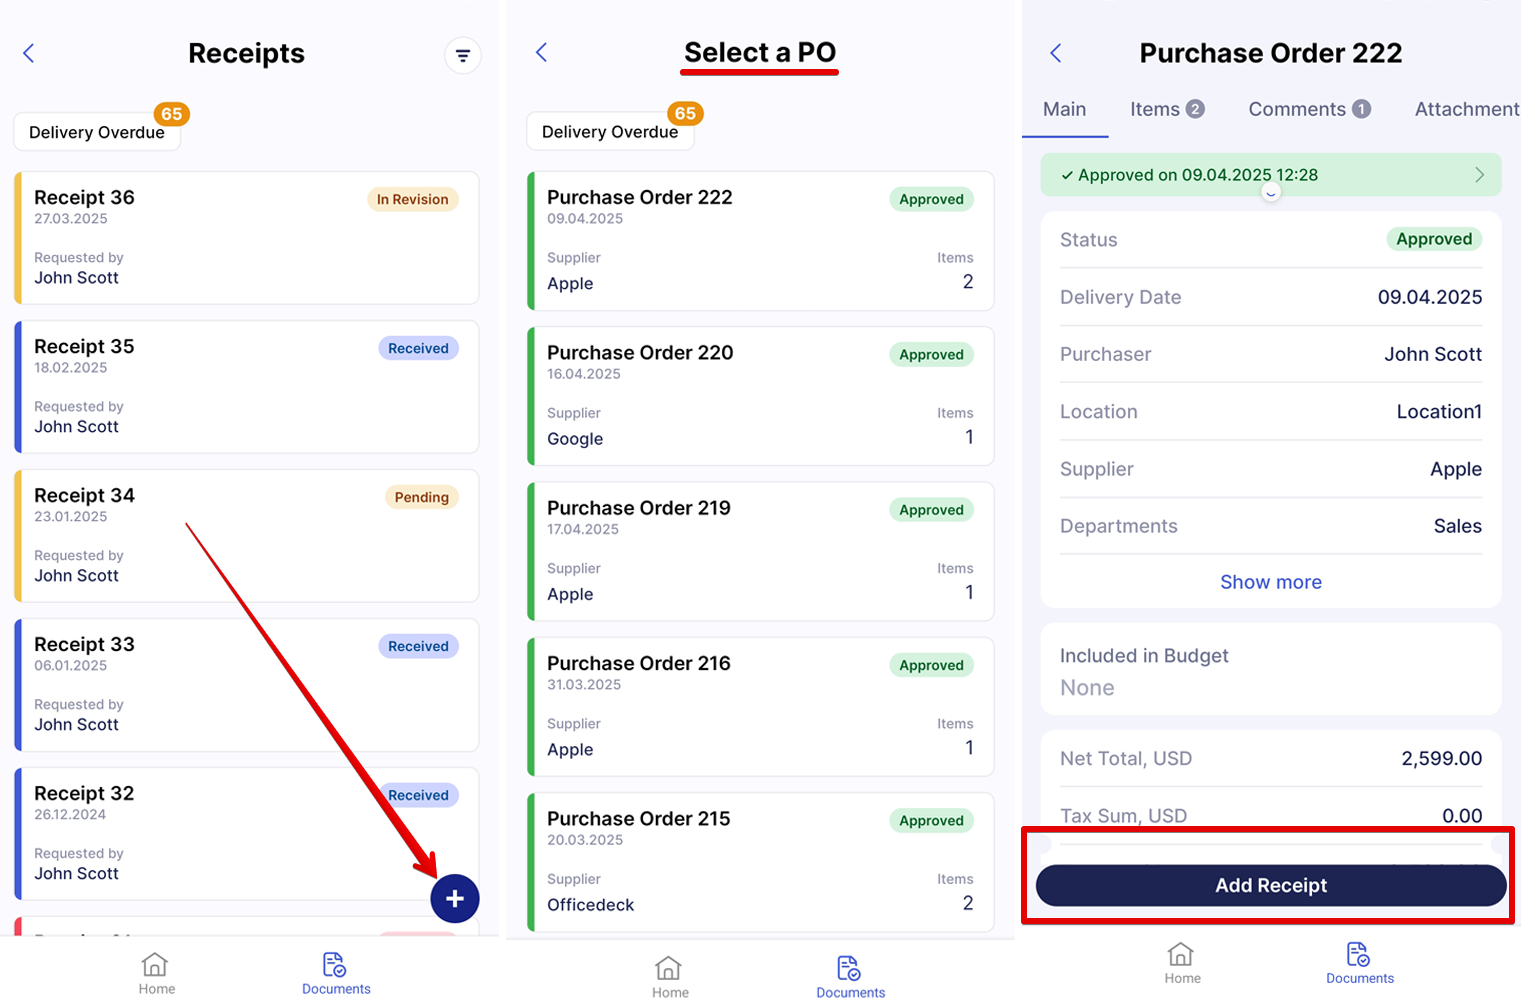
How to Add Receipts
On the Receipts page, click the + icon, select a PO to which the receipt will be added, and click Add Receipt.
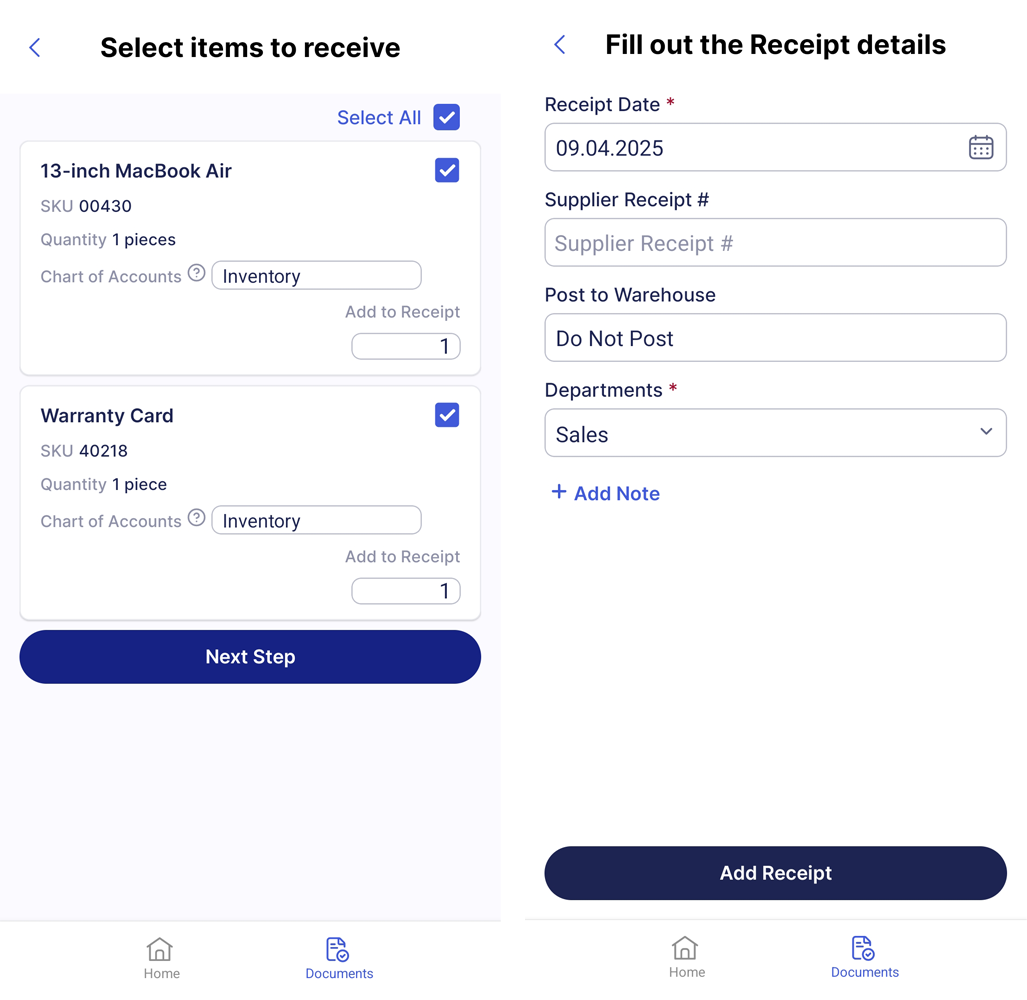
Select the items from the order you want to receive and click Next Step.
Fill out the details and press Add Receipt.
How to Track Documents
From the Module Page
On any module page, you can use these tools to navigate the document list faster:
-
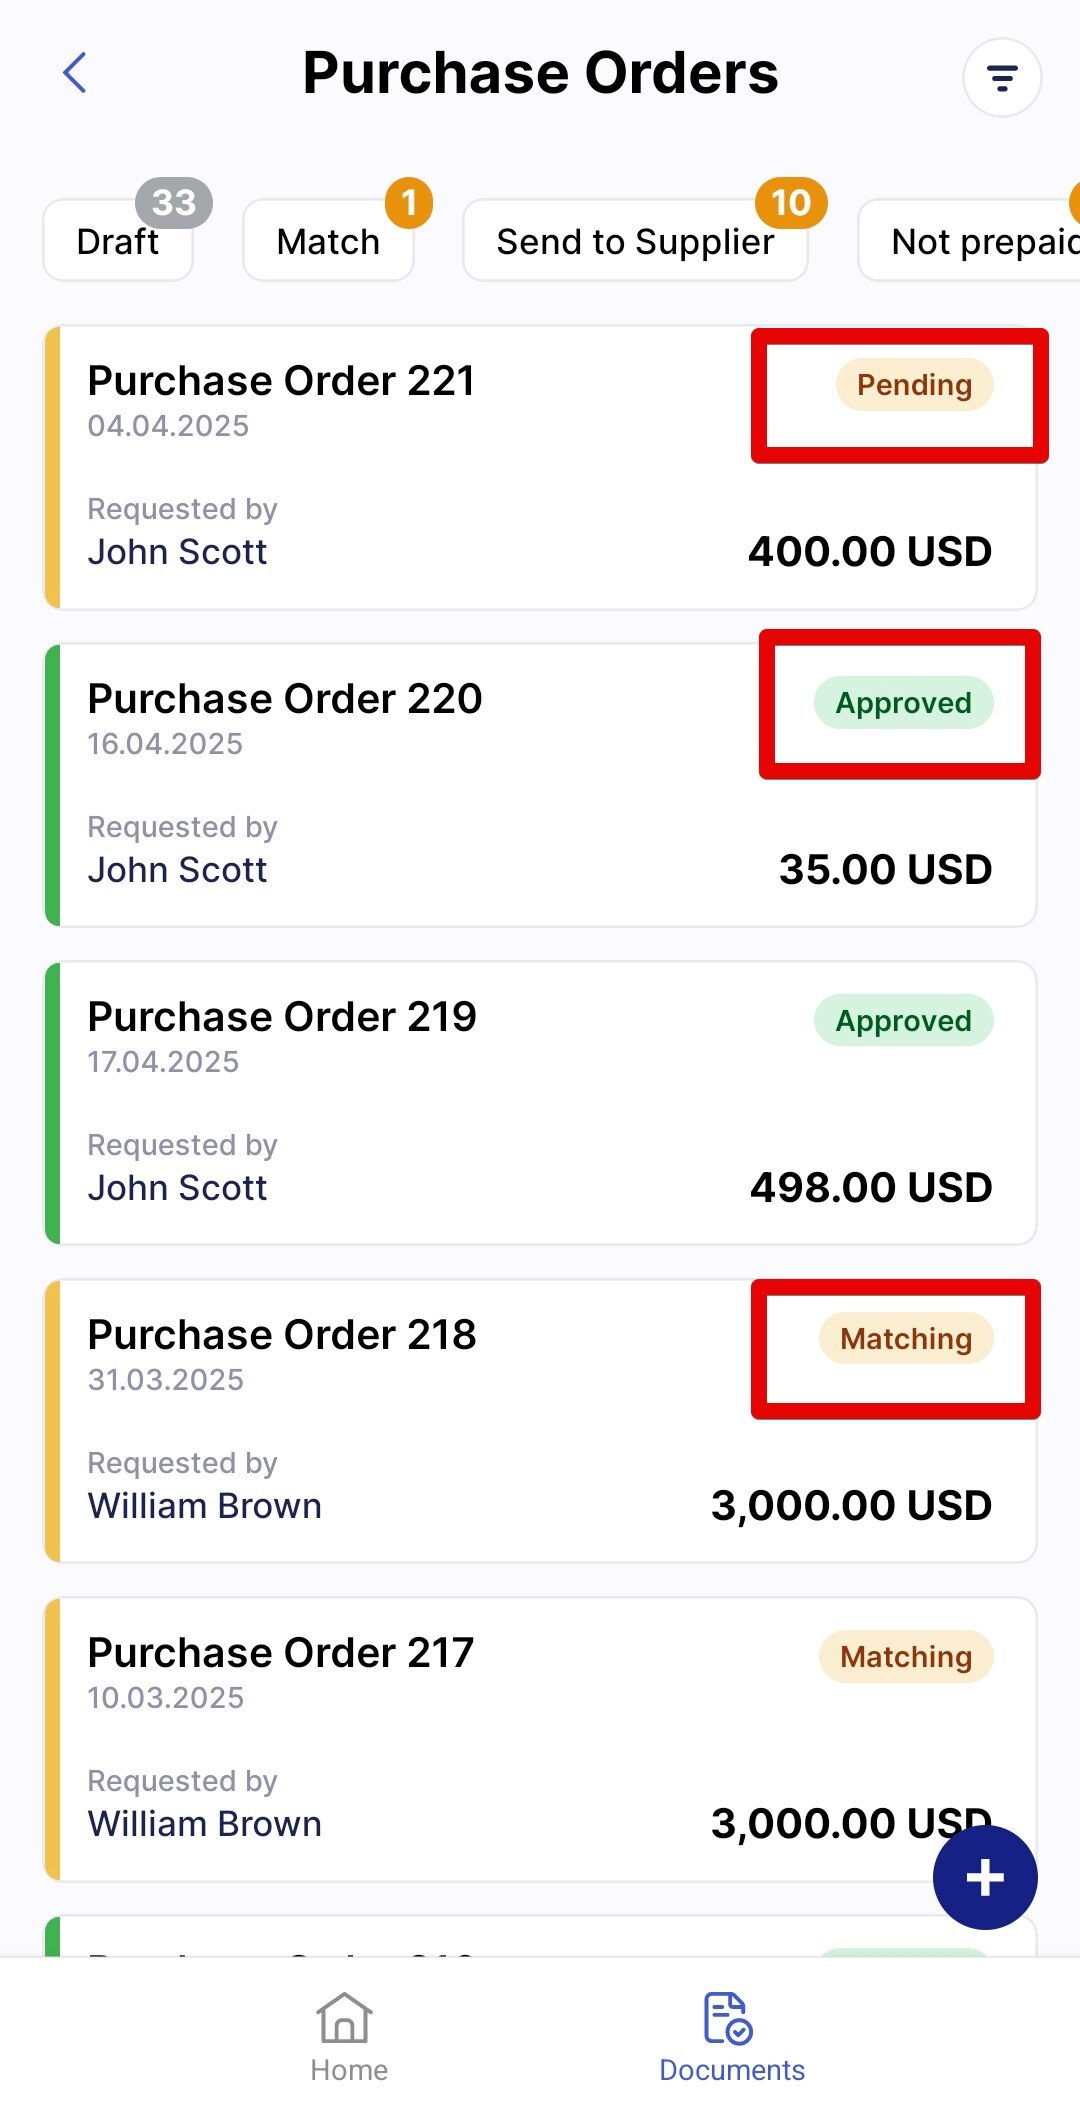
Statuses
Statuses are displayed for every document, allowing you to understand its progress stage at a glance. Learn more about PO statuses here.

-
Infocards
Infocards are standard sets of filters to speed up searching. Click the infocard to see only the documents that match the criteria.

-
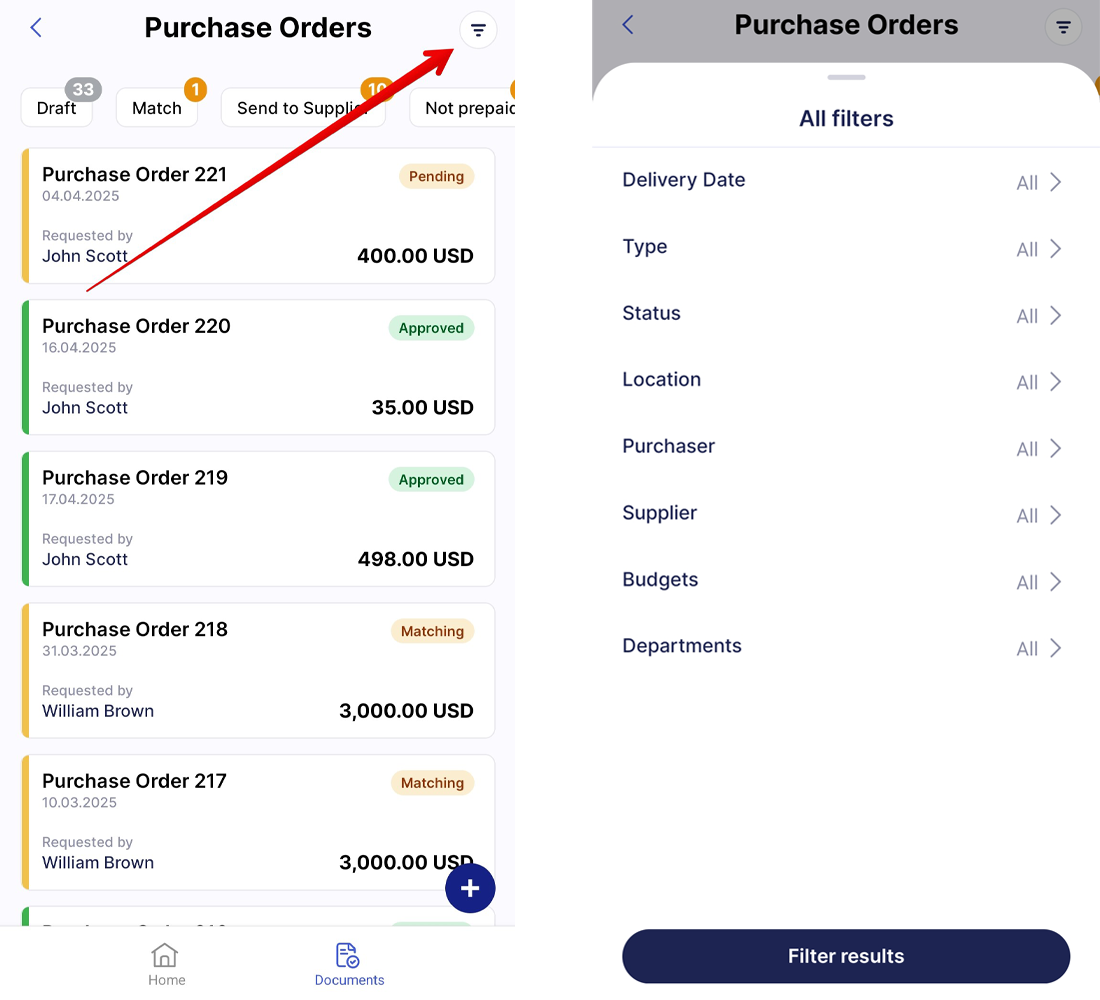
Filters
For a more precise search, click the Filters icon and select the needed parameters.


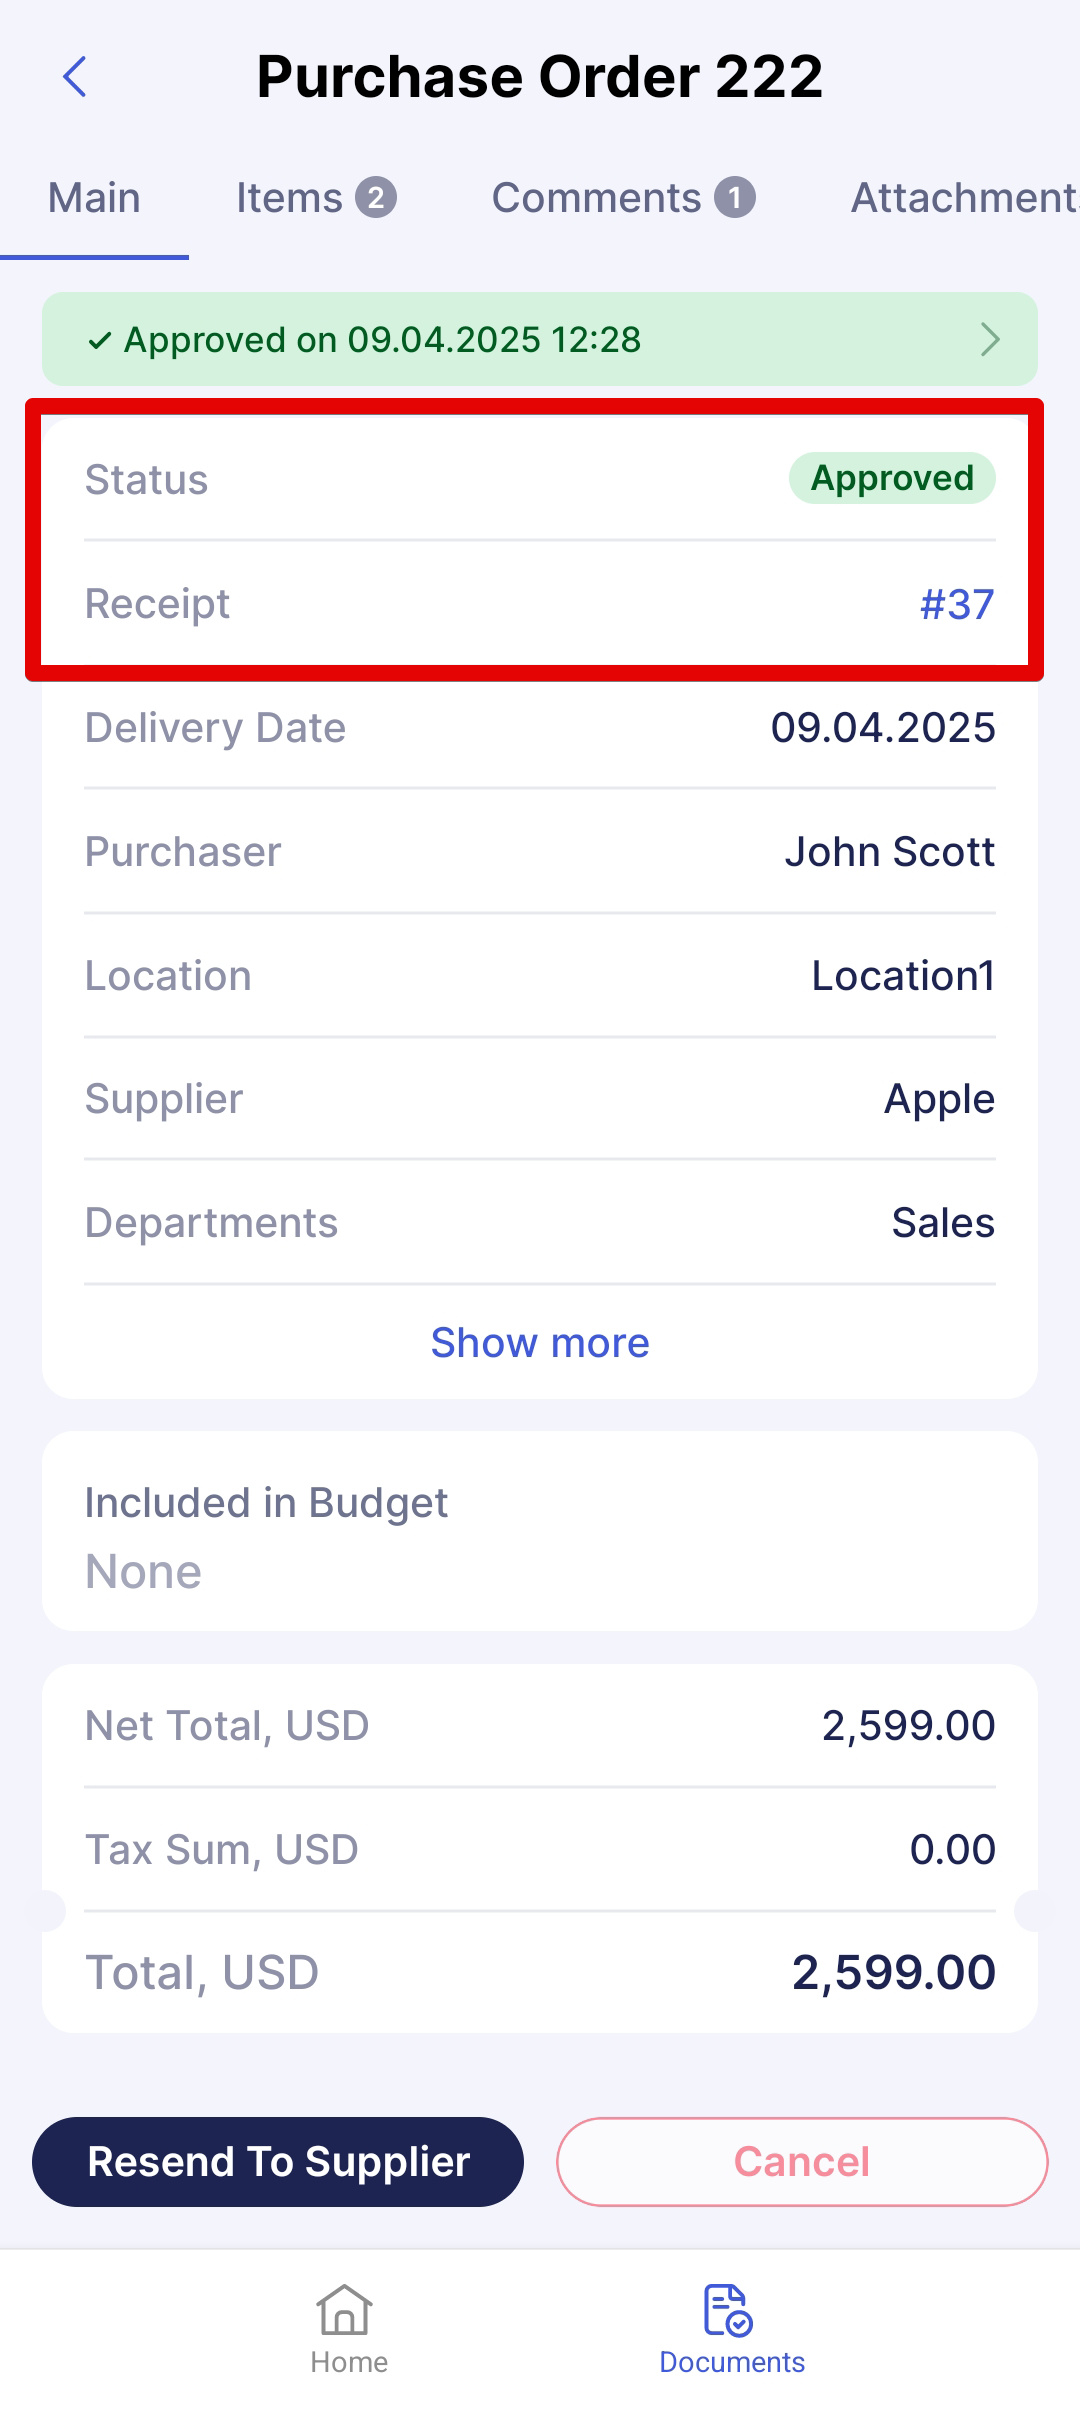
From the Document Page
When viewing a document, you will see its status along with other details. Additionally, if there are related documents, you will see their numbers and links to them.