TABLE OF CONTENTS
- How to Send a Purchase Order to a Supplier Manually
- How to Automate the Process to Avoid Manual Sending of Purchase Orders
- How to Select the PO Documents That Will Not Be Sent to Suppliers
How to Send a Purchase Order to a Supplier Manually
- Go to the Purchase Order page → choose the required Purchase Order from the list. You can also filter Purchase Orders by their sending statuses (in this case, choose not sent purchase orders).
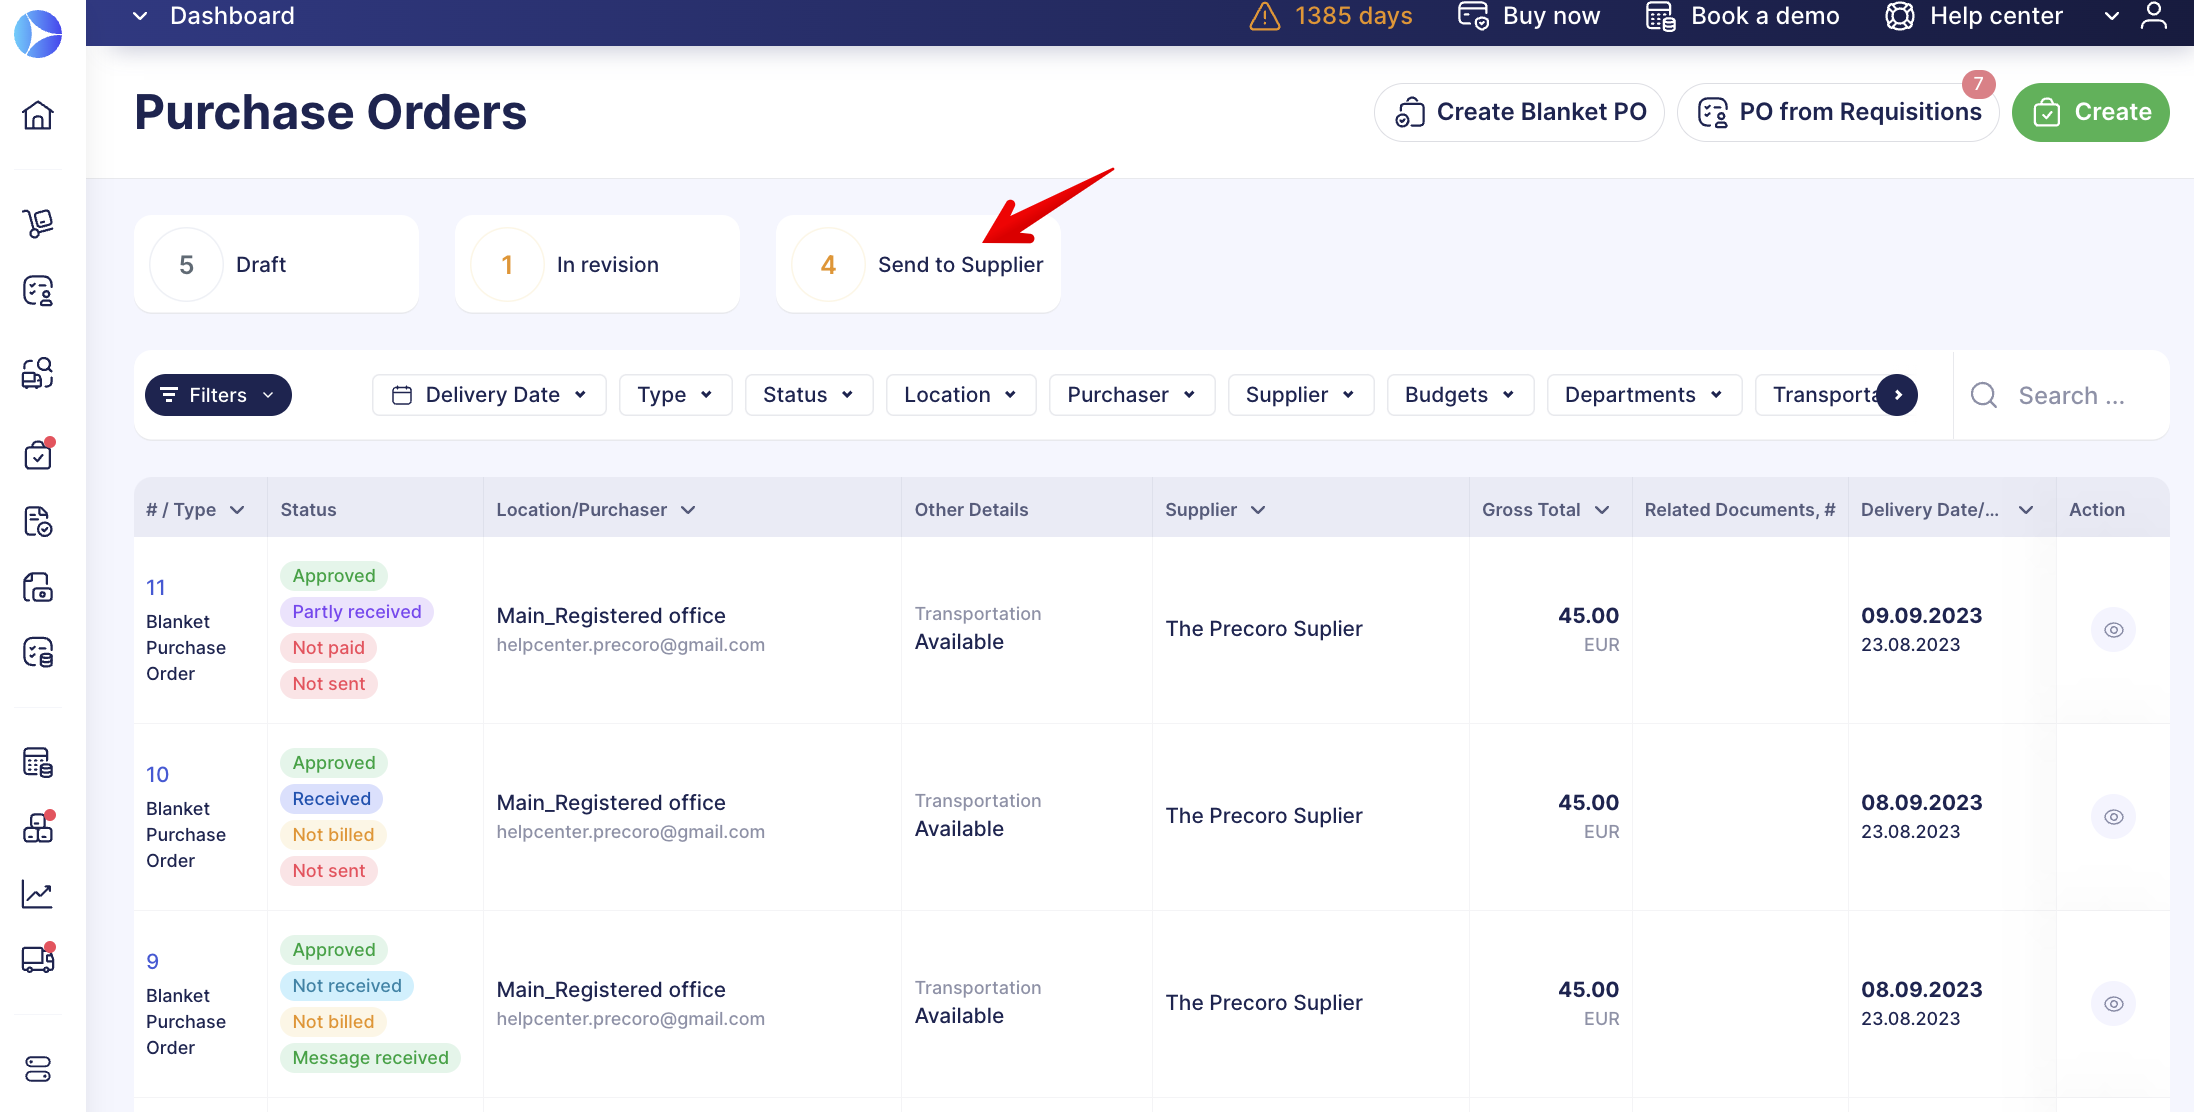
- Check the info and click the Send to Supplier button.

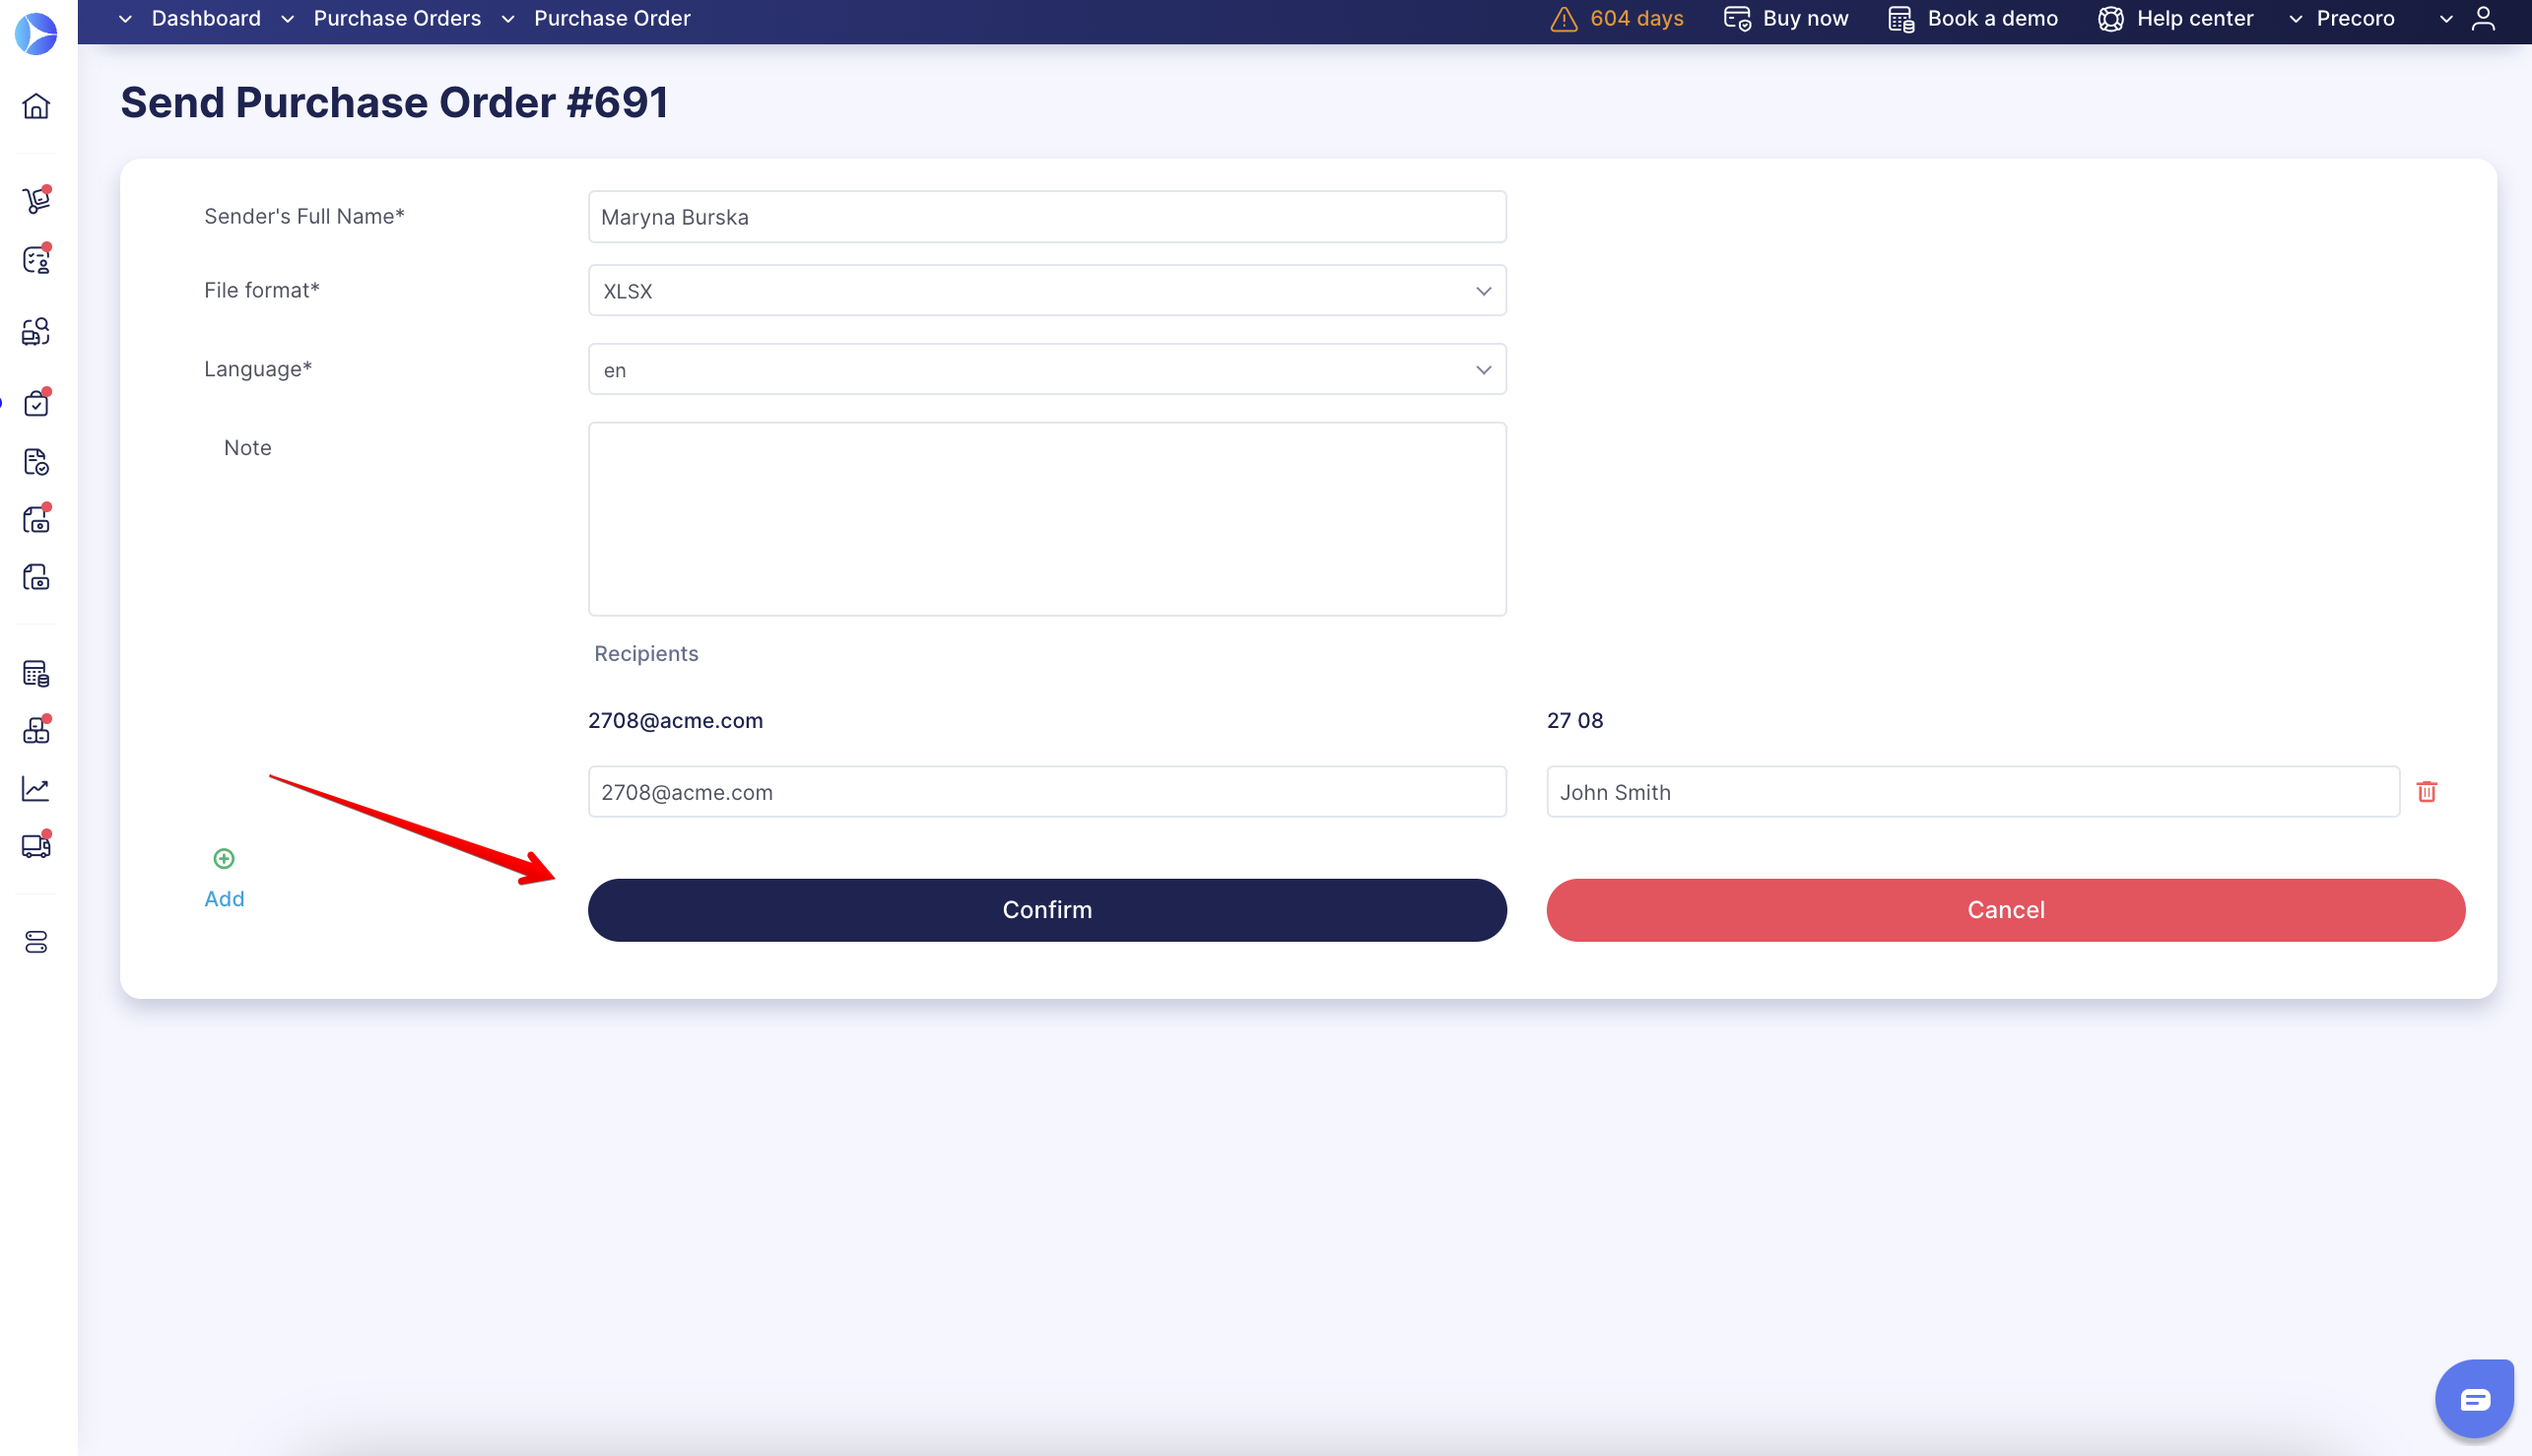
- The Supplier’s email must appear automatically (as you previously added it to the Supplier Management page). If the supplier’s email was not previously added, you need to add it to this form. Then click Confirm, and the email with the PO will be sent to the Supplier.

- You can check the Supplier’s email activity with the statuses listed below.

- Not sent — you have not sent the Purchase Order yet.
- Sent — the Purchase Order is sent but not received.
- Email is received — the Supplier received your email.
- Opened — the Supplier opened the letter.
- Failed — the email did not reach the recipient for one of the possible reasons:
- The letter was sent, but the server rejected it.
- The inbox does not exist.
- Any other unexpected error that prevented the email from reaching the recipient.

Below, you can find an example of an email your Supplier will receive.
The note you added for the Supplier is displayed, and your contact details are added as well. In the attachment, your Supplier can find a Purchase Order document available for download.
How to Automate the Process to Avoid Manual Sending of Purchase Orders
Go to the Supplier Management page, add the contacts of all of your suppliers, and activate the PO Automatic sending toggle. 
You may choose a standard file format to be sent to suppliers.
Go to the Purchase Orders tab in Configuration → Basic Settings → Document Setup and choose the needed Order Format for Suppliers. It can be either PDF or XLSX.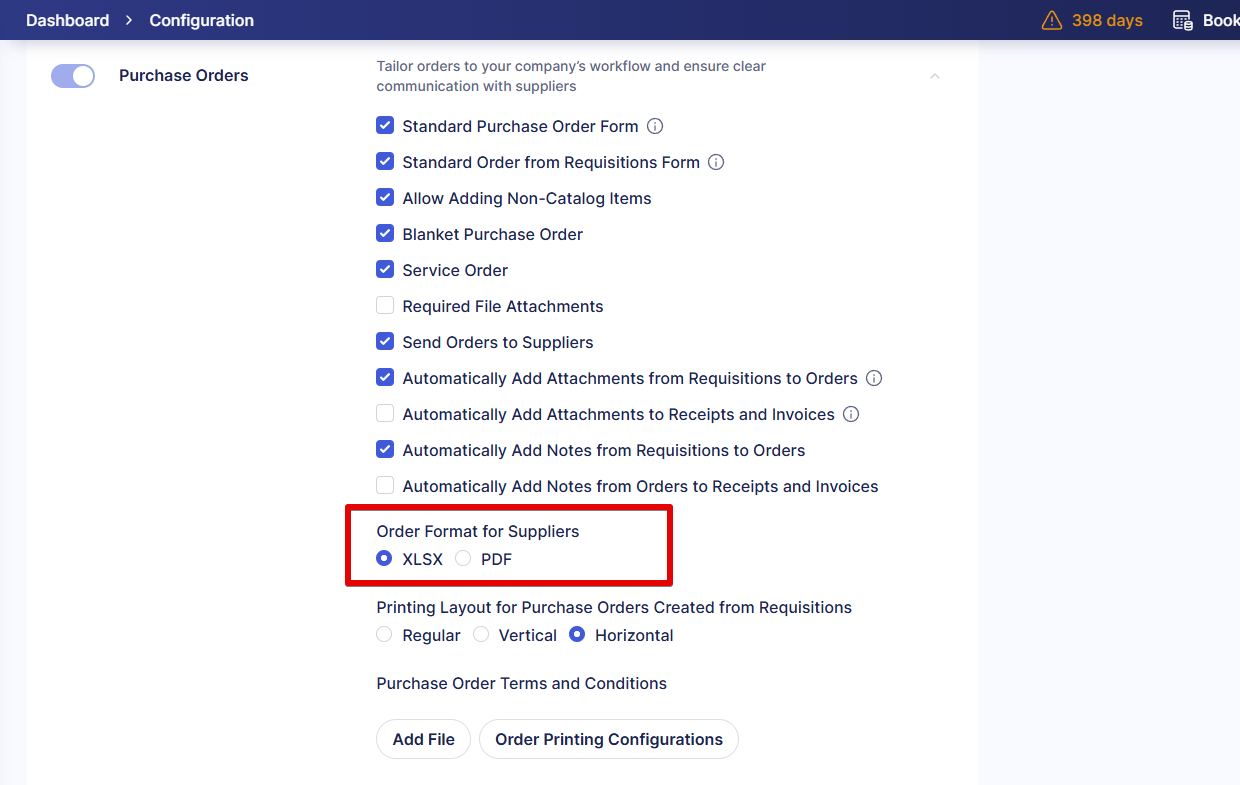
How to Select the PO Documents That Will Not Be Sent to Suppliers
You can separate the Purchase Order documents that you would like to send to Suppliers or not.
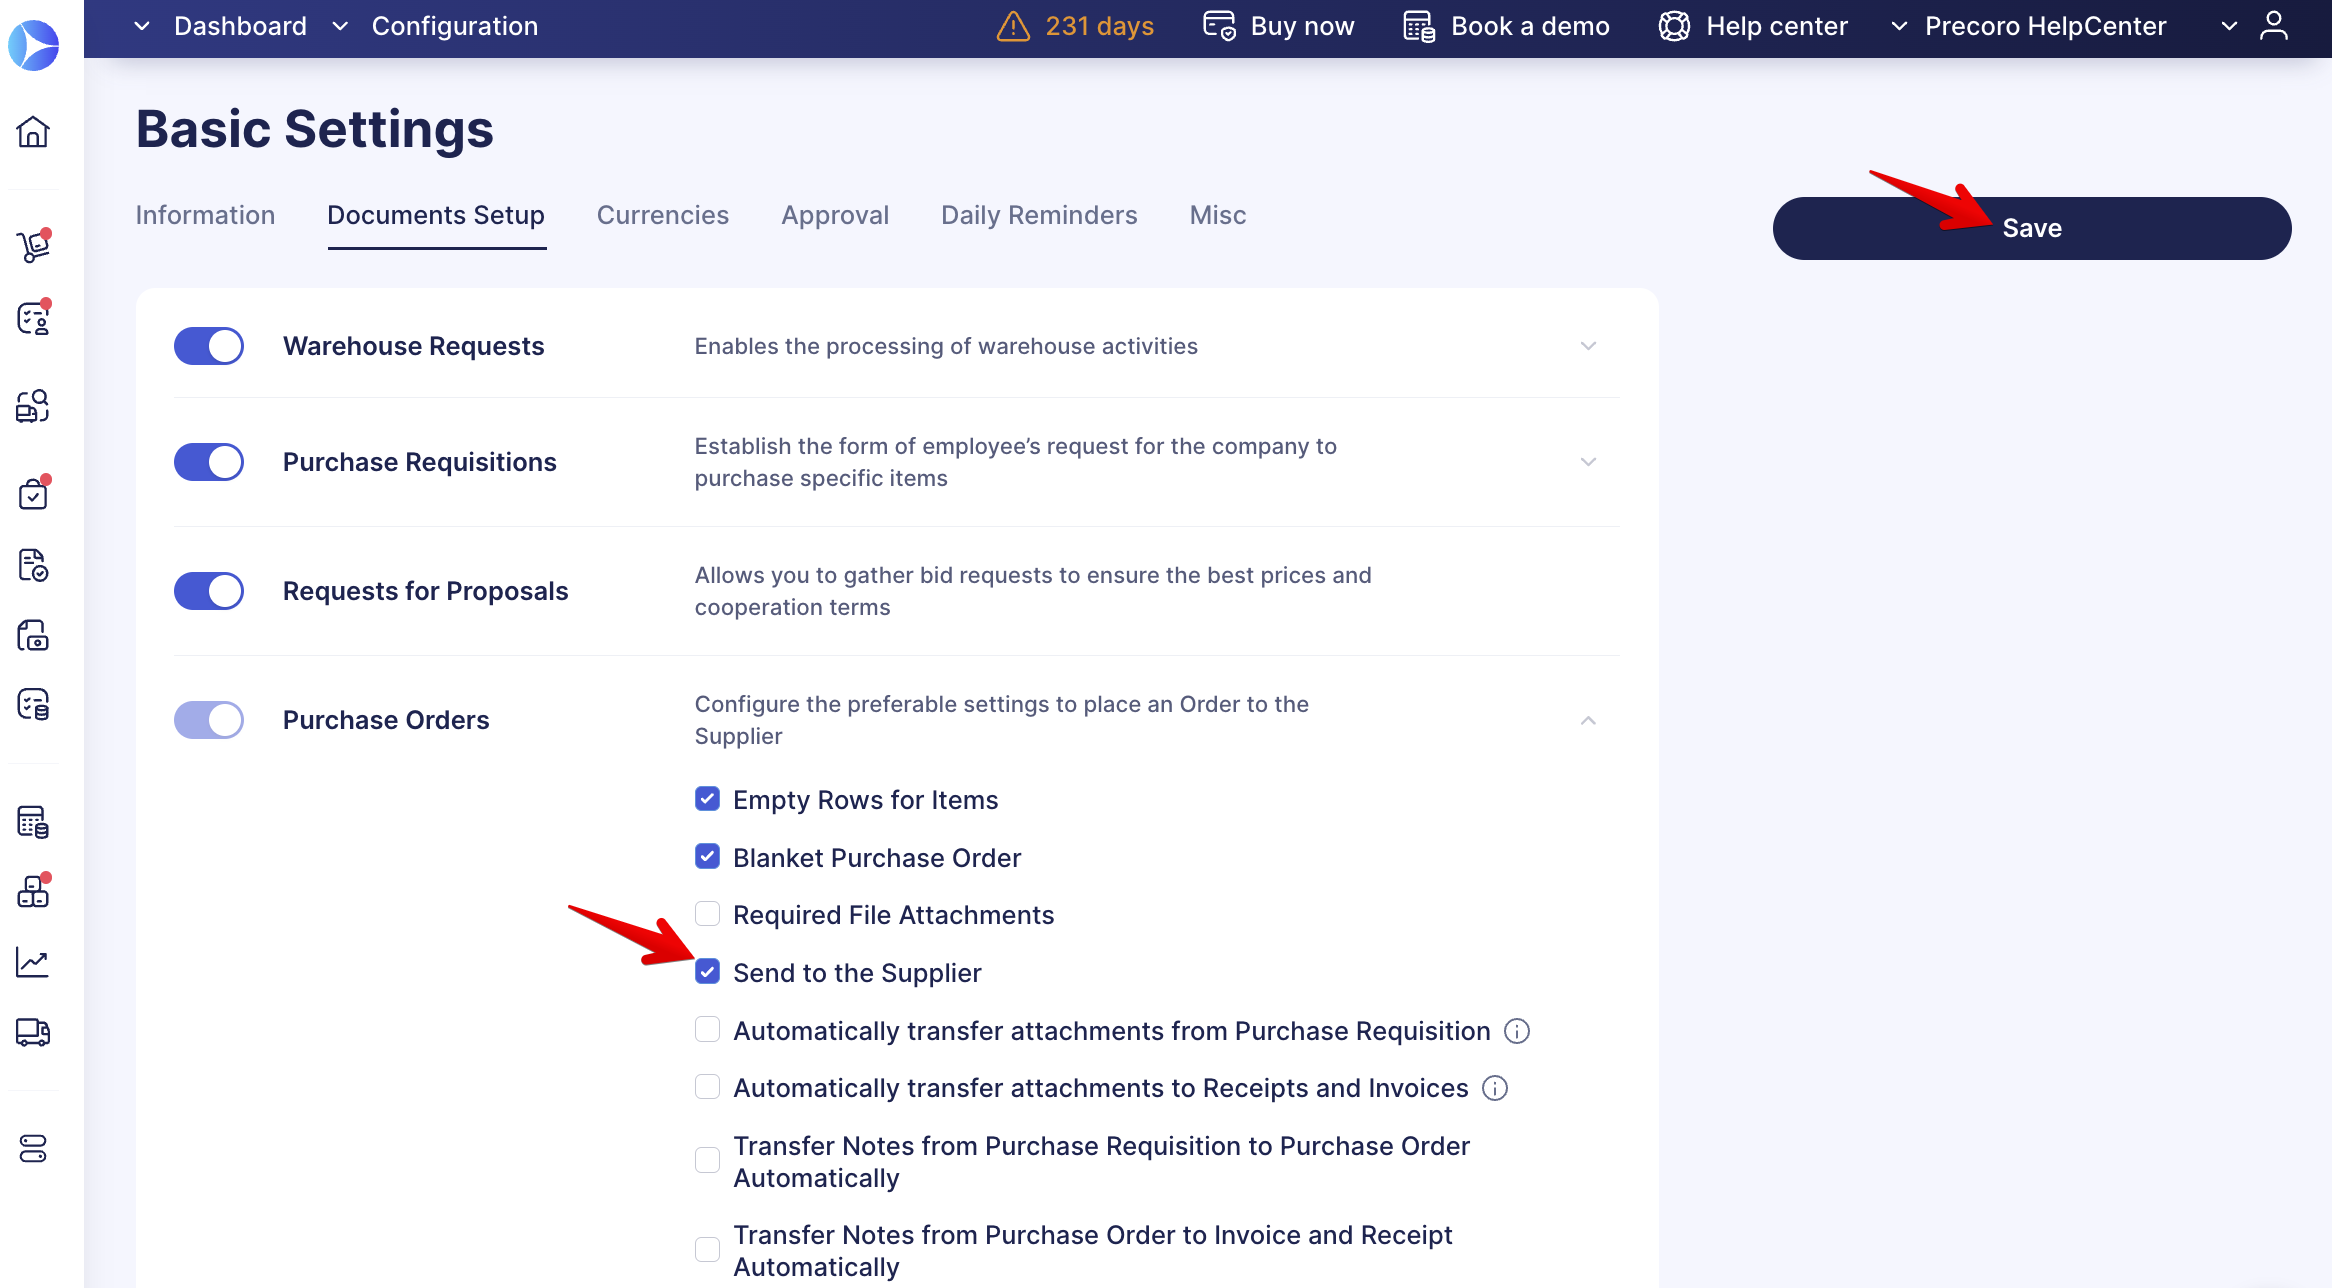
💡 Please note: This feature is only available if you have previously activated it in the Configuration → Basic Settings → Document Setup → Purchase Orders → Send Orders to Suppliers check box.
How this works
When creating a new PO document, you can now select whether you would like it to be sent to the Supplier or not:
- On the Supplier Management page, choose the Supplier, and select the necessary option in the Send PO to Supplier field.
💡 Please note: The “Yes” option is chosen in the Send PO to Supplier field by default.
2. If you do not wish to send the PO document to the Supplier automatically after the Confirmation and Approval, select the “No” option.
In that case, you will NOT see the following:
- Send to Supplier button on the PO page
- Not sent status
- Documents listed in the “Send to Supplier” info card.
How to resolve the already existing number of POs in the “Send to Supplier” info card
- When pressing on the “Send to Supplier” info card, you will see boxes next to the documents.
- Check the necessary documents, and you will see the Do not Send to Supplier button.
- After selecting the needed documents and pressing the Do not send to Supplier button, you will see the following information:
- The number of POs in the “Send to Supplier” info card will decrease.
- There will be no Send to Supplier button or Not Sent status on the PO view page.
- When editing the PO in the Send PO to Supplier field, the “No” option will be selected automatically.