
TABLE OF CONTENTS
Independently Configure Intelligent AP Automation
AP Automation settings are now available to users with the Configuration role. With this update, you can change the setup and try new features without involving your Customer Success Manager.
To find the settings, simply open the Configuration page and click on the Intelligent AP Automation tab.
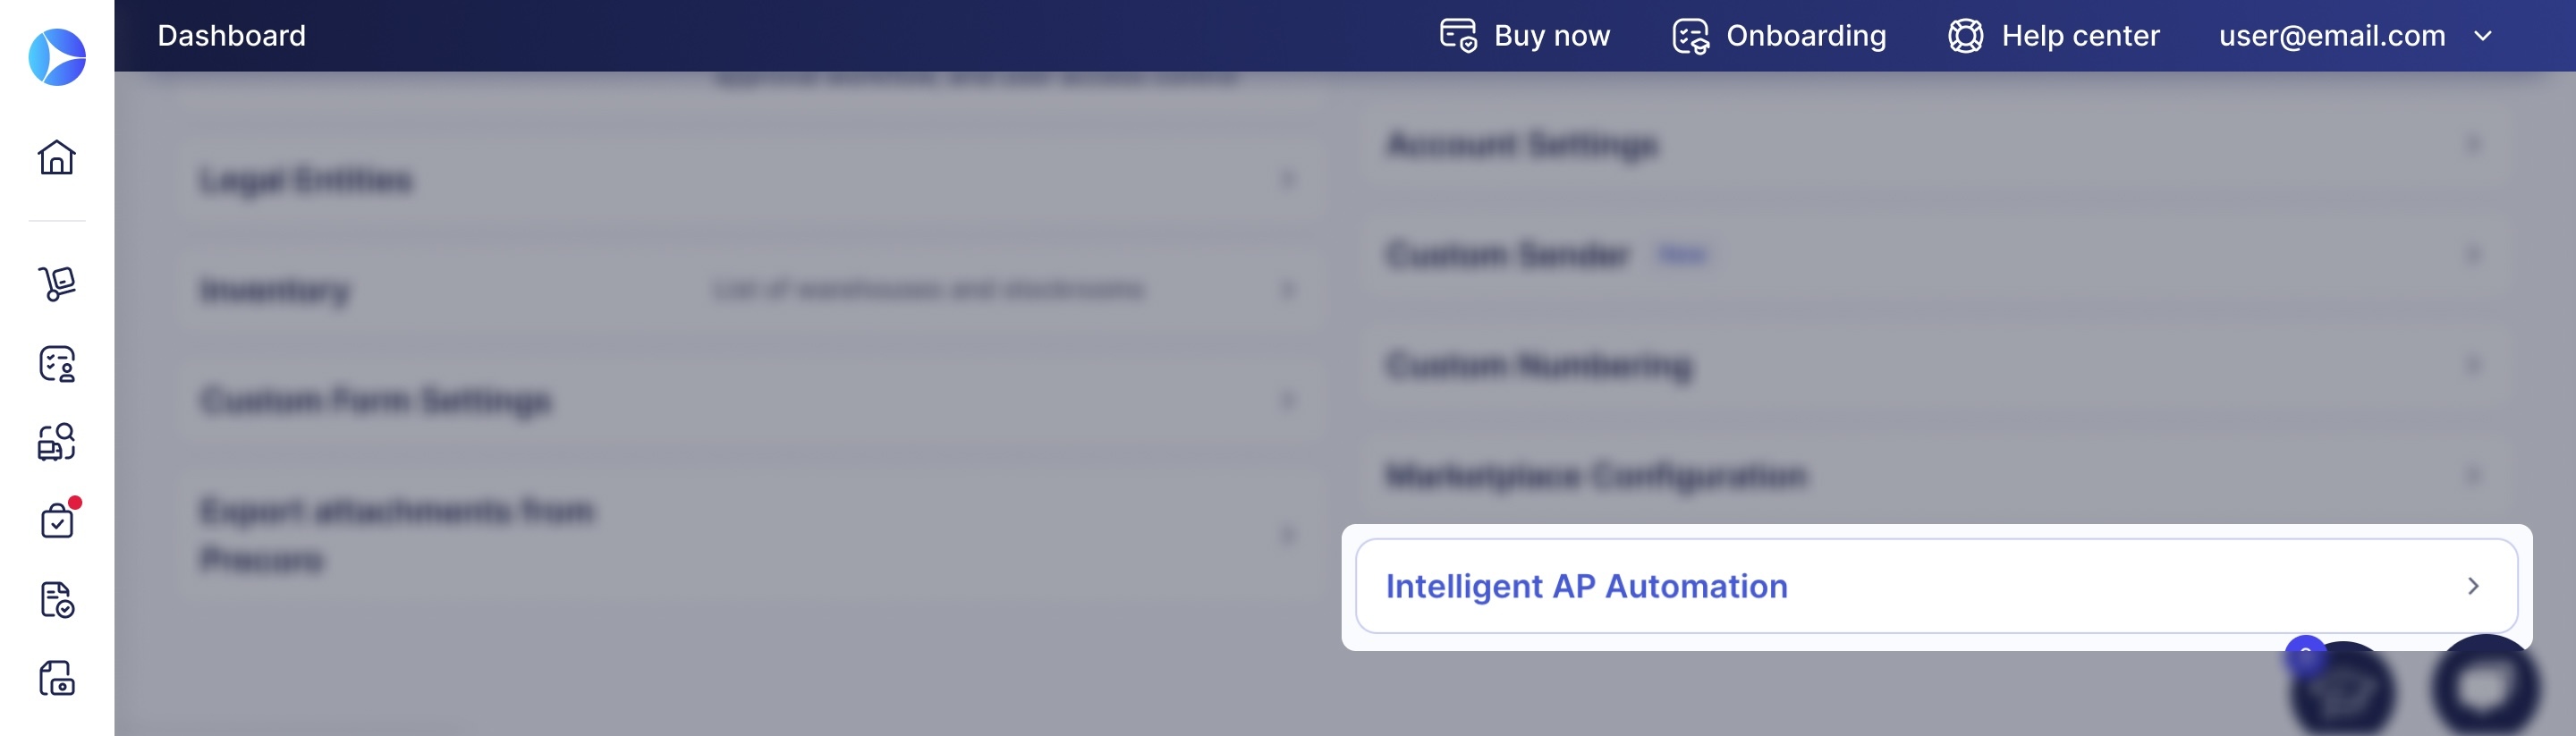
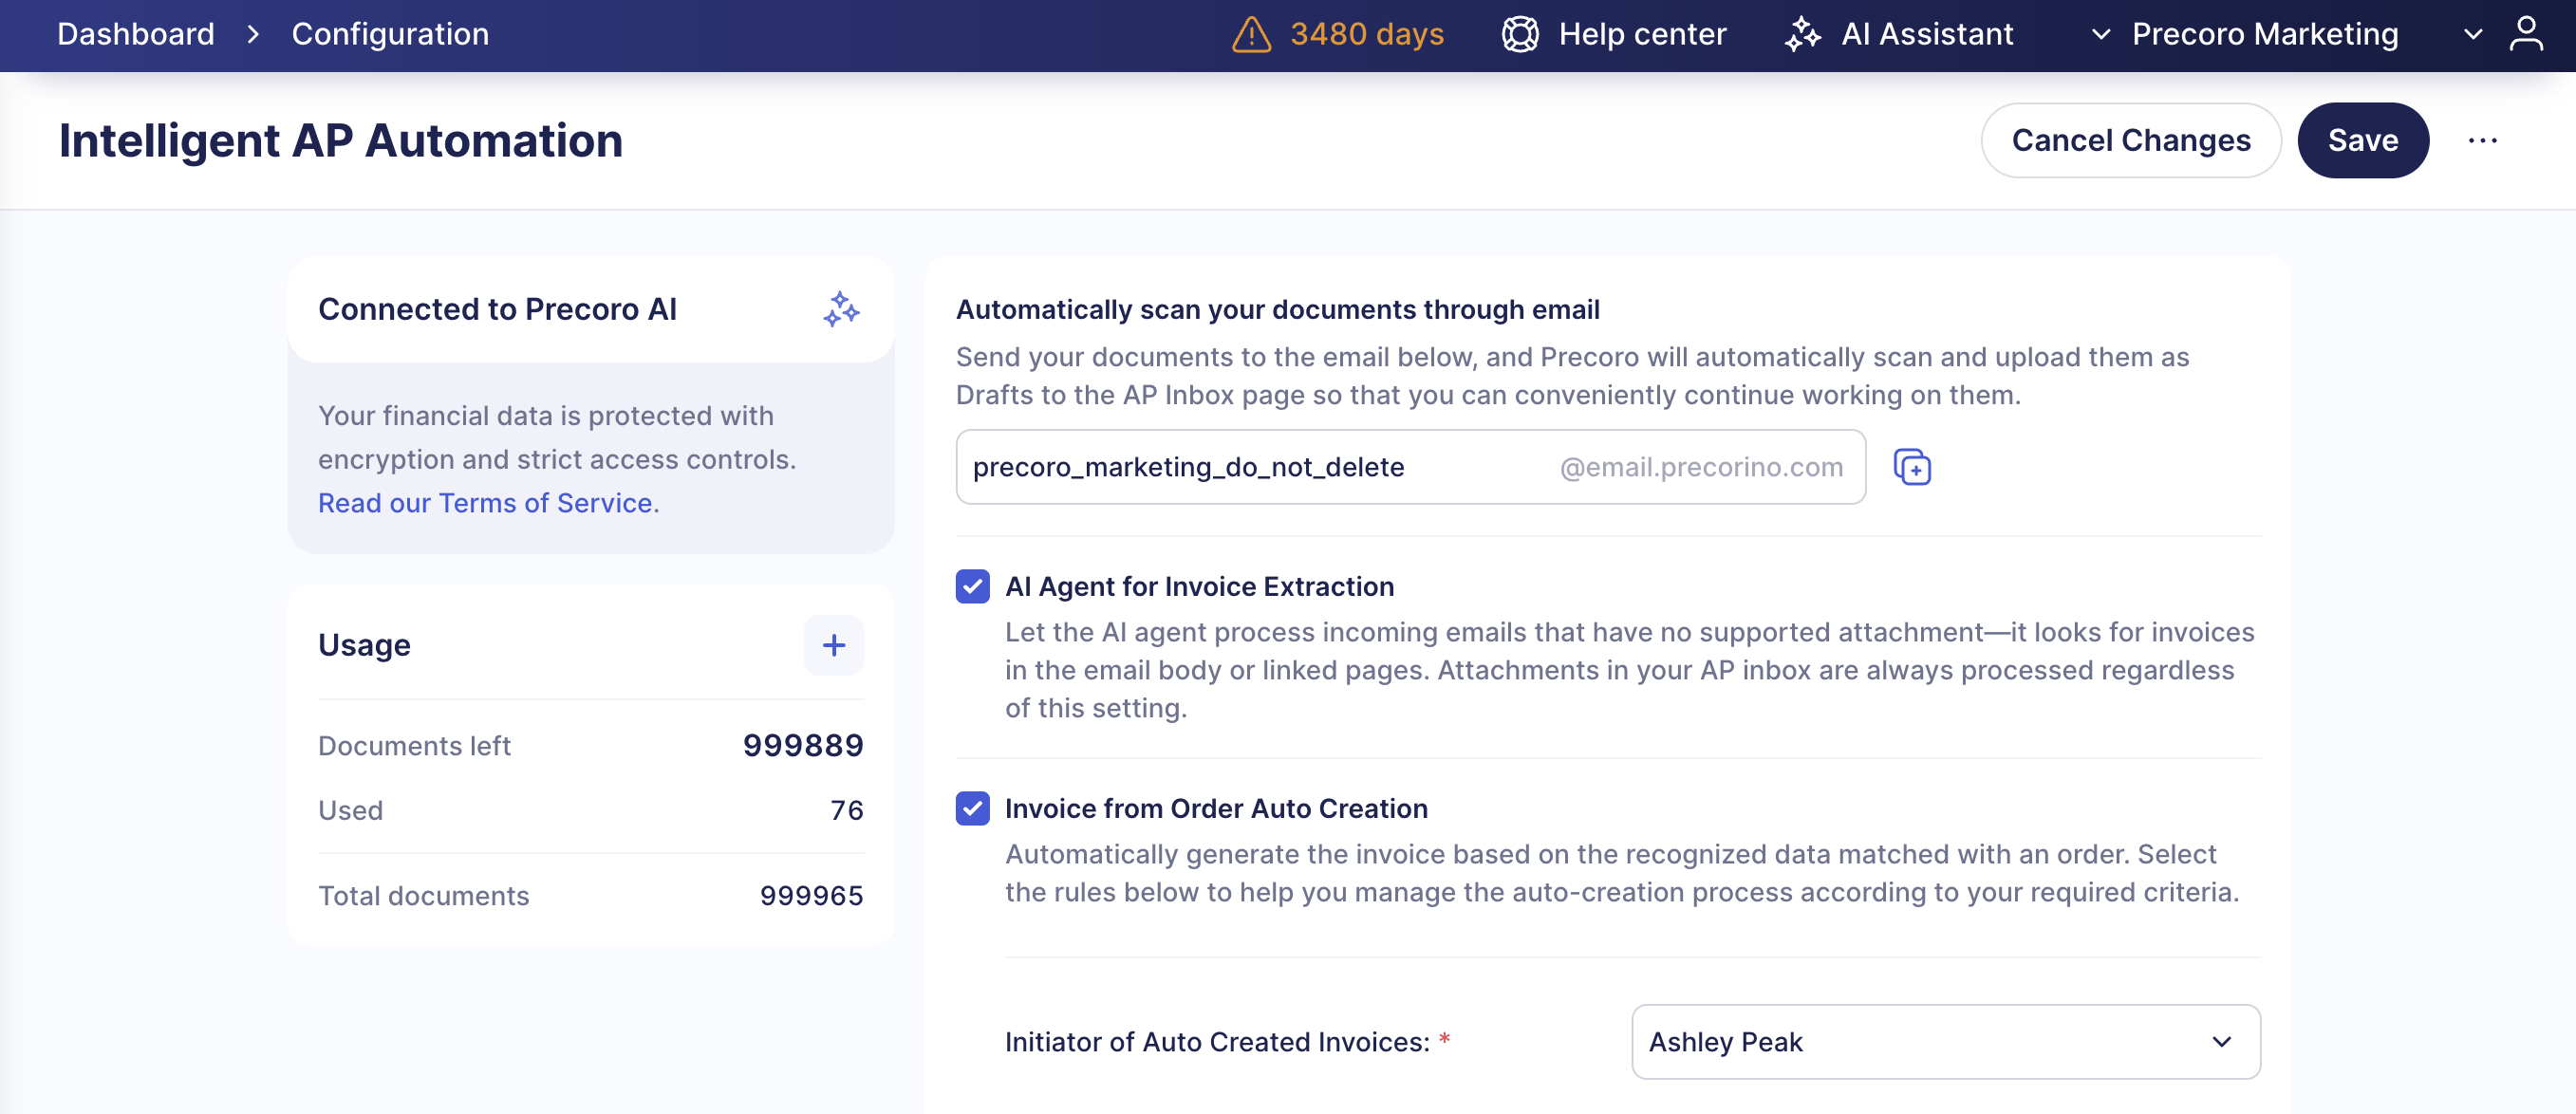
Here’s what you can do on the page:
- View connection status and usage,
- Change the AP Inbox email address,
- Enable or disable the AI Agent for Invoice Extraction,
- Configure invoice auto-creation,
- Select invoice-to-order matching rules,
- Enable E-Invoicing.
Please note that Intelligent AP Automation is included in the Automation subscription plan, so companies with this plan can enable it at any time through the Configuration page. If you’re using the Core plan, consider upgrading or contact our Customer Success team for more information.
Create and Edit Budgets with Clarity and Confidence
With the new design, budgets are easier to view and edit. We’ve also made the creation flow cleaner, with defined, simple steps that guide you through the process.
Here’s how the new creation flow works.
Step 1: Fill in the general budget details, such as name and included fields. This step has an updated design, and you can now add attachments up to 25 MB. Once ready, click Next Step in the top right.
Step 2: Add budget lines. You’ll notice a convenient table that clearly directs to what needs to be filled in. Total for the line is always shown on the right, making it easy to keep track of the sum.
Here are a few tips to speed up the process:
- When you add a new budget line, the previous one is collapsed to offer a compact view. Click it to see it in full again.
- A three-dot button on the right of every line contains options to duplicate or delete the lines.
- Autofill all cells in a budget line from the first cell: simply click the second cell and select Copy from.
- Autofill lines from a previous line: click the amount cell in a line, then select Copy from.
You can also view the full guide here: How to Create and Edit a Budget.
When viewing and editing the budget, please pay attention to the following changes:
- Total amounts are now displayed on the right side, opposite the budget information.
- You can hover over any budget cell to view detailed usage.
- To update the budget using a template, find this option under the More Action menu (three dots) in the top right.
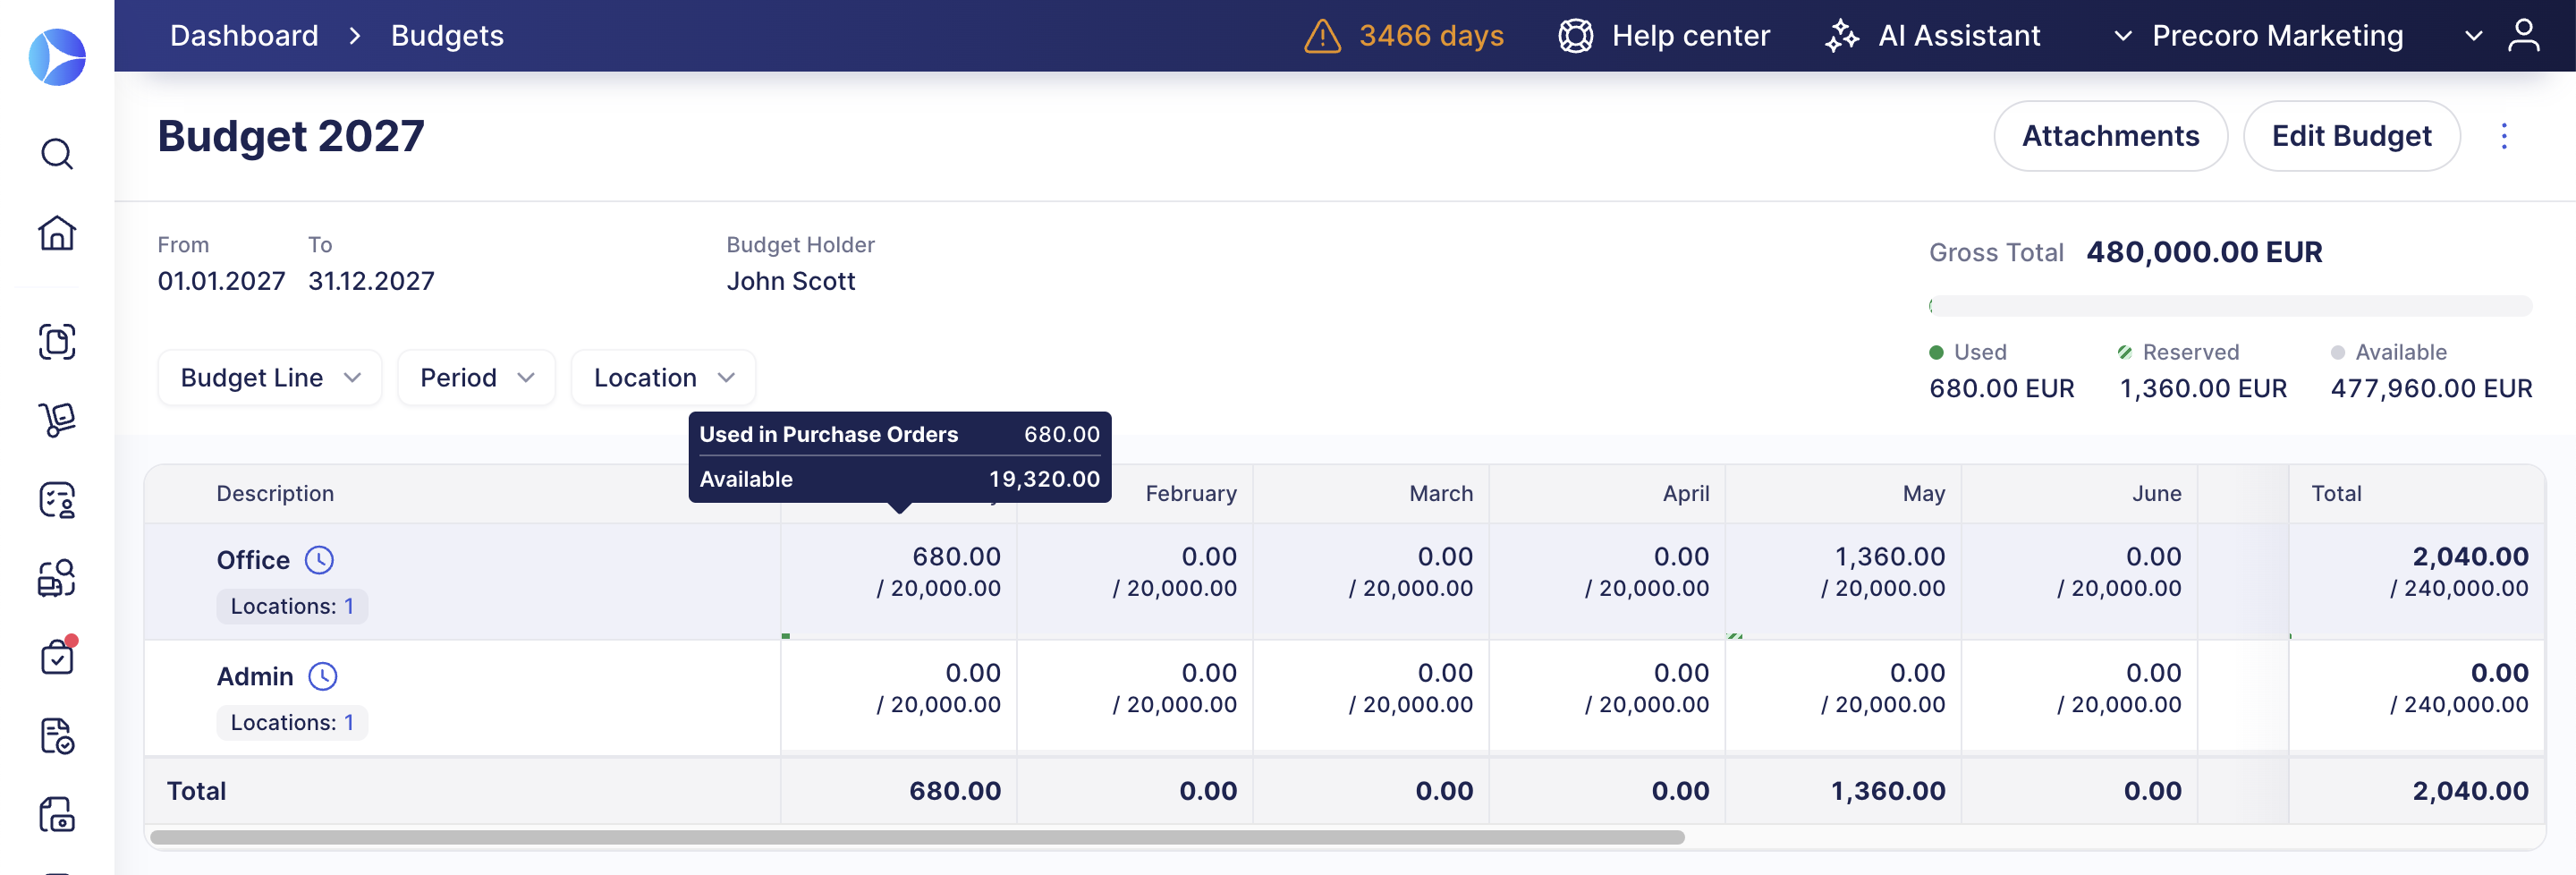
Here's the full guide: How to View and Track a Budget.
Track Cost Savings on Your Dashboard
Track how much your company saves on Purchase Orders and see the results directly on the Dashboard.
The Dashboard now includes a Savings tab, so you can see how much you’re saving against baseline prices over the selected periods and filter data to customize the view. This will help you better understand the financial impact of your and your team's purchasing decisions.
The tab includes two charts:
- Tracked Savings—monitor total tracked savings over time.
- Savings by Supplier—see which suppliers contribute the most to savings.
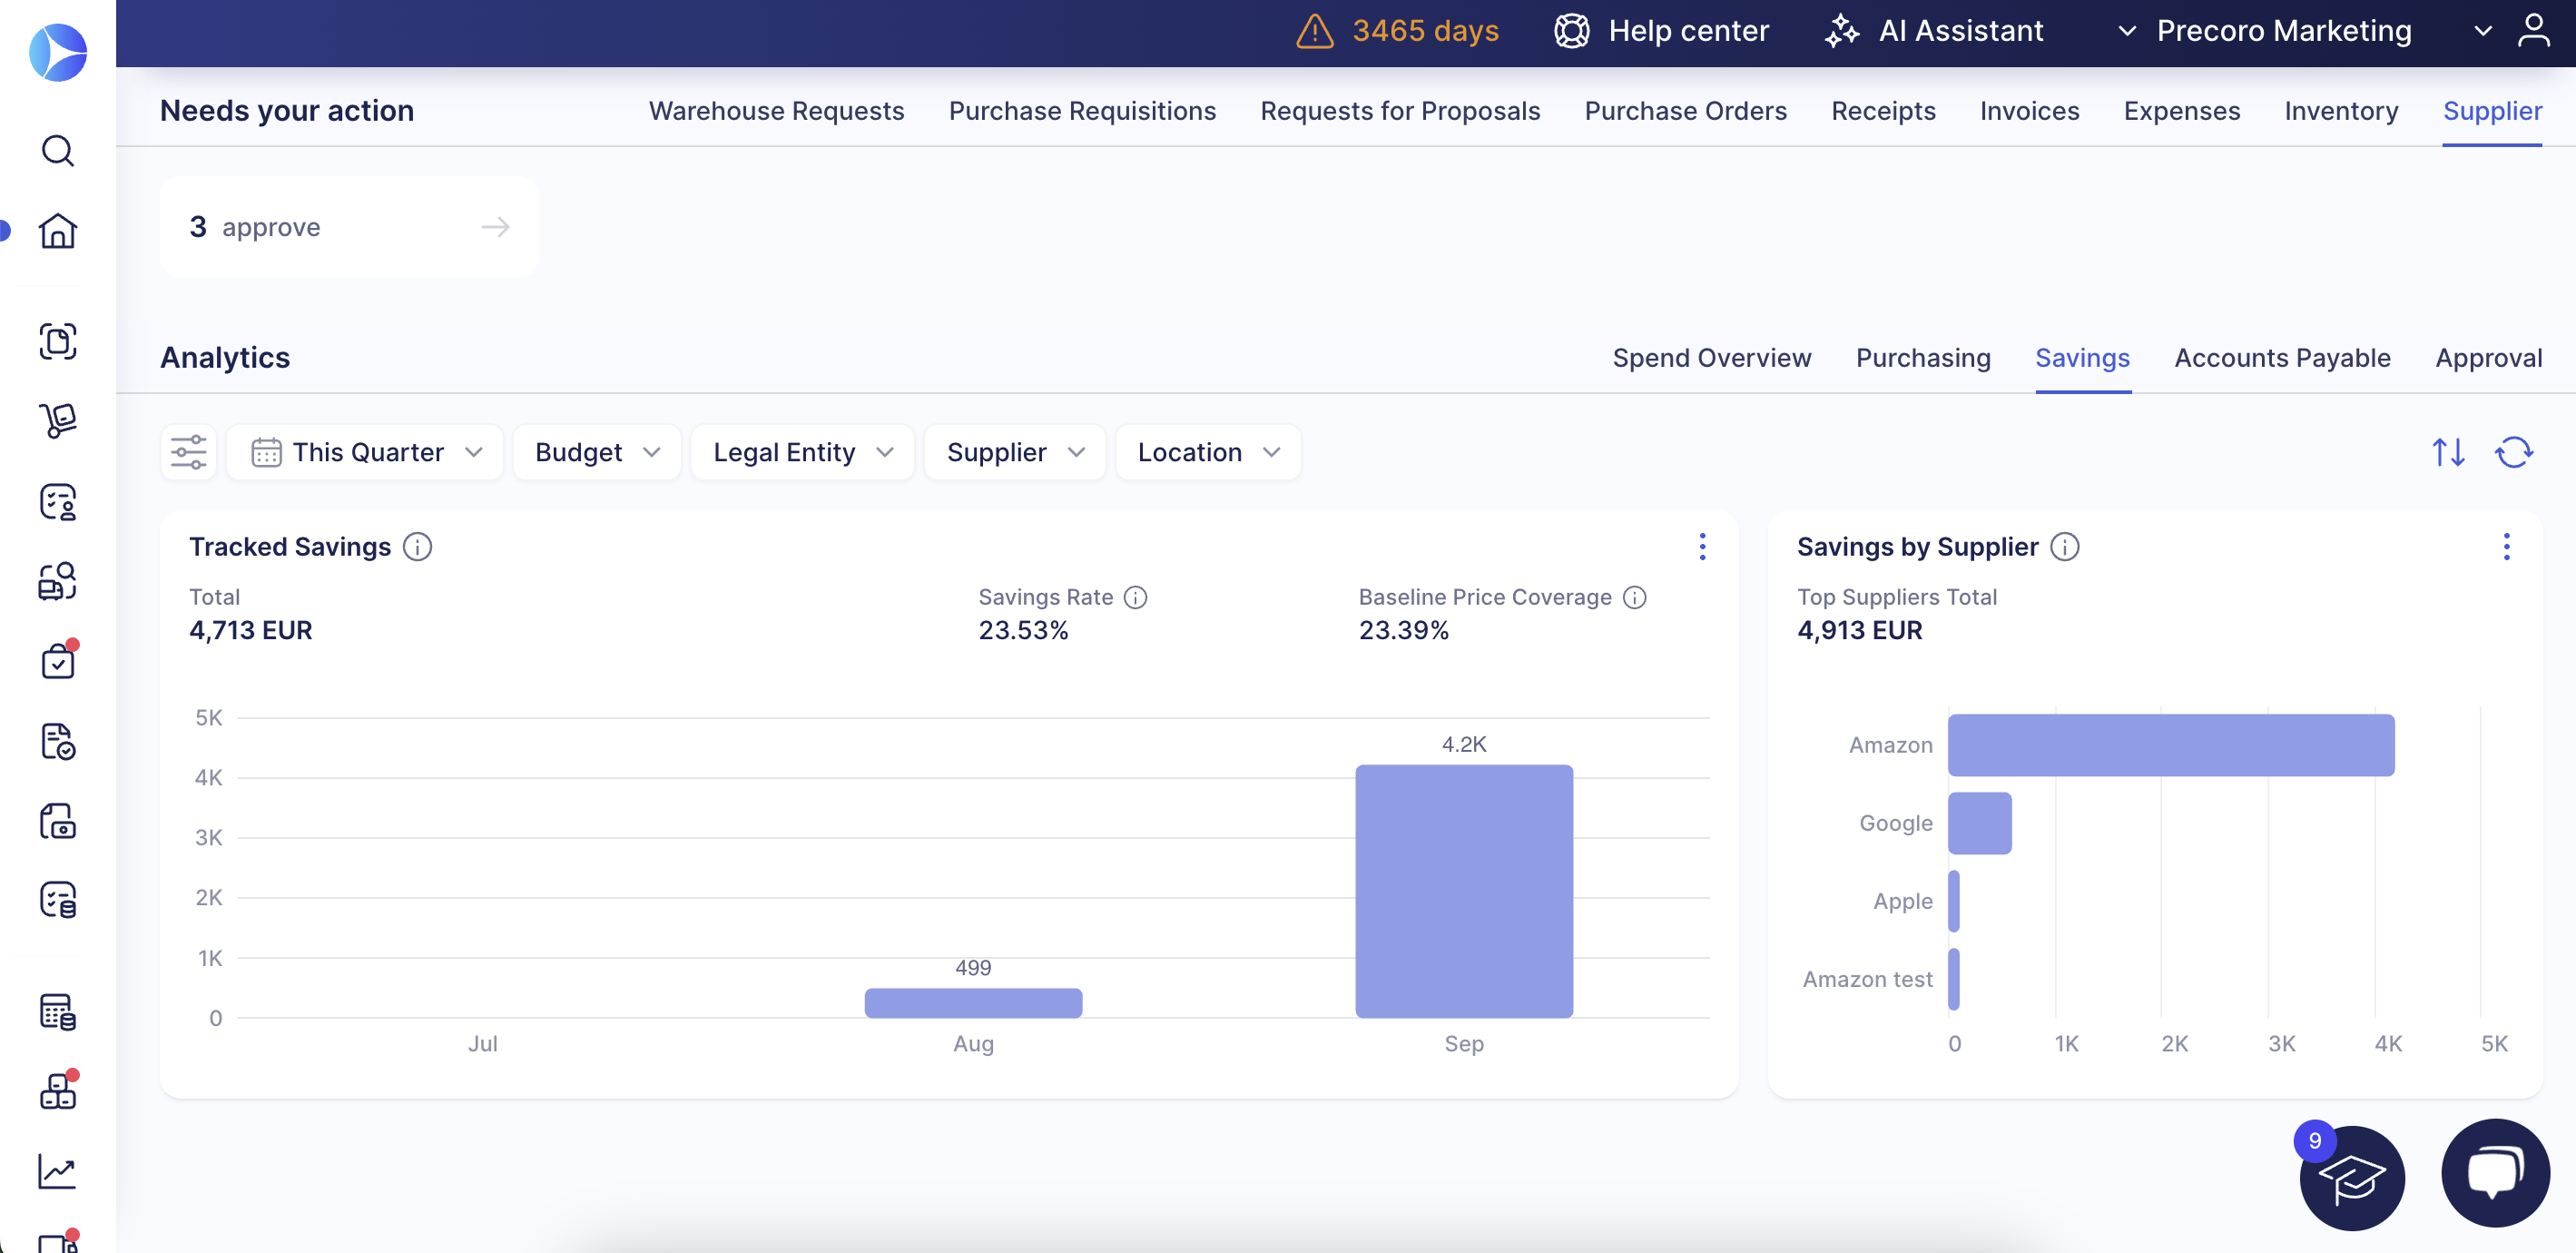
The data is pulled from POs where you’ve added a baseline price. If item-level baseline prices are unavailable, users can also enter Savings manually at the PO level, making it easier for companies to start tracking savings right away.
Learn how to track savings in each PO in this article.
Scan More File Types with the AI Document Processing
We keep upgrading document scanning to make sure your POs, PRs, receipts, and expenses take as little manual work as possible. With this update, Precoro can scan new file formats: XLSX, XLS, DOCX, and MSG, creating previews and filling out document forms with extracted details.
See Fuller Info in Supplier Card
This update makes it easier to track and use supplier credit funds and ensures all relevant details are displayed in the supplier profile.
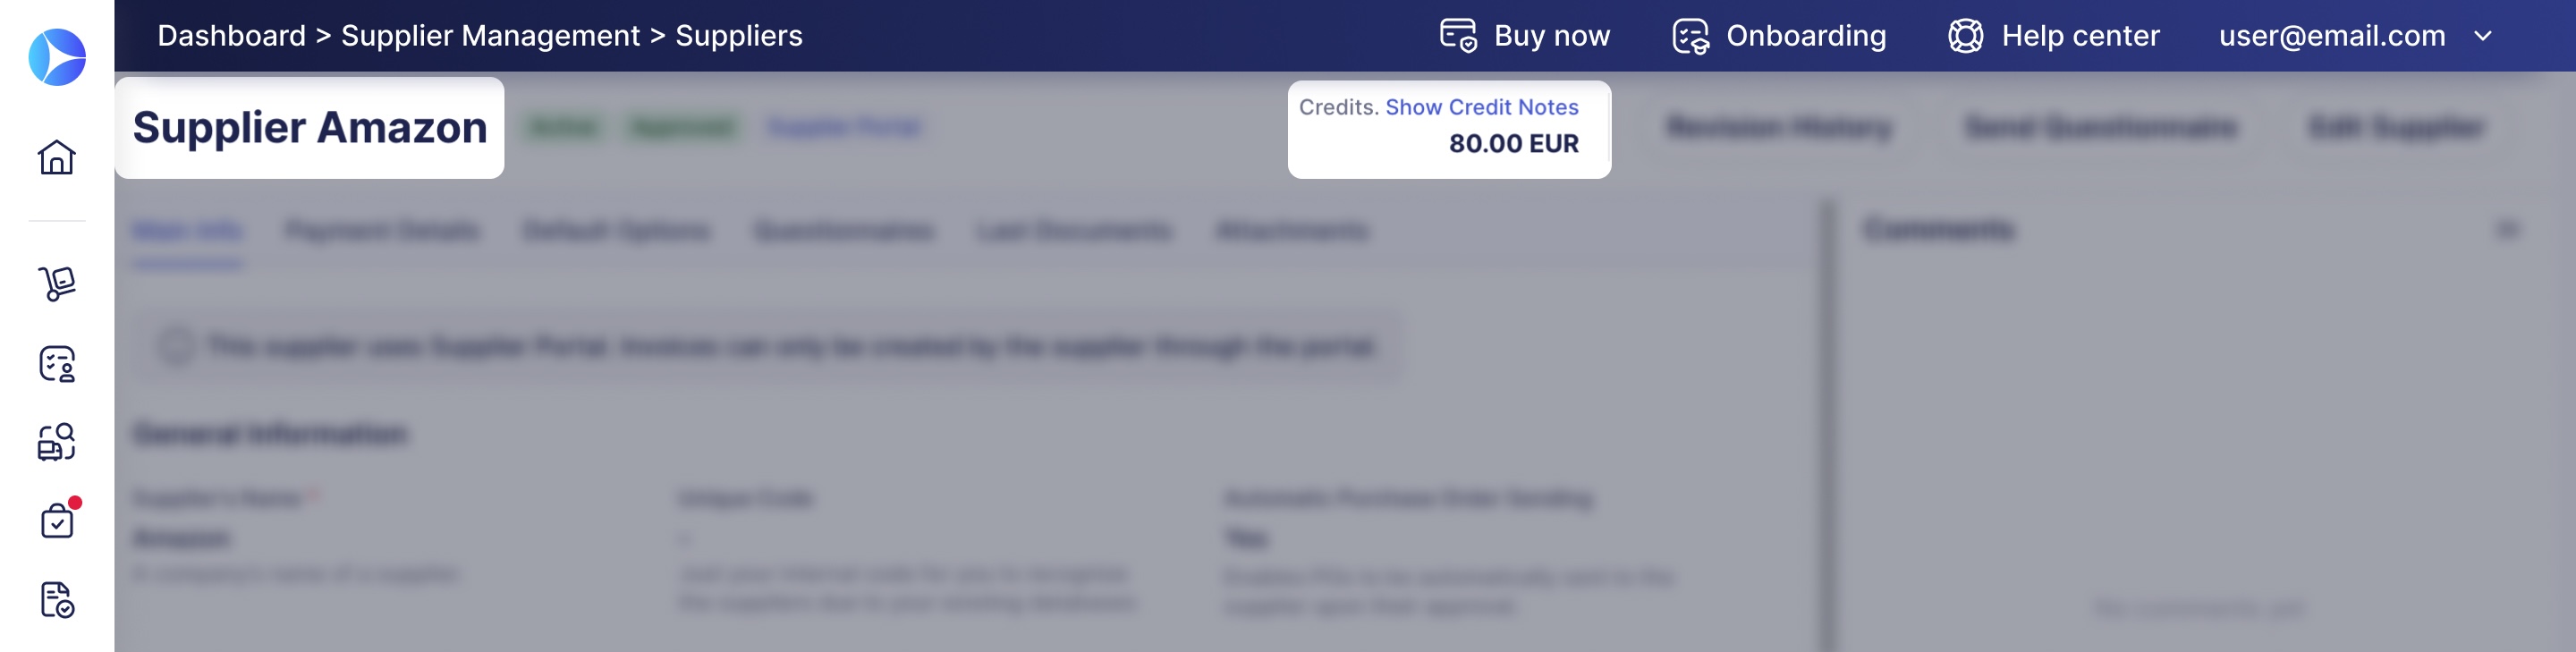
In addition to seeing the supplier credit balance when adding a payment, you’ll also have this info available in the supplier card.
Add Catalog Items to Expenses
To extend the item catalog's functionality, we’ve added the ability to add items from your catalog when creating or editing an expense. You can save frequently added expense items in the catalog, minimizing the need to enter them by hand.
The process is similar to other documents:
- Create an expense.
- Select Add Catalog Item below the item table.
- Choose one or more items from the Catalog.
- Precoro fills in the default details, but you can still edit them afterward.
Item bundles are also available for Expenses, and you can save a manually entered line to the Catalog directly from the new line row, the same as on other document types.
Correctly Track Discounts in POs and Invoices
To support partial invoices and ensure correct budget consumption, discount line items on PRs, POs, invoices, and RFPs now use amount-based tracking instead of quantity-based tracking—the same approach already used for Tax and Shipping items. Quantity is fixed at 1 and no longer editable, and invoiced and waiting amounts are tracked and displayed by dollar amount rather than by quantity.
The change applies to new discount lines only; existing lines keep their current quantity-based behavior.
Document Printing Updates
See a Cleaner, Easier-to-Read PDF Across More Document Types
We’ve extended the redesigned PDF and XLSX layout—already available for purchase orders—to PRs, RFPs, receipts, invoices, expenses, WRs, inventory consumption documents, and stock transfers. The update improves typography, spacing, and how header details are grouped, for a clearer, more professional document.
If you suggestion on further improvements, let us know in the Open Product Roadmap. You can also contact your Customer Success Manager to revert the change for your company.
Hide Signatures on Printed Purchase Requisitions and Receipts
You can now control whether the signature block appears on printed PRs and receipts.
Here’s how to adjust printing settings:
- Navigate to Configuration → Basic Settings → Document Setup.
- Locate the configuration block: Purchase Requisitions or Receipts.
- Check or uncheck the Signature box in the new Printing Configurations subsection (enabled by default).
- Save the changes.
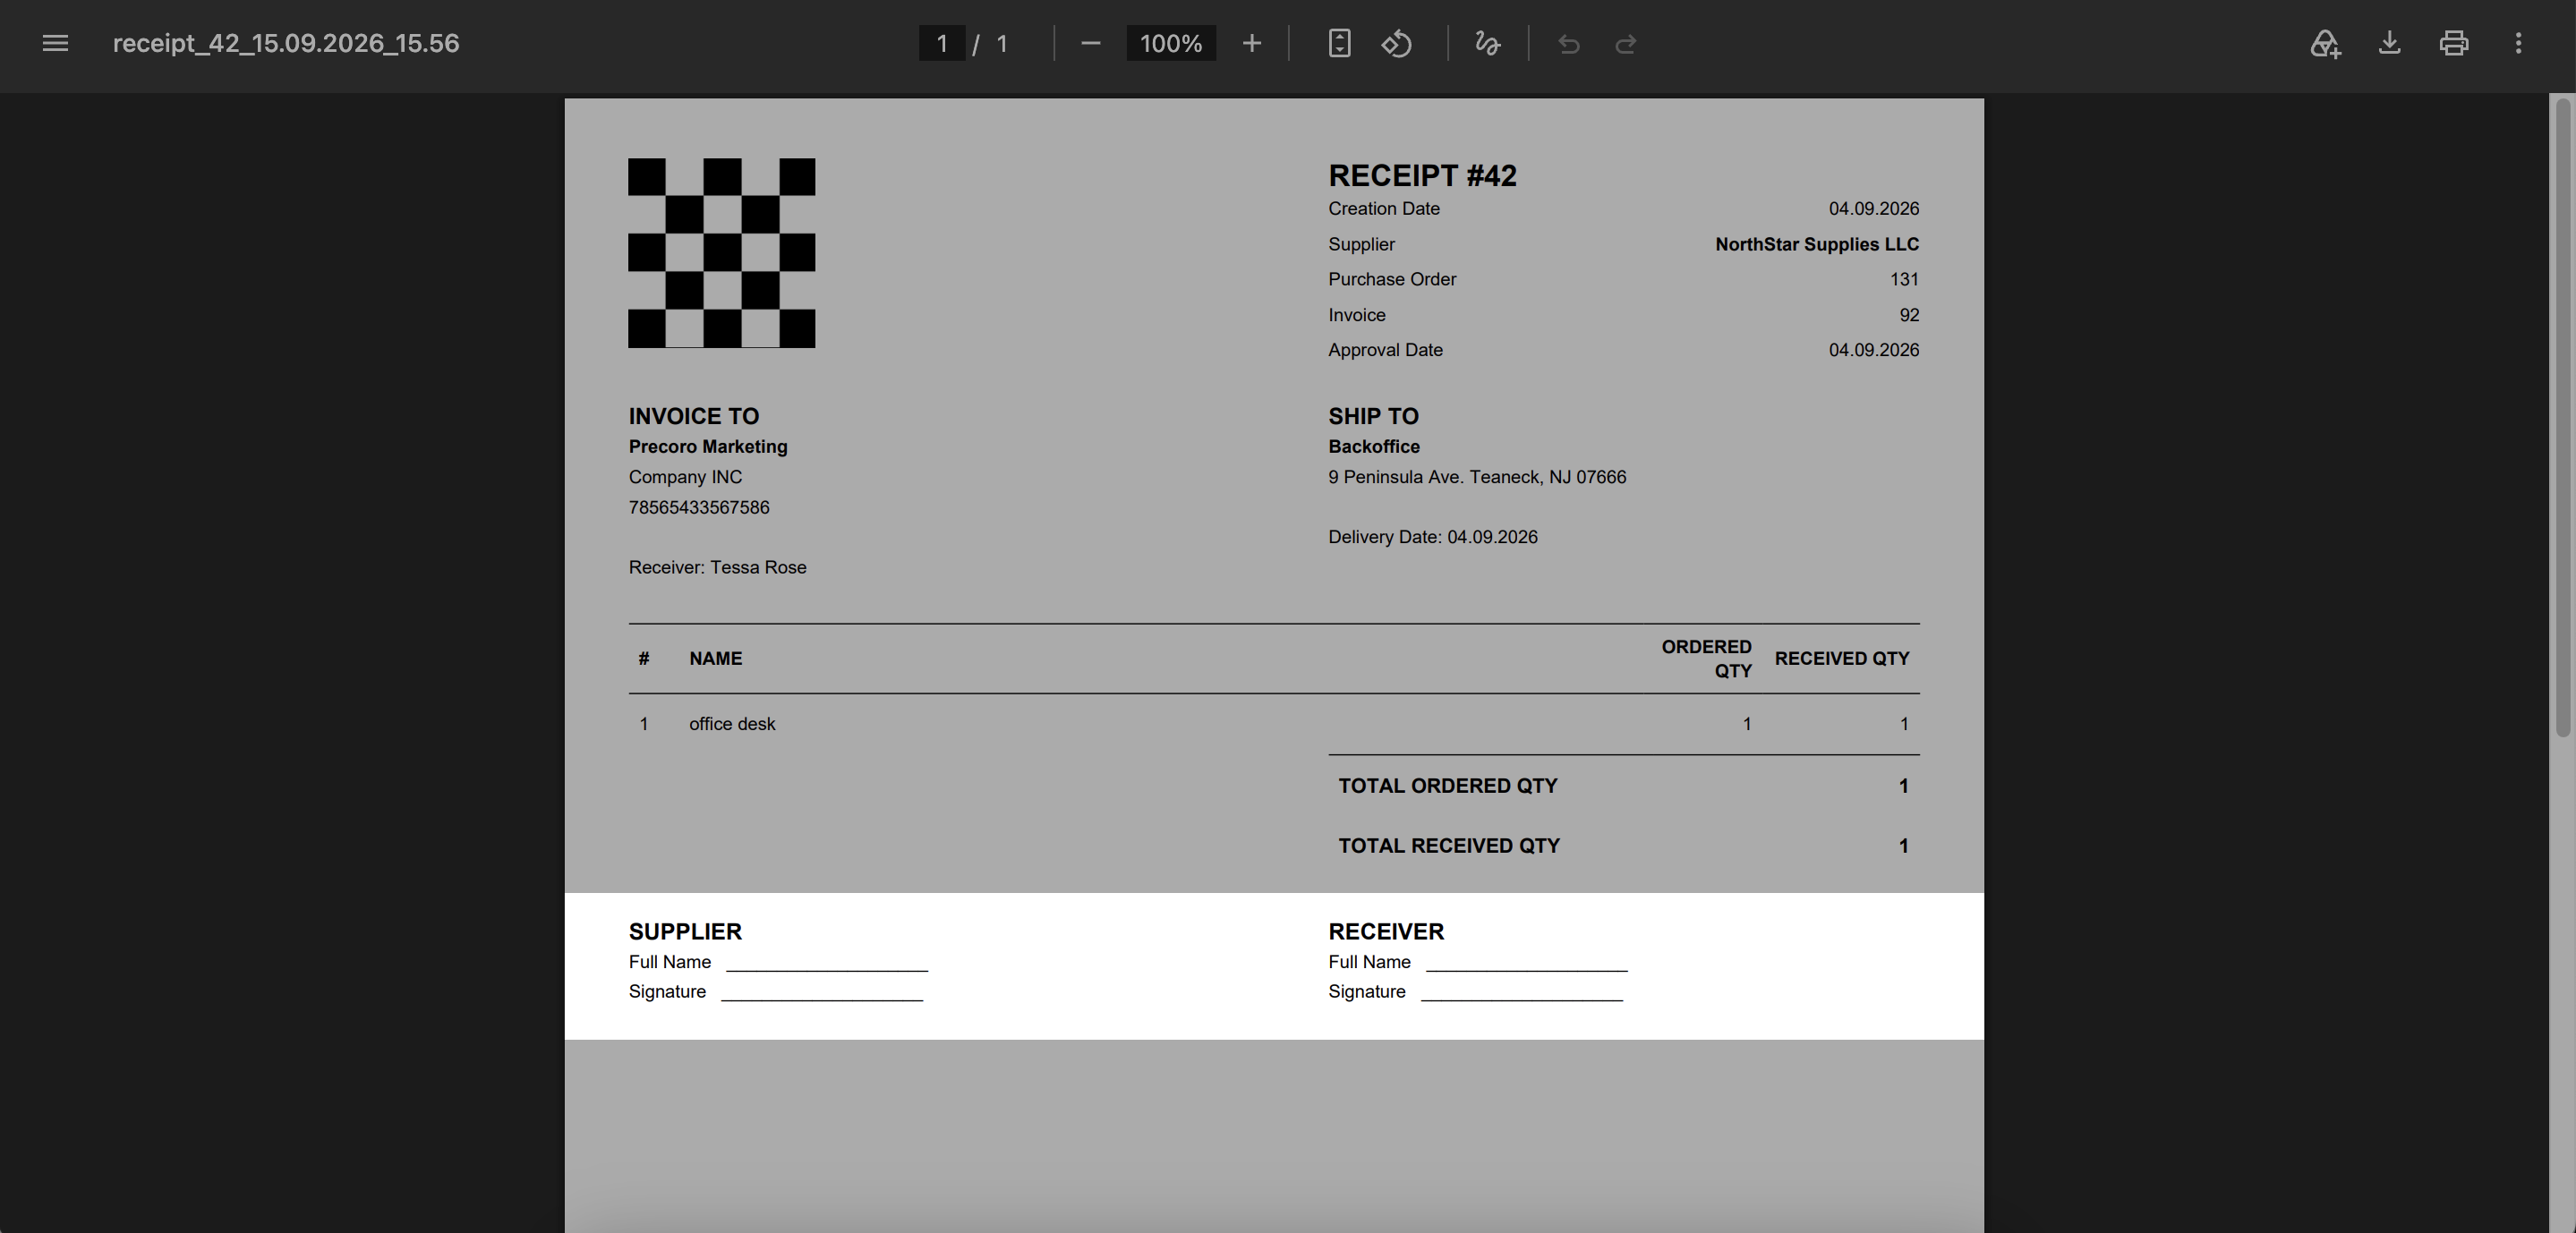
Unchecking the box removes the signature block entirely from PR and receipt PDFs and Excel exports.
Customize How Suppliers and Your Team See POs
Choose Which Header Details Appear on Printed Orders
You can now decide which fields are included in PO headers for PDF and XLSX exports as follows:
- Navigate to Configuration → Basic Settings → Document Setup → Purchase Orders.
- Click Order Printing Configurations.
- In the new Header Settings section, only leave the relevant checkboxes enabled.
- Save the changes.
Choose to display or hide these parameters:
- Status
- Creation Date
- Approval Date
- Delivery Date
Enabling the delivery date display on POs also affects order types:
- For blanket POs, printed documents will show Validity Period, First Delivery Date, and Number of Deliveries.
- Printed service orders will include the Service Period.
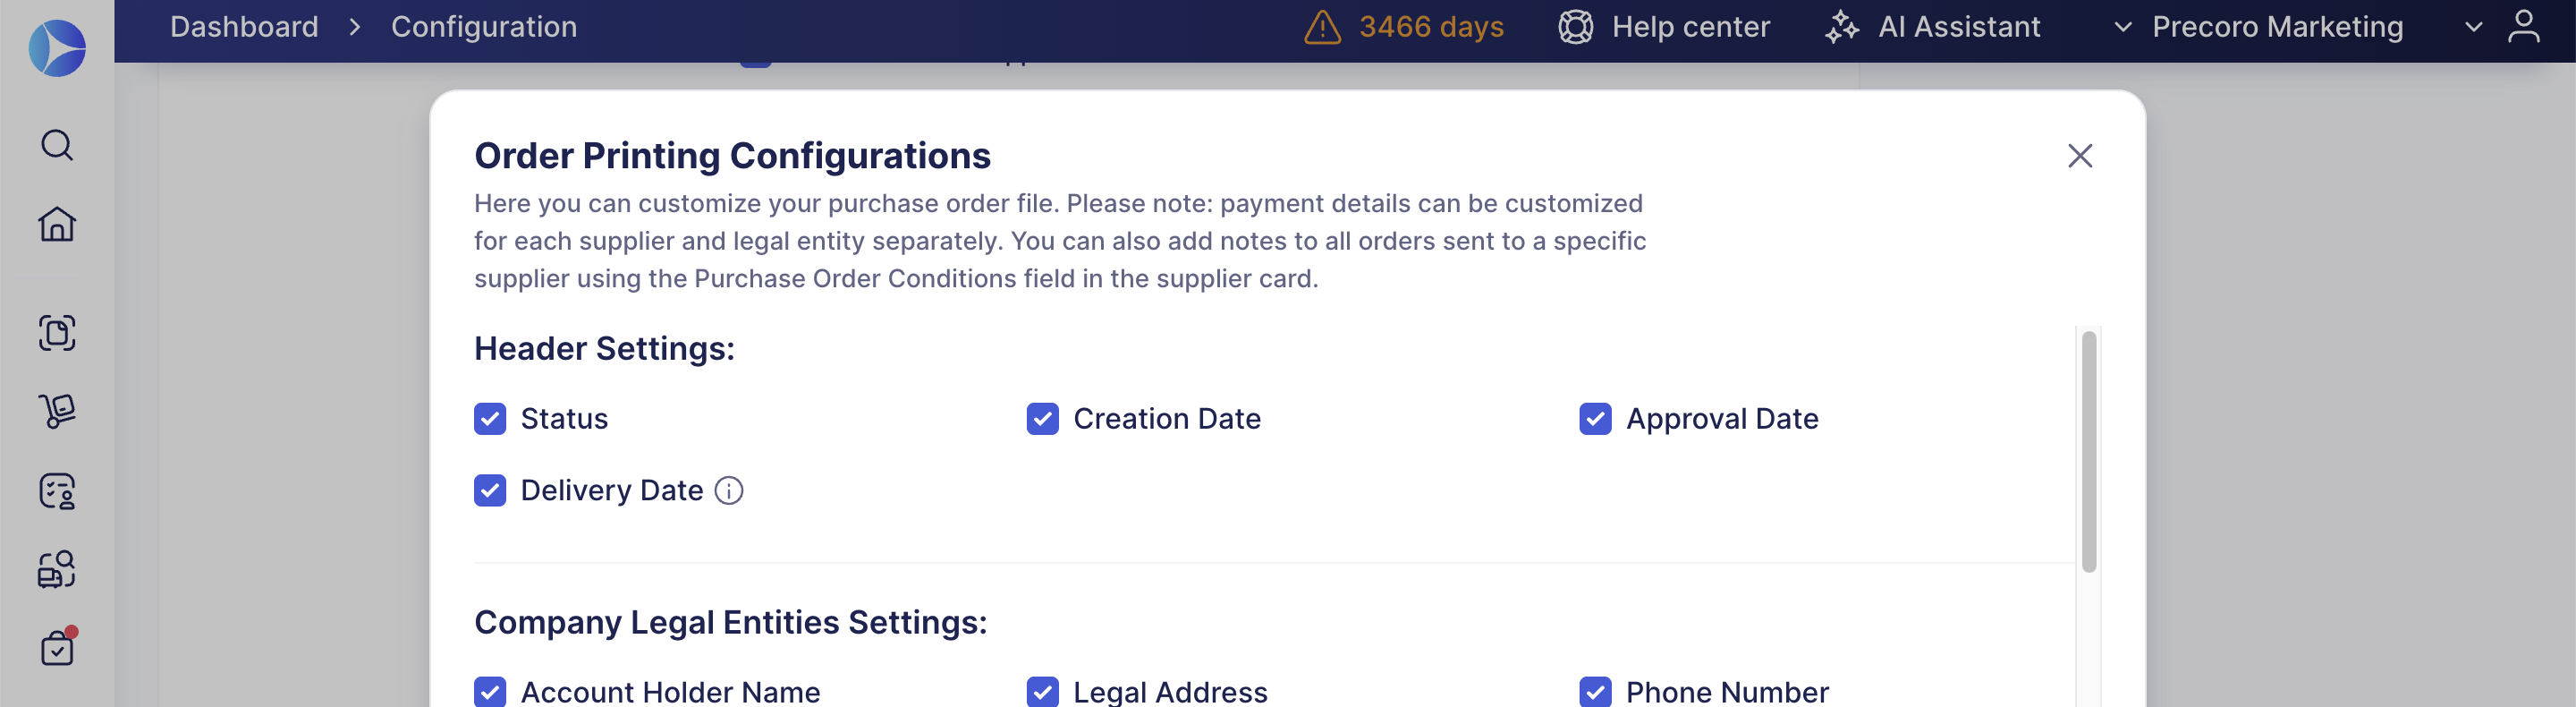
All fields are enabled by default, and the setting applies to PO, BPO, and SO documents across PDF (Regular, Vertical, and Horizontal) and Excel exports.
Add a Custom Footer to Printed Purchase Orders
POs (service orders and blanket POs included) can now have a custom footer—useful for a standard disclaimer, terms note, or legal text—on every printed page.
You can set up a default footer in Basic Settings:
- Go to Configuration → Basic Settings → Document Setup → Purchase Orders.
- Click Order Printing Configuration.
- Scroll down and enable the Include a Disclaimer checkbox.
- Use the text editor to format your text. The text can run up to 1,000 characters.
If using Multi-Entity Management, you can also set up custom footers for legal entities:
- Go to Configuration → Legal Entities.
- Click a legal entity to start editing.
- Scroll down and enable the Include a Disclaimer checkbox.
- Use the text editor to format your text. The text can run up to 1,000 characters.
The footer appears at the bottom of every PO page, across PDF and Excel exports and all layout orientations (Regular, Vertical, and Horizontal).
Keep Internal Notes off Printed Purchase Orders
You can now hide the Notes block from printed purchase orders (POs), service orders (SOs), and blanket purchase orders (BPOs). Turn off the Show Notes checkbox (enabled by default) in Configuration → Basic Settings → Purchase Orders → Order Printing Configurations → Other Settings, and the notes block is removed from the document entirely, with no empty space left behind. This applies to PDF (Regular, Vertical, and Horizontal) and Excel exports.
Set Which Day Your Week Starts On
You can now choose which day starts the week for your company in Configuration → Basic Settings → Misc, First Day of the Week field.
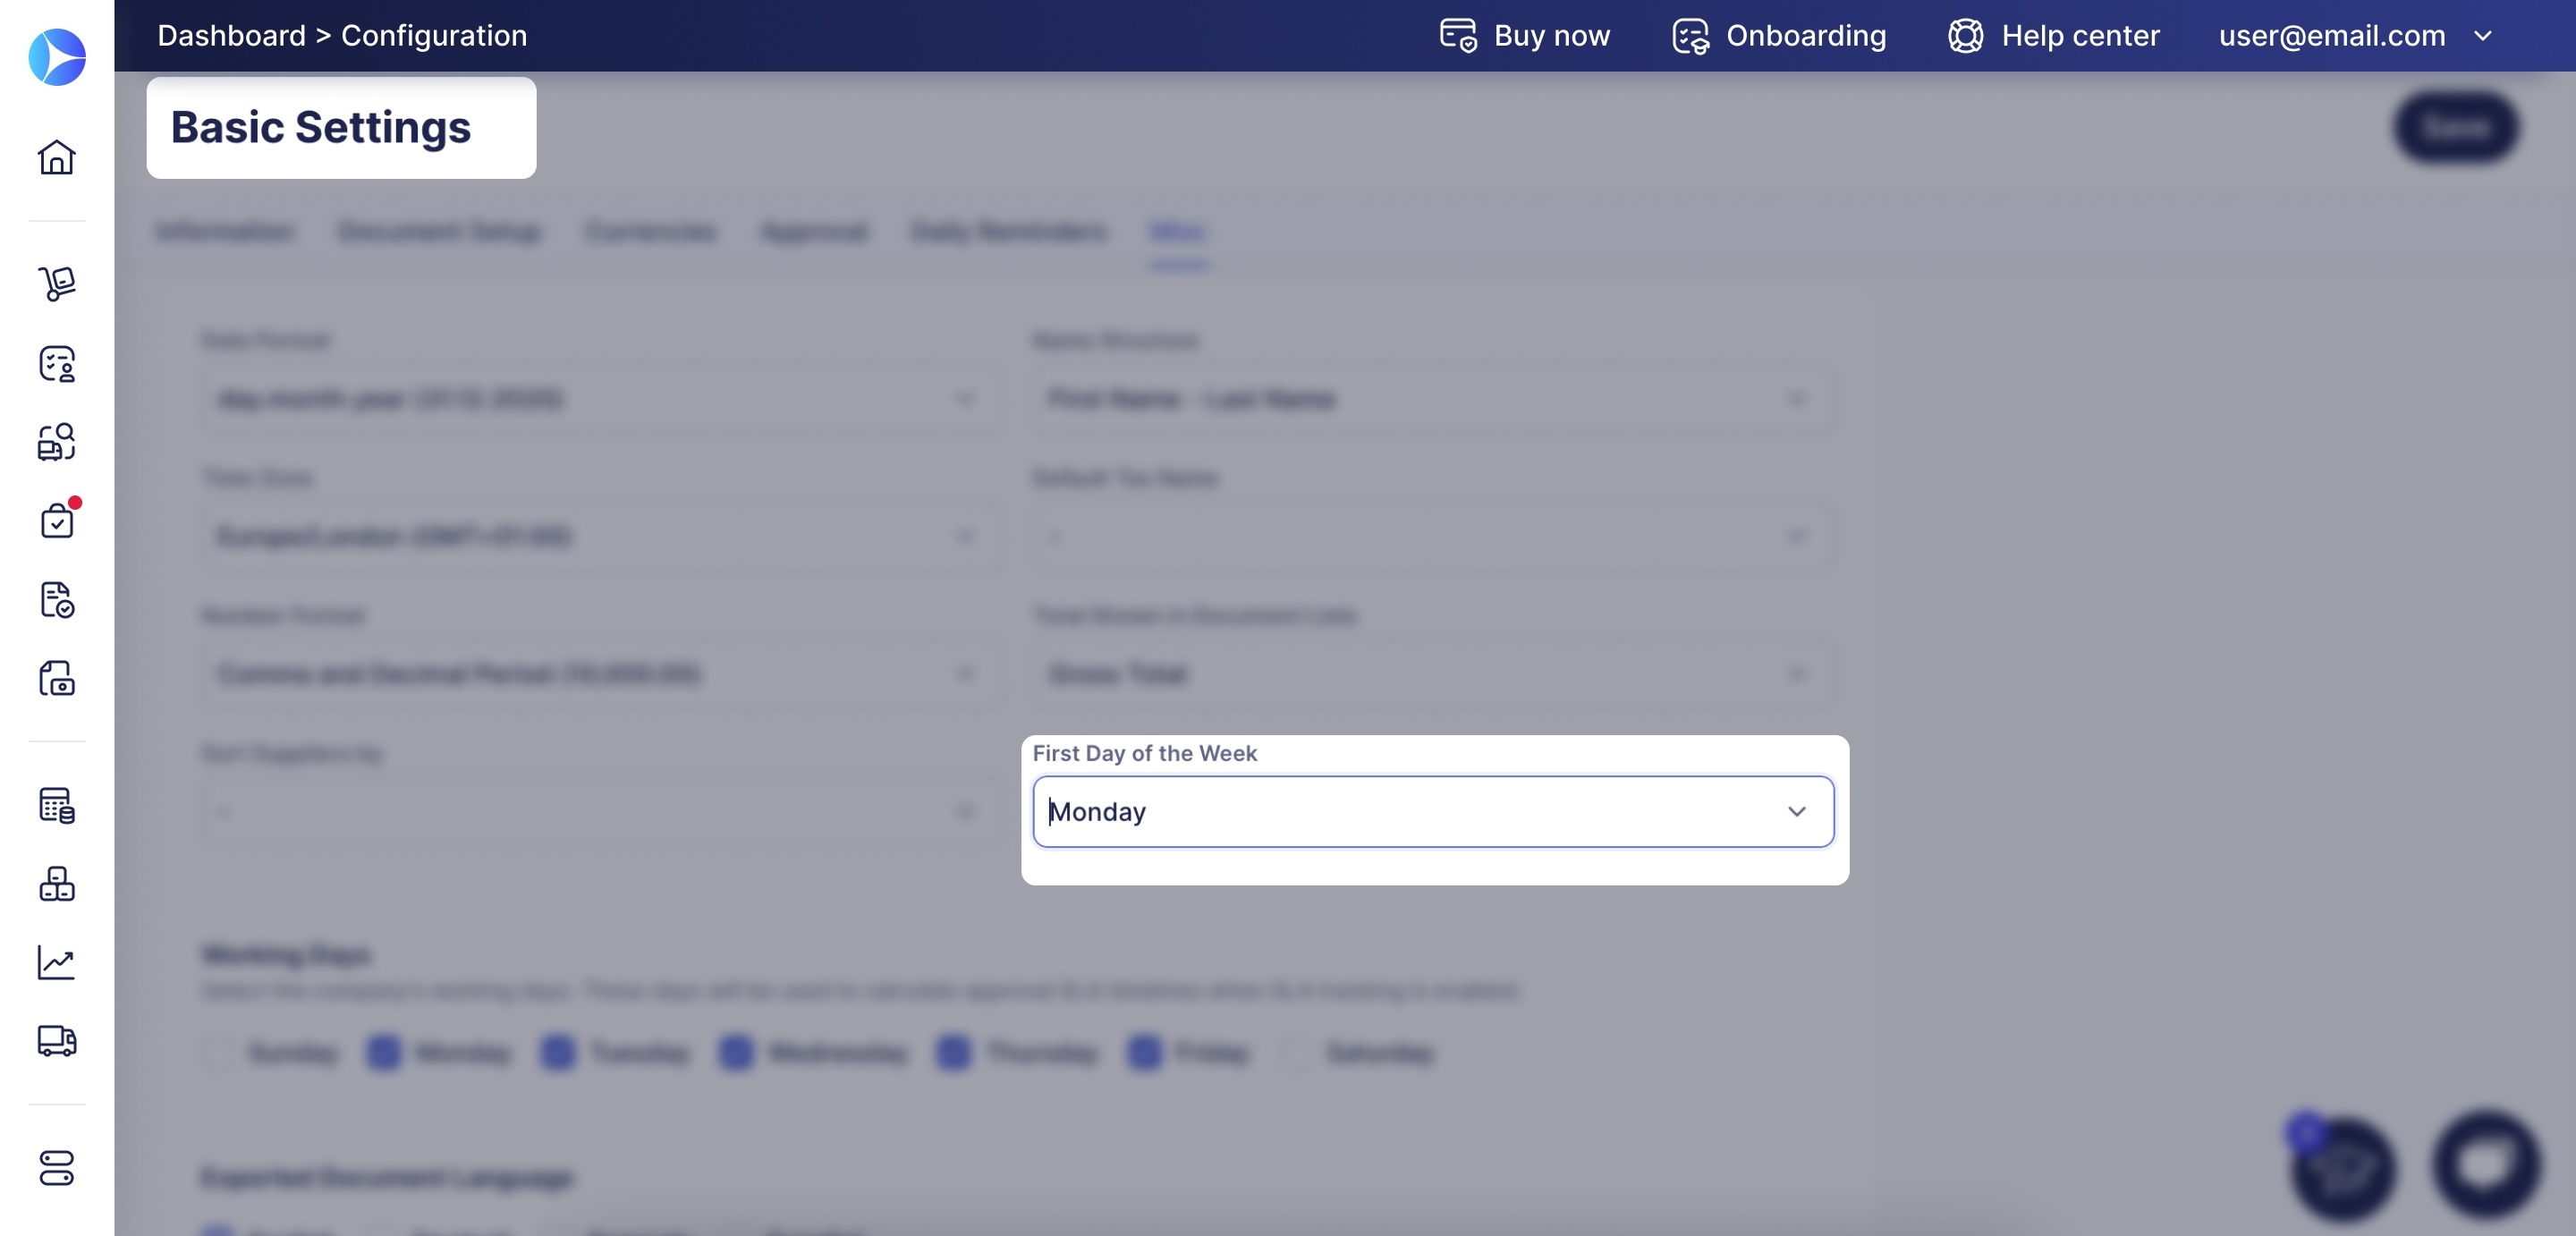
The setting applies across every date picker in Precoro.
Create an Invoice from a Purchase Order on Mobile
You can now create an invoice directly from a PO in the Precoro mobile app, matching the single-PO flow available in the web app.
- Tap the “+” sign on the Invoices page and select if you want to add a standalone invoice or an invoice from PO.
- If creating a PO-backed invoice, Precoro will ask you to select a PO on this step.
- Select the items to invoice. You can invoice partially if necessary.
- Fill in the invoice details.
- Confirm. Precoro checks the invoice against the PO before finalizing it.
Supplier, currency, and budget all carry over from the PO automatically and aren't editable on the invoice. If the PO has no budget, the invoice won't show a Budget field either.
Filter Documents by Integration Status
You can now filter documents by integration status—Integrated, Not Integrated, Historical, Internal, or Processing—matching the status badges already shown on documents. The filter appears when viewing All Filters in companies with NetSuite, QBO, Xero, and Bill.com integrations.