TABLE OF CONTENTS
- Define and Track Contract Amounts for Better Expense Control
- Protect Accounting Data with Finance Period Close Feature
- Control Payments Depending on Supplier Status
- Set Up McMaster-Carr PunchOut Catalog
- Manage Custom Fields for Items Efficiently with Updated Design
- Notice Faster Loading Through Caching with IndexedDB
- Complete PRs via API to Ensure Consistency Between Systems
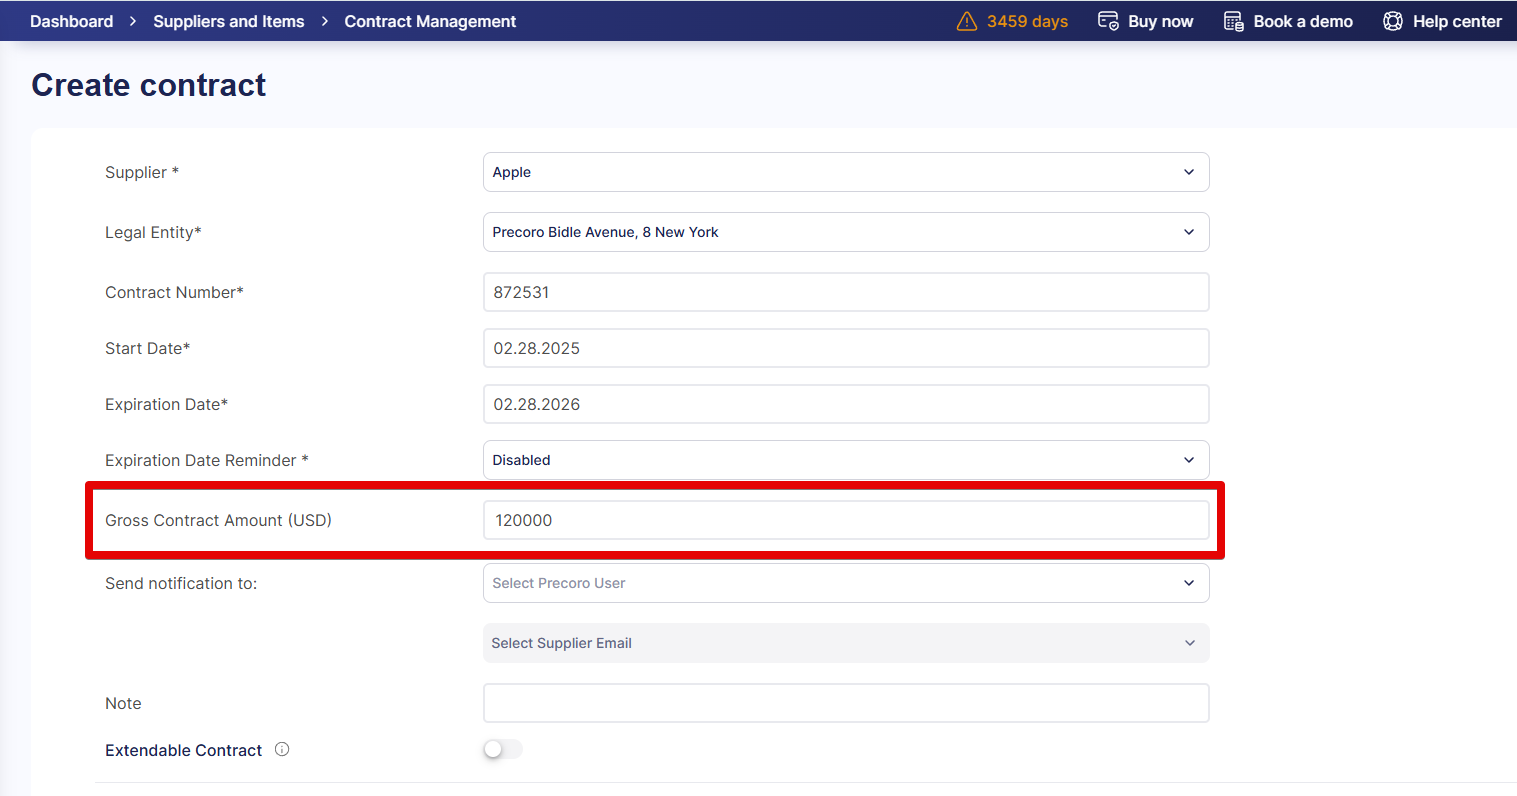
Define and Track Contract Amounts for Better Expense Control
With the new update, we've added a new "Gross Contract Amount" field to the contract creation page. Now, you can set contract limits and track them in real time.
How the Contract Amounts Are Calculated
- The amounts spent and available in the contract are recalculated every time the items' total changes in a PO or invoice linked to this contract. The total of items in a document is deducted from the contract amount.
- When a contract is added to a PO, and you create a related invoice with the same contract, the amounts spent and available in the contract are recalculated according to invoiced items’ prices, taxes, and discounts specified in the invoice.
- If you have a contract specified in a PO but want to invoice items from this order without affecting the contract total, you can delete the contract from the invoice or specify a different contract.
- If you assign a contract to an invoice and add a credit note to it, the CN amount will be added to the contract total and become available for spending again.
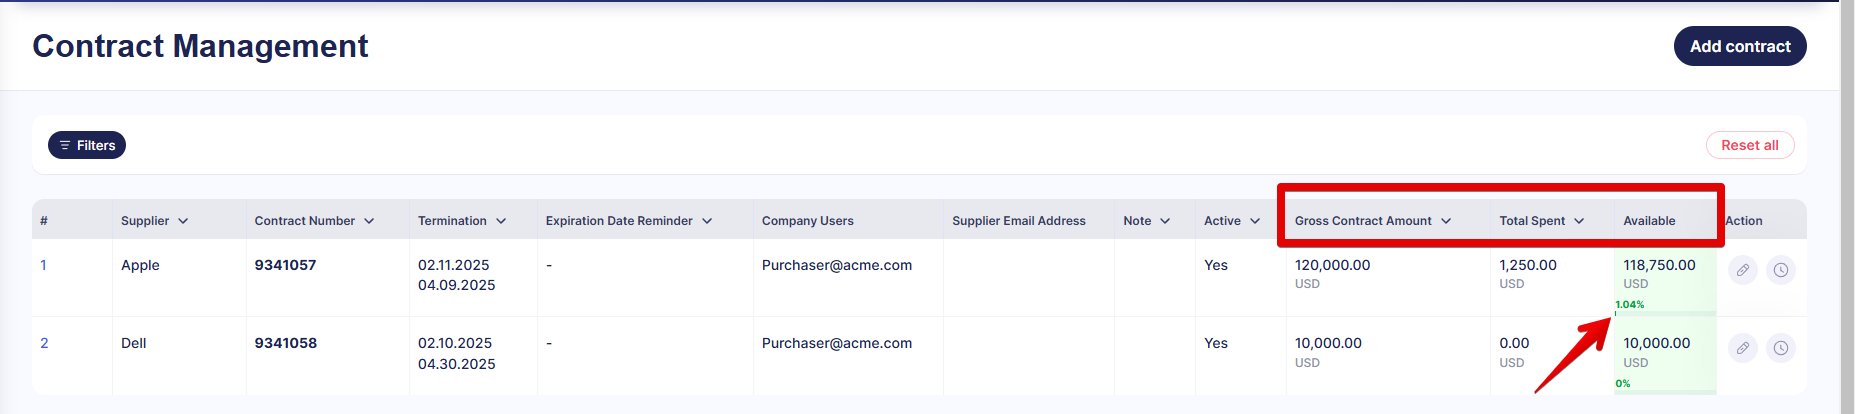
How to Track the Contract Amount
On the Contract Management page (Contract Management for app.precoro.us), you can now easily see the total contract amount, total spent, the remaining available balance, and a visual progress bar that helps you monitor contract limits at a glance. Any contract on the page with exceeded limits will be highlighted in red so you can quickly spot contracts that need attention.
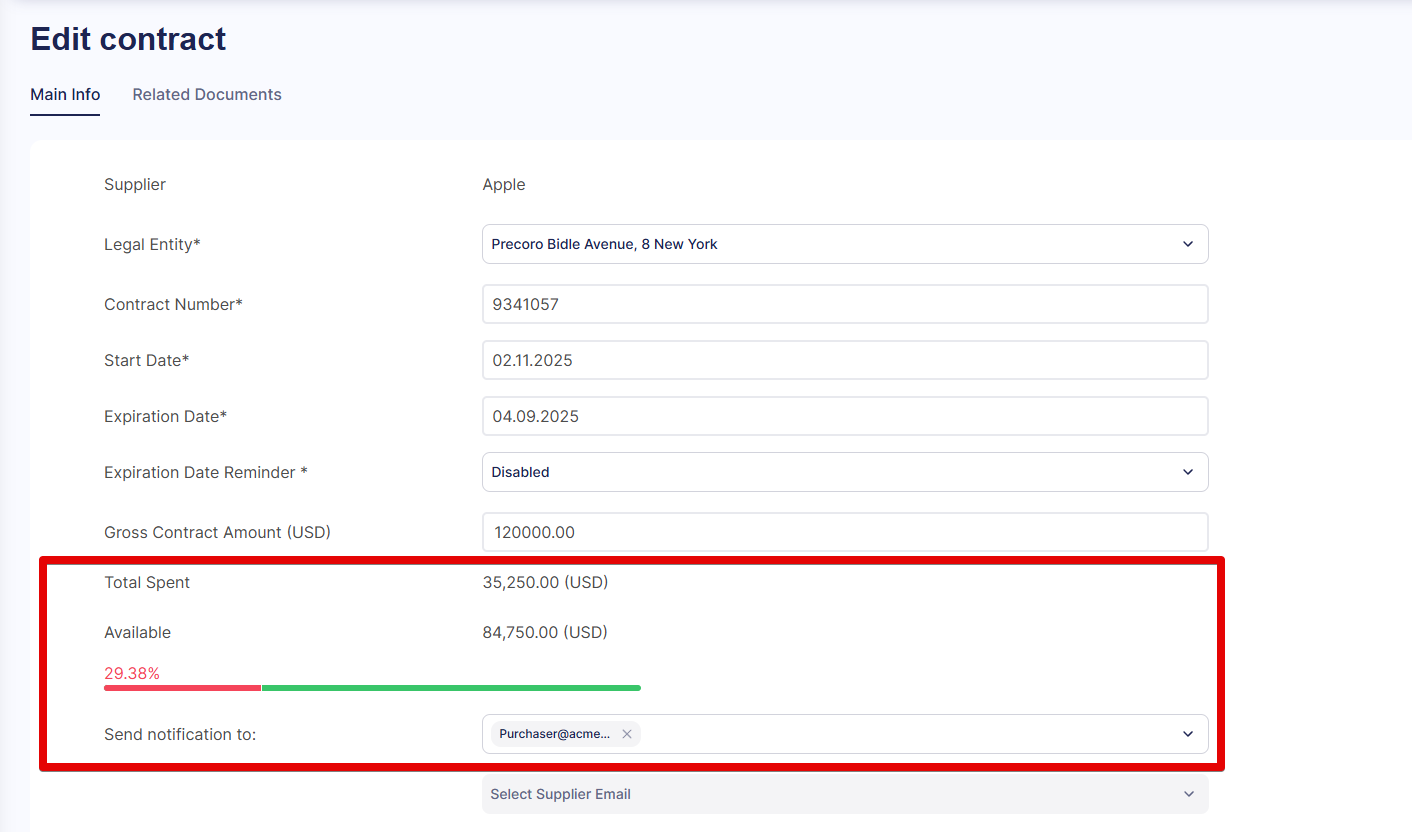
You can also see these amounts on the contract editing page.
If your total spending exceeds the contract amount, Precoro will automatically send you a notification. To add a user who receives these messages, provide their email address in the Send notification to field when creating or editing a contract.
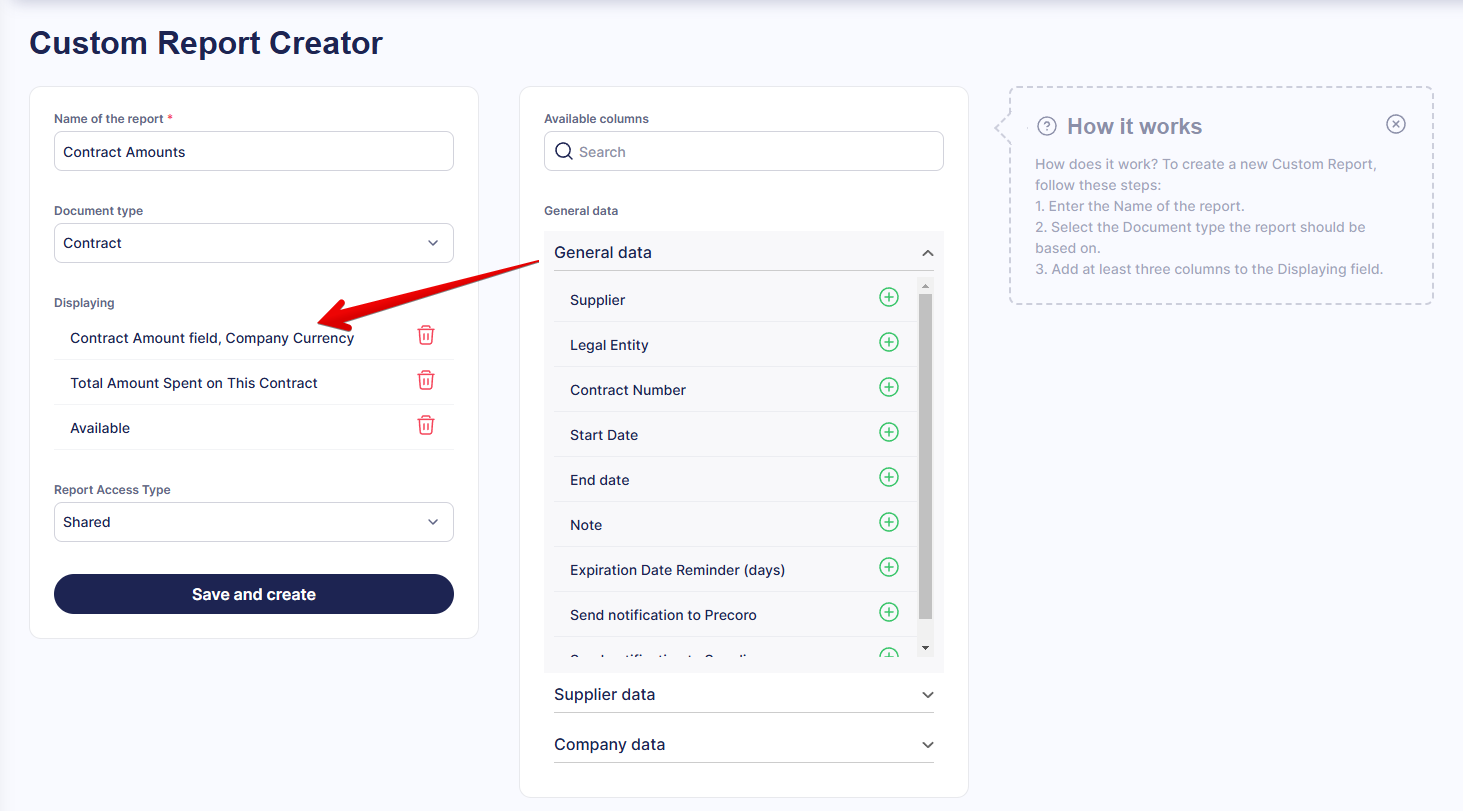
In the custom contract report, you can now see three new columns:
- Contract Amount field — to show the contract's total value;
- Total Amount Spent on This Contract — for expenses so far;
- Available — to display the remaining balance.
How to Track Documents Related to a Contract
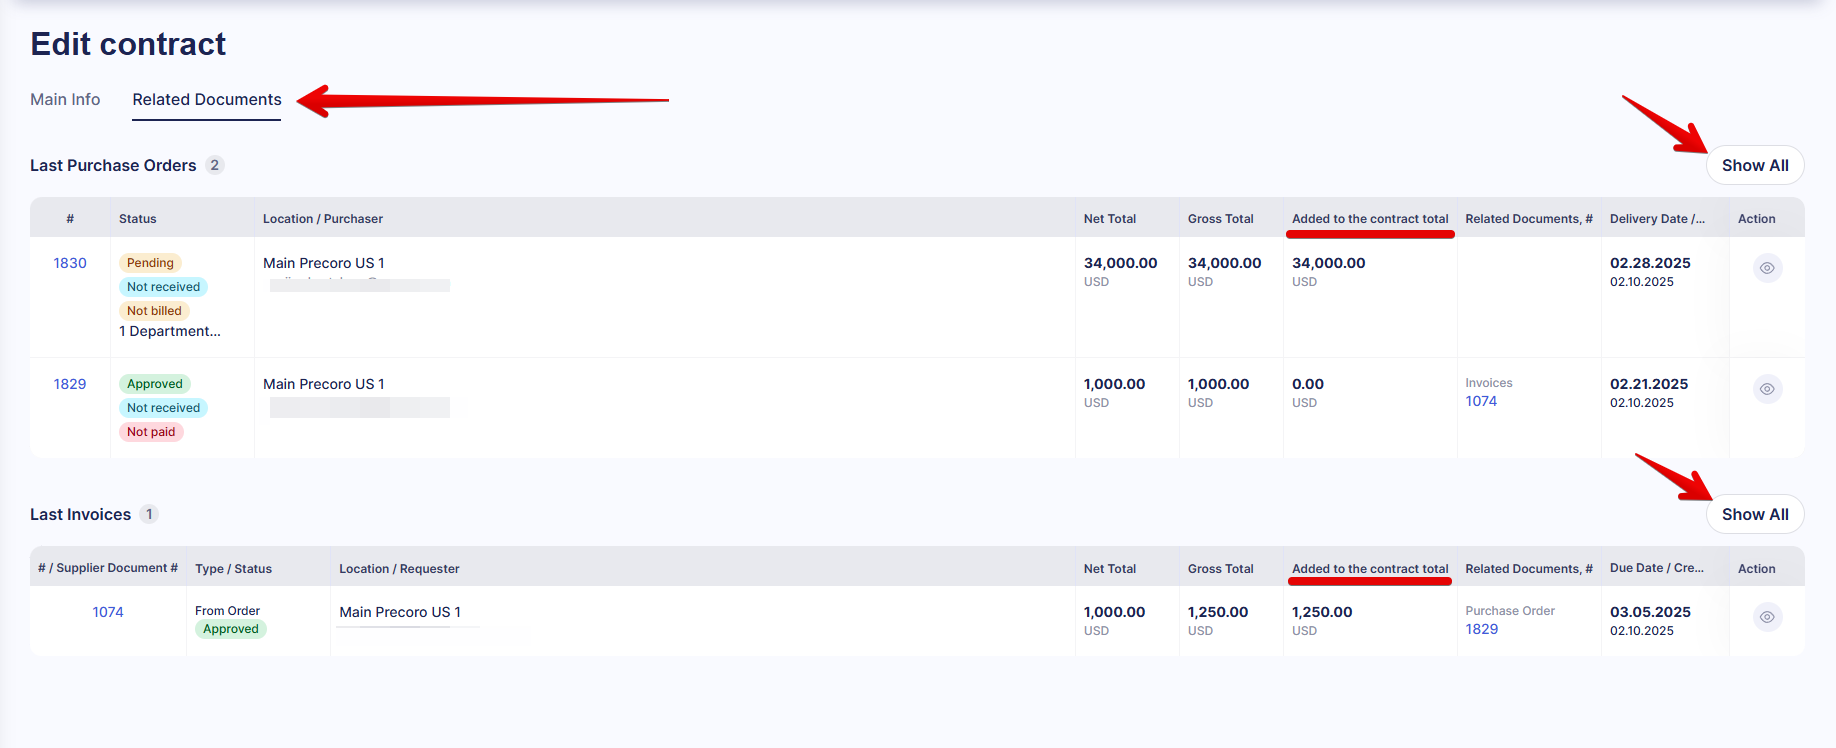
When you open a contract, you will see a new Related Documents tab. There, you will see the lists of the newest POs and invoices linked to the contract. To see the full list of related POs or invoices, click the Show All button opposite the table’s title.
The Added to the Contract Total column in these tables shows the amount from this document added to the linked contract. It helps you track how exactly each document affects the contract total. For instance, if you have a PO with all the items already invoiced, this column will show 0 since the total for these items is calculated and added to the contract based on the invoice.
How the Contract Amount Works with Recurring POs
For recurring POs, the contract amount is automatically deducted each time a new recurring PO is created and reaches Pending or Approved status. Once a contract ends, new POs will no longer be linked to that contract. If the Contract field is mandatory for the recurring PO, the document cannot be confirmed until a new contract is selected.
Protect Accounting Data with Finance Period Close Feature
You can now close your books in Precoro and restrict actions with documents in closed accounting periods. Here’s what this feature will help you with:
-
Increase tax filing accuracy;
-
Ensure consistency between Precoro and integrated platforms that allow you to close accounting periods;
-
Protect documents and accounting information from unwanted changes;
-
Customize period close dates and users’ ability to interact with past documents.
To activate this functionality:
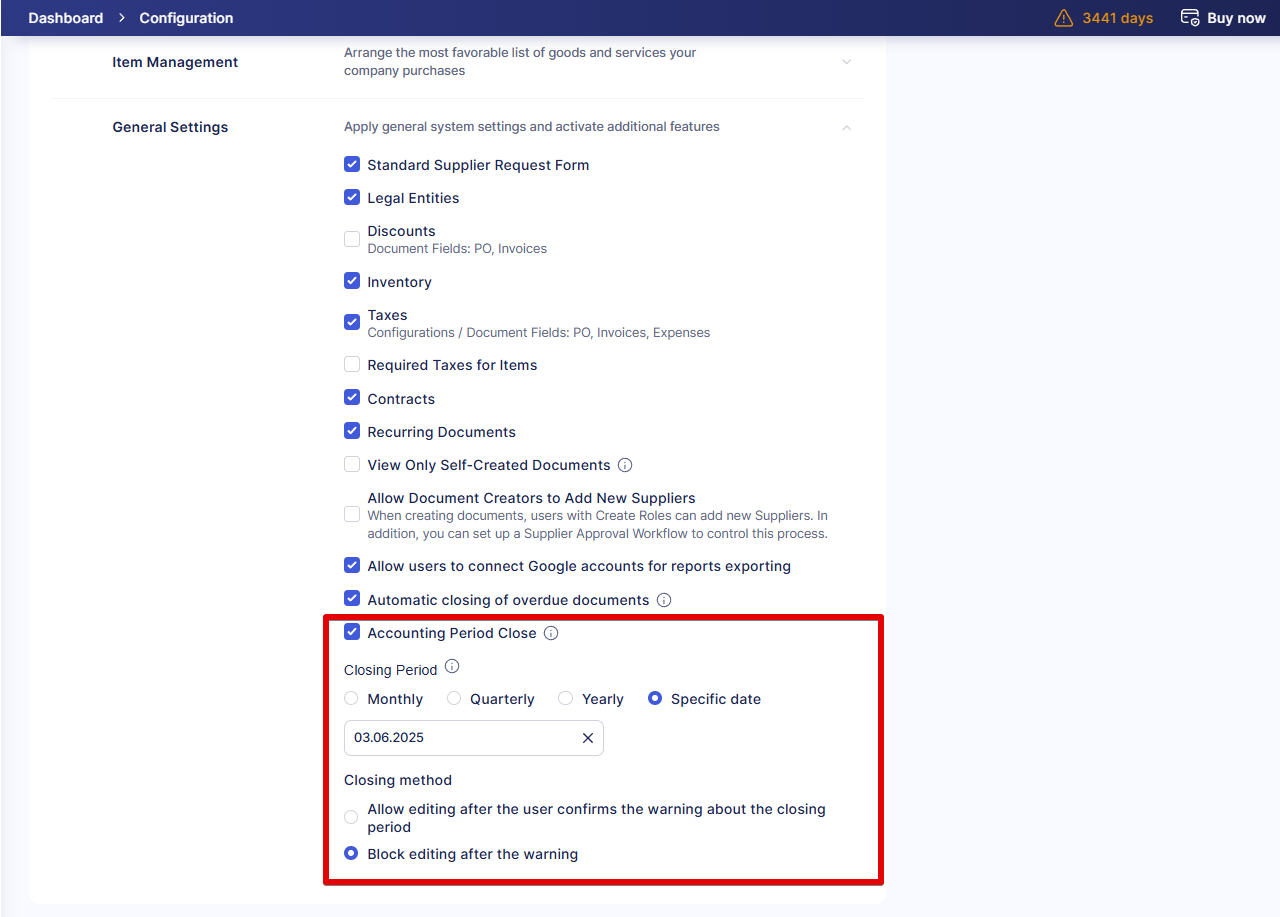
- Navigate to Configuration — Basic Settings — Document Setup, scroll down to General Settings, and enable the Accounting Period Close checkbox.
- Select the accounting period (monthly, quarterly, or yearly) and enter on which day it closes. You can also choose Specific date and add the closing date manually.
- Use the Closing method setting to control flexibility regarding documents in closed periods. You can select Allow editing after the user confirms the warning about the closing period. In this case, users will be notified that the document they are interacting with is in a closed accounting period but will be able to proceed. The other option blocks actions in a closed period entirely. Please note: Super Users will still have access to actions with the documents after the warning.
Please review this guide for more details on the feature’s setup and use.
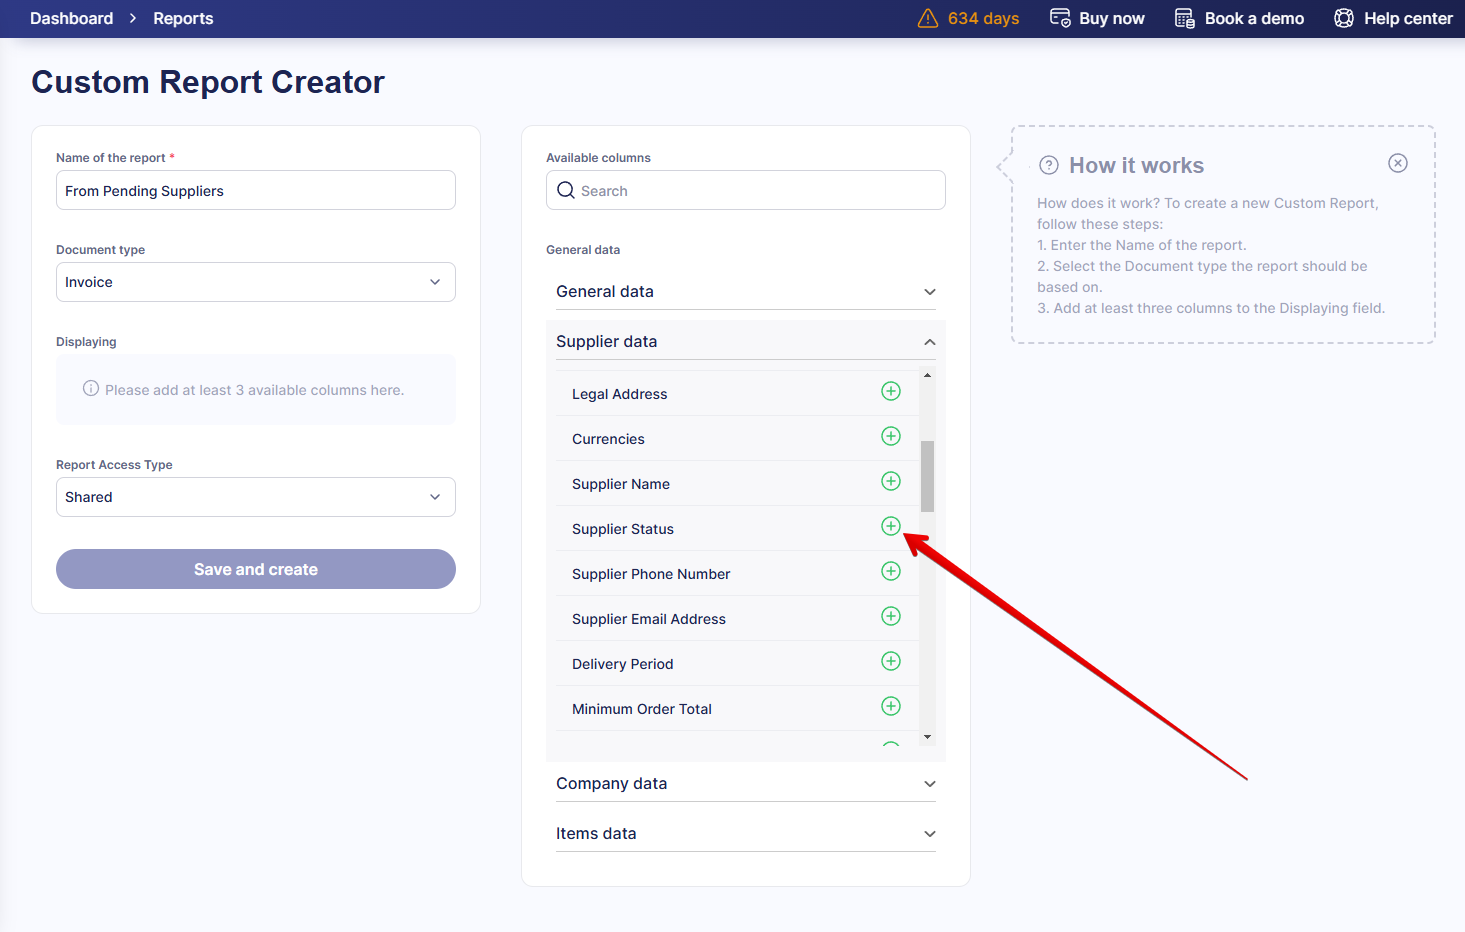
Control Payments Depending on Supplier Status
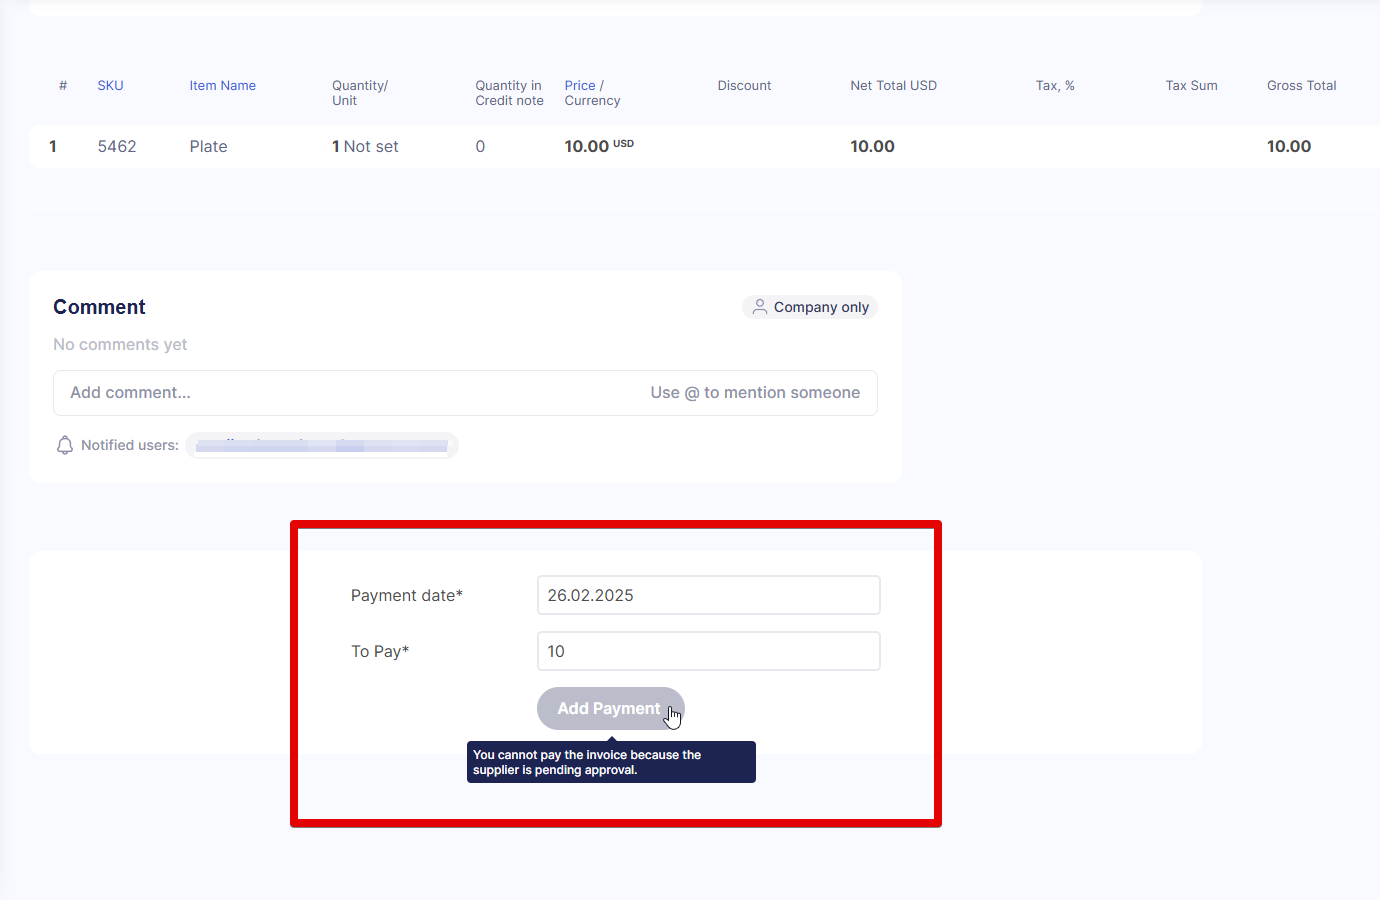
To ensure the payments are correctly processed, we added another level of control when paying invoices. With this update, you cannot add payments when the supplier has a Pending or In Revision status.
The Add Payment button on the invoice document page will be greyed out; hover over it to see a message explaining the reason. This way, users cannot add payments until the approver confirms all necessary supplier information, such as bank details.
We also added a way to filter such invoices for reporting. You can add the Supplier Status column from the Supplier Data section when creating an invoice custom report.
Set Up McMaster-Carr PunchOut Catalog
We are excited to announce a new McMaster-Carr punchout catalog. This highly anticipated collaboration will allow easier purchasing of industrial equipment, tools, and parts, expanding our list of Marketplace Integrations.
Setting up the integration between Precoro and the McMaster-Carr catalog will make your purchasing process effortless and accurate. When this connection is established, you can add a PR or PO in Precoro, be redirected to the McMaster-Carr to browse and select your items, and then have this information sent to Precoro for approval and order tracking.
Please find a detailed guide on how to set up and start using the McMaster-Carr PunchOut Catalog.
Manage Custom Fields for Items and Documents Efficiently with Updated Design
We present a new design to improve your experience when creating and editing Custom Item Fields and Custom Document Fields. When you create a new field or open one you want to update, you will see the editing page featuring:
-
sleek modern interface;
-
efficient space usage to edit field names and descriptions with ease;
-
upgraded options table providing quick access to the list;
-
option hierarchy display with the ability to expand and collapse sub-level lists.

You can also edit the options more conveniently using the sidebar.
- Click Edit (pencil icon) opposite the option to see the editing panel on the right.
- Make the necessary changes, including activating or deactivating the option with the toggle in the top right corner.
- Press Update to save the changes or Cancel to discard them.
Stay tuned for more updates to custom fields soon!
Notice Faster Loading through Caching with IndexedDB
As we keep working on speeding up your processes, this update introduces caching with IndexedDB. This tool allows storing vast volumes of data and quickly loading lists such as Custom Fields for Documents and Items, Suppliers, Locations, etc.
When you open a page containing the lists for the first time, the options are saved to cache memory. Precoro will update the cache automatically, so you do not need to take action. Thanks to this feature, you will be able to access the pages faster on subsequent interactions.
Complete PRs via API to Ensure Consistency Between Systems
With this update, you can ensure the purchase requisitions do not differ in Precoro and the platforms you connect via API. Now, you can create a PR in Precoro, send it to your preferred tool, add a related purchase order there, and then send a request for PR completion in Precoro.
Once the PR is completed, users cannot make changes to it, so you can be certain all requests are processed correctly.
Please note: only PRs with the Approved status can be completed manually.
These users can confirm a PR:
- the PR creator;
- a user with the Approve role and access to the document;
- Super User.
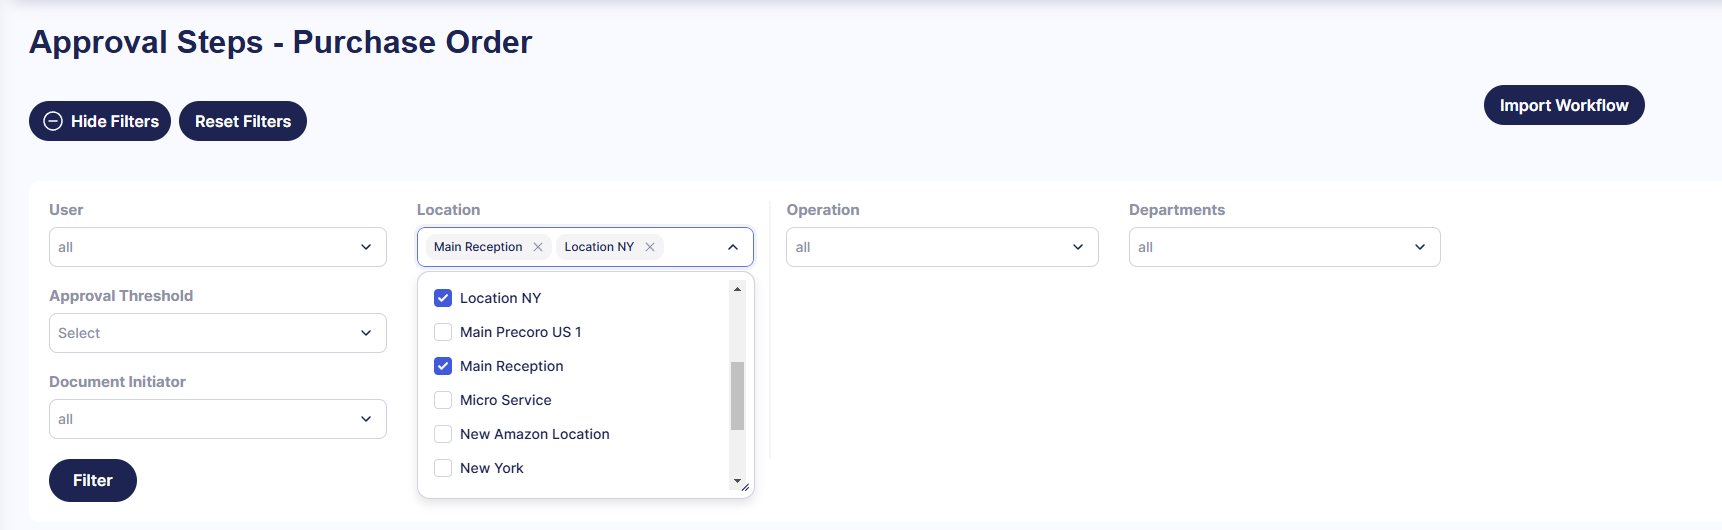
Edit the Approval Workflow Faster with Enhanced Filters
With this update, the filters you use when editing the Approval Workflow remain active even after you make changes to the filtered steps. Additionally, the Location filter also allows you to select multiple options. Along with these improvements, we made the Approval Workflow filters more reliable and consistent.