TABLE OF CONTENTS
- How to Add a New Supplier in Precoro
- How to Deactivate or Reactivate a Supplier
- How to Multi-Select Suppliers in Filters
- Supplier Notifications
How to Add a New Supplier in Precoro
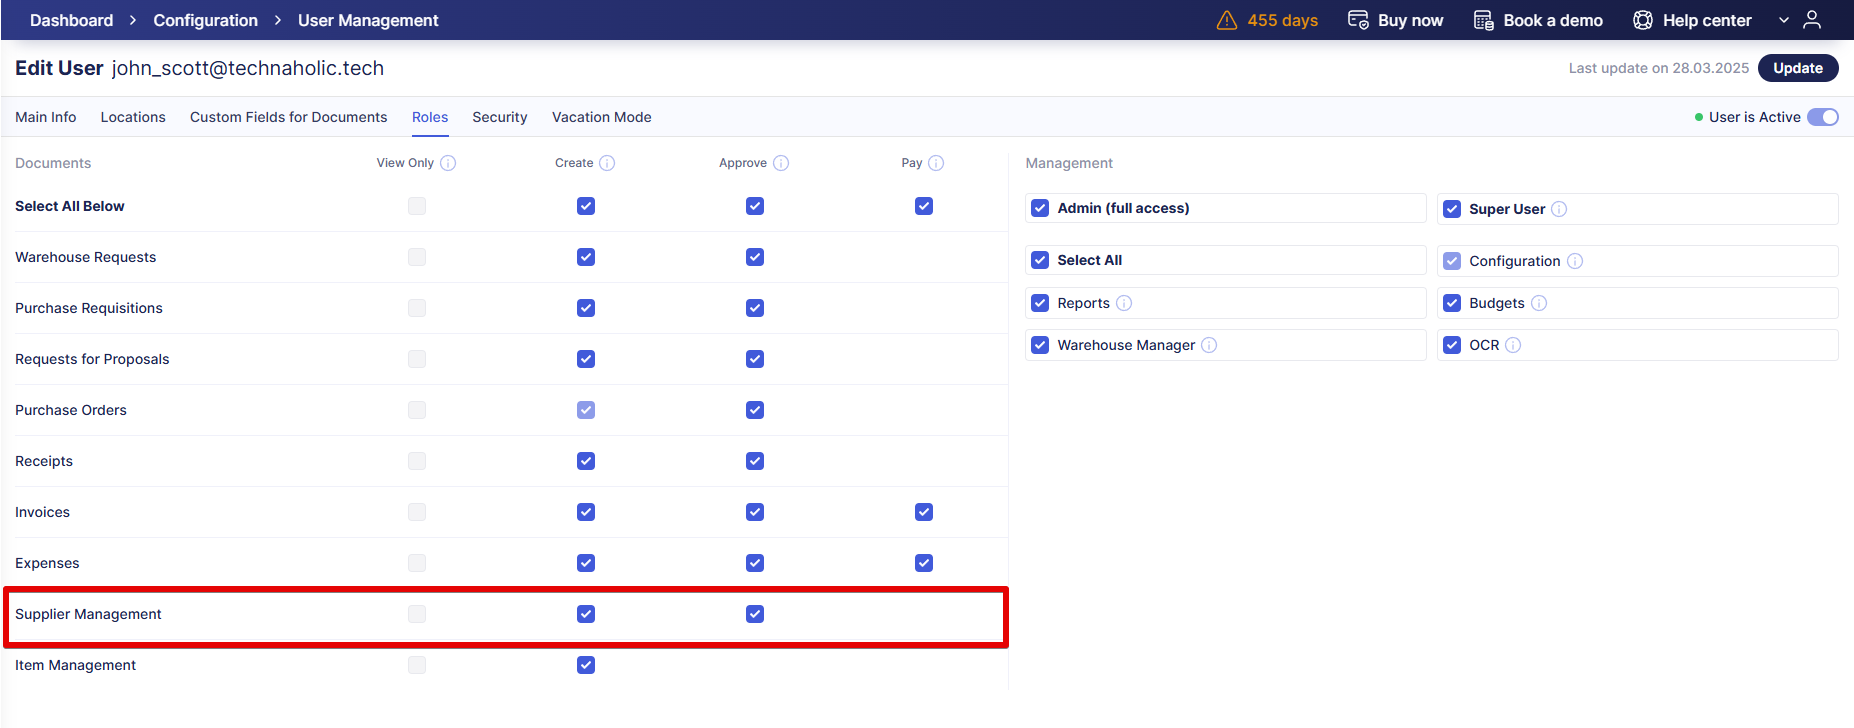
💡 Please note: To enable users to create and approve new suppliers, ensure they have access to the Supplier Management module:
- Navigate to Configuration > User Management.
- Select the users requiring access by clicking Edit.
- Check the Create and Approve boxes under Supplier Management.
Press Update to save changes.
Option 2: Directly in a document:
- When creating or editing a document, locate the Supplier field and click the Add New Supplier button.
- Enter the required details in the form and press Request.
The supplier will be automatically added to the document.
💡 Please note: The Allow Document Creators to Add New Suppliers feature should be enabled in Basic Settings to use this feature. For more details, see the How to Submit a Request for Creating a New Supplier article.
Here’s a how-to video:
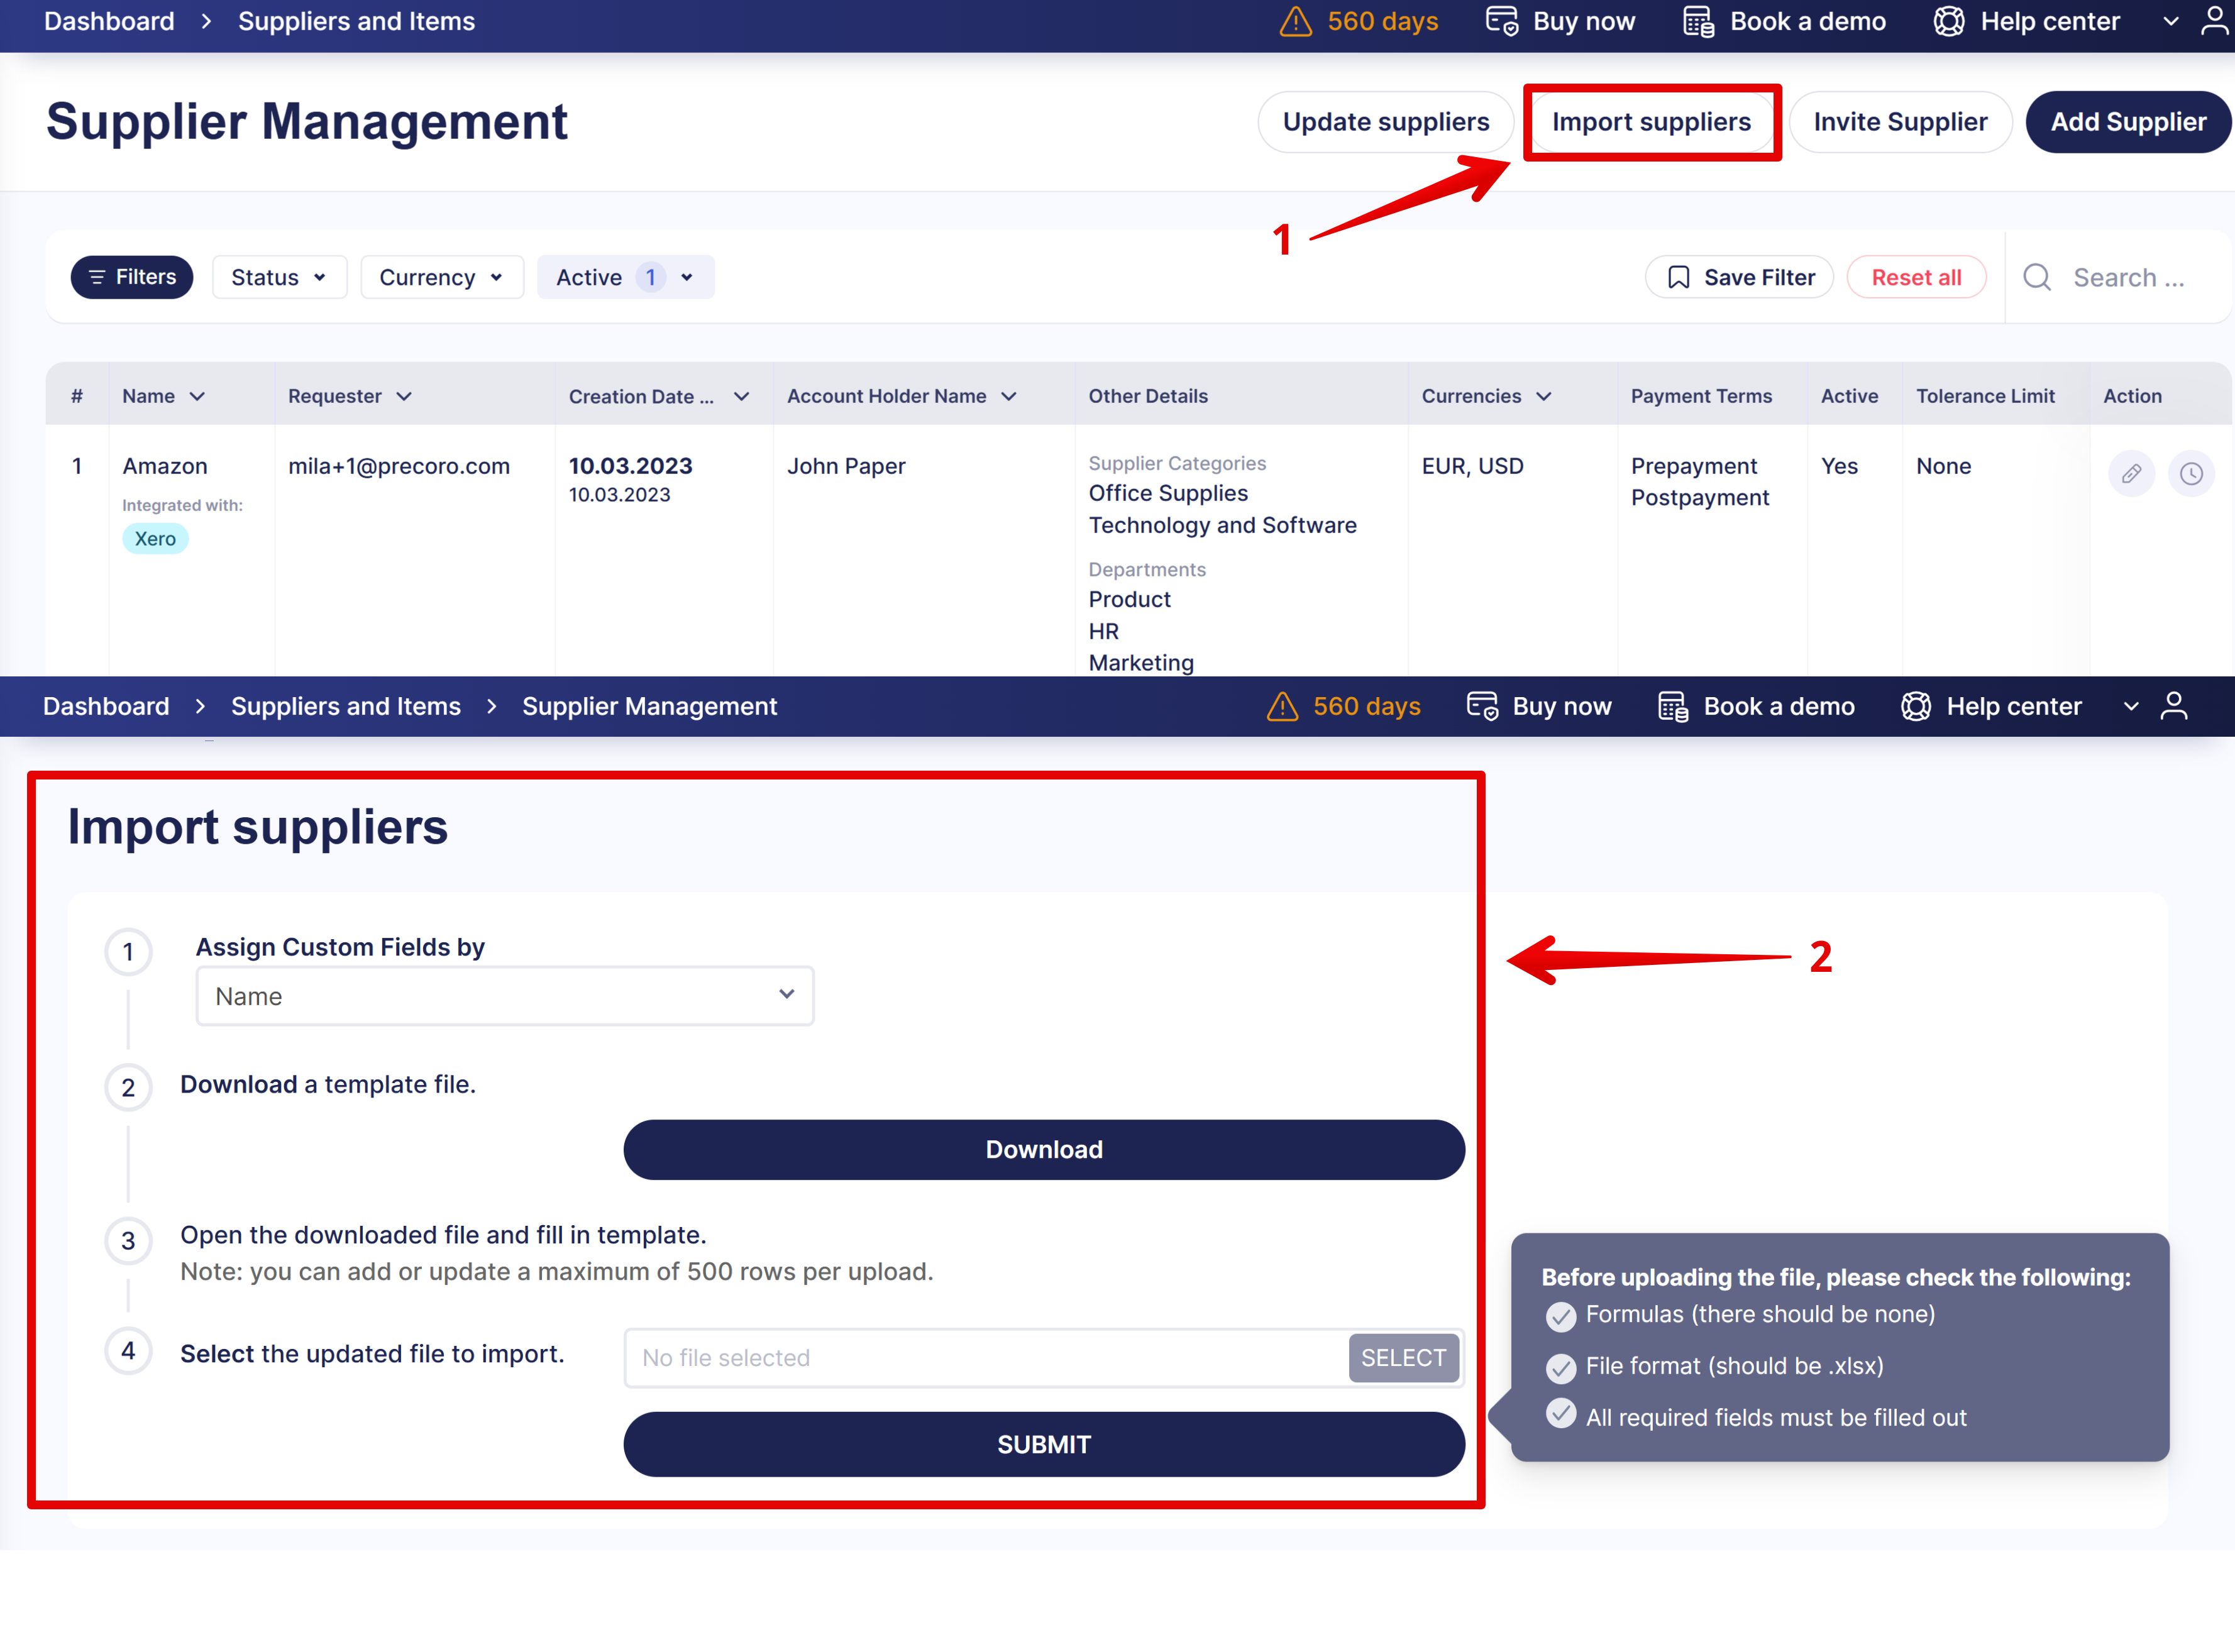
Option 3: Import suppliers in bulk
Use the supplier import and update functionality on the Supplier Management page to:
- Quickly update your existing supplier list
- Import a new list from scratch, which is ideal for transferring a large database
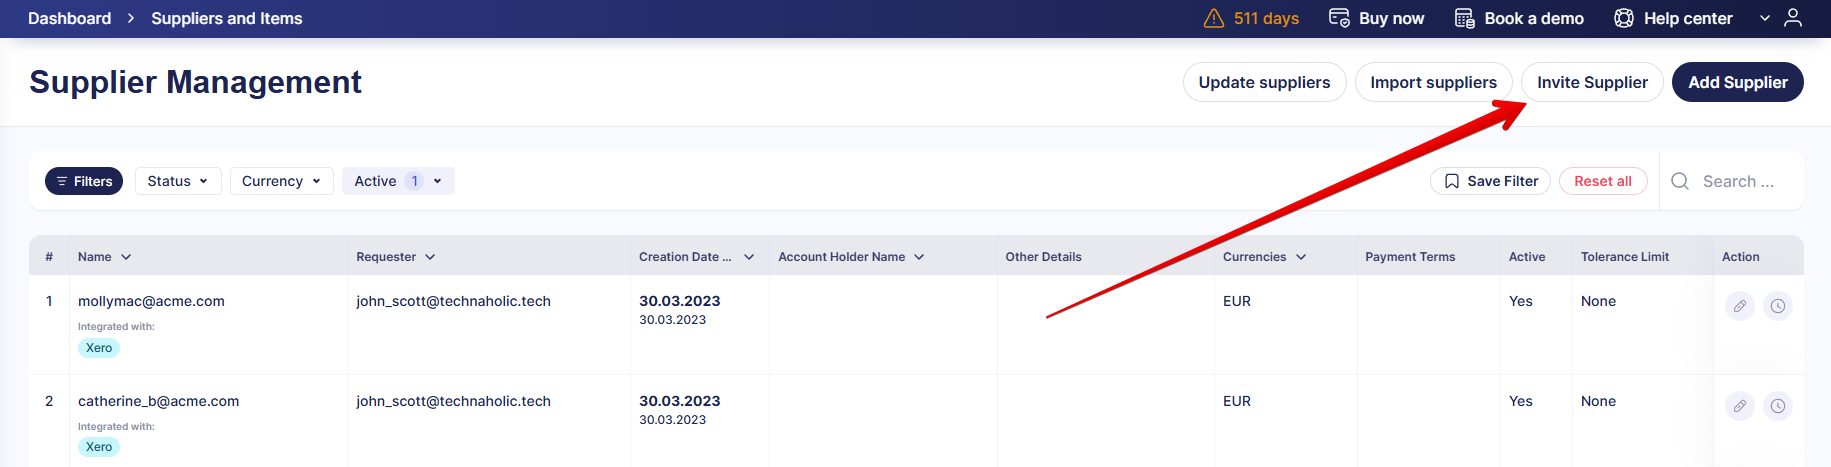
Option 4: Using Supplier Invitations
If you want the supplier to enter details (collaboration terms, payment information, contacts, etc.) themselves, send them an invitation as described in this guide.
Refer to the Supplier Approval Functionality guide for detailed steps on managing supplier approval.
How to Deactivate or Reactivate a Supplier
To deactivate a Supplier:
- Go to the Suppliers Management page.
- Locate the desired supplier and click the Edit button.
- Switch the blue toggle to deactivate a supplier.
- Press the Confirm button to save changes.
Once deactivated, the supplier will be hidden from the general list.
To reactivate a Supplier:
- Open the Suppliers Management page.
- Click Show Filters and set the Active field to No.
- From the list of deactivated suppliers, select the one you wish to reactivate and click Edit.
- Switch the blue toggle to reactivate a supplier.
- Press the Confirm button to save changes.
Here's a how-to video:
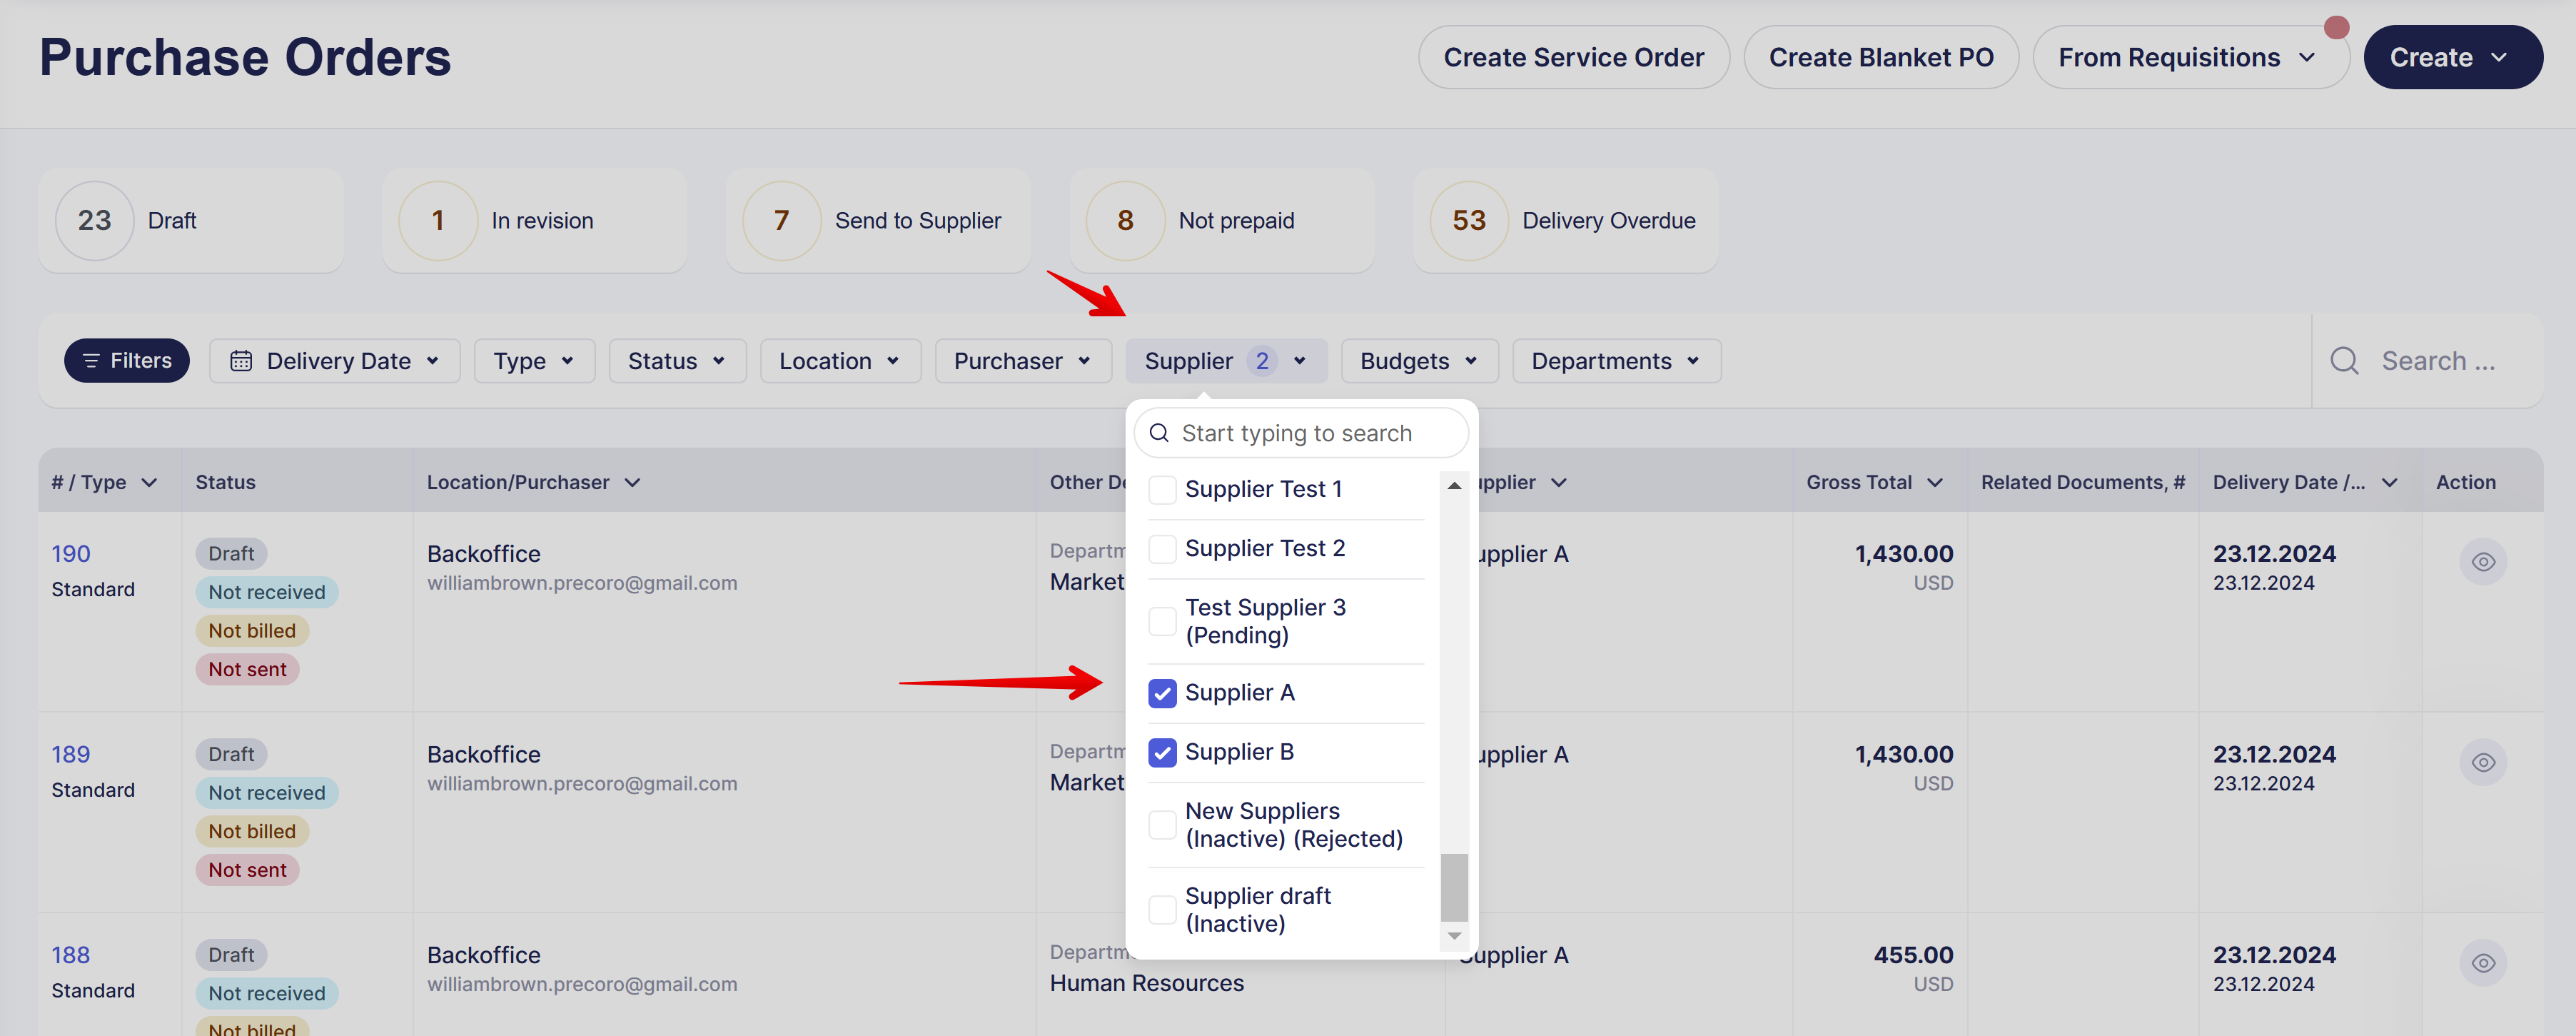
How to Multi-Select Suppliers in Filters
You can add multiple suppliers to the filters for faster and more accurate data retrieval.
- Fast Filters Panel: Quickly check the suppliers to add them to your filtration:
- Advanced Filters: Use detailed filtering options available in:
- Purchase Order, Invoice, Request for Proposals, Receipt, and Create Receipt pages
- Default visual charts on Purchase Order and Invoice pages
- Default reports such as Purchase Order Export by Items/Documents, Invoice Export by Items, Credit Note Export by Items
- Custom reports for Purchase Orders, Invoices, Requests for Proposals, Receipts, Credit Notes, and Payments
For detailed guidance, refer to the How to Use Filters in Precoro article.
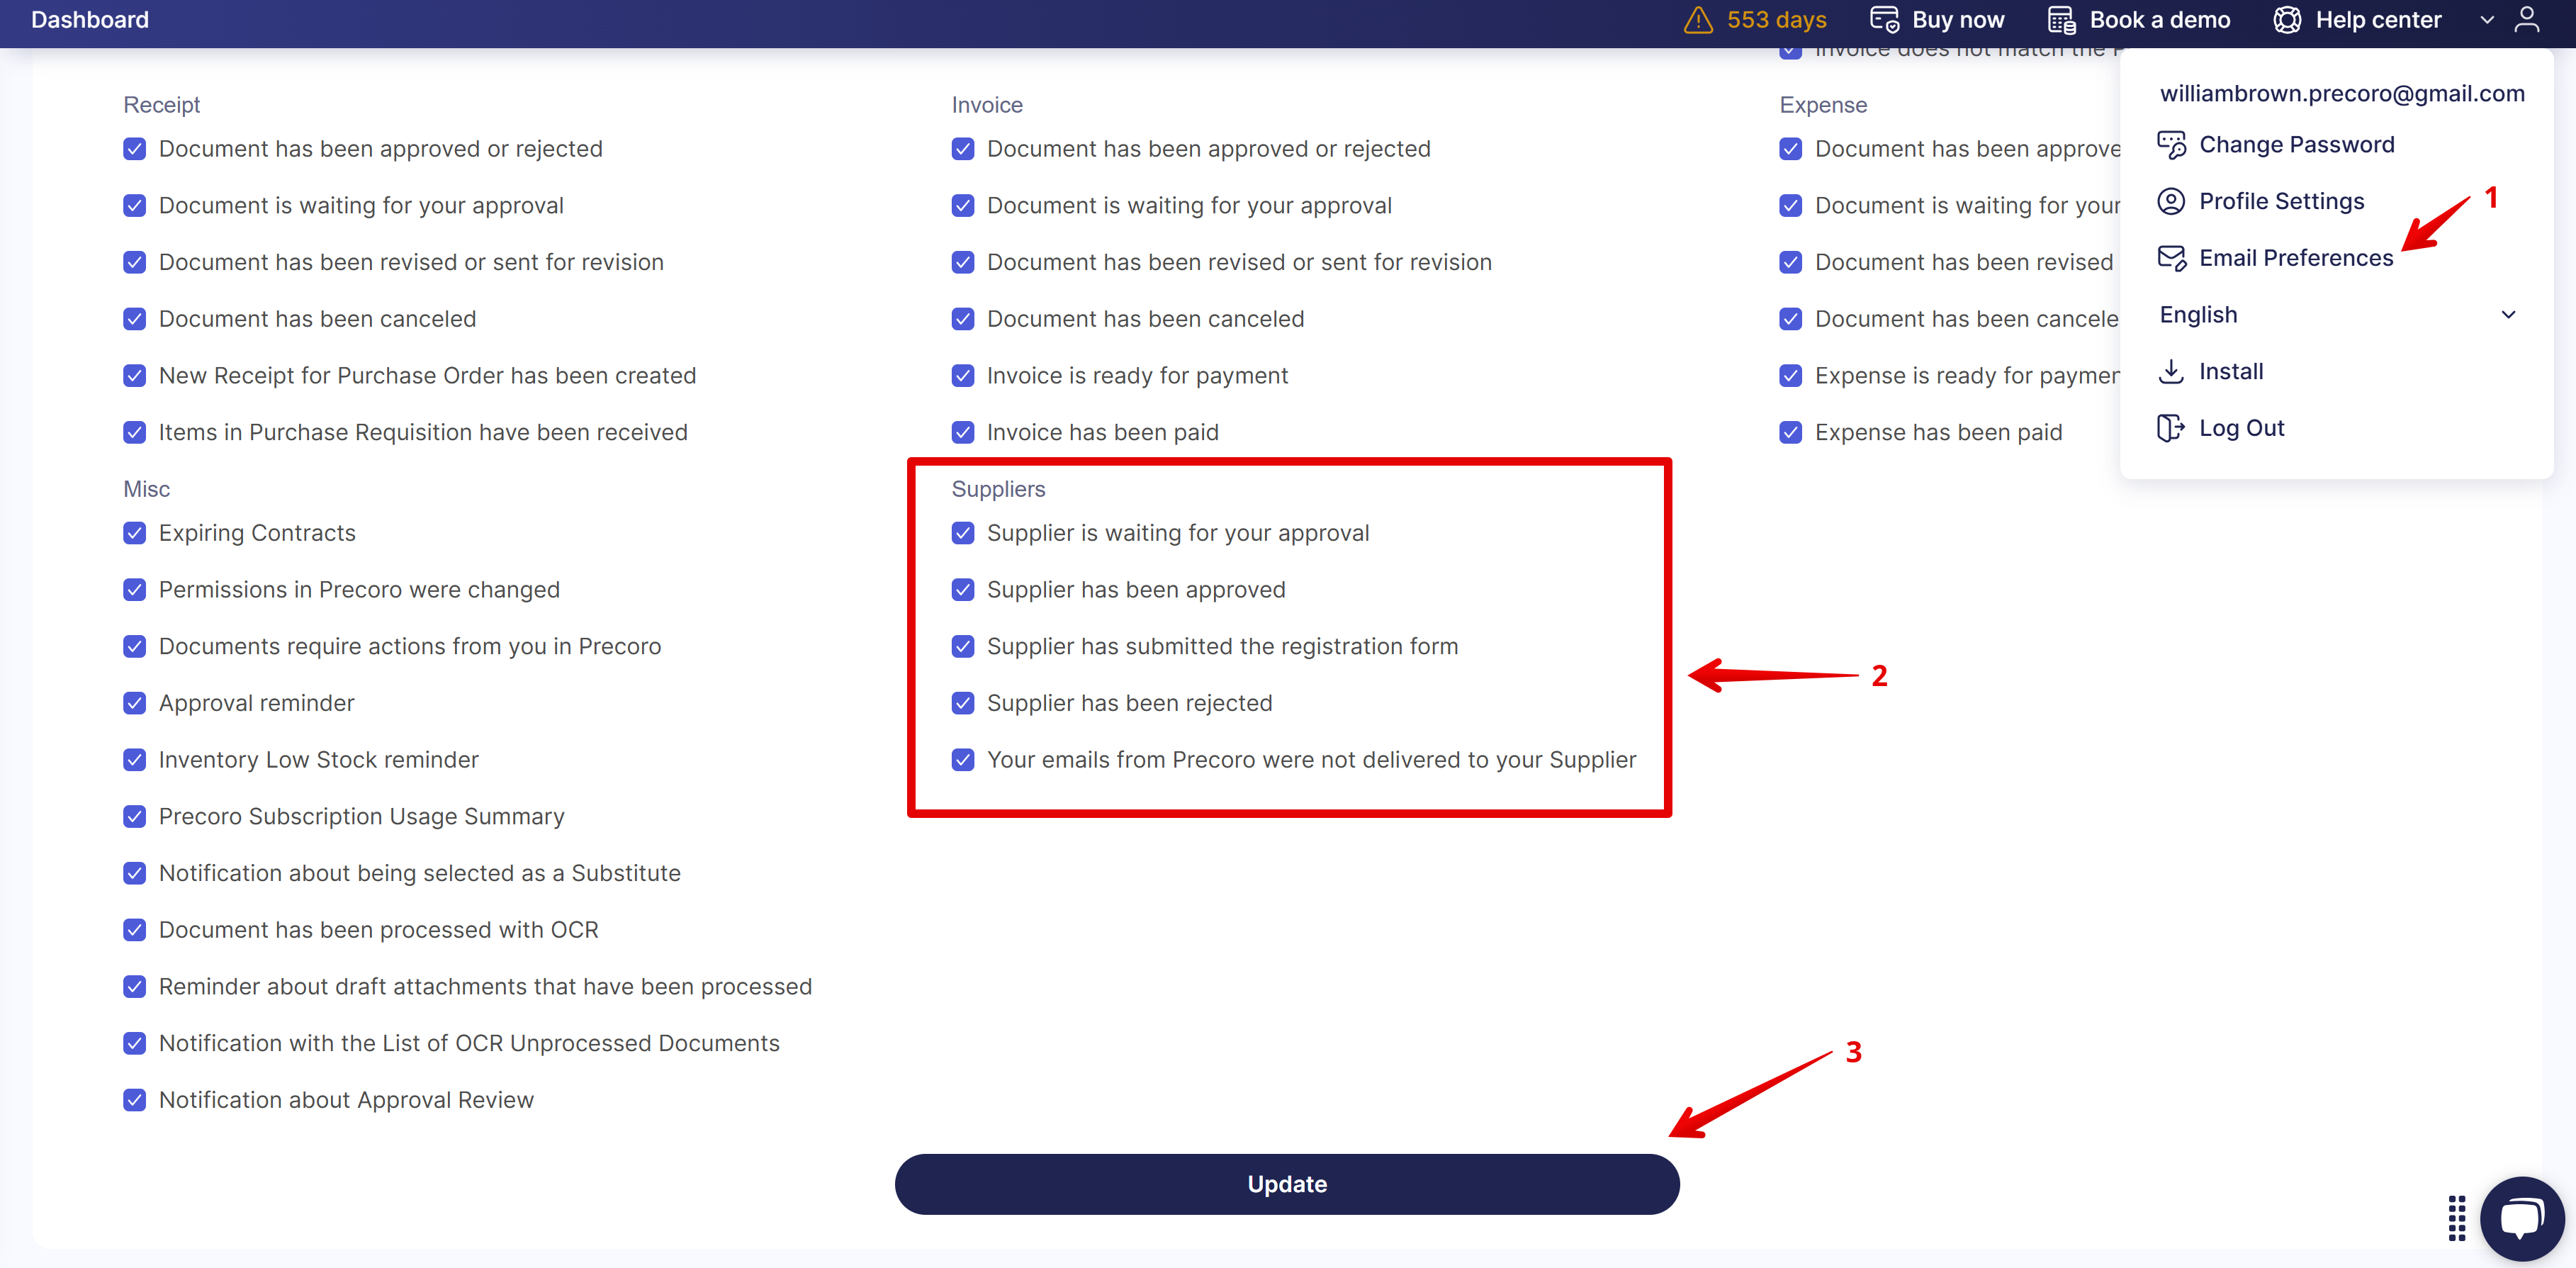
Supplier Notifications
In the Email Preferences, you can customize the number of notifications regarding Supplier Approval functionality:
Follow the How to Fill Out the Supplier Card article to add your supplier's details.