A Receipt is a confirmation of the delivery stage. The vendor/supplier includes the receipt with items that have been delivered to the purchaser. The Receipt details exactly what is in the shipment or order. The Receipt typically includes the same information as the Invoice and describes the method of payment.
A Receipt is a way to track that the suppliers delivered the items you requested in Purchase Orders. Once you have received ordered items or services, you need to mark them as delivered in the system.
This process will benefit your company if you track the stock balance in your Warehouse.
Using Receipts in Precoro, you can solve the following problems:
- Lack of information about what was delivered
- Discrepancies in quantity between what was ordered and what was delivered
- Early payment, before the order is fulfilled.
A stockman receives, inspects, and marks all delivered goods. The delivery information appears in an appropriate purchase order, thus the procurement department can control the order fulfillment process or pass an Invoice for payment.
TABLE OF CONTENTS
- How to Mark Items as Received
- How a Requester Can Get Full Information on the Purchase Order Items from the Receipt
- How to Modify the Receipt
- How to Not Display Prices for Receipt Creators and Approvers
- How to Track the Items Delivery
- How to Create Receipts in Bulk Using Multi-Select Function
How to Mark Items as Received
There are two possible ways to do it:
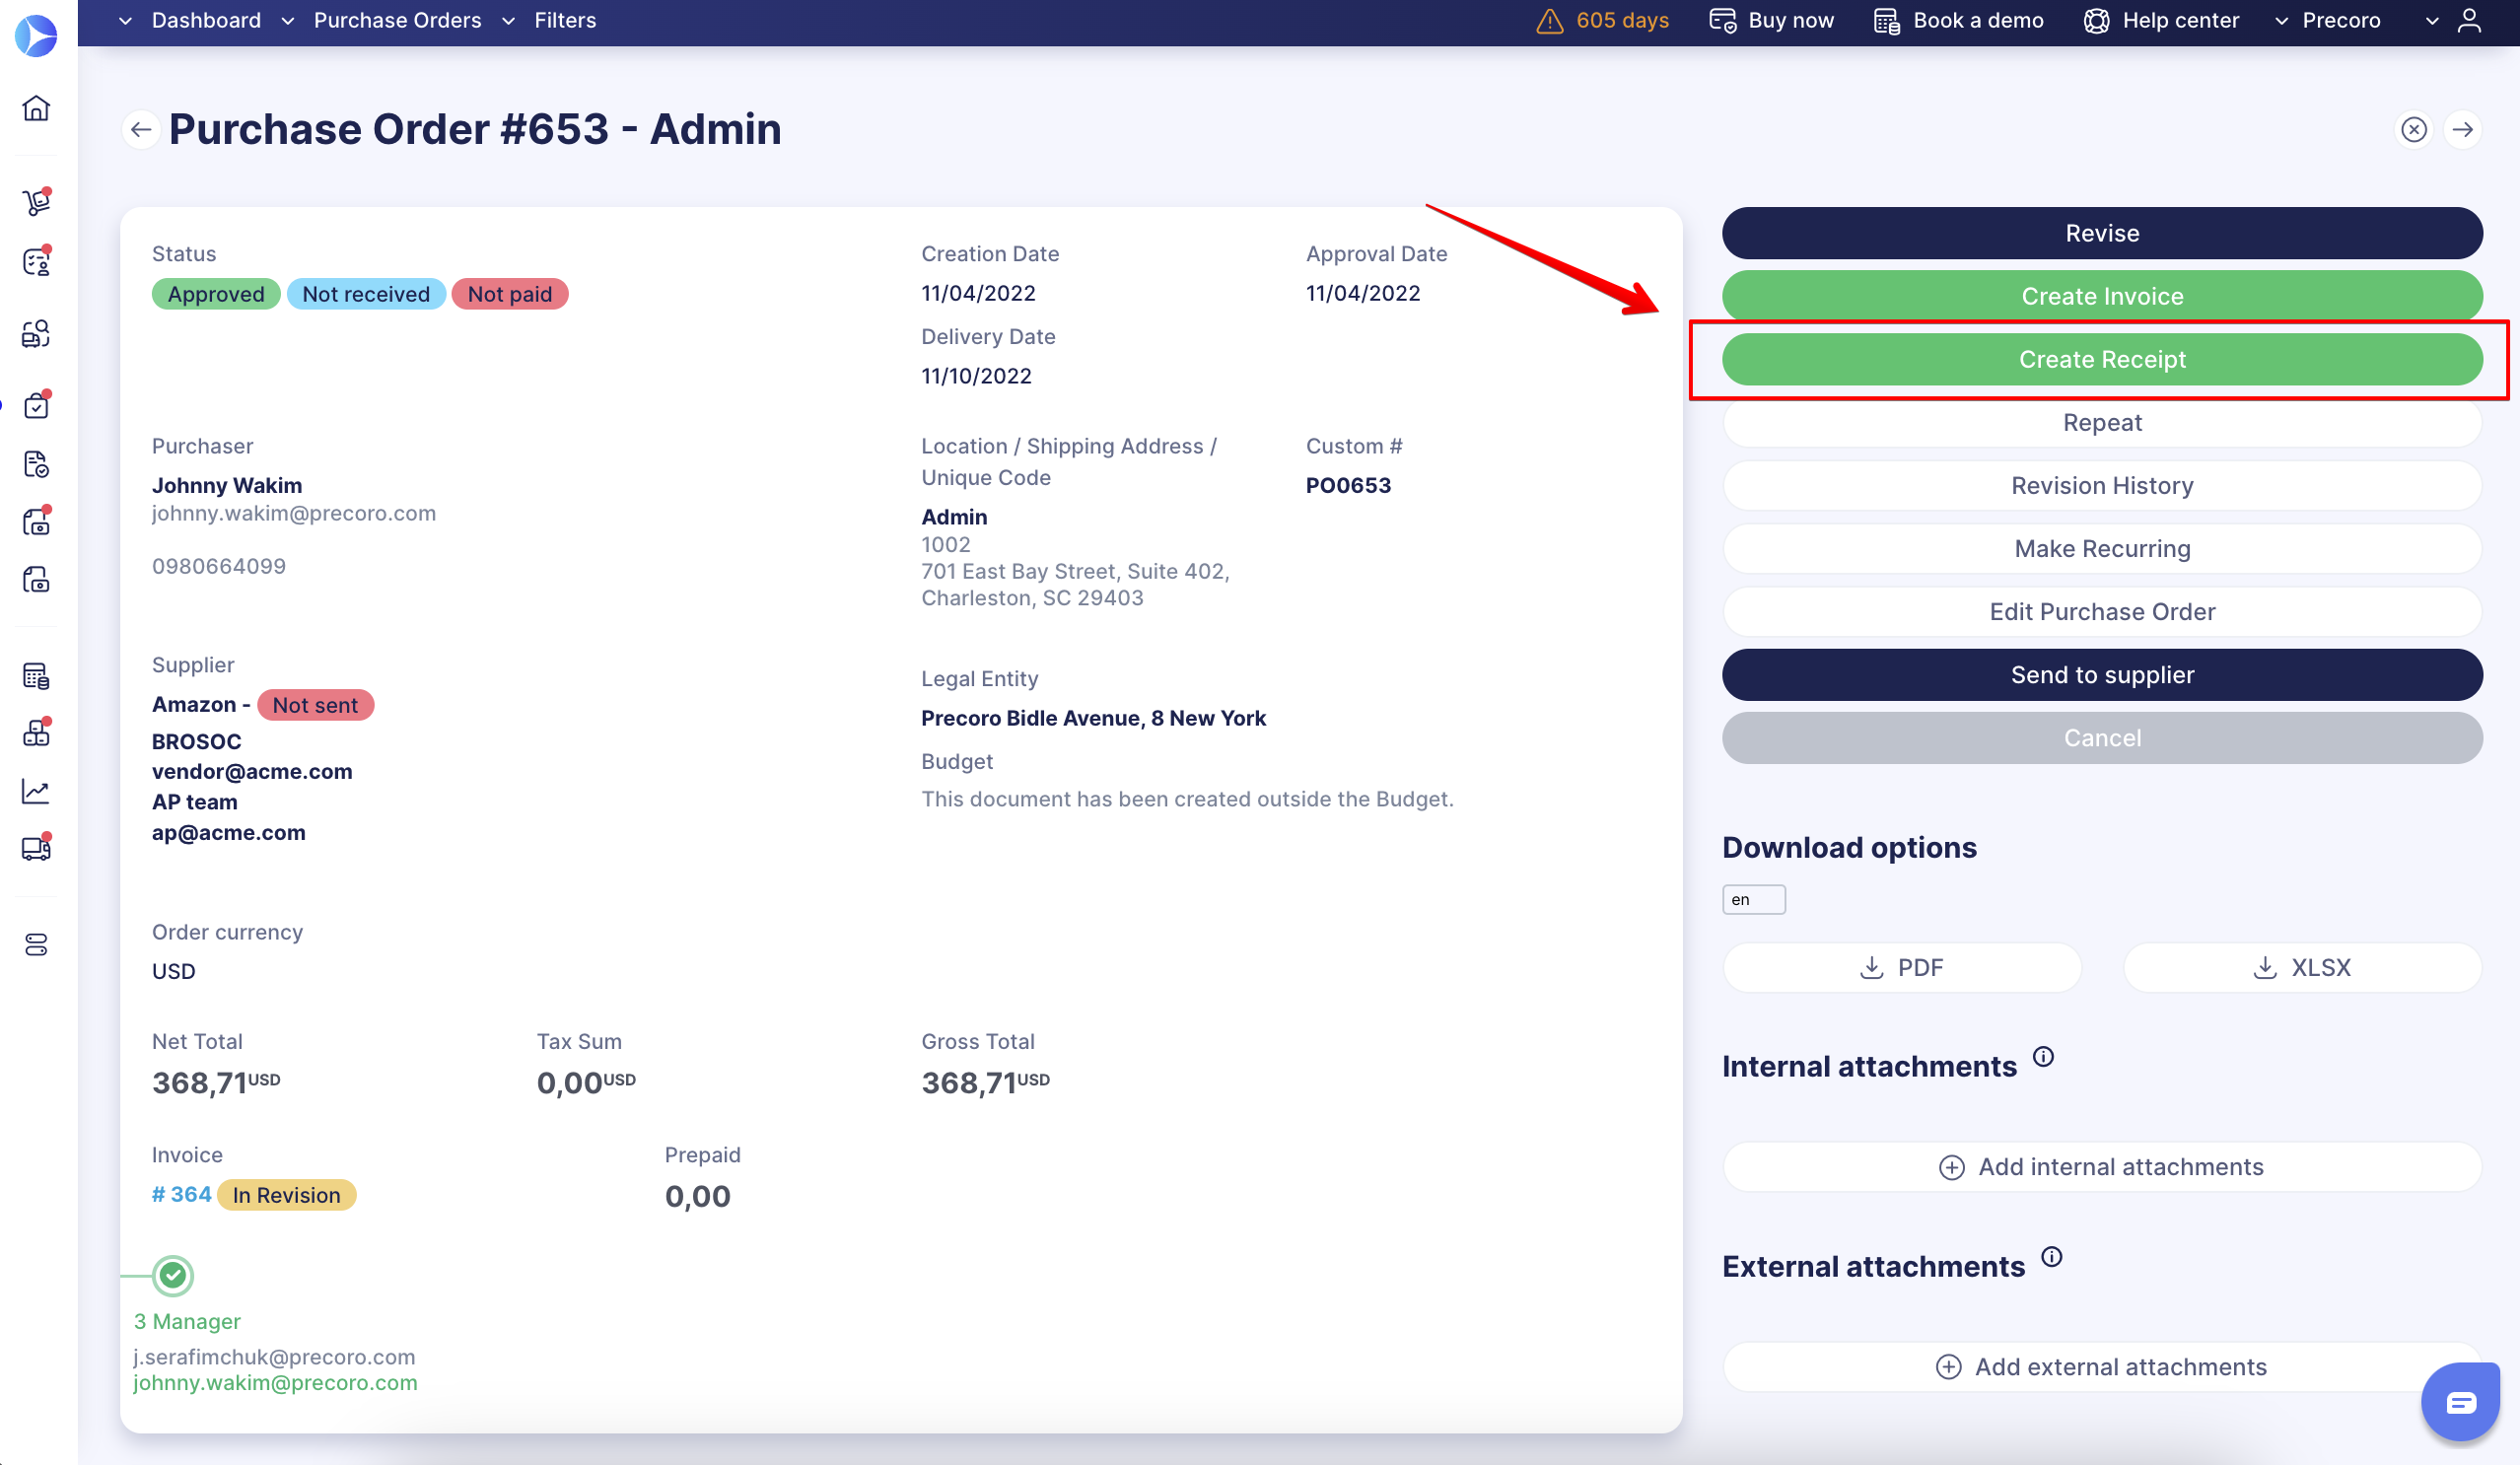
1. Directly from a specific Purchase Order by clicking the Create Receipt button.
2. On the Receipt page in the left-side menu:
- Click the Create Receipt button, choose a relevant PO, and click the plus button (+) on the right side of the page.
- Select the items you received and specify the received quantity. You can then create as many receipts as you need to cover the number of items left undelivered. You can also use filters, this function can be useful when you have a lot of items in the Order and need a quick and easy tool to sort all of them.
You can apply filters to the following:- Name field, where you can specify the information in the search line.
- Custom Fields for Items (available only to those activated for the Receipts). More information on working and activating ICFs for documents can be found here.
- Specify the actual delivery date, fill out the other necessary fields, and click the Create button.
In case you have activated a 3-Way Match Functionality the matching process of the received quantity will remain the same. After you have created and approved the received amount this information will be automatically updated and displayed in the related PO:
You can also download the Receipt printed form, available both in PDF and XLSX formats.
Please note that you can only download the printed form if the document has the Received status. You will not see the download options if the document is still Pending. You must Approve the document first.
How a Requester Can Get Full Information on the Purchase Order Items from the Receipt
For you to use this function, the Receipt should have a related Purchase Order.
A requester can get full information on the order and items by using the Show Purchase Order button: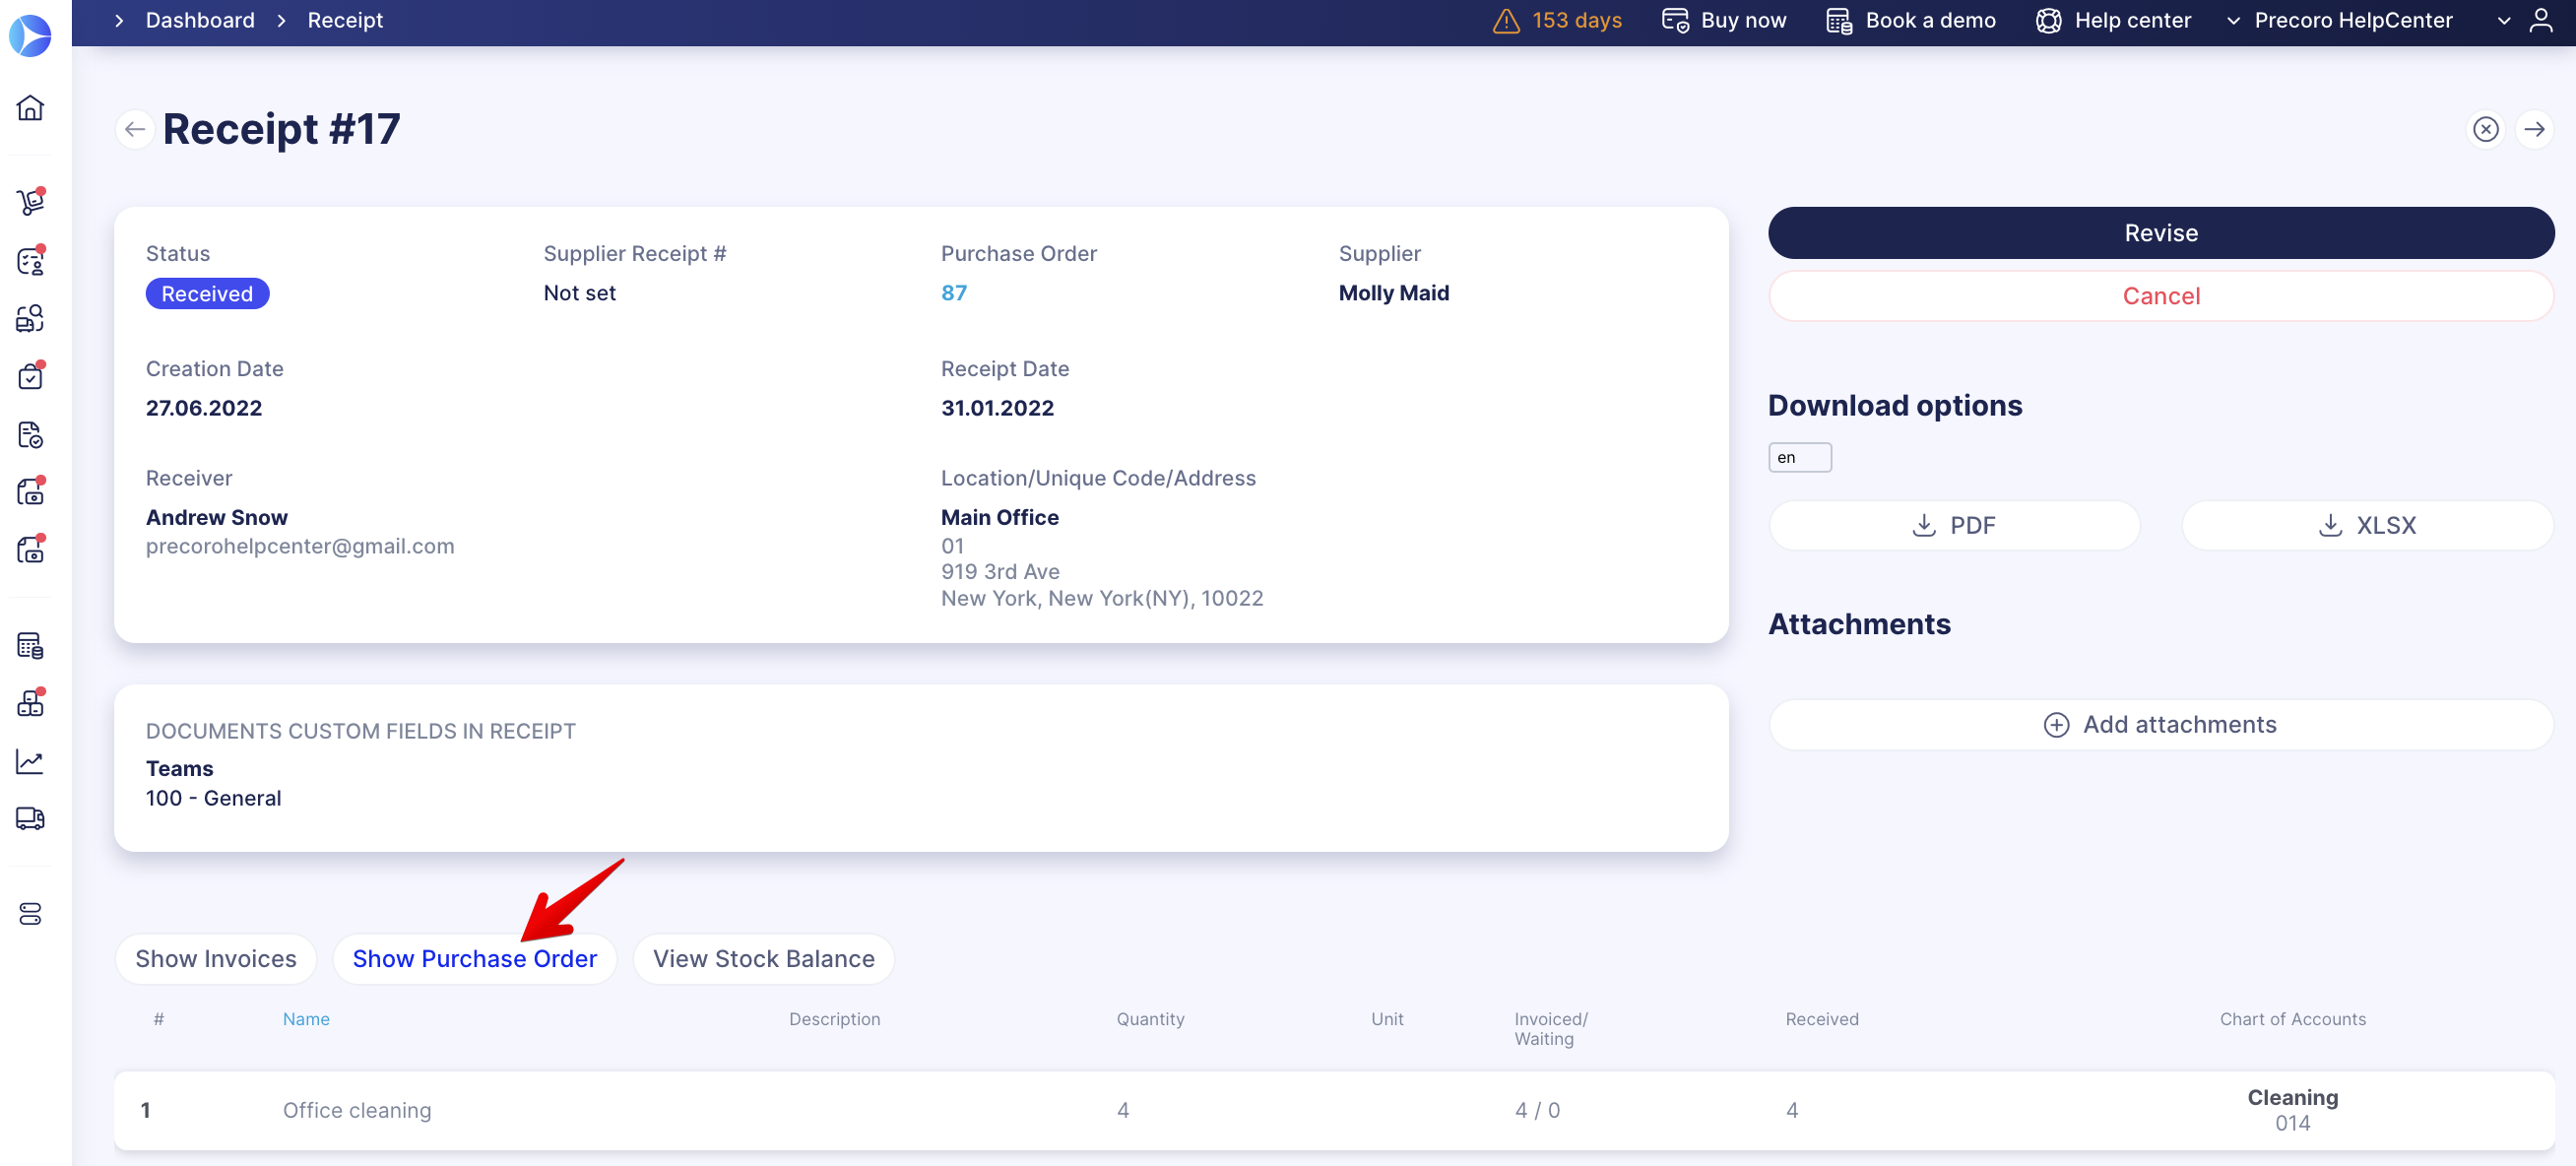
You will see the general Order information and complete information on the Items:
Also, you can see the related documents displayed and their numbers that function as hyperlinks for the actual document pages.

As well as on the Purchase Order Management page, you can see the related Invoices and Receipts documents displayed with their numbers being the hyperlinks to the documents themselves:
How to Modify the Receipt
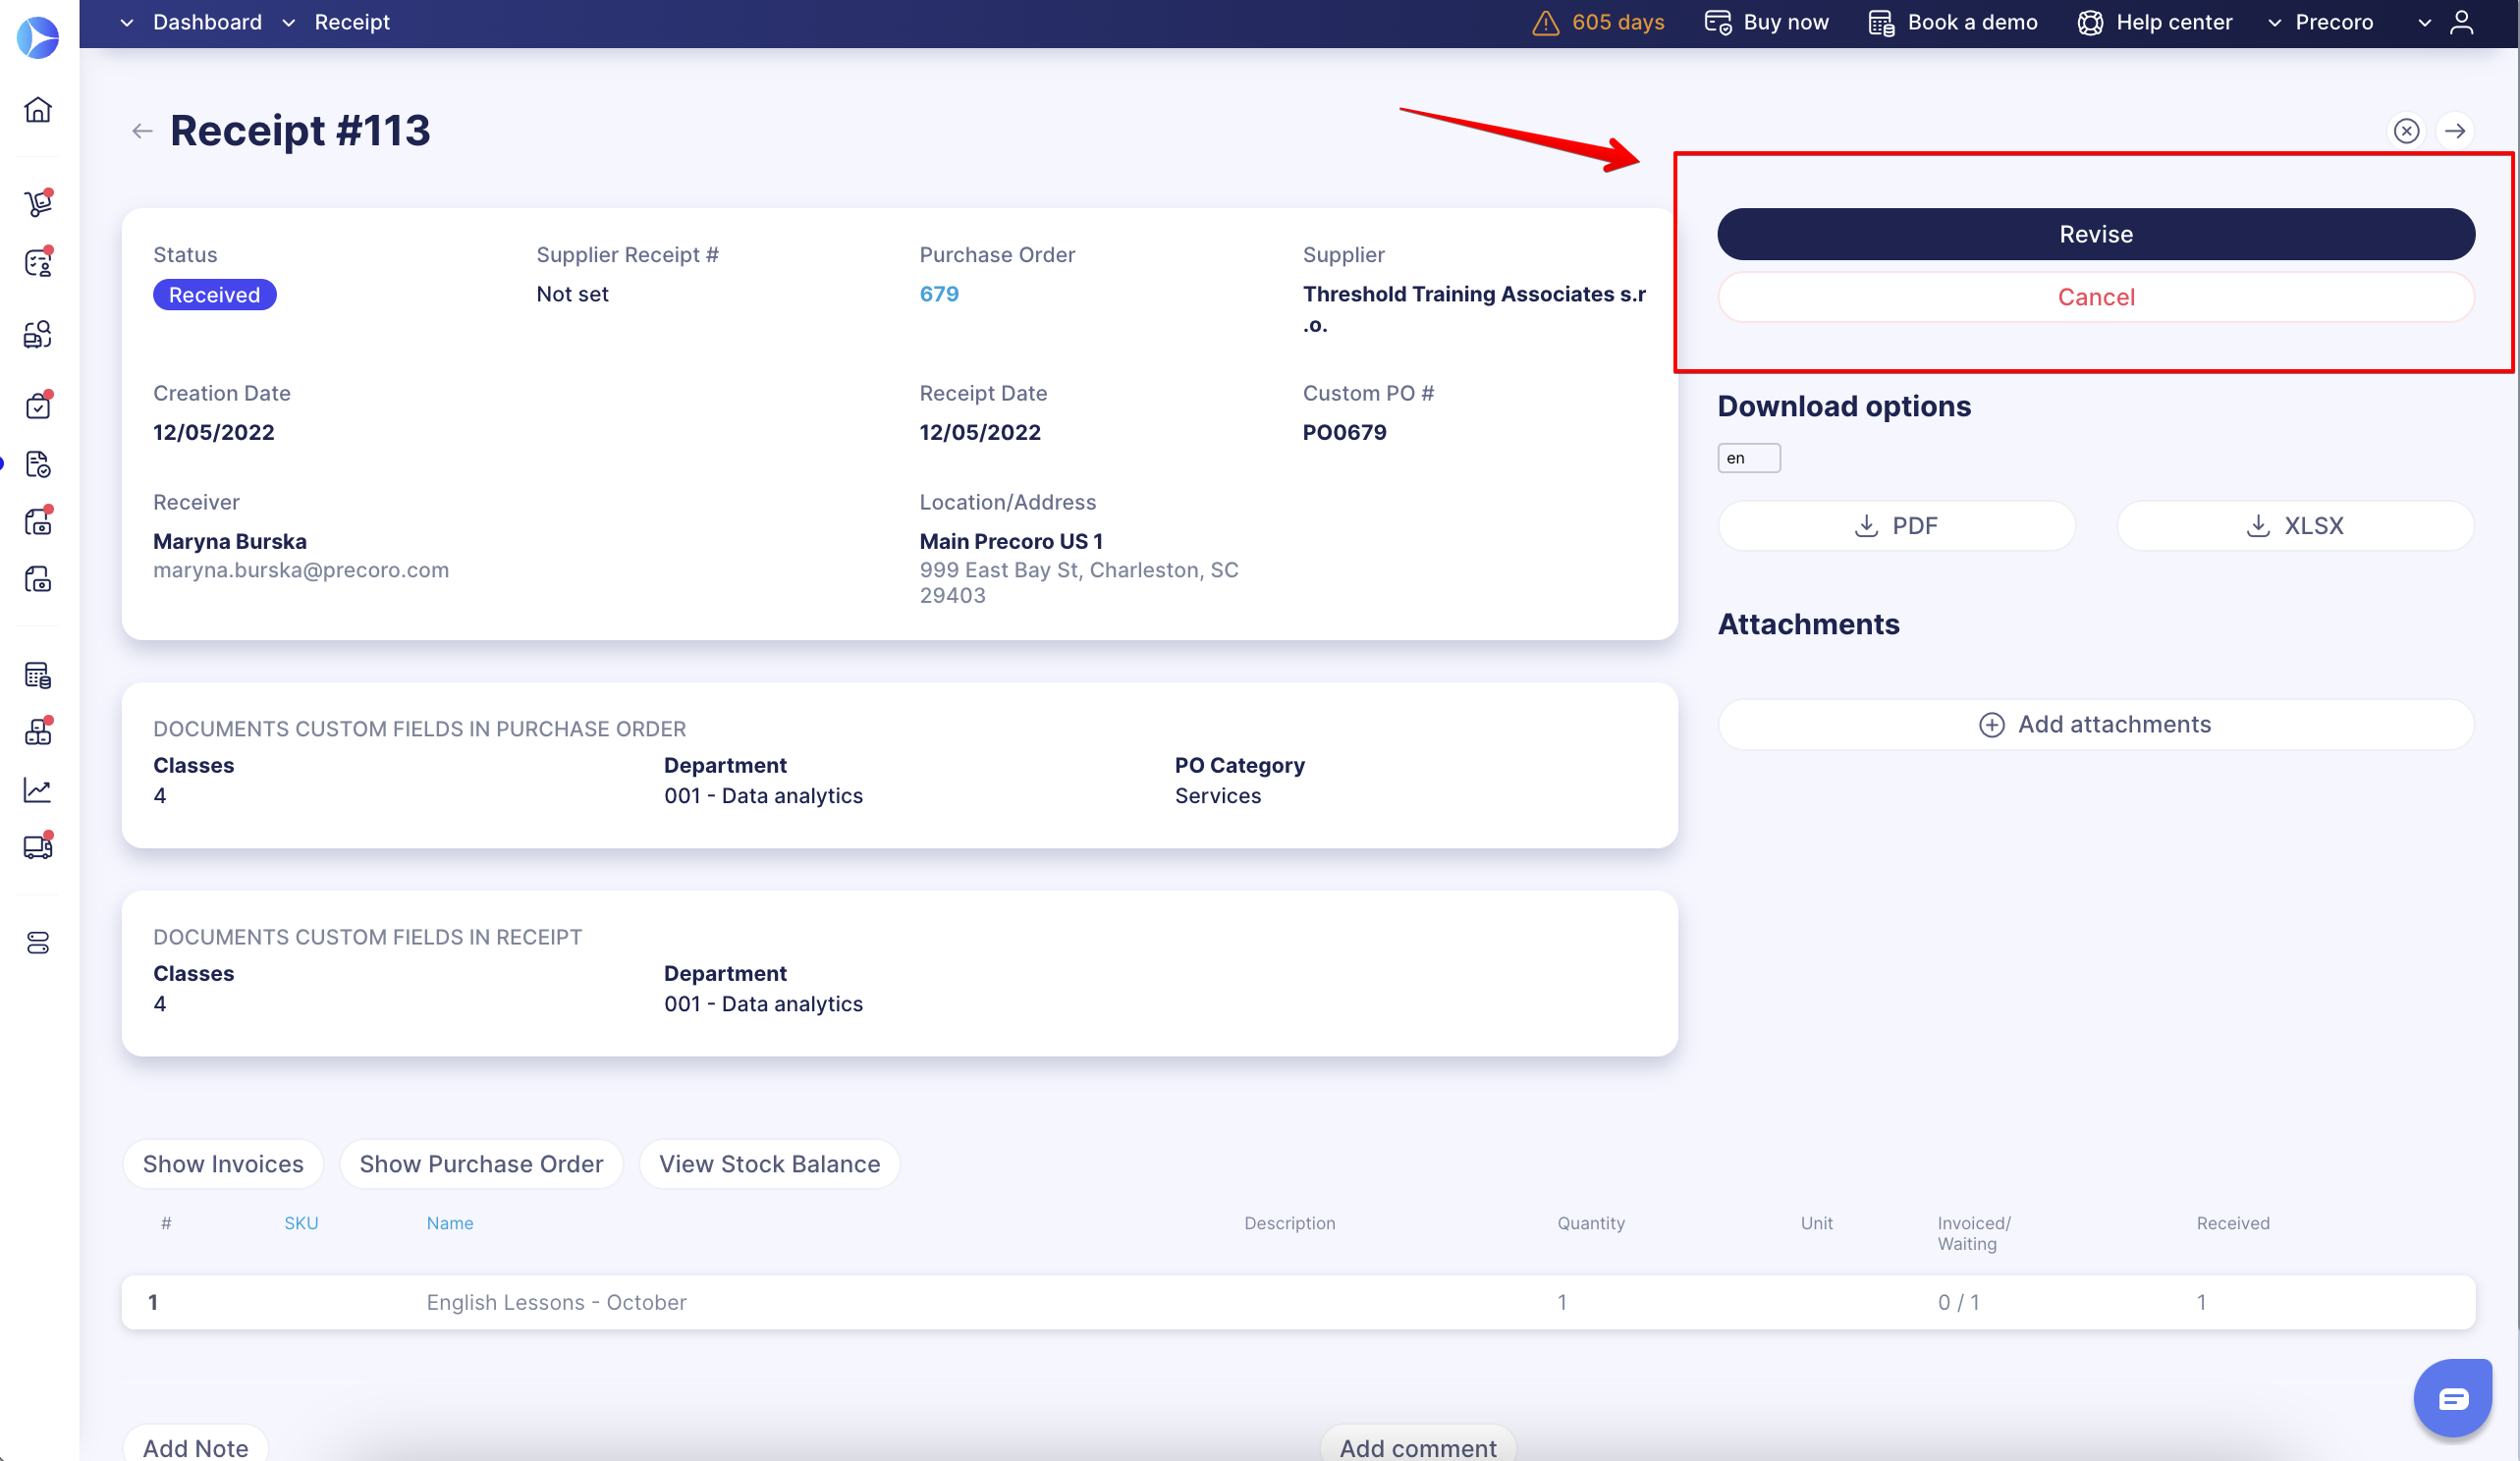
If you need to change anything in the Receipt once it was created, use the Revise button.
If you mistakenly created a receipt, or it is no longer relevant for you, you can Cancel it and start again.
For you to use this function, the Receipt should have a related Purchase Order.
How to Match Receipt with Purchase Order
To verify the procurement accuracy, the Precoro system can match Receipts against Purchase Orders and highlight serious discrepancies if there are any. It is done via the Matching and Tolerance Limit features. To do the Receipt-PO matching, you must first activate that functionality in the Basic Settings.
Please see the Matching Process article to learn more about the setup and available functionality.
How to See the Invoice Attachments When Creating Receipts
You can see attachments from the related Invoice when creating Receipts. This functionality will help you conveniently verify the information from the Invoice and receive precisely what is needed.
This functionality is available for users with:
- Receipt Create and any PO or Invoice roles (View, Create, or Approve).
- Receipt Create and Super User role.
To activate the setting, please go to Configuration → Basic Settings → Documents Setup → Receipts → Show Invoice attachments when creating Receipts.

On the Receipt creation page, you will be able to see the Invoice attachments:
How to Not Display Prices for Receipt Creators and Approvers
You can activate the setting to Not Display Prices in the Configuration → Basic Settings → Document Setup → Receipt. When active users with Create or Approve Receipt roles will not see prices in the document preview. Except for the Service Order Receipts, we will still display the Net Total amount even if the Not Display Prices setting is activated.
However, please note that users with Invoice or Purchase Order roles will always see the prices displayed, regardless of this setting.
How to Track the Items Delivery
You can track receiving items by the following statuses:
1. Not Received.
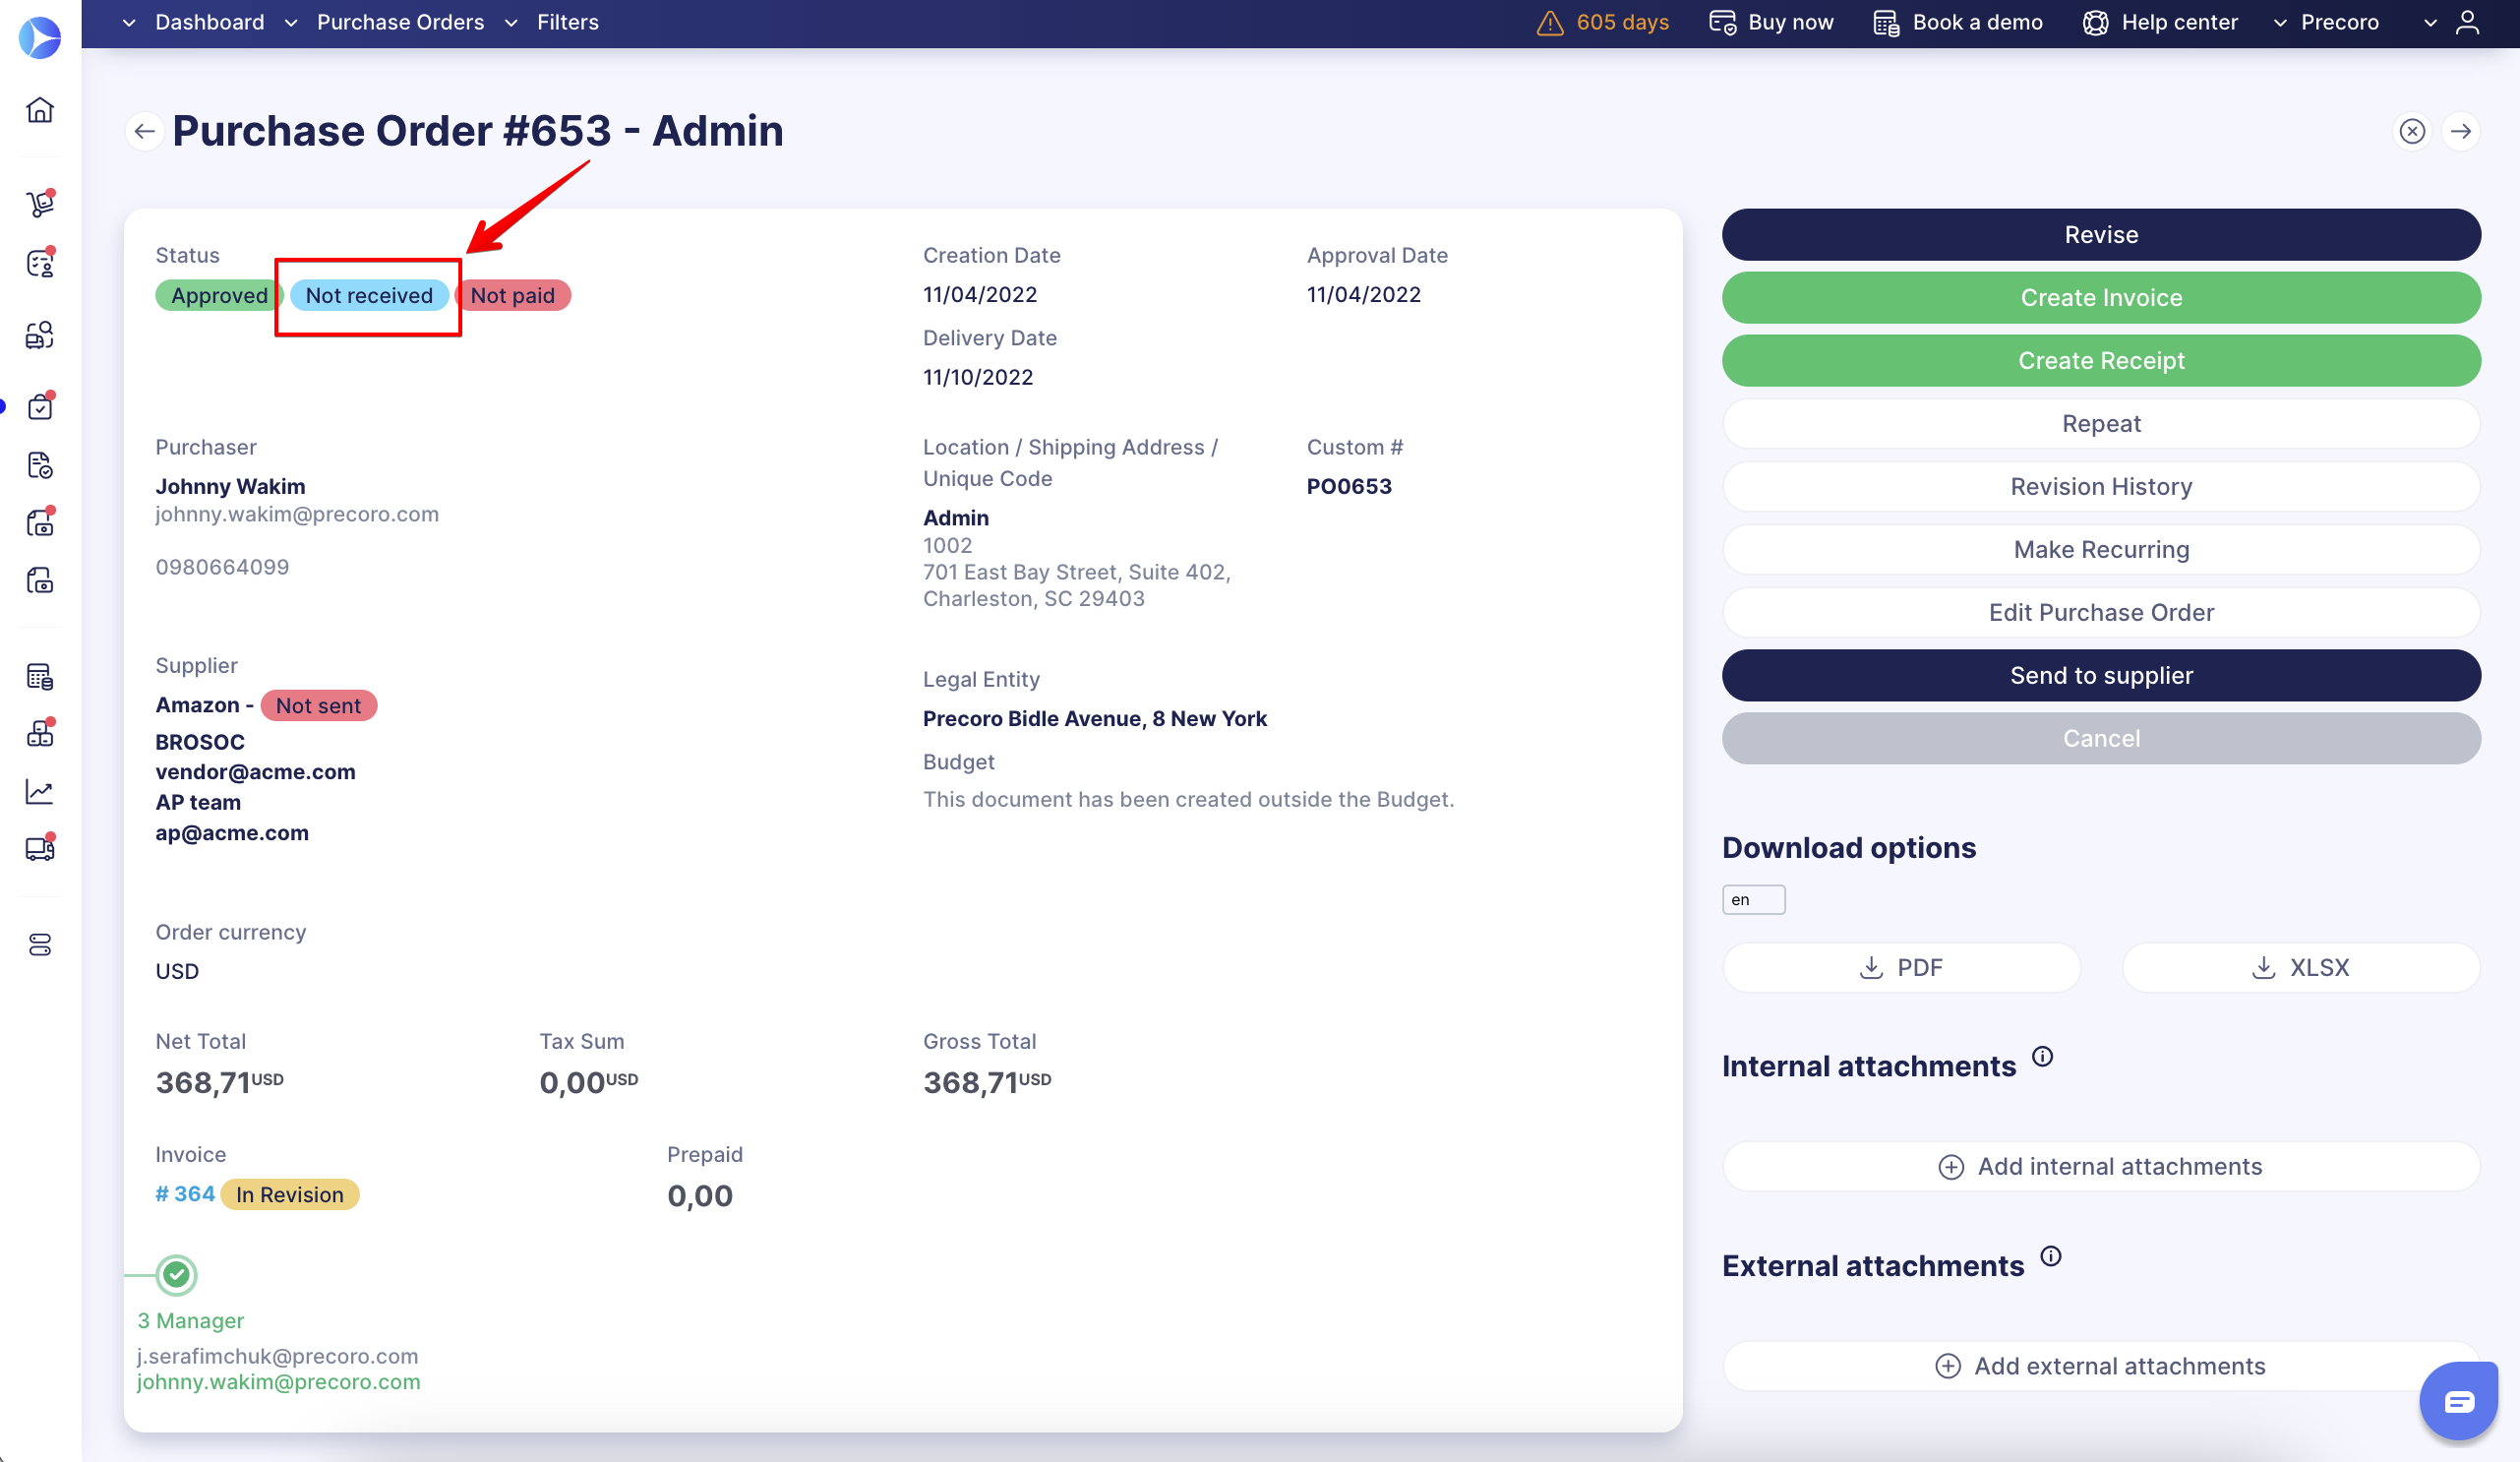
2. Partly Received — if you received only a part of the order.
Please note that if you did not receive some items, you should not add them to the Receipt. Just do not choose the appropriate line on the Receipt creation page.
3. Received — if you received a complete order.
Please note: Items added to the Receipt are not available for revision within the Purchase Order. To be able to adjust the items in PO, you should cancel all related receipts first.
How to Create Receipts in Bulk Using Multi-Select Function
You can select multiple Purchase Orders and create Receipts for all of them in one click.
This function is available to all users with Creator roles and access to the Receipt and Purchase Order modules.
To utilize this function:
- Open the Create Receipt page.
- Select the necessary Purchase Order documents by ticking them.
- Choose the Receive selected function.
In case you have the Receipt Approval Workflow in place, the documents you have selected to Receive will get the Pending status, and the set workflow logic you have will be executed.
How to Track Documents with Infocards
Track the Delivery Overdue Orders
Use an infocard on the Receipt management page that will allow you to see the Delivery Overdue orders. It will help you quickly manage those past the set Delivery Date documents that the Supplier still needs to send, or you still need to create the Receipts for.
The filtering parameters for this infocard include:
-
Delivery Date earlier than today.
-
Document Status that is Approved and Not Received.
Track the Pending Receipt Documents
You can instantly see the number of Pending Receipt documents with the infocard on the following pages:
- Purchase Order management page.
- Receipt management page, which redirects to the Purchase Order selection for the Receipt creation page.