TABLE OF CONTENTS
- How to Set Up Receipts Integration
- How to Send a Receipt to NetSuite
- Integrated Fields and Their Synchronization Method
How to Set Up the Receipts Integration
To set up the receipts integration:
- In Precoro, go to Configuration → Integrations.
- Locate NetSuite integration card → click the Update Settings button.
- In the Documents to Send field, select the Approved Purchase Orders and Receipts option.
- Click Save to record the changes.
💡Please note: You can also integrate the Approved Purchase Orders (without receipts). More information on this type of integration can be found here.
The receipts in NetSuite will be integrated into the Transactions → Purchases → Receive Orders → List section.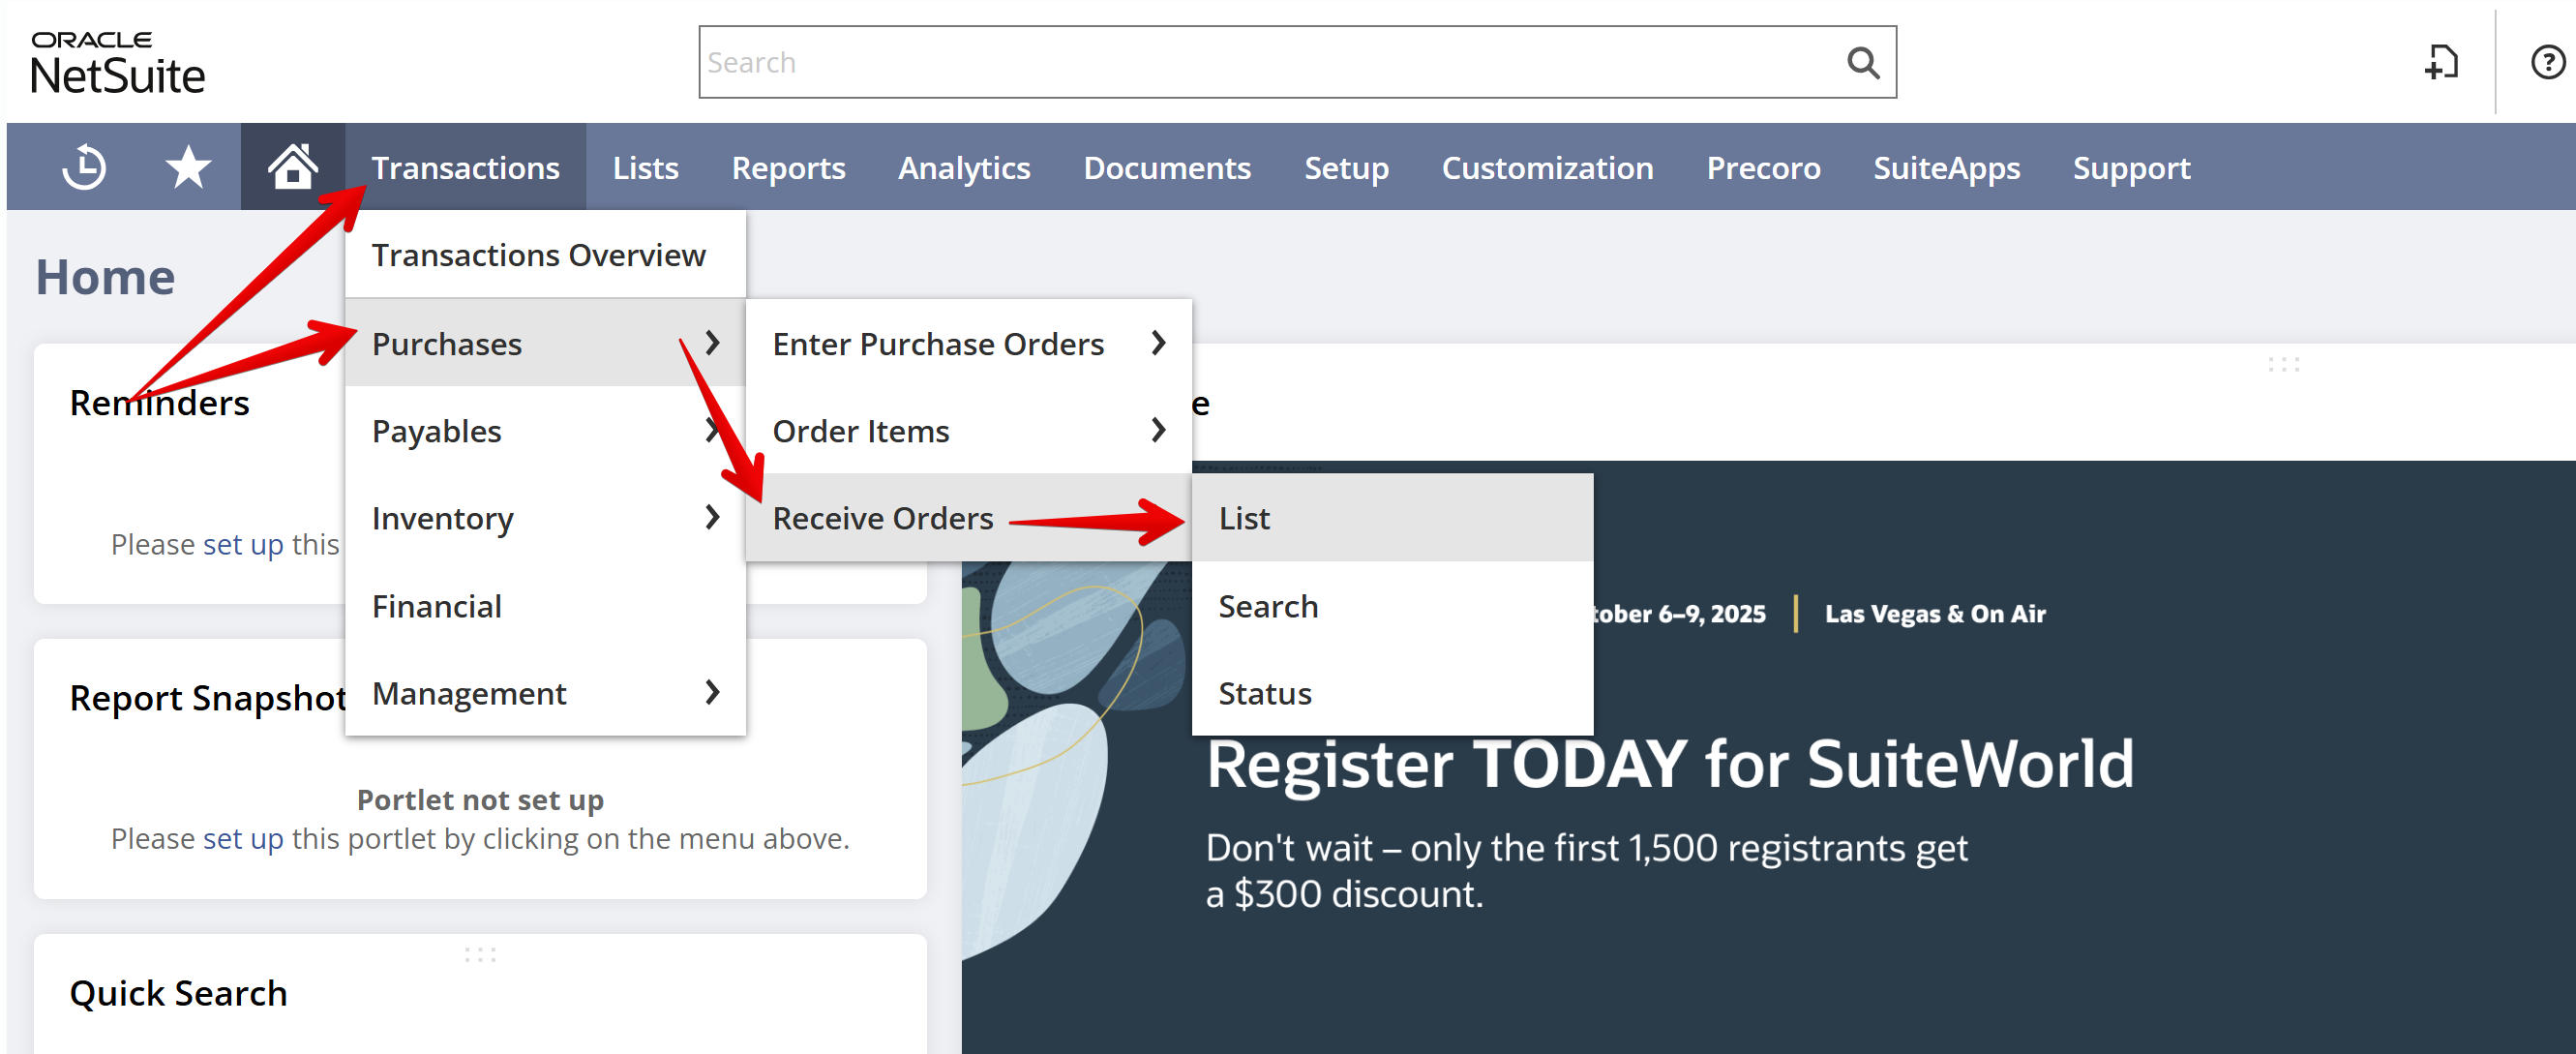
Once a receipt is integrated, you will also be able to find it on the related purchase order page in NetSuite in the Related Records → Receipts & Bills tab:

How to Send a Receipt to NetSuite
To send your receipt to NetSuite:
- Open the previously created Purchase Order → click the Add Receipt button.
- Select the received items → Next Step.
- Fill out all the necessary details → Create.
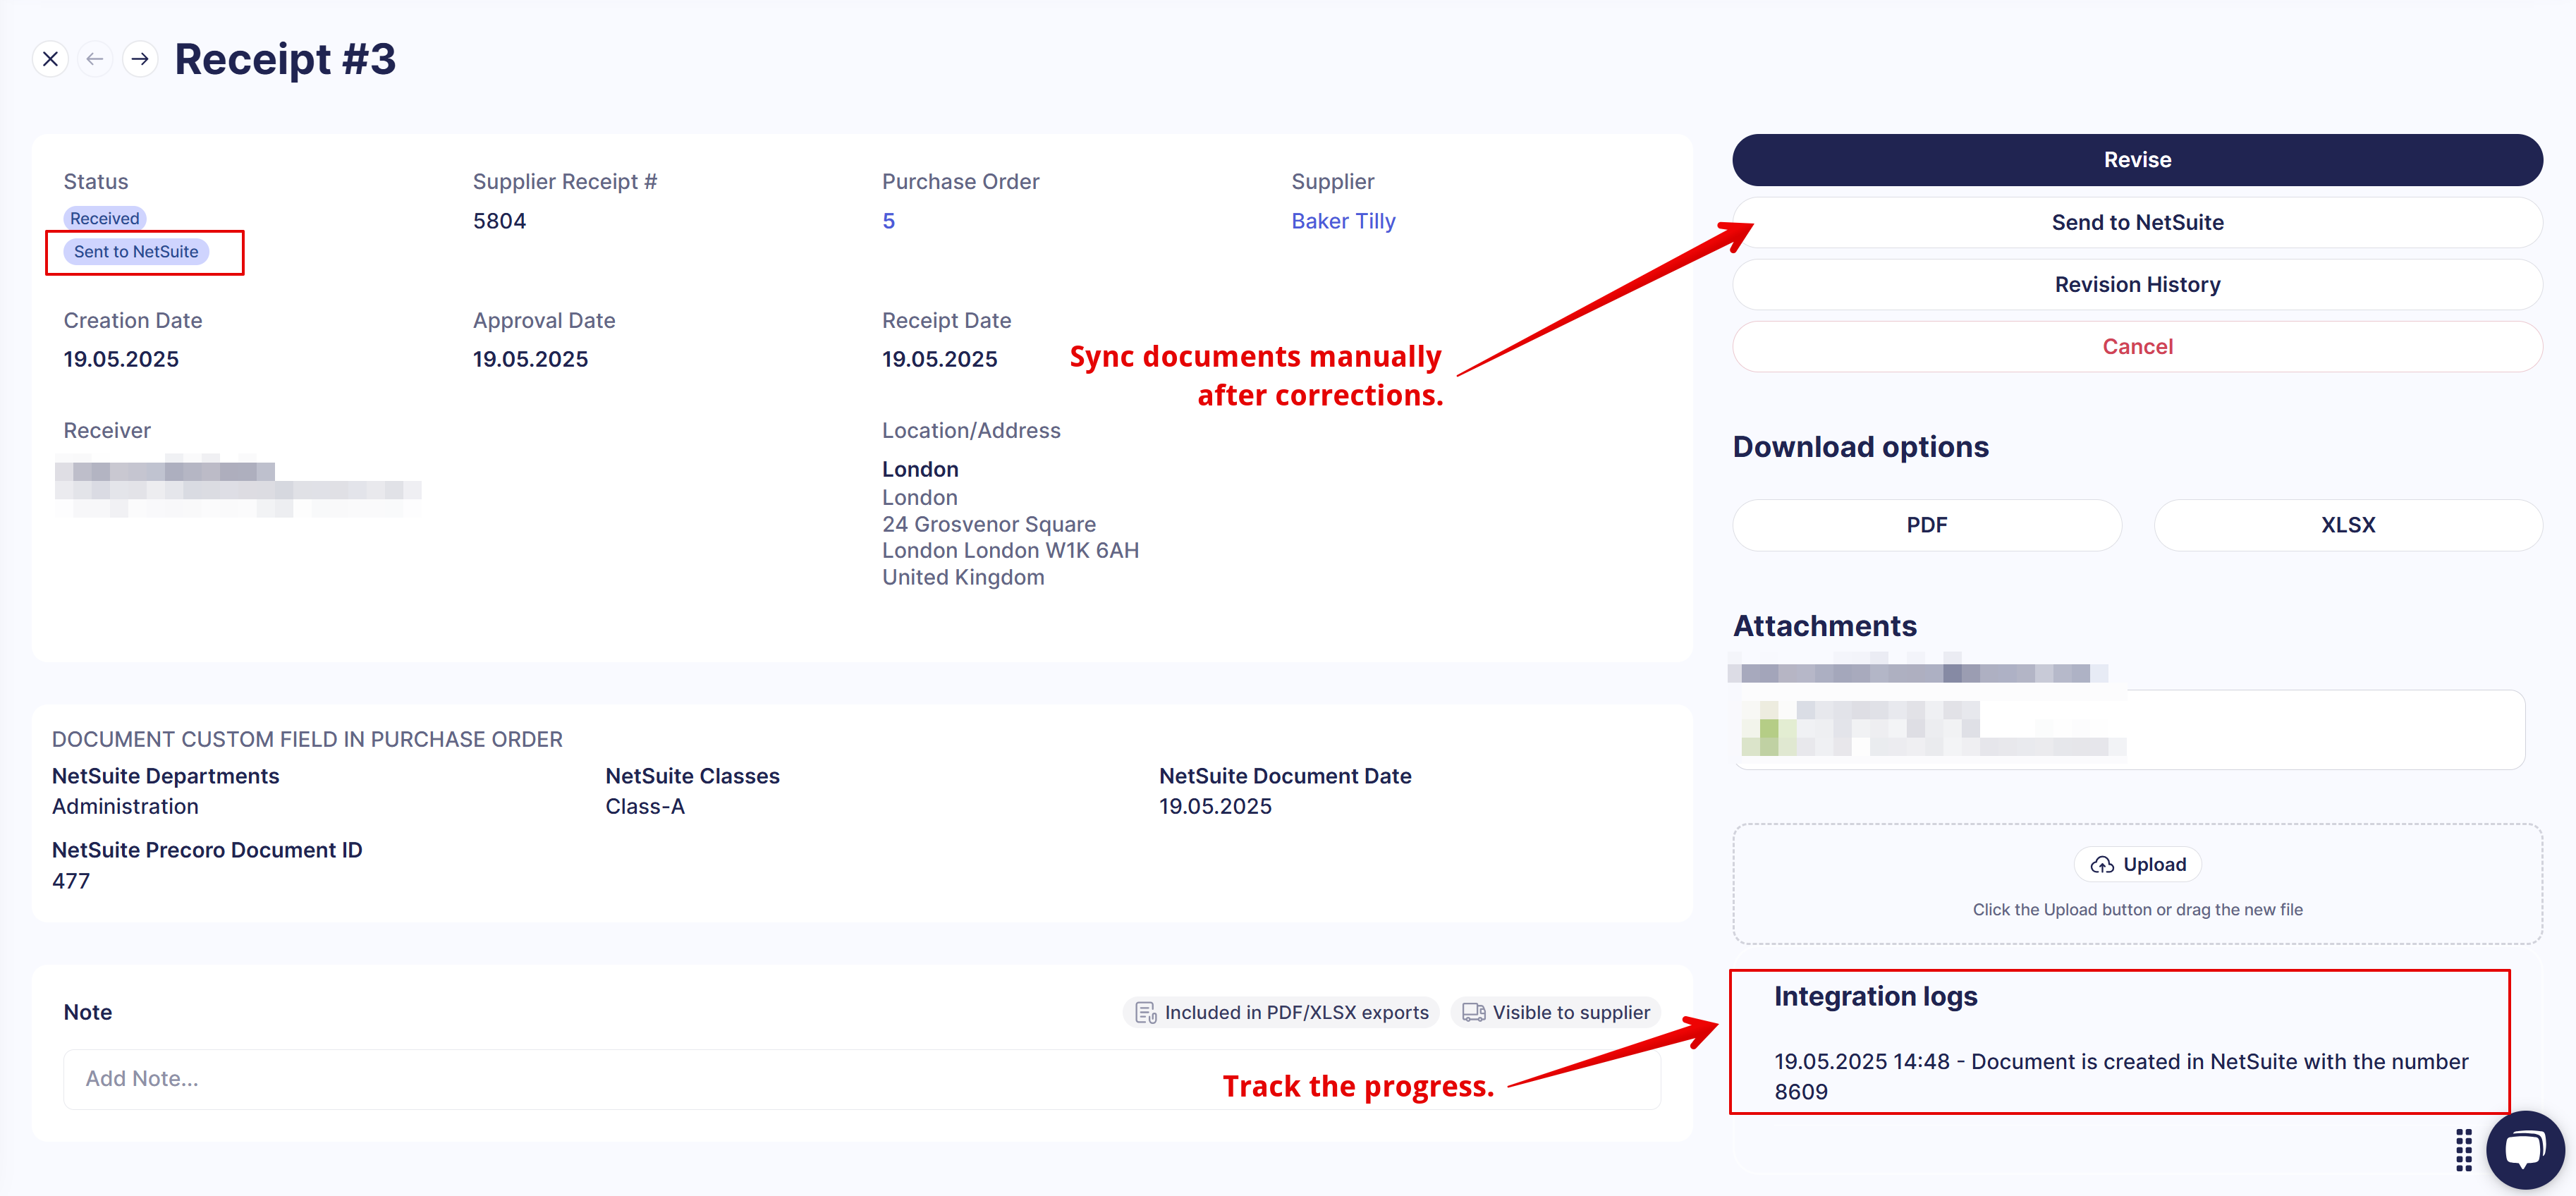
- The receipt will be sent to NetSuite automatically. You can check the Integration logs tab on the Receipt page for detailed information (including confirmation of a successful import or details about any issues that occurred during the process).
💡Please note: If you make any changes to the imported document and want to sync them with NetSuite, use the Send to NetSuite button.
Integrated Fields and Their Synchronization Method
The integration uses one-way synchronization, therefore:
- Documents created in Precoro will be transferred to NetSuite.
- Documents created in NetSuite will not be sent to Precoro.
Here’s how the data mapping works:
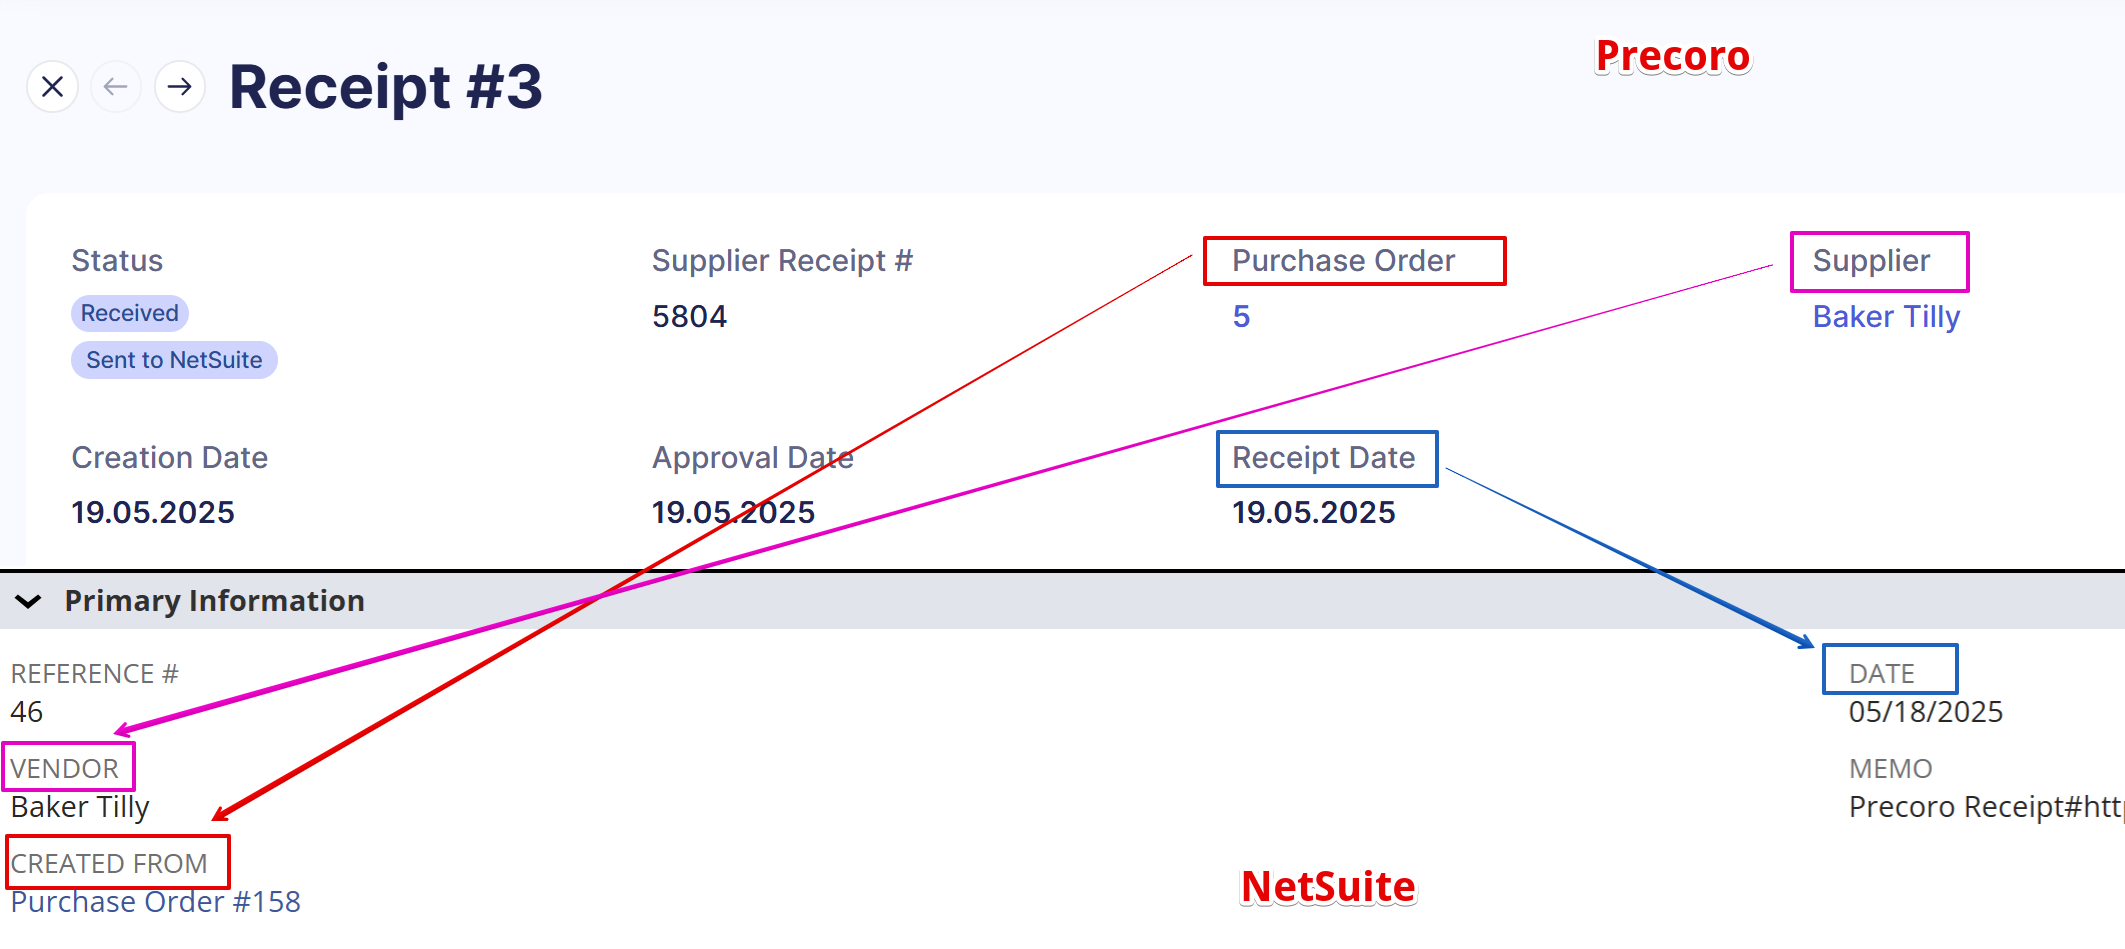
Primary Information Mapping
| Field in Precoro | Field in NetSuite |
| Purchase Order | Created From |
| Supplier | Vendor |
| Receipt Date | Date |
 |
|
Attachments Mapping
Attachments from Precoro Receipt are transferred to the Files tab in NetSuite.
How the Items Mapping Works
💡Please note: You can find more detailed information about items integration here.
The way items are added in Precoro affects how they appear in NetSuite:
- Items added via the Item Management page using the Add Item button that were previously integrated will be transferred to the Items tab in NetSuite.
- Items added from the Item Management page → Add Item button, but not integrated, will be transferred to the Expenses tab in NetSuite.
- Items added manually using the Add empty row button will be transferred to the Expenses tab in NetSuite.
Here’s how the mapping of manually added items works:
| Field in Precoro | Field in NetSuite |
| Item Name | Description |
 |
|
Here’s how the mapping of items added from the Item Management page works:
| Fields in Precoro | Fields in NetSuite |
| Item Name | Item |
| NetSuite Locations | To Location |
| Quantity | Quantity |
 |
|
FAQs