TABLE OF CONTENTS
How to Export Items from NetSuite
Overview and Requirements
You can find your items list in NetSuite in the Lists → Accounting → Items section.
Before setting up the items integration, please pay attention to the following points:
- Make sure to first integrate all mandatory lists and any lists used by your items in NetSuite. These may include Accounts, Departments, Customers/Projects, Vendors, or Locations. This ensures that when you integrate items, they will be correctly assigned to the corresponding items in Precoro.
- If multiple integrations are configured, records will be exported based on the subsidiary’s availability rule. An item will only be exported to the Precoro company if it is available to the subsidiary with which it is integrated.
You can integrate items in several ways:
Option 1: Mass Export
To export items in bulk:
- In NetSuite, navigate to Precoro → Configuration → Integrations.
- In the Export Lists tab, click Export next to Items.
- Only items available for integrated subsidiaries will appear on the Items Export page. Select the items to export, or click Mark All to select all on the current page. If you switch pages, selections will be reset, so each page must be exported separately.
- Click Export. The selected items will appear in Precoro within 15 seconds. For large numbers of items, the integration will occur in batches, and the data will appear in Precoro gradually.
- Repeat the process for other pages if necessary.
💡Please note: The “Sync to Precoro” checkbox will be automatically enabled for all exported records.
Option 2: Single Record Export
To export a specific item:
- Navigate to Lists → Accounting → Items.
- Click Edit next to the desired item (or click New Item to create one).
- Enable the Sync to Precoro checkbox.
- Click Save. The item will appear in Precoro within 15 seconds.
Option 3: Import Items in Precoro
To import items in Precoro:
- Go to Precoro → Item Management page → Item Management.
- Click the Import from NetSuite button.
- Select the items you want to import or click Select All (if you need to integrate all of them). You can also use the search bar to quickly find a particular item and check the currency imported from either the Item’s Currency setting or the Preferred Vendor’s Purchase Prices.
- Click Import to complete the process.
- The selected items have been successfully imported into Precoro.
How to Sync New Items by Default
To enable automatic syncing for all newly created items:
- In NetSuite, go to Precoro → Configuration → Integrations.
- Open the Global Settings tab.
- In the Sync New Records by Default section, enable the Items checkbox.
- Click OK to confirm the synchronization. All new items will now be synced automatically.
💡 Please note: You can manually uncheck the “Sync to Precoro” checkbox when creating a new item. In this case, the item will not be synced with Precoro.
How the Updates Work
Updates to the integrated items from NetSuite to Precoro occur in real time as soon as changes are saved in NetSuite.
For the update to occur, the “Sync to Precoro” checkbox must be enabled for the corresponding item.
Item Types That Can Be Integrated with Precoro
Precoro supports the following item types for integration with NetSuite::
- Inventory Item
- Non-Inventory Item:
- For Purchase
- For Resale
- Other Charge:
- For Purchase
- For Resale
- Service:
- For Purchase
- For Resale
When integrating document items into NetSuite, the behavior depends on how the items were added in Precoro:
- If you add previously integrated items in Precoro via the Item Management page → Add Item button, they will be displayed in the Items tab in NetSuite.
- If you add non-integrated items via the Item Management page, they will be integrated into the Expenses tab in NetSuite.
- If you add items manually via the Add Empty Row button in Precoro, they will be displayed in the Expenses tab in NetSuite.
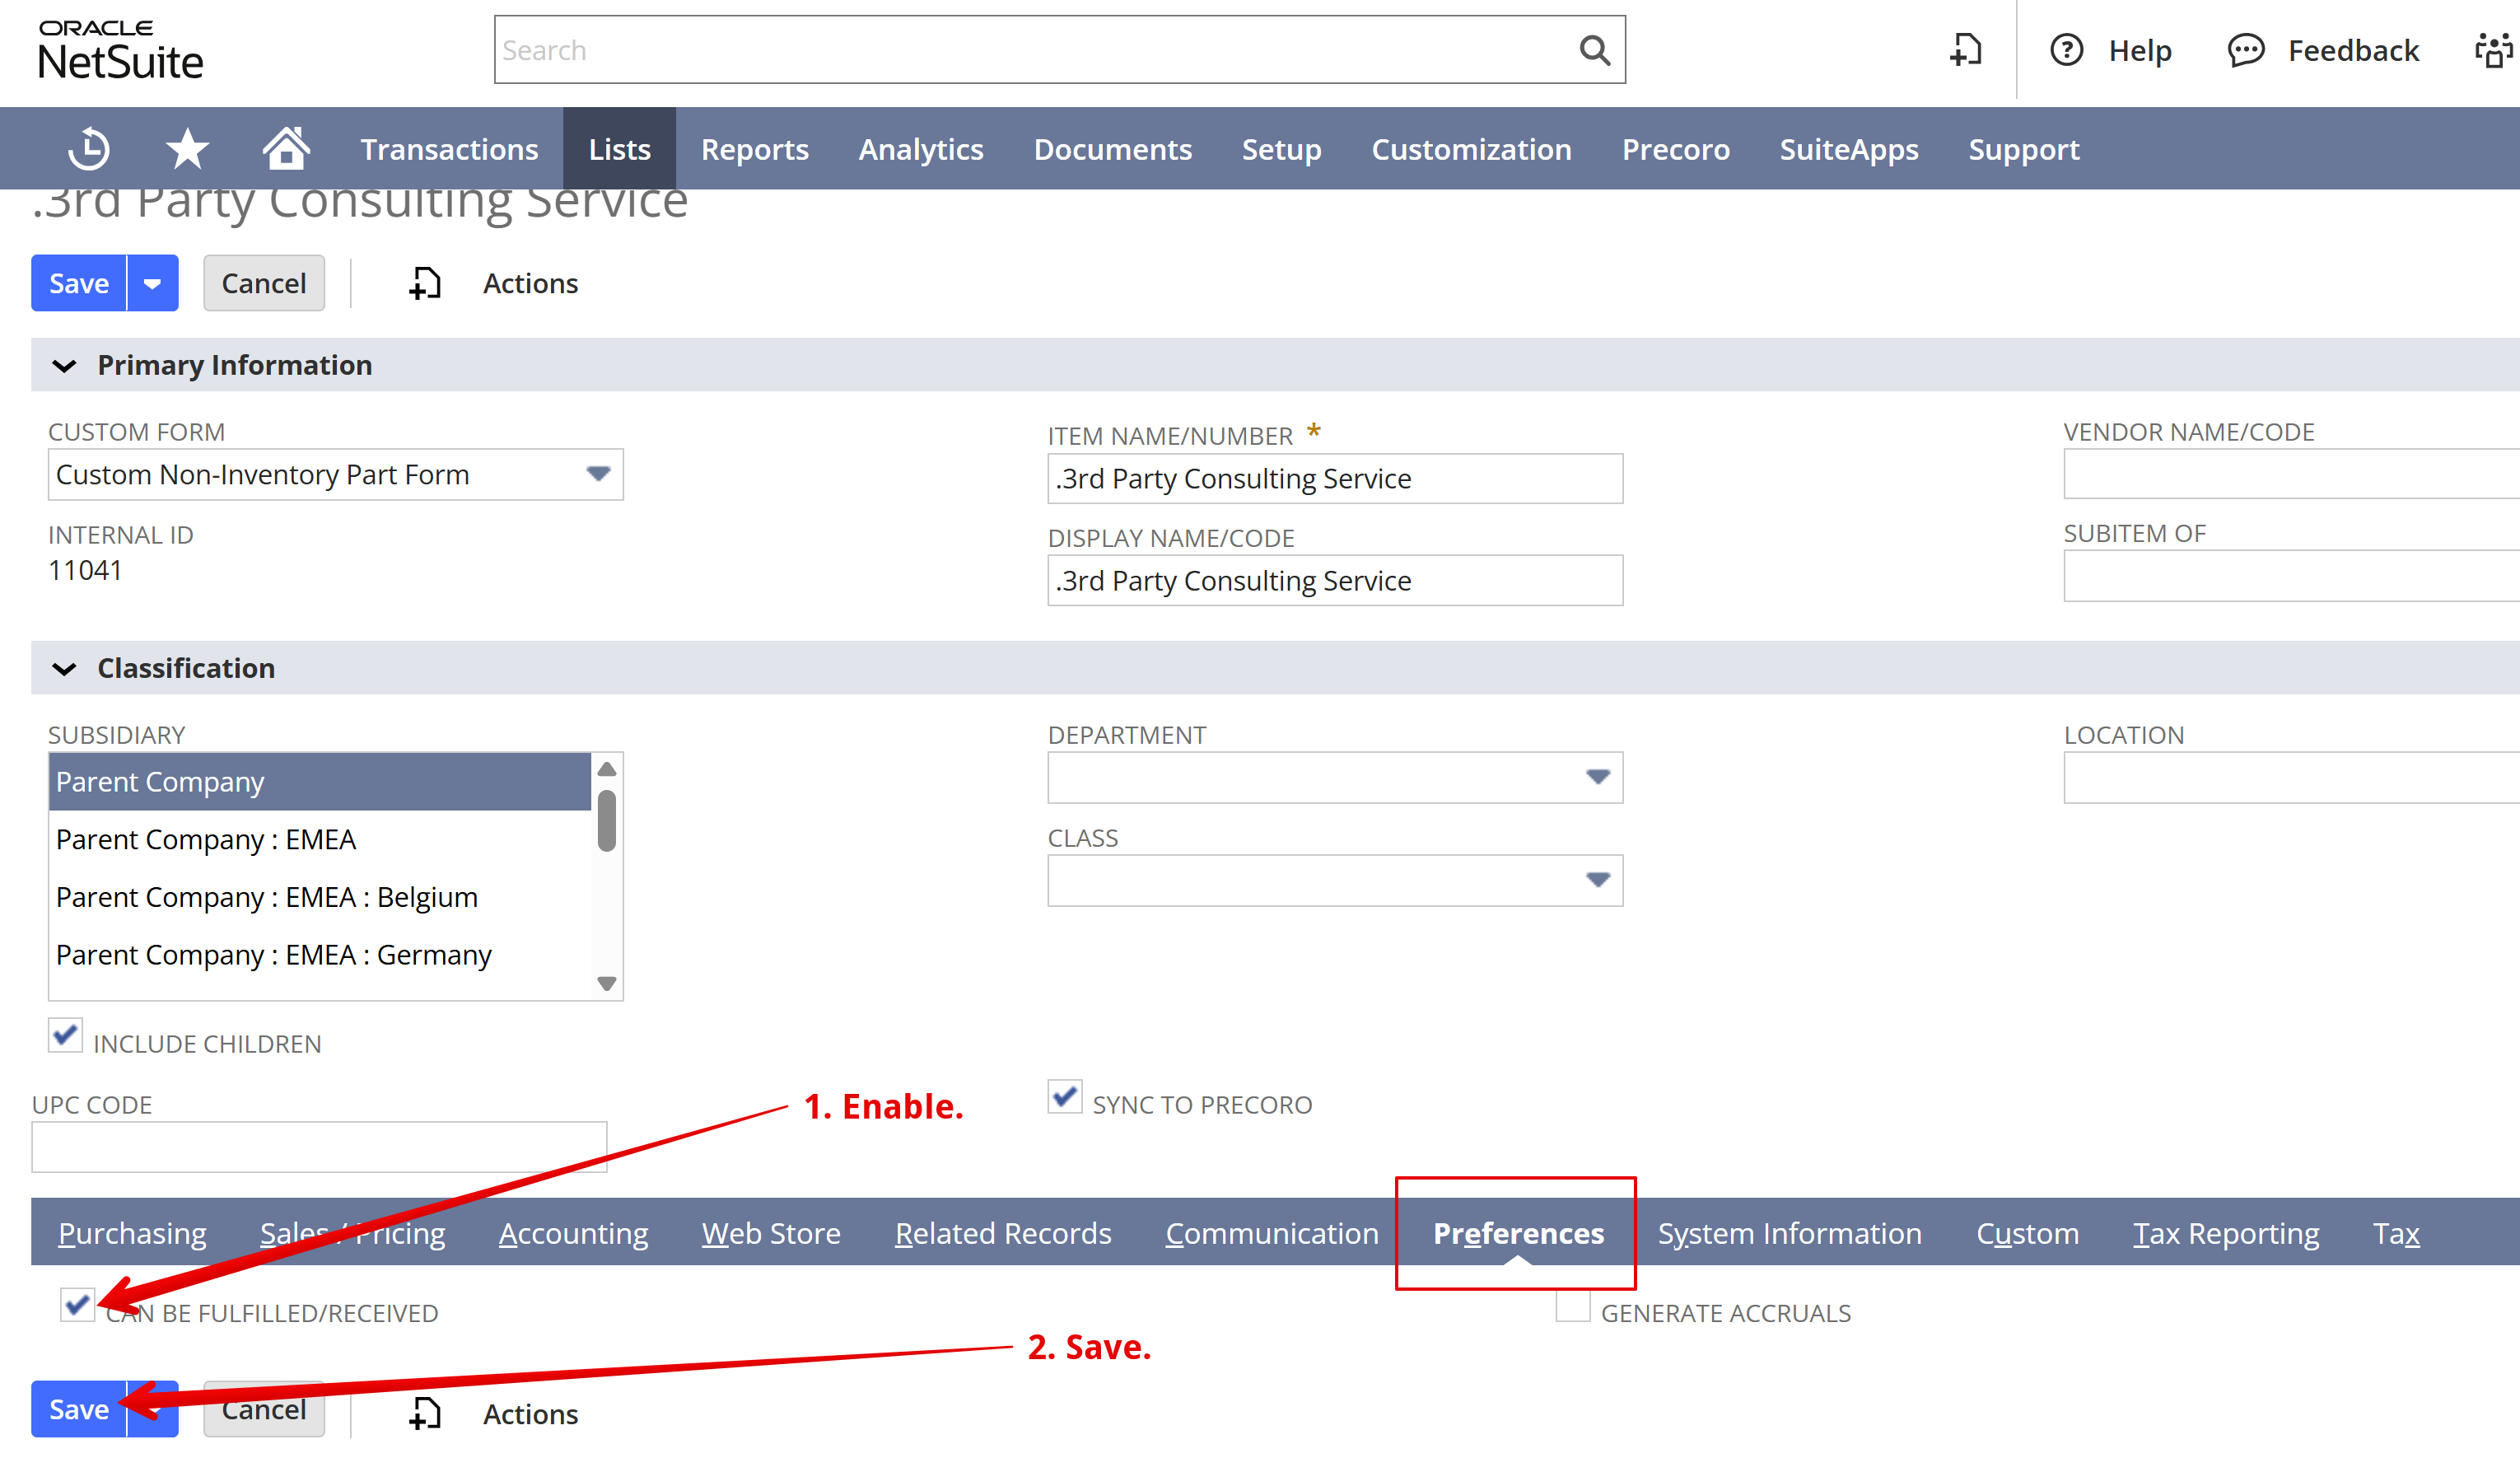
To ensure the successful export of item data from Precoro to NetSuite, each item type must have the Can Be Fulfilled/Received setting enabled.
To activate this setting in NetSuite:
- Go to Lists → Accounting → Items in NetSuite.
- Click Edit next to the required item.
- In the Preferences tab, enable the Can Be Fulfilled/Received setting.
- Click Save to record the changes.
Integrated Fields and Their Synchronization Method
There are two types of item integrations between NetSuite and Precoro, depending on the fields used in the item form within NetSuite.
To select the appropriate integration type:
- In NetSuite, navigate to Precoro → Configuration → Integrations.
- Open the Global Settings tab.
- In the Other Settings section, configure the Integrate Item Vendor Code As SKU checkbox according to your requirements:
- When enabled, the item vendor code is integrated as SKU (the setting is enabled by default):
Item field in NetSuite Item field in Precoro Notes Primary Information section in NetSuite Item Name/Number Name Vendors section in NetSuite Vendor Code SKU The Vendor should be marked as preferred. - When disabled, the item name is integrated as SKU.
Item field in NetSuite Item field in Precoro Primary Information section in NetSuite Item Name/Number SKU Display Name/Number Name
- When enabled, the item vendor code is integrated as SKU (the setting is enabled by default):
- Click OK to confirm the changes.
Precoro also currently syncs the following item information from NetSuite:
💡Please note: The integration uses one-way synchronization, therefore:
- Changes in NetSuite are reflected in Precoro
- Changes in Precoro are not reflected in NetSuite
|
Item field in NetSuite |
Item field in Precoro |
Notes |
|
Classification section in NetSuite |
||
|
Department |
NetSuite Departments (as Custom Fields for Items) |
|
|
Location |
NetSuite Locations (as Custom Fields for Items) |
|
|
Class |
NetSuite Classes (as Custom Fields for Items) |
|
|
Expense Account |
NetSuite Chart of Accounts (as Custom Fields for Items) |
|
|
Vendors section in NetSuite |
||
|
Vendor |
Supplier |
The Vendor should be marked as preferred. |
|
Purchase Price |
Price |
The Vendor should be marked as preferred. |
|
Currency |
Currency |
The Vendor should be marked as preferred. |
Character Limits for Item Fields in NetSuite
NetSuite enforces the following character limits:
- Item name/number: 250 characters
- Vendor code/name: 250 characters
- Display name/code: 250 characters
- Purchase price: numbers up to 10,000,000,000,000,000.999999999999999
- Purchase description: 4000 characters
FAQs