TABLE OF CONTENTS
- How to Set Up the Invoices Integration
- How to Send an Invoice to NetSuite
- Integrated Fields and Their Synchronization Method
- How the Items Mapping Works
- How to Create and Sync the Related Payments
- How to Enable and Use the Credit Notes Integration
- How to Track the Not Sent Documents
How to Set Up the Invoices Integration
To set up the invoices integration:
- In Precoro, go to Configuration → Integrations.
- Locate NetSuite integration card → click the Update Settings button.
- In the Documents to Send field, select the Approved Invoices option.
- Click Save to record the changes.
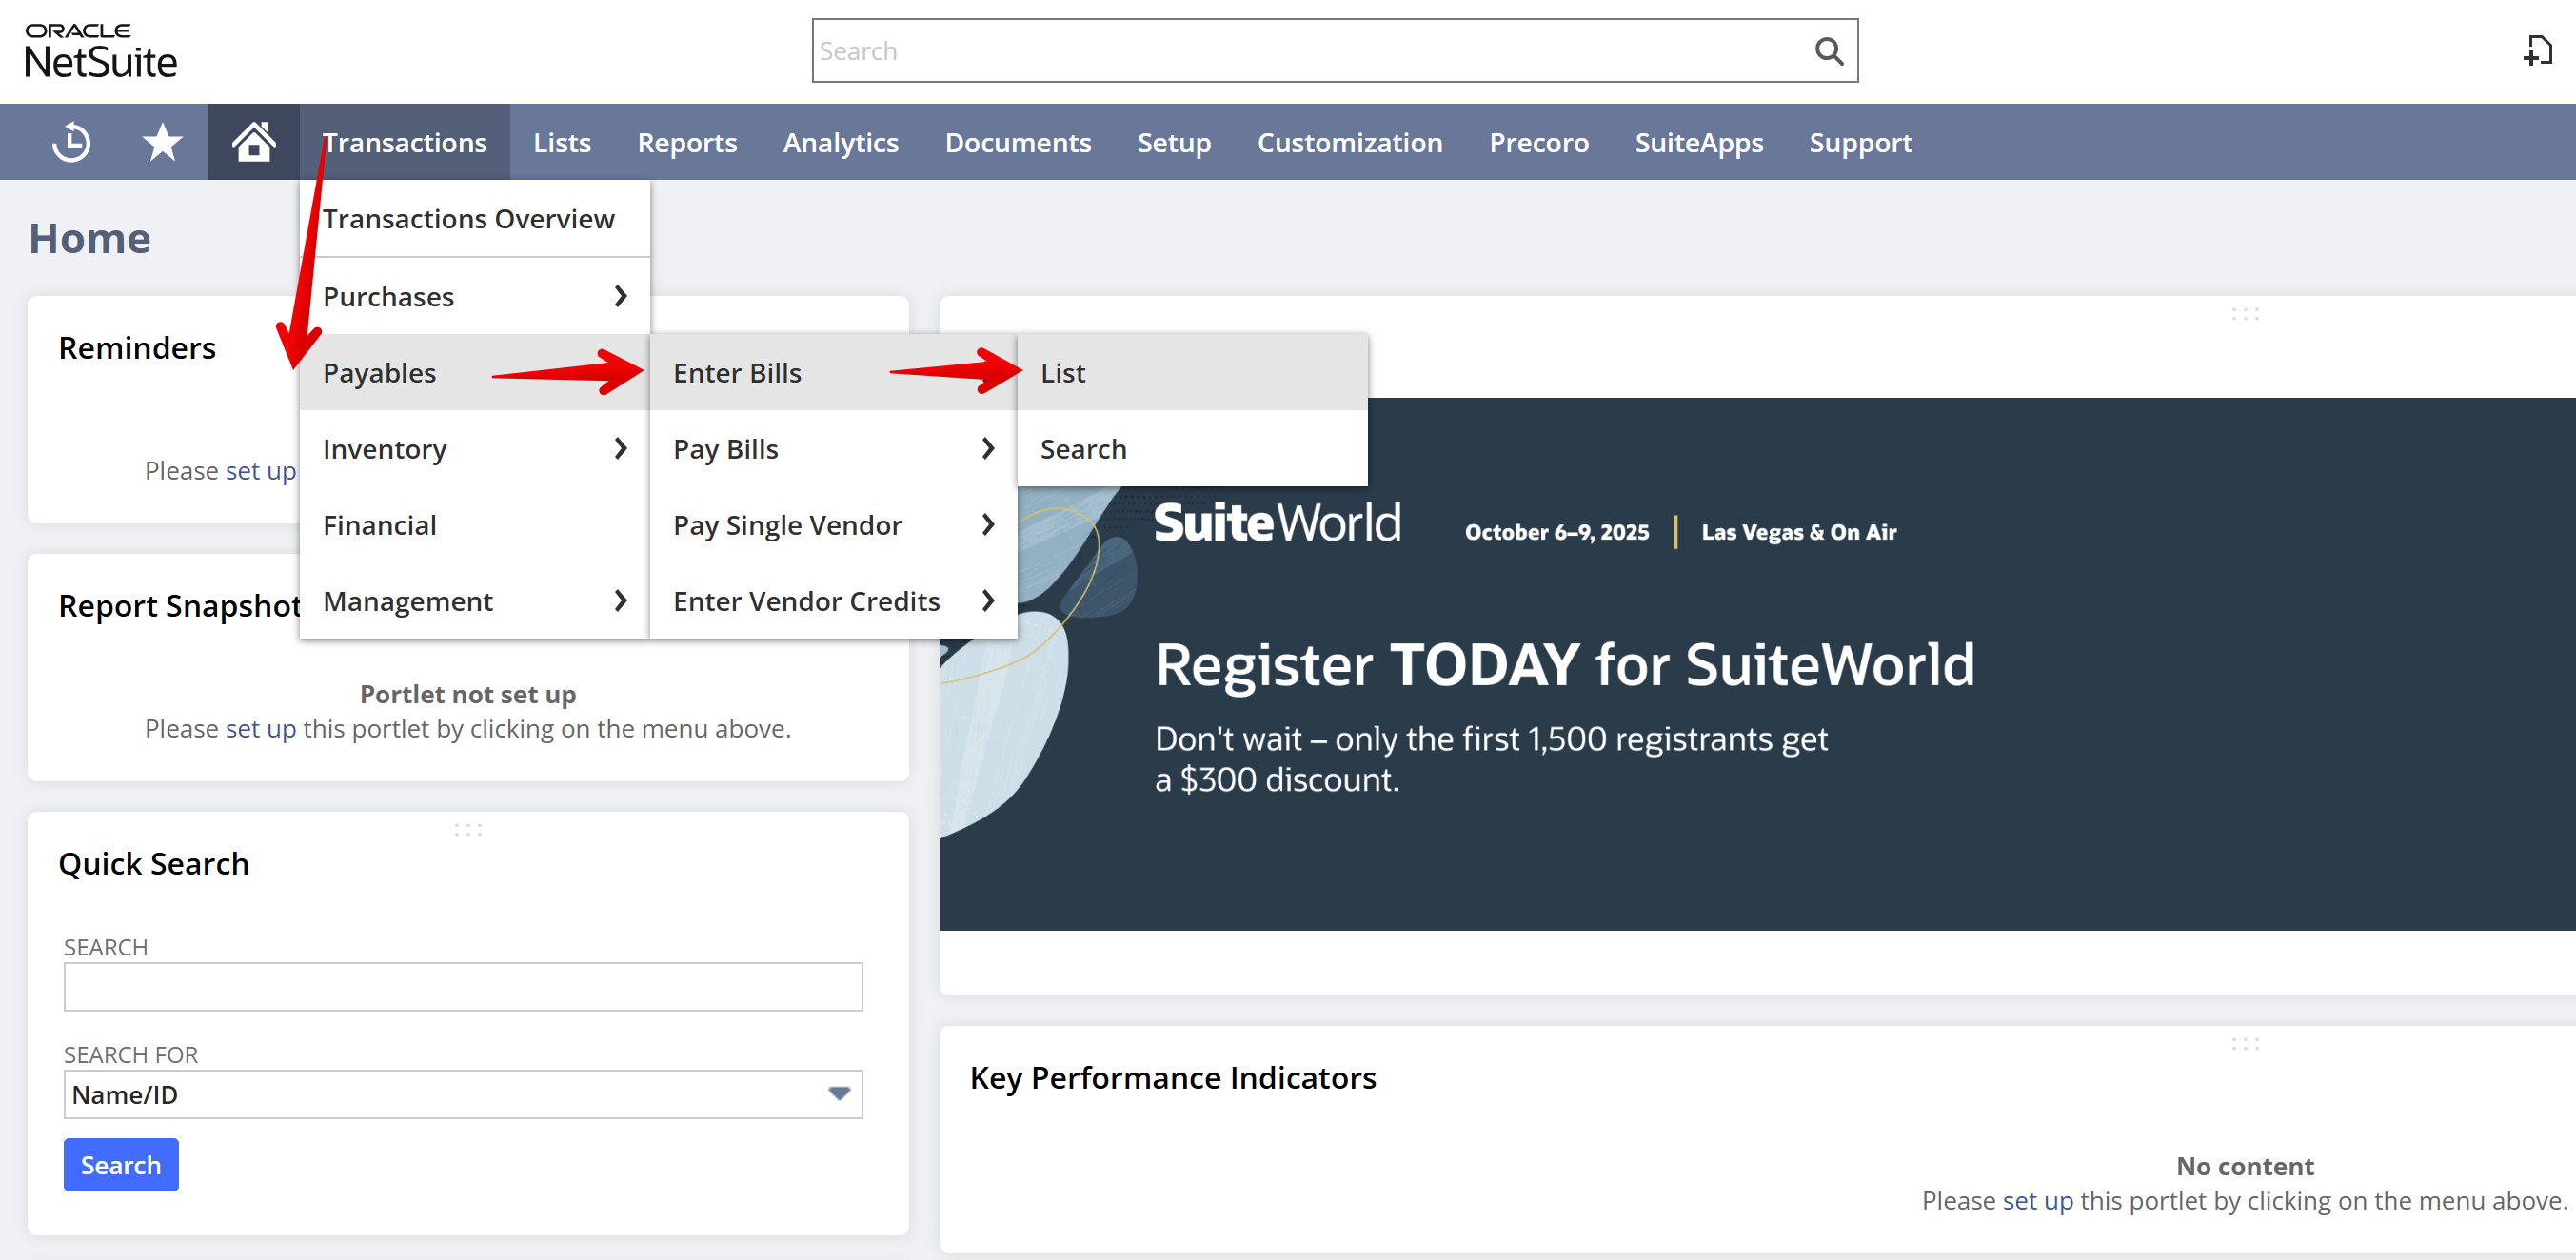
The invoices in NetSuite will be integrated into the Transactions → Payables → Enter Bills → List.
How to Send an Invoice to NetSuite
You can create an invoice from scratch or from your PO. Check the How to Create and Track an Invoice article for a full guide if necessary.
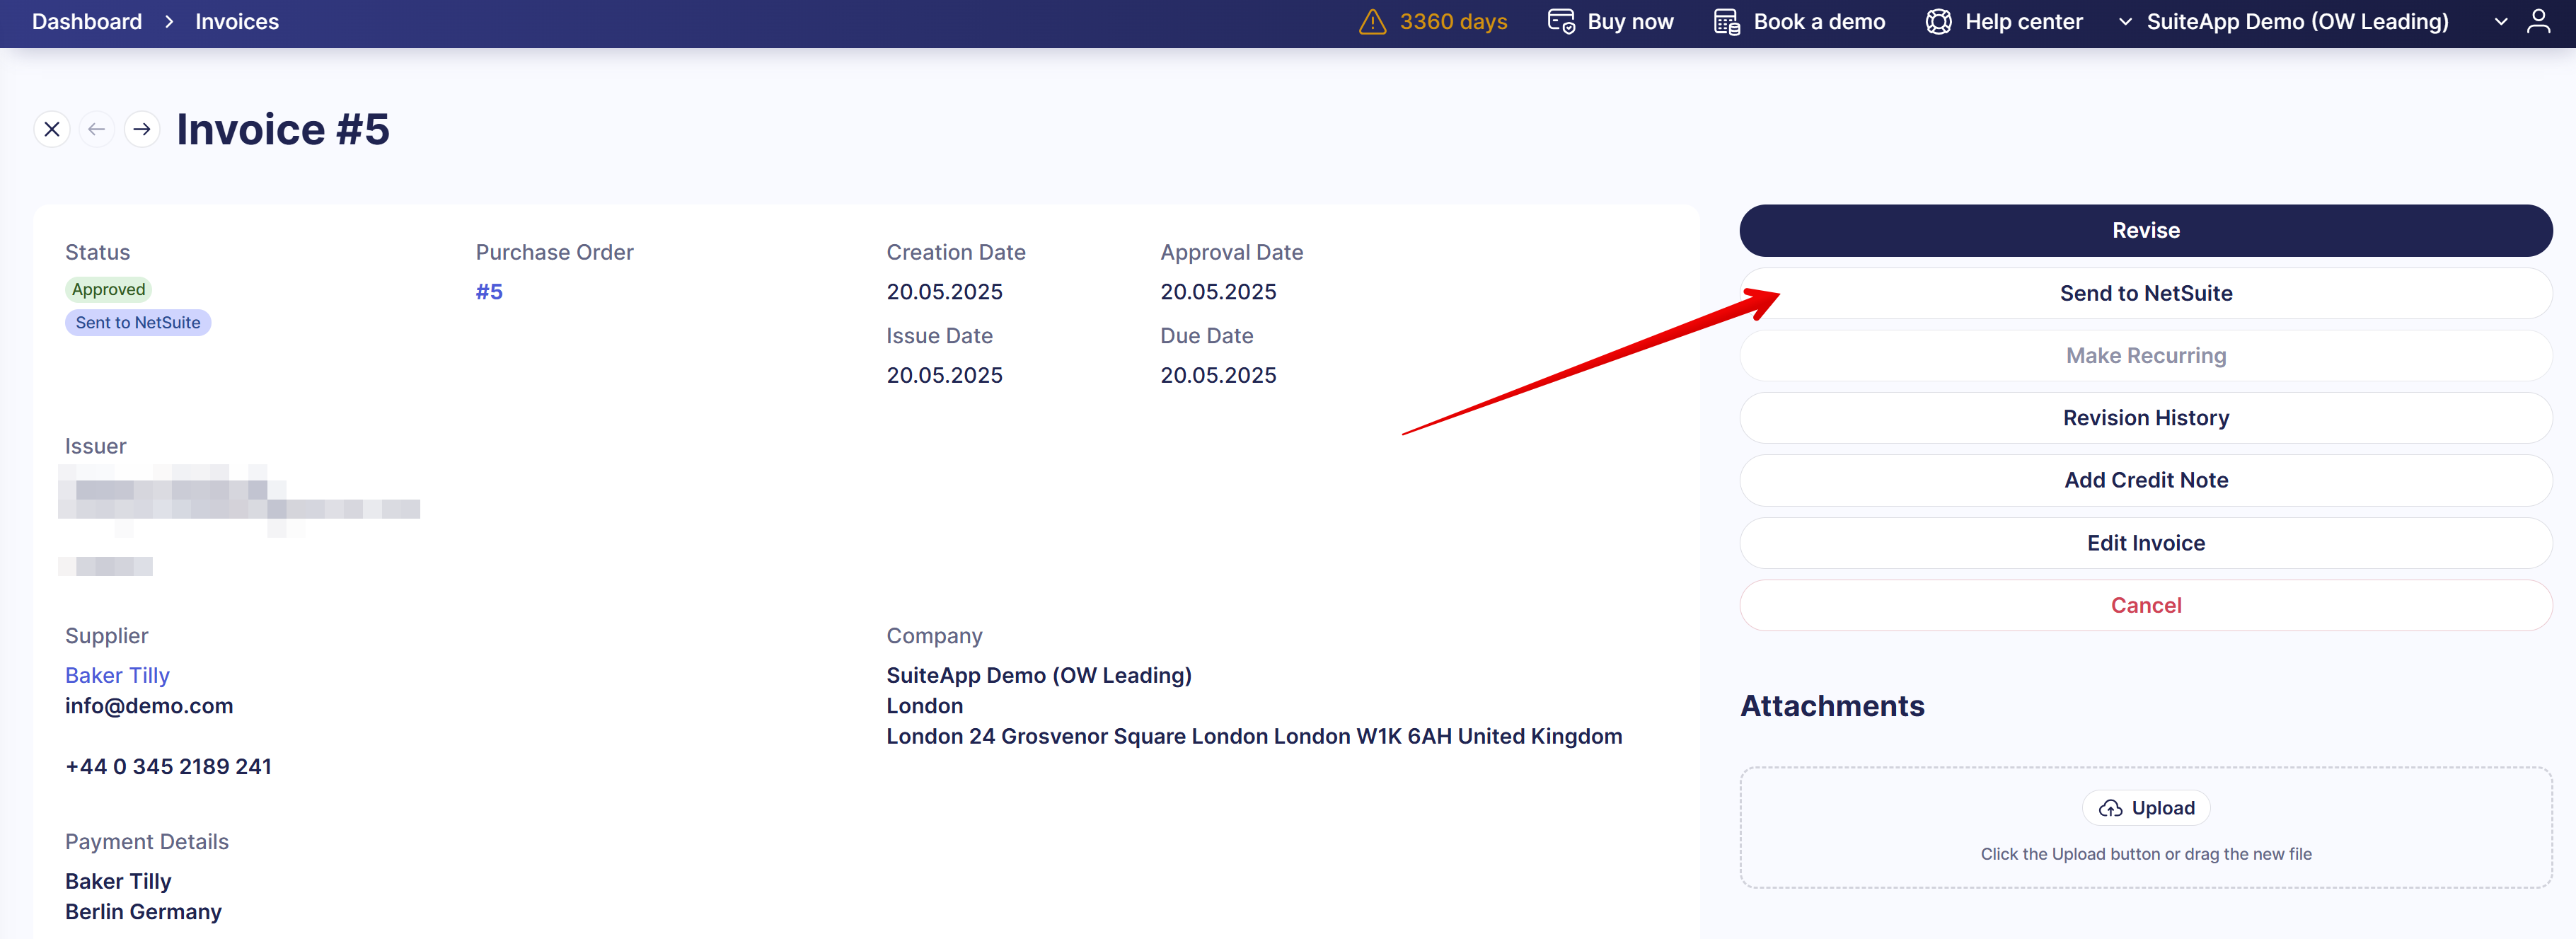
Once the invoice is created, it will be sent to NetSuite automatically. You can check the Integration logs tab on the Invoice page for detailed information (including confirmation of a successful import or details about any issues that occurred during the process).
💡Please note: If you make any changes to the imported document and want to sync them with NetSuite, use the Send to NetSuite button.
How to Send Pending Invoices to NetSuite
To enable sending invoices in the Pending status to NetSuite, please contact our Support Team.
Once the feature is activated, it will be available for users with the Create and Approve Invoices roles.
When the document acquires the Approved status, the current system logic will work out, and the document will be sent to NetSuite automatically.
Integrated Fields and Their Synchronization Method
The integration uses one-way synchronization, therefore:
- Documents created in Precoro will be transferred to NetSuite.
- Documents created in NetSuite will not be sent to Precoro.
Here’s how the data mapping works:
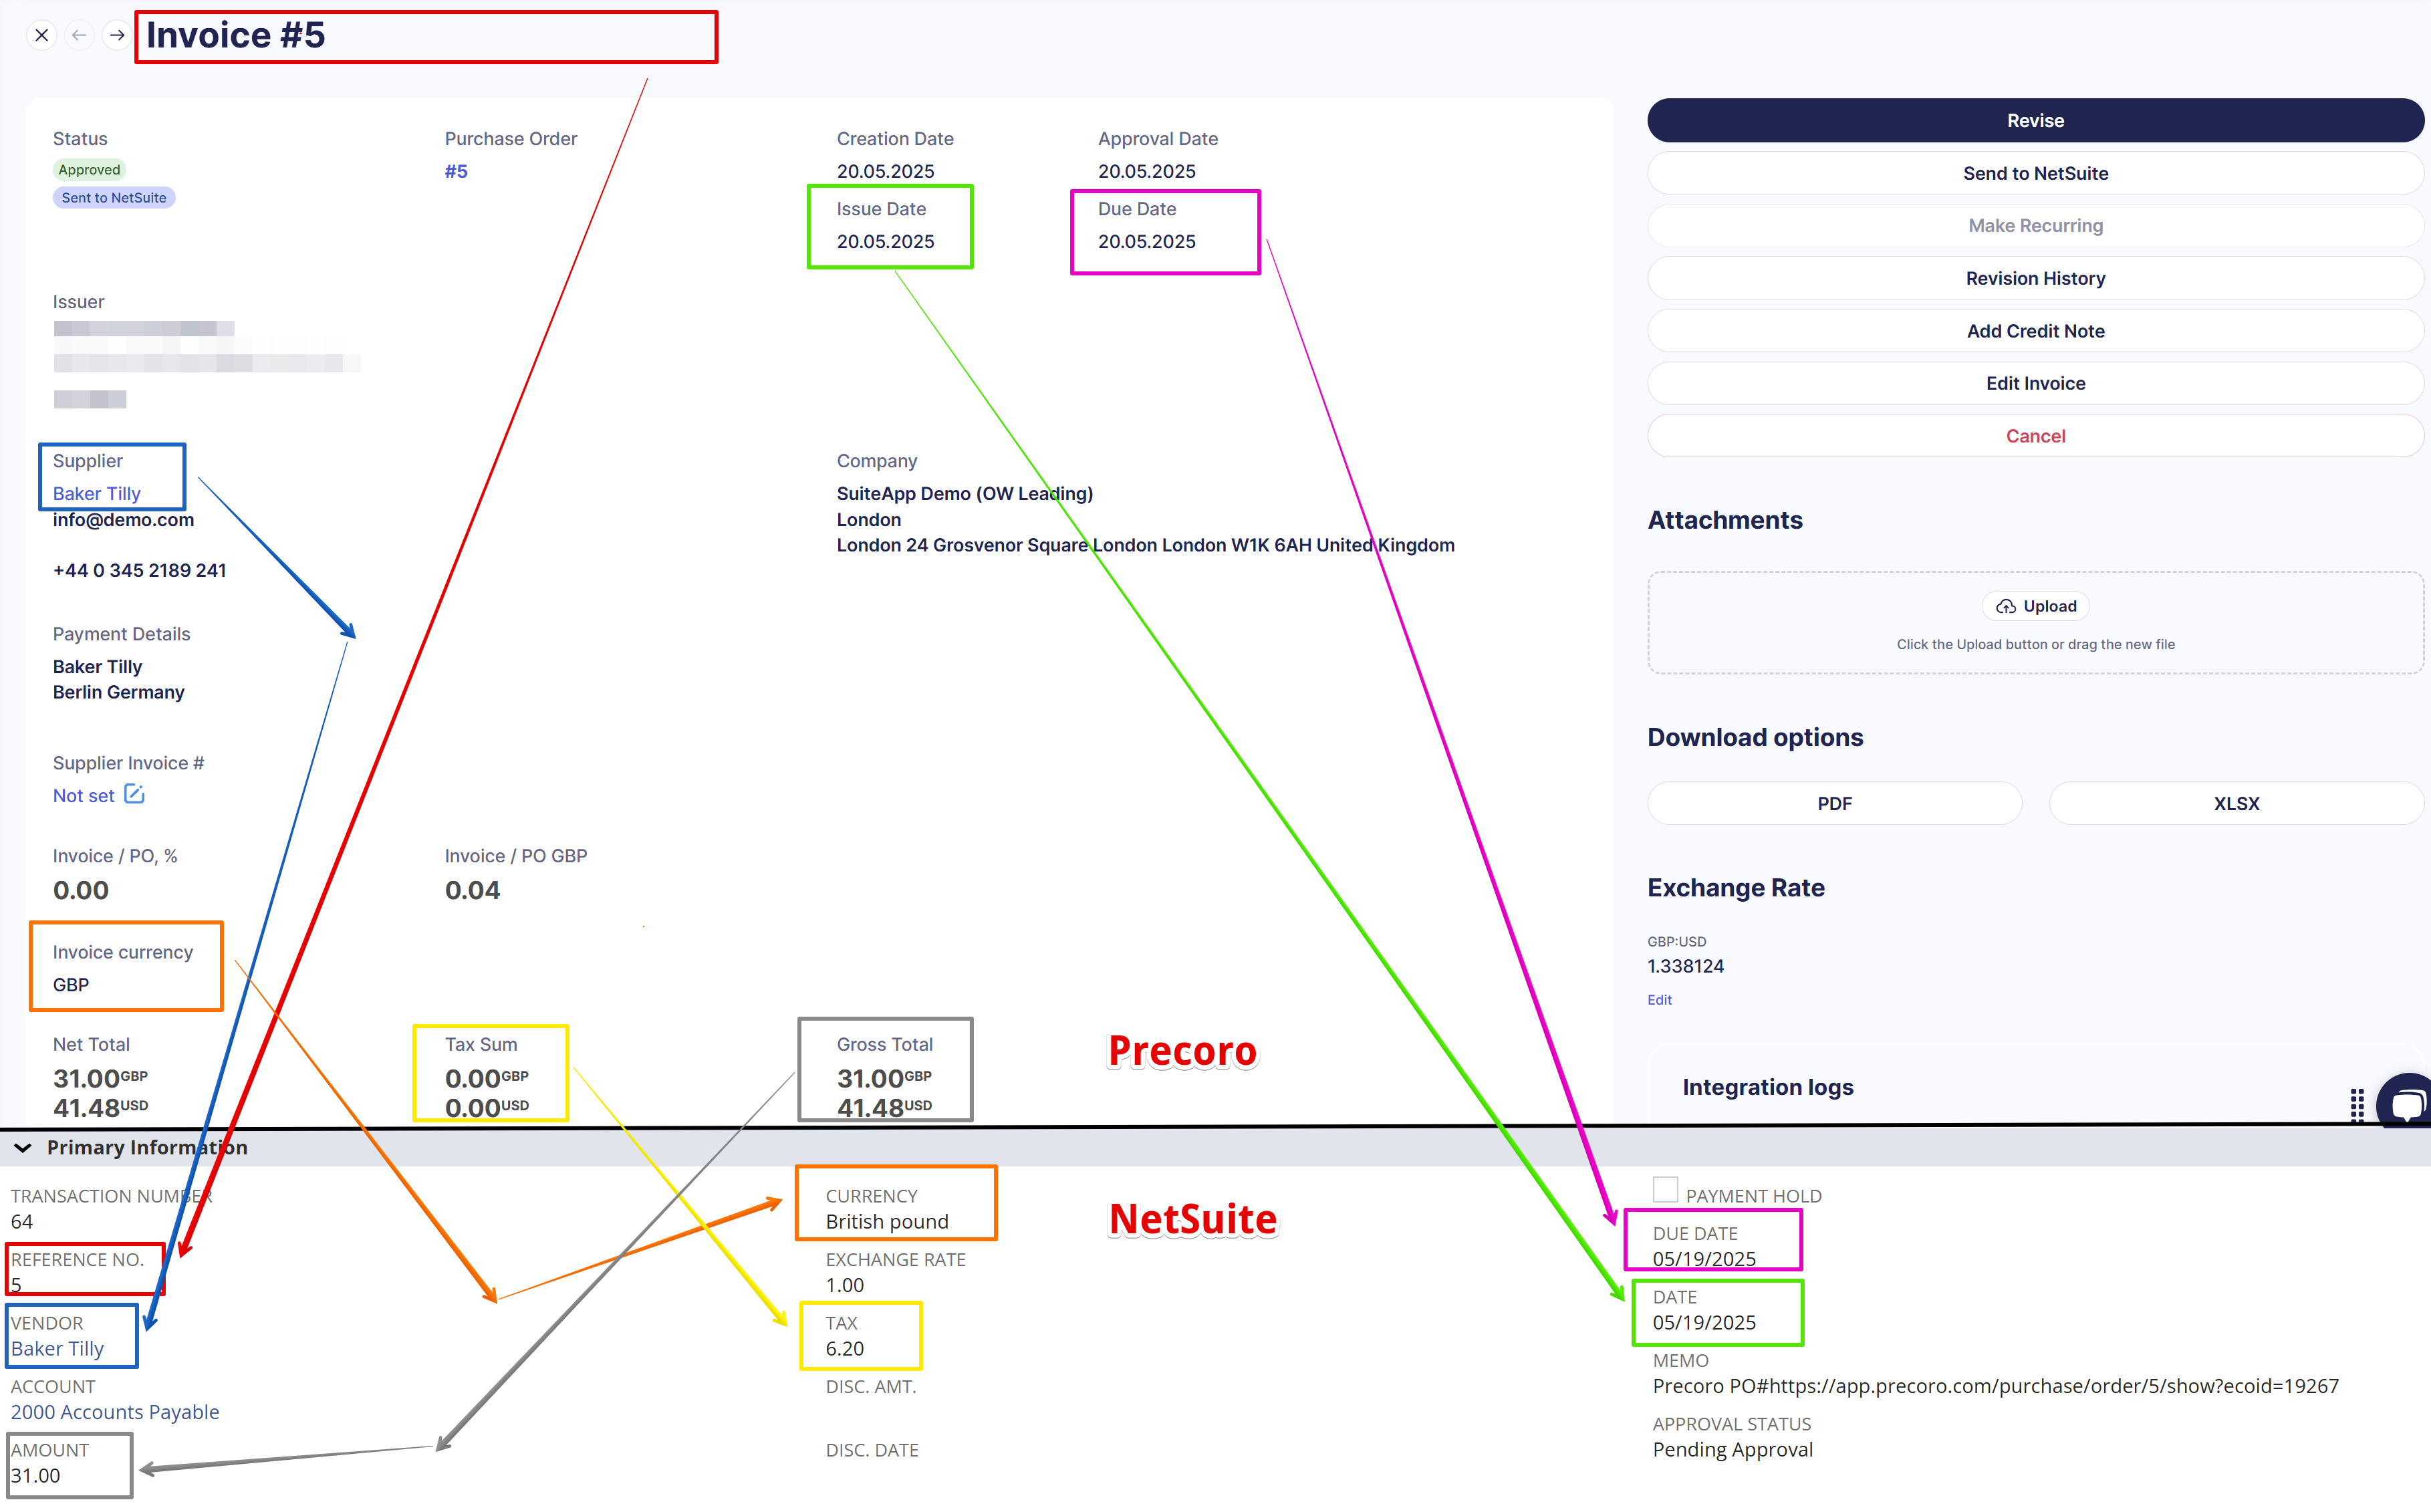
Primary Information Mapping
| Field in Precoro | Field in NetSuite |
| Invoice # | Reference No. |
| Supplier | Vendor |
| Invoice currency | Currency |
| Issue Date | Date |
| Due Date | Due Date |
| Tax Sum | Tax |
| Gross Total | Amount |
 |
|
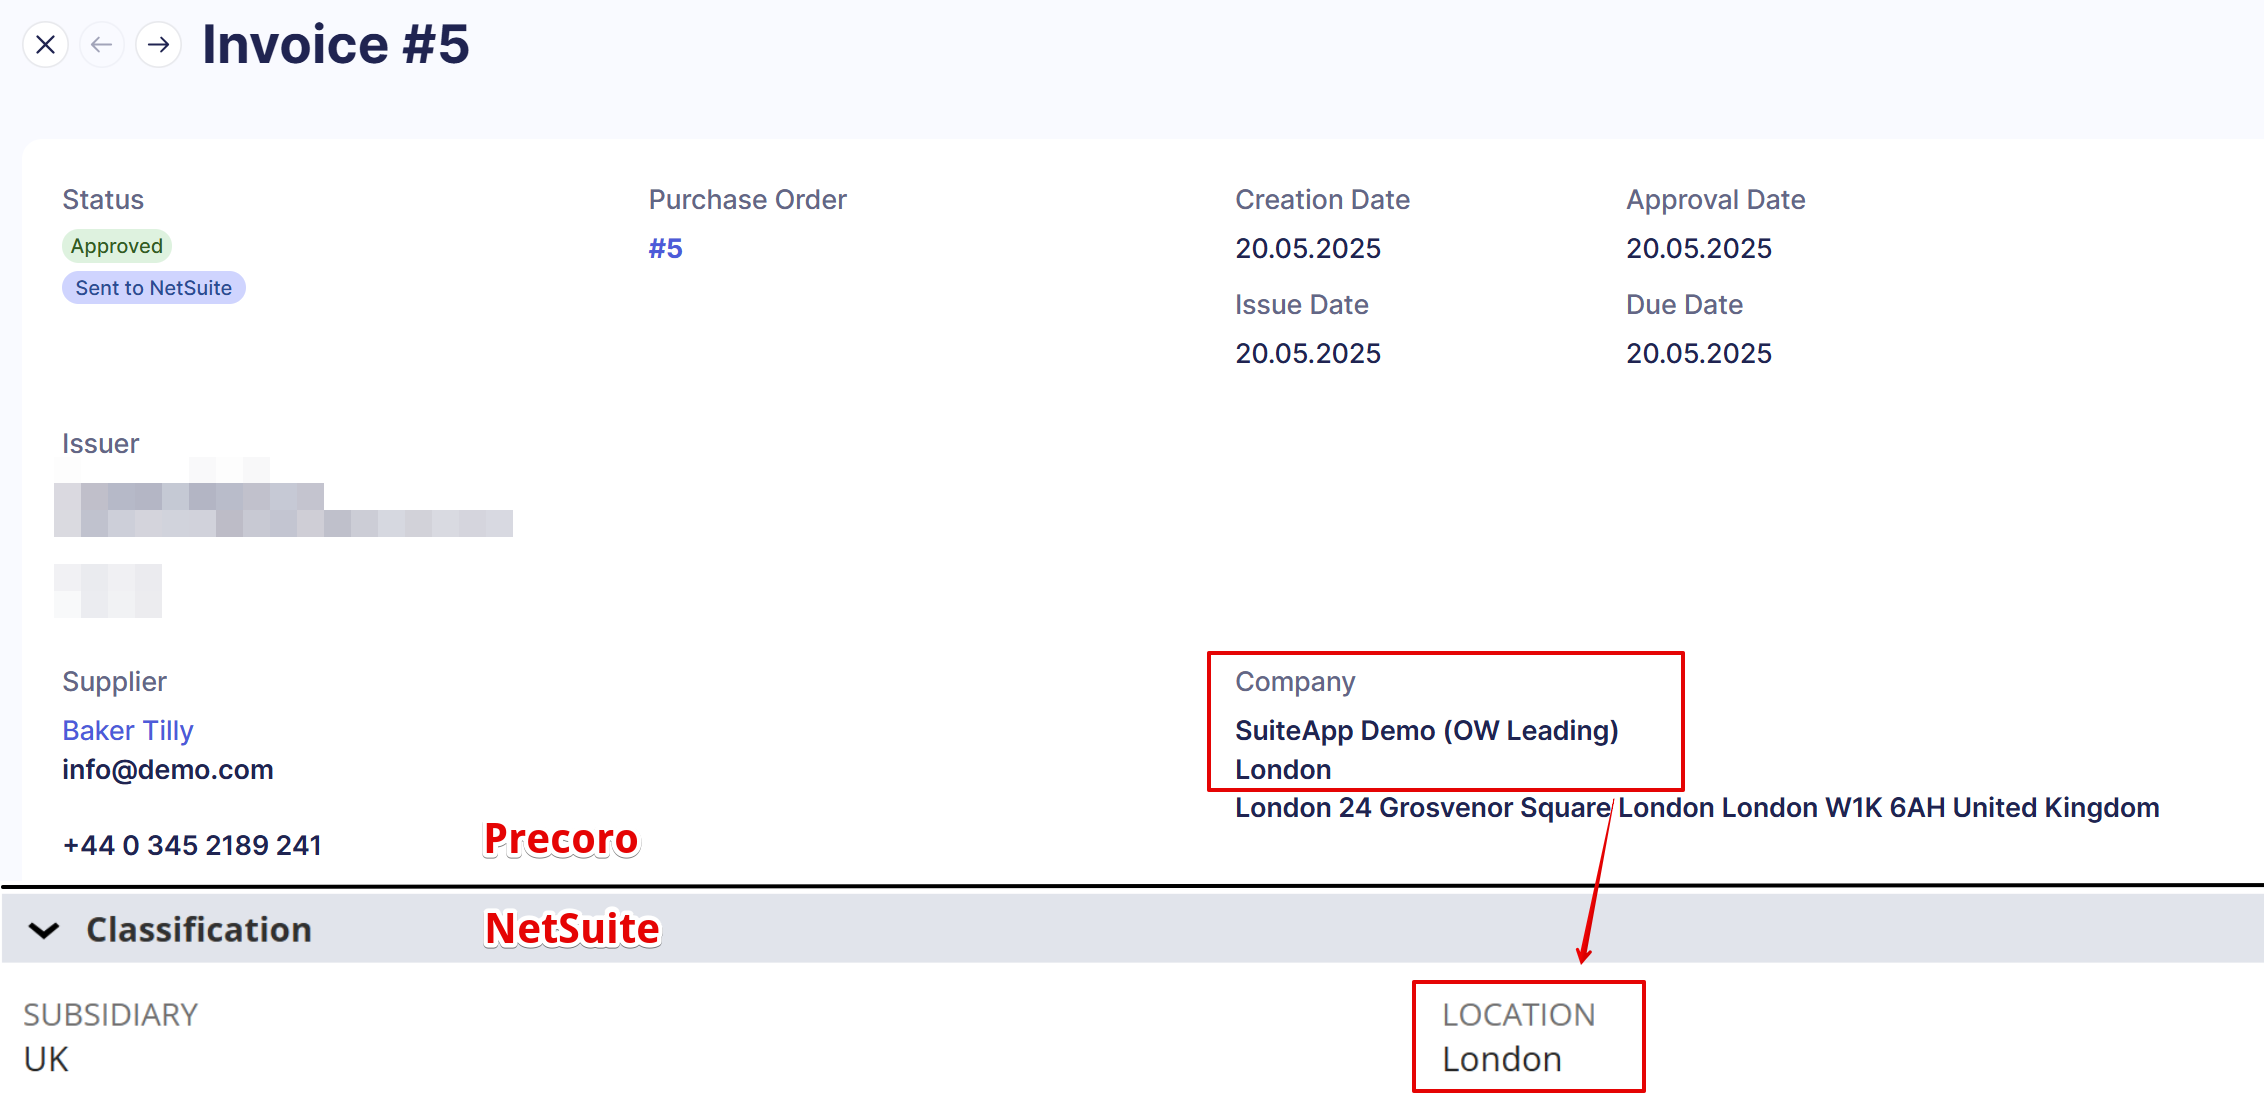
Classification Mapping
| Field in Precoro | Field in NetSuite |
| Company | Location |
| NetSuite Departments | Department |
 |
|
Check the How to Sync Locations with NetSuite SuiteApp guide to get more information on the locations integration.
Attachments Mapping
Attachments from Precoro invoices are transferred to the Files tab in NetSuite.
How the Items Mapping Works
💡Please note: You can find more detailed information about items integration here.
The way items are added in Precoro affects how they appear in NetSuite:
- Items added via the Item Management page using the Add Item button that were previously integrated will be transferred to the Items tab in NetSuite.
- Items added from the Item Management page → Add Item button, but not integrated, will be transferred to the Expenses tab in NetSuite.
- Items added manually using the Add empty row button will be transferred to the Expenses tab in NetSuite.
Here’s how the mapping of manually added items works:
| Field in Precoro | Field in NetSuite |
| Item Name | Memo |
| Price/Currency | Amount |
| Tax, % | Tax Code |
| Tax Sum | Tax Amount |
| Total (Gross Total) | Gross Amt |
| NetSuite Locations | Location |
| NetSuite Departments | Department |
| NetSuite Classes | Class |
| NetSuite Customers | Customer/Project |
| NetSuite Chart of Accounts | Account |
 |
|
Here’s how the mapping of items added from the Item Management page works:
| Field in Precoro | Field in NetSuite |
| Item Name | Name |
| Quantity/Unit | Quantity |
| Price/Currency | Amount |
| Tax, % | Tax Code |
| Tax Sum | Tax Amount |
| Total (Gross Total) | Gross Amt |
| NetSuite Locations | Location |
| NetSuite Departments | Department |
| NetSuite Classes | Class |
| NetSuite Customers | Customer/Project |
 |
|
How to Create and Sync the Related Payments
To create a payment in NetSuite:
- Open the invoice (bill).
- Click the Make Payment button.
- Select the items → Save.
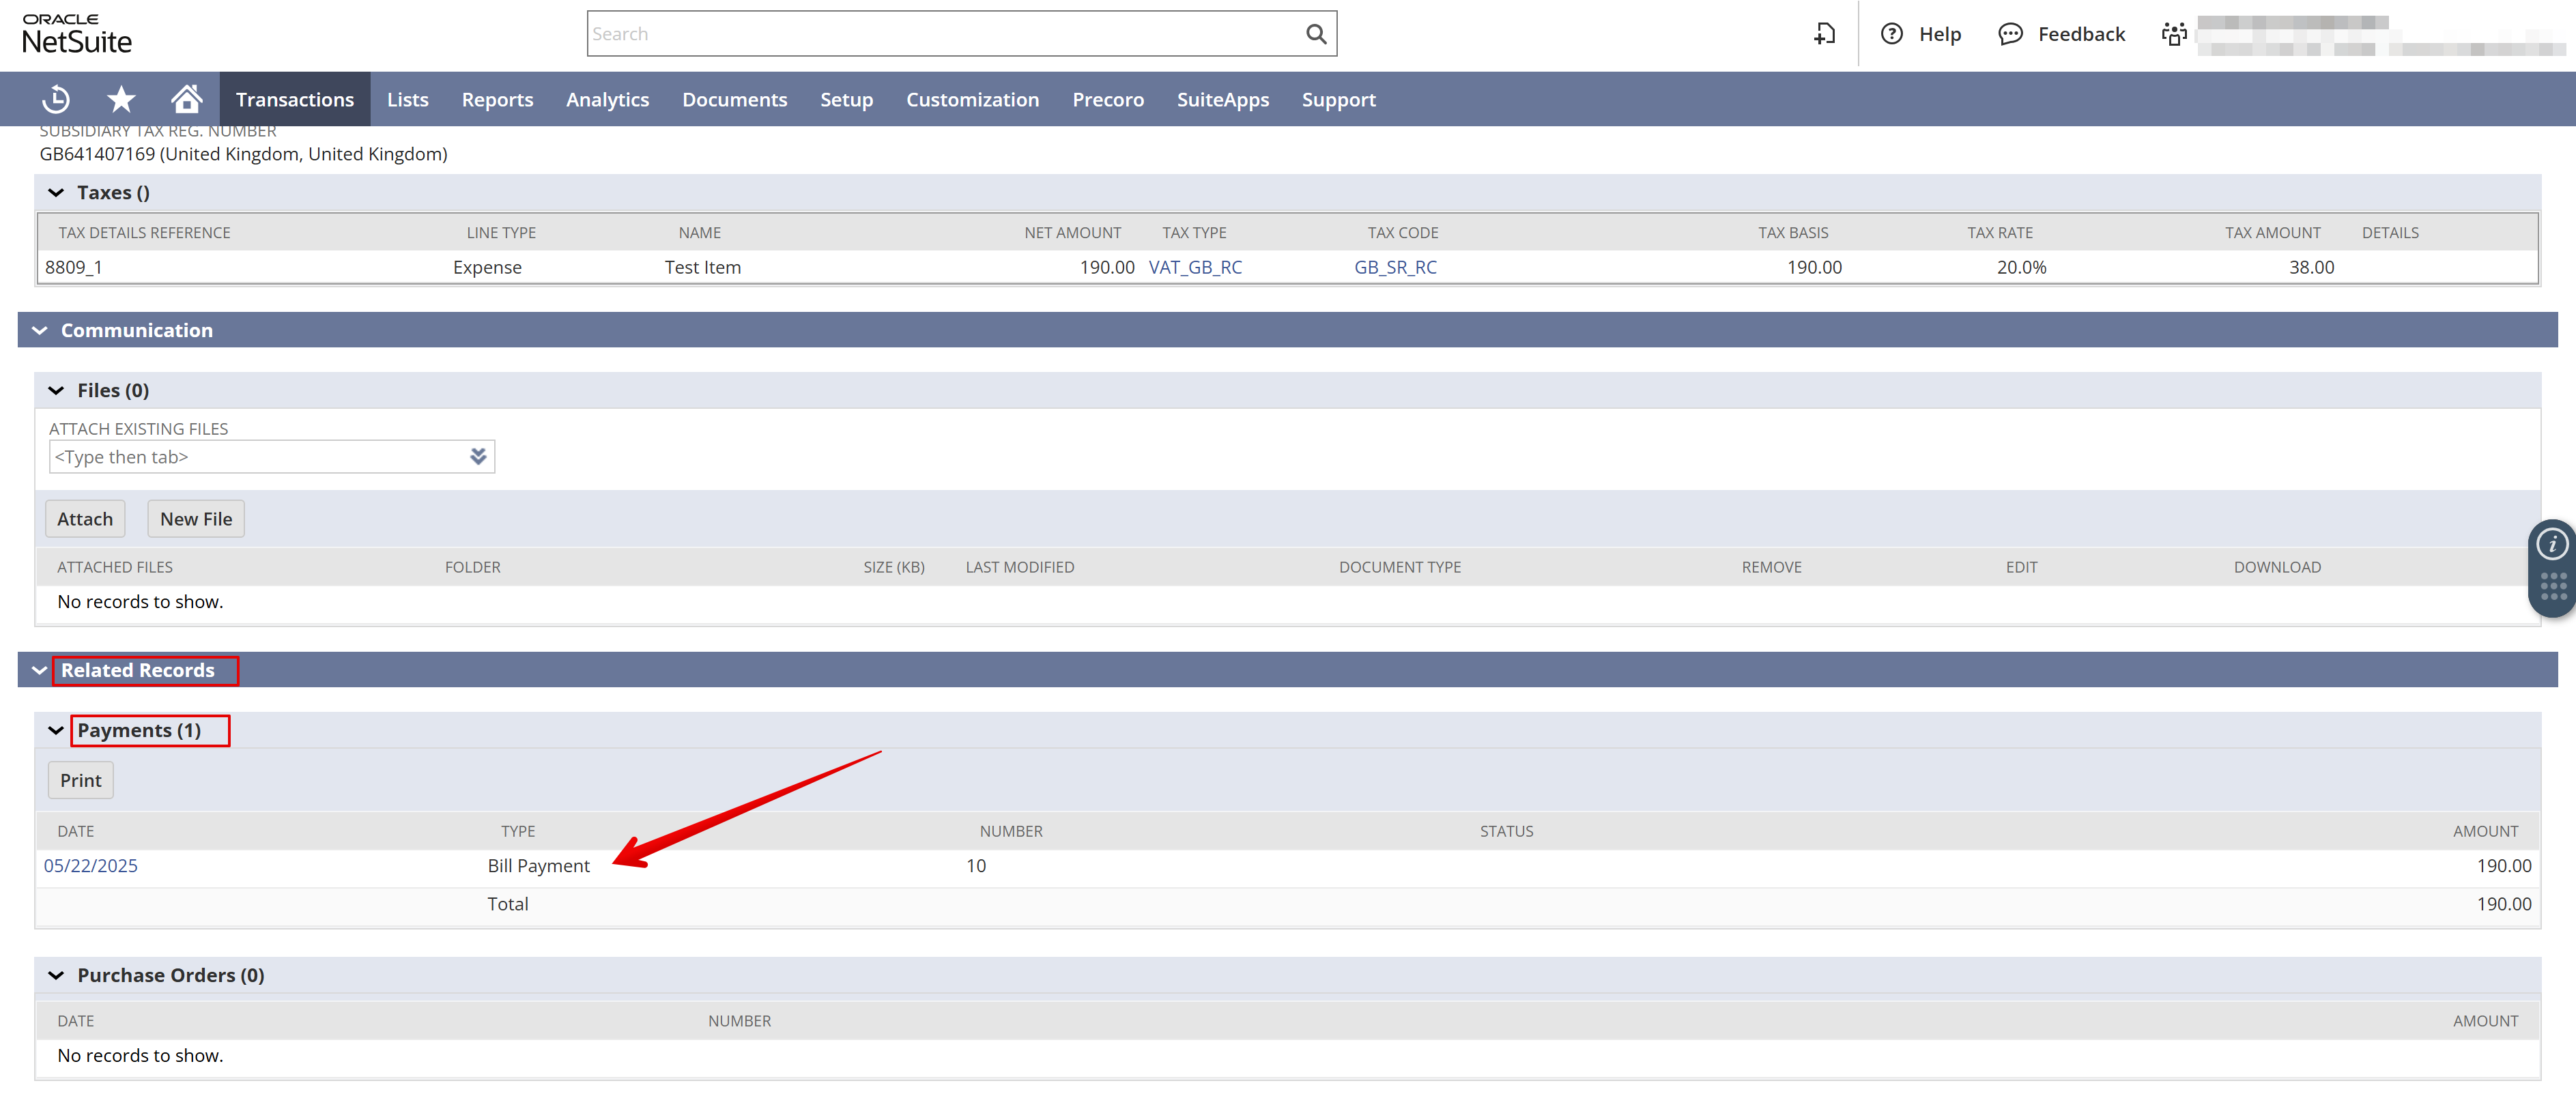
You can find the payment on the Bill page in NetSuite in the Related Records → Payments tab:
You can import the related payments into Precoro in two ways:
Option 1: Sync Payments manually
Once the payment is saved, you can sync it with Precoro:
- In Precoro, navigate to Invoices → Payments.
- Click the Import from NetSuite button.
- Select the Invoice Issue Date range → click Import from NetSuite.
- Refresh the page in a few minutes to view the imported payments. Each imported payment acquires the Integrated with: NetSuite status.
Option 2: Enable Automatic Payment Sync
To enable the automatic synchronization of all newly created NetSuite payments:
- In NetSuite, go to Precoro → Configuration → Integrations.
- Open the Global Settings tab.
- In the Sync New Records By Default section, enable the Payments checkbox.
- Click OK to confirm.
Once this setting is activated, any newly created payment in NetSuite for a Precoro-integrated invoice will be automatically synced in real time.
How to Enable and Use the Credit Notes Integration
Step 1: Configure the Integration in Precoro
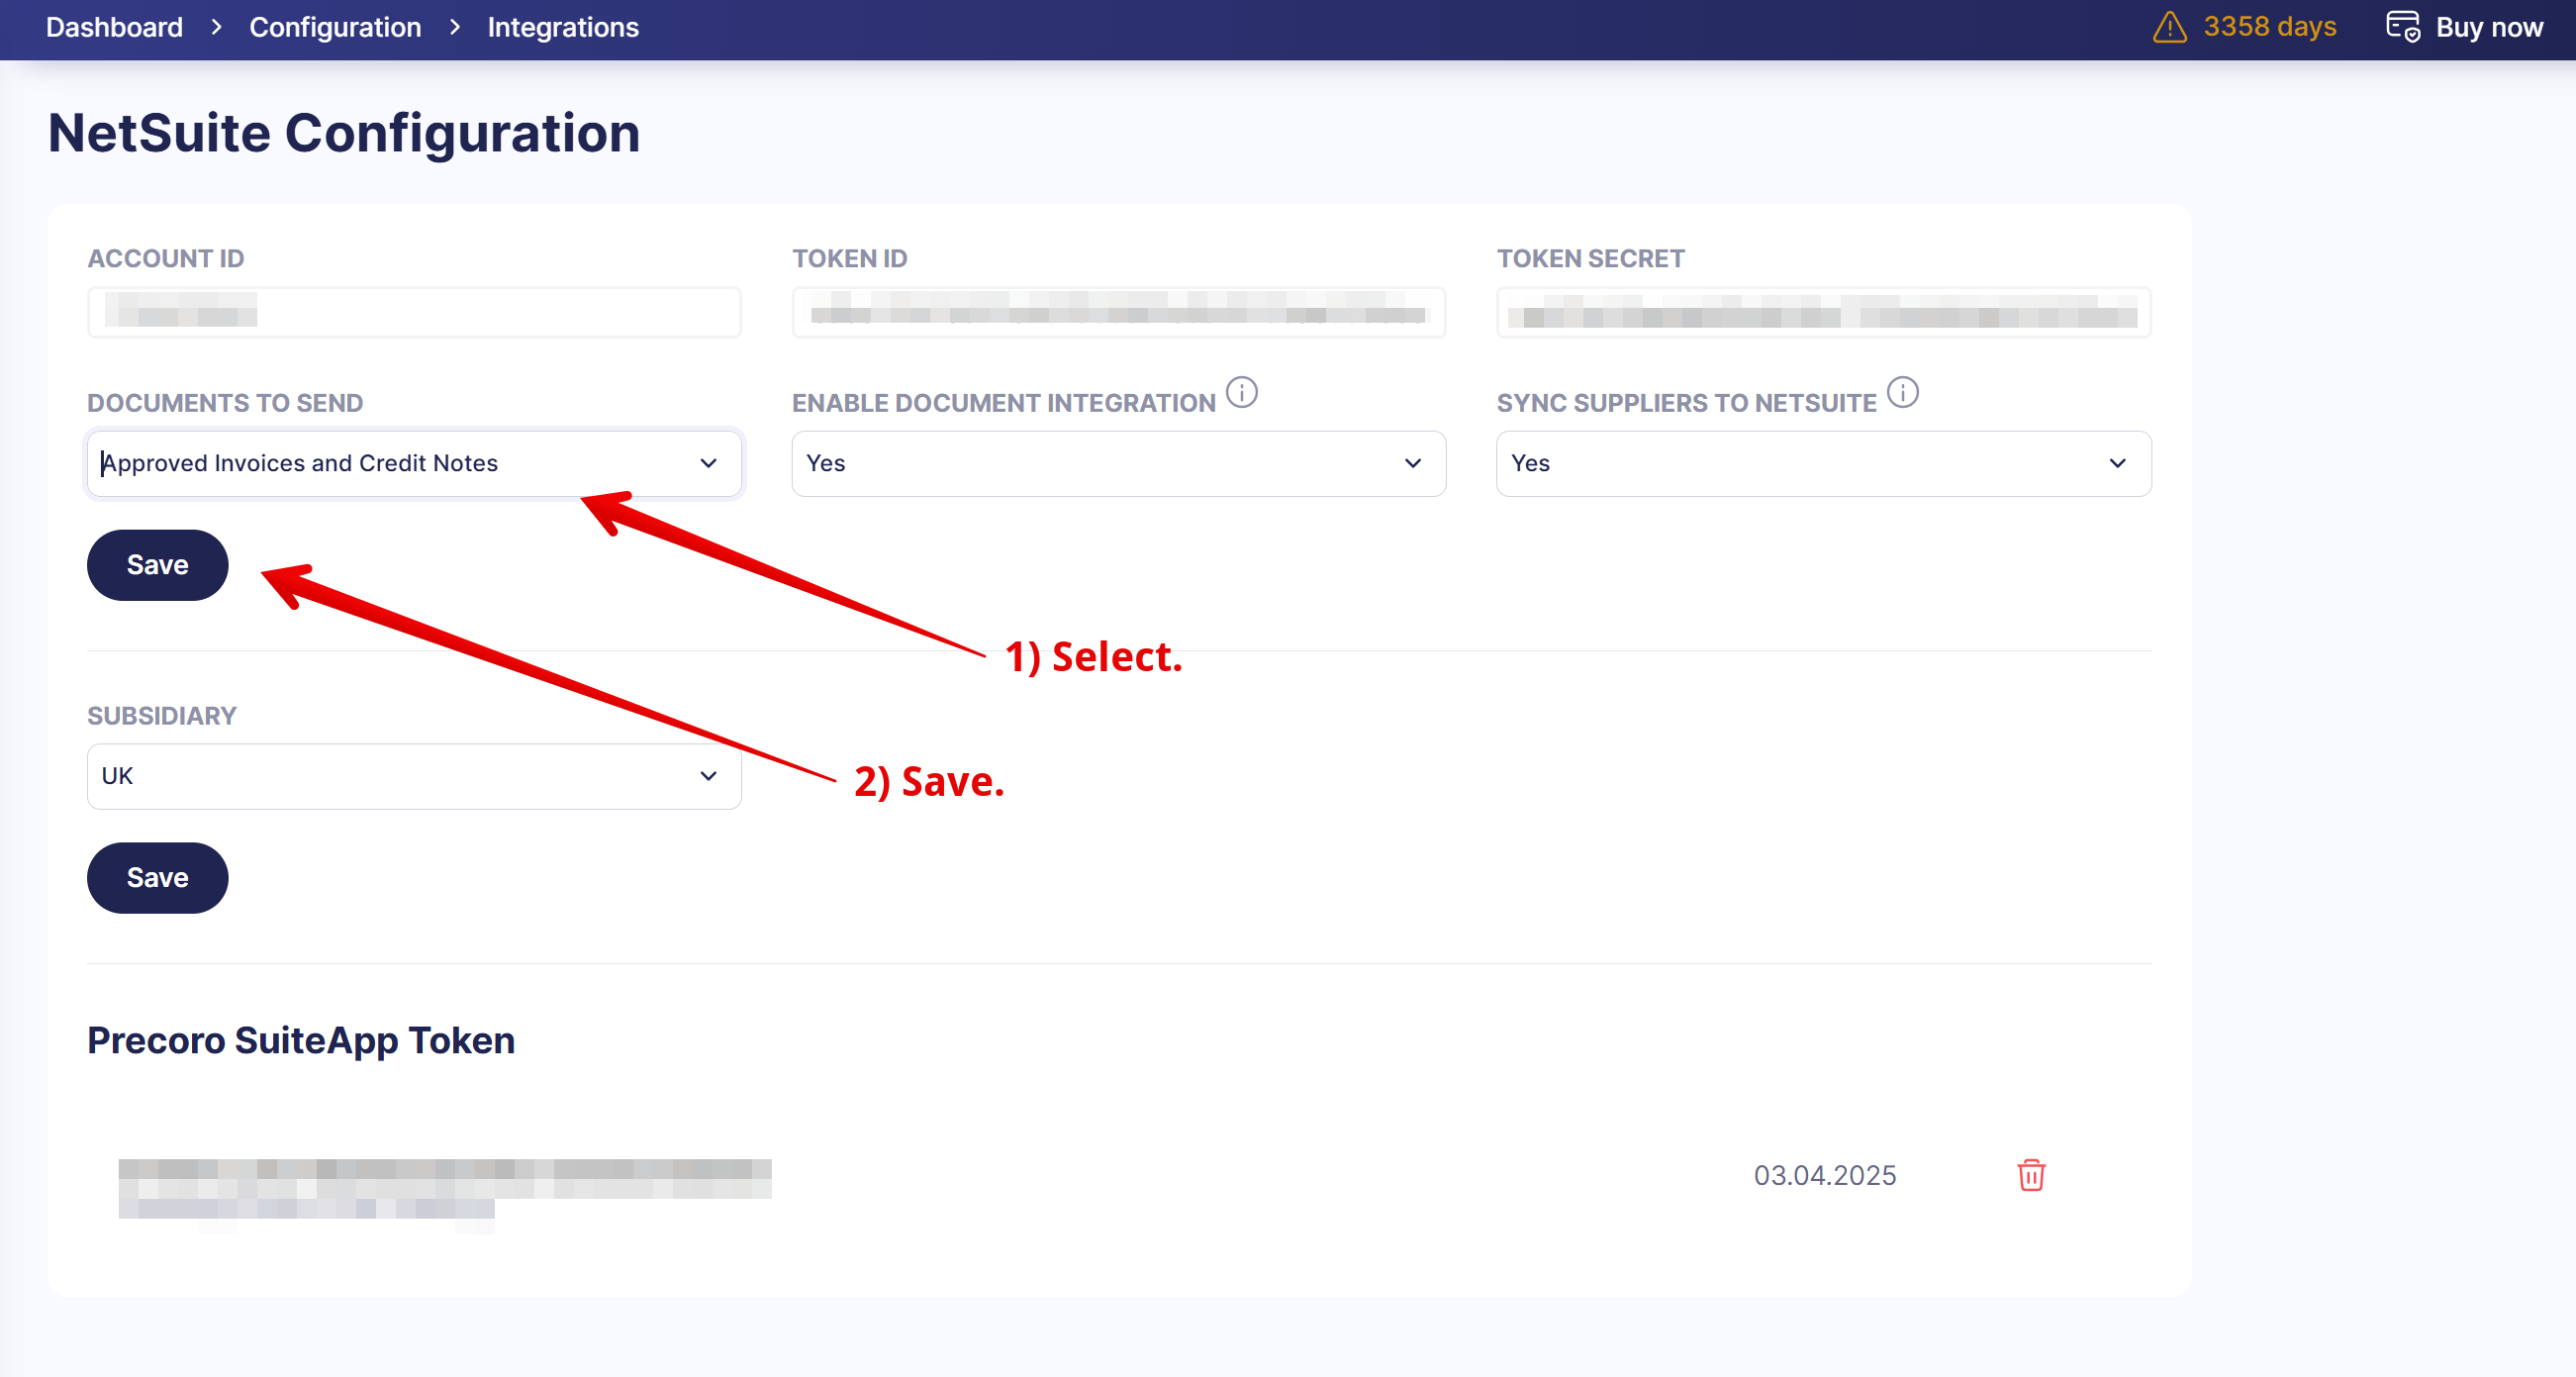
To set up the credit notes integration:
- In Precoro, go to Configuration → Integrations.
- Locate NetSuite integration card → click the Update Settings button.
- In the Documents to Send field, select the Approved Invoices and Credit Notes option. This integration includes standalone credit notes.
- Click Save to record the changes.
Step 2: Update the Permissions in NetSuite
For the integration to work correctly, you should enable the corresponding permissions in NetSuite:
- In NetSuite, go to Setup → Users/Roles → Manage Roles.
- Click Edit next to the Precoro Integration Role.
- In the Permissions → Transactions section, locate the Enter Vendor Credits option.
- Set the level value to Full.
- Click OK → Save to confirm the changes.
Step 3: Create a Credit Note and Send It to NetSuite
Once the integration is enabled, follow these steps to create a credit note and send it to NetSuite:
- Go to the Invoices page in Precoro.
- Open the invoice in question → click the Add Credit Note button.
- On the next page, select the items and fill out the necessary details → click Create.
- Confirm the document → click the Send to NetSuite button.
The document will acquire the Sent to NetSuite status once synced with NetSuite. You can also check the Integration logs tab for detailed information (including confirmation of a successful import or details about any issues that occurred during the process).
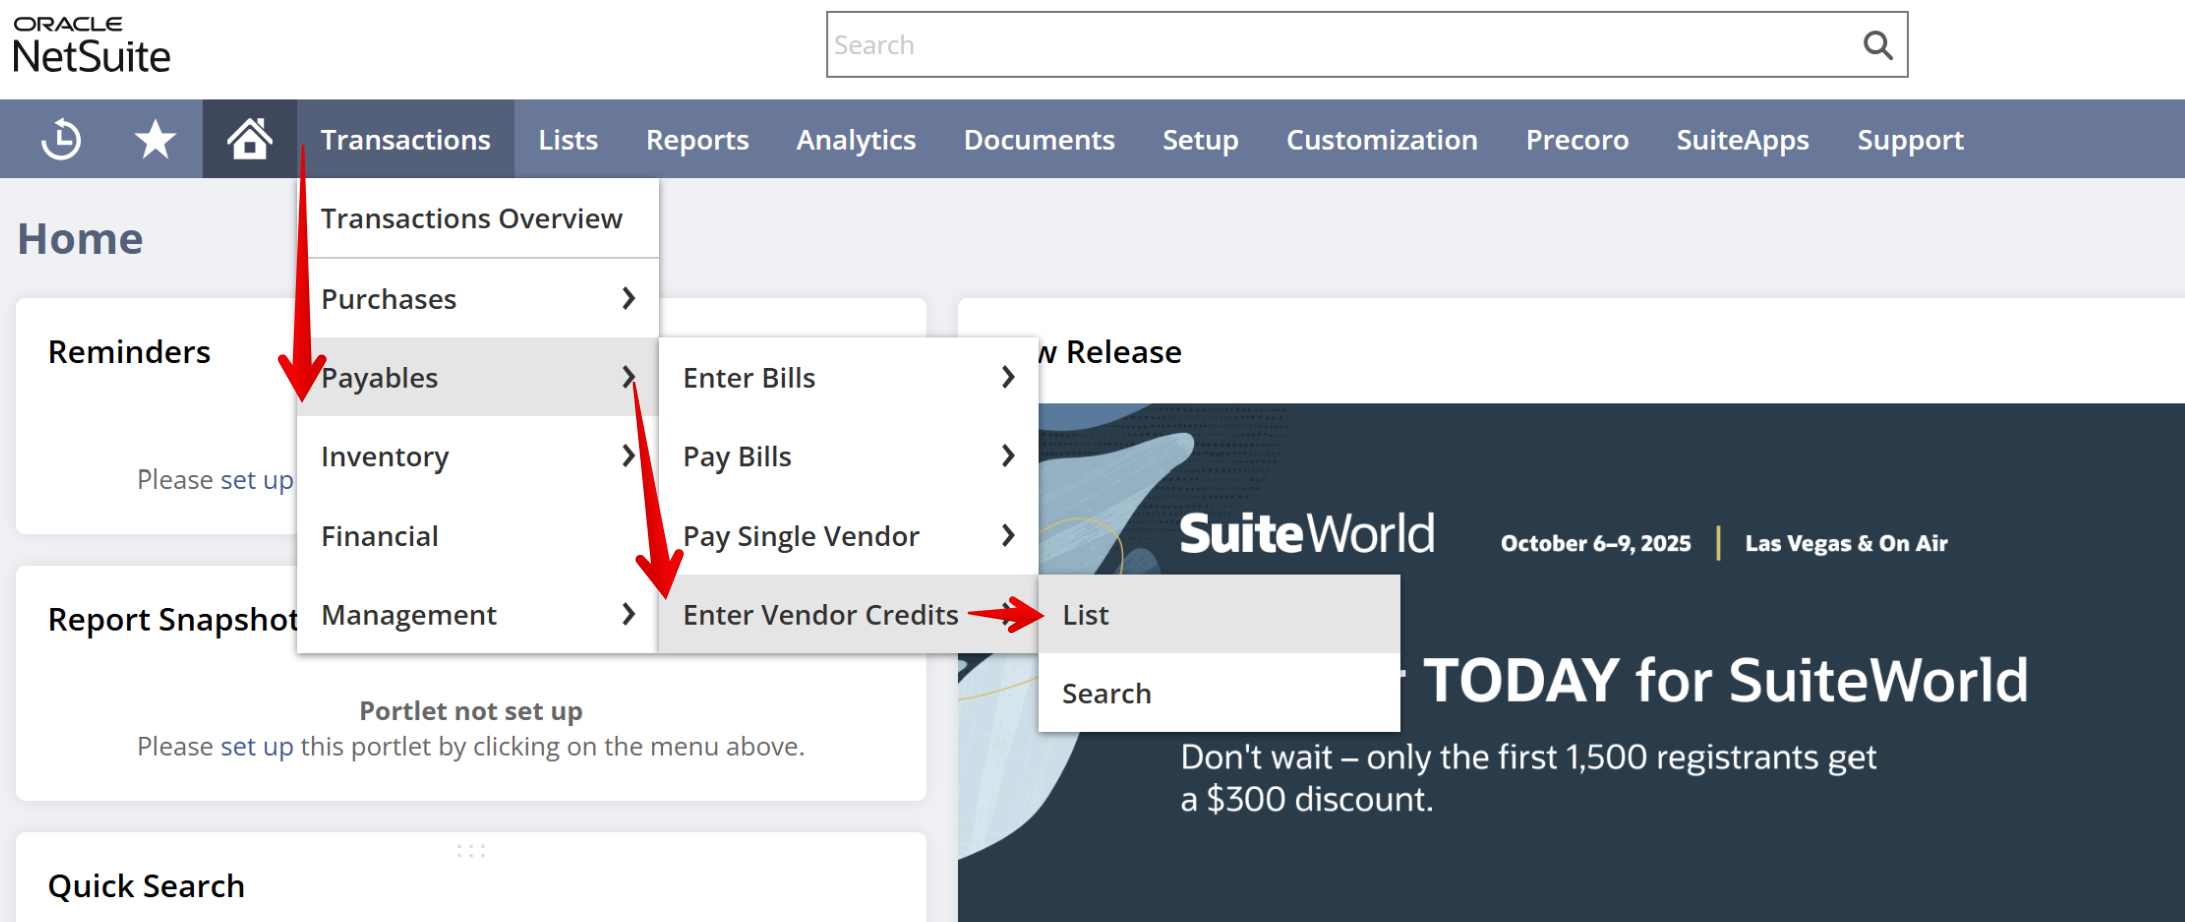
The credit notes in NetSuite will be integrated as Vendor Credits into the Transactions → Payables → Enter Vendor Credits → Lists section:
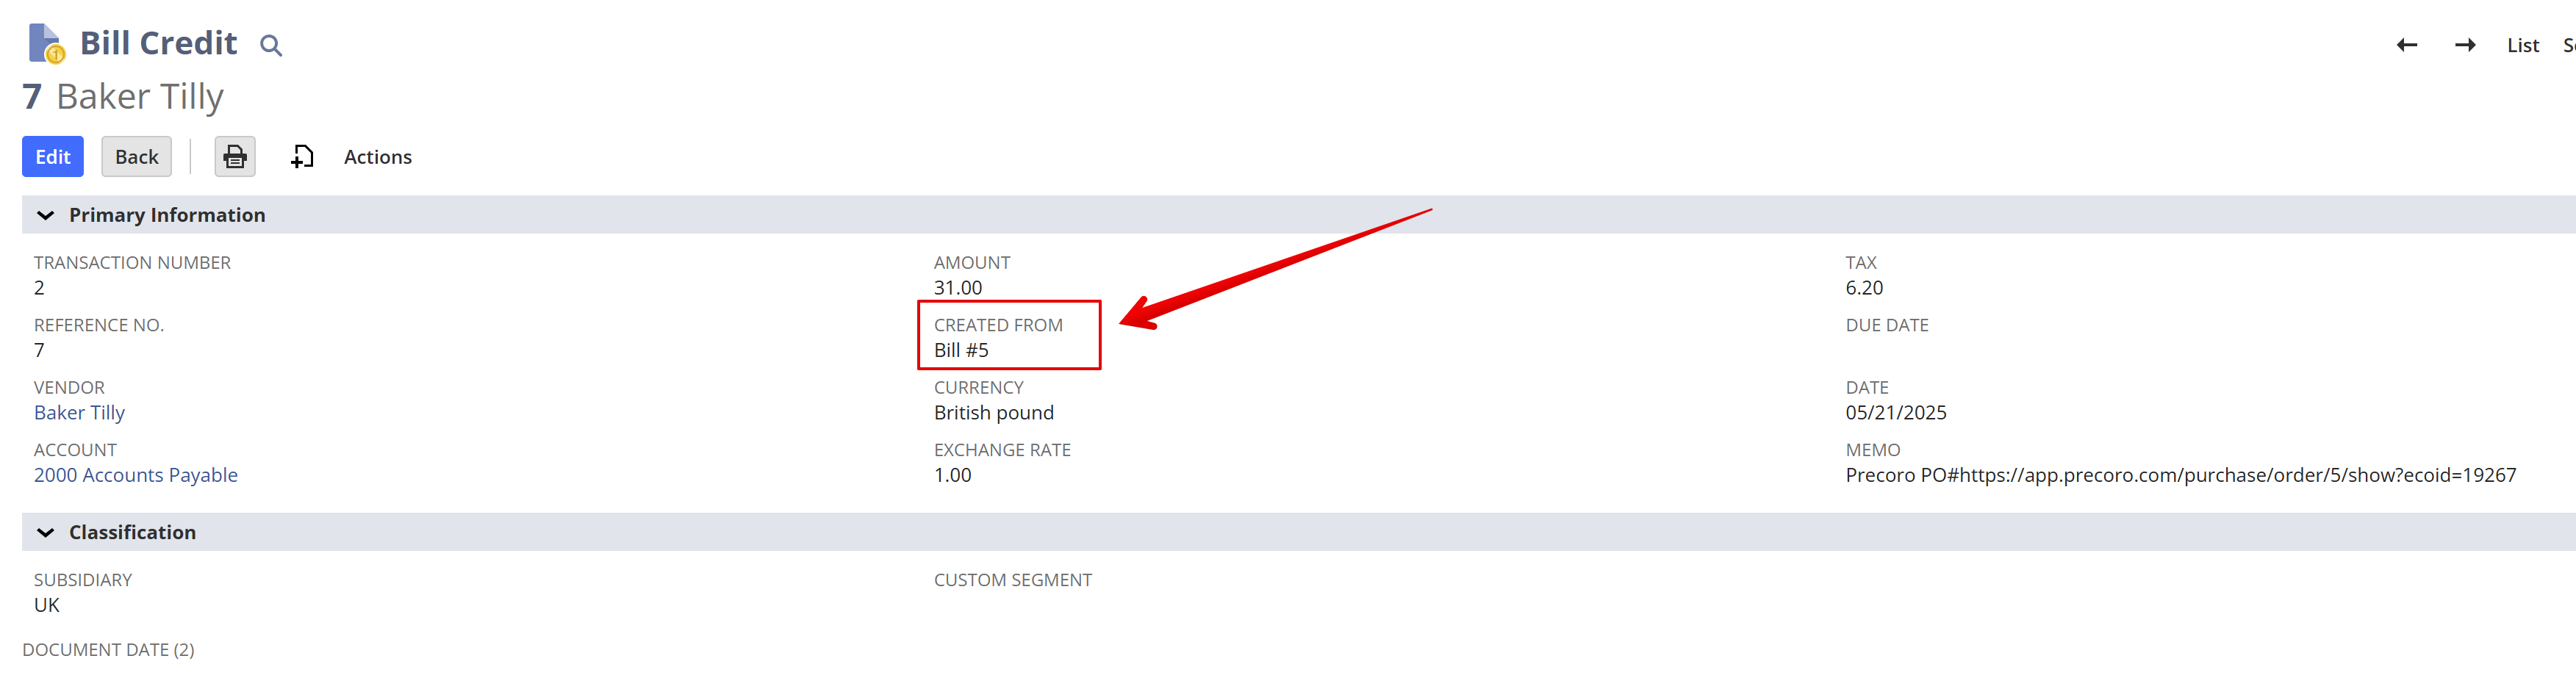
Field Mapping for Credit Notes
Field mapping for credit notes is identical to the invoices mapping. However, the Created From field contains the invoice ID (Bill #) in NetSuite:
How to Track the Not Sent Documents
You can easily track the not-sent-to-NetSuite invoices and credit notes in Precoro through the filters or the infocard:
- To apply a filter, click the Filters button on the Invoices page → set the value to No in the Sent to NetSuite field → click Filter results. You’ll see the complete list of documents regardless of their other statuses:
- To see all documents that haven’t been exported, use the Not Sent to NetSuite infocard on the Invoices page. It shows only approved invoices that failed to export due to a possible error:
How to Cancel an Invoice
If you cancel an invoice in Precoro, it will be automatically canceled in NetSuite.
To cancel the invoice in Precoro:
- Open the document in question.
- Click Cancel.
- Enter the cancellation reason → click Yes to confirm.