TABLE OF CONTENTS
- Step 1. Set Up the Necessary Module in the Basic Settings
- Step 2. Provide Users with Appropriate Roles
- Step 3. Build an Approval Workflow That Suits Your Company’s Needs
- Step 4. Establish the Perfect Working Process to Manage Your Documents
Step 1. Set Up the Necessary Module in the Basic Settings
In the Basic Settings section, you can activate the following modules:
- Warehouse Requests
- Purchase Requisitions
- Request for Proposals
- Receipts
- Invoices
- Expenses
- Budgets

Step 2. Provide Users with Appropriate Roles
Each user can have an appropriate role according to the tasks before them. There are three roles available:
- Viewer — this role grants document viewing without editing or approving rights.
- Creator — this role provides access to document creation and editing.
- Approver — this role allows approving the documents created by other users.

Step 3. Build an Approval Workflow That Suits Your Company’s Needs
- Open the Configuration page and go to the necessary Approval Workflow tab.
- Create a workflow that suits your company’s needs best by adding approvers and creating the approving steps.
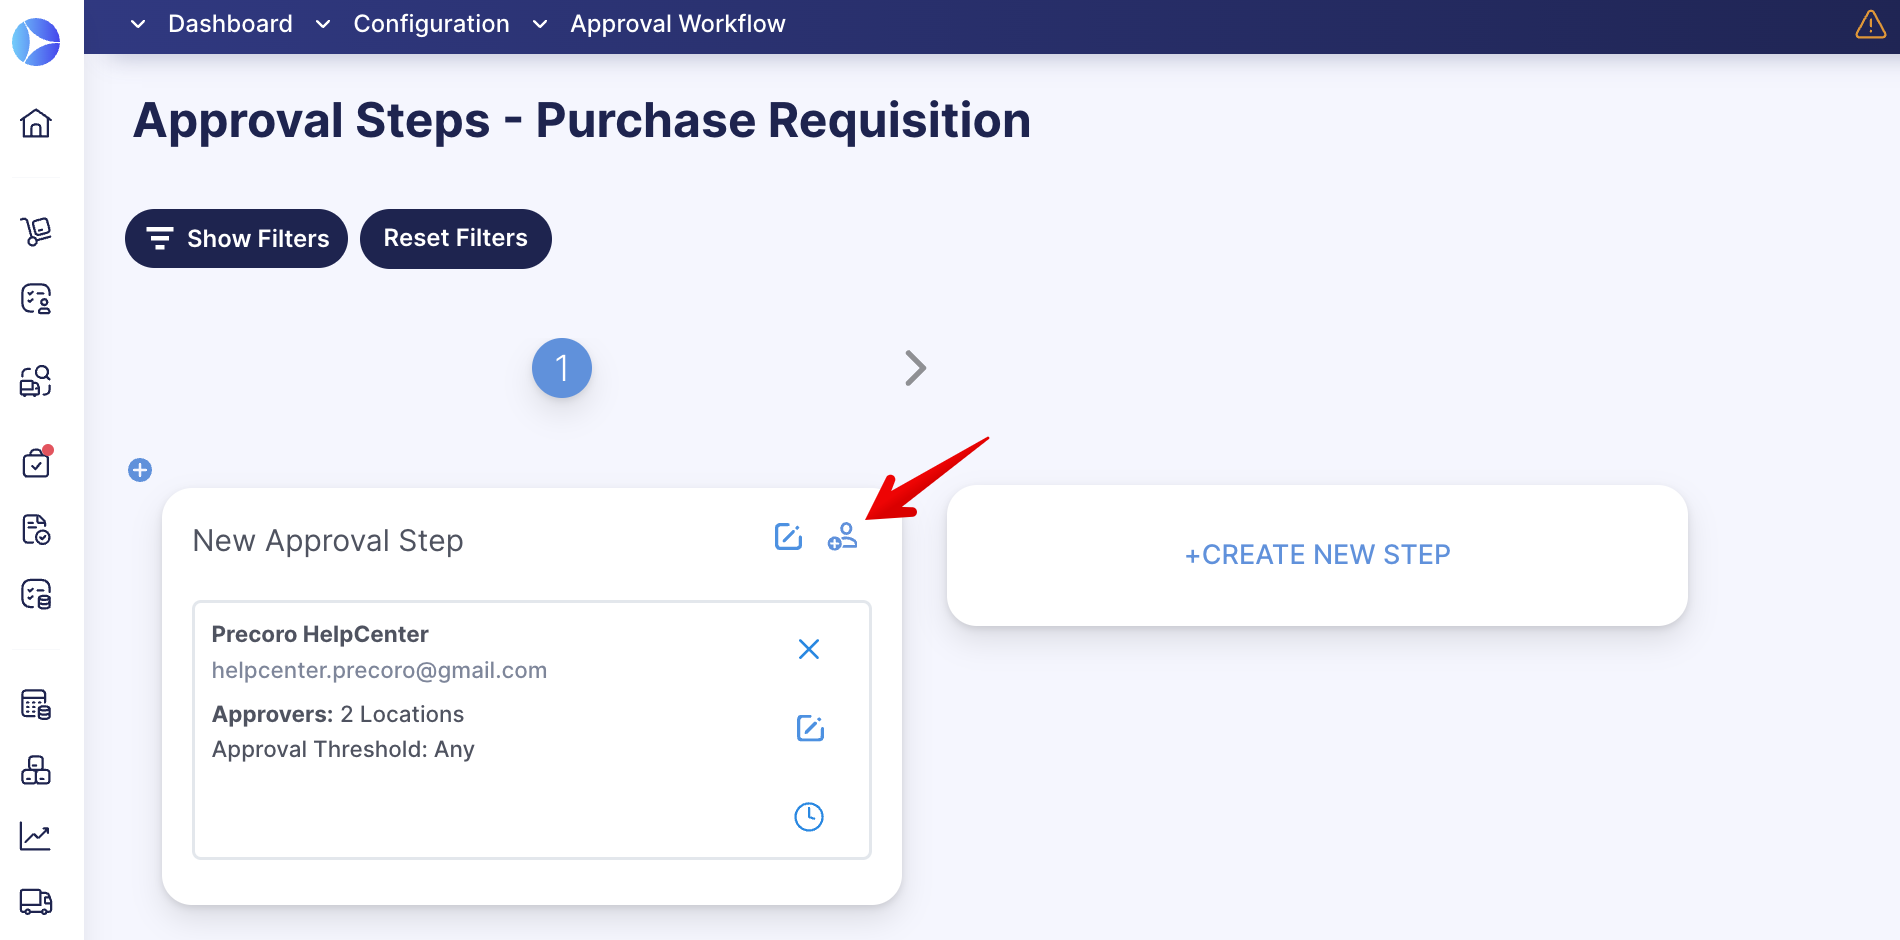
More information about setting up and utilizing Approval Workflow can be found here.
You can only add users with the Approval role to the workflow process.
In the Workflow, you can appoint the Approvers rights to Locations, Custom Fields for Documents, and set Threshold:
Step 4. Establish the Perfect Working Process to Manage Your Documents
Once you have completed the three previous Steps, you can start creating needed documents and managing them with the help of their statuses.
Statuses can be managed according to user roles. Find more information about setting up roles in Step 2 of this article.
Viewer
Having this role only, a user can perform the following actions:
- View the list of all previously created documents and all the added information in the document, including items and prices.
- Use the Revision History function.
- View and add comments.
- See and open the related documents.
- View the attached files.
- Download the document.
💡 Please note: Users with this role cannot input changes into the document. The Editing and Revision modes are not available.
Creator
Having this role only, the user can perform the following actions:
- Create a document or repeat the previously created one.
- Add items, attachments, comments, and view the stock balance.
- Revise documents on the Pending and Approved steps, which sets the documents’ status to In Revision.
- Confirm documents to move forward from Draft to Pending (if there is a workflow in place) or Approved (if there is no workflow) statuses.
- Manually complete documents, changing their status from Approved to Completed.
- Delete documents on the Draft stage.
- Cancel documents at the Pending and Approved steps, after which they acquire Canceled status.
- Edit the available Custom Fields for Documents.
Having a document on Revise with Creator role, a user can perform the following actions with items:
- Add new items manually or using the import option.
- Edit the existing items in the document, reject, or replace them.
- Confirm the changes.
Before editing fields, please read this article: Field Logic Behavior after Edit and Revise Actions in Documents.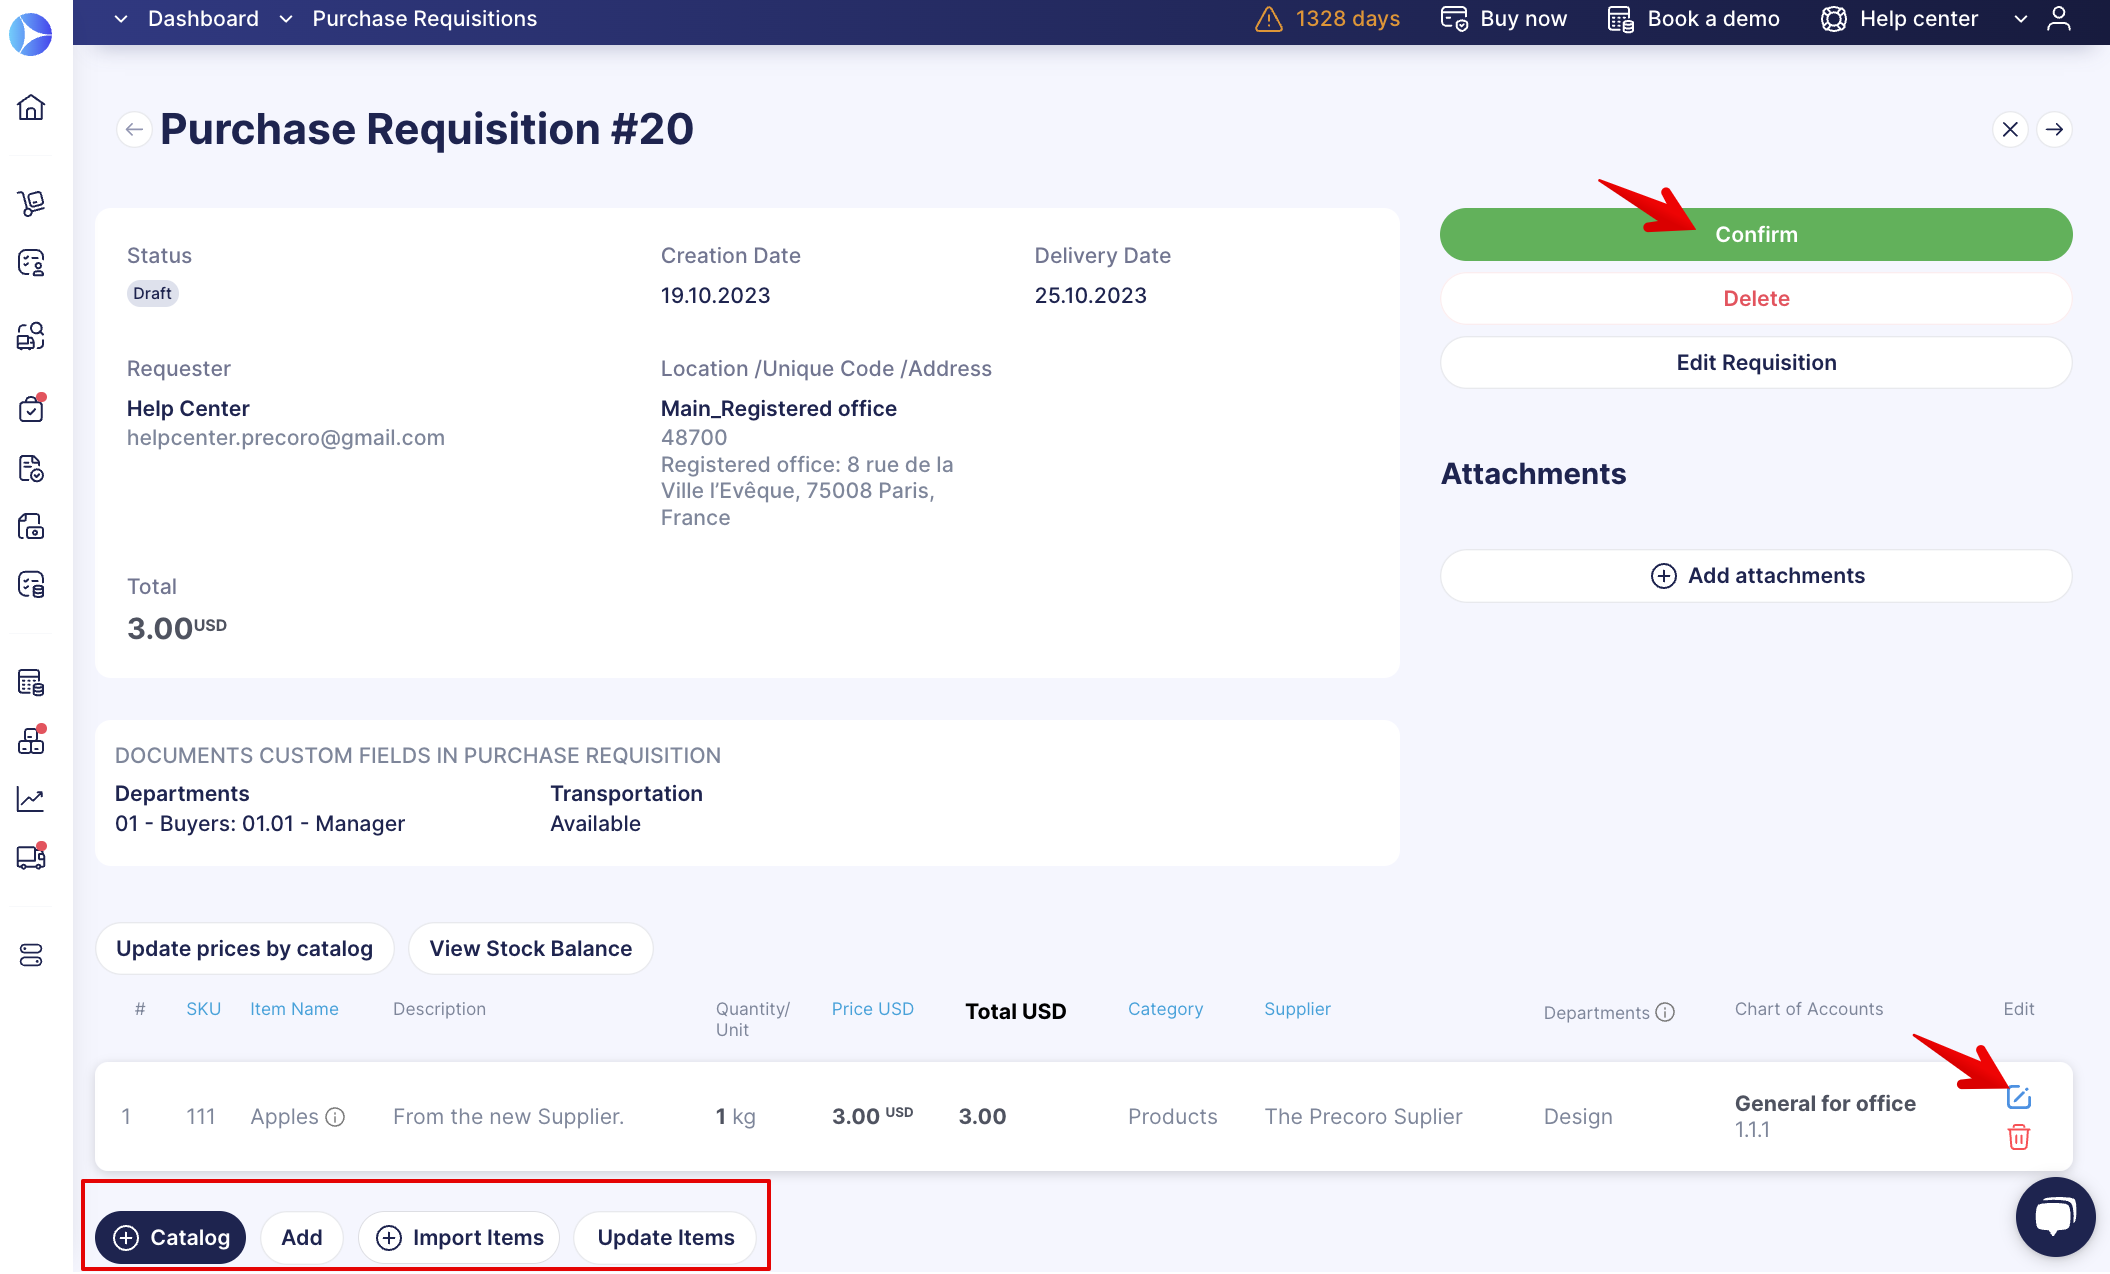
Editing a document with the Creator role enables the following access:
- Changing the Delivery Date and the Requester.
- Changing the Custom Fields for Documents.
- Leaving a note.
💡 Please note: You can change only those Custom Fields available to you.
The Custom Fields' availability to edit depends on your access to them in User Management and their Availability in Approval Workflow (setting in the CFD itself).
Approver
All users who have this role can perform the following actions:
- View documents assigned to them for approval.
- Approve documents, changing their status from Pending to Approved.
- Reject documents, after which they obtain the Rejected status.
- Edit documents without changing their status to In Revision. In editing mode, an approver can make changes to:
-
Delivery Date and Requester,
-
Note,
-
Required custom document fields available to them in the Approval Workflow,
-
Optional custom document fields,
-
Exchange rates (when the document is in Draft, Pending, Approved, or In Revision statuses).
-
- Revise documents with Pending and Approved statuses, after which they acquire In Revision status. In revision mode, an approver can make changes to:
-
Add new items manually or via the import option.
-
Edit existing items in the document.
-
Reject or replace items.
-
Confirm the changes to restart the workflow.
-
- If the user previously had a Creator role, they can still manage their Draft documents.
- Cancel documents at the Pending and Approved steps, after which they acquire the Canceled status.
This role has the most authority over Creator and Viewer.

Find more information on Custom Fields for Documents in Step 3 of this article.
Supplier and Item Management Roles
You can activate the View Only, Create, and Approve for the Supplier Management module in User Management. For Item Management, choose between View Only and Create.
All users without Item Management roles can view the items added to Precoro via the Product Catalog module.
Activating the Re-Approval Process in Documents
After the Revise action, you will not trigger the repeated approval process when editing the following document fields:
In all documents:
- Initiator/Creator
- Legal Entity
- Custom Fields for Documents (only unrequired ones)
- Terms & Conditions
- Contract
- Notes
- Date
In Receipts:
- Post to Warehouse
- Supplier Receipt #
In Invoices:
- Issue Date
- Supplier Invoice #
In Expenses:
- Expense #
Please read this article to learn more useful information on the topic.