TABLE OF CONTENTS
- Assess Your Spend and Find Improvement Opportunities with Our AI Assistant
- Track Your Funds Precisely Using Standalone Credit Notes
- Easily Order from NAPA with the New PunchOut
- Keep Your Team Updated by Sending Scheduled Reports via Email
- Use Updated E-Invoicing Capabilities to Ensure Compliance
- Add Catalog Items to Documents Comfortably with the Interface Update
- Receive Goods in a Few Clicks with Item Auto-Selection
Assess Your Spend and Find Improvement Opportunities with Our AI Assistant
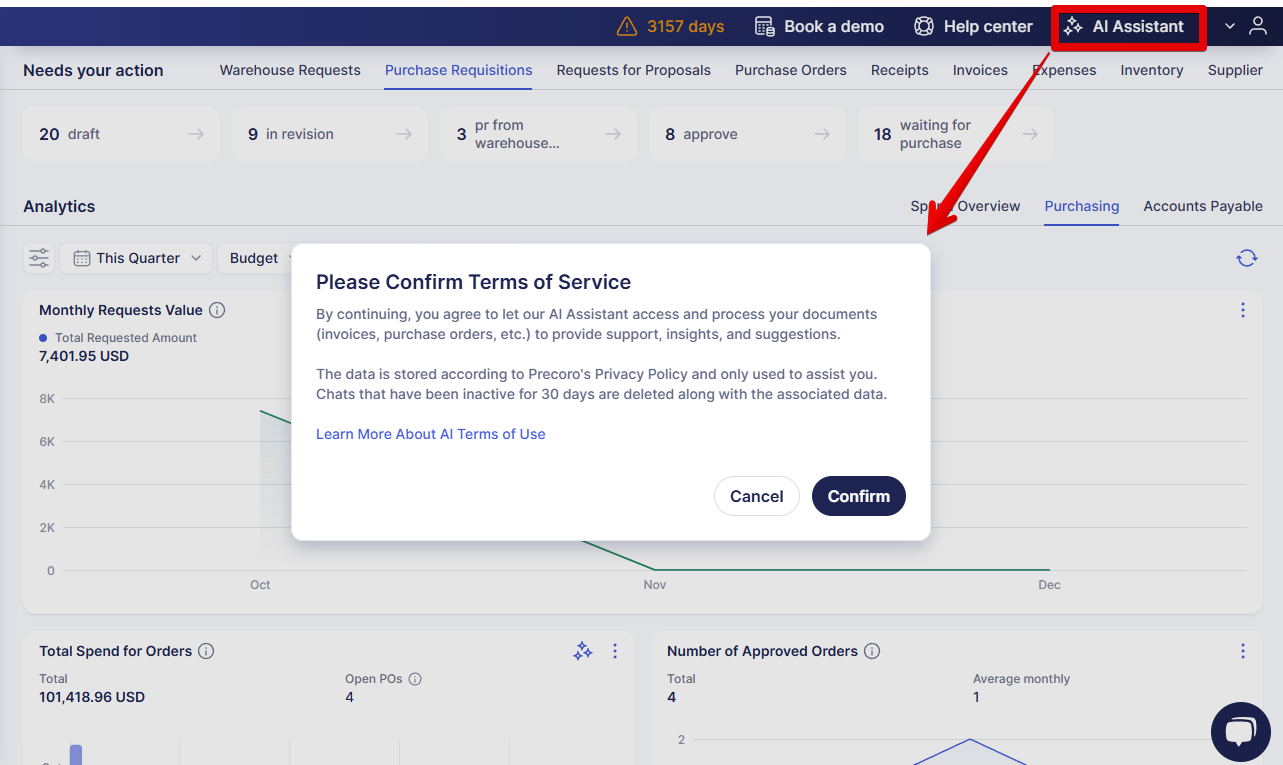
The AI Assistant is now available to everybody and ready to help you understand spending tendencies, identify operational holdups, and improve your procurement strategy.
To enable the Assistant, users with the Configuration role can navigate to Configuration → Basic Settings → Document Setup → General Settings and check the AI Assistant checkbox.

Once the feature is enabled, users will see the AI Assistant button in the navigation menu located in the top right corner and accessible from any page. When a user opens the Assistant for the first time, it will explain how the data is used and request individual consent.
We’ve also prepared the AI Assistant Guide to help you quickly understand its capabilities and use it to the fullest.
Track Your Funds Precisely Using Standalone Credit Notes
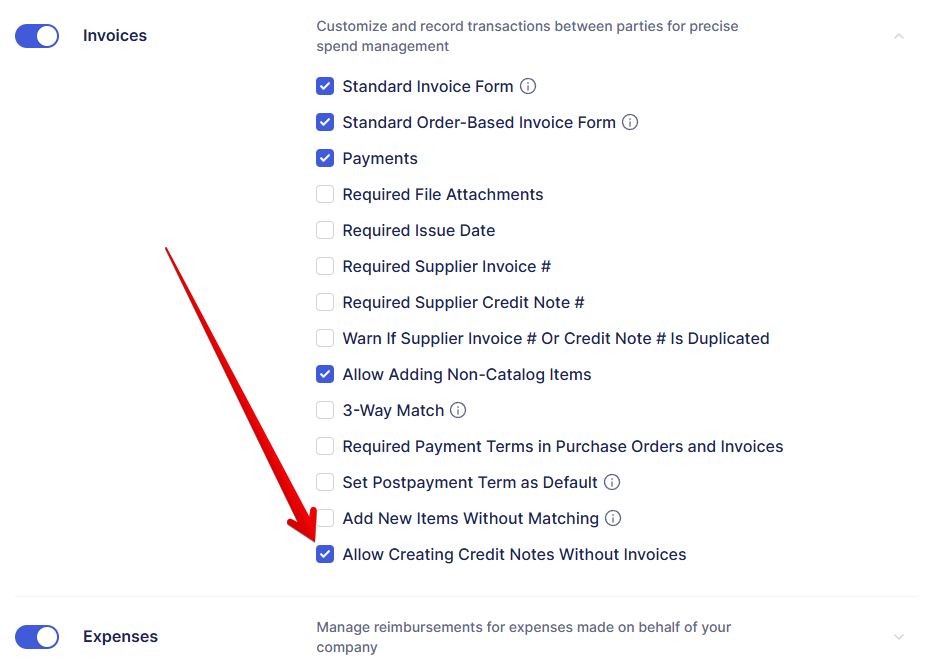
To help you track your spend more accurately and record all discounts and negotiated price adjustments, we’ve added the ability to create credit notes without a related invoice. When this feature is active, you can create standalone CNs in addition to the CNs from invoices that were available before.
To enable this functionality, navigate to Configuration → Basic Settings → Document Setup → Invoices and check the Allow Creating Credit Notes Without Invoices checkbox. If you want to assign budgets to standalone CNs, enable the Budgets for Credit Notes checkbox in Configuration → Basic Settings → Document Setup → Budgets. Click Save to confirm the changes.
Once you’ve activated the feature, you can create a standalone credit note as follows:
- Navigate to the Invoices module.
- Press the Add Credit Note button in the top right.
- Fill in the details, including Supplier, Contract, and Budget (if enabled for CNs in your company).
- Add items from the catalog or fill in item details manually. Please note that you can’t add negative-value items to a standalone credit note. Once ready, confirm the CN.
- The credit note will proceed to the Invoice Approval Workflow (if set up in your company) to reach the Paid status.
Please note: standalone credit notes undergo the same approval workflow as invoices. You can set it up or adjust the current process in Configuration → Approval Workflow → Invoice Approval Workflow. - Once the credit note obtains the Paid status, its total is added to the supplier's credits and removed from the Spent/Used amount in the assigned contract/budget.
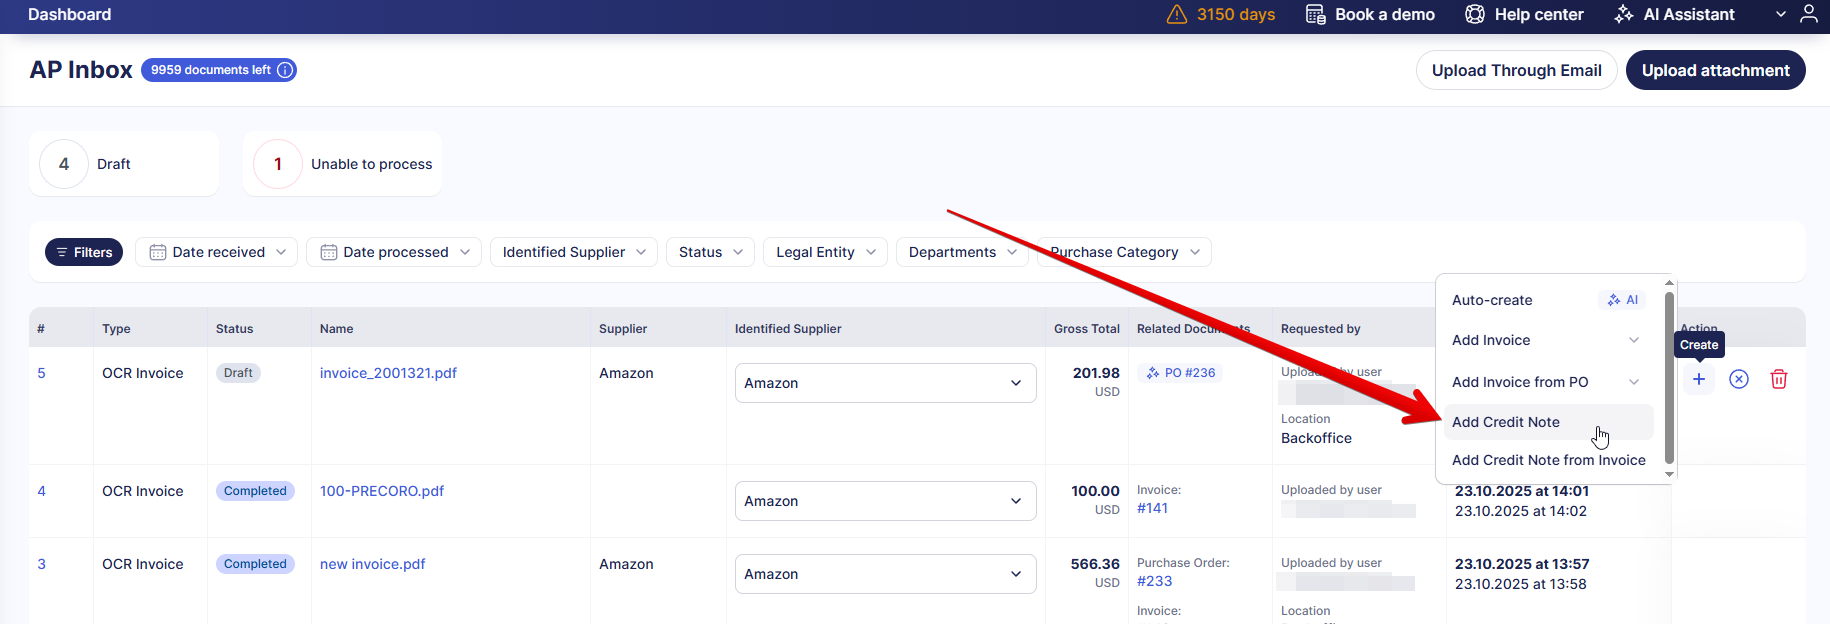
You can also create CNs without invoices using OCR. Find the relevant attachment in the AP Inbox, click Create (“+” icon), and select Add Credit Note.
Easily Order from NAPA with the New PunchOut
If your company needs supplies to keep vehicles in the best condition, purchase the parts and accessories easily with our new NAPA PunchOut integration. Using the new catalog, you can add a PR or PO in Precoro, be redirected to NAPA to browse and select your items, and then have this information sent to Precoro for approval and order tracking.
Please refer to this guide to set up and start using the NAPA PunchOut Catalog.
To see other available catalogs, check out our list of Marketplace Integrations.
Keep Your Team Updated by Sending Scheduled Reports via Email
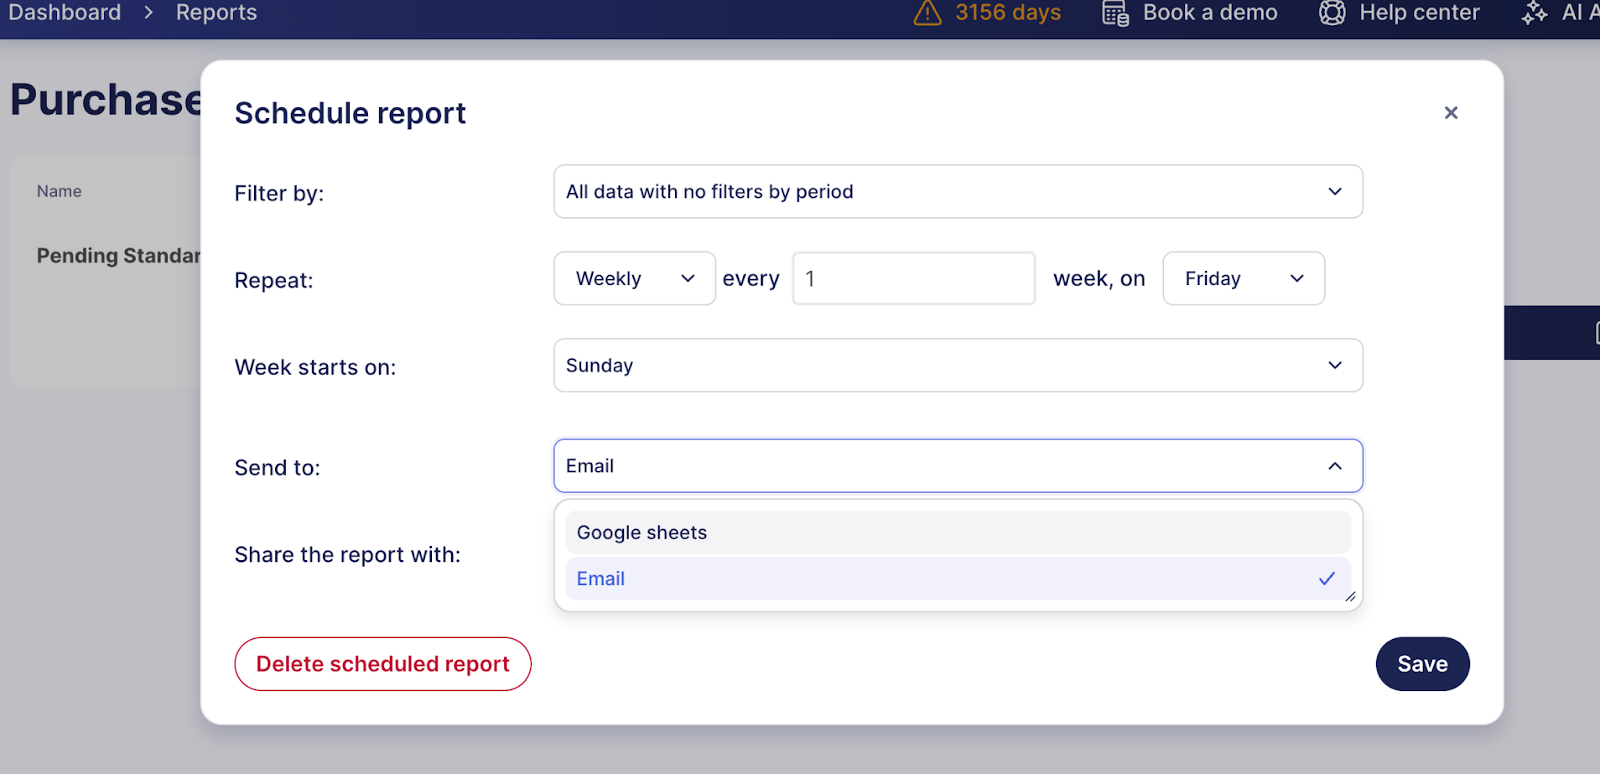
You can now share scheduled reports as files via email in addition to exporting them to Google Sheets. It allows you to regularly send reports even if you or your colleagues don’t use Google Sheets or don’t have Google accounts connected to Precoro.
In the Reports module, when you select a report and all the necessary filters, you have the option to Save Filter. On the Saved Filers page available from any report, pressing the Schedule Report button will open a dialog window, where you’ll be able to choose if you want to send the reports via email or Google Sheets, set the frequency, and select the users you want to share the report with.
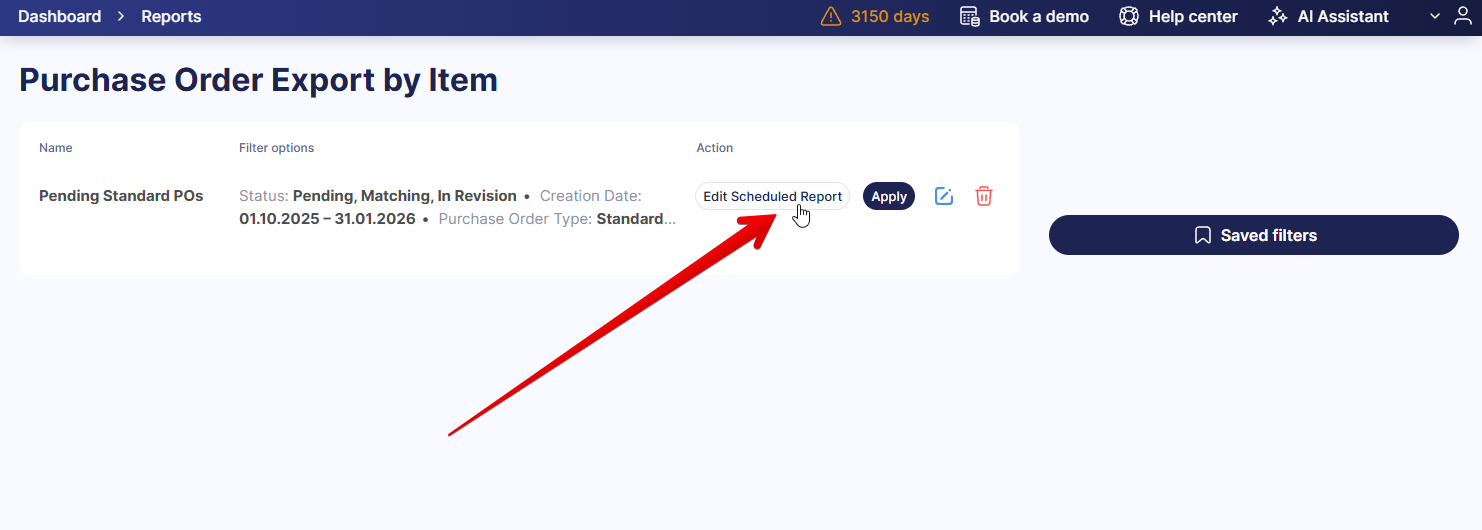
You can also edit any scheduled report and view or adjust the recipients. To do so, find it on the Saved Filters page and click Edit Scheduled Report. Make changes in the dialog window and press Save to confirm them.
Use Updated E-Invoicing Capabilities to Ensure Compliance
To help you process more invoice types and adhere to regulations, we’re gradually implementing e-invoicing support. When the feature is enabled for your company, you can add the XML file to the AP Inbox via email, API, or manually, and Precoro will use a custom algorithm to extract the data and show the document in a familiar format. Please refer to this guide for more details.
We now offer e-invoicing support for these countries and formats:
- Mexico (CFDI)
- Belgium (Peppol BIS 3.0)
- Germany (ZUGFeRD, XRechnung, Peppol)
Please reach out to your Customer Success Manager to enable this functionality. If you’d like to work with e-invoices in Precoro and your country isn’t yet on this list, kindly let us know via the Open Product Plan as described here.
Add Catalog Items to Documents Comfortably with the Interface Update
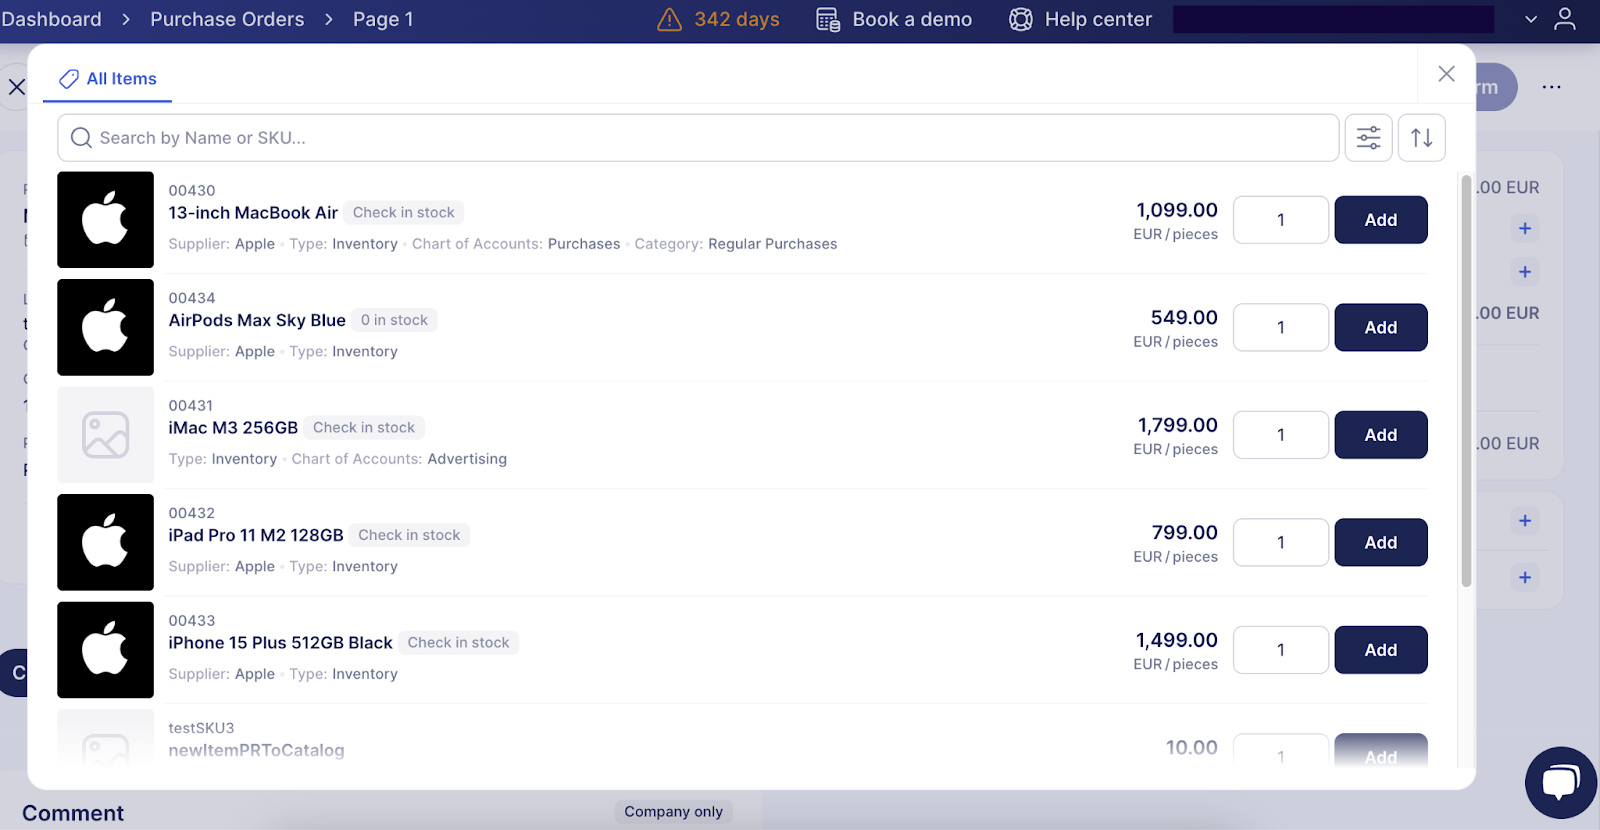
This update introduces the new view for adding items from the catalog to all types of documents. You’ll notice a more space-efficient and modern design, convenient search and filters, and a “Check in stock” button to see if the item is in the inventory.
You’ll see the new design when adding items from the catalog to purchase orders, purchase requisitions, invoices, requests for proposals, and warehouse requests.
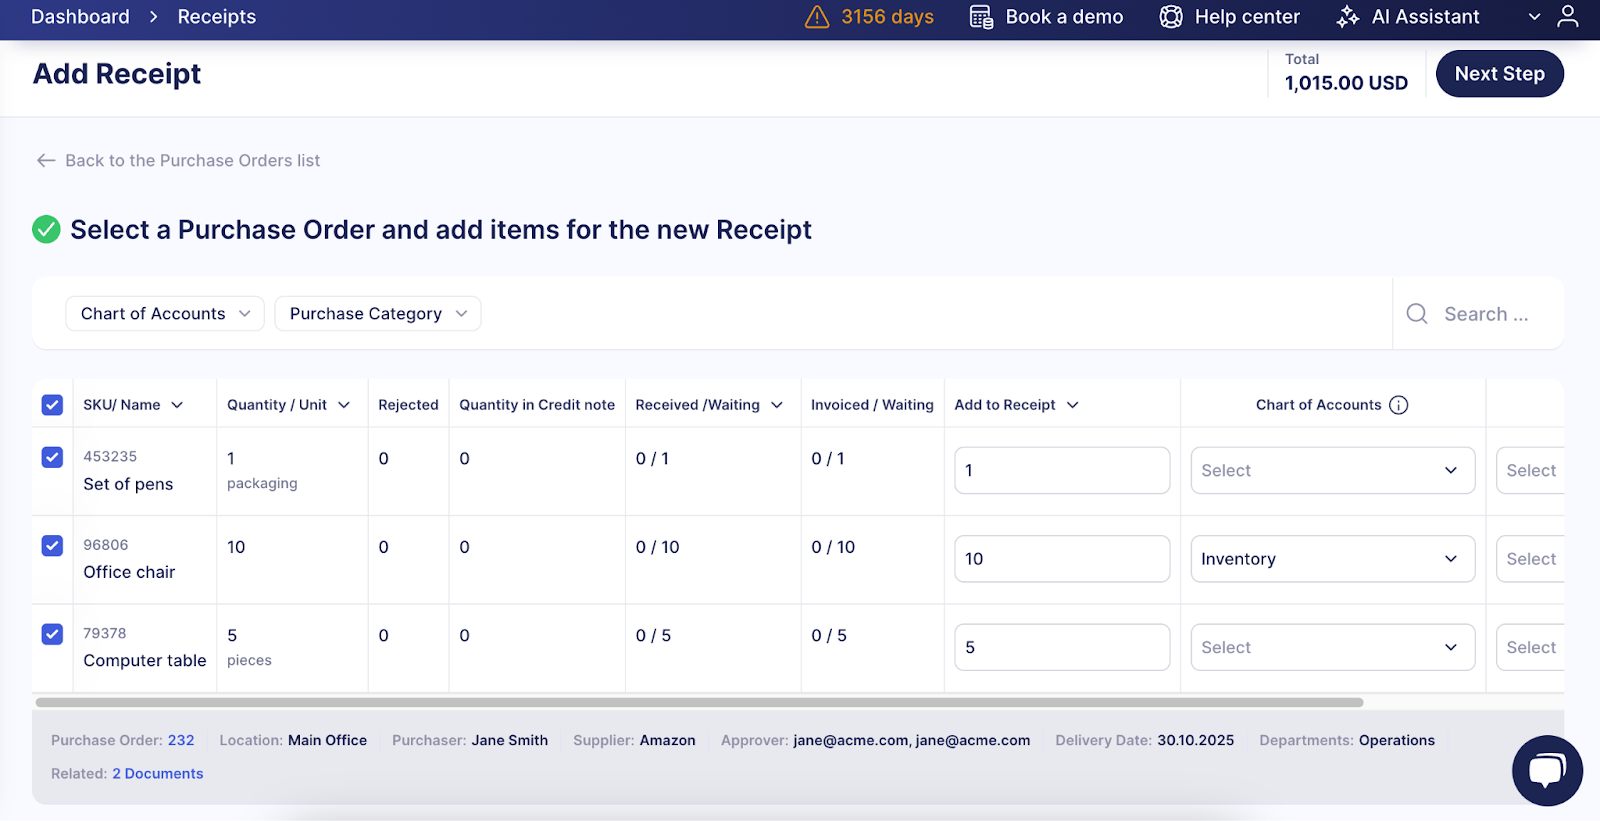
Receive Goods in a Few Clicks with Item Auto-Selection
When you create a new receipt, the items from the related PO that haven’t been received yet are now automatically checked. You can then adjust the selection and uncheck the items you don’t need in this document. With this change, you can create receipts a lot quicker, as you don’t have to select the items manually.
The items are auto-selected when you create a receipt from the order page or from the Receipts module.