TABLE OF CONTENTS
Introducing Payments: Manage the Entire Procure-to-Pay Cycle in Precoro
This update introduces Precoro Payments—a way to pay and reconcile invoices in one flow right within Precoro.
Create a financial account in Precoro, link your bank accounts, and start issuing payments to:
- Fully control spend: Ensure every payment is approved before the money leaves your account.
- Cut payment costs: Minimize transaction fees and operational costs.
- Sync procurement and finance: Manage the entire procure-to-pay cycle in Precoro for complete visibility into cross-team workflows.
To start using Precoro Payments, please follow this guide to set up your financial account.
Precoro partners with Stripe Payments Company for money transmission services.
Order Conveniently with Unit Conversions
If you use different units of measurement to purchase and keep stock of items, this new Item Management function is for you. In addition to the base unit, you can now establish a purchase unit, a price for it, and also a conversion rate between units.
Here’s how to do it:
- Open the Item Management page.
- Find the item you want to add a new unit for and press edit (pencil icon).
- Under the input boxes for base price, currency, and unit, press + Add Purchase Unit.
- Enter the price and select a new unit.
- After selecting the purchase unit, you’ll see a conversion input below. Please enter the rate. Example:
- Base Unit: piece
- Purchase Unit: pack
- 1 pack = 10 pieces
- Press Save.
Now, when requesting or ordering this item, you’ll see the purchase unit.
You can edit the unit when editing the item in PO or PR. However, you can’t change the unit when creating an invoice or receipt for a PO.
New in Integrations
Sync Entities in a Click Using Smart Integration
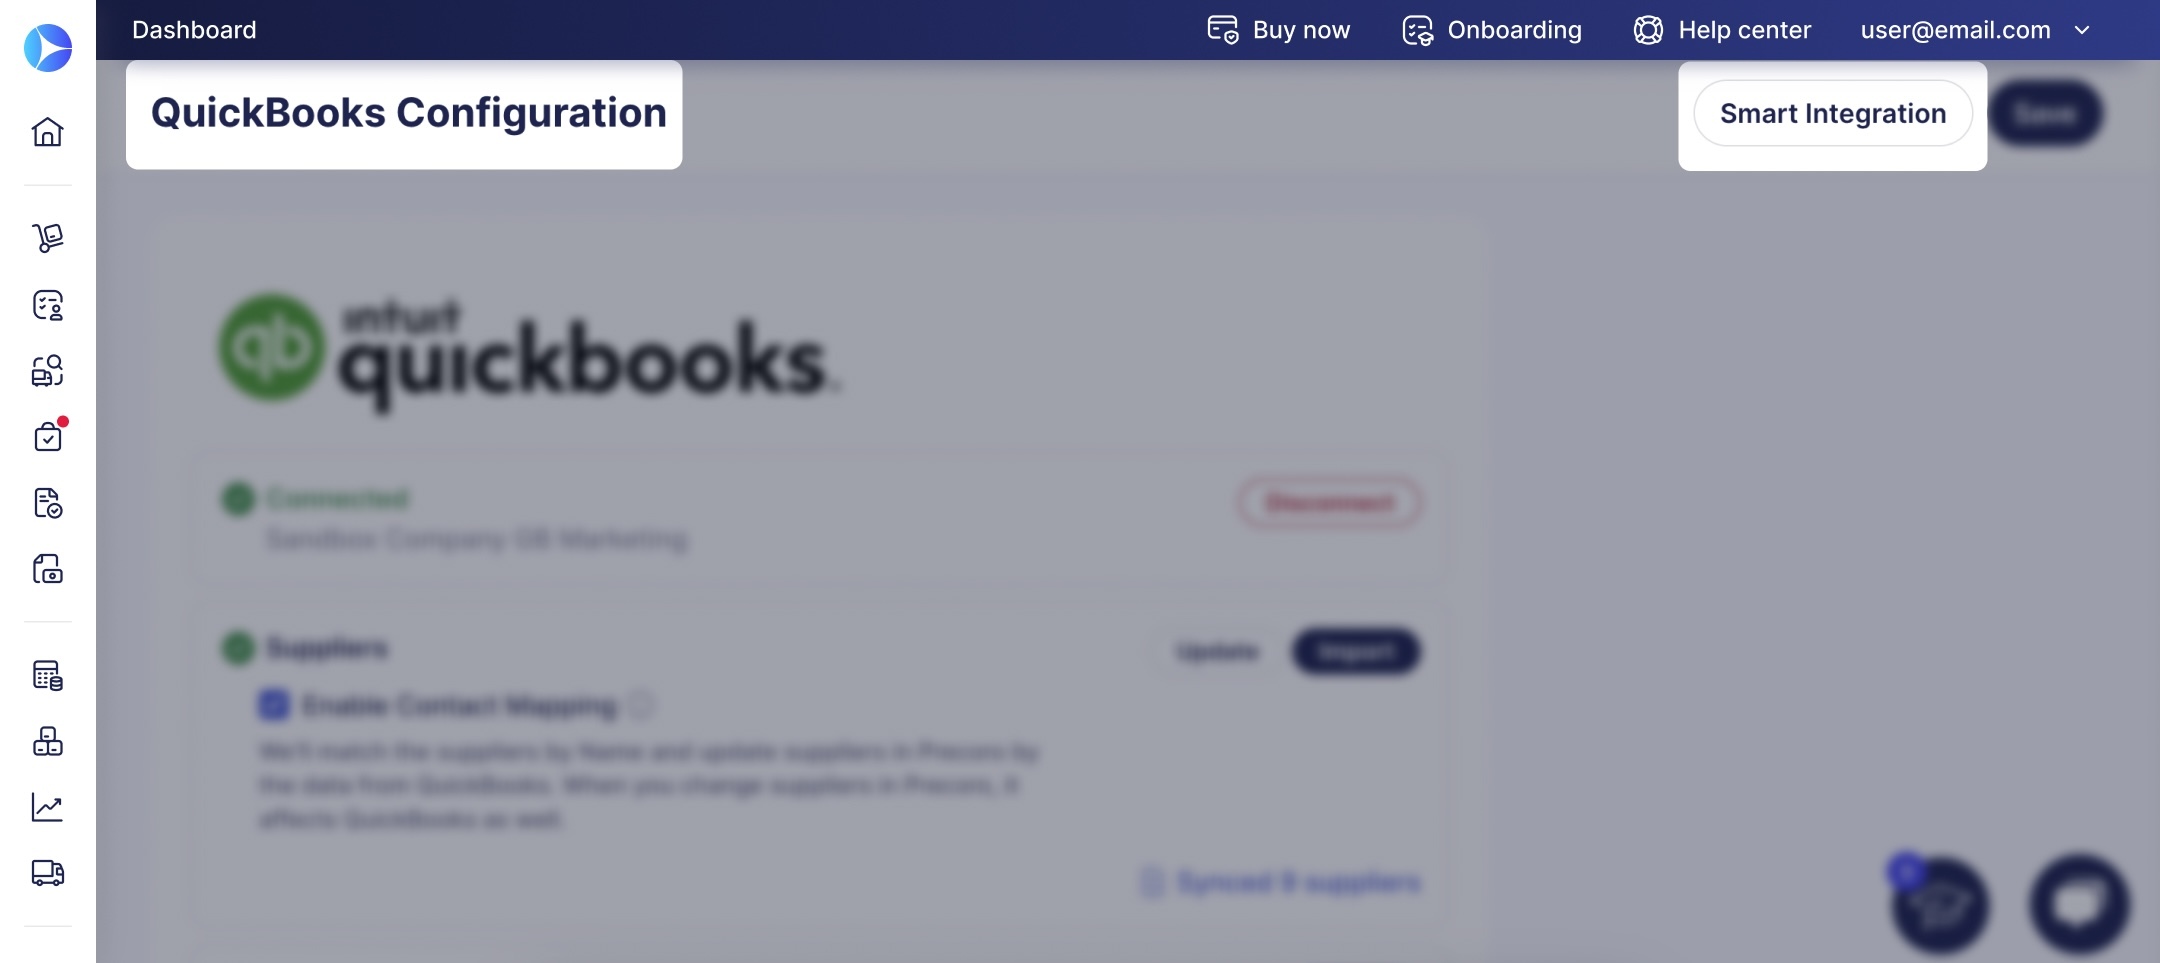
Planning to integrate your Precoro account with NetSuite or QBO? The initial setup is now easier than ever.
After connecting the account, use Smart Integration to sync entities to:
- Skip the manual import process.
- Cut setup time.
- Ensure better performance by only importing actively used options.
Smart Integration is already available for NetSuite and QuickBooks Online; check out these guides to learn more:
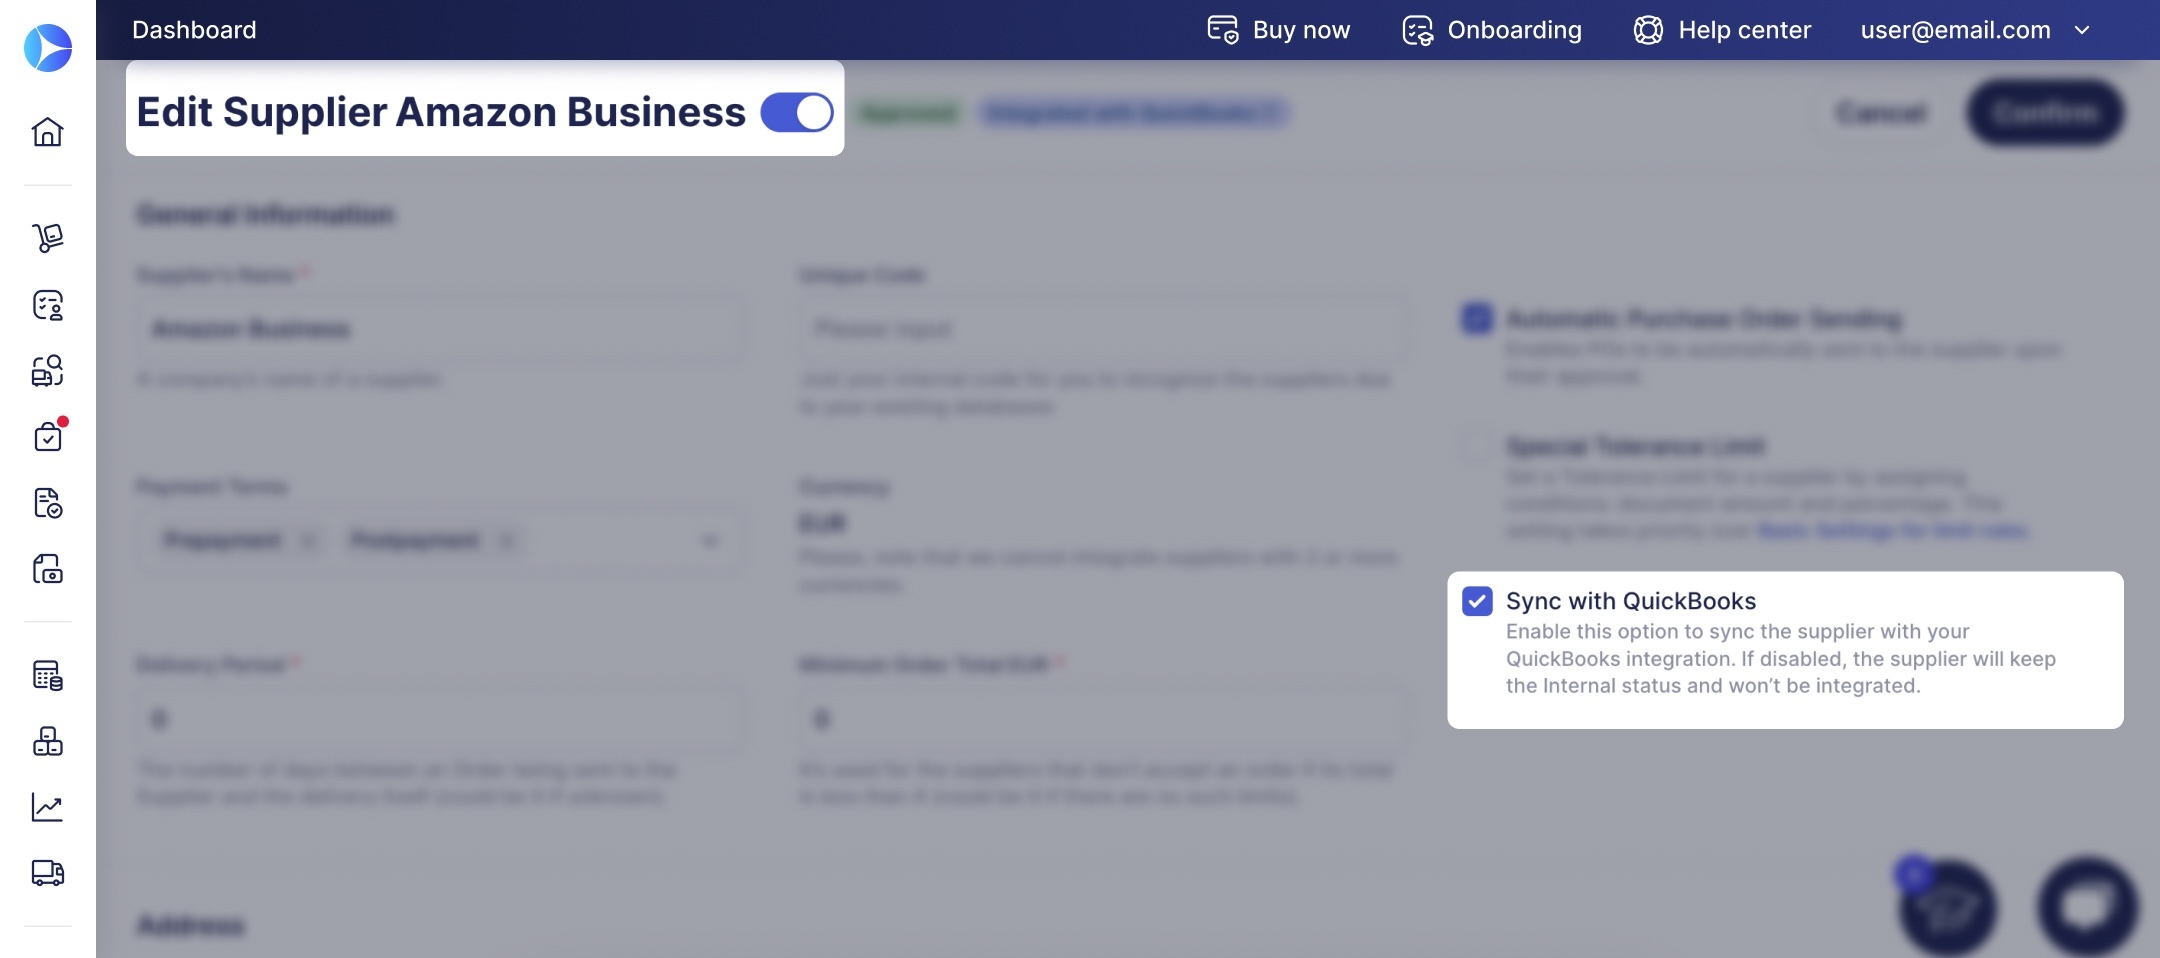
Precisely Manage Supplier Integration with the Internal Status
If you’re using NetSuite, QBO, Xero, or Bill.com integrations, you can now control which suppliers are integrated and which are excluded.
To mark suppliers that don’t need to be integrated, we’ve added the Internal status.
Here’s how it works:
- When you disable the Sync with Integration checkbox for a supplier, Precoro assigns them the Internal status.
- This supplier will exist in Precoro, but will not be mapped with any supplier in the integrated platform.
- Documents for this supplier won’t be sent to integrations.
- Internal suppliers and documents won’t gain the Not mapped/Not sent to Integration statuses or added to the corresponding infocards. This allows you to focus on relevant data.
To mark a supplier as Internal:
- Navigate to the Supplier Management page.
- Open the supplier’s card by pressing Edit.
- Disable the Sync with Integration checkbox.
- Press Confirm.
While supplier integration is inactive, all suppliers are marked Internal, and this checkbox is inactive.
While supplier integration is active, Precoro automatically integrates vendors added via import or the registration form; you can turn off integration for them in the supplier card.
If you sync a supplier that was previously internal, Precoro does not automatically send their documents to integration. If necessary, you can integrate them manually from the document page.
Create Invoices via API
We continue expanding our API capabilities to give you maximum flexibility when integrating external tools with Precoro.
Set up requests to post invoices to Precoro to:
- Ensure consistent data across platforms,
- Fully record your spend in Precoro,
- Cut manual work.
Please note that you currently create only standalone invoices and use only the standard invoice form.
New in Mobile App
Please note: These features become available globally starting May 1.
Mark Invoices and Expenses as Paid
Mobile App now lets you move invoices and expenses to the Paid or Partly Paid status.
To mark a single document as paid:
- Open the document.
- Press Add Payment at the bottom of the screen.
- Fill in the details.
- Press Pay.
To add payments in bulk:
- Navigate to the Invoices or Expenses module, depending on what type of documents you want to pay.
- Press the Payments icon (see screenshot below).
- Select the documents you want to pay and press Add Payment.
- Fill in the details.
- Press Pay.

Revise Documents
In addition to editing documents, you can also revise them on mobile. This feature offers the ability to change items and correct the values of document fields. To revise a document, open it, press “...” in the top right corner, and select Revise.
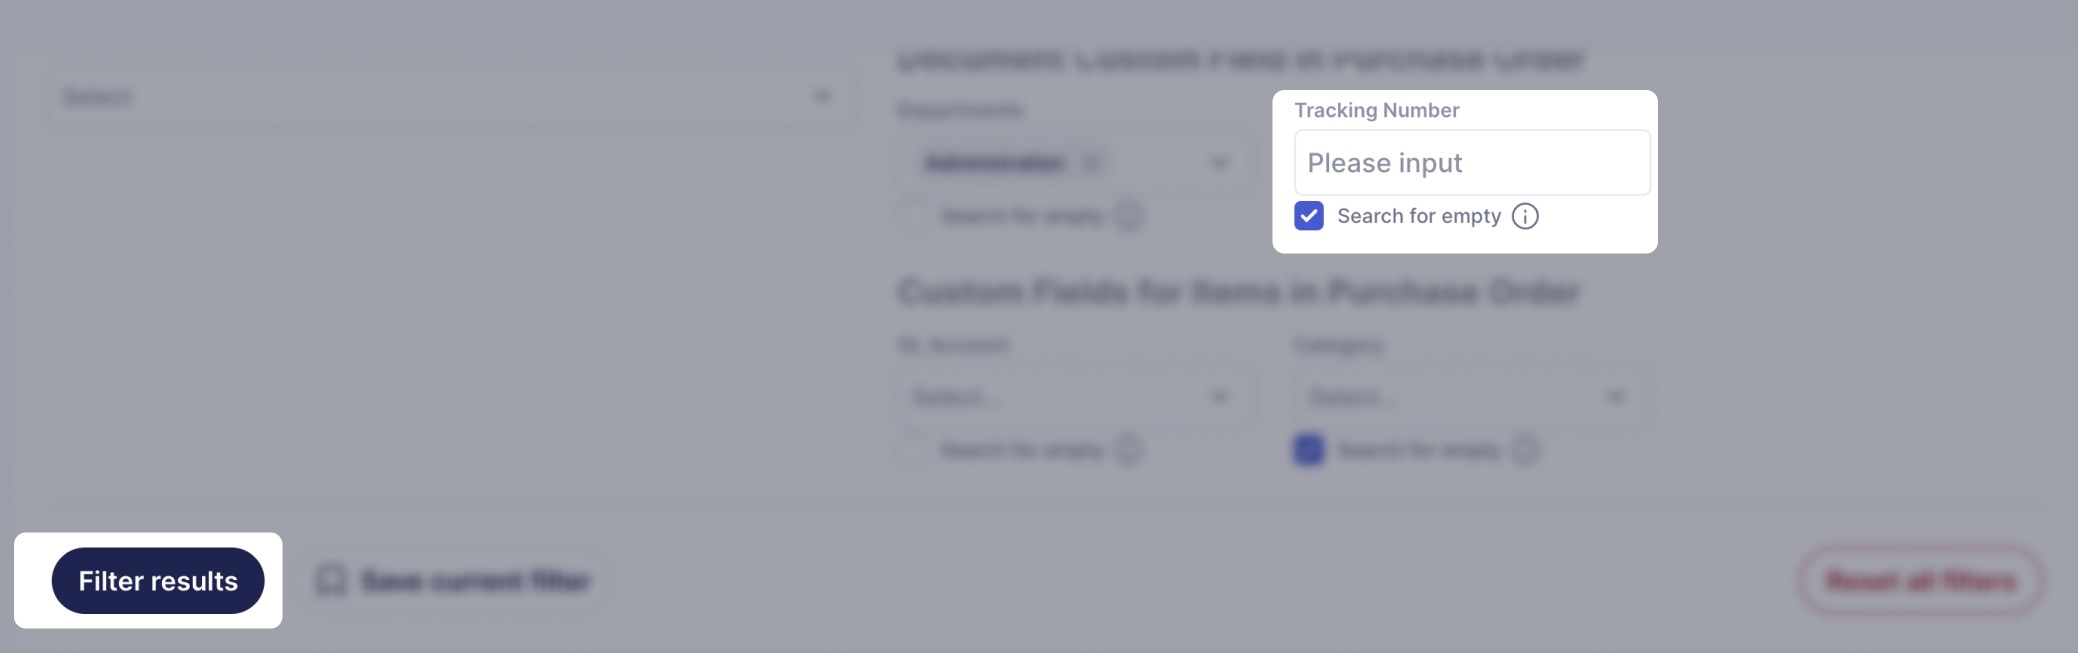
Easily Detect and Add Missing Document Information
You can now use filters to find documents that are missing information in
- Custom fields for documents
- Custom fields for items
Here’s how to use the new filters:
- Open the necessary module (for instance, Purchase Orders), and click Filters to open the full list of filters.
- Scroll down to the Custom Fields section.
- Enable the Search for Empty checkbox under any field you want to check.
- Press Filter results.
You’ll see all documents from the current list, where the field is empty.