TABLE OF CONTENTS
How Does the Integration Work?
The Precoro & Sage 50 UK integration enables a bi-directional data flow, keeping your procurement and financial data in sync without manual updates.
Here’s how the integration works:
- Request items and approve invoices in Precoro.
- Once approved, the invoice is automatically sent to Sage 50 UK.
- After you make a payment in Sage 50 UK, the payment status syncs back to Precoro.
If you add or update suppliers, the changes are automatically synced between systems in both directions.
Item and GL account (Nominal Codes in Sage 50 UK) updates flow only from Sage 50 UK to Precoro, so the financial records in Precoro stay accurate without affecting the source data in Sage 50 UK.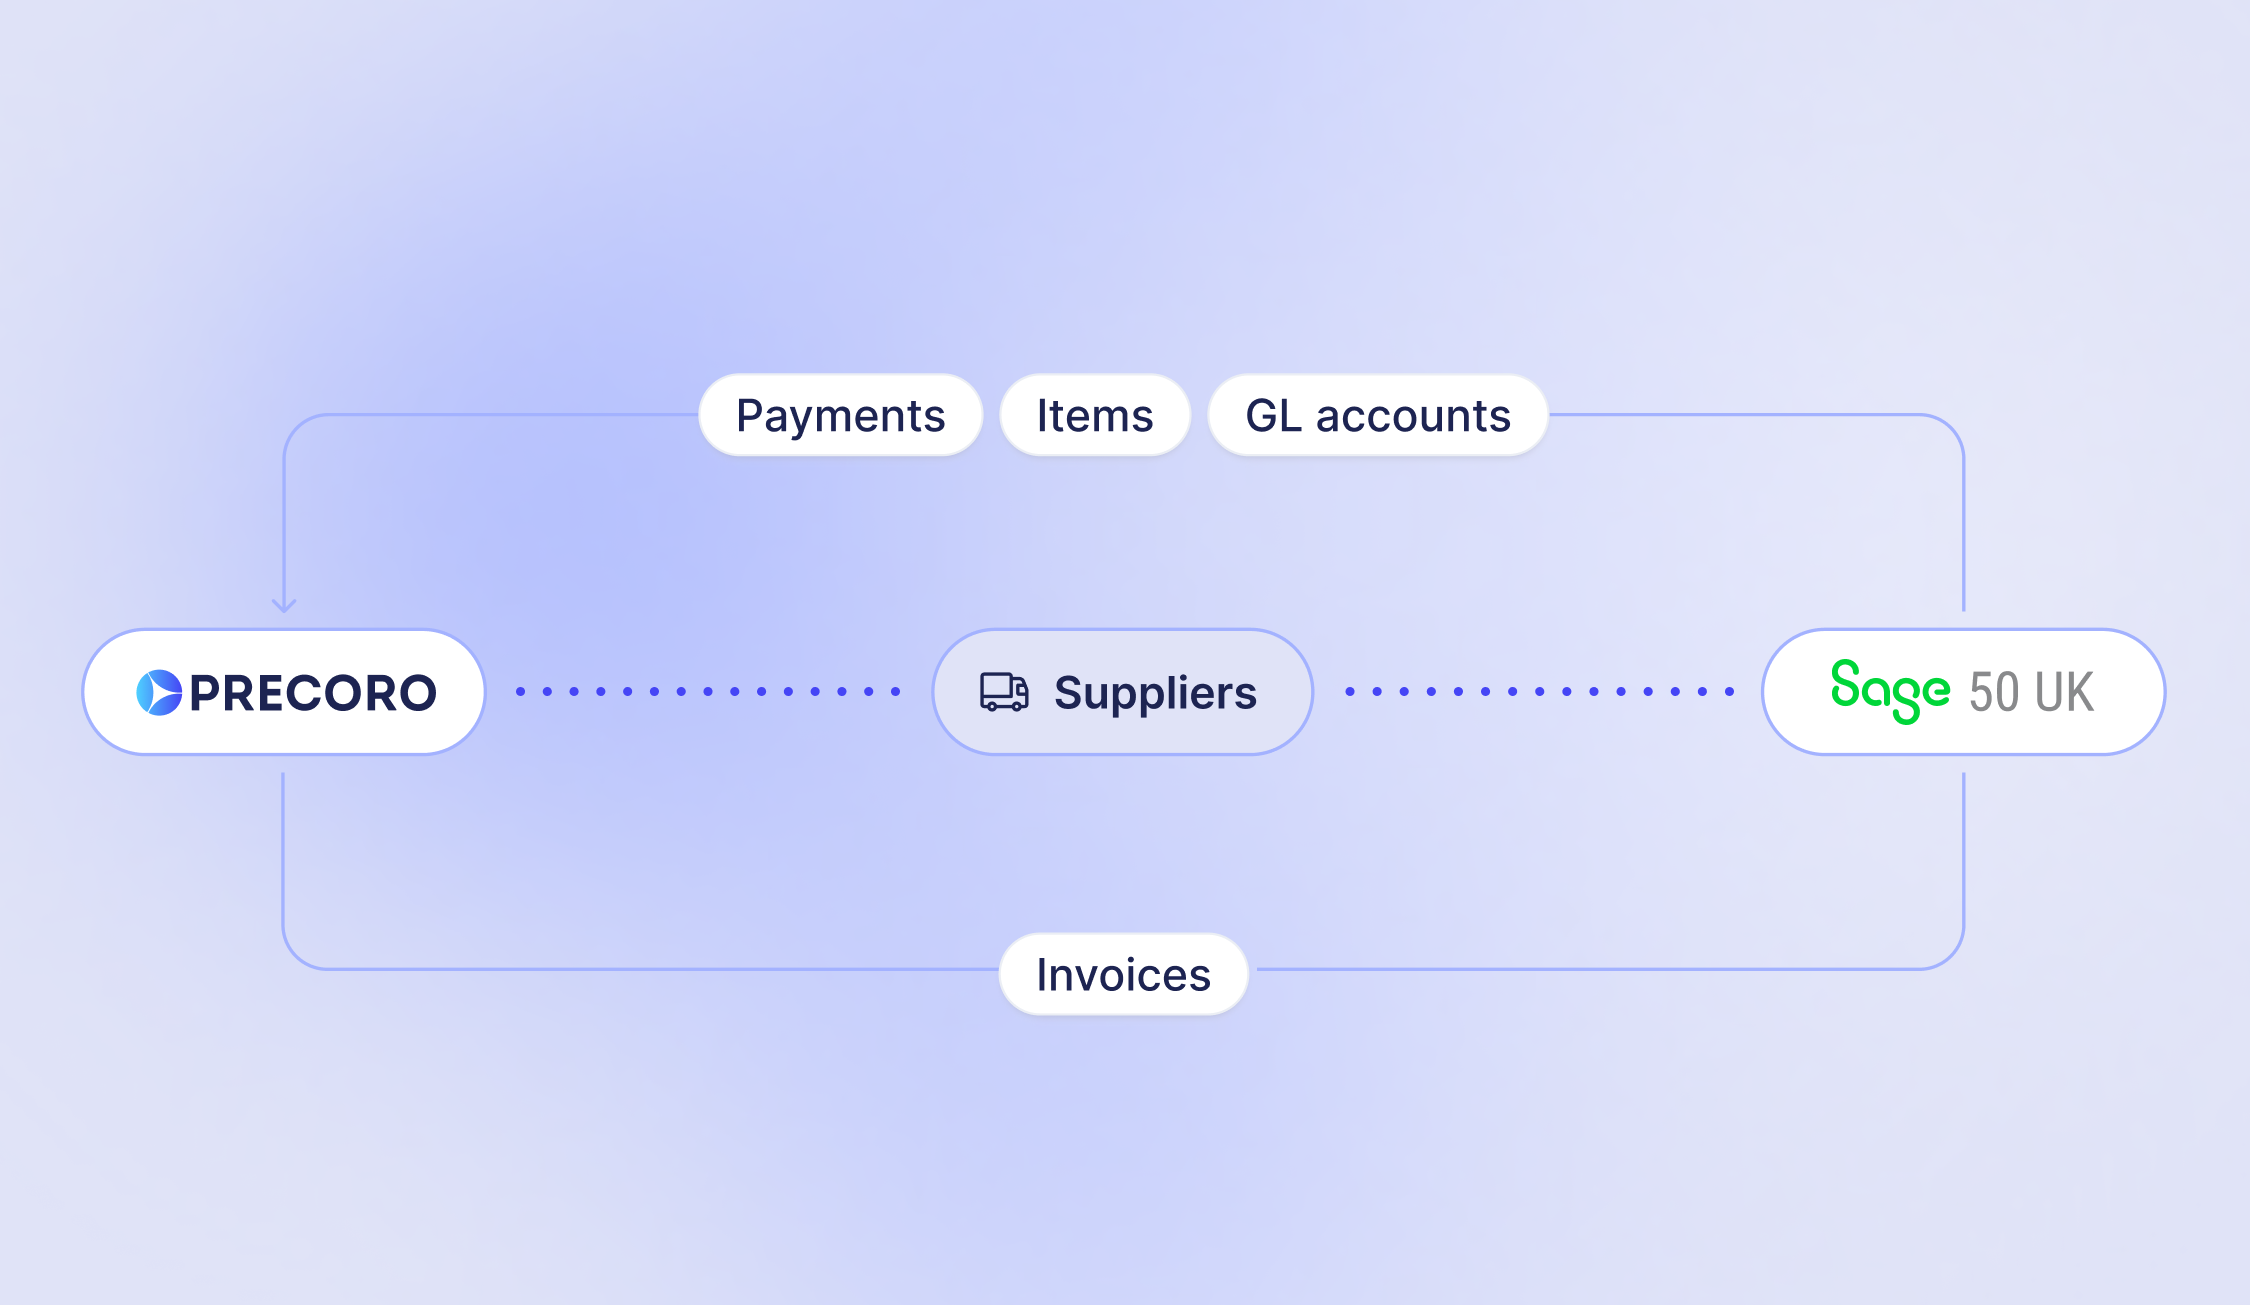
The integration runs through the Sage 50 UK Connector (.exe), installed on the same machine as your Sage 50 UK company file. It enables secure local data exchange while keeping records up to date in both systems.
Setting Up the Sage 50 UK Integration
💡Please note: This integration is a paid add-on, available for purchase if you have the Automation or Enterprise package. For pricing details, please contact your Customer Success Manager.
To set up the Precoro & Sage 50 UK integration, you’ll need:
- Admin roles in Precoro and Sage 50 UK accounts
- Permission to run the .exe connector
- Separate setup for each company if you manage multiple accounts
Follow these steps to configure the integration:
Step 1: Decide on the Data You Want to Sync
Determine which data you want to sync between Precoro & Sage 50 UK. You can choose to synchronize the following:
- From Precoro to Sage 50 UK: Invoices
- From Sage 50 UK to Precoro: Payments, items, and GL accounts
- Two-way sync: Suppliers
Step 2: Retrieve API Token
💡 Please note: You can view and copy the API key only once during the generation. Make sure to save the key securely, as you won’t be able to view it again in Precoro.
API access is restricted based on user roles and permissions for locations, departments, and projects. To avoid synchronization issues, we strongly recommend generating the API key using a user account with full system access and no restrictions (by role, group, location, custom fields for documents, etc.).
If your account includes multiple companies, create a separate API key for each one.
To create an API token:
- In Precoro, go to Configuration → Integrations.
- Locate the API Key section → click Go to Page.
- On the API Access Keys page, click the Generate API Key button.
- Copy the generated key and save it securely for future use.
- Click Confirm to complete the process.
Learn more about Using API in Precoro.
Step 3: Configure Your Sage 50 UK Environment
Before connecting Precoro with Sage 50 UK, make sure you have configured and collected the following:
- Sage 50 UK desktop application
- Sage 50 UK admin user and password
- Permission to run the .exe connector on the local machine as an administrator
- company_file_name (e.g., C:\ProgramData\Sage\Accounts\2026\Company.000\Accdata)
- DSN for your Sage 50 UK version (e.g., SageLine50v32)
- Admin rights for the user to grant necessary permissions to the app
Step 4: Contact the Customer Success Team
Once you have the setup details ready, contact Precoro’s Customer Success team. They will provide you with the link to download the .exe connector and the JTW-signed connector password for authorization.
Step 5: Run the .exe Connector
Once everything is prepared, follow these steps to run the connector:
- Download the .exe connector file from the link provided by the Customer Success team.
- Configure the connector to run automatically after every restart (optional):
- Right-click the Windows icon on the bottom left.
- Select run, then type shell:startup → click OK.
- When the Startup folder opens, move the launcher from Downloads into it.
- Right-click the connector launcher → select Run as administrator.
- Enter your connector password in the pop-up window → click OK.
If the pop-up closes automatically, the password was accepted. The connector is now installed and ready to sync data.
FAQs