How to Set Up a Purchase Requisition Module
Learn how to add and use a Purchase Requisition Module in your Precoro account.
TABLE OF CONTENTS
- Set Up a Purchase Requisition Module in the Basic Settings
- Set Relevant User Roles
- Create the Approval Workflow
Purchase Requisition is a document generated by an employee to request that the company orders certain items and to advise on the quantity and timeframe for the order. Please read this article to learn more about the Purchase Requisition and how to use it in Precoro.
Set Up a Purchase Requisition Module in the Basic Settings
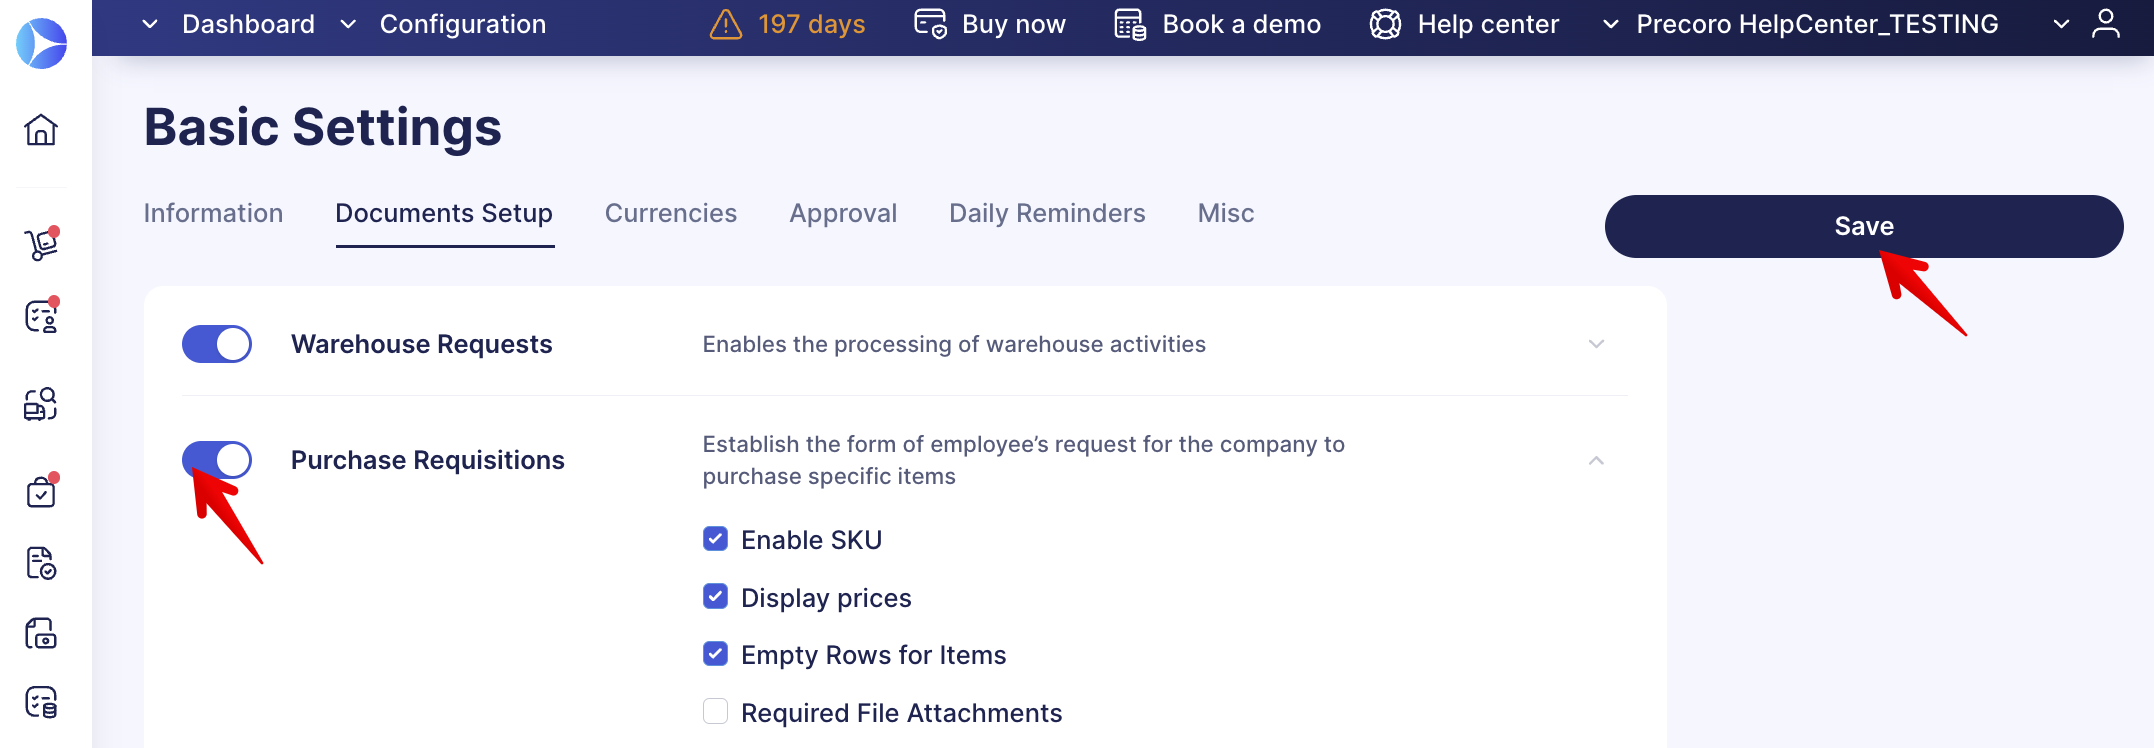
1. Open the Configuration → Basic Settings → Documents Setup → Purchase Requisitions.
2. Activate the module by turning the switch On then press Save.
3. Make sure that all necessary features are active:
- Allow Adding Non-Catalog Items — allows users to add items to the requisition in a free form.
💡Please note: When this feature is active, users have more options when adding items: they can pick an item from the Catalog, add all the necessary information manually, or import items in bulk.
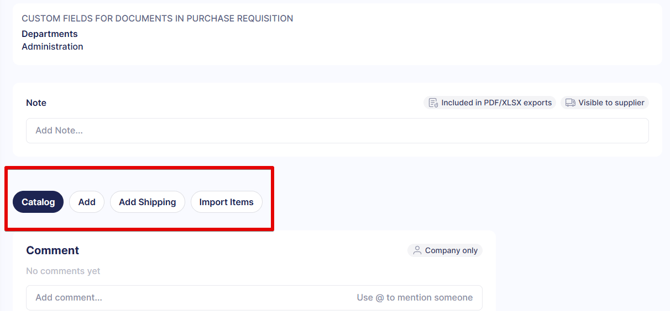
Disabling this feature allows users to only add items from the Catalog. Therefore, you do not need to add items manually as the Add button will not be displayed in the document.
You can take advantage of adding non-catalog items in the following cases:
- You are confident that users will select the appropriate Chart of Accounts and will follow the Accounting rules.
- There will be no errors or misspellings in denominations.
If you wish to receive clear and formalized information on the items you are buying or assist your users with selecting a Chart of Accounts, it is best you use the Catalog items. To do so, turn off the Allow Adding Non-Catalog Items and fill your Catalog.
💡Please note: Read this article to learn more about how to create a Catalog.
- Display Prices — allows users to see the price and Total Sum of the document
Disabling this feature allows you to hide the item price and the Total Sum from other users: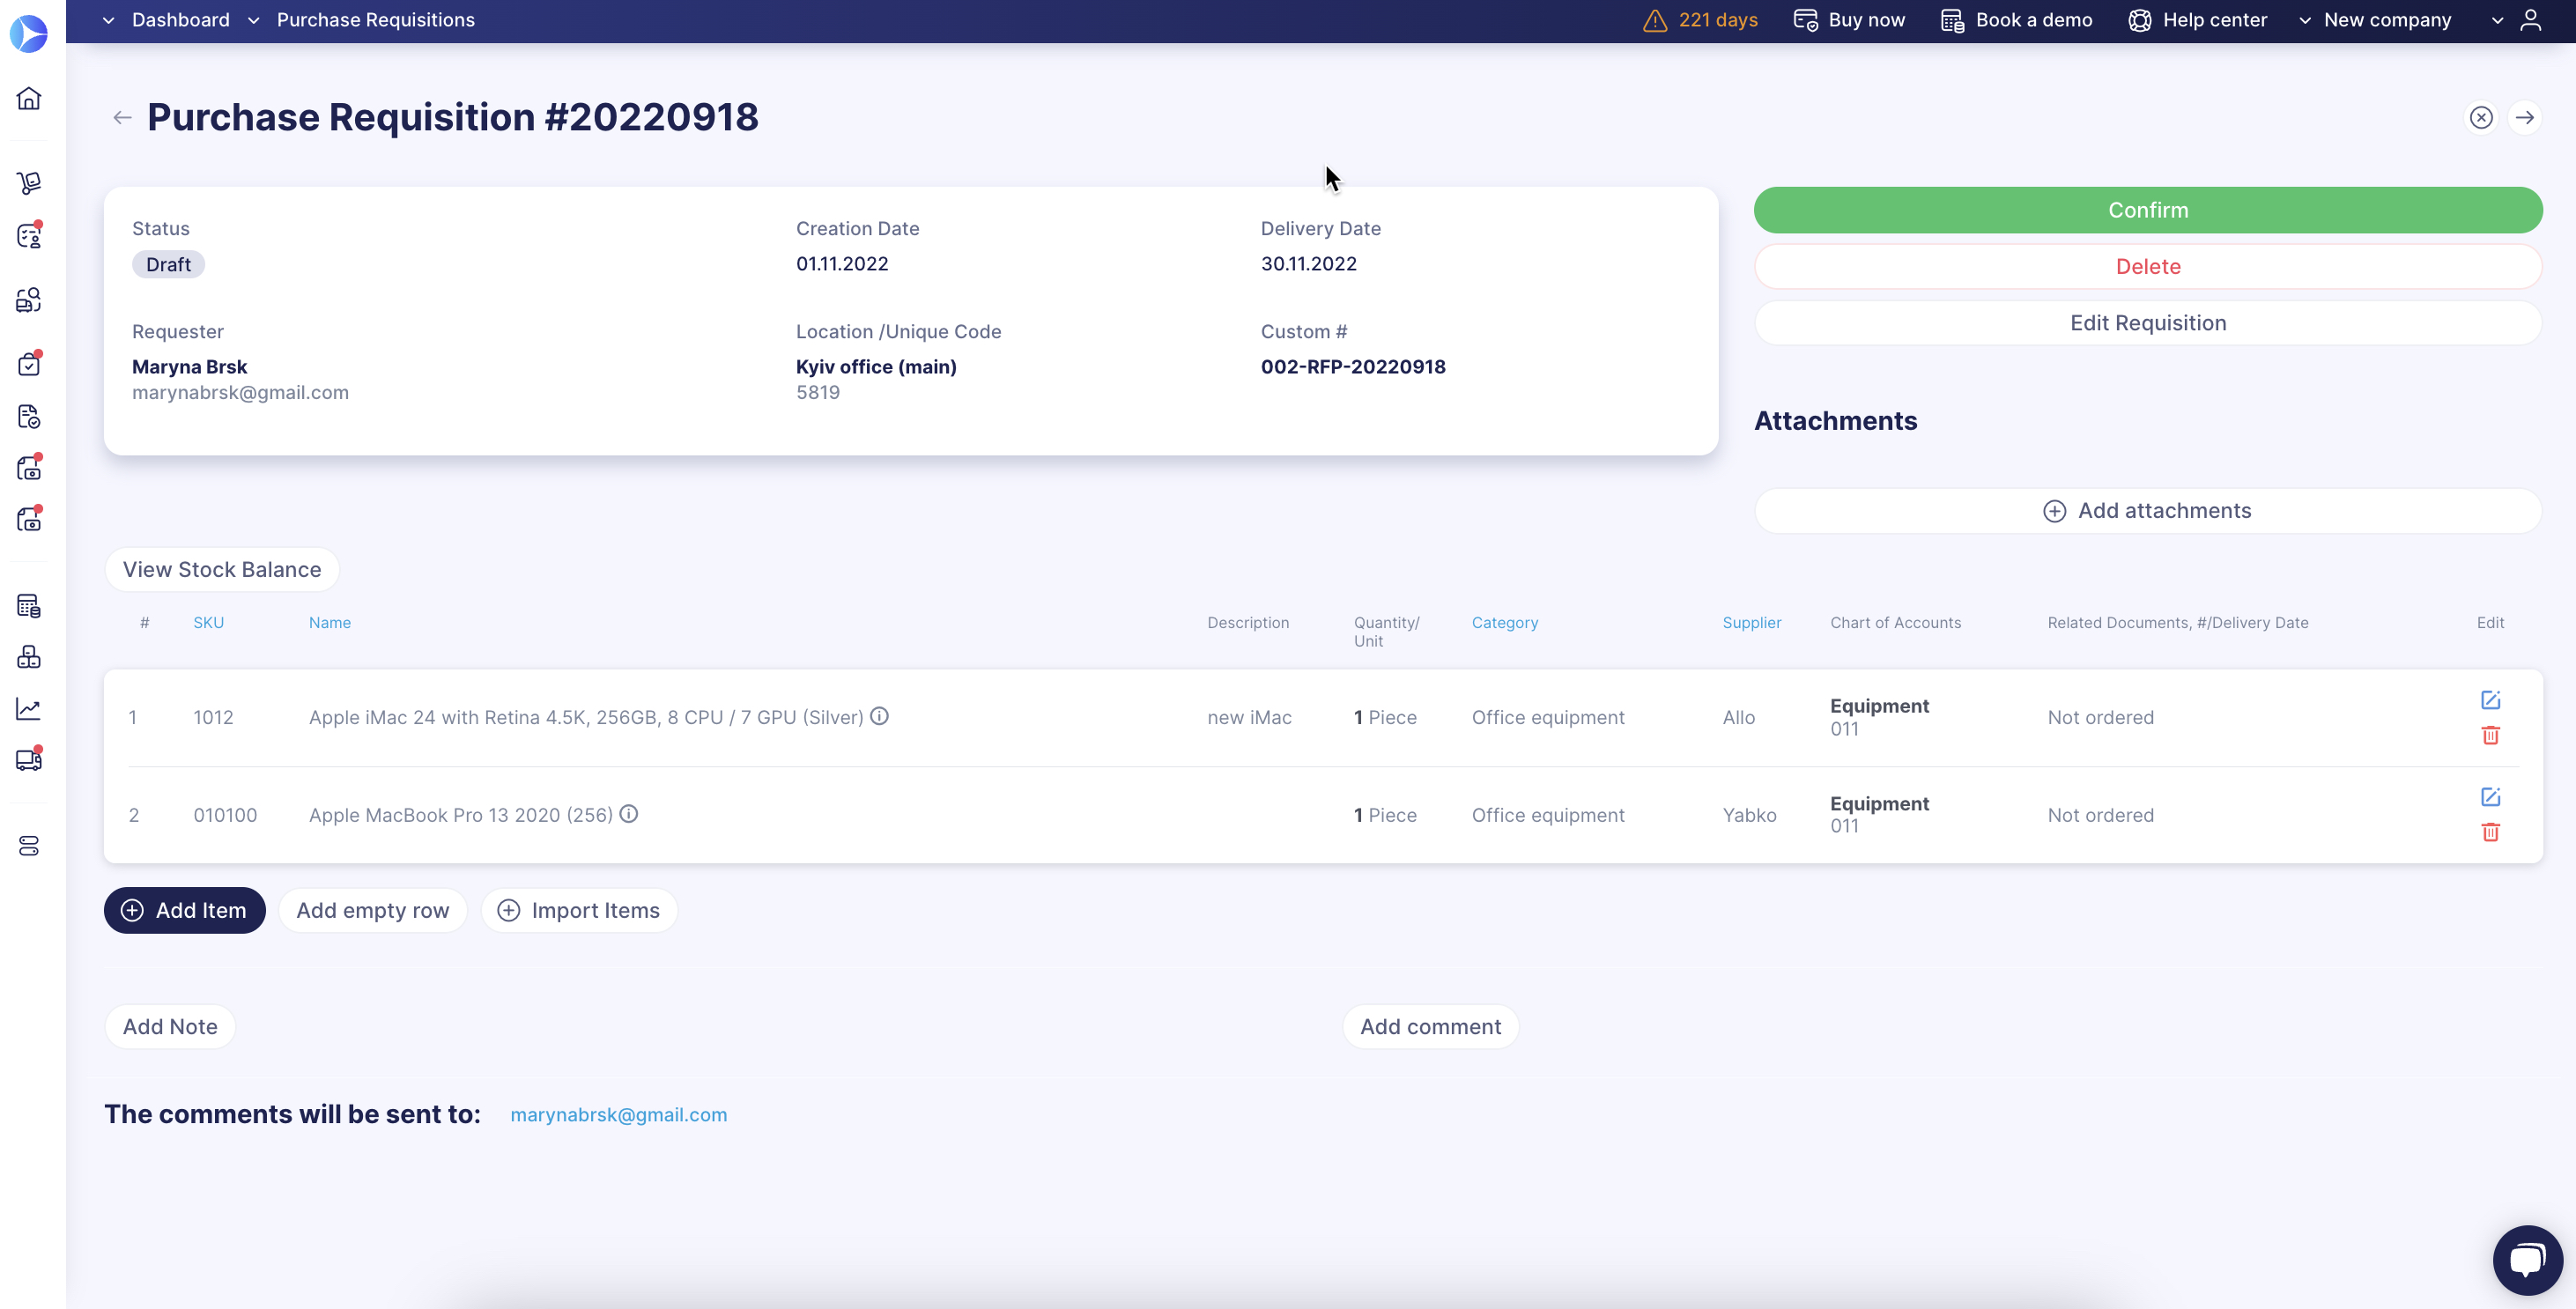
If the Display prices setting isn’t activated, the items added to requisitions as empty rows are saved with a 0 value in the Price field. This helps adjust prices quicker when creating purchase orders from requisitions. Moreover, if the item from a purchase requisition was added to the catalog, the Price will also be saved as 0.
-
SKUs — allows users to see the SKU of the item in the row.
Disabling this feature removes the SKU information from the item’s row so your users will not see it.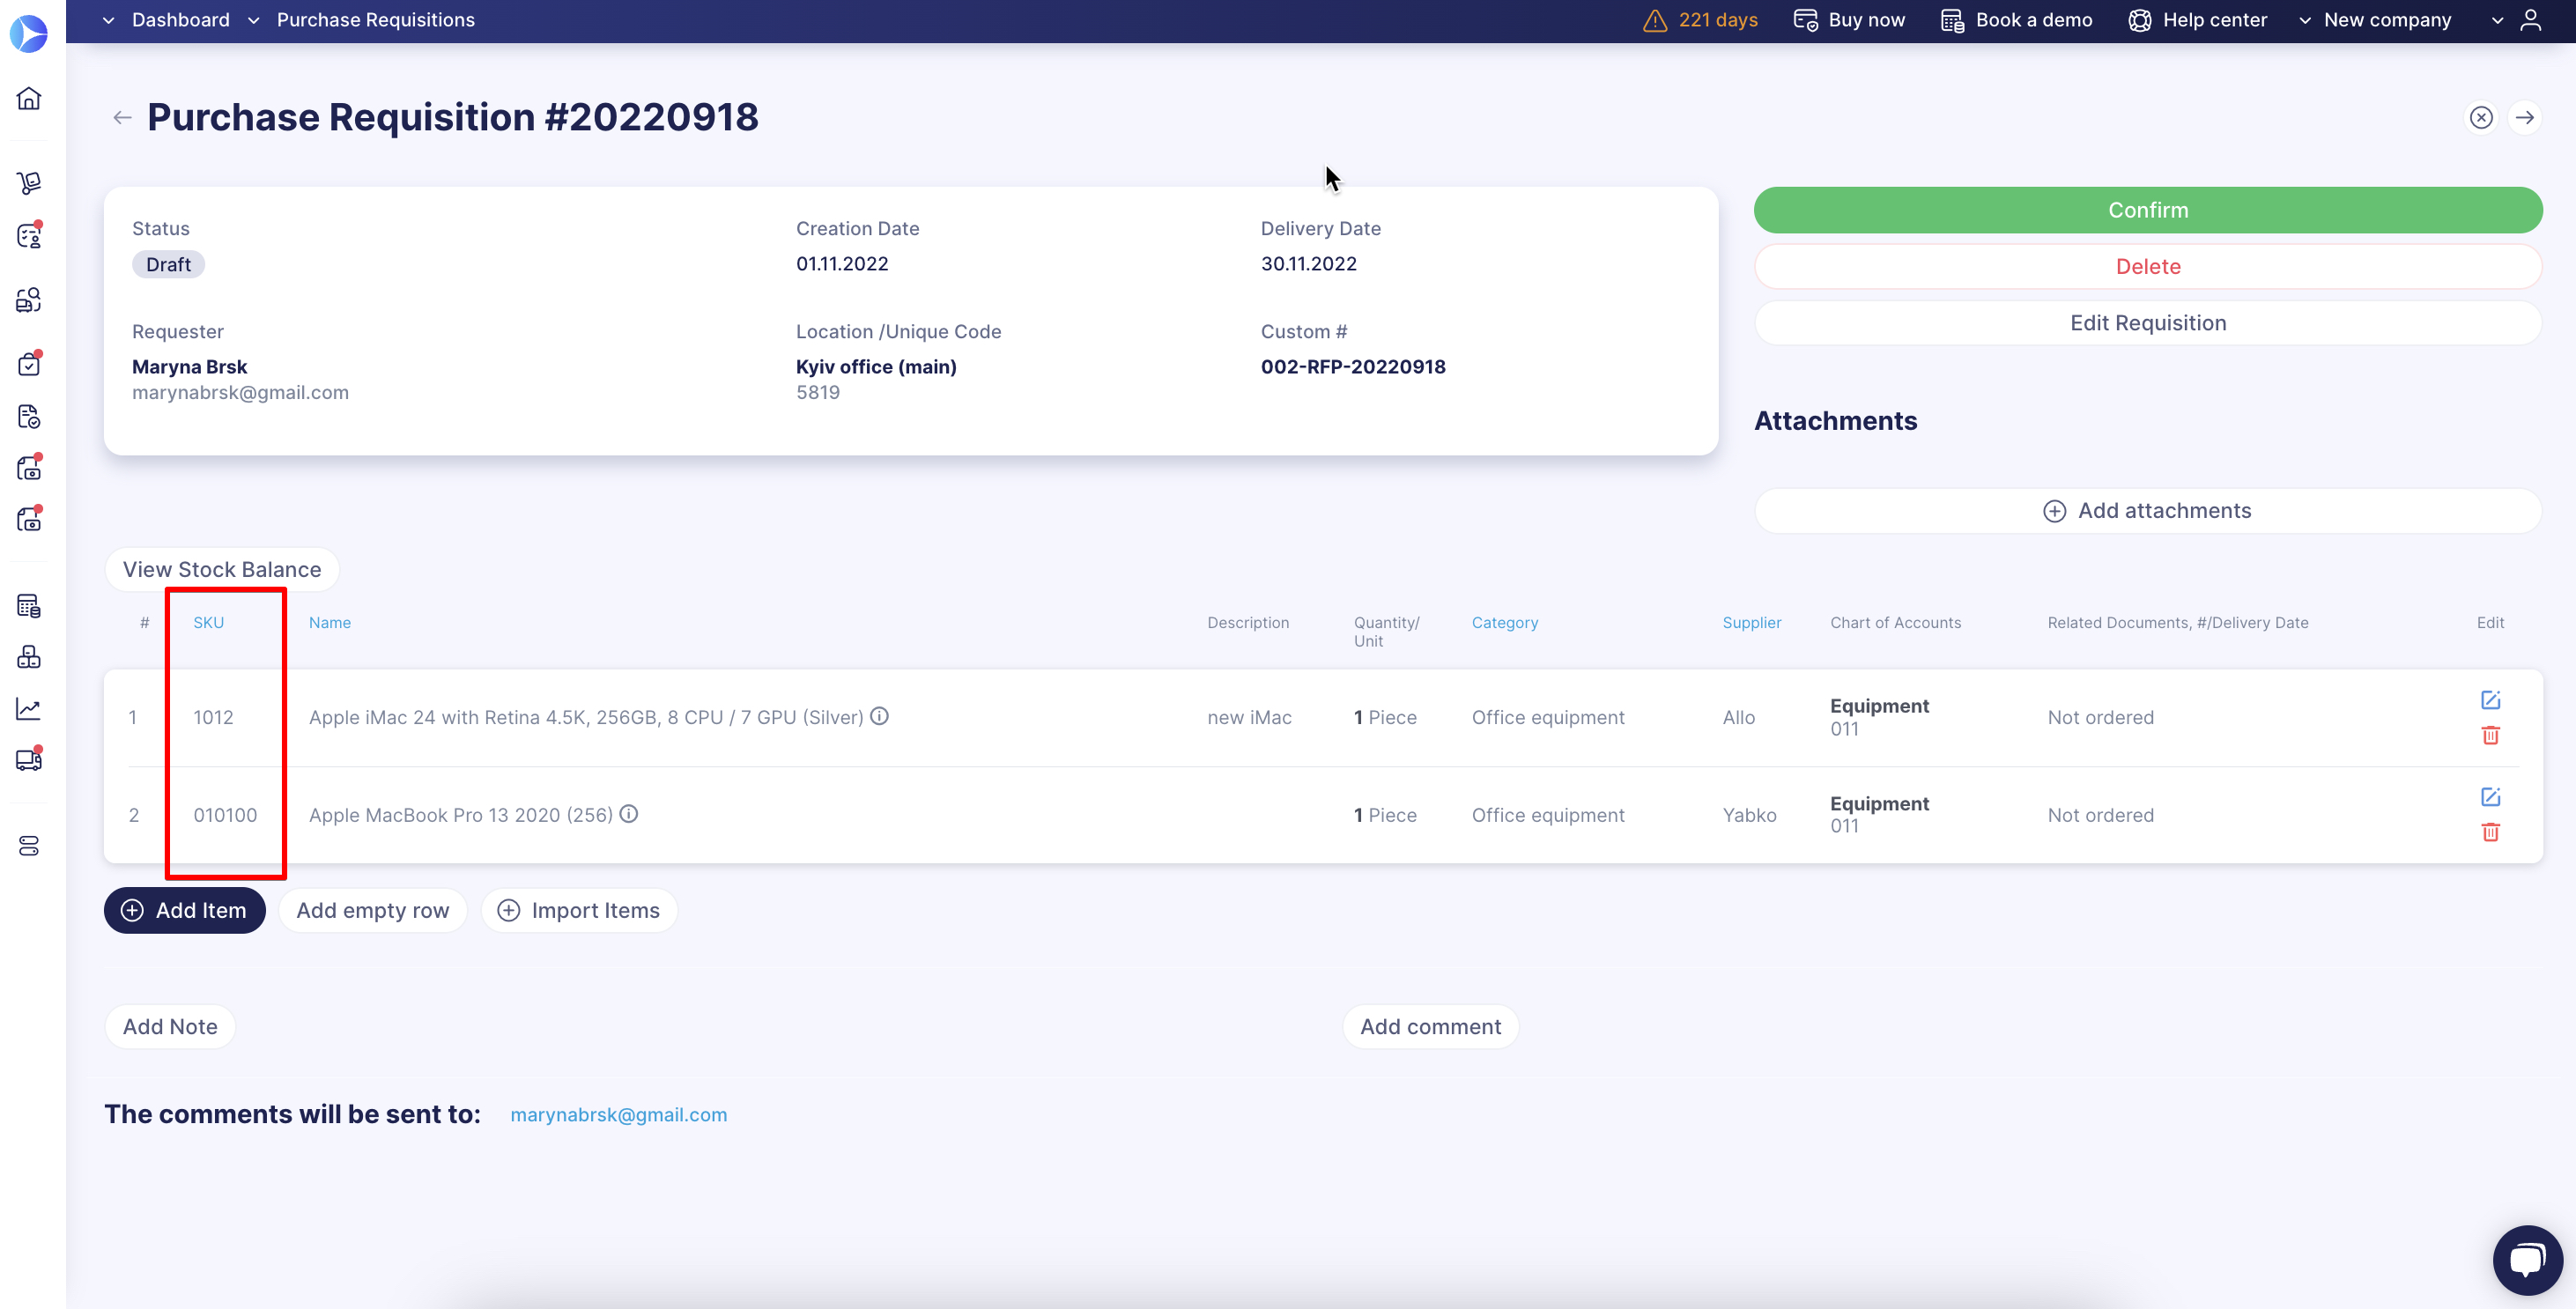
Set Relevant User Roles
1. Open the Configuration page and go to the User Management tab.
2. Select the users who will work with the PR module and provide them with corresponding roles. To do that, press the Edit Action and set the user’s rights in the Roles tab.
3. To save the changes, press the Update button below.
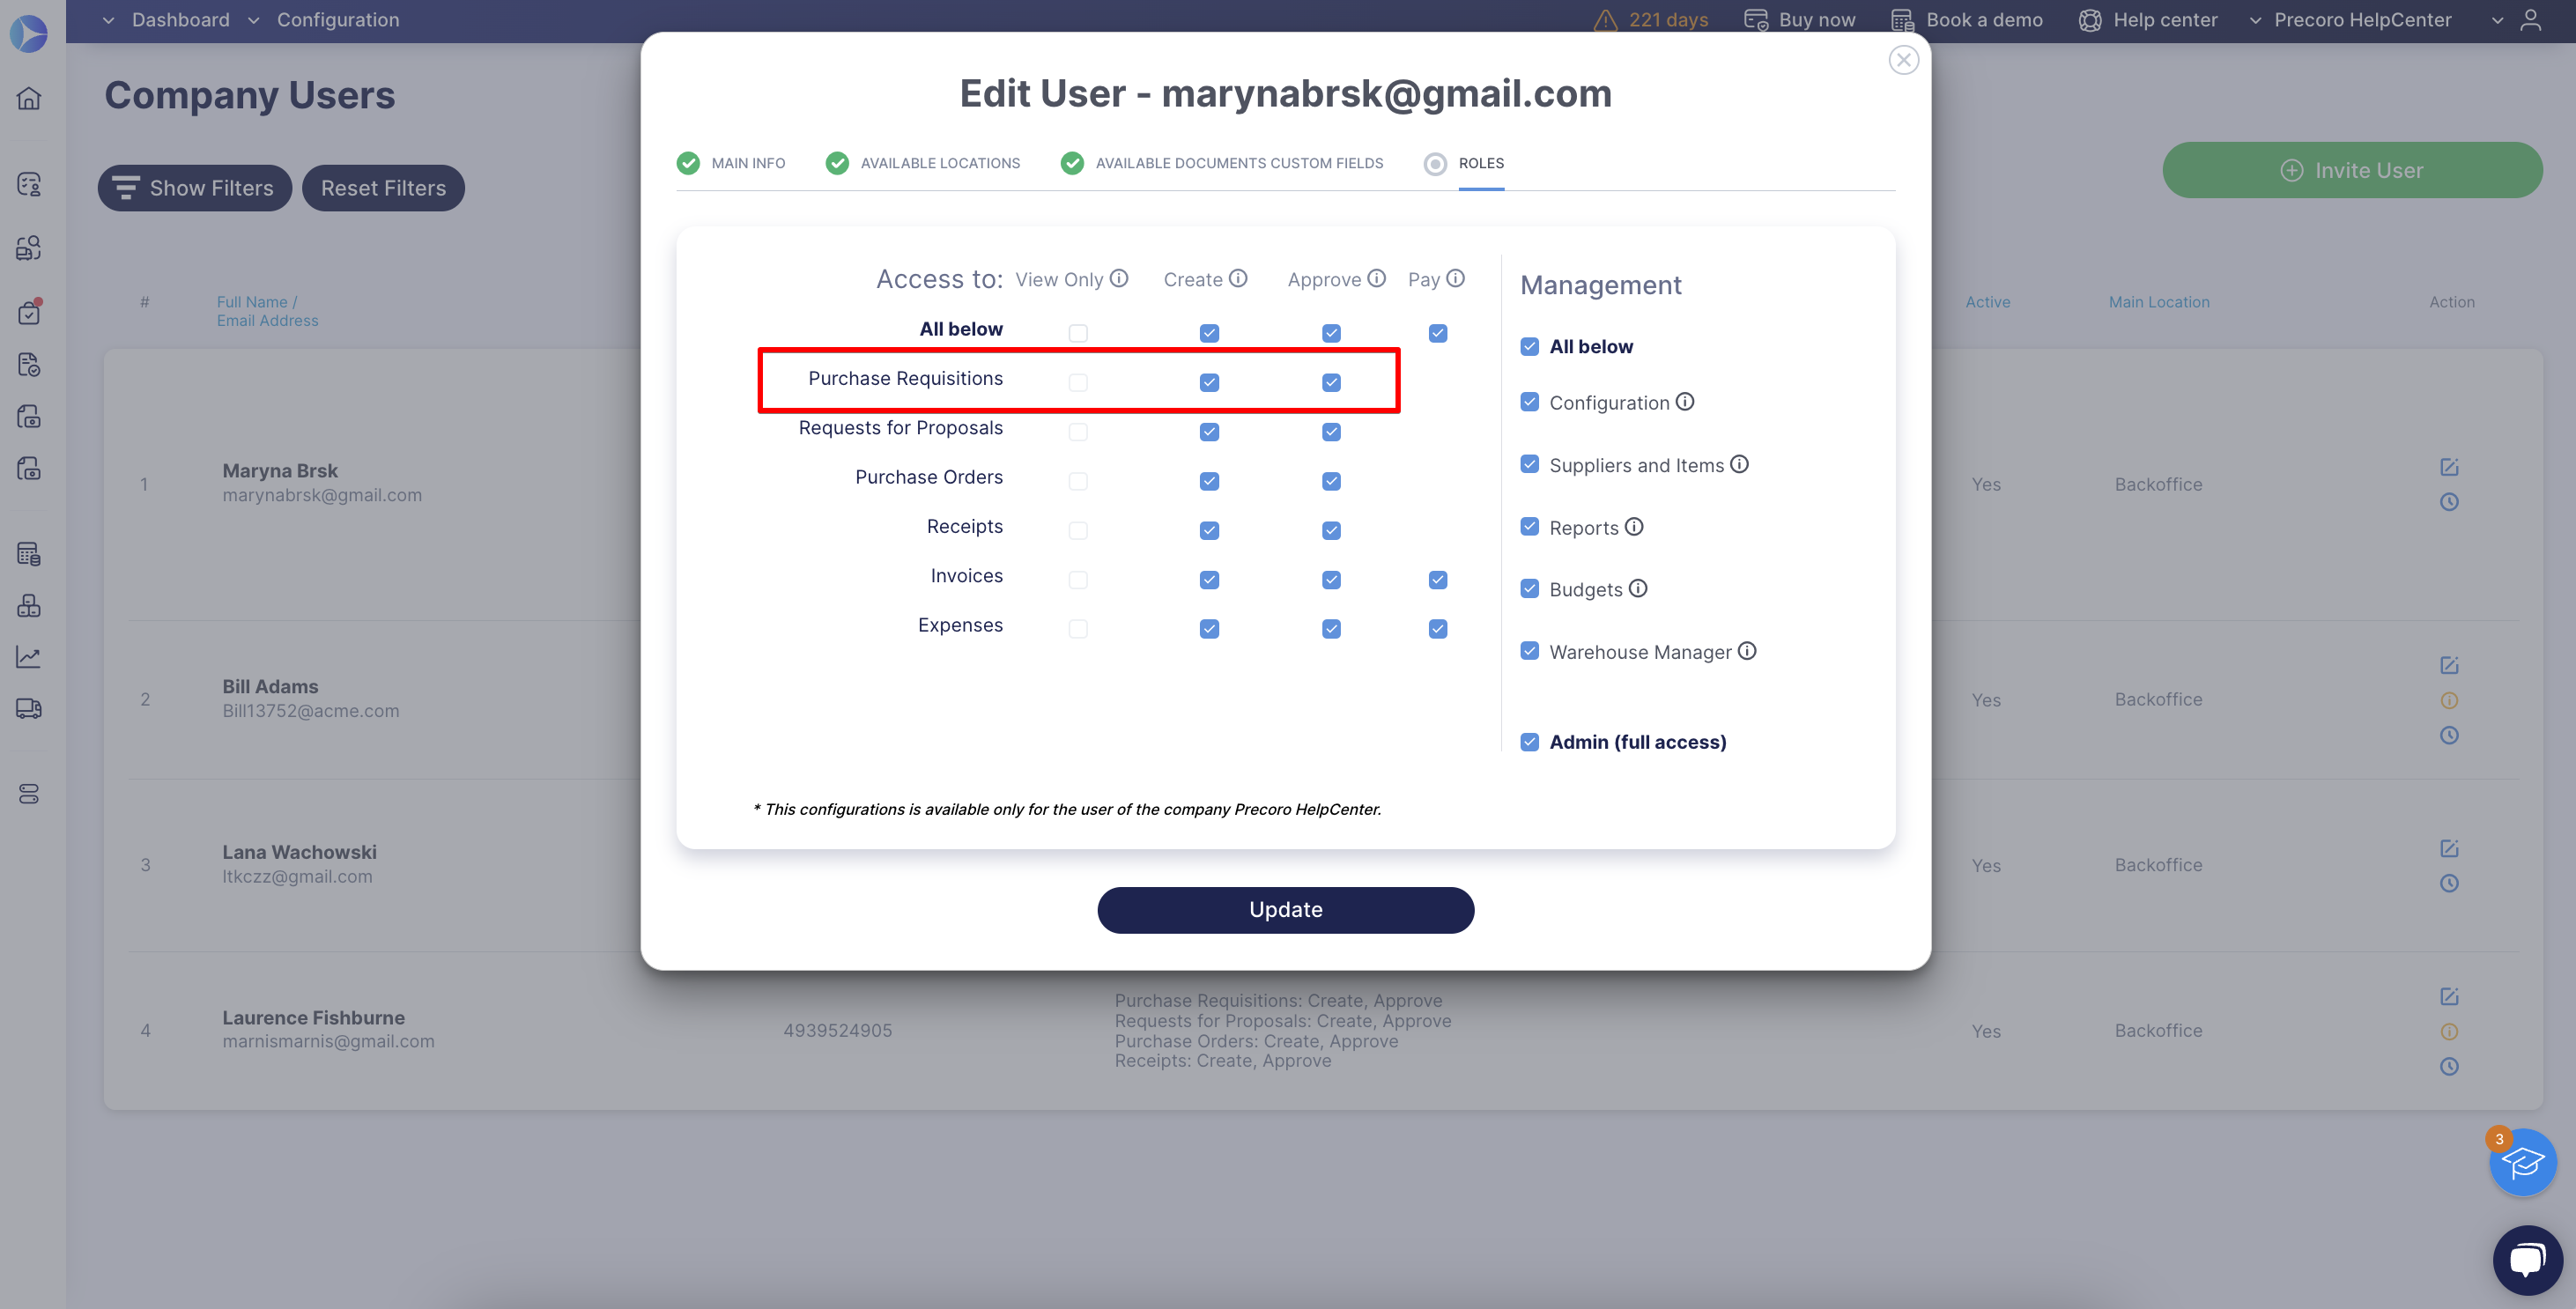
The “View only” role grants document viewing without editing or approving rights.
The “Create” role provides access to document creation and editing.
The “Approve” role allows approving the documents created by other users.
💡Please note: More information on User Roles in Precoro you can find in the corresponding article.
Create the Approval Workflow
Approval Workflow allows you to send documents stored in Precoro to one or more people for their approval. This process is set up individually for each company. Find more information on the approval workflow and the advantages of using it in Precoro here.
Detailed instructions on creating and setting up the Approval Workflow are in this article.
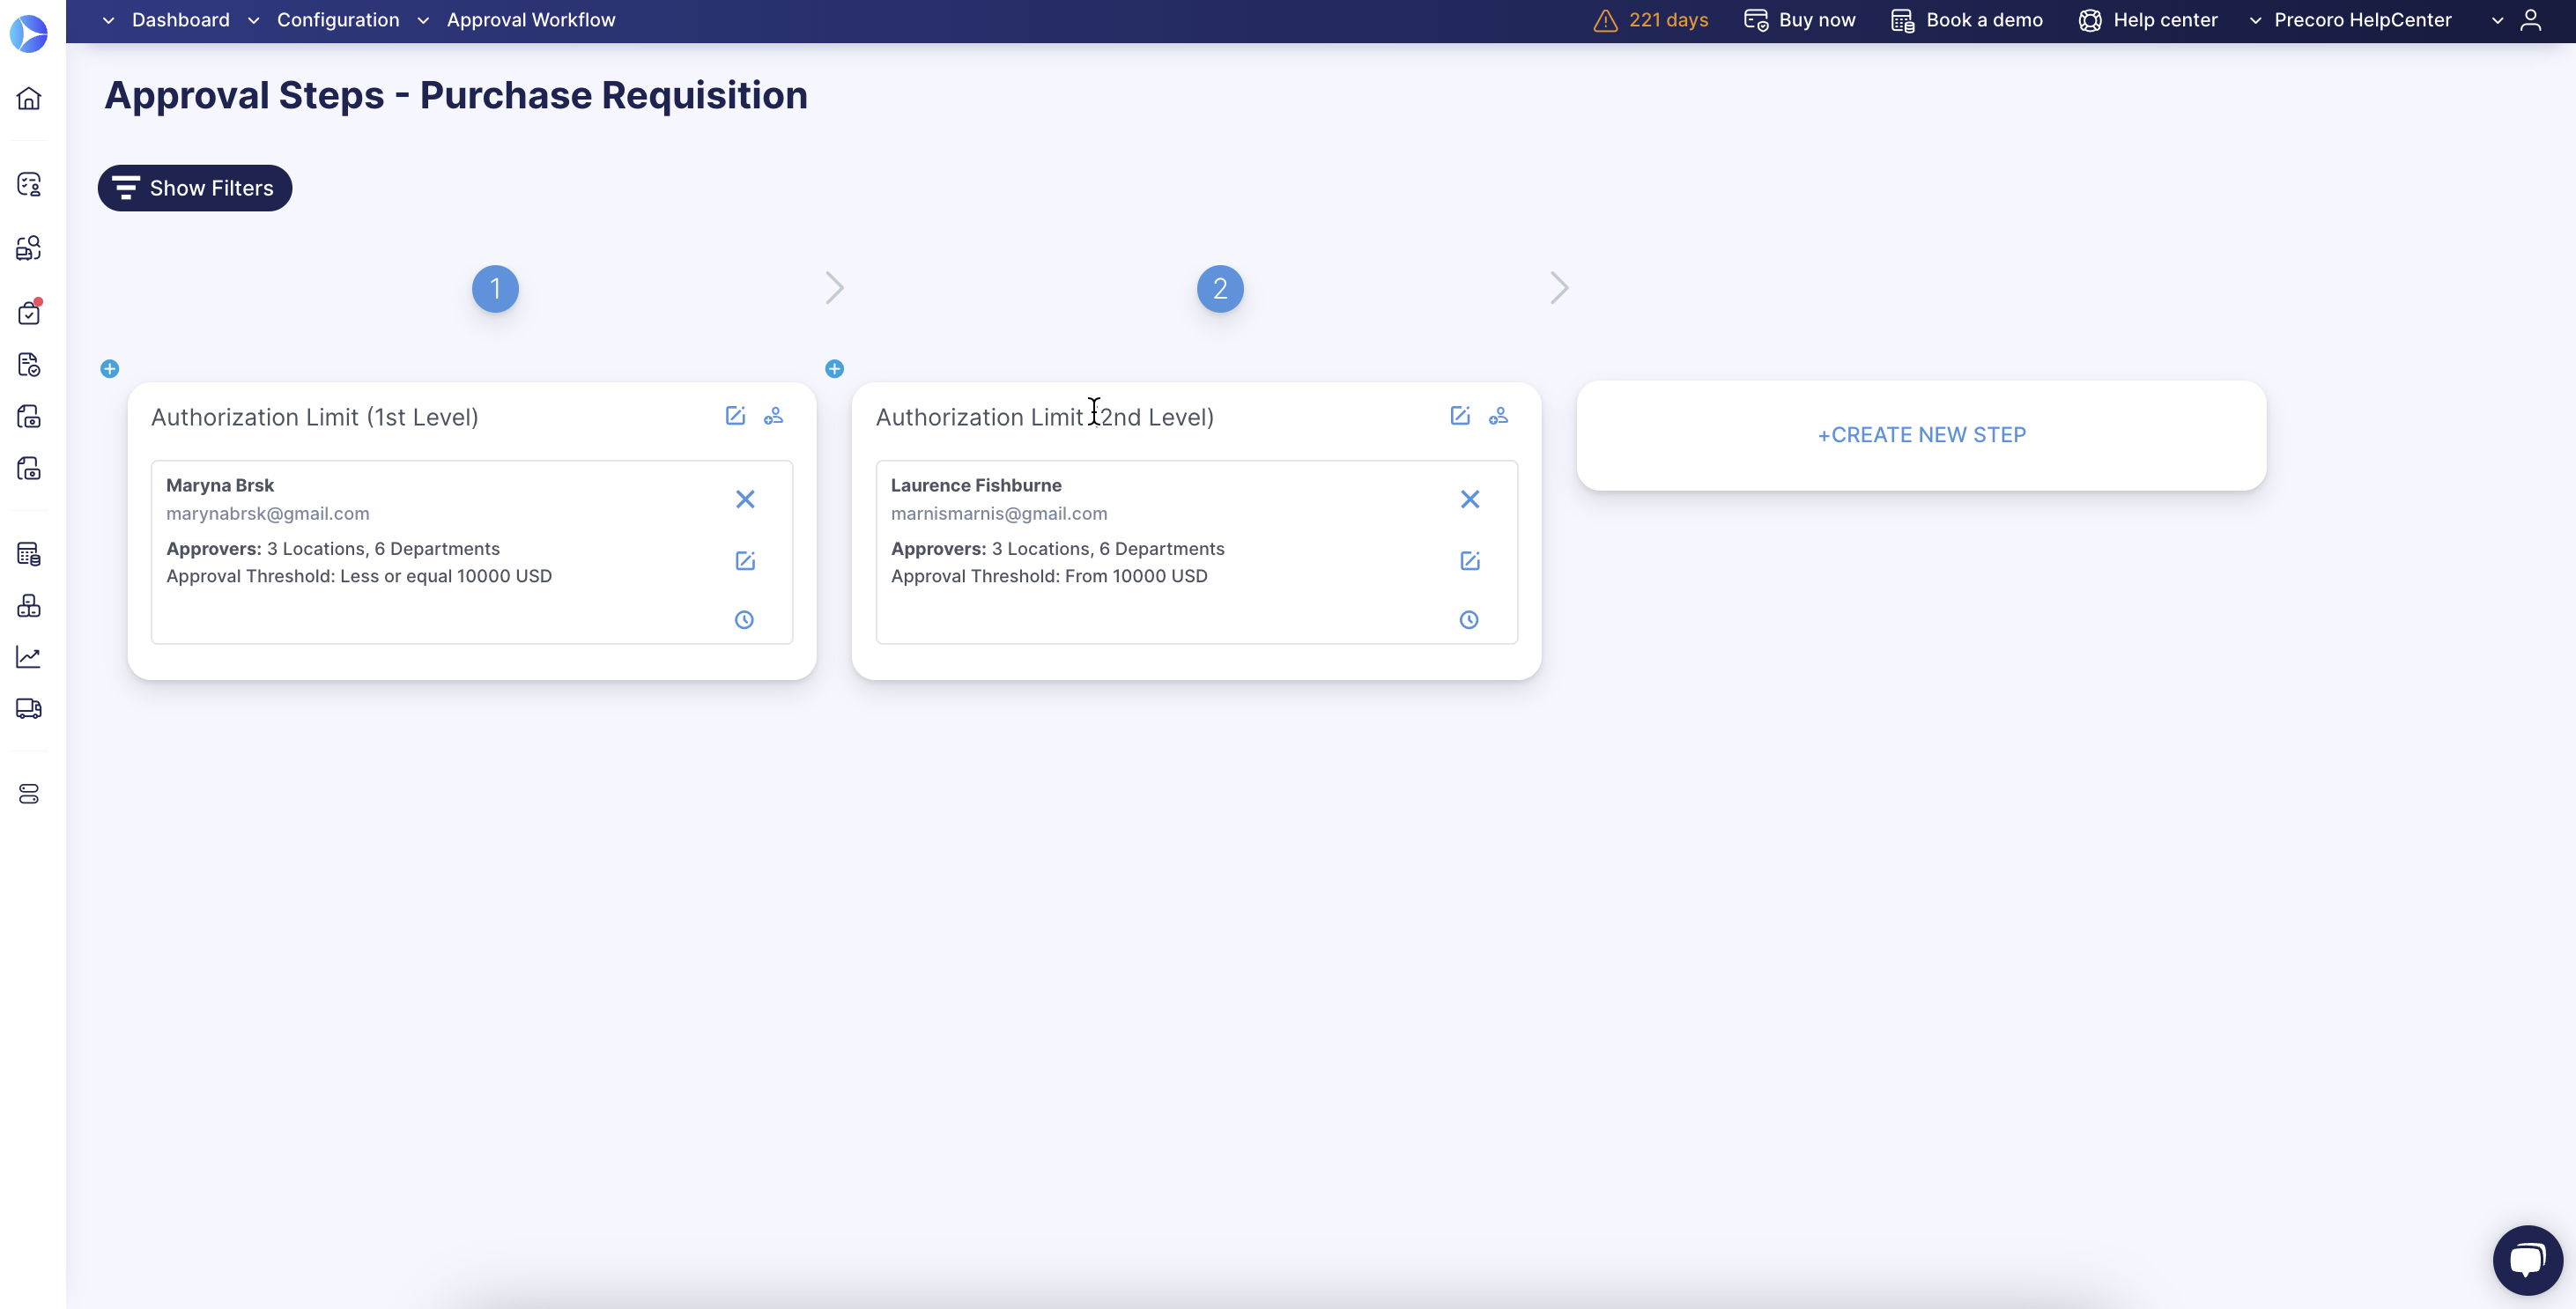
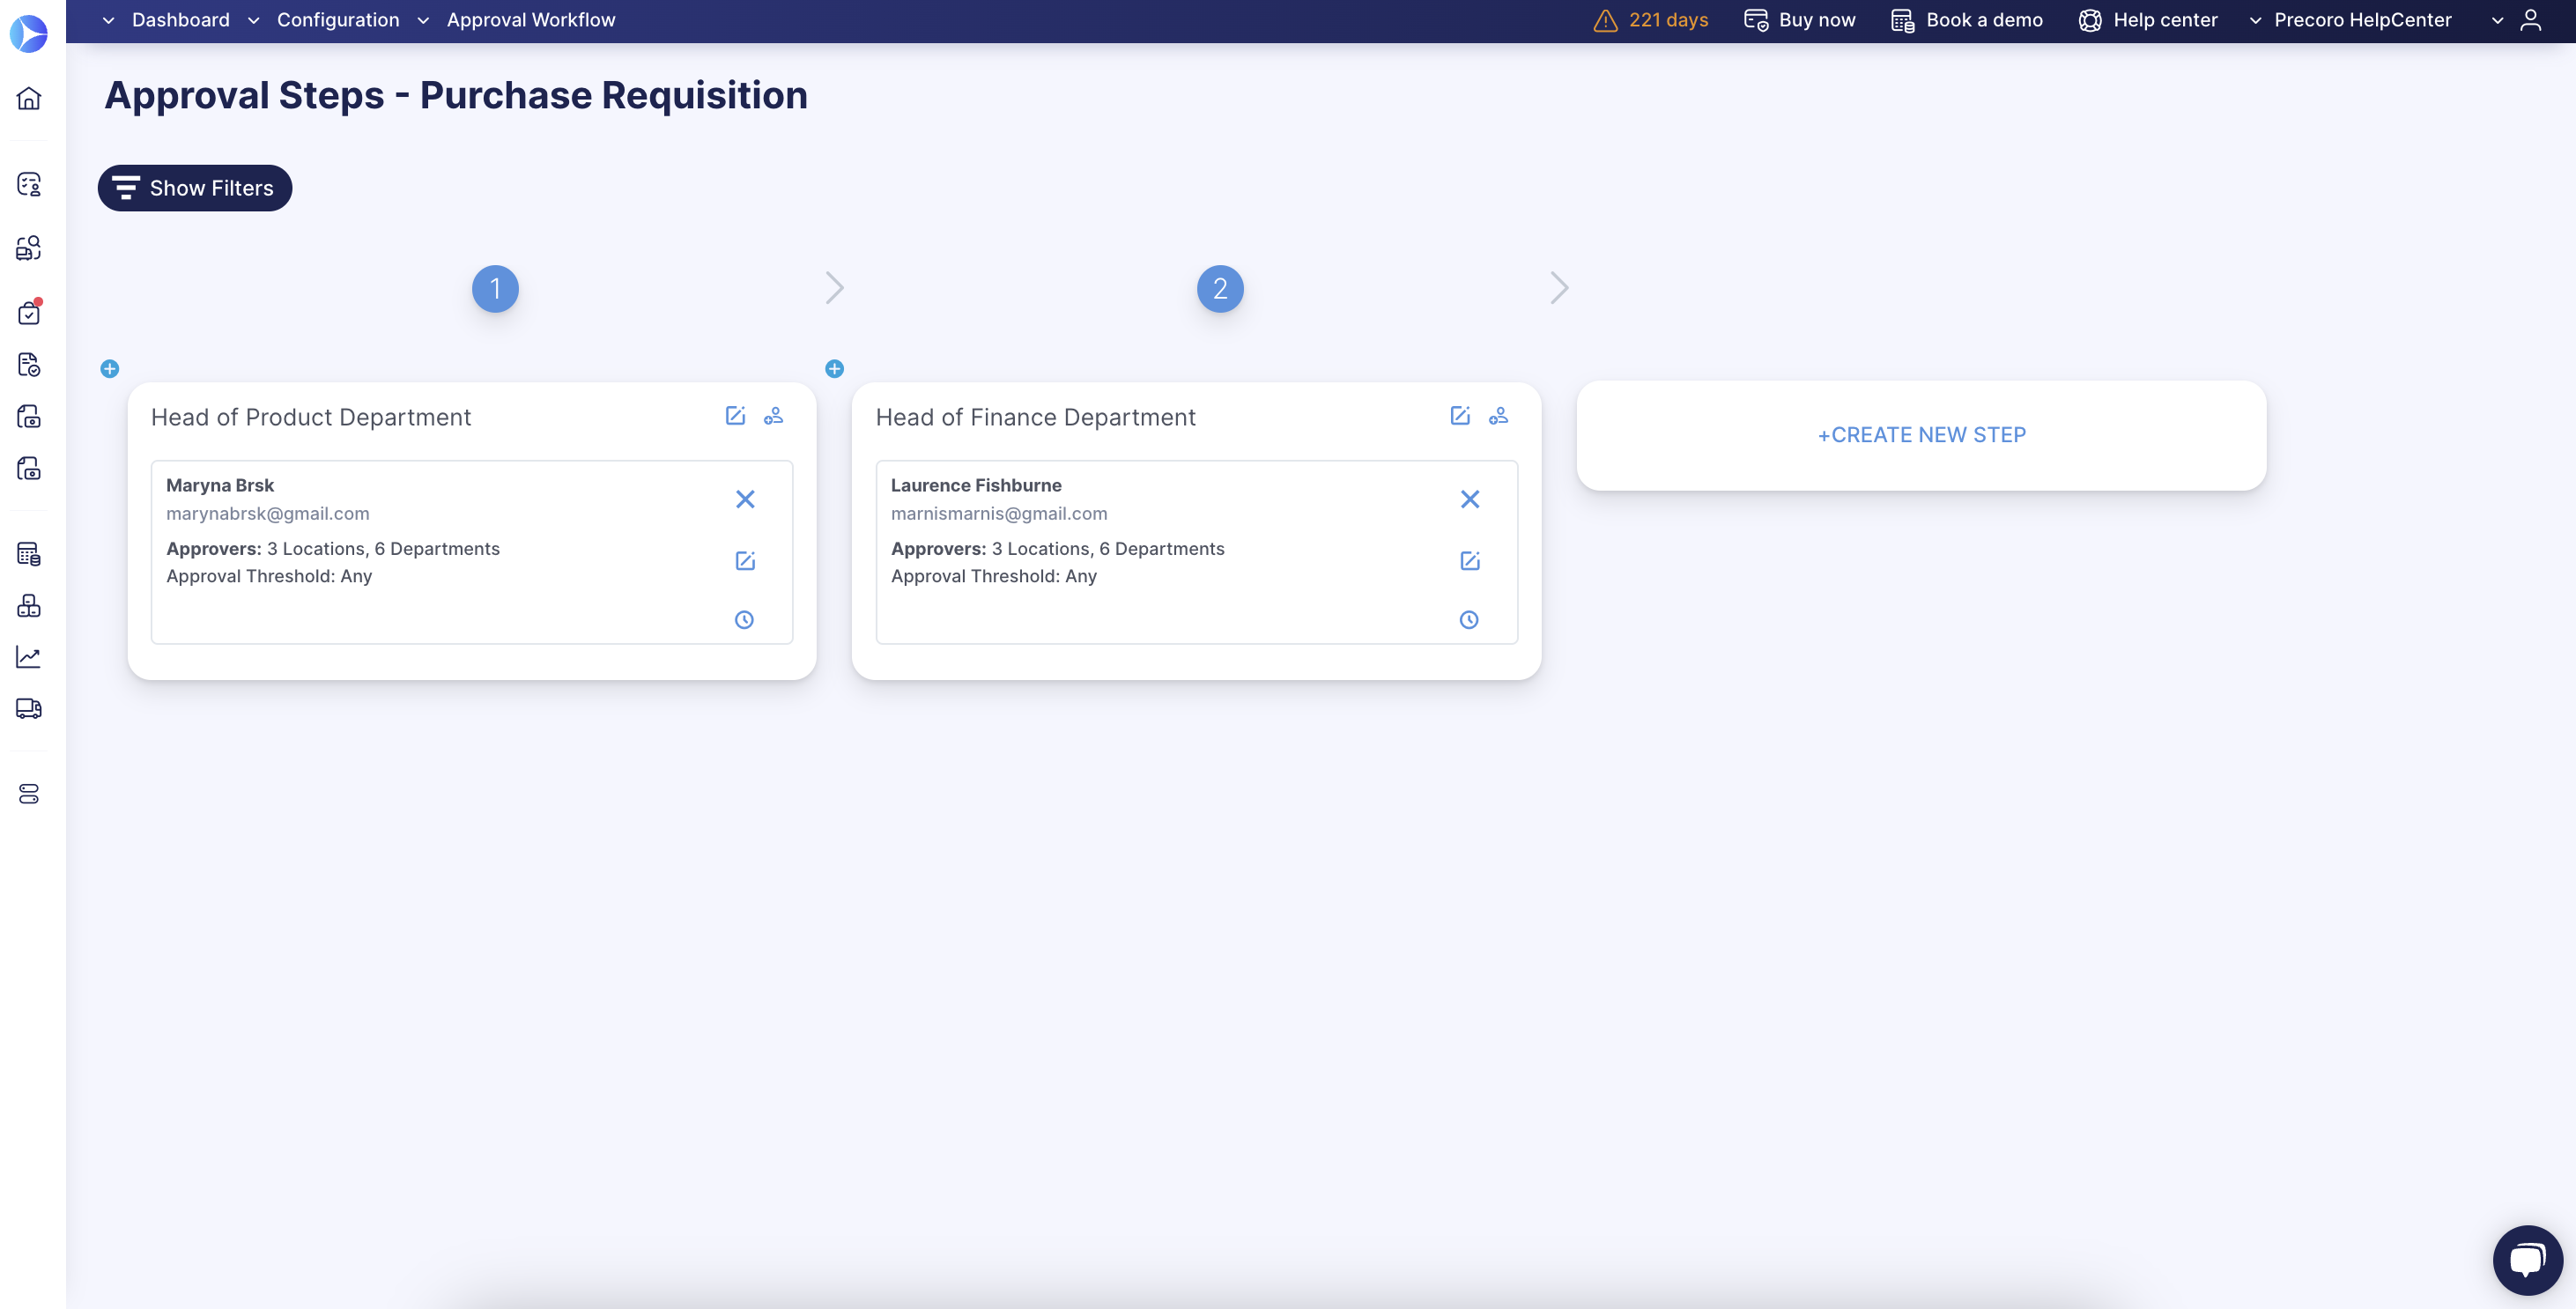
In the Purchase Requisition document, you can build the Approval Steps that best suit your company’s working process.
For example, you can incorporate:
- Different Authorization Limit levels for the Procurement process
- Head of Department Approval
Additional Useful Materials
Please see the additional functionalities below that can help you optimize the working process with the PR documents:
How to Set Up Editing Restrictions for Catalog Items
Use the Restrict Catalog Items Editing feature to avoid inaccuracies and item mix-ups in submitted requests. This setting allows you to determine what information about catalog-added items requesters can edit in a PR.
Here’s how to set it up:
-
Activate the Restrict Catalog Items Editing setting in Configuration → Basic Settings → Document Setup → Purchase Requisitions.
-
You will see these options under Restrict editing for:
-
SKU and Name
-
Price, Currency, and Unit
-
Custom Fields for Items
-
Supplier
-
-
Activate the options for which you want to limit the editing and save the changes. You can multi-select all the options needed for your process.
The restrictions apply both to editing item lines and to bulk updates with the Update Items button.
Exceptions based on user roles
Please note how restrictions are applied depending on user roles:
Users who cannot edit the restricted fields:
- Having only the PR Approve or Create roles.
- Other role combinations that do not include Item Management Create and/or PO Create or Approve roles.
Users who still can edit the restricted fields:
- Having the PR Approve or Create roles + PO Approve or Create roles.
- Having the PR Approve or Create roles + Item Management Create role.
- Having the PR Approve or Create roles + PO Approve or Create roles + Item Management Create role.
- Having the Super User role.
- If SKU and Name restrictions are off, you can always edit the Link field.
- If restrictions are on and you have only PR create/approve roles, the Link field can be edited only when it’s empty in the catalog. Once updated in the catalog, the field becomes non-editable.
- If restrictions are on and you have PO create/approve roles, you can edit the Link field anytime.
Exceptions based on other settings
Additionally, the following sets of configurations allow users to edit a restricted field:
- the field is required to select in items and is not filled out in the catalog;
- the field is only available to select in PR but not in the catalog (Items).
Consider this example:
- All options in Restrict Catalog Items Editing are enabled.
- When creating a PR, a user adds an item from the catalog. In the catalog, the Chart of Accounts custom field is not filled out for this item.

- Chart of Accounts is configured as a required field available in purchase requisitions and in items.

In this case, a requester will be able to edit this field for the item added to the PR.
How to Make the Attachments Required
To activate this function, go to Basic Settings → Documents Setup → Purchase Requisition and check the Required File Attachments option. Then, press Save to implement changes.
When the Required File Attachments option is on, users cannot confirm the PR without uploading any documents. However, in case it is deactivated, users can confirm the document without adding any attachments.
