
TABLE OF CONTENTS
- Update From the Items Management Page
- Update Directly From the Document
- Working with Template Fields Step-by-Step
Update From the Items Management Page
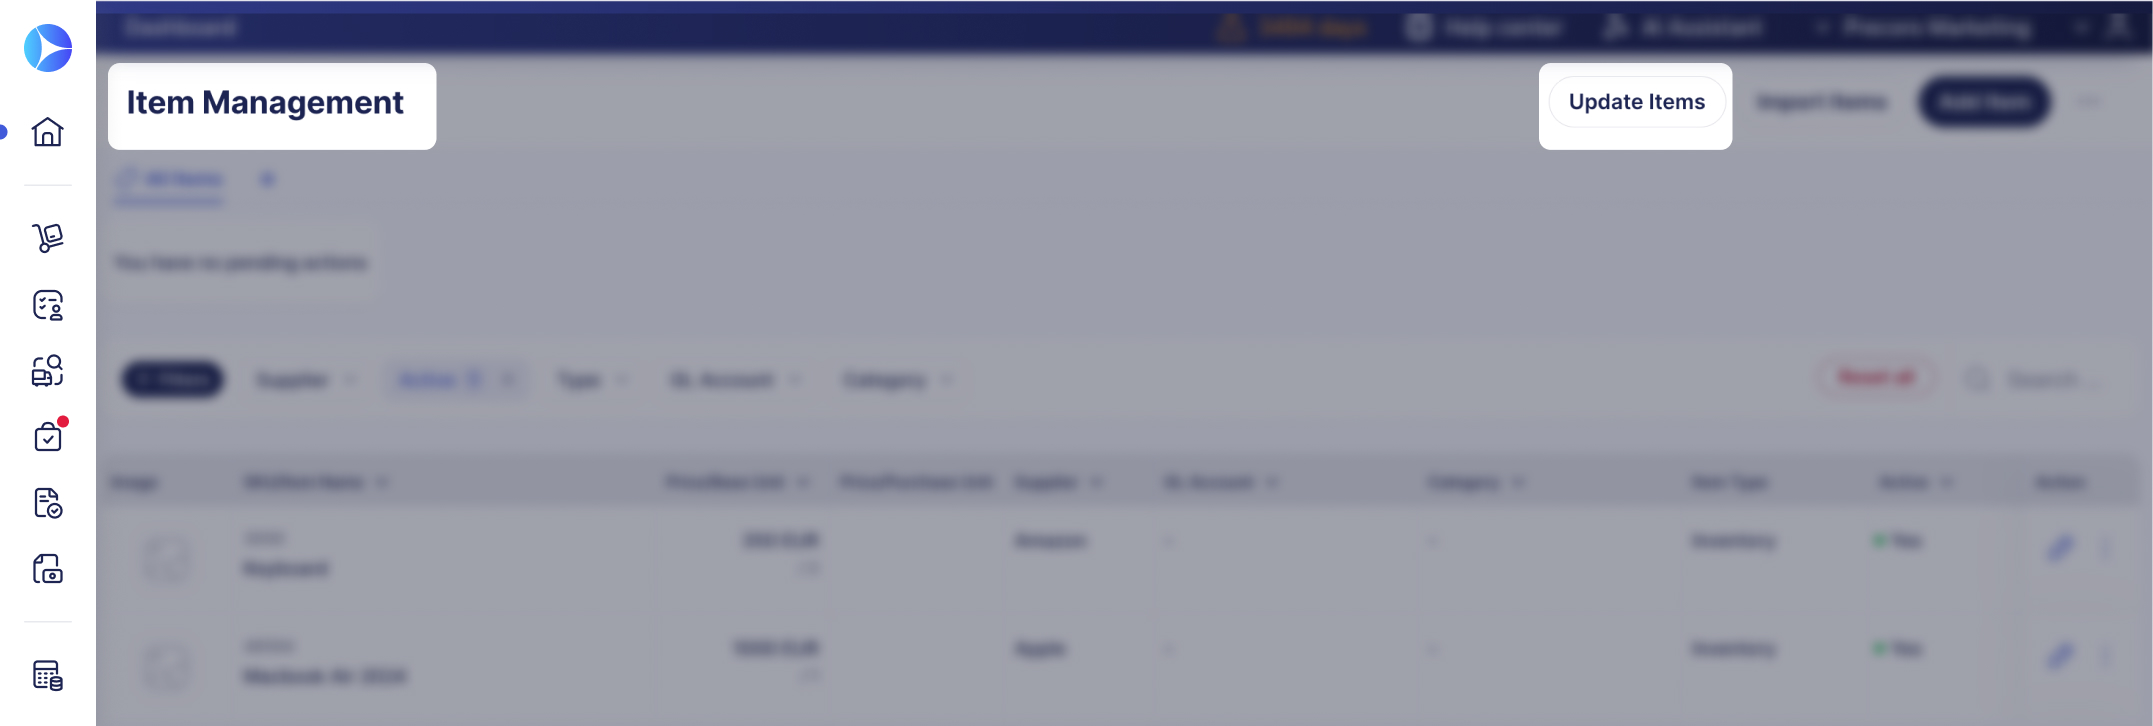
You can do a mass update of your items using the Update Items button on the Item Management page.
💡 Please note: This article covers bulk updates using an Excel template. If you want to update a shared field across selected items without leaving the document, or save several manually edited items in one request, see How to Mass Edit and Bulk Save Items in a Document instead.
To update items in bulk, please follow this instruction:
1. Download a template.
You can download the file by a specific supplier or custom item field (available in items) or download the whole list of items. To do this, don't select any of the custom fields/suppliers. Then press the Download button.
If you deactivate a Supplier, their items stay available in the Update Items template, no need to create duplicates. The Supplier will show as inactive in the list. To add such an item to a new document, assign it an active Supplier first, items linked to an inactive Supplier can't be added to new documents.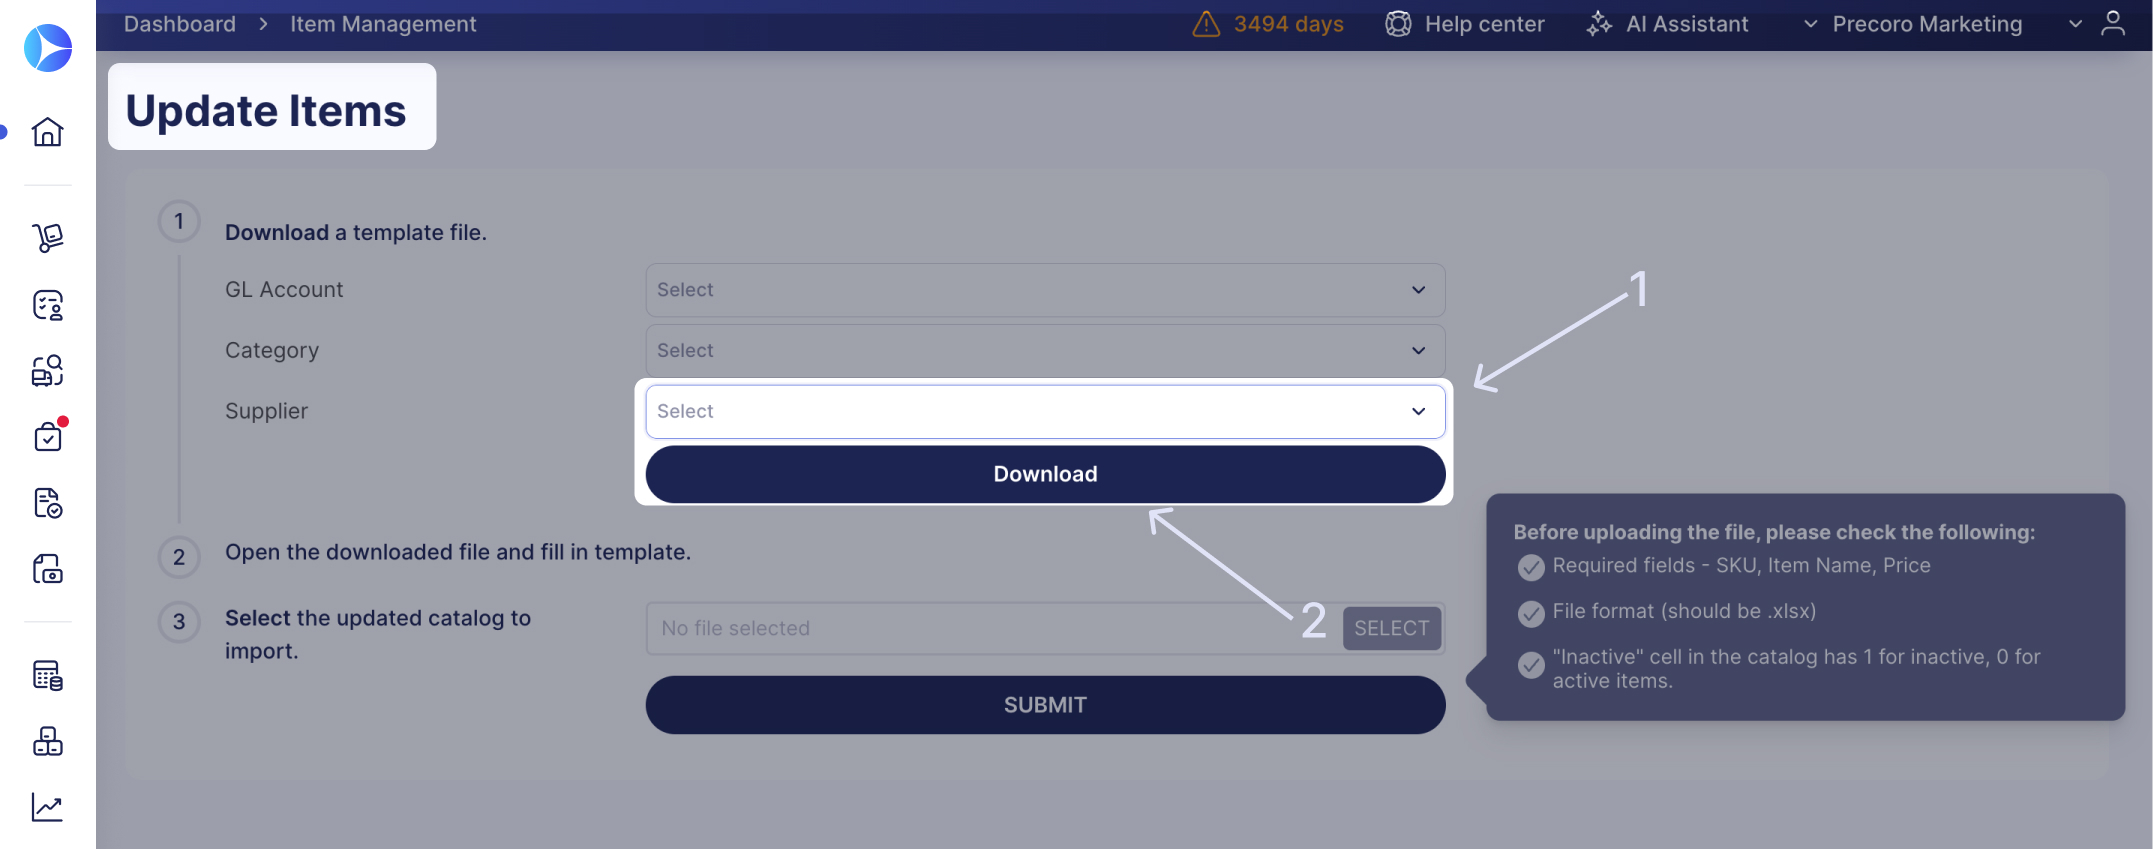
2. Open the file and make the necessary changes. See more information about working with a template here.
3. Save the file and upload it back into Precoro, by clicking the Submit button.
.jpg?hsLang=en)
Please note:
The number of columns in your file must match the required amount. If you delete a column or add an extra one and it changes the number of columns, Precoro shows an error message:
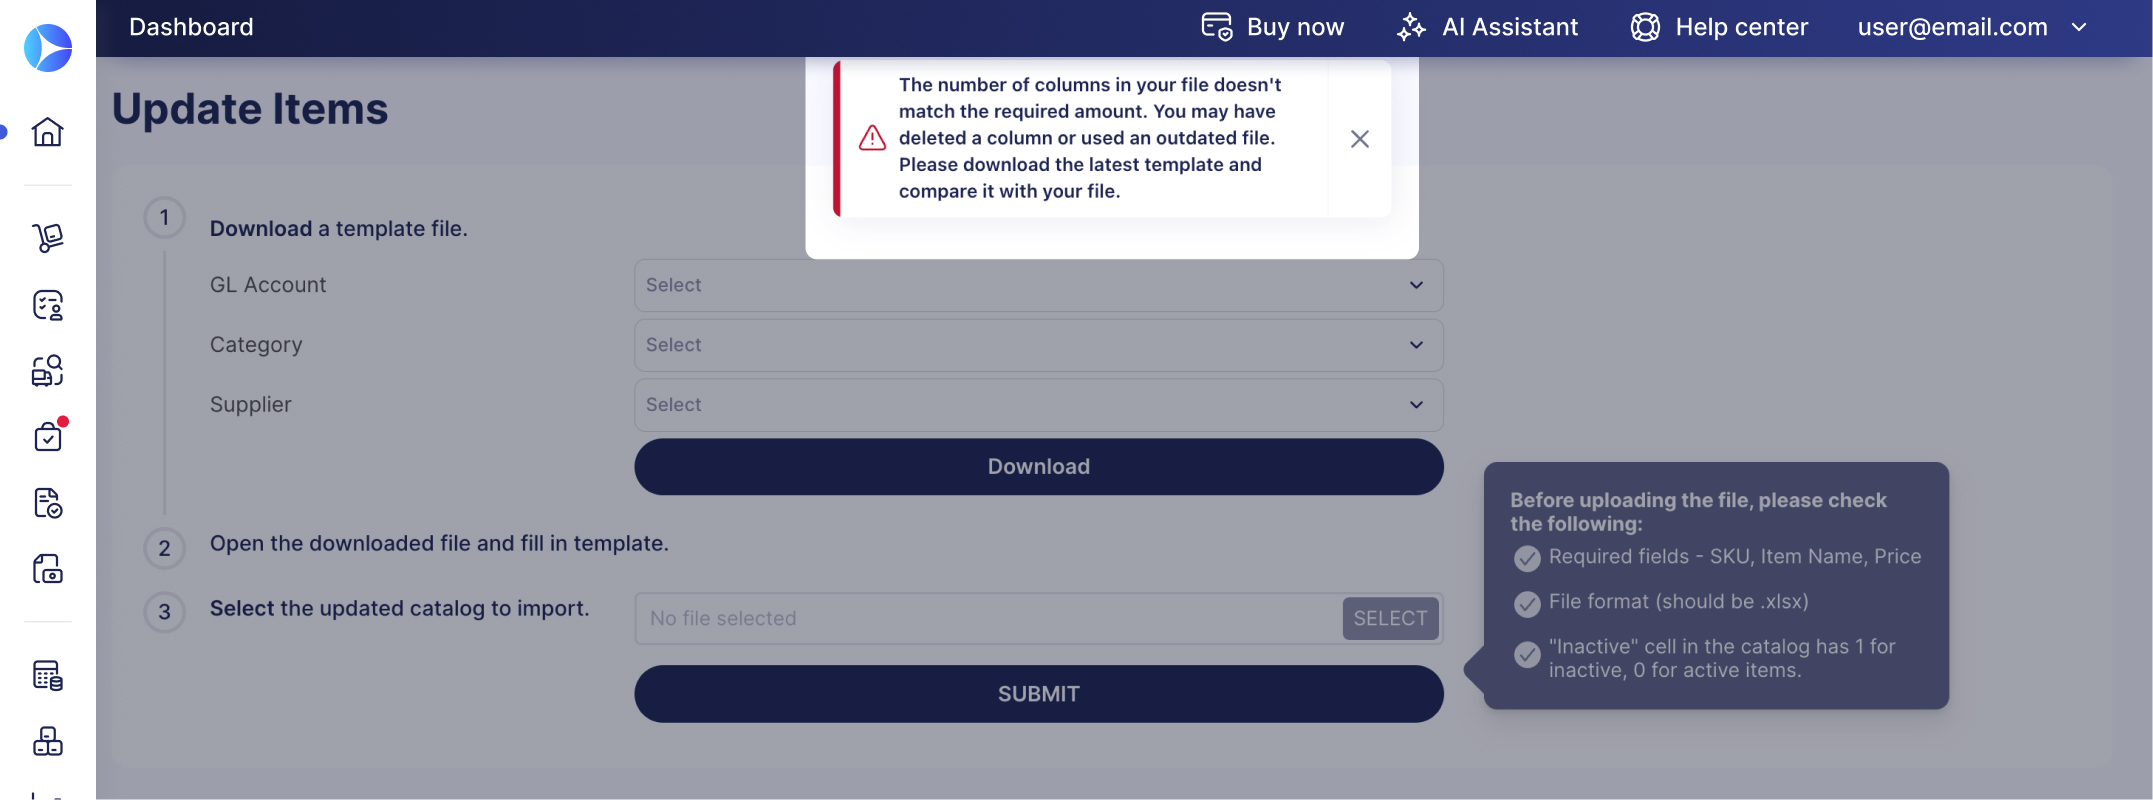
If you see this message, download the latest template and compare it with your file before uploading it again.
4. After a successful upload, review if the info is pulled up correctly and if nothing is missing.
You may see the imported unmatched fields highlighted in blue. They will help you find and process Items with unmatched fields faster.
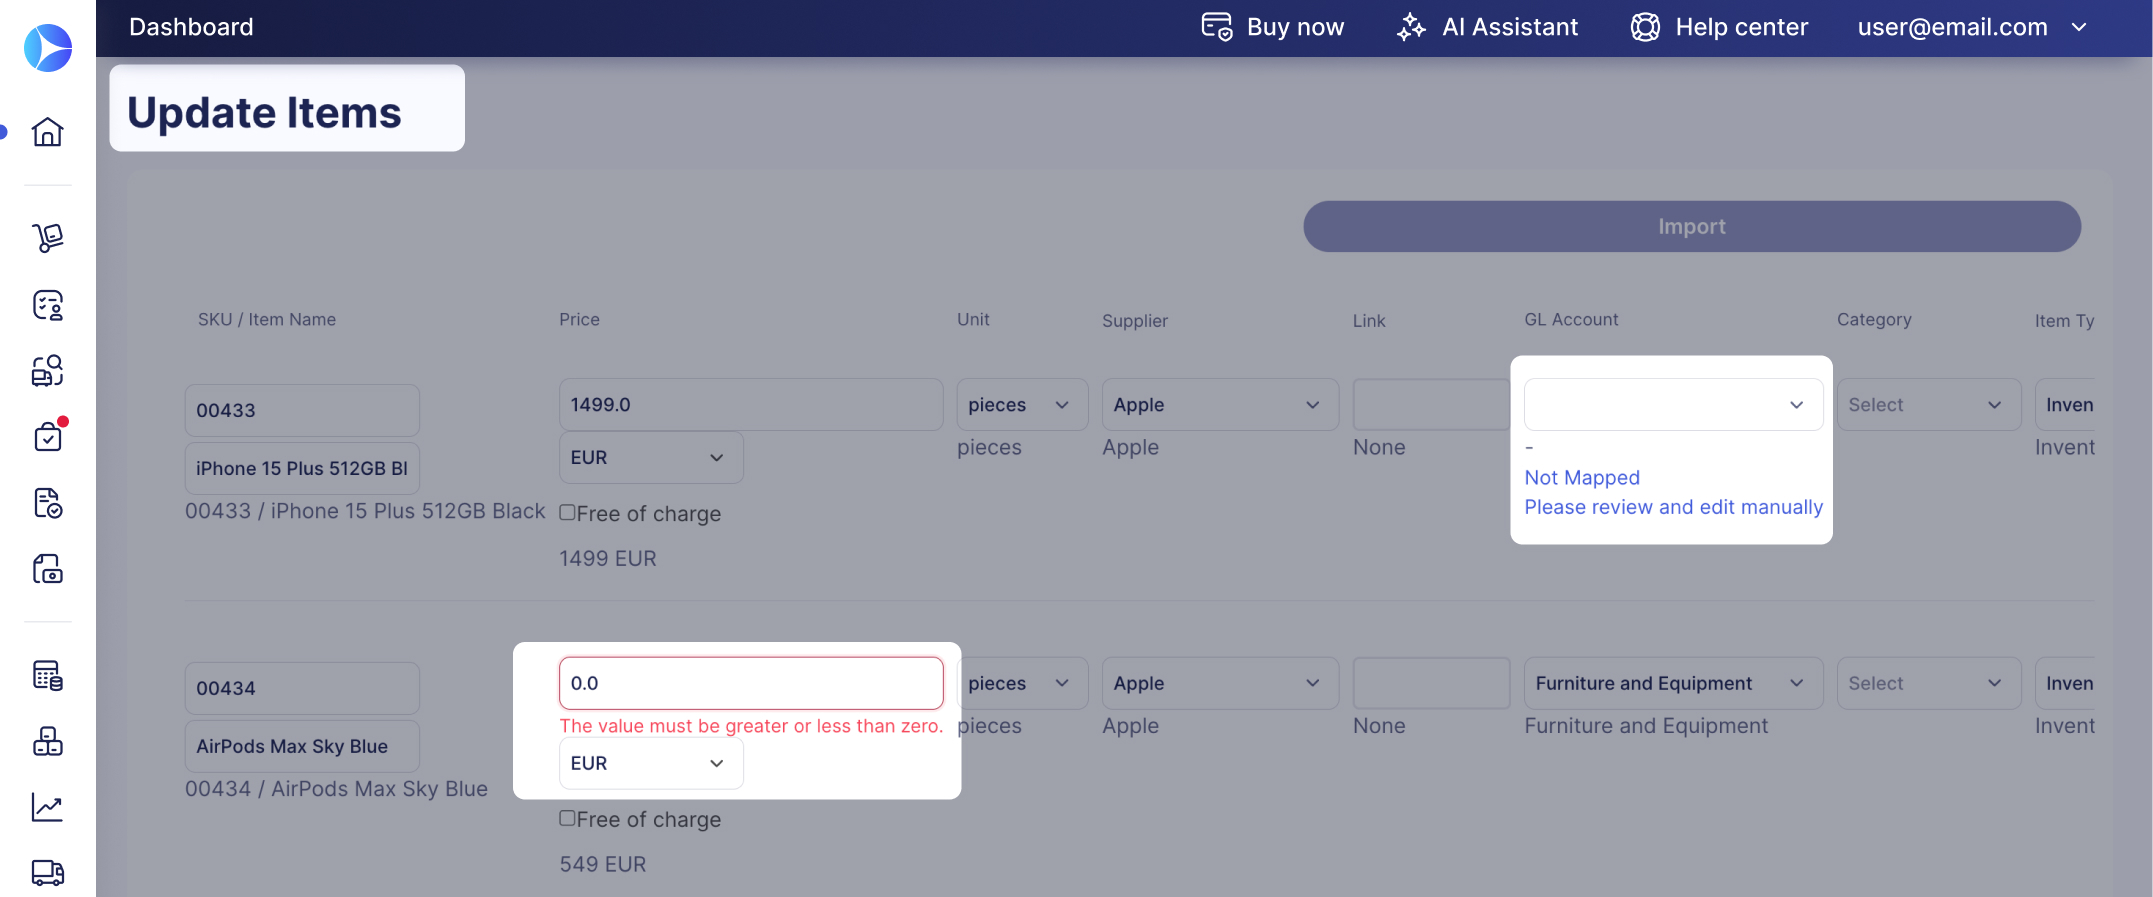
The blue highlight is only affecting the unrequired fields. The required ones are highlighted in red if there are any issues with them.
5. Once you are ready, click the Import button on the top or at the bottom of the page.
6. All the changes will be displayed in the Item Management list.
Update Directly From the Document
You can make the update directly from the following document pages: Invoices, Purchase Requisitions, Expenses, Purchase Orders, and Requests for Proposals.
Follow these steps to make a successful update:
1. Open the document you want to update, make sure you have added items, and click the Update Items button.
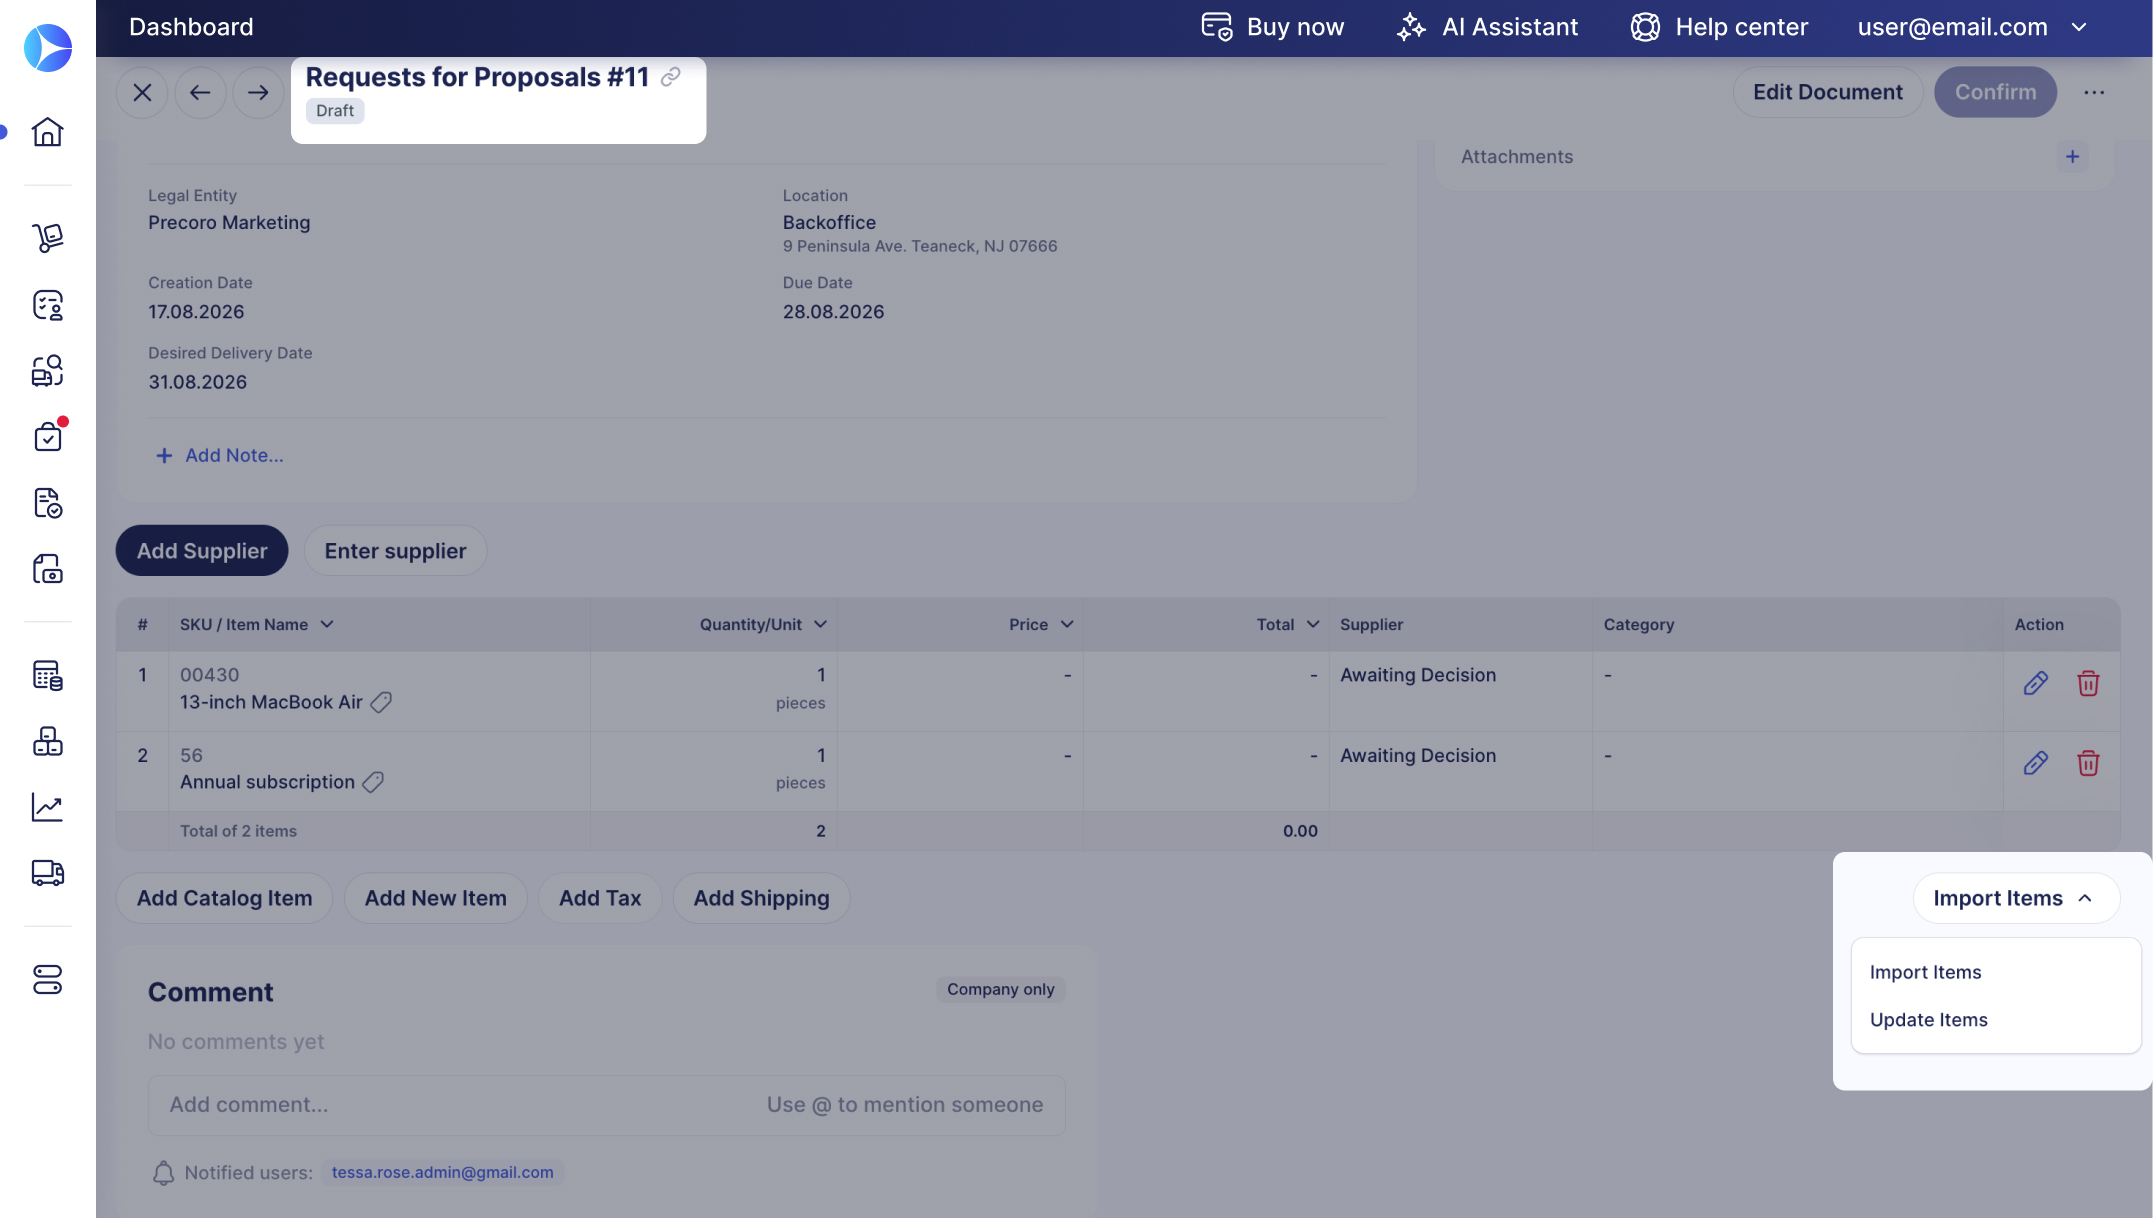
2. You will be redirected to the Update Items page. By following the instructions, you can download a template file (with the items from your document), update the necessary information, and upload it back to Precoro.
Add new items in the template file if needed. You can leave the Item ID column empty for any new row, and Precoro generates the ID automatically.
💡 Please note: The file must be in XLSX format and should not contain the tips from rows 2 and 3, which you need to delete before the upload.
Please do not edit the Item ID column. Otherwise, it will affect the correctness of data displayed in the Reports and Inventory sections.
3. After Submitting the document, you will receive a system message about the download success, and the changes will be displayed in the edited items.
The process for updating items in other types of documents is identical to the example in the recording:
Working with Template Fields Step-by-Step
When downloading the template file directly from the document you will get a file with tips on how to fill it out: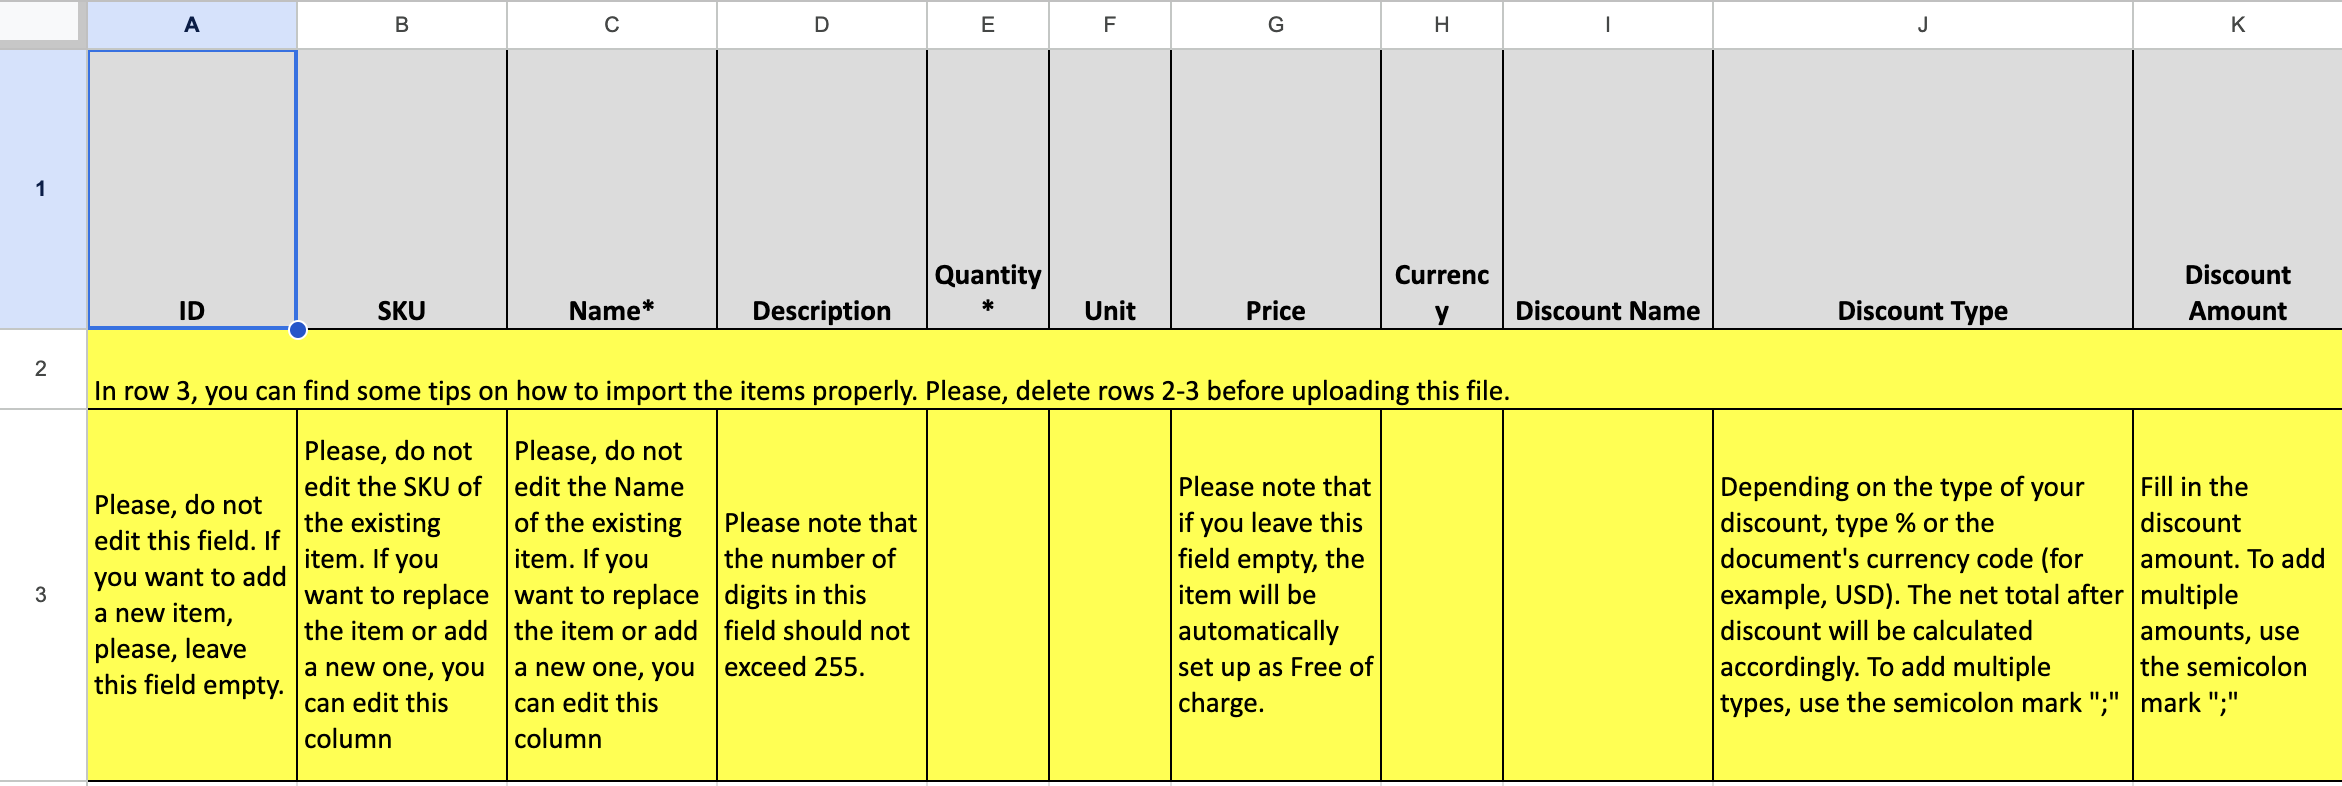
|
Name of the field |
How to fill in |
| ID or # |
When you download the template for items update, you see the filled Item ID columns.
|
| SKU | Please, do not edit the SKU of the existing item. If you want to replace the item or add a new one, you can edit this column. |
| Name | Please, do not edit the Name of the existing item. However, if you want to replace the item or add a new one, you can edit this column to do that. |
| Description | Please note that the number of characters in this field should not exceed 255. |
| Quantity (field is available only from the document update template) |
Enter the number of items/services you need. Please note, for a Tax item row, quantity must equal 1. You can only edit the price. Entering a different quantity for a Tax item triggers a validation error. |
| Price | Enter the price (it may differ from the one in the catalog). Please note that if you leave this field empty, the item will be automatically set up as Free of charge. |
| Currency |
|
|
Custom Fields for Items |
|
| Discounts: Discount Name, Discount Type, Discount Amount |
If you have enabled discounts, then you will see these three columns in the templates: |
| Tax |
If you have enabled Taxes for your company, you will see them in the template. If you want to set or edit taxes for items, fill in or edit the Tax Names in the rows needed. To add multiple Taxes, use the semicolon mark ";" If you set a Tax on a document level, do not repeat that Tax Name in this field. Otherwise, you will create a duplicate one. |
Additional important points to consider when working with Discounts:
- If you add a document-level discount, then when you import or add items with an update, it will be automatically assigned to all items.
- If you download the template of an update, the document-level discounts will be downloaded along with the items. Even if you delete the discounts in items, they will still be set when you download the template.
- To remove a discount from an item, you need to delete it at the document level, and then it will be removed automatically.
- Apart from the document-level discount, you can add as many discounts as you like at the item level—item-level discounts can only be set as a percentage. To add multiple amounts, use the semicolon mark ";"
- To apply a fixed-sum discount, add a separate item with the Discount type in a new row, and enter the discount amount in the Price column.
Additional important points to consider when working with Taxes:
- If you add a document-level tax, then when you import or add items with an update, it will be automatically assigned to all items.
- If you download the template of an update, the document-level taxes will be downloaded along with the items. Even if you delete the taxes in items, they will still be set when you download the template.
- To remove a tax from an item, you need to delete it at the document level, and then it will be removed automatically.
- Apart from the document-level tax, you can add as many taxes as you like at the item level.
Additional important points to consider when working with Custom Fields for Items:
- Please make sure to choose the Name option (not the Code), especially if your Precoro account is integrated with QuickBooks because Precoro maps columns by the custom fields for items Names.
- You need to fill in the last level of the custom item fields structure, not the parent one. Otherwise, you will get an error.
- To add a new Custom Field for Items column, first set it up in Configuration → Custom Fields for Items and make it available to select in Items or other needed document types.
Then either download an updated template that already includes it, or add the column to your existing file manually. Precoro picks it up and imports the values you entered. - To delete a Custom Field for Items column from a template, first deactivate this field in Configuration → Custom Fields for Items.
Additional important points to consider when working with Catalog Items:
When importing or updating, you can add items so that they would get mapped with the catalog ones (this function is available for Purchase Requisitions, Purchase Orders, and Invoices).
The mapping can come in handy when creating Receipts. You will not have to match file items with the catalog ones manually.
💡 Please note: For an item added through a template to be automatically mapped with a catalog one, there must be an exact match with the SKU, Name, Supplier and Currency fields.
In the Purchase Requisition and Request for Proposal template, you have to enter all values: SKU, Name, Supplier and Currency.
In Purchase Order and Invoice templates, the Supplier will be already added at the document level, so you only need to enter the identical SKU, Name and Currency fields.
Additional important points to consider when working with Default Supplier Options:
- If a supplier has default custom item fields, you can leave the corresponding columns blank, and they will be filled in automatically during the import/update.