TABLE OF CONTENTS
How You Benefit from Adding Supplier Contracts
When signing a contract with a supplier, you can negotiate the timeframe and total amount you intend to spend along with any special terms. Adding contracts to Precoro will help you:
-
Access information about supplier contracts from a single location;
-
Create purchase orders and invoices linked to contracts;
-
Manage spending within contracts and track it with convenient indicators;
-
Receive notifications about approaching contract limits for easier tracking.
How to Start Working with Supplier Contracts
Enabling Contracts in Precoro
-
To start working with supplier contract management in Precoro, go to Configuration → Basic Settings (Basic Settings for precoro.us) → Documents Setup → General Settings. Tick the Contracts box and click Save at the top right of the page to confirm the changes.
-
Ensure the users who work with contracts have the Supplier Management role enabled. Learn how to manage user roles here.
-
To access the contracts, navigate to the Supplier Management module → Contract Management (Contract Management for precoro.us) page.

Adding a New Contract
-
Navigate to the Supplier Management module → Contract Management page.
-
Click the Add Contract button in the top right corner to create a new document.
-
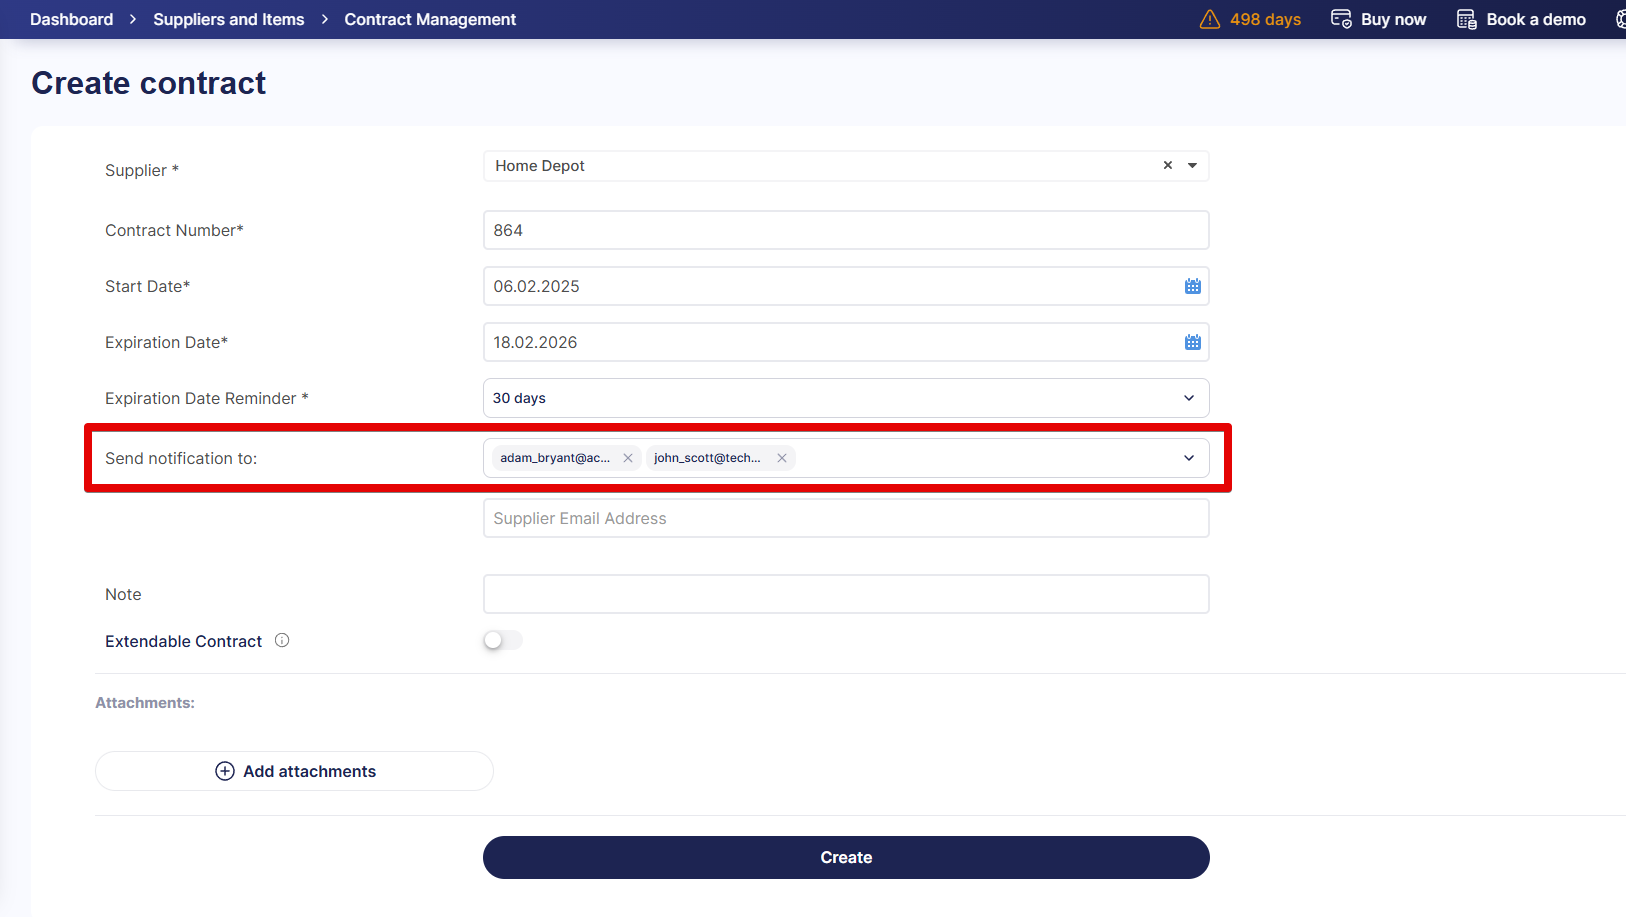
Enter the relevant information (required fields are marked with asterisks *):
Supplier* Choose the name of the previously created Supplier. Find more information on how to add one here. Once you have filled this field, additional fields (Expiration Date Reminder, Send notification to) will appear on the contract creation page. Legal Entity* If Legal Entities are enabled for your account, select the Legal Entity this contract belongs to. Contract number* Enter the number of the contract signed with the vendor. You can later find the document on the list of contracts using this value. Start Date*, Expiration Date*
Set the negotiated validity period. Expiration Date Reminder* Specify when you want to receive a notification about the expiration date or select Disabled if you do not need a reminder. Gross Contract Amount Specify the amount that can be spent with documents linked to this contract. Send notification to: Select users who will receive notifications about approaching expiration date or exceeding the established contract total. This field is required if you set the Expiration Date Reminder time or Gross Contract Amount. You can also add the supplier’s email below the users’. Note Put in any additional important information. -
If necessary, enable the Auto-renewal option — if enabled, the contract will automatically be extended for the same duration (e.g., if the contract was for 6 months, it will be extended for another 6 months).
- If you manage multiple Legal Entities and have Currency Support enabled, select the needed contract's currency from the dropdown.
To turn on Currency Support, contact your Customer Success Manager.
Please note:
Contract currency is validated against the Legal Entity and cannot be changed after creation. Amounts drawn against a contract are calculated in the contract currency, converted using the exchange rate from Basic Settings or the rate specified on the document. - Fill out additional information in custom contract fields. Please visit this article to learn how to configure and use them.
-
Press the Add Attachments button to upload any necessary files.
-
Click the Create button below to save the contract.
💡Please note: the Extendable Contract toggle must be activated before the contract’s expiration date. If it is enabled after the expiration date, the contract will not renew.

You can use the Contract Agent to automatically fill in required fields and available custom contract fields. Before confirming the contract, review the details and make any needed edits. Learn more about how the Contract Agent works from this article.
Please note: The Contract Agent is currently in Beta and available for companies on the Automation plan.
How to Track and Manage Supplier Contracts
Add and Track Documents Linked to a Contract
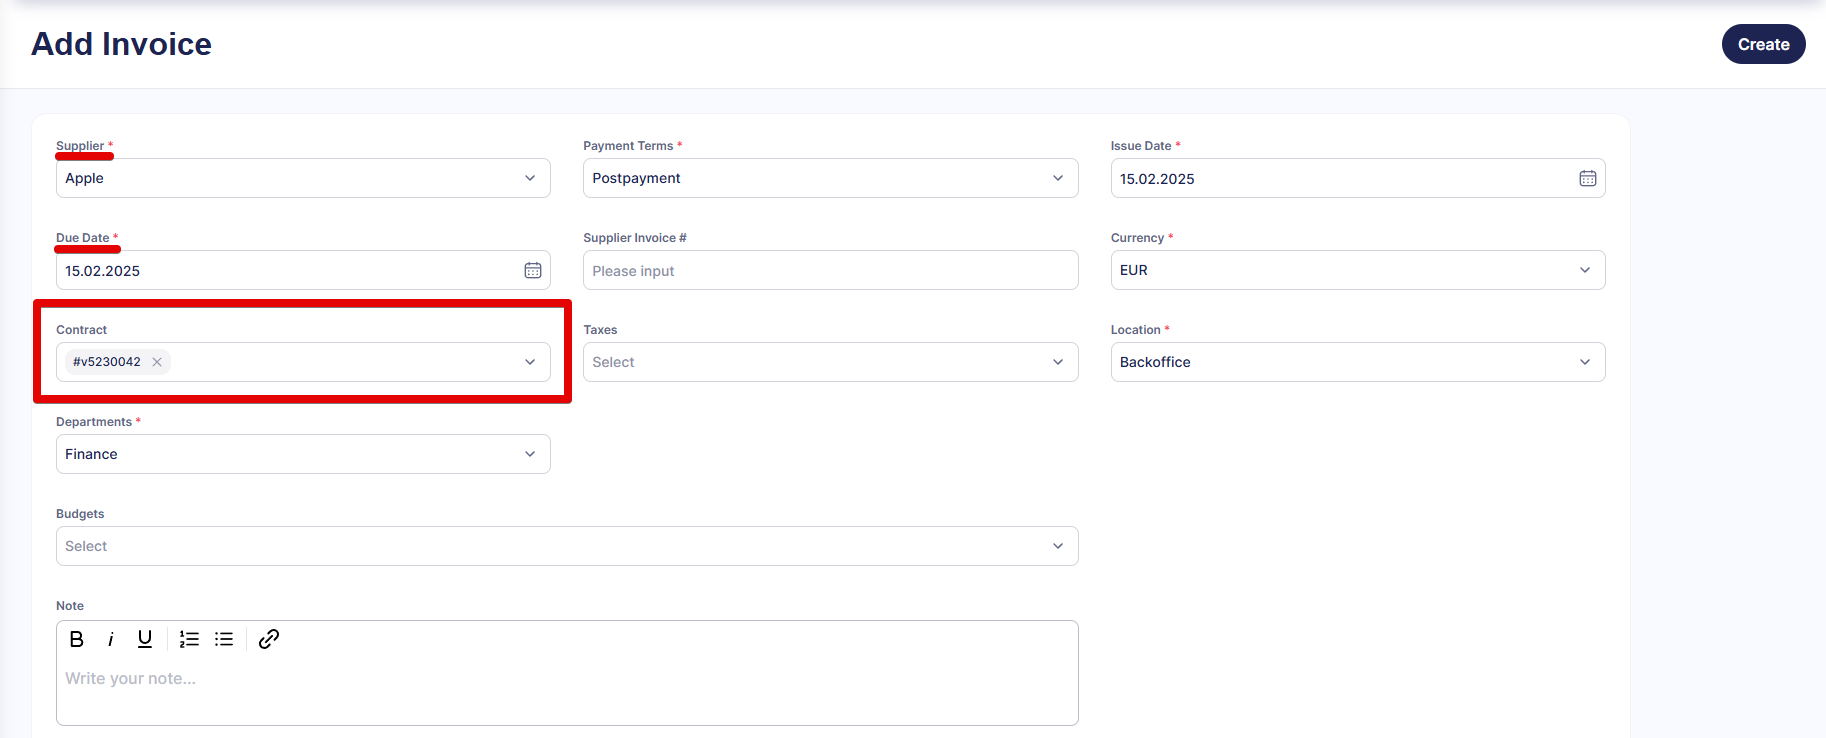
You can link POs and invoices to contracts when creating or editing documents. Available contracts will be displayed once you have filled out the following fields:
-
In a purchase order — Supplier and Delivery Date;
-
In an invoice — Supplier and Due Date.
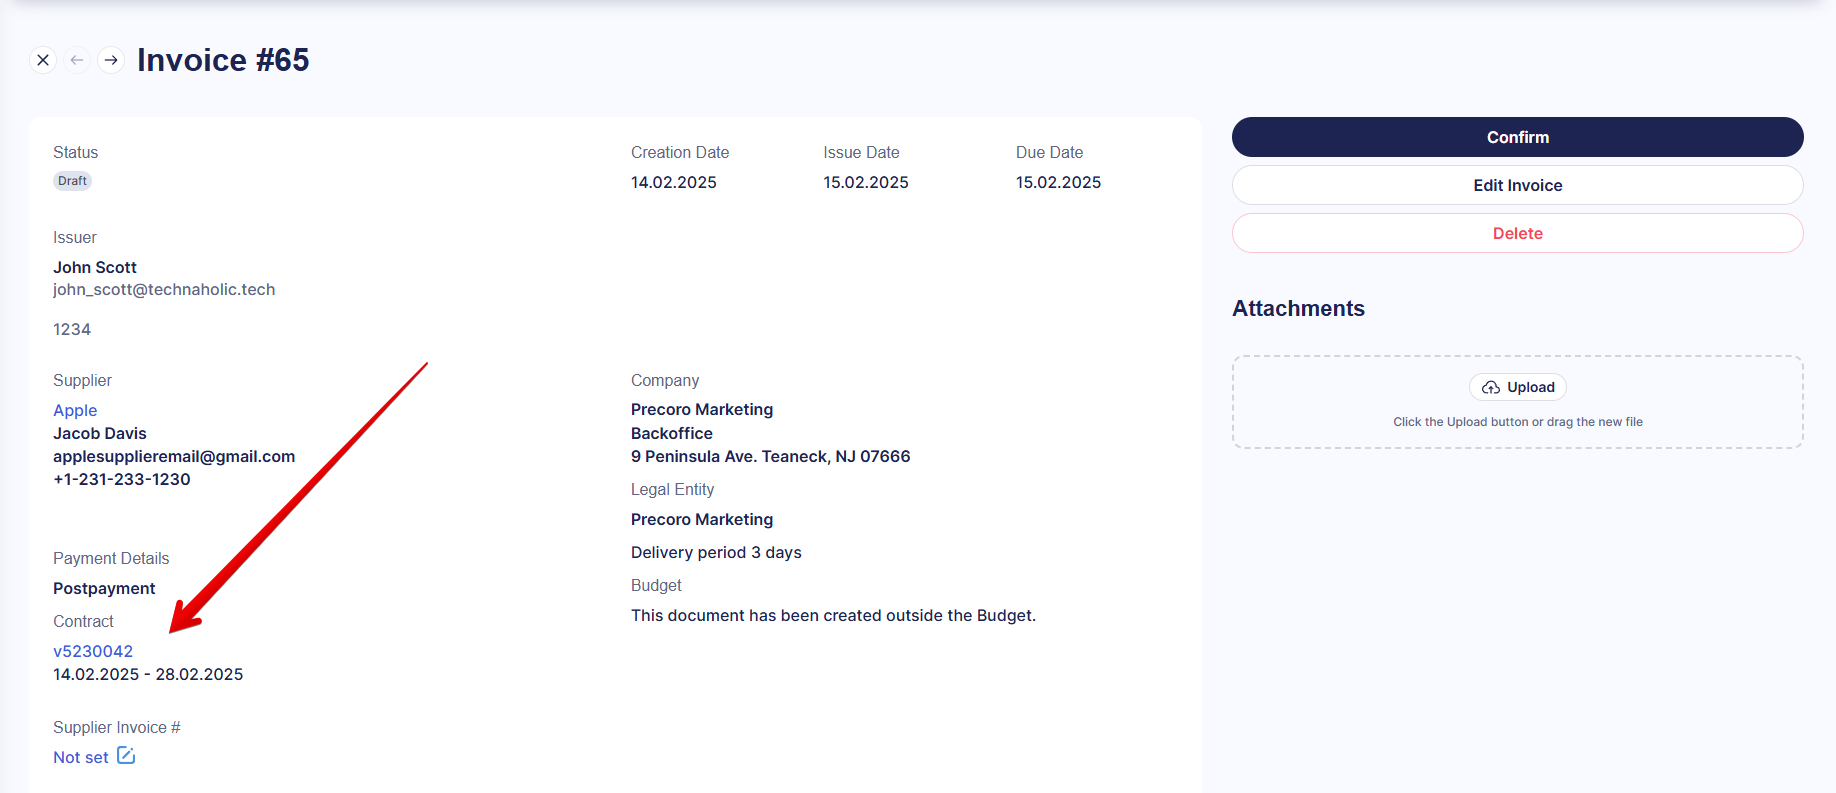
You will see the contract number and validity period on the document page below the payment details.
When you open a contract, you will see a Related Documents tab. You can find the lists of the newest POs and invoices linked to the contract there. To access the full list of related POs or invoices, click the Show All button opposite the table’s title.
The Added to the Contract Total column in these tables shows the amount from this document added to the linked contract. It helps you track how exactly each document affects the contract total. For instance, if you have a PO with all the items already invoiced, this column will show 0 since the total for these items is calculated and added to the contract based on the invoice.

How the Contract Amounts Are Calculated
-
The amounts spent and available in the contract are recalculated every time the items' total changes in a PO or invoice linked to this contract. The total of items in a document is deducted from the contract amount.
-
When a contract is added to a PO, and you create a related invoice with the same contract, the amounts spent and available in the contract are recalculated according to invoiced items’ prices, taxes, and discounts specified in the invoice.
-
If you have a contract specified in a PO, but you want to invoice items from this order without affecting the contract total, you can delete the contract from the invoice or specify a different contract.
-
If you assign a contract to an invoice and add a credit note to it, the CN amount will be added to the contract total and become available for spending again.
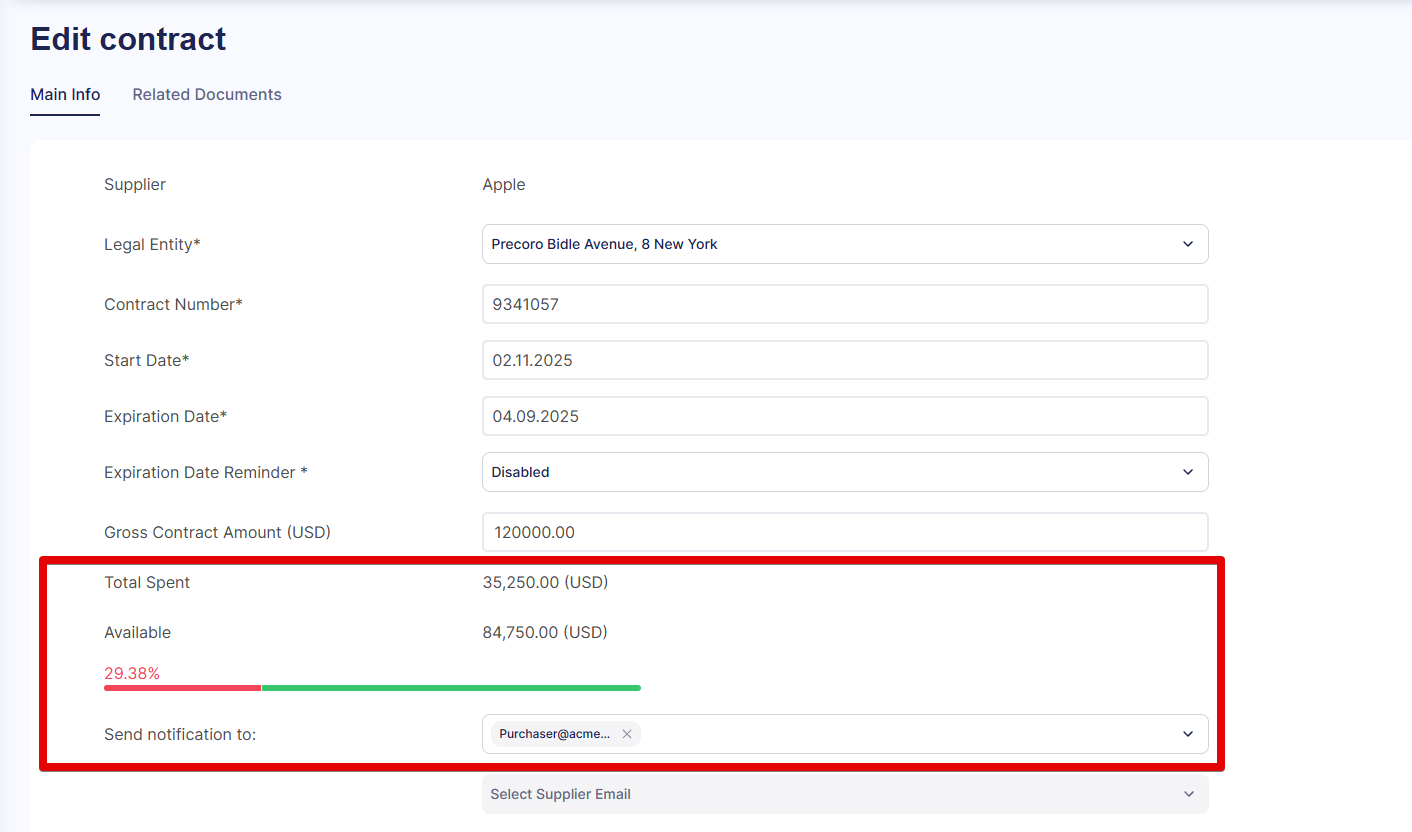
Track the Contract Amount
On the Contract Management page, you can see the total contract amount, total spent, the remaining available balance, and a visual progress bar that helps you monitor contract limits at a glance. Any contract on the page with exceeded limits will be highlighted in red so you can spot contracts that need attention.
![]()
You can also see these amounts on the contract editing page.
Search Contracts Easily Using Filters
You can promptly sort through the existing contracts using an advanced set of filters. Click Show Filters on the Contract Management page and set your preferences:
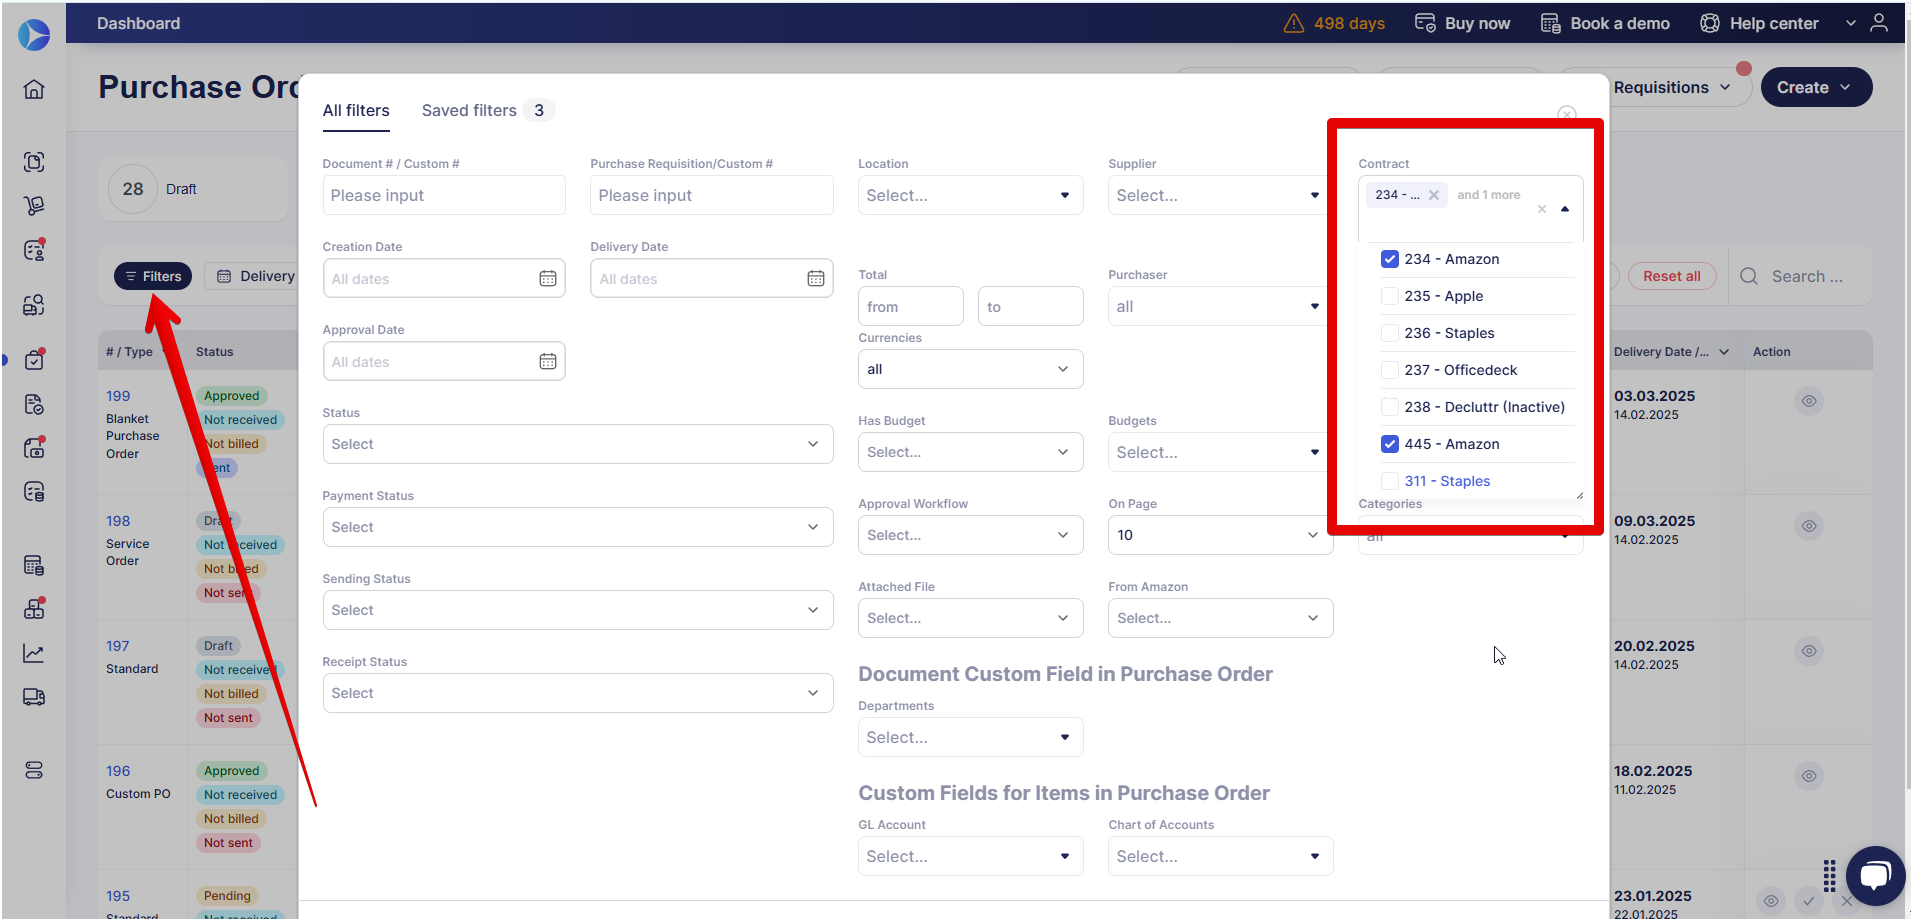
Use advanced filters on the Invoices and Purchase Orders pages to view documents linked to specific contracts.
-
Click on Filters and select the needed values in the Contract field. You can choose one or several options to view all necessary invoices or POs.
-
Press Filter Results to see documents that use the selected Contracts.
Manage Contracts from the Supplier Page
You can create and manage supplier contracts directly from the supplier’s profile without opening the Contract Management page.
To create a new contract for a specific supplier:
-
Go to Supplier Management and open the needed supplier’s profile.
- Click Add Contract button, it opens the standard form for creating a contract manually.
- Since you're already on the supplier's page, the Supplier field isn't shown on the form—just complete the remaining fields as described in this section.
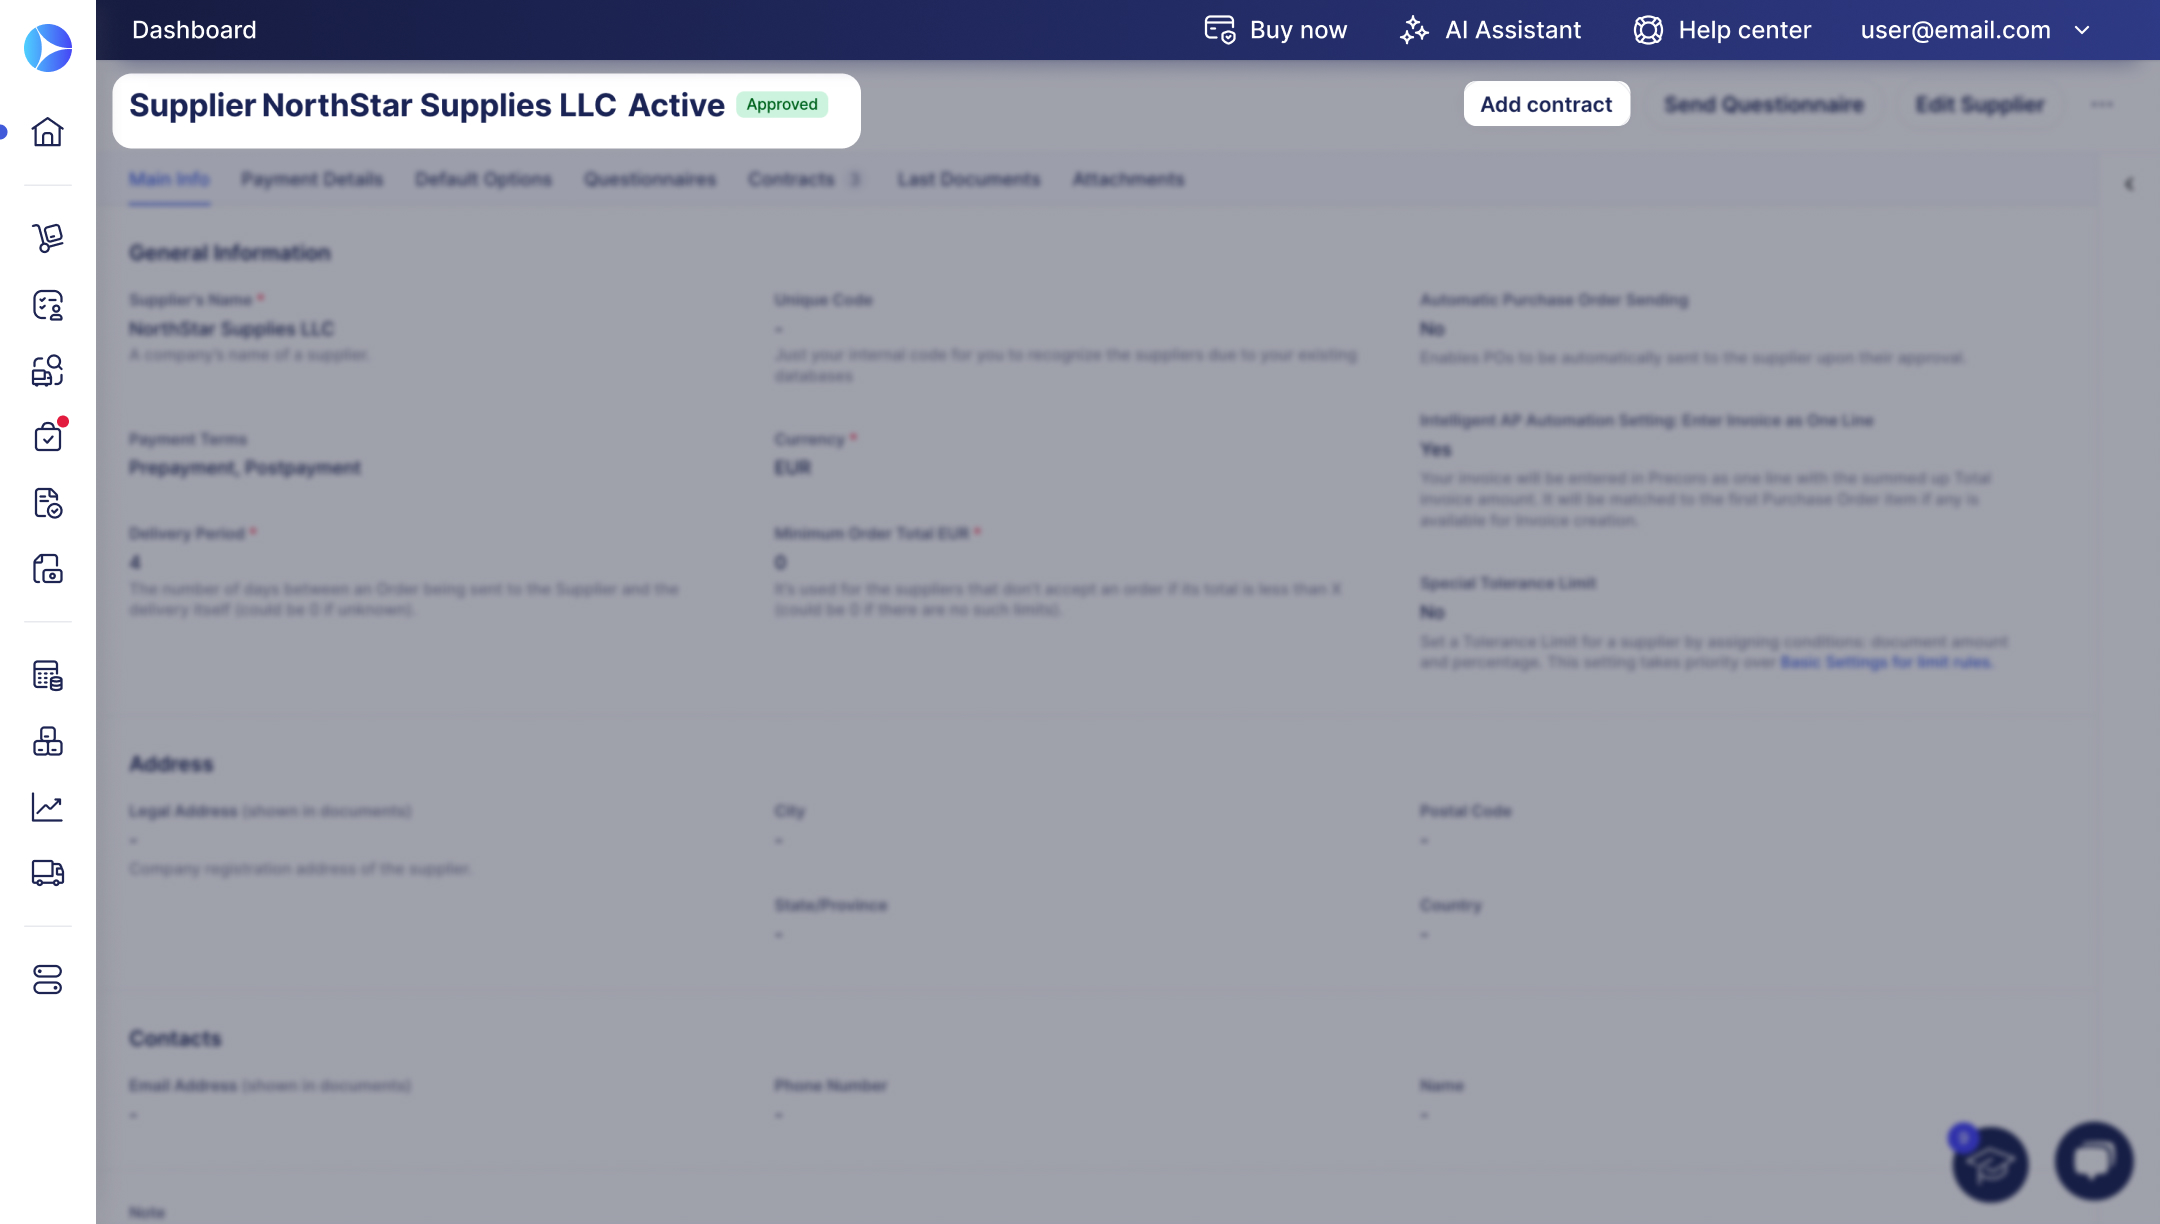
To view and edit contracts from the supplier page:
-
Go to Supplier Management and open the needed supplier’s profile.
You will see the supplier’s contracts divided by status:
- Active
- Inactive
Each contract card shows key details, such as contract number, note, spent, Legal Entities number (if configured), start date and expiration date, auto-renewal (if enabled), expiration date reminder(if enabled), and Contract Agent scanned icon.
- Click a contract card to edit the contract details. From there, you also can:
- view related documents;
- ask the Contract Agent questions or explore previous Contract Agent insights.
Stay Updated with Email Notifications
Precoro can send emails regarding contract limits to users selected in the Send notification to field on the contract creation/editing screen.
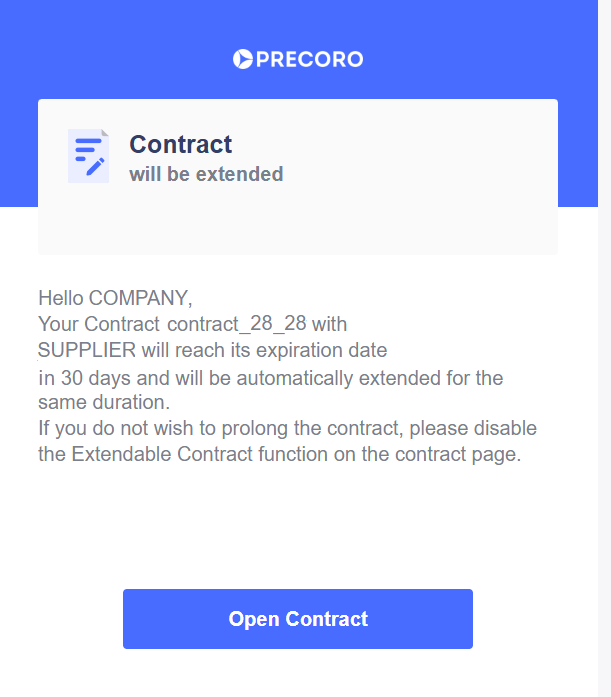
Use the Expiration Date Reminder field in the contract to select when users receive a notification about contract expiration (30, 60, 90, 120, 150, or 180 days before the expiration date). If the contract has the Extendable Contract toggle enabled, you will be notified that the contract will be extended soon.
If the Gross Contract Amount field is filled, Precoro will also automatically notify users if total spending exceeds the contract amount.
To control whether you receive email notifications regarding contracts, go to the Email Preferences (Email Preferences for precoro.us) page — Misc section and use the Expiring Contracts checkbox.
Manually Deactivate Contracts
You can check whether a contract is Active on the Contract Management page:

To manually deactivate a contract:
-
Open the needed contract.
-
Turn the Active toggle off.
-
Click Update.
You can also Filters to sort the Active and Inactive contracts.
Need More Control Over Contracts?
If you need more flexibility in managing contracts, the functionality you’re looking for may already be in development or waiting to be requested. To see what's in store, please check out our
Open Product Roadmap.
There, you can:
-
See what’s planned and in progress
-
Upvote ideas that matter to you
-
Leave comments to share your use case
-
Subscribe to announcements and follow relevant ideas
-
Submit new feature requests
To get started:
-
Review existing ideas and upvote the ones that you find helpful.
-
Log in or sign up using your business email to access full functionality.
Submit new ideas and share insights with your peers in the comments.
Every suggestion counts—your feedback shapes what we build next. Refer to this article for more details on working with the product plan.
Frequently Asked Questions