TABLE OF CONTENTS
- Why You Should Use Custom Contract Fields
- How to Create Custom Contract Fields
- How to Use Custom Contract Fields
Why You Should Use Custom Contract Fields
Custom Contract Fields provide even more flexibility in managing and tracking contracts. Using them, you can store various contract data needed for your workflow.
Here’s what they help you with:
- Save additional information in Text, Date, or Drop-down list format.
- View this information from the Contract Management page (Contract Management for precoro.us) or from any specific contract.
- Navigate the contract list efficiently using filters by custom fields.
- Create comprehensive and informative reports about contracts.
For more information and tips about creating and managing contracts in Precoro, please visit this article.
How to Create Custom Contract Fields
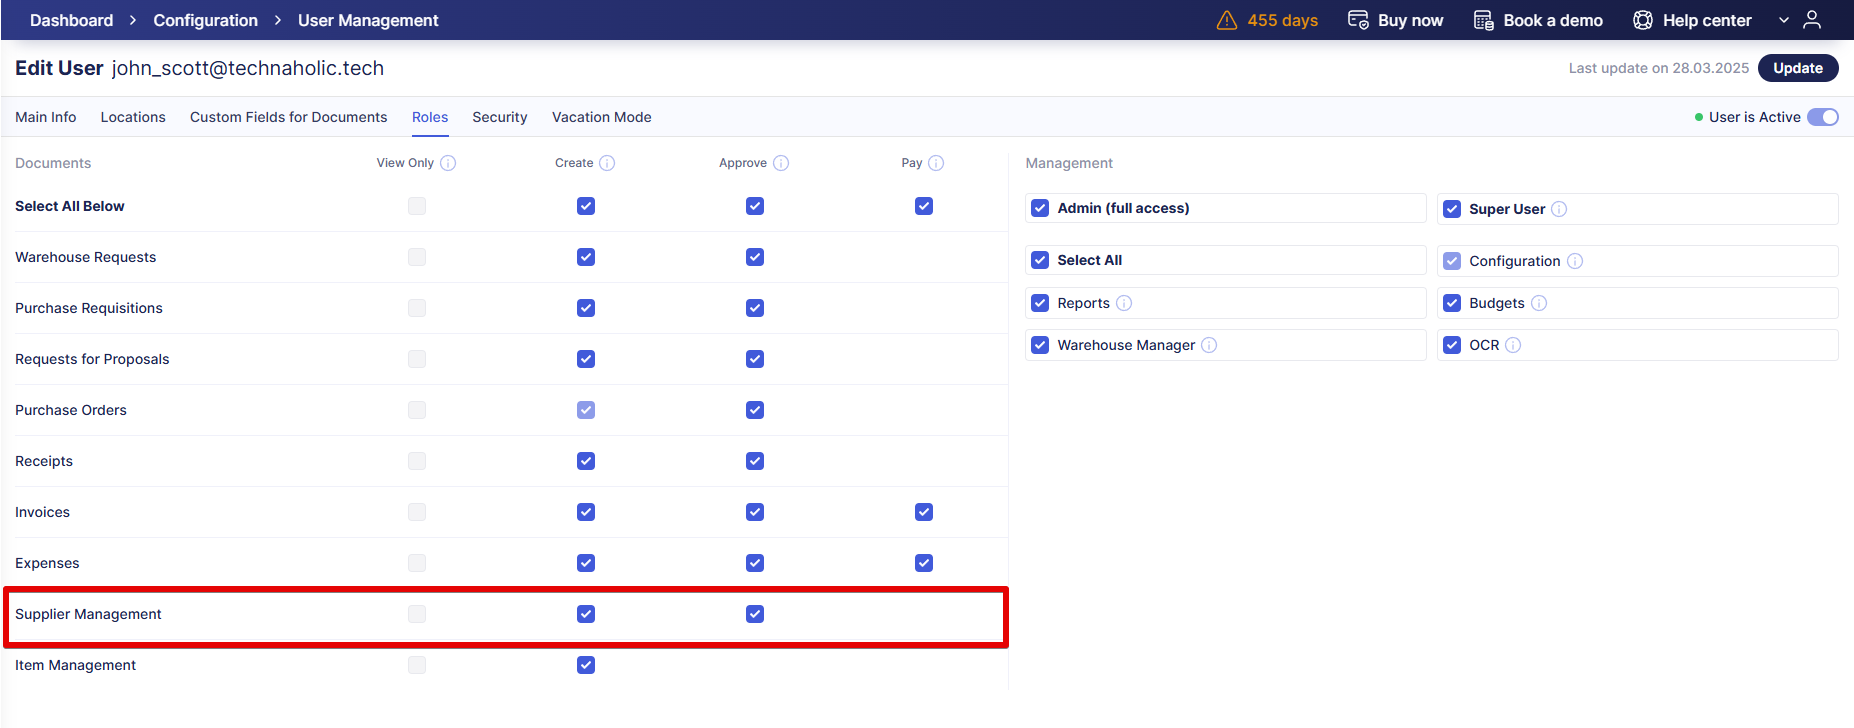
This functionality is available to all users with the Supplier Management Create Role:
Step 1: Add a New Custom Supplier Field
Navigate to Supplier Management → Custom Supplier Fields tab and press Add field in the top right corner.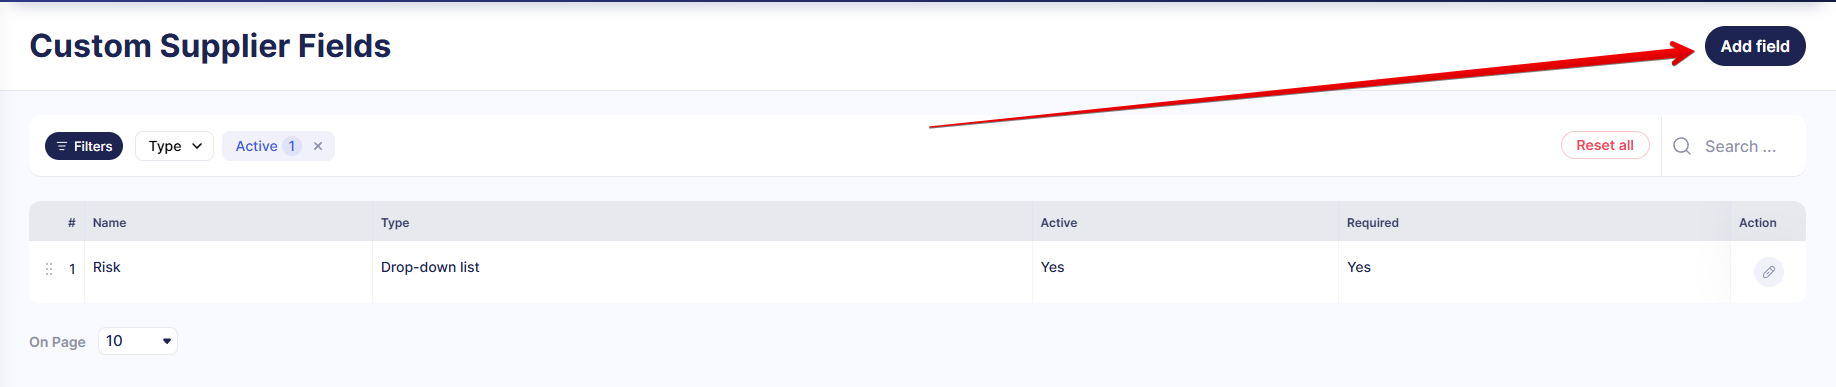
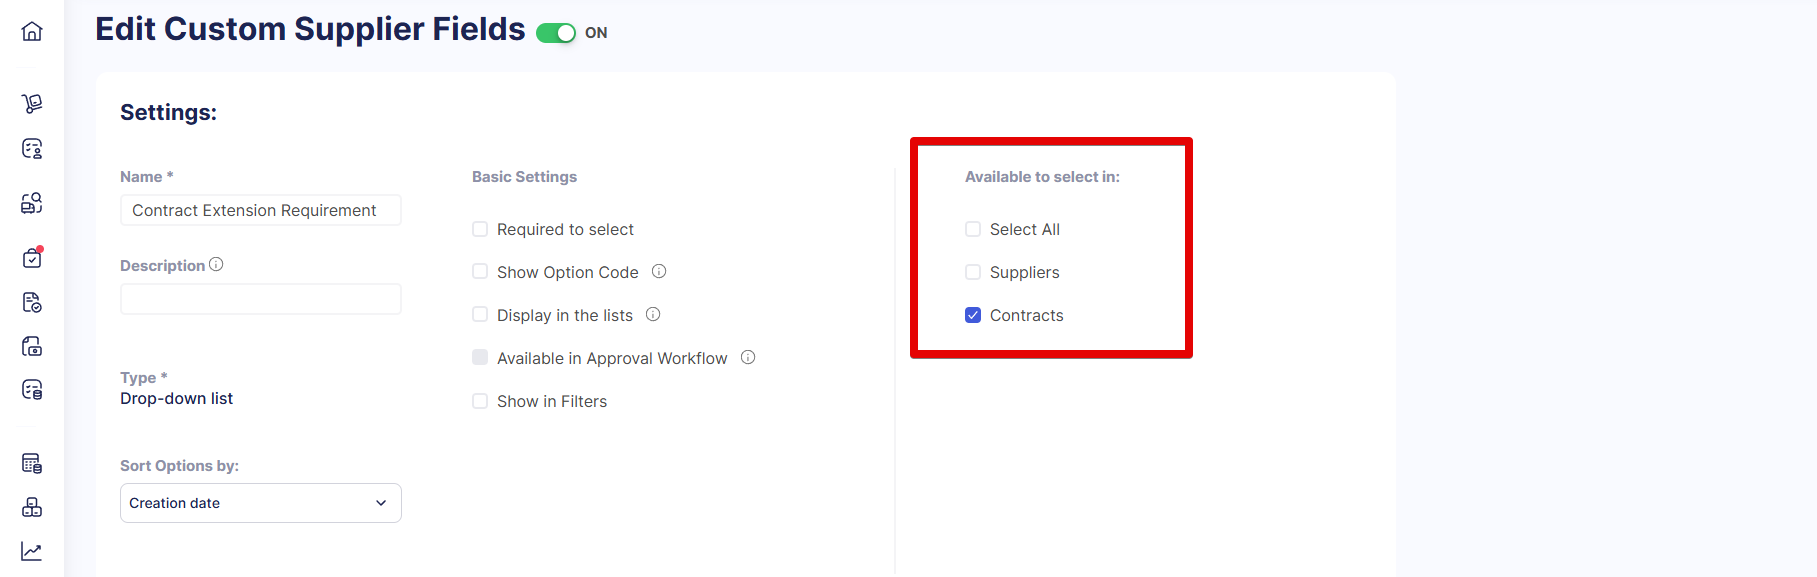
Step 2: Set Availability in Contracts
In the Available to select in section, check Contracts or Select all. If the field is only available in contracts, it can’t be used in Supplier Approval Workflow and will only be displayed in the list of contracts.
Step 3: Select a Type
There are three types of fields available:
- Drop-down list—allows users to select the previously added options from the list.
- Text—allows users to enter text value into the field.
- Date—allows users to select the date.
Step 4: Configure Basic Settings
For Text and Date fields, you can enable these settings:
- Required to select—makes this field mandatory in contracts.
- Display in the lists—the custom field will be displayed in the Other Details column on the Contract Management page.
- Show in Filters—if activated, the field is added to the filters on the Contract Management page.
If you select Drop-down list in the Type field, these additional settings will be available:
- Show Option Code—allows users to view option codes along with names in document lists.
- Available in Approval Workflow—this setting can be enabled if the field is also available for suppliers. If the field can only be selected in contracts, this option will be greyed out.
💡 Please note: If this field is also available to select in suppliers, the settings affect other modules as explained in the Custom Supplier Fields Functionality article.
Step 5: Save the Custom Field’s Configuration
If you selected Date or Text type, press Save to create the field. If you selected the Drop-down list type, press Next Step and proceed to adding the options.
Step 6: Add Options for Lists
Add options via a table in the lower part of the page. Press Add option to create a new option or Add sub-level to create a sub-option for an existing parent. You can create an option hierarchy with up to 5 levels.
To delete an option, simply click the cross icon opposite it.
Once everything looks good, press Update to save the list.
How to Use Custom Contract Fields
Edit Contract Page
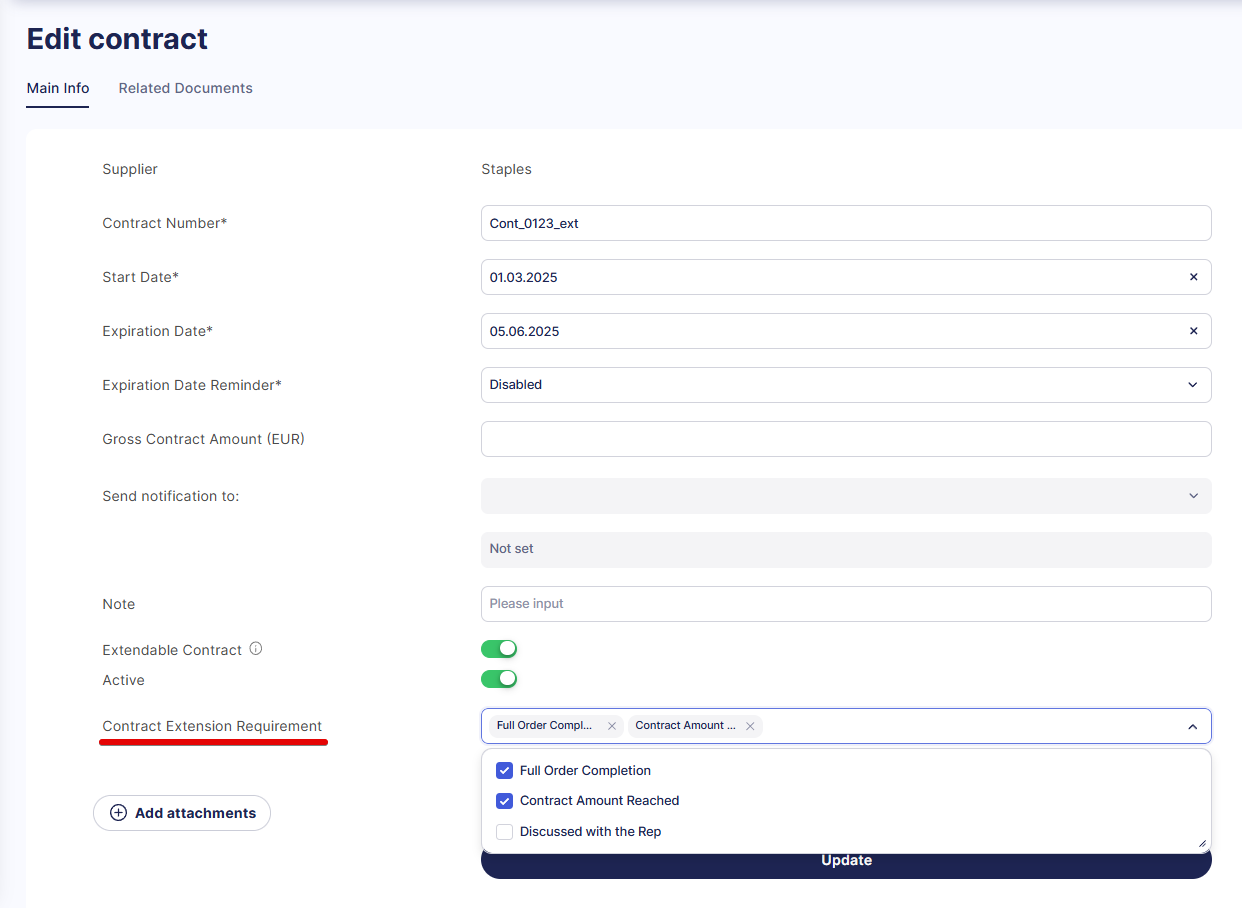
When creating or editing a contract, you'll find the custom fields below the Extendable Contract and Active toggles. You can fill out and view the values on this page. If you set up custom fields with the Drop-down list type, you can select multiple options.
Contract Management Page
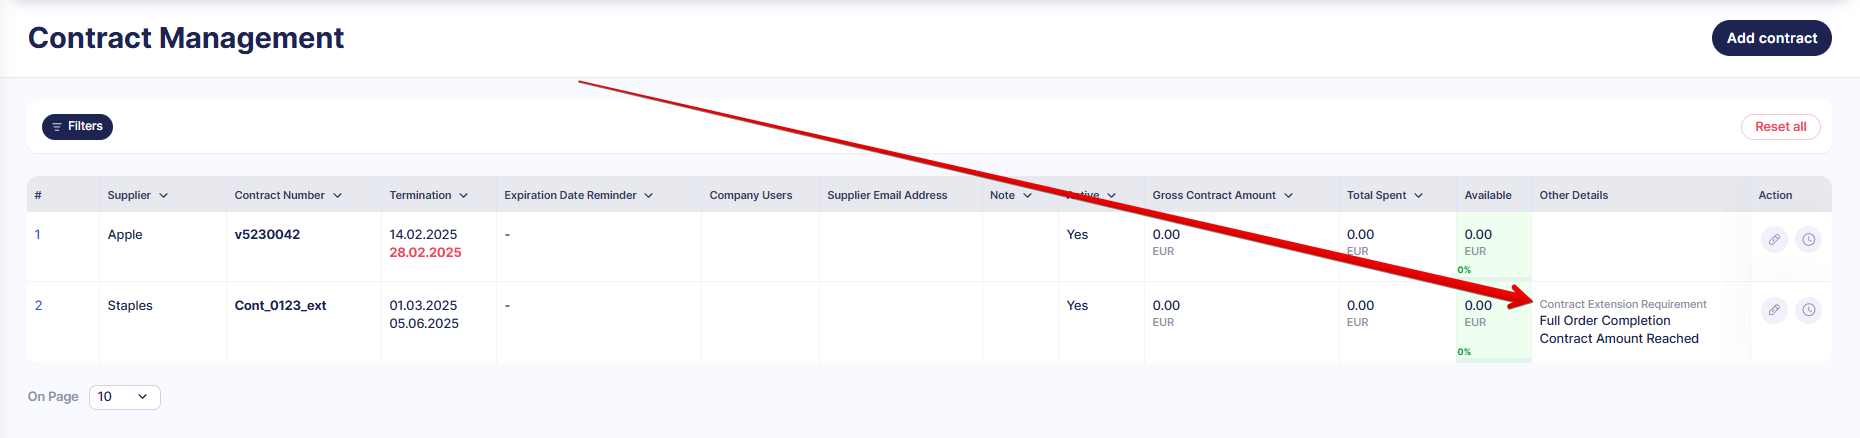
If a custom field has the Display in the lists setting enabled, it will appear in the Other Details column on the Contract Management page.
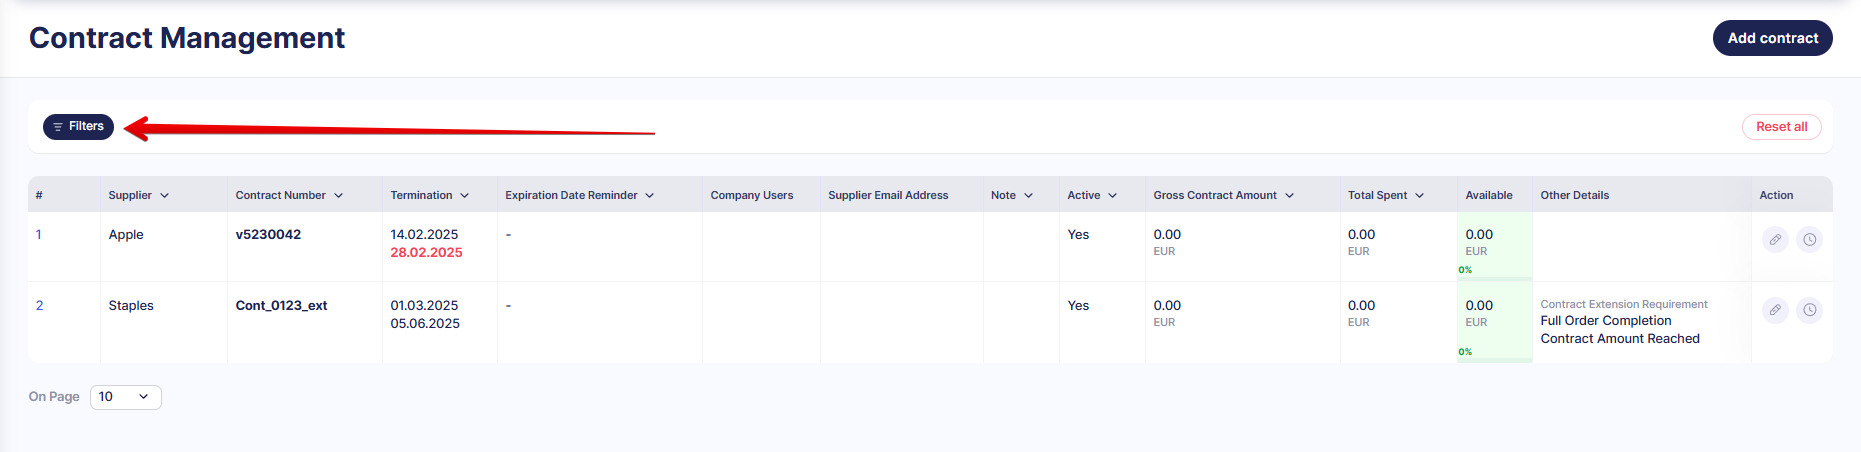
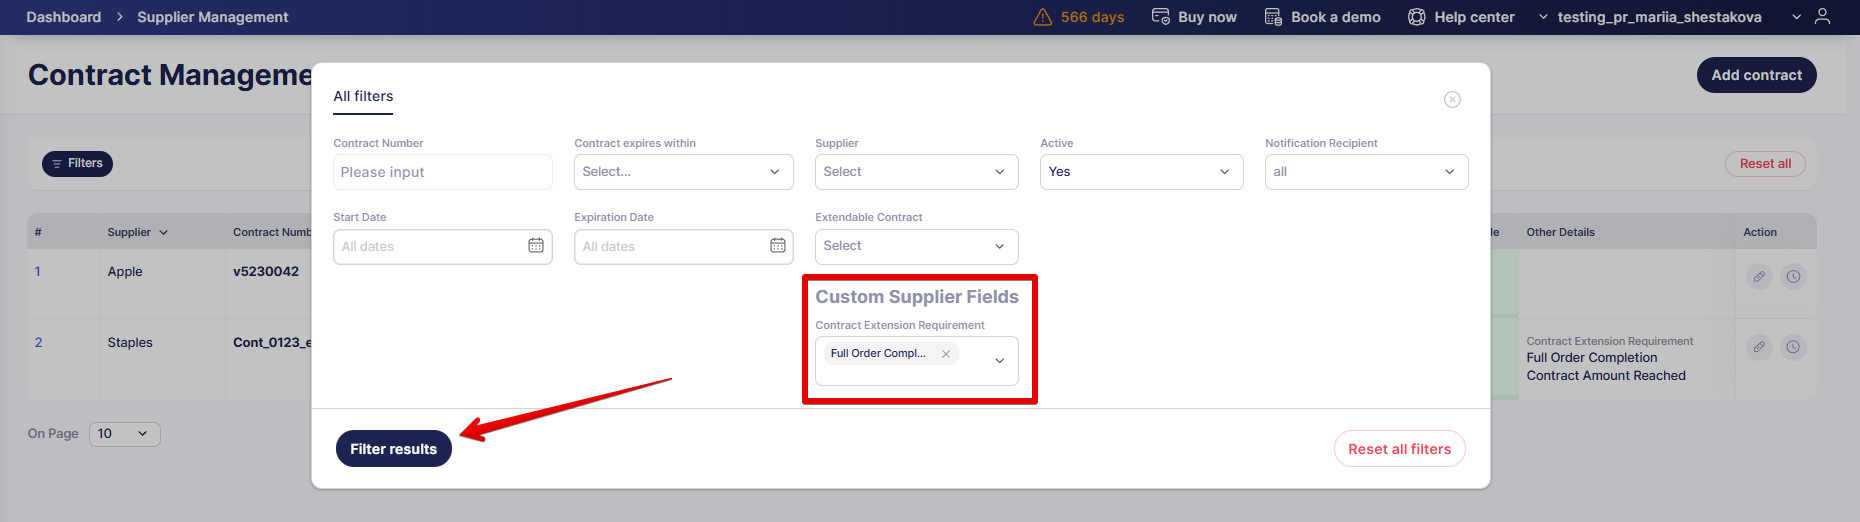
To filter documents on the Contract Management page using a custom field, check the Show in Filters box when creating or editing the field. On the Contract Management page, click Filters, find the custom field, set the necessary value, and press Filter results.
Learn more about filtering the list of contracts here.
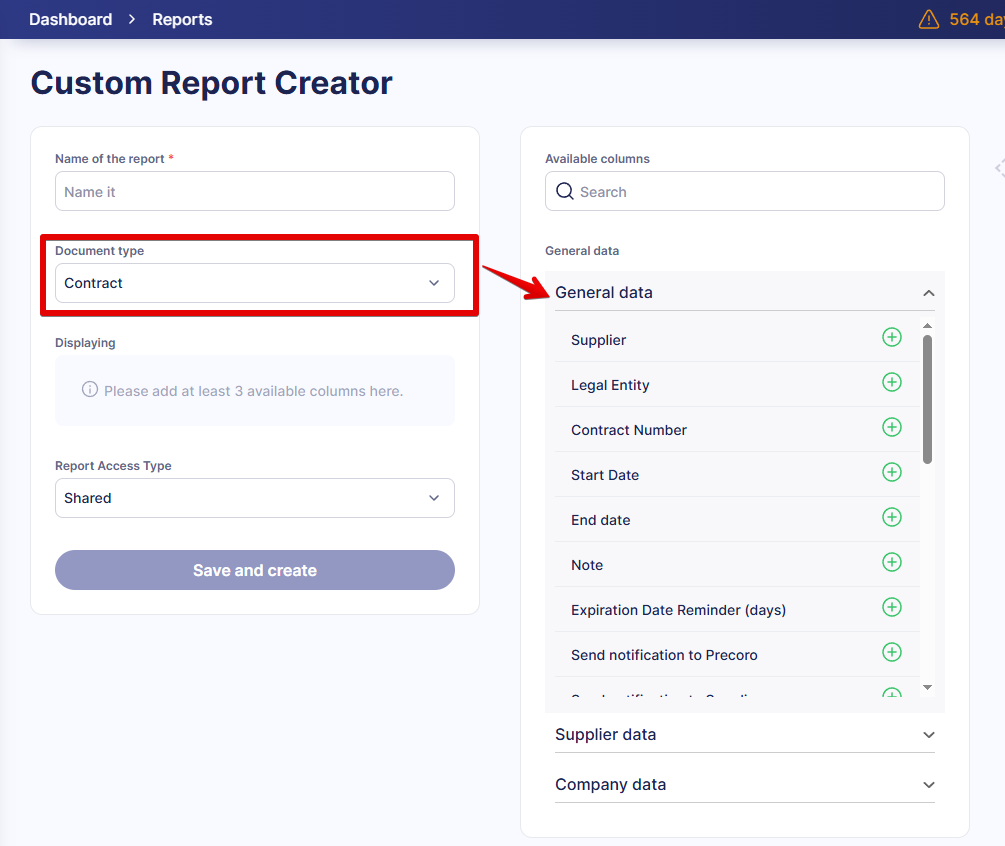
Custom Reports
When creating custom reports with the Contract document type, you will find custom contract fields in the General Data tab.