This article discusses how to import and update suppliers in bulk. Generally, only users with the Supplier Management role will be able to perform these actions.
TABLE OF CONTENTS
How to Import Suppliers in Bulk
You need to prepare your supplier’s data and fill out a template. Then, you will be able to upload your list of suppliers to Precoro. It may be easier and quicker to export the supplier’s data from your accounting system.
Yet, make sure you have no duplicates or outdated suppliers.
The file for uploading needs to be in XLSX format.
1. On the Supplier Management page, press the Import Suppliers button on the right action panel.
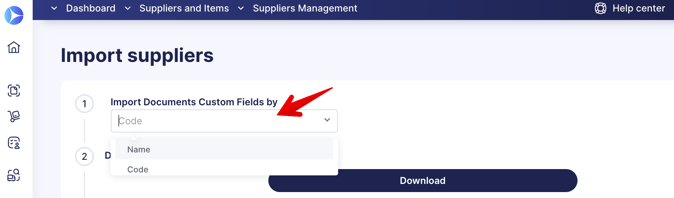
2. Choose how you would like to Import Custom Fields for Documents by using Name or Code fields. That will simplify your work with the form as you would not need to fill out both fields, just the chosen one.
3. Follow the step-by-step instructions on the Import page.
Please note that all suppliers will be imported as active by default. You can learn how to deactivate them here.
How to Fill Out Precoro Template
When working with the template, use the tips in rows 2 and 3 to correctly fill out all the fields.
Before uploading the file, please remember to delete rows 2 and 3.
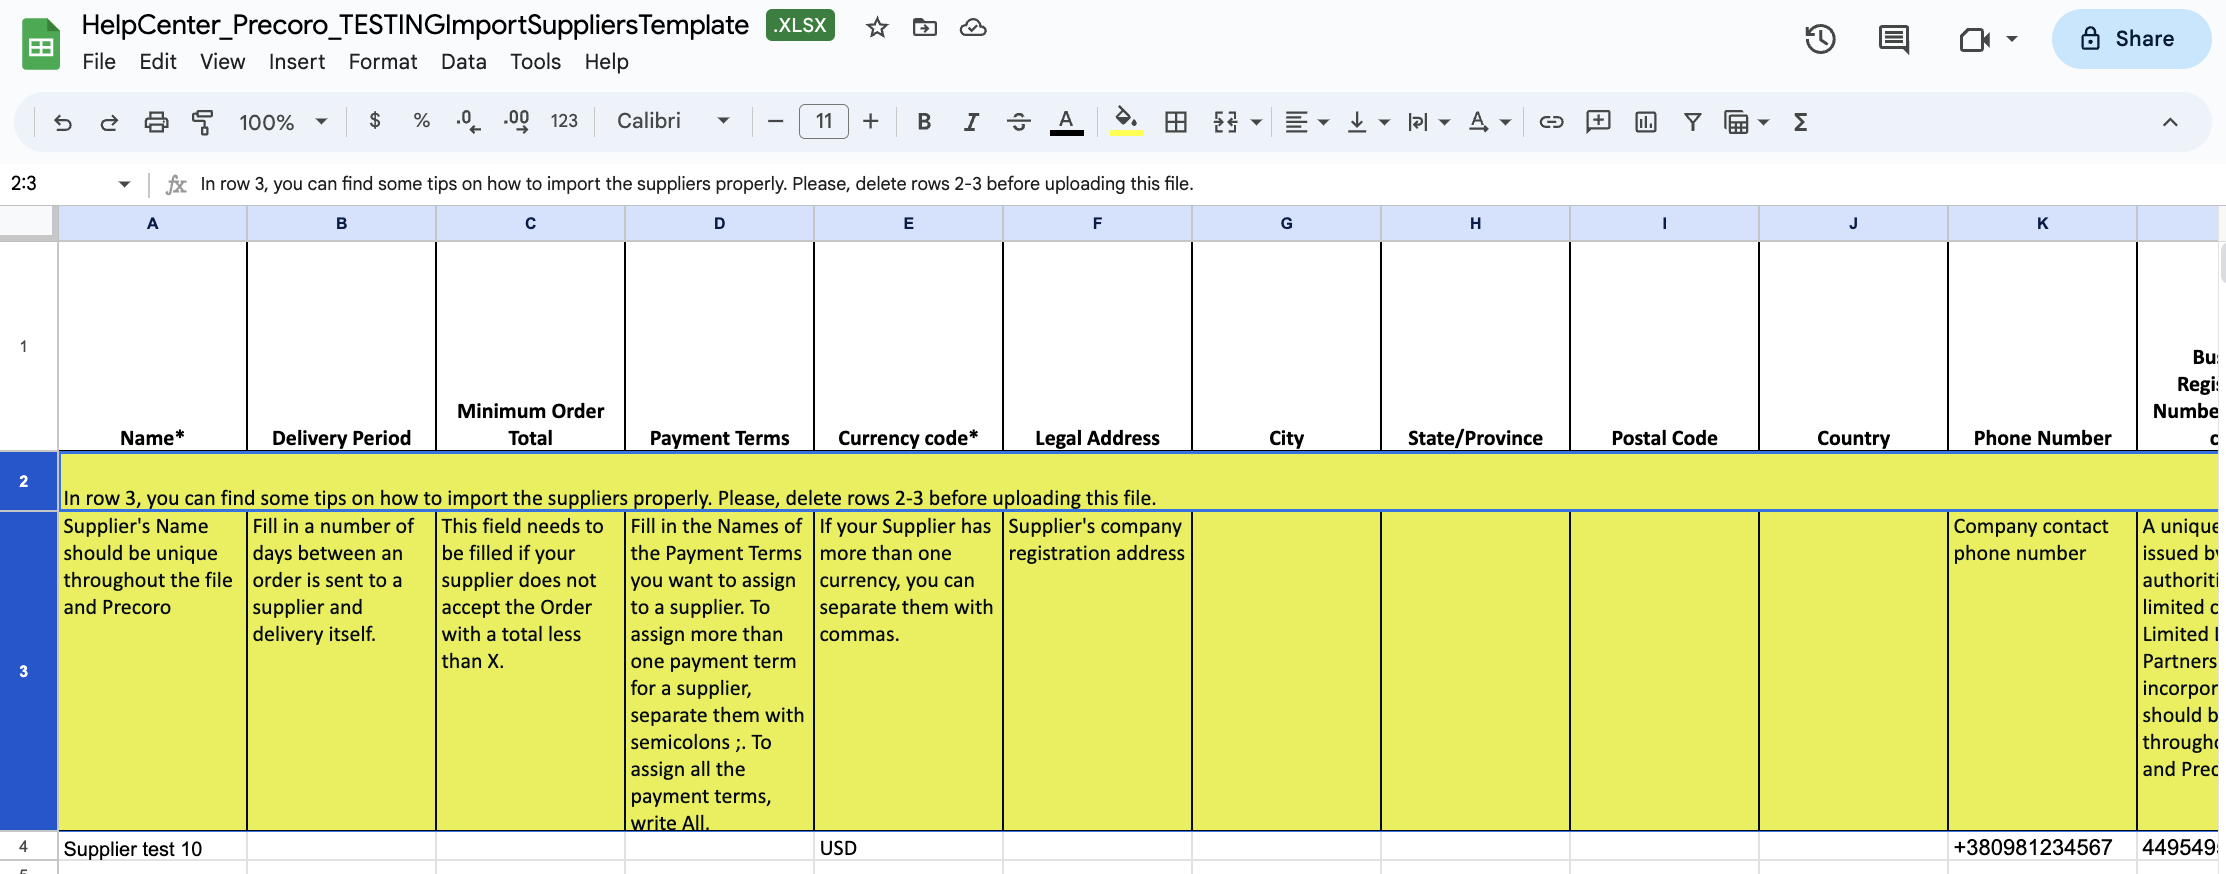
- The fields marked with asterisks are required. Be sure to fill them in before uploading.
- Note that in fields like Name* and Unique Code, the entered values should be unrepeatable throughout the file and the Precoro system.
- It might be easier and quicker to copy and paste any current codes and payment terms into the file from Precoro:
- If your supplier has multiple currencies, you can separate them with commas, such as UAH,EUR,USD.
- If you need more than one payment term for a supplier, separate them with semicolons (;), such as Prepayment;Post payment. To assign all the payment terms, write All in the field.
- In the Automatic Purchase Order Sending*, put down 0 for inactivating this function or 1 if you want to send the document to the supplier after the Confirmation automatically.
-
If you need to add two or more contacts per supplier, add more columns in the file (works only with contacts). Copy the column title and enter the information.
-
Make sure you have deleted duplicates in the file before importing the information.
How to Update Suppliers in Bulk
The update functionality works similarly to the import one. You can export your list of suppliers, promptly edit information, and upload it back to Precoro.
1. On the Supplier Management page, press the Update Suppliers button on the right action panel.
2. Choose how you would like to Import Custom Fields for Documents by using Name or Code fields. That will simplify your work with the form as you would not need to fill out both fields, just the chosen one.
3. Follow the step-by-step instructions on the Update page.
The file for uploading needs to be in XLSX format. Before uploading, please remember to delete rows 2 and 3 containing the tips.
How to Deactivate Existing Suppliers in Bulk
Download your suppliers list into an Excel file and input the changes: set 1 in the Active* [0=Inactive 1=Active] column for the suppliers you want to activate and set 0 if you wish to disable the supplier. Save the file, and submit the renewed data to Precoro.
How to Add More than One Currency to Suppliers in Bulk
1. Go to Suppliers and Items → Supplier Management → Update Suppliers.
2. Download your suppliers list into an Excel file and make the required changes:
- Add new currencies in the corresponding column, separating them with a comma.
- Make sure you have not deleted any existing currency. Otherwise, your suppliers’ list will not be updated with the deleted currency.
Please note that if you have integrated your suppliers via QuickBooks, the currency box will be blocked.
How to Import and Update the Supplier Custom Fields
If you are using the Supplier Custom Fields Functionality, you can also Update or Import those fields in bulk:
- Depending on the settings selected on the Supplier Import or Update pages, you can assign the SCFs by Code or Name:
- If you have selected the Name option in the settings, then SCFs of the selected type will be assigned by the name values you are entering. Please fill in the names exactly as they are in Precoro. If not, the corresponding flesh will prompt you to correct the values.
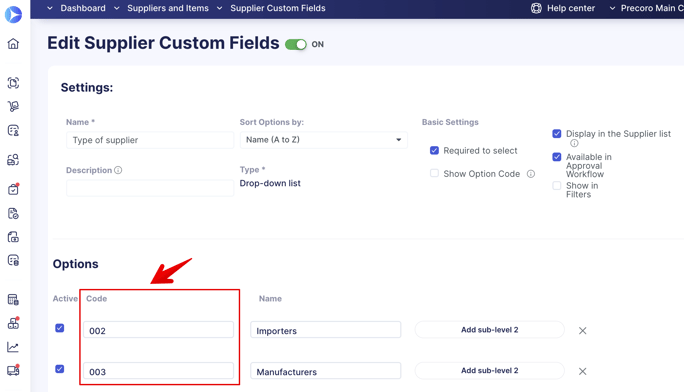
- If you have selected the Code option in the settings, then SCFs of the selected type will be assigned by the code values you are entering. Please make sure to fill in the codes exactly as they are in Precoro. If not, you will see the corresponding flesh prompting you to correct the values.
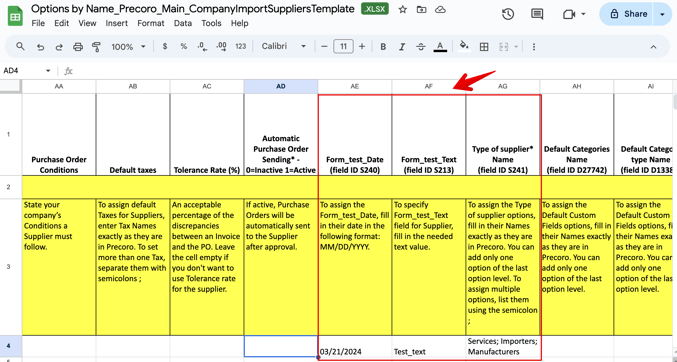
Supplier Custom Fields can be of three types: Multi-select, Text, and Date.
- In the multi-select type, you can assign several options by using the semicolon as a separator ;
- In the text type, enter the text value in the field.
- In the date type, enter the date value. Please note that the date must be in the format you have chosen in the Basic Settings:
- Please pay close attention to the fact that you need to set the column format in Excel to text in order to import or update the date.
- When the file is imported, the date format will be validated, and you will see the corresponding tip if the date was not imported correctly.
- If the field was marked as mandatory, you will not be able to upload a template without this field being completed.
The turned-off options will not be displayed in the template file. Also, all the fields will be automatically marked as Not to Show by default in the template.