TABLE OF CONTENTS
- Introduction to Custom Reports
- How to Provide Access to the Reports Module
- Custom Reports Structure
- How to create a Custom Report
-
How to Add CFIs to Custom Reports Even When They Are Activated for Items Only
Introduction to Custom Reports
Custom Reports allow you to generate, analyze, and export any company’s data set based on the type of document used in Precoro:
- Purchase Requisition
- Purchase Order
- Invoice
- Receipt
- Budget
- Credit Note
- Payment
- Warehouse Request
- Inventory
- Expense
- Stock Transfers
- Contract
- Approval Performance
How to Provide Access to the Reports Module
Custom Reports are available for users with an active Reports role and with access to the module they wish to use in reports.
For example, if users wish to create reports on Invoices, they should have two roles: Reports and Invoices (with any access type: Create, Approve, Pay, or View Only).
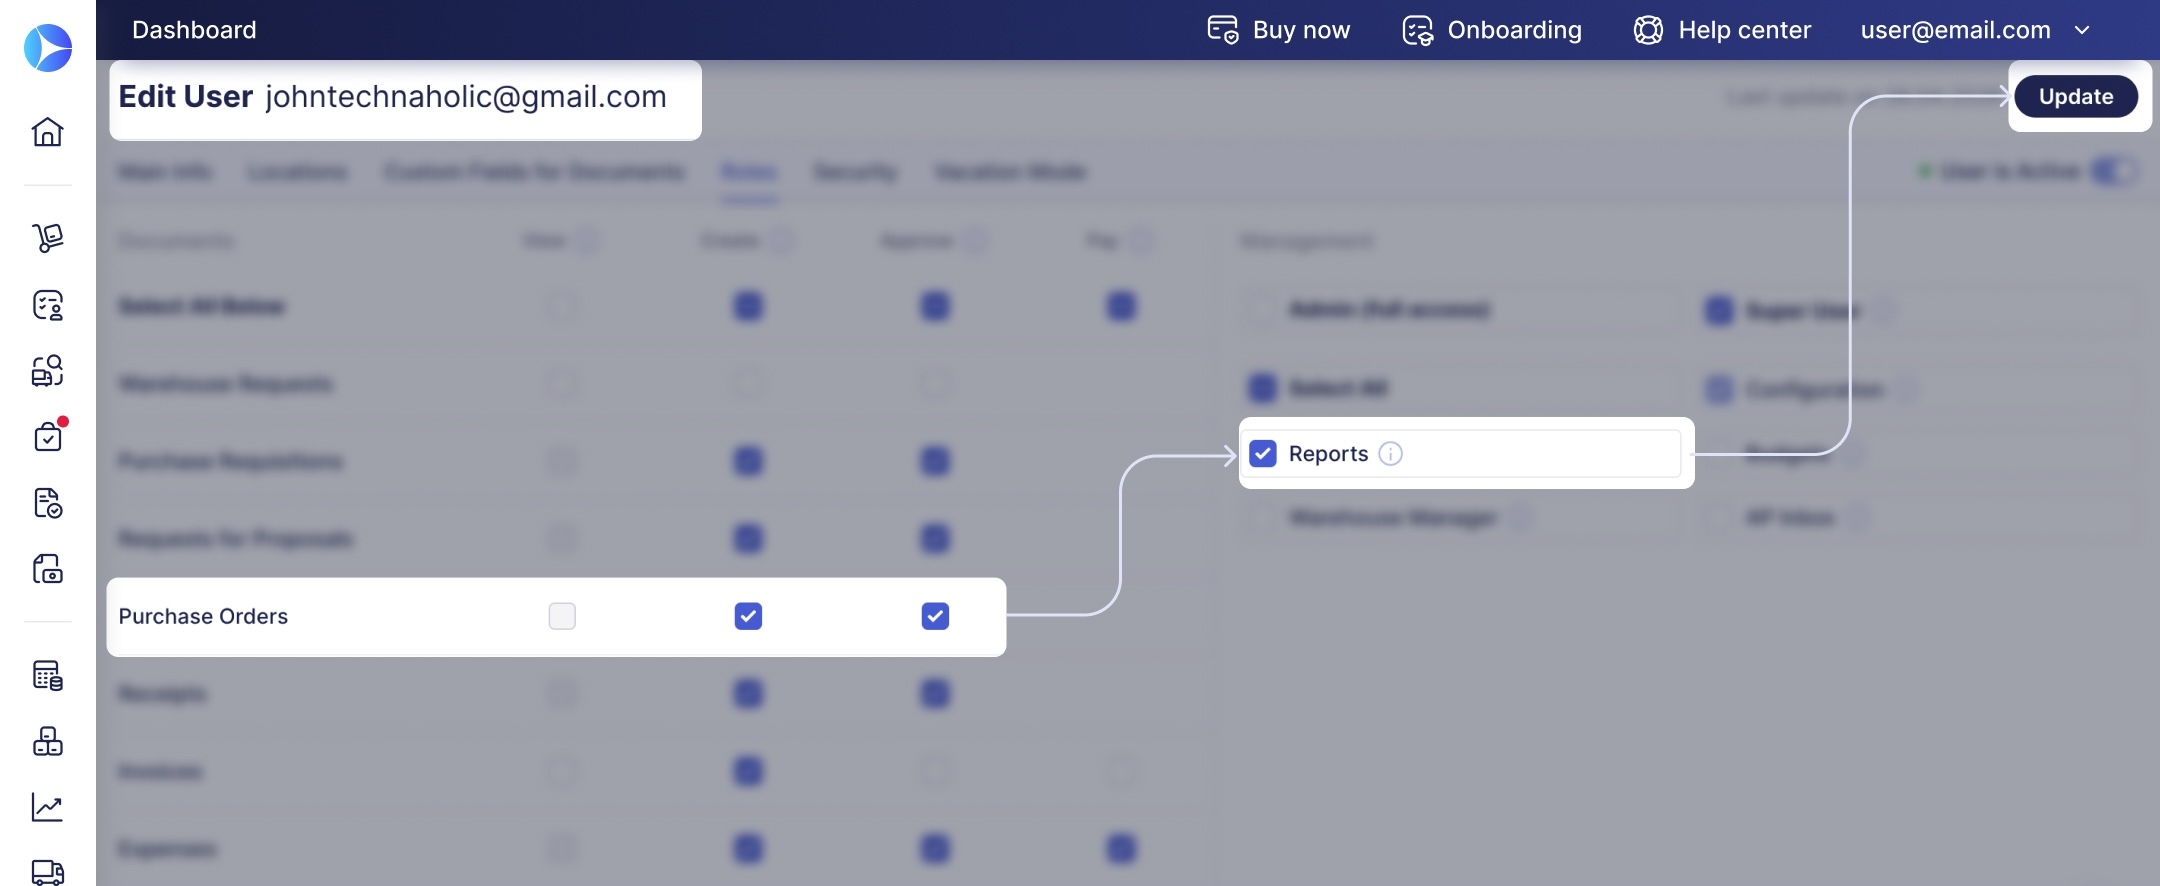
To set user roles:
- Open the Configuration page and go to the User Management tab.
- Find the needed user, press Edit (pensil icon), and click the Roles tab.
- Ensute the user has access to the modules they work with and activate the Reports role on the right.
- To save the changes, press the Update button in the top right corner.
Editing Reports with Substitute Rights
In case you have deactivated a user and chosen a substitute, they will receive access to all reports created by their predecessor.
Choosing a substitute is a required action when deactivating a user.
Also, in the Report Owner report field, the previous user information will be replaced with that of the substitute.
Report Management for Super Users
To ensure the custom reports in your company are relevant and easy to find, Super Users have the option to edit reports, delete them, or assign a different owner. It helps keep reports in order even if they were created by users deactivated without a substitute.
Learn more about this functionality here.
How to Set the Report Access Type
You can set the Report Access Type for Shared or Private when creating custom Reports. 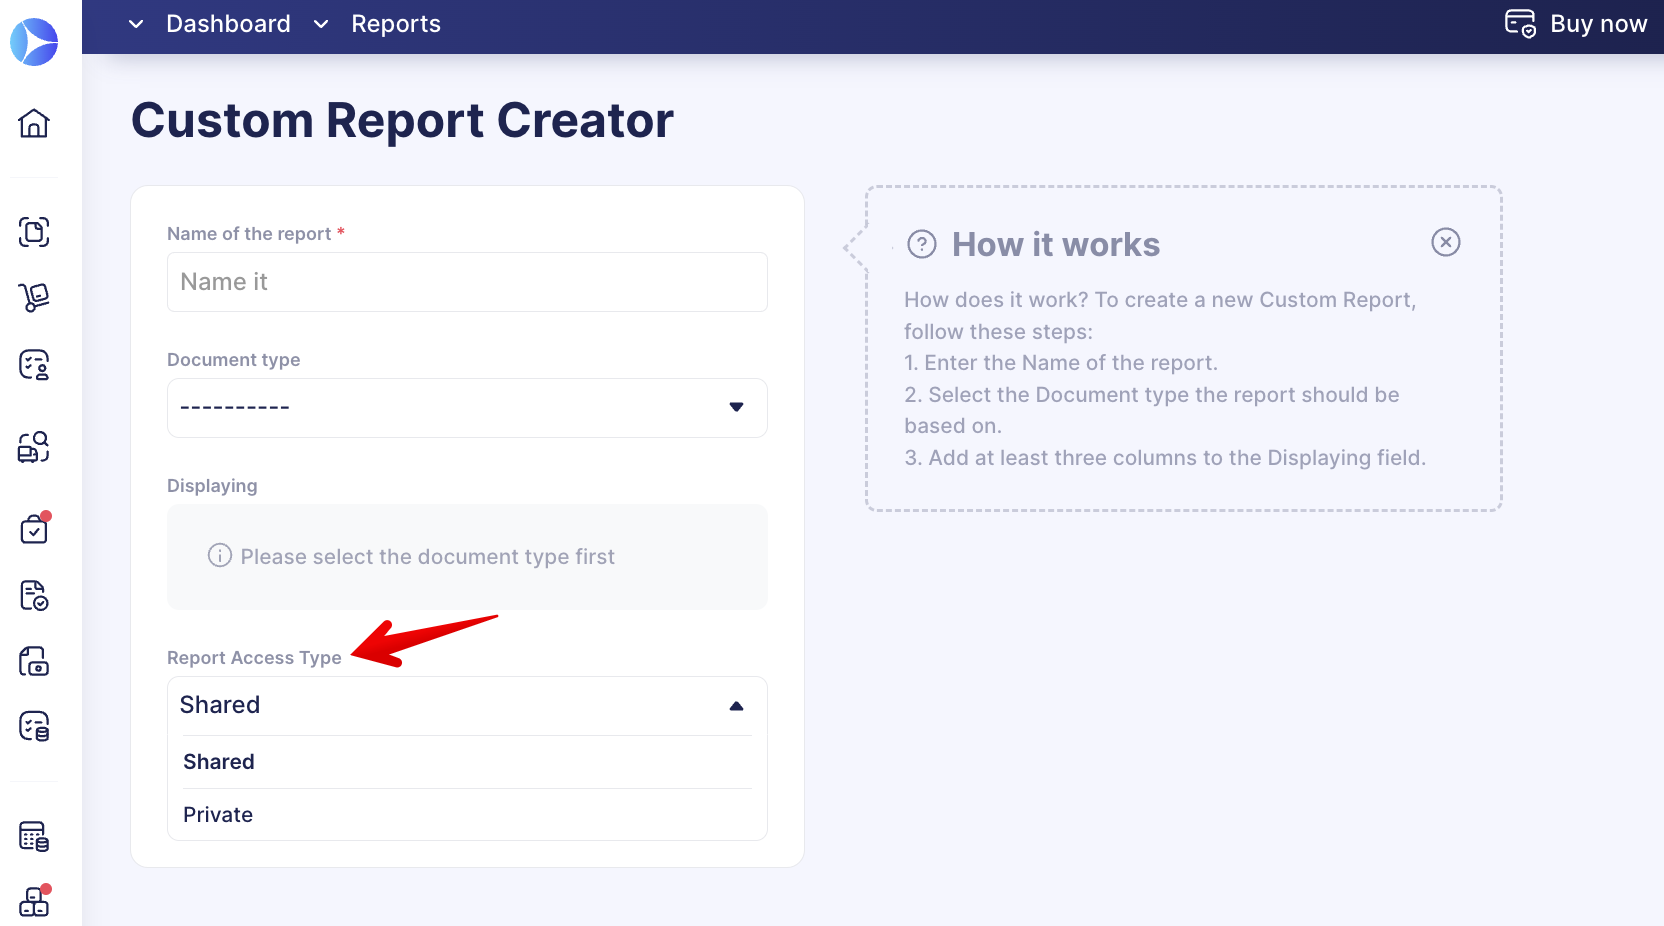
💡 Please note: Shared reports are available to all users with an active Reports Role.
On the other hand, the Private access type is available only to the report creator. Thus, you must be the report creator to see this option available.
Custom Reports Structure
The general idea of creating a Custom Report is to get a specific downloadable piece of data related to the given document type. The data set available to include in the report is organized into the following groups:
- General data
- Supplier data
- Company data
- Items data.
General data is available for all types of documents. Other data groups' availability works as follows:
|
Data / Report |
Purchase Requisition | PO | Invoice | Receipt | Budget | Credit Note | Payment |
| General data | + | + | + | + | + | + | + |
| Supplier data | + | + | + | + | + | ||
| Company data | + | + | + | + | |||
| Items data | + | + | + | + | + |
- General data contains general information about the whole document or related documents (Document #, Status, Dates of Creation/Approval/Delivery, Creator Names, Document Custom Fields, etc.).
- Supplier data indicates pieces of information about suppliers (e.g., Name, Legal Address, Delivery Period, Billing information, Contract Number, etc.)
- Company data provides a similar breakdown as supplier data but with regard to your company.
- Items data is all about the products stated in PO, Invoices, Receipts, or Credit Notes.
💡 Please note: Once you have created a Custom Report, you can save the template and use it when needed. After running, any Custom Report can be downloaded in XLSX format.
You can gather, filter, process, analyze, and use any information about documents in your Precoro account.
You can also select and display the Item Row # field in custom reports for the following document types:
-
Invoice
-
Warehouse Request
-
Purchase Requisition
-
Receipt
-
Credit Note
-
Expense
-
Stock Transfer.
The Item Row # field indicates the line number of each item in the document. This information can be useful for further work with the file as well as data import.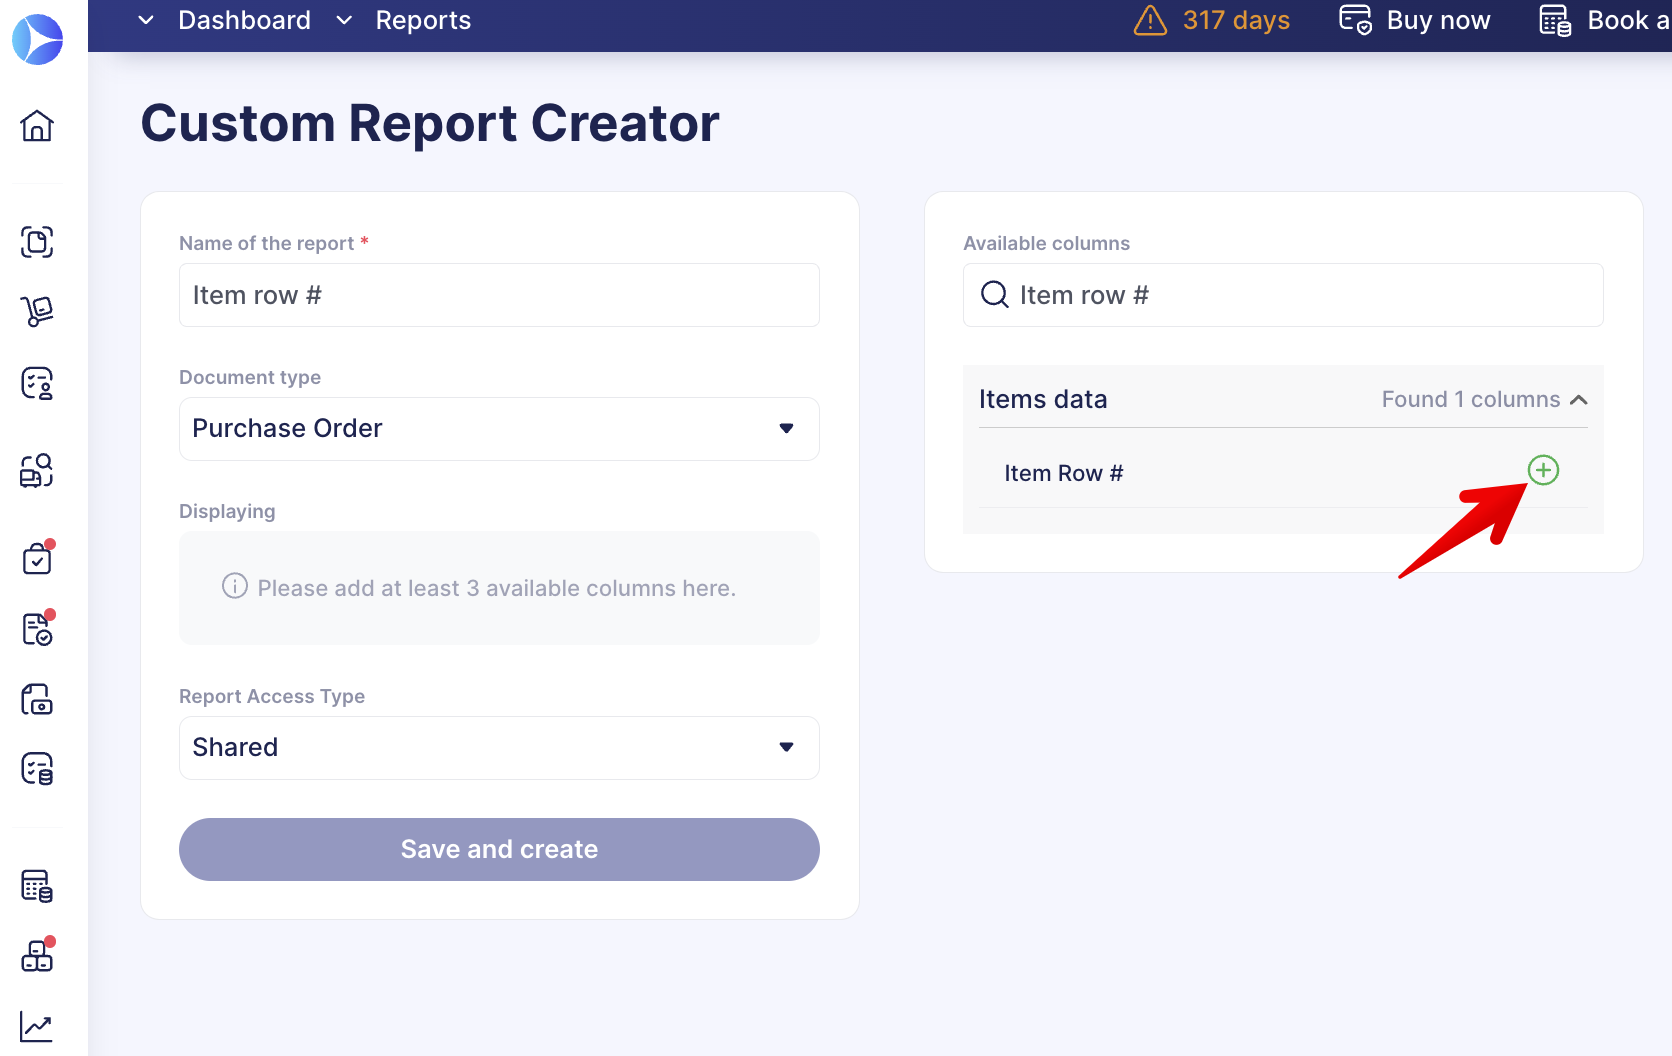
How to Create a Custom Report
1. Provide users with appropriate roles and activate the module as described here.
2. Open the Reports section in the left-side menu and click on the Create a Custom Report button.
3. Enter the Report Name.
3. From the drop-down list, choose the Type of Document.
4. Choose the columns you wish to add.
💡 Please note: In one report, you can include data from two objects: General and Items.
You can add the necessary Items Custom Fields as well as the Document Custom Fields, to which you can later apply filters.
5. Save the changes you have made.
After saving the report, it will be displayed on the main Reports page in the Saved Reports category. Subsequently, you will be able to continue working with the created report, editing, setting the filters, or deleting it.
- If you wish to continue working with data in XLSX format, press the Export button.
- If you wish to export the report to Google Sheets, consider this article.
- Learn more about exporting and sharing reports here.
💡 Please note: You can export reports in English, Spanish, French, and German languages.
You can select the report language from the drop-down list above the Export button. 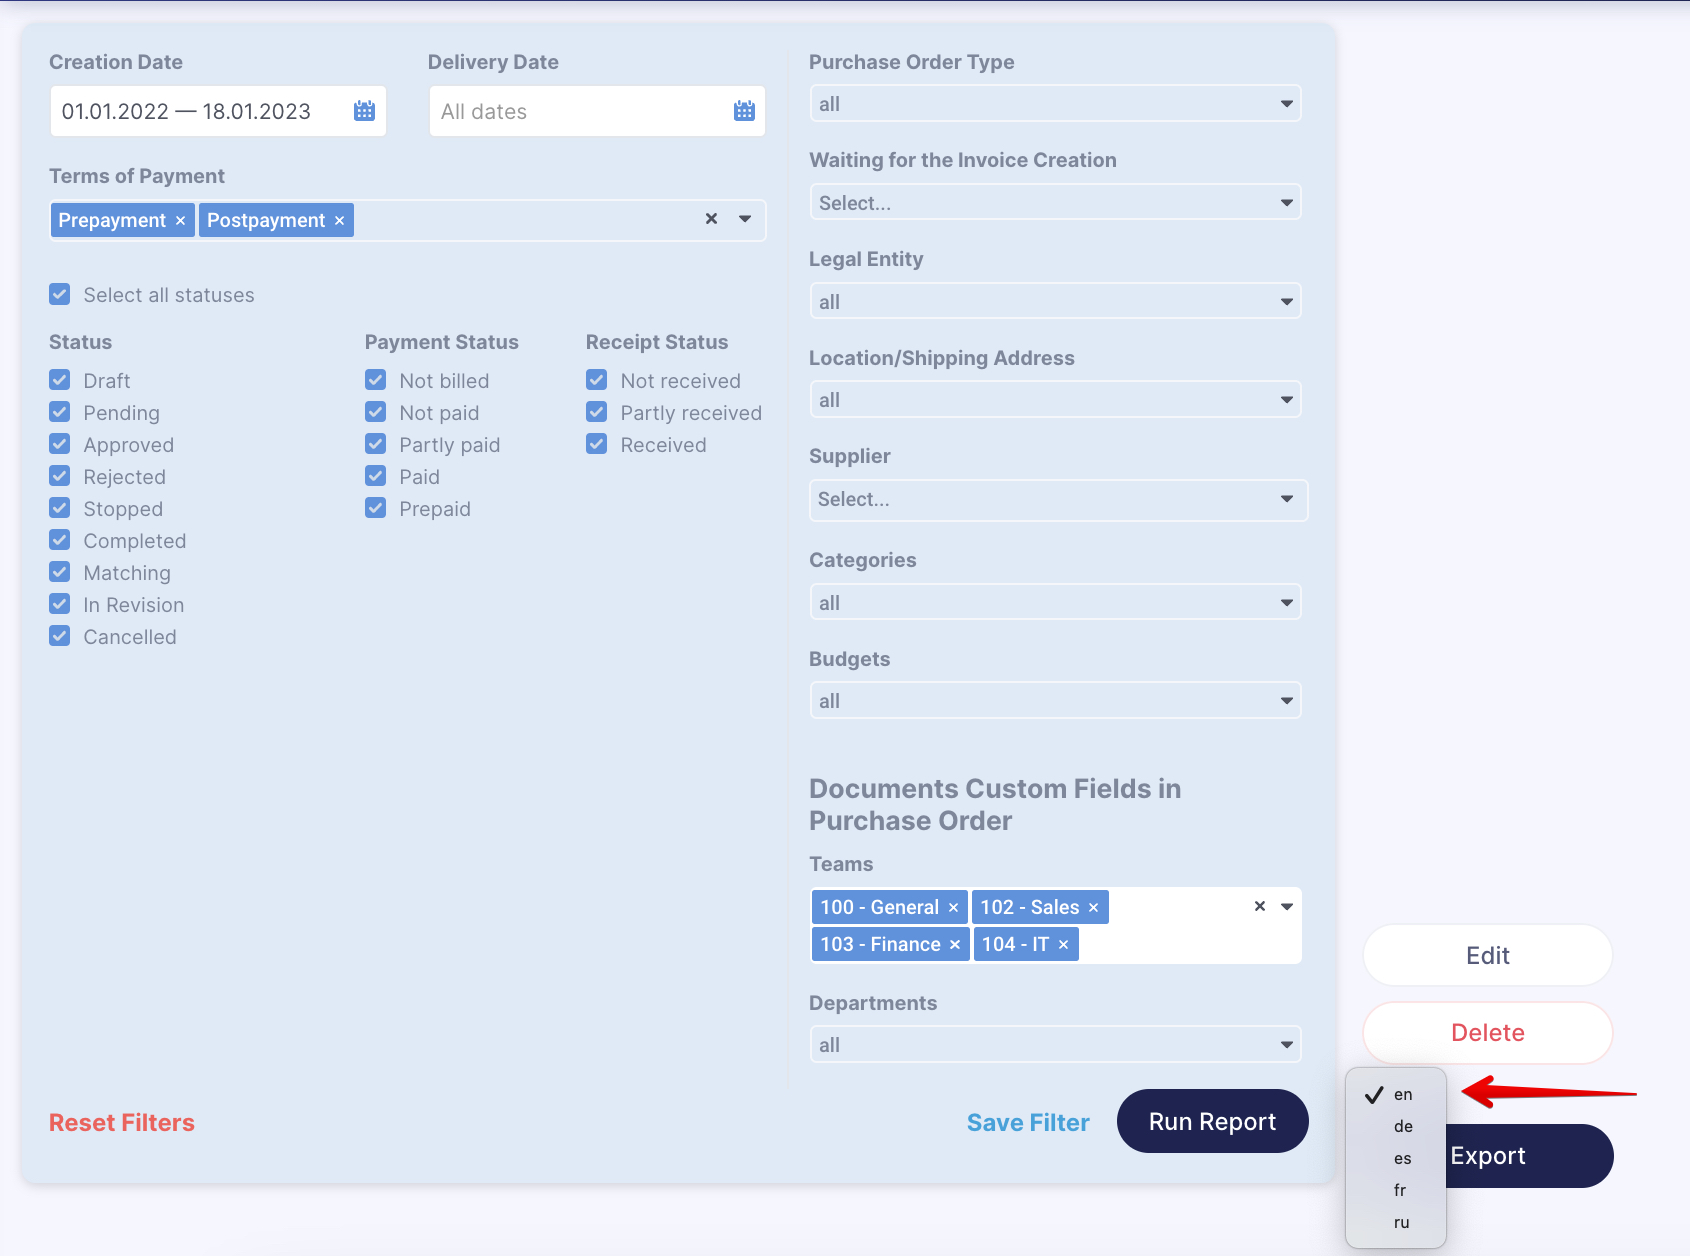
How to Add CFIs to Custom Reports Even When They Are Activated for Items Only
In Custom Reports, you can use Items Custom Fields that are available for selection in Items only.
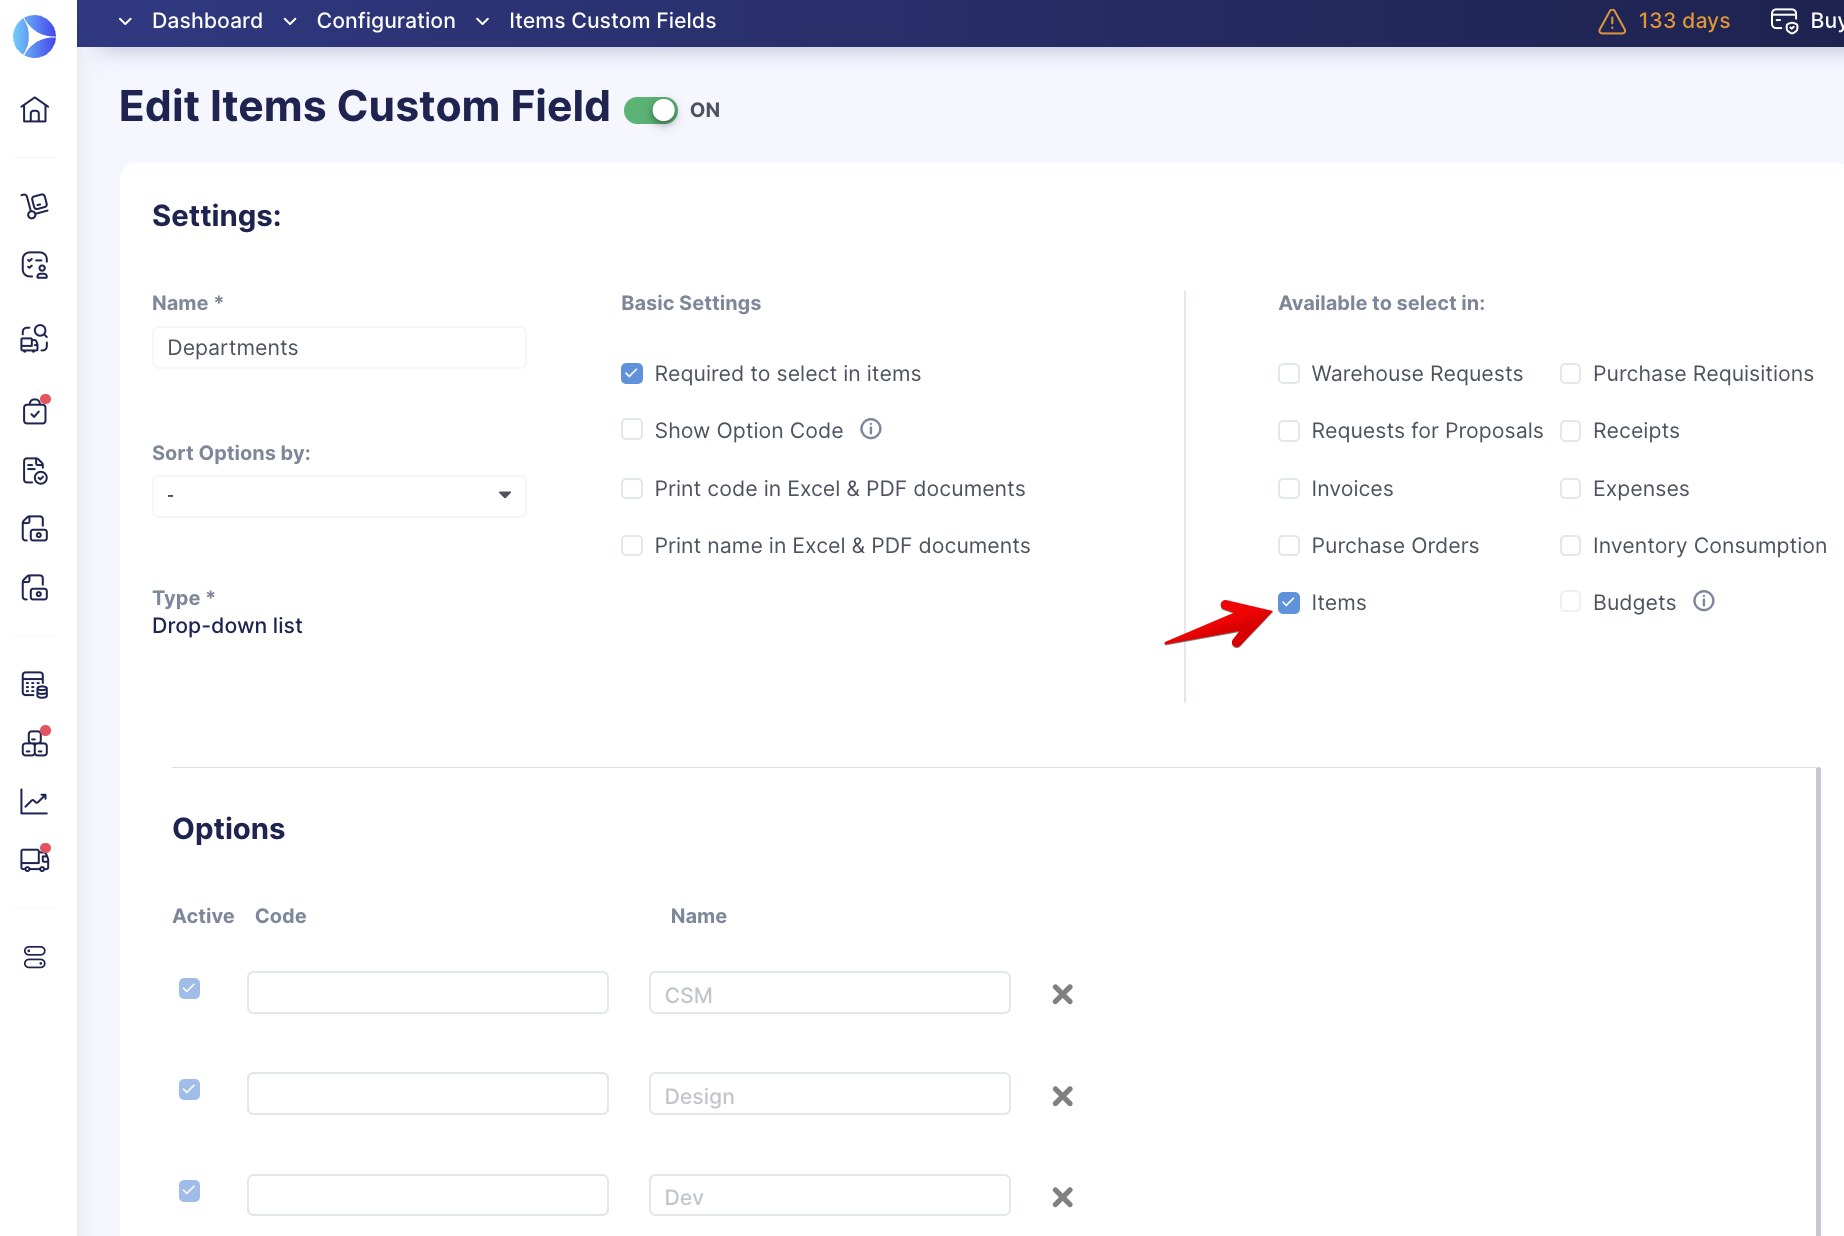
These CFIs are available for selection in Custom Reports for the following document types:
-
Warehouse Requests
-
Purchase Orders
-
Purchase Requisitions
-
Invoices
-
Credit Notes
-
Stock Transfers