TABLE OF CONTENTS
Access Relevant PunchOuts with Precoro’s Custom Connector
PunchOut integrations help you place orders and create requisitions by accessing your preferred suppliers' stores from Precoro. When using PunchOut catalogs, it’s easier to:
- Stay within budget by accessing real-time prices.
- Make ordering as simple as online shopping.
- Delegate catalog maintenance to suppliers.
In addition to preconfigured catalogs, you can use our custom connector to integrate with any supplier that supports PunchOut connections. Keep reading to learn how to configure an integration with suppliers you frequently order from.
Please note: The supplier is fully responsible for the quality, availability, and continued operation of the custom PunchOut Catalog you set up with them. Precoro can’t influence their decisions to make changes or suspend the catalog, nor can we notify you about any changes on the supplier’s side.
Available Types of Punchout Connections
Please consider that Precoro only supports the following:
- cXML connection
- Punchout + PO (explained below)
- Level 1 PunchOut catalogs
(Precoro will redirect you to the supplier’s website for item selection. By default, items are not saved to your catalog.)
However, if Automatically Add Items to the Catalog is enabled in the PunchOut configuration, Precoro can add new approved PunchOut items to the catalog automatically. Learn how to enable it here.
For the integration to work correctly, your flow should be as follows:
- You create a purchase order or requisition document in Precoro. You define the starting point for the process when setting up the integration.
- You’re redirected from Precoro to the supplier’s website to select items for purchasing.
- Once ready, you press the checkout button on the website. It redirects you back to Precoro and transfers information about the selected items.
- If the process started from a PR, items appear in the PR. Once it's confirmed and approved, Precoro creates a related PO.
- If the process started from a PO, items are added to it.
- When the order is approved, Precoro automatically sends it to the supplier.
How to Set Up a Custom PunchOut Integration
Step 1: Contact the Supplier to Set Up the Integration
First, discuss whether the integration is possible with the supplier. Please send them this article, which contains the necessary documentation.
The supplier will send you the credentials required to set up the integration. If necessary, you can request 2 sets of credentials: for testing and for live orders.
Step 2: Provide Basic Supplier Information
To start setting up the integration in Precoro:
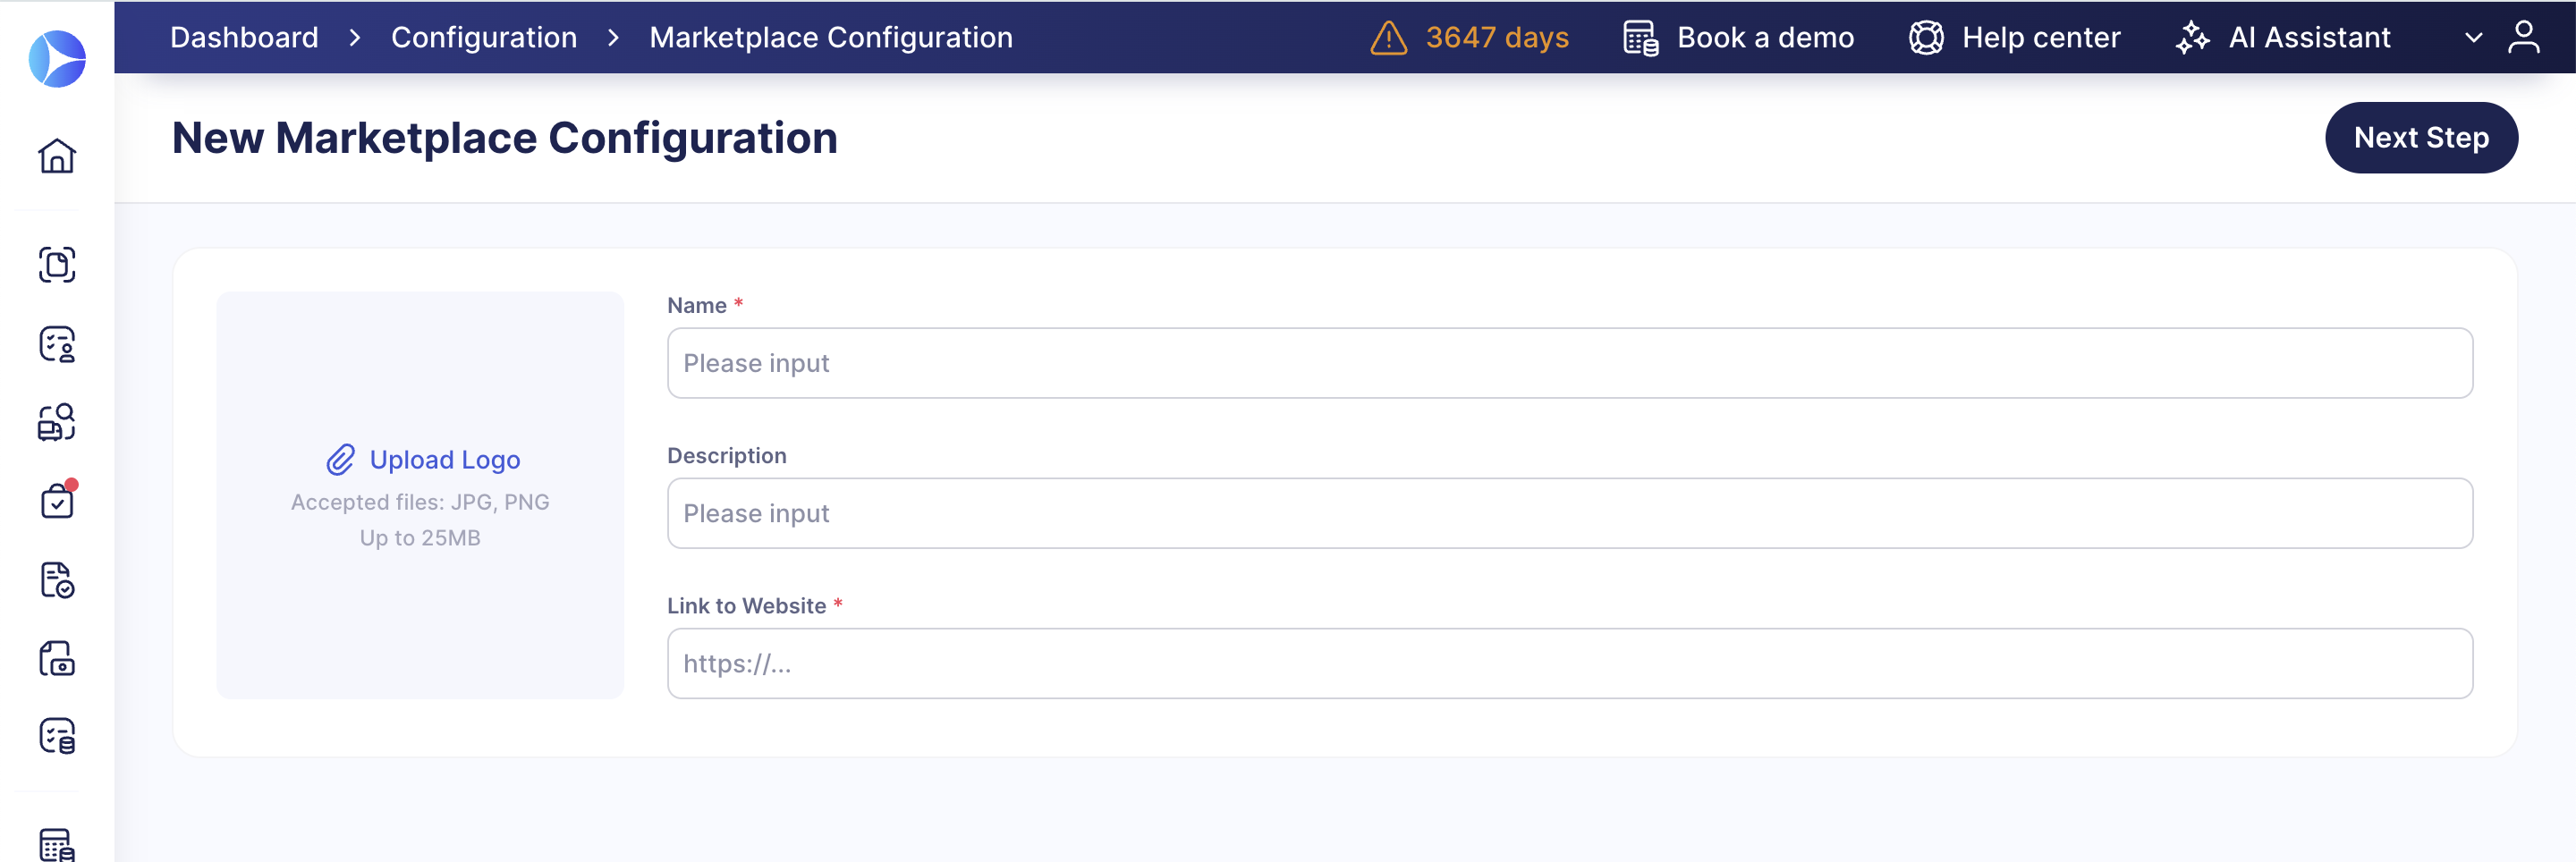
- Navigate to Configuration → Marketplace Configuration and press Create in the top-right corner.
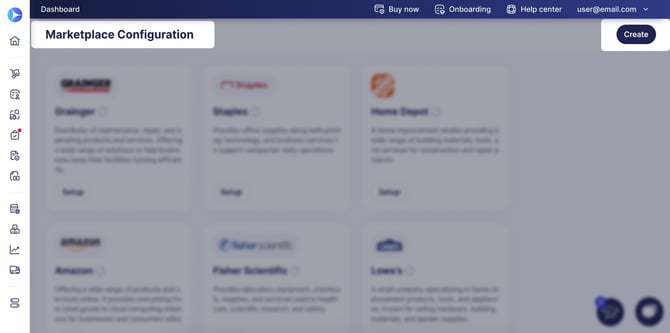
- On the next screen, enter the PunchOut name and link to the supplier’s website.
- Optionally, add a logo and a description for the PunchOut.
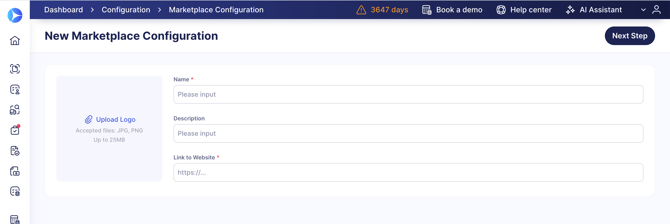
- Click Next Step and proceed to the PunchOut Configuration page.

Step 3: Enter Supplier-Provided Credentials
Choose where your purchasing process should start:
- Purchase Requisition
- Purchase Order
Based on your selection, the Request from your custom PunchOut button will appear in the corresponding module.
Then, enter the credentials provided by the supplier in the Marketplace Settings section shown below.
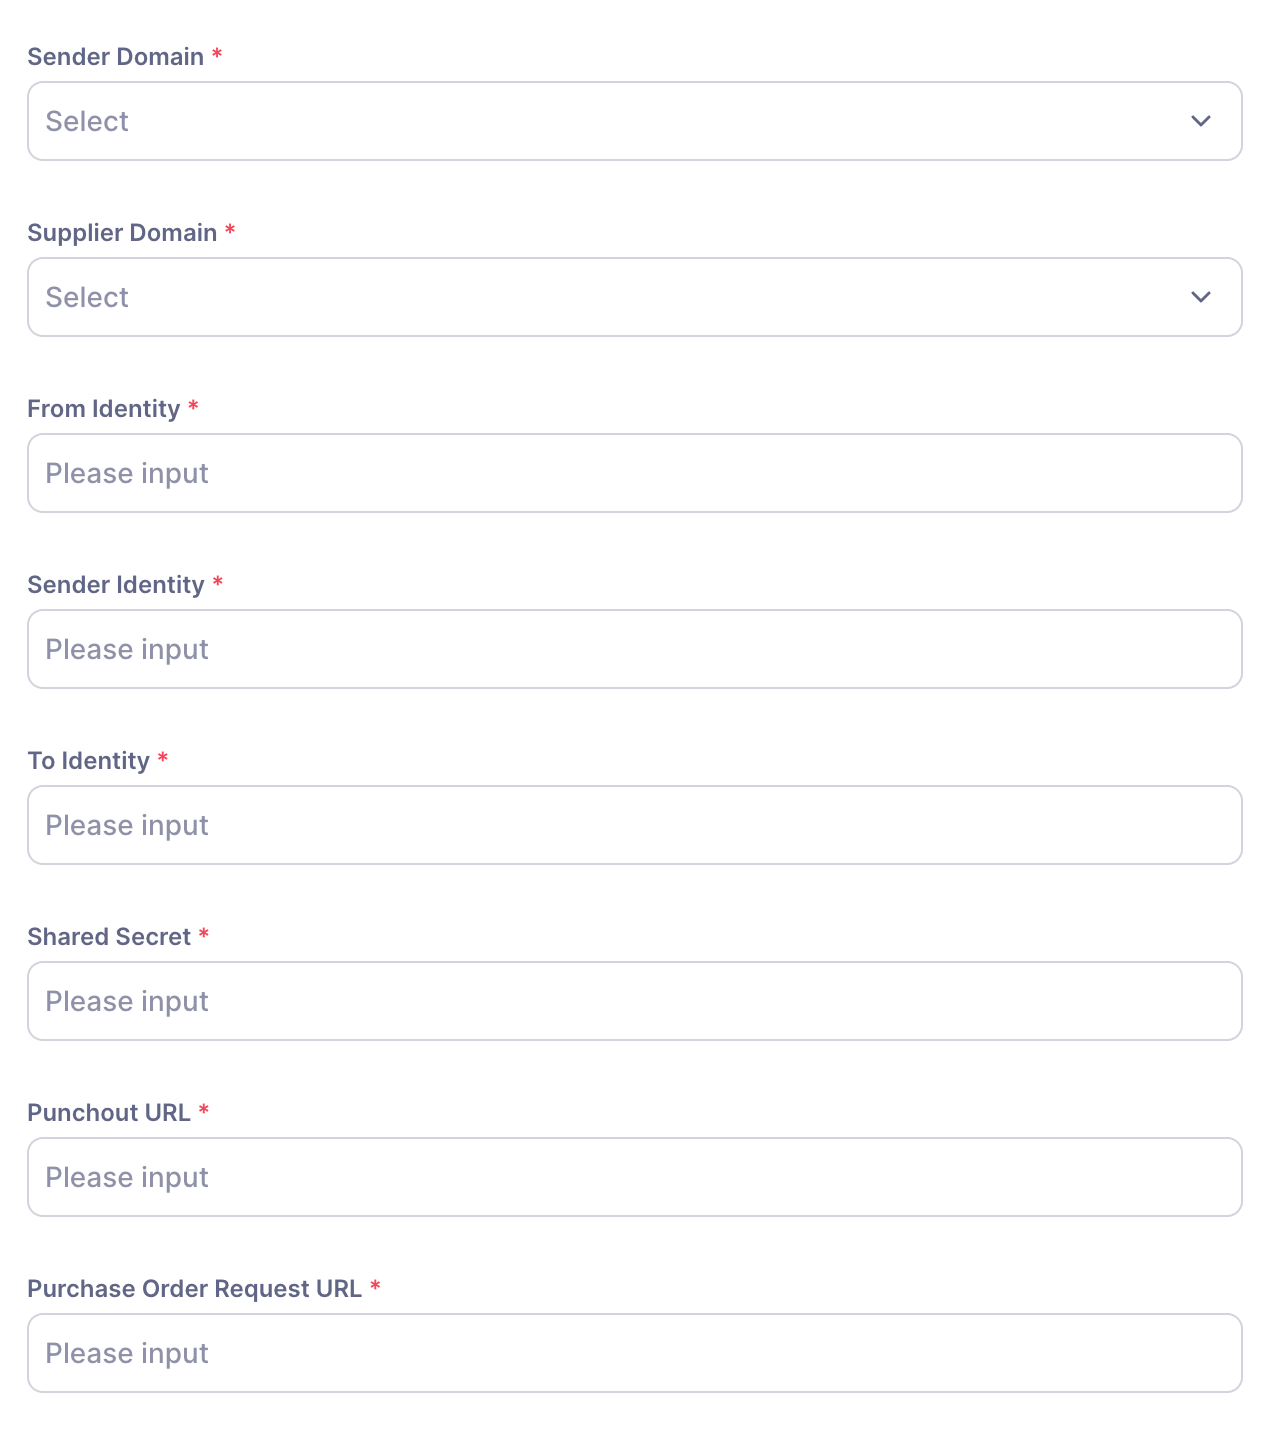 Here is a detailed description of each field:
Connection Identity Fields
Sender Domain
Your company’s ID type (NetworkID or DUNS)
- Use
NetworkIDif your company is identified by Ariba Network ID (ANID) - Use
DUNSif your company uses a Dun & Bradstreet number
Supplier Domain
The supplier’s ID type (NetworkID or DUNS)
- Use
NetworkIDif the supplier is identified on the Ariba Network - Use
DUNSif the supplier uses a DUNS number
From Identity
Your company’s identifier value, based on the selected Sender Domain.
For example: AN01234567890 (if Sender Domain = NetworkID)
To Identity
The supplier’s identifier value, based on the selected Supplier Domain.
For example: AN09876543210 (if Supplier Domain = NetworkID)
Sender Identity
The credential used to authenticate the cXML request, typically provided by the supplier. It may match the From Identity, but can differ depending on the supplier’s setup.
Security
Shared Secret
A password or token agreed upon between your system and the supplier's system to authenticate cXML messages. Both sides must use the same value.
Please, treat this as a password — share and store it securely.
Endpoint URLs
Punchout URL
The supplier’s entry point URL that your procurement system calls to launch the PunchOut catalog session. This URL receives the PunchOutSetupRequest when you click Request from [PunchOut_Name] in Precoro.
Purchase Order Request URL
The supplier’s URL that receives the OrderRequest when you submit a purchase order from Precoro.
Both URLs are provided by the supplier with separate values for test and production environments.
💡 Please note: If your company uses multiple legal entities, you can configure this PunchOut separately for each one using the Set by Legal Entity option on the configuration page. This allows you to manage credentials and settings per entity.
After entering the information from the supplier, complete the following fields in the Precoro Settings section:
- Deliver orders to (only if PR is selected in Start Purchase Processes From)—specify whose contacts should be provided for delivery: the PO Purchaser or the PR Requester.
- Default Purchaser (only if PR is selected in Start Purchase Processes From)—select a user who will be listed as the Purchaser in POs created from the PRs made via this PunchOut. Please note that only users with the Create Purchase Order role will appear in the list.
- Supplier—select the corresponding supplier from the list of suppliers that exist in your company, or add a new one.
Once ready, press Save at the bottom of the page.
Step 4: Ensure the PunchOut is Active
When you press Create, Precoro will send a test setup request to the supplier. If everything is configured correctly, you’ll see the PunchOut catalog in the top part of the Marketplace Configuration page. From this point, you can start creating orders or requisitions using the PunchOut.
However, if there’s an error and the supplier can’t receive the request:
- You’ll see a flash message indicating an unsuccessful request.
- The PunchOut won’t be marked as connected, and will be added to the bottom section of the Marketplace Configuration page.
In case of connection issues, please contact the supplier and notify them of the issue. In the email, CC punchout@precoro.com, so we can stay informed and help you with the setup.
If the integration is inactive, orders and requisitions won’t be sent to the supplier.
Step 5: Start Using the PunchOut Catalog
Once you’ve set up the integration and ensured it’s active, you can start using it to create purchase requisitions or orders (depending on your choice in the PunchOut configuration).
Here’s how ordering will work:
- Navigate to the Purchase Requisitions or Purchase Orders module.
- On the top panel, click the Request from (your PunchOut Catalog name) button or click Request from Marketplace and select the needed catalog on the following page. If you have multiple forms for document creation, choose one from the drop-down list.
- Create a new document by filling out all the necessary information. Please note that only the locations with Marketplace Shipping Address stated will be available in the Location field. Then click the Create button.
- You‘ll be redirected to the store's catalog. Choose the needed item, enter its quantity, and add it to the order. Repeat the process for all items you want to request.
- Click the checkout button (please note that the name may differ depending on the store’s interface), review the order, and proceed.
- You will be automatically redirected to Precoro with the created requisition or order on the Draft status. Check the information, fill in the necessary Custom Fields for Items, and Confirm the document.
- The document will undergo the Approval Workflow configured in your company.
- If you created a PR: Once it gains the Approved status, a related purchase order is created. Once the PO is Approved, it is sent to NAPA.
- If you created a PO: Once it reaches the Approved status, Precoro will automatically send it to the supplier.