TABLE OF CONTENTS
Service Order Functionality
Use the new Service Order type of document to conveniently create, pay, and track all your utilities and services.
The major difference between Service and Purchase Orders is that you order actual items in Purchase and need to track their receipt. In Service, on the other hand, you will have the ability to:
- Pay for services instead of items. The document does not have a quantity field. Therefore, you will not be necessarily required to create Receipt documents.
- Create multiple Invoices and break the item total into partial amounts. It can be helpful if you, for example, want to create a payment for a 12-month service.
- Add such Orders to the budget.
Please see the following section in the Knowledge Base dedicated to setting up and working with Service Orders in Precoro.
Adding and Managing Budget in Purchase Requisitions
Adding and taking into account the budget in PR documents will improve and automate work and approval processes for your company. Document approvers will see the essential budget information in the document itself without having to manually check the data in the budget section.
To activate this functionality please contact our Support Team, who will gladly activate it for you.
Upcoming improvements will allow you to activate this function yourself by following these steps:
1. Go to Configuration → Documents Setup → Basic Settings→ Budgets and activate the Budgets for Purchase Requisitions checkbox. Click Save to apply your changes.
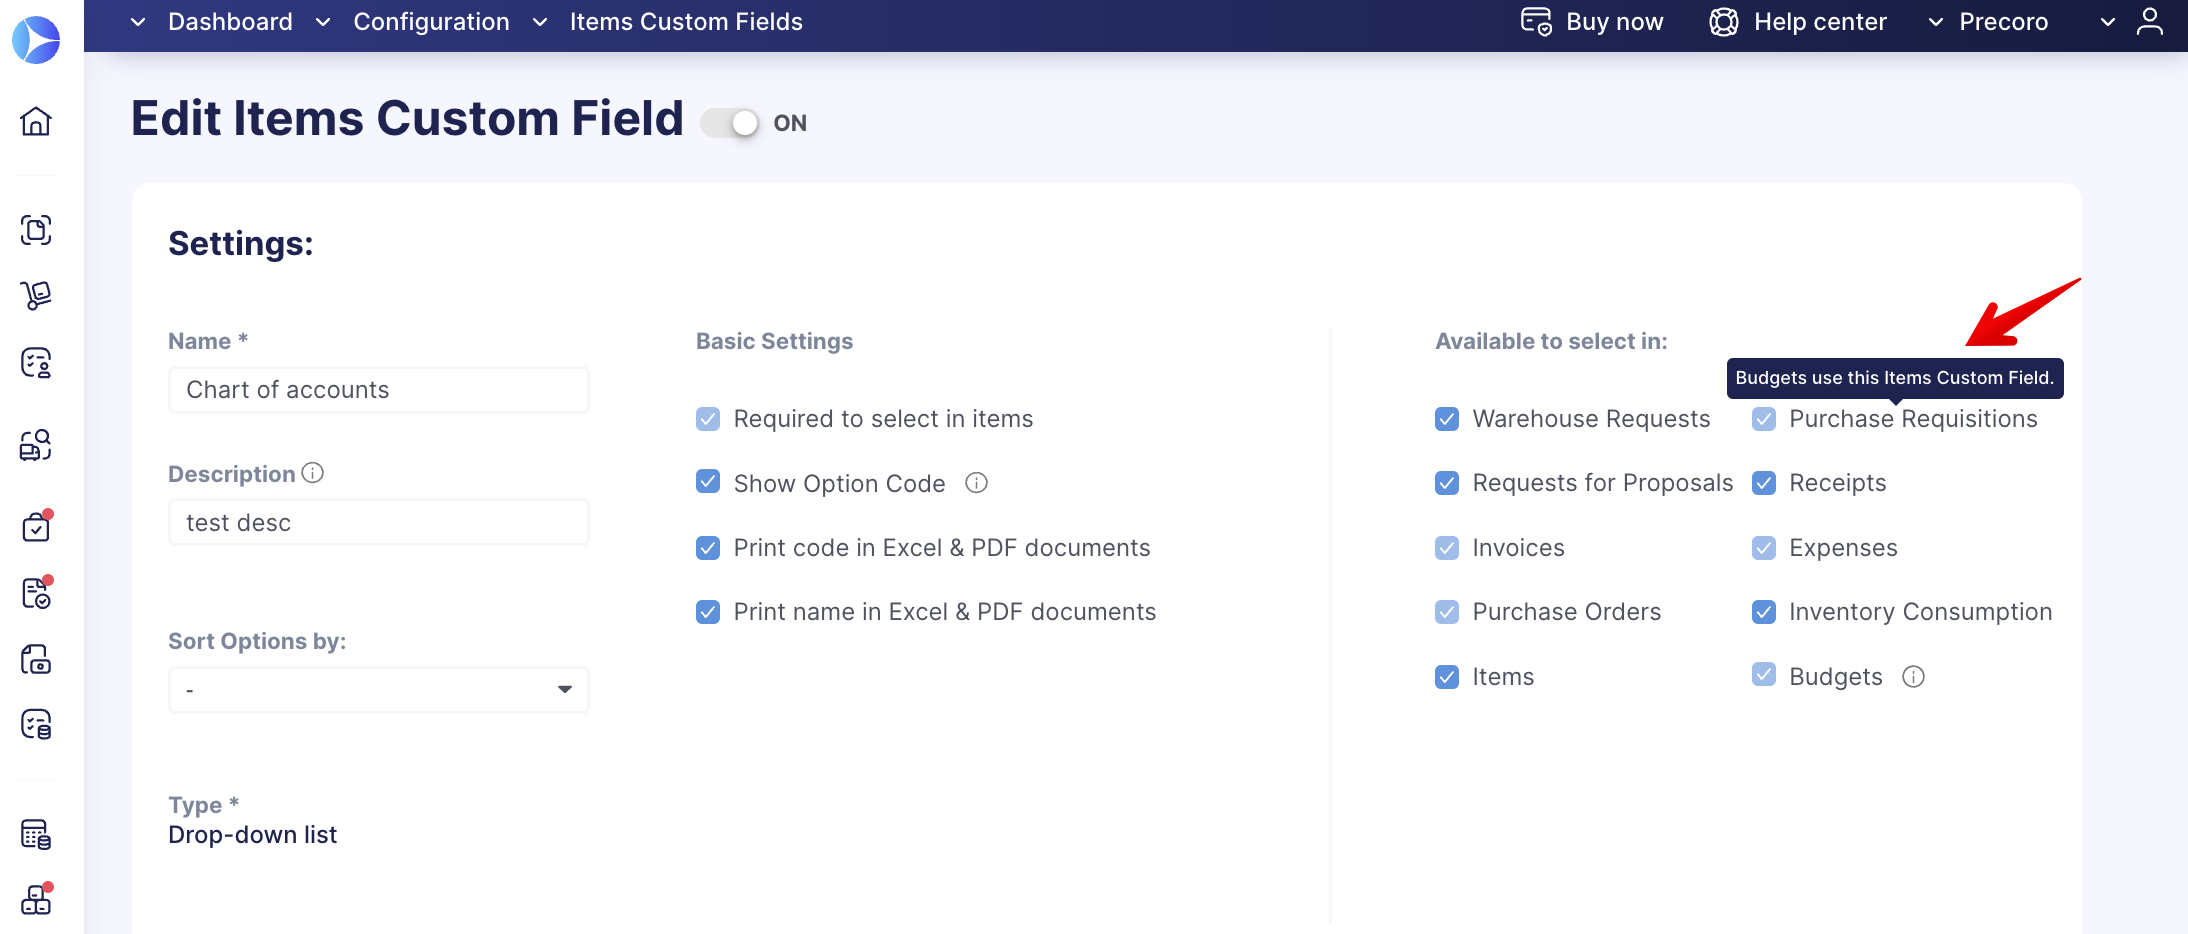
Please note that after function activation, the Purchase Requisitions checkbox in all Document and Item Custom Fields included in the budget will be automatically activated and unavailable for editing if fields are used in the budget.
2. Click Create to add a new Purchase Requisition document, and on the creation page, you will see the Budget selection field.
The added budget in the document will be displayed on all the document statuses.
The sum for the created PR will be recorded in the Used budget:
To learn all about this new functionality, please proceed to this article.
Invoice Confirmation Without Receipt Functionality Improvement
We have added new checkboxes to the Configuration → Basic Settings→ Documents Setup → Invoices section to help you manage the Payment Terms settings in the documents:
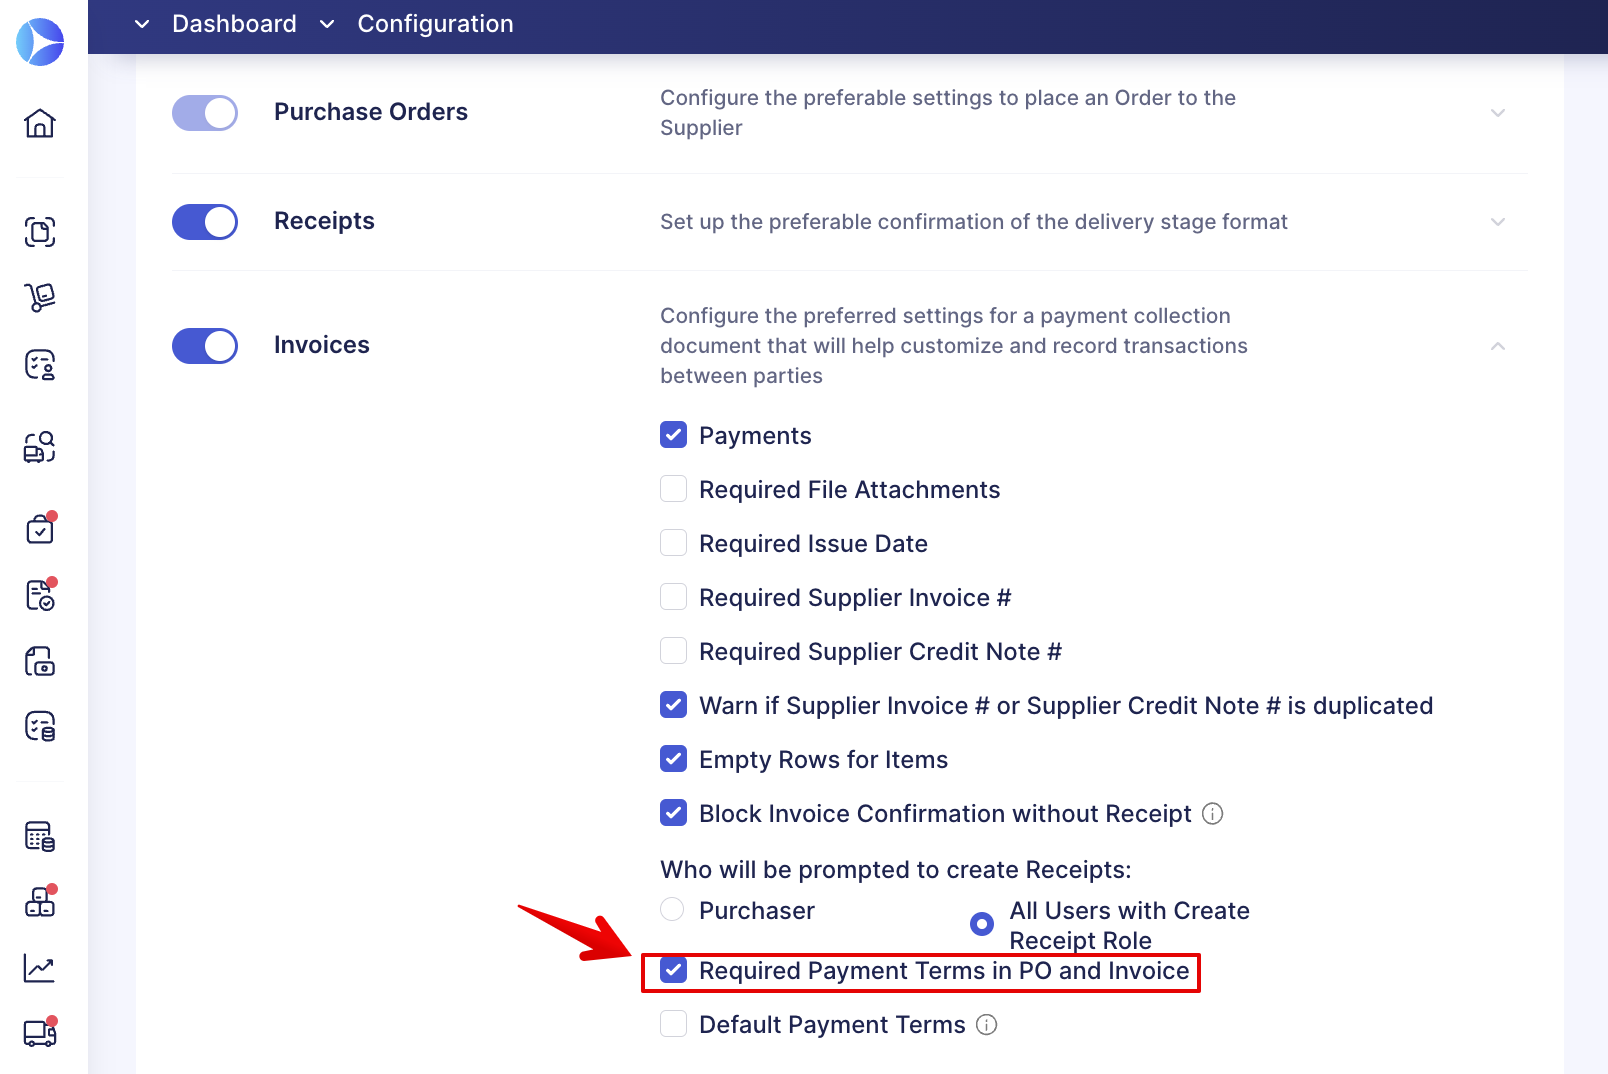
- The Required Payment Terms in PO and Invoice checkbox functions in the following way:
- If activated, users will not be able to create a document with the Payment Terms field blank.
- If disabled, users will be able to create a document without the specified Payment Terms.
Invoices will only still be blocked if the user sets the Payment Terms to Post Payment in the document.
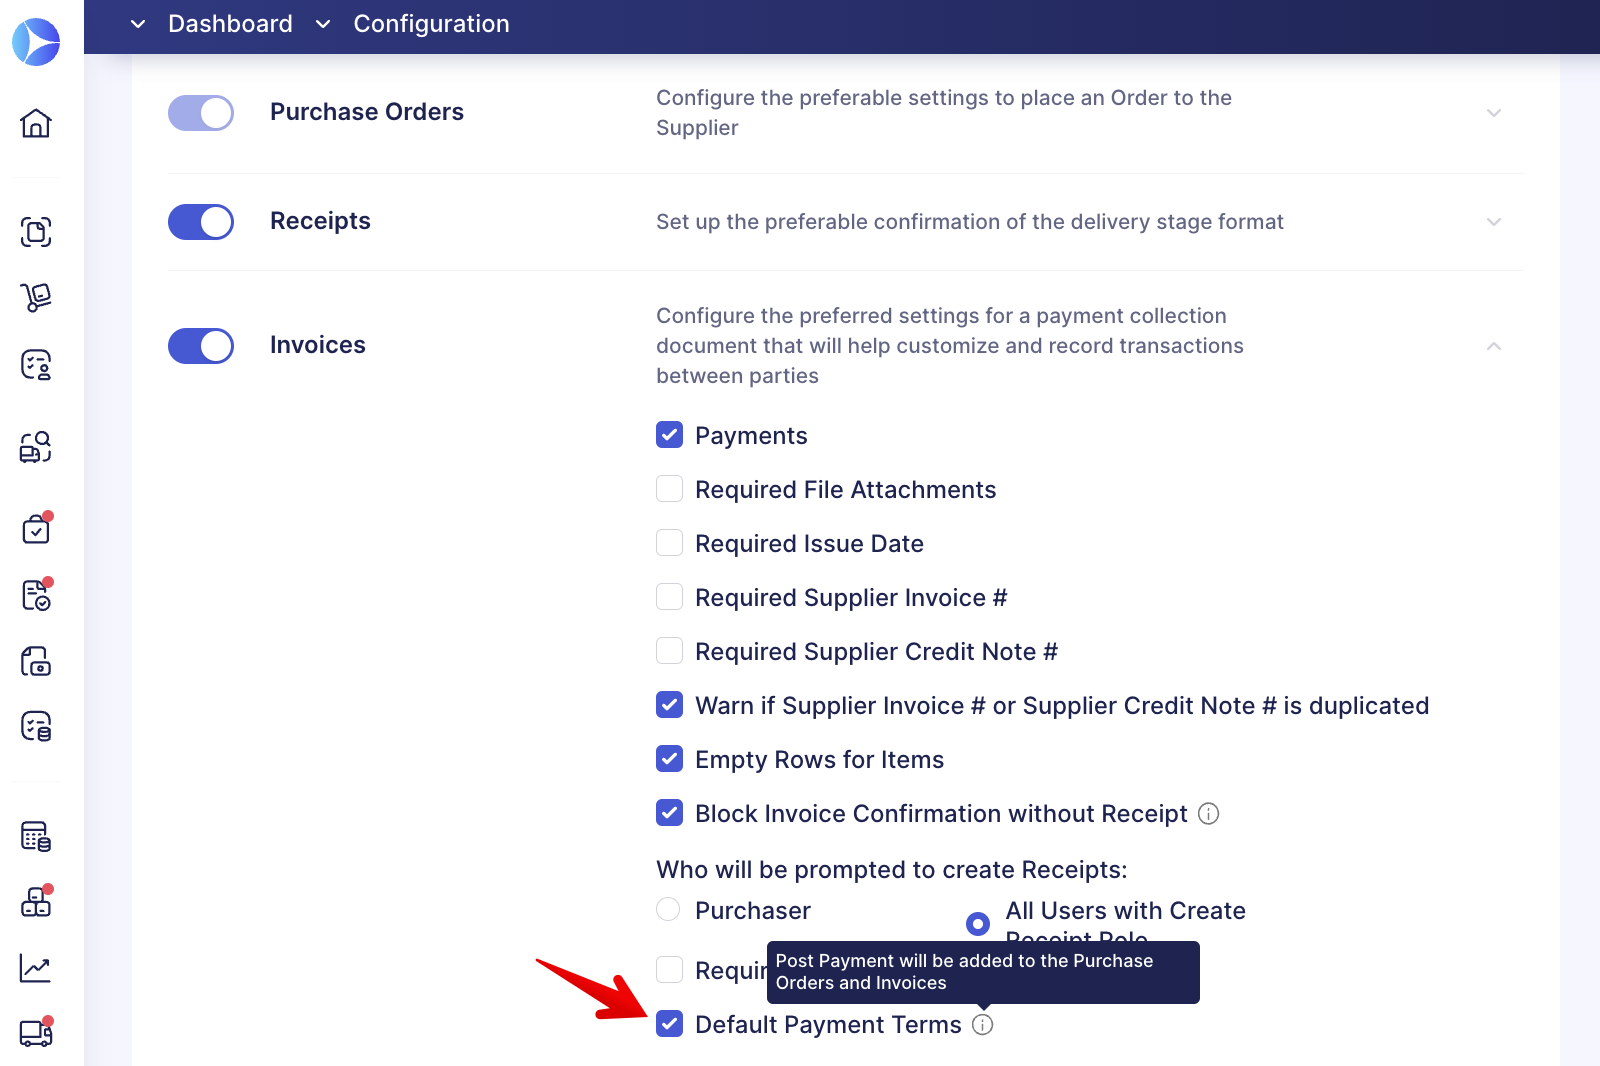
- The Default Payment Terms checkbox is not activated by default, and it functions in the following way:
-
- With the Default Payment Terms checkbox enabled, users, when creating new PO or Invoice documents, will get the Payment Terms field automatically set to Postpayment in the document, even if in the Supplier card, the payment terms information is not specified or there are several payment terms added or only the Prepayment option is chosen. For those Suppliers that you add to the document and who did not have the Postpayment option added, it will be created and added automatically.
- With the Default Payment Terms checkbox disabled, you will be able to select only those terms that are added to the Supplier cards. If the Supplier does not have a Postpayment option added, it will not be added automatically.
Both Required Payment Terms and Default Payment Terms settings can be activated without enabling the Block Invoice Confirmation without Receipt functionality.
Set Default Filters
You can now set the default filter on all the document management pages with filters. This will allow you to refresh the page or work on other pages, and when you return, the set default filter will still be running.
Please note that you cannot have more than one default filter set on a page.
You can click Apply filter for another filter, and it will be applied, but after refreshing the page or switching to other pages, the default filter will be re-applied until you click the Reset Filters button.
You can set the default filter by choosing the necessary options and clicking the Save Filter button.
The functionality is available for both advanced and fast sets of filters.
See how you can apply the default filter using fast options:
And how to set the default filter using advanced options:
Added Custom Field Display to Stock Transfer
You can now see more related information in the Stock Transfer documents that will help you quickly get the necessary information from the document.
- When creating the Stock Transfer from the Warehouse Request, you will see the added information on the Documents Custom Fields and Item Name column.
When you open the created Stock Transfer from the Warehouse Request, you will also see those fields displayed in the document.
![]()
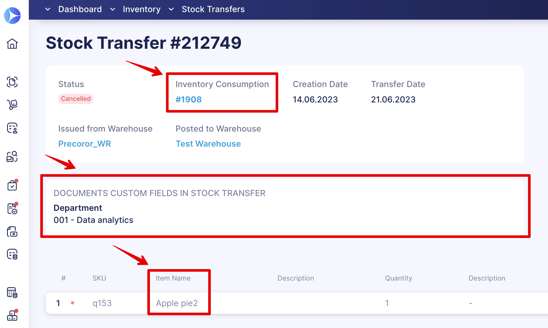
- When you open the created Stock Transfer from Inventory Consumption, you will see the added information on the Documents Custom Fields and Item Name column as well as the related Inventory Consumption document, with the document number being a hyperlink to the document itself.
- When you open the created Stock Transfer from Receipt, you will see the added information on Documents Custom Fields.
![]()
Added Issue Date Field to the Supplier Portal
Now, suppliers can enter the information on the document Issue Date by themselves in the Supplier Portal when creating an Invoice from Purchase Order.
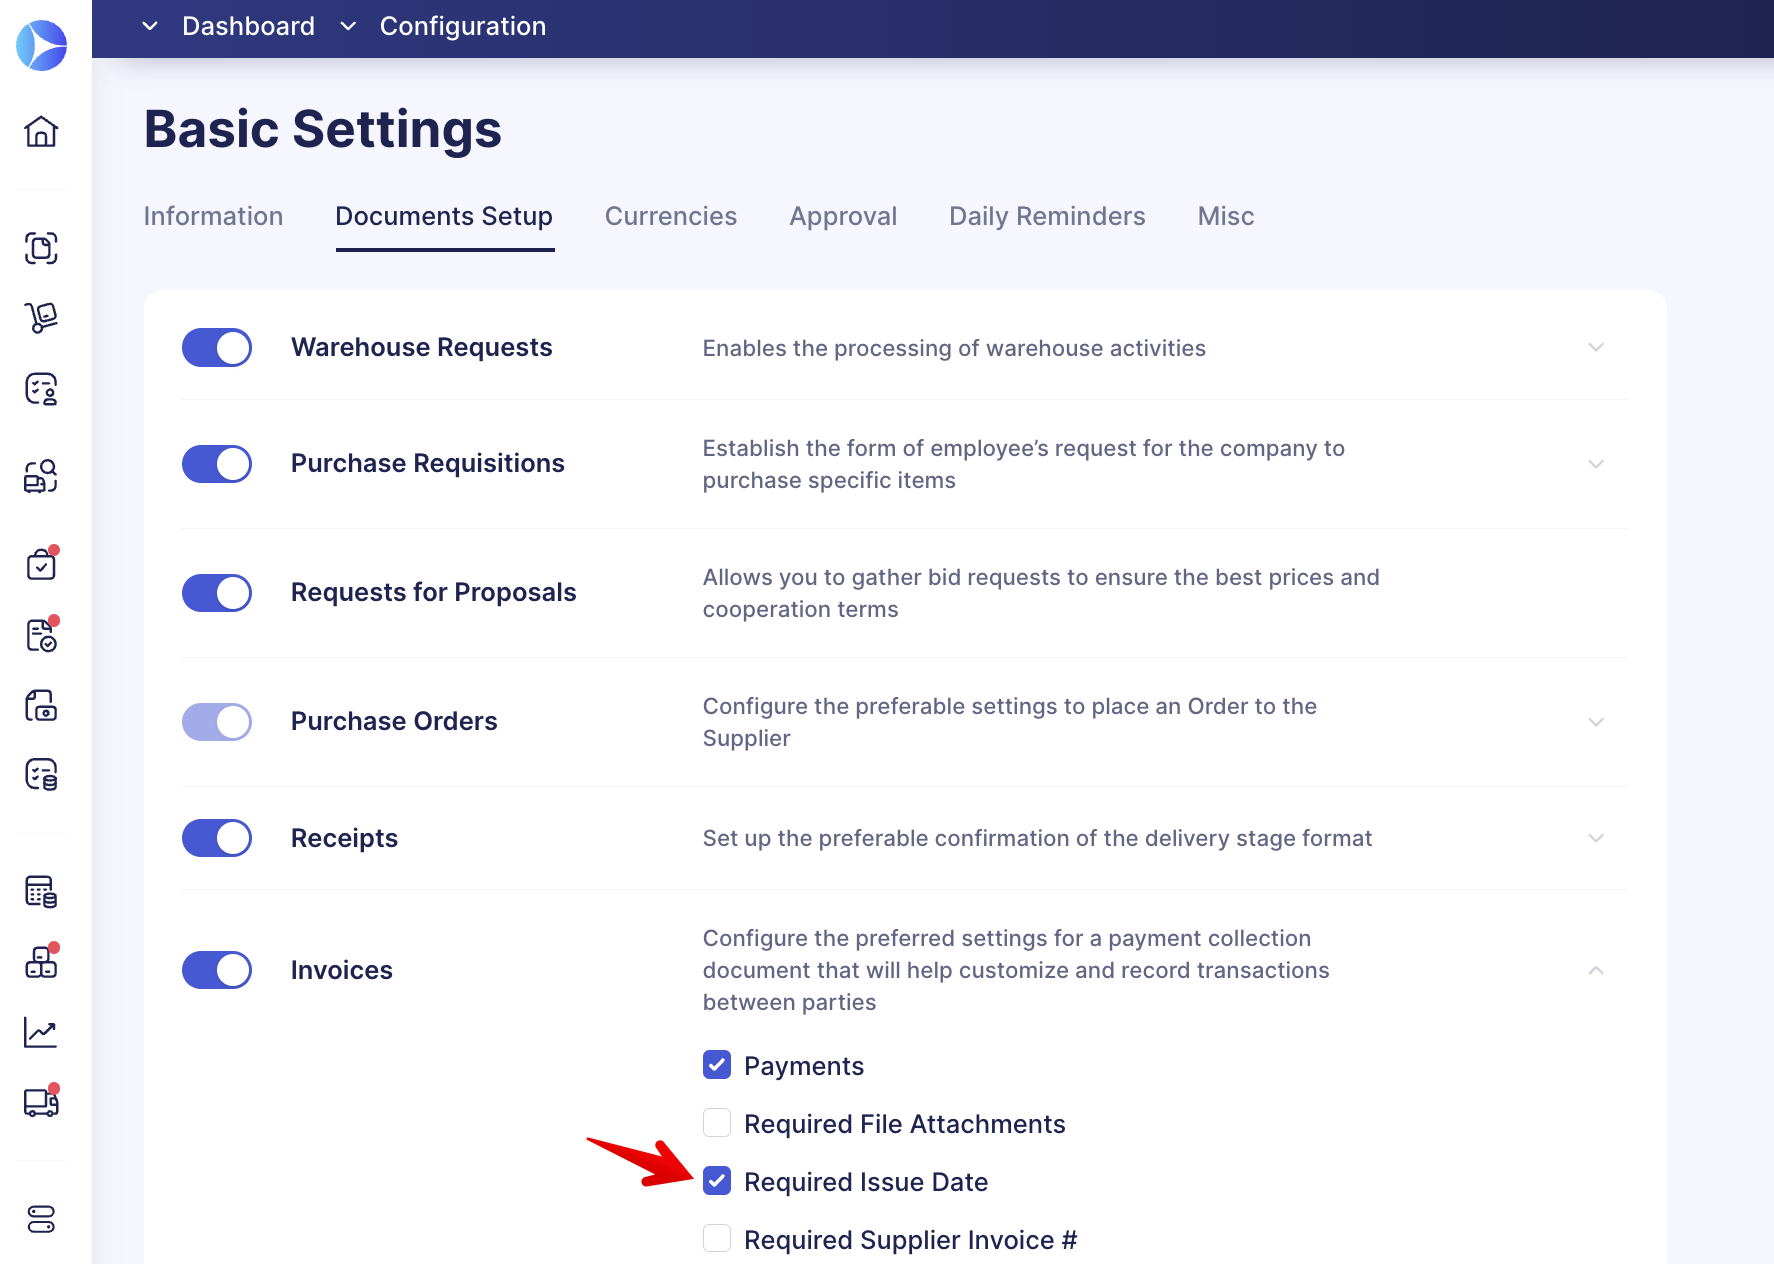
Additionally, you can set this field as required, and without filling out the information the supplier will not be able to proceed with document confirmation. To make it required, go to the Configuration → Basic Settings → Documents Setup → Invoices and check the Required Issue Date checkbox. Afterward, press Save to apply the changes.
If this field is not required in your company, suppliers will be able to create Invoices without filling it out.