TABLE OF CONTENTS
- Send Invitation Form After Creating a Supplier
- NetSuite Information Auto-Update
- Super Users Can Edit Email Addresses
- Cancel Inventory Consumption
Send Invitation Form After Creating a Supplier
With this functionality, you can have a quicker and more automated process of adding new Suppliers. Follow the steps listed below:
1. Press the Send Invitation Form button on the Supplier card.
The button is only available for Suppliers with Pending or Approved statuses.
On the Pending status, the Form can be sent only by the Approver of a particular step (has similar work logic to the Send for Revision function). On the Approved status, the Form can be sent by any user with the Supplier Management role.
2. You will be redirected to the Registration Form selection page, where you can choose and send the needed Form.
The Email and Name information from the Form will be automatically filled in if specified in the Supplier card.
3. The Supplier will receive the Form, and if any data is already filled in on the Supplier’s card page, the Form will be sent along with that information. In this case, the Supplier can choose to leave it as is or make edits.
4. After receiving the Form from the Supplier, you can continue working with it on the registration page. You can also add a comment and use the Send for Revision option to return the Form for Supplier’s consideration once again.
- If you reject the Form, subsequently, the Supplier will get Rejected.
- If you approve the Form, the Supplier with auto-completed data will go through your company’s Approval Workflow.
Important information to consider
After approving the Form, the data will be transferred to the Supplier card.
The re-approval will not be triggered if some steps have already been completed. However, if we send the Form to the Supplier with the Approved status and confirm it, the Supplier will undergo the re-approval process.
NetSuite Information Auto-Update
You can now turn on or off NetSuite information auto-updating from the Integration page. This functionality can help you eliminate manual and routine tasks of constant data updates.
Updates occur weekly on Mondays.
To Update Changes Automatically, toggle the corresponding switch to turn it blue. The deactivated toggle is gray, which means that information will only be updated manually.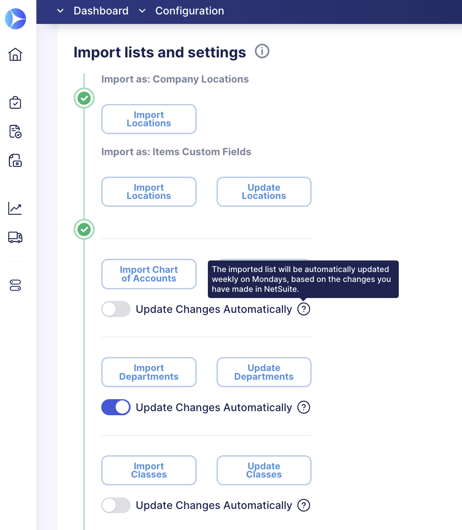
Super Users Can Edit Email Addresses
Employees with Super User Roles can edit Email addresses in User Management.
They can edit Emails of registered users who have already confirmed their inboxes.
A confirmation is sent to the newly entered and saved in the settings Email addresses.
Cancel Inventory Consumption
You can now Cancel previously created Inventory Consumption. To do that, follow these steps:
1. Open the Inventory Consumption (IC) you want to Cancel and press the corresponding button in the right action panel.
2. Provide a reason for cancellation and press Yes to proceed.
You can only cancel Consumptions with a Completed status.
Subsequently, after the IC is canceled, it will have a Canceled Status:
- The related Stock Transfer will also automatically acquire a Canceled Status.
- A new Stock Transfer will be created to return the items to the original Warehouses.
Suppose you created a Consumption for multiple Warehouses. Consequently, you will have several Stock Transfers (one for each Warehouse). After Cancelation, you will have a second round of Stock Transfers to return the taken items.
![]()
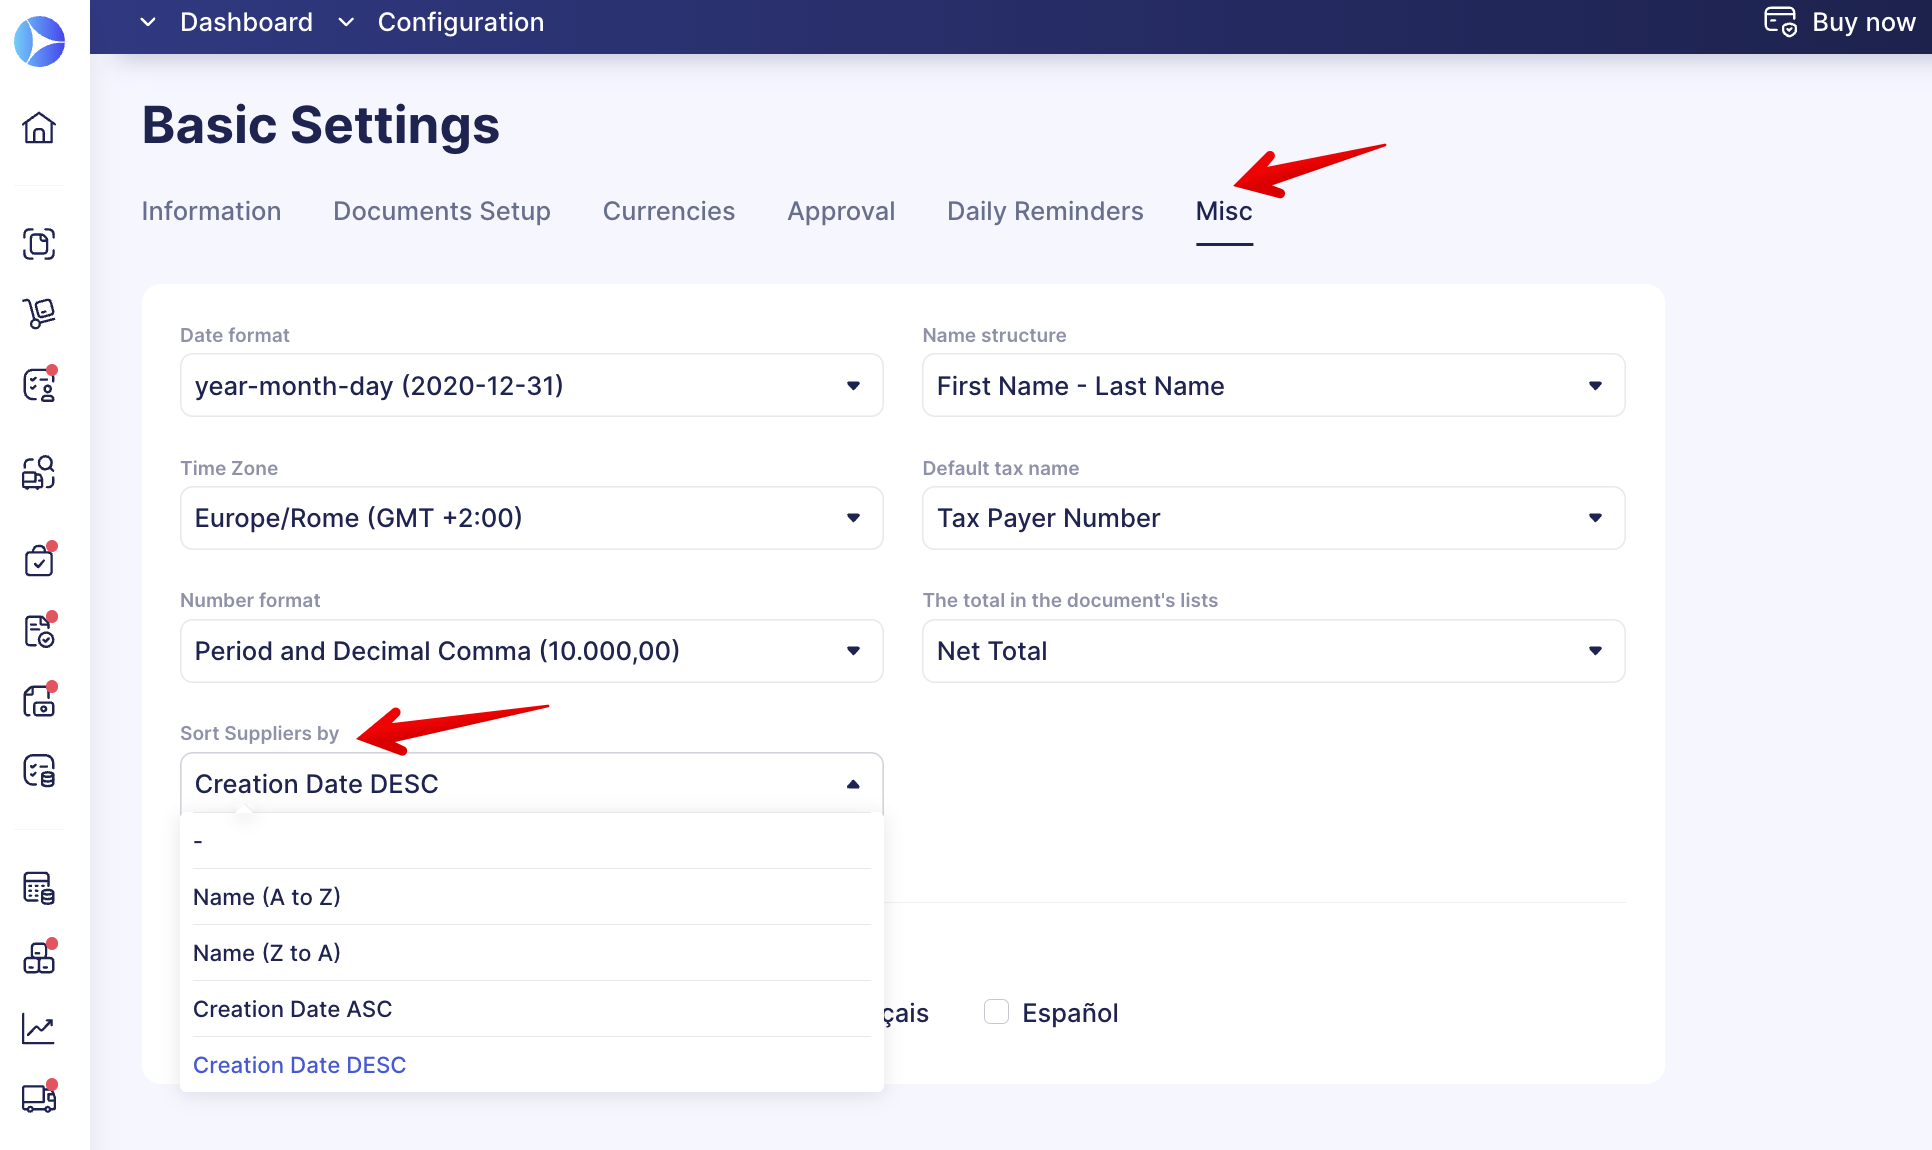
Customize Sort Supplier Settings
In the Configuration → Basic Settings → Misc → Sort Suppliers by field, you can customize the preferable data display order by selecting one of the four options.
The setting will be applied to all pages where the filter is used: document lists, preset and custom reports, and the pop-up for adding items.
By default, sorting is performed in ascending order by Creation Date ASC (from oldest to newest entries).