TABLES OF CONTENTS
- Save and Set as Default Filters on the User Management Page
-
Improved the Notification Process for Mass Approval Document Action
Save and Set as Default Filters on the User Management Page
We have updated the advanced and fast filters in the User Management, so now you can save and set your custom filtering parameters as default. This functionality will save you time and eliminate manual routine work.
How to save filters on the advanced filters page
1. Open the advanced filters page.
2. Select the necessary filtering parameters.
3. Click the Save current filter button below.
4. Enter the filter Name, and if needed, check the Use as a default setting.
Having set the default filter will allow you to refresh the page or work on other pages, and when you return, the set default filter will still be running.
Please note that you cannot have more than one default filter set on a page.
You can click Apply filter for another filter, and it will be applied, but after refreshing the page or switching to other pages, the default filter will be re-applied until you click the Reset All Filters button.
How to save filters on the fast filters panel
1. Select the needed parameters on the fast filters panel.
2. Click the Save filter button on the right.
You can see and manage all your saved filters in the Saved Filters tab on the advanced filters page.
3. Enter the filter Name, and if needed, check the Use as a default setting.
Improved the Notification Process for Mass Approval Document Action
Now, if you utilize the mass approval action, you will receive one letter that contains all the necessary information about the action. You will see the total number of approved documents and their basic information:
-png.png?width=421&height=492&name=Untitled%20design%20(2)-png.png)
OCR Functionality Improvements
We have made several improvements in the OCR functionality:
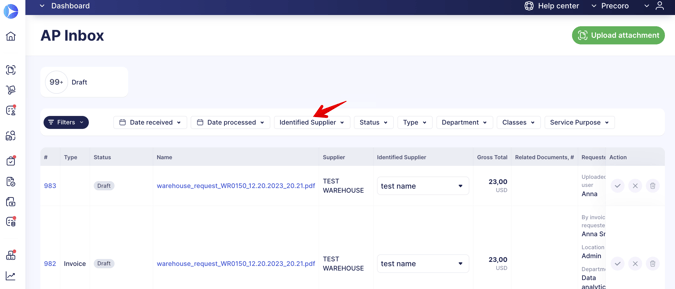
- Added the Identified Supplier quick filter on the AP Inbox page:
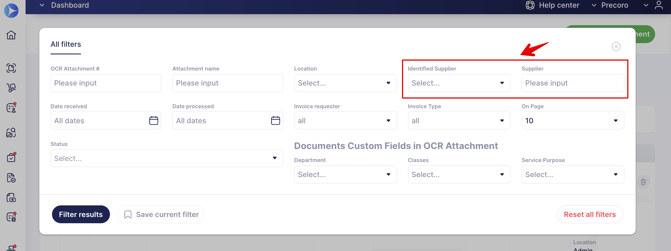
- Added the Identified Supplier and Supplier filters to the advanced filters on the AP Inbox page:
- We have added more matching rules for Invoices to Purchase Order documents with OCR to increase the number of documents created automatically.
Here is the list of new matching rules that you can additionally select for your OCR processing:
-
Invoice line SKU or code matched to the PO line SKU.
-
Invoice line Name or Description matched to the PO line Name.
-
Invoice line rate matched to the PO line Price.
-
Invoice line amount matched to the PO line Net Total.
-
Invoice line amount matched to the PO line Gross Total.
-
Invoice amount matched to the PO Gross Total.
-
Count of the Invoice lines should match the PO line count.
These are the default matching rules that are automatically selected and cannot be deleted:
-
PO number on the Invoice matched to the PO IDN or custom number.
-
Invoice match to the PO if there is only one PO available.
You can select additional matching rules only after activating the automatic Invoice processing.
To adopt the new rules, please contact our Support Team, who will gladly help with the settings.