TABLES OF CONTENTS
-
Standardized Opening of the Related Documents and Preview in the New Tab
- NetSuite Integration Improvements
Added Document Creator Condition in the Approval Workflow
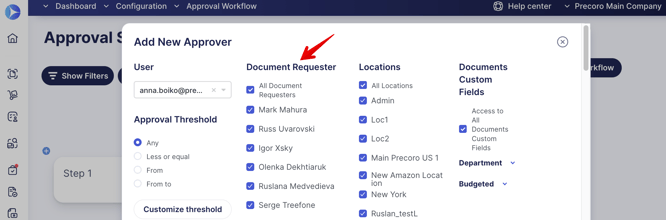
With the new update, in the Approval Step settings, you can multi-select the Document Requsters — users with Create roles for whom the Approver will perform the document approval. This additional option to select the authorized Approvers for particular Creators will simplify your workflow and allow the approval process to be more seamless.
Please note that this update will not affect your current approval setup.
However, you can go ahead and start editing your setup, implementing the new Direct Manager approval to enhance and optimize your processes. Before editing your setup, we recommend that you consult with your Customer Success Manager.
This functionality will work as follows:
1. When you edit the existing or add a new Approver to the step, you will see the Document Requester list of users who have Create roles for the document. By default, the setting All Document Requesters is applied.
2. Select the needed users from the list, adjust Threshold, Locations, and DCF settings, and save the changes.
The Document Requester works in connection with other settings: Threshold, Locations, and DCF.
For example, suppose you, as an Approver, selected your coworker as a requester and activated certain DCF options. In that case, you will get to approve documents created by that coworker who used your DCF options in the document.
3. All is set! Now, the added Approver will process documents from the chosen users.
Important to Note:
1. If the creator of the document is changed and it affects the set workflow, reapproval will be triggered.
2. Super User still has the ability to approve documents with direct manager approval.
3. The Parallel Workflow is working as usual.
Enhanced the Supplier Registration Forms Functionality
Previously, you could submit the Supplier Registration Form only once. But now we have improved this functionality and enabled you to submit an unlimited number of Questionnaires, for example, to clarify additional data, conduct surveys, and update Supplier information.
How to send an unlimited number of Questionnaires to Suppliers:
- The Send Questionnaire button in the Supplier profile is displayed even if there was a form previously sent to this Supplier:
- If the Supplier has a Pending status, then the button is available to the current Approver. Only that person can send the form.
- If the Supplier is Approved, the button is always available to all users with the Supplier Management Roles.
- Rejected Suppliers do not have the Send Questionnaire button available for sending.
- Each new sent form can be found in the Sent Invitations list.
- Each form has to be Approved by the person who sent it.
- If your company has a Supplier Approval Workflow in place, then after the form is approved, the Supplier will undergo a reapproval process.
Added Status Filters to the Attachments Export
We have speeded up and facilitated the process of exporting attachments with the help of additional multi-select filters:
-
Status — here, you can select statuses from all the Precoro documents and Suppliers. This filter is available for all document types.
-
Payment Status — here, you can select Purchase Order Payment Statuses from the documents. This filter is available for Purchase Order document type only.
-
Receipt Status — here, you can select Purchase Order Receipt Statuses from the documents. This filter is available for Purchase Order document type only.
-
Transferred Status — here, you can select Warehouse Request Transferred Statuses from the documents. This filter is available for the Warehouse Request document type only.
To use the new functionality:
1. Go to the Export Attachments page and click the Create Request button on the right.
2. Fill out the required fields, including the type of document for which you want to make an export.
3. Enter the additional information in the new Status fields to customize the query and only retrieve the necessary attachments.
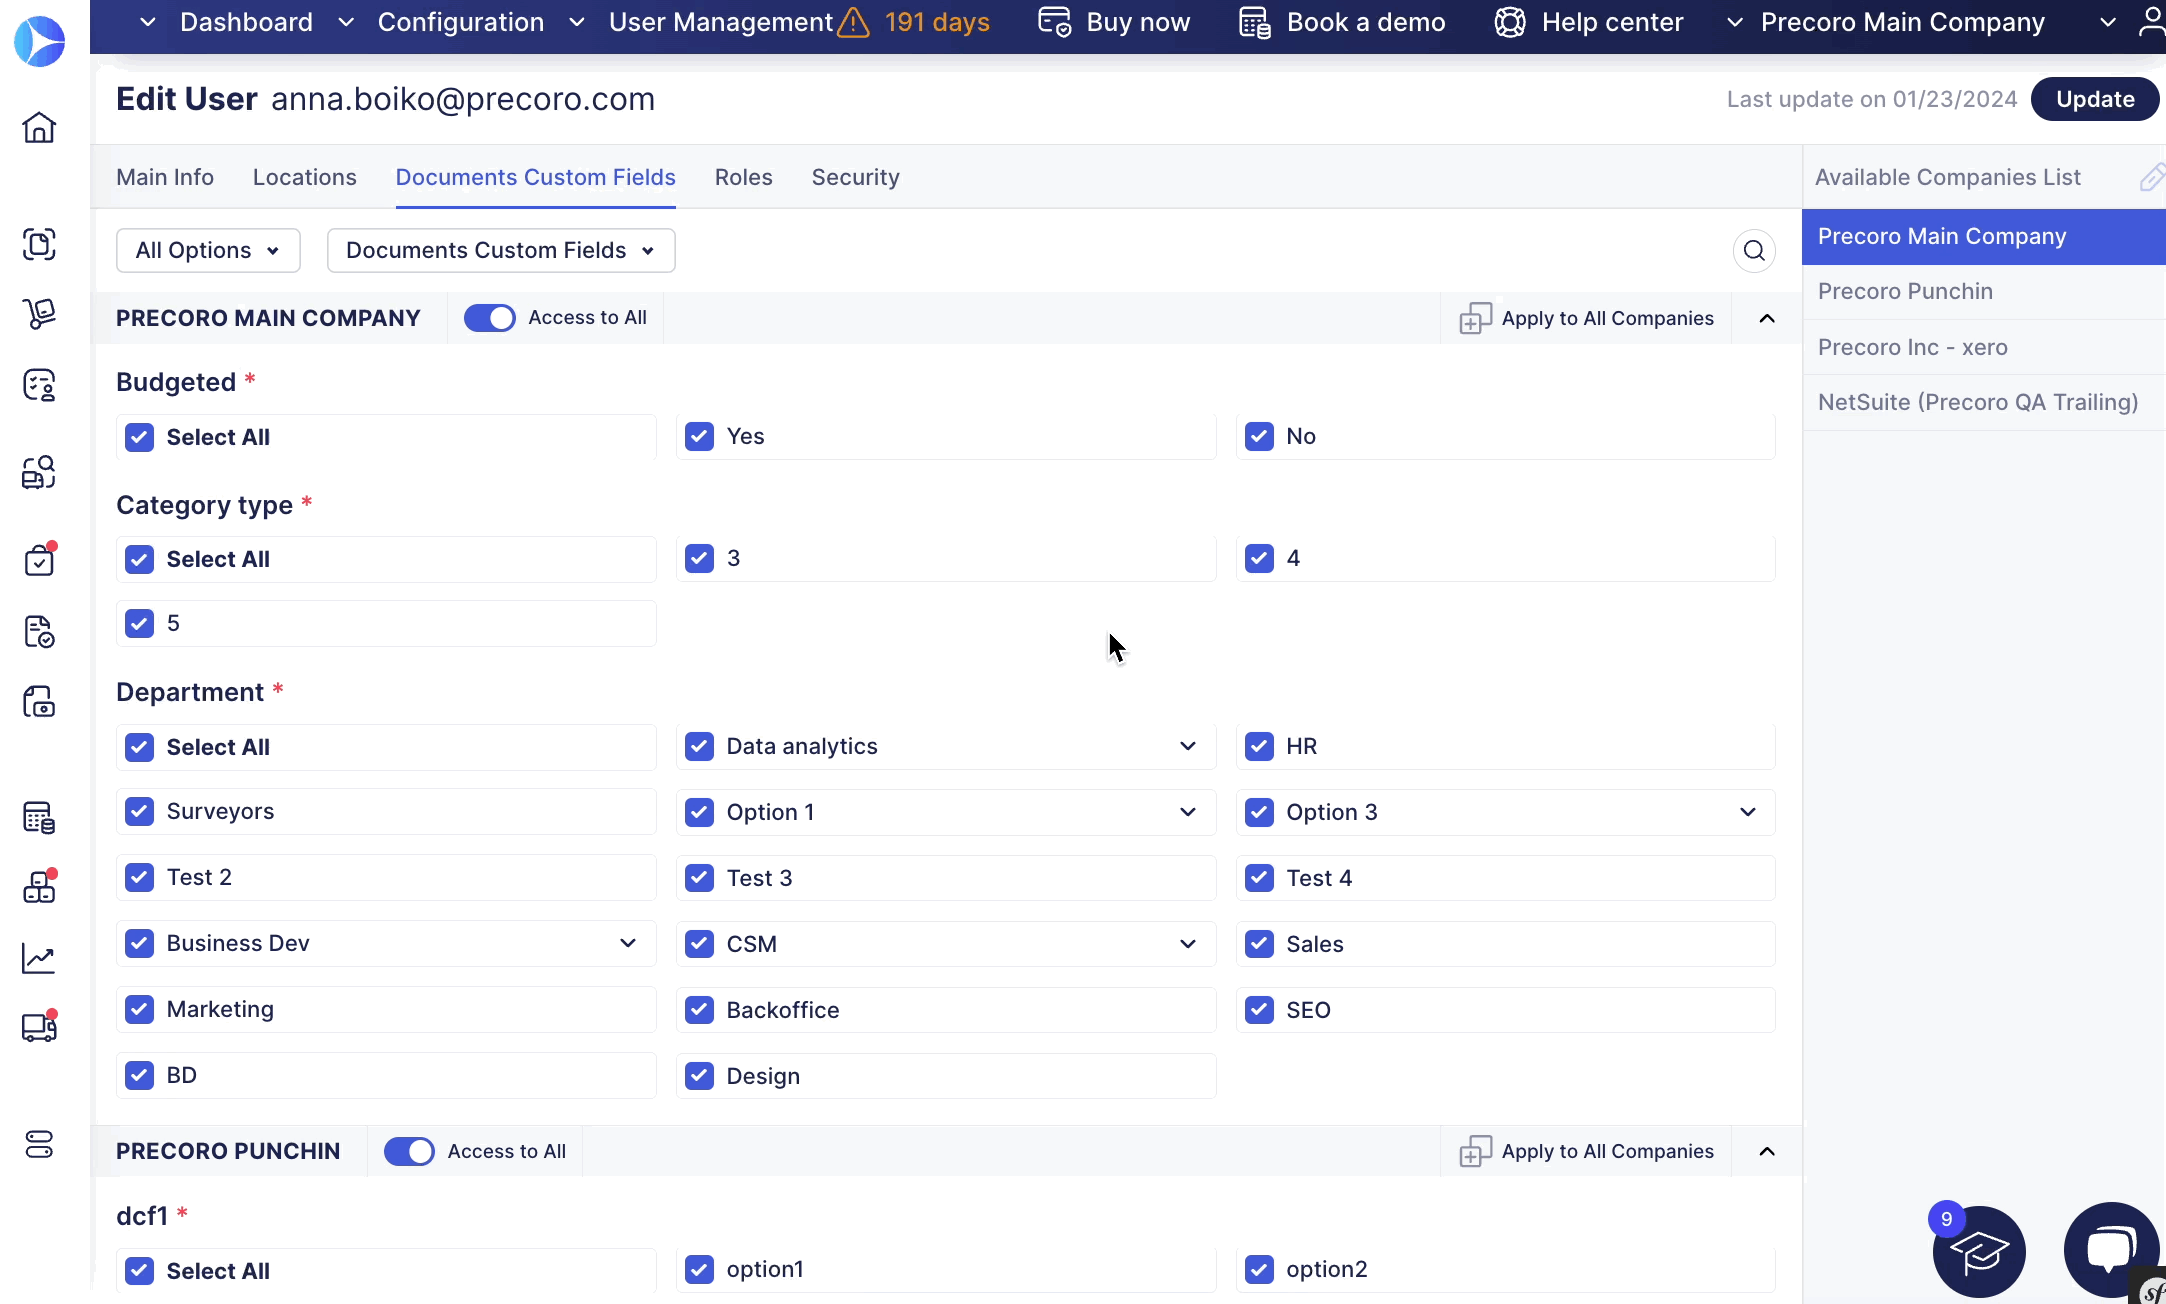
Added the Search Functionality in the User Profile
You can now utilize the Search functionality when creating new or editing the existing User Profile on the Locations and Documents Custom Fields tabs. To start the search press the icon and enter the needed information.
The search will be performed by the option Name or Code throughout all the available companies.
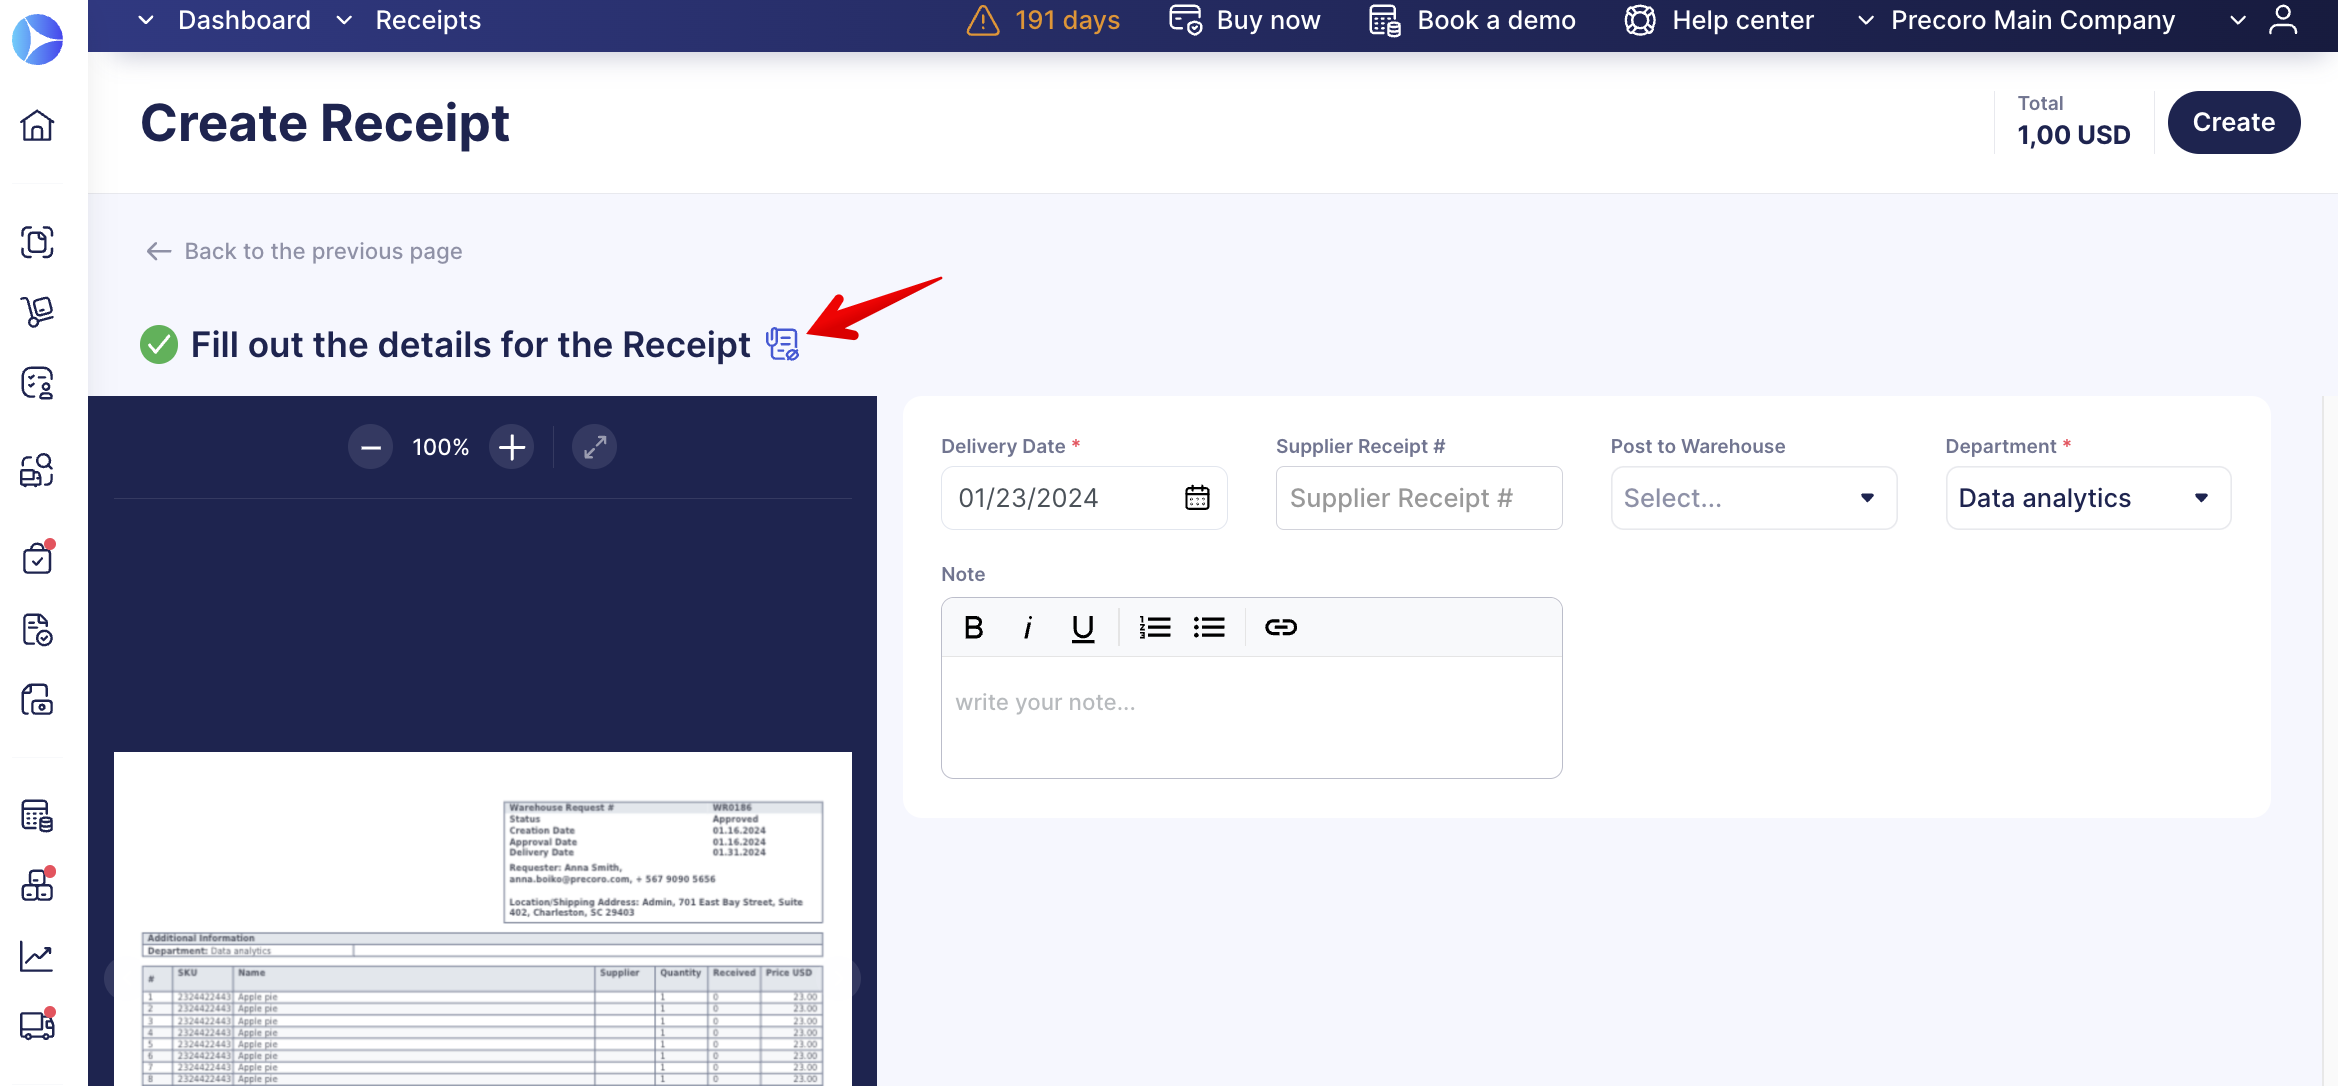
Standardized Opening of the Related and Preview Documents
To improve the user experience and make it easier to navigate the system, we have standardized the opening of the linked related and preview documents so you would be able to comfortably go back without losing the previously opened window.
How this process works now:
- A click on a document line will always open it in the same tab.
To open a document line from a table in a new tab — press the command button and click on the line to open. - A click on the opening a document for preview button will open it in the same tab.
To open a document for preview in a new tab — press the command button and click on the line to open. - A click on the related document number will open it in the same tab.
To open a related document in a new tab — press the command button and click on the line to open.
Added New Reminder to Fix Users Without DCF Access
Earlier, we added a new Infocard for users with no access to the required Documents Custom Fields, and now, to help you keep all these issues in check, we have added an email reminder for all the Configurators who will receive the letter every Monday. The letter will only be sent in case there are problematic users in your company who lack the needed DCF access.
-png.png?width=445&height=451&name=image%20(35)-png.png)
Noteworthy Design Changes
This week, we have prepared a lot of significant design changes that will:
- Improve the general layout.
- Make the interface more intuitive and user-friendly.
- Help to navigate faster.
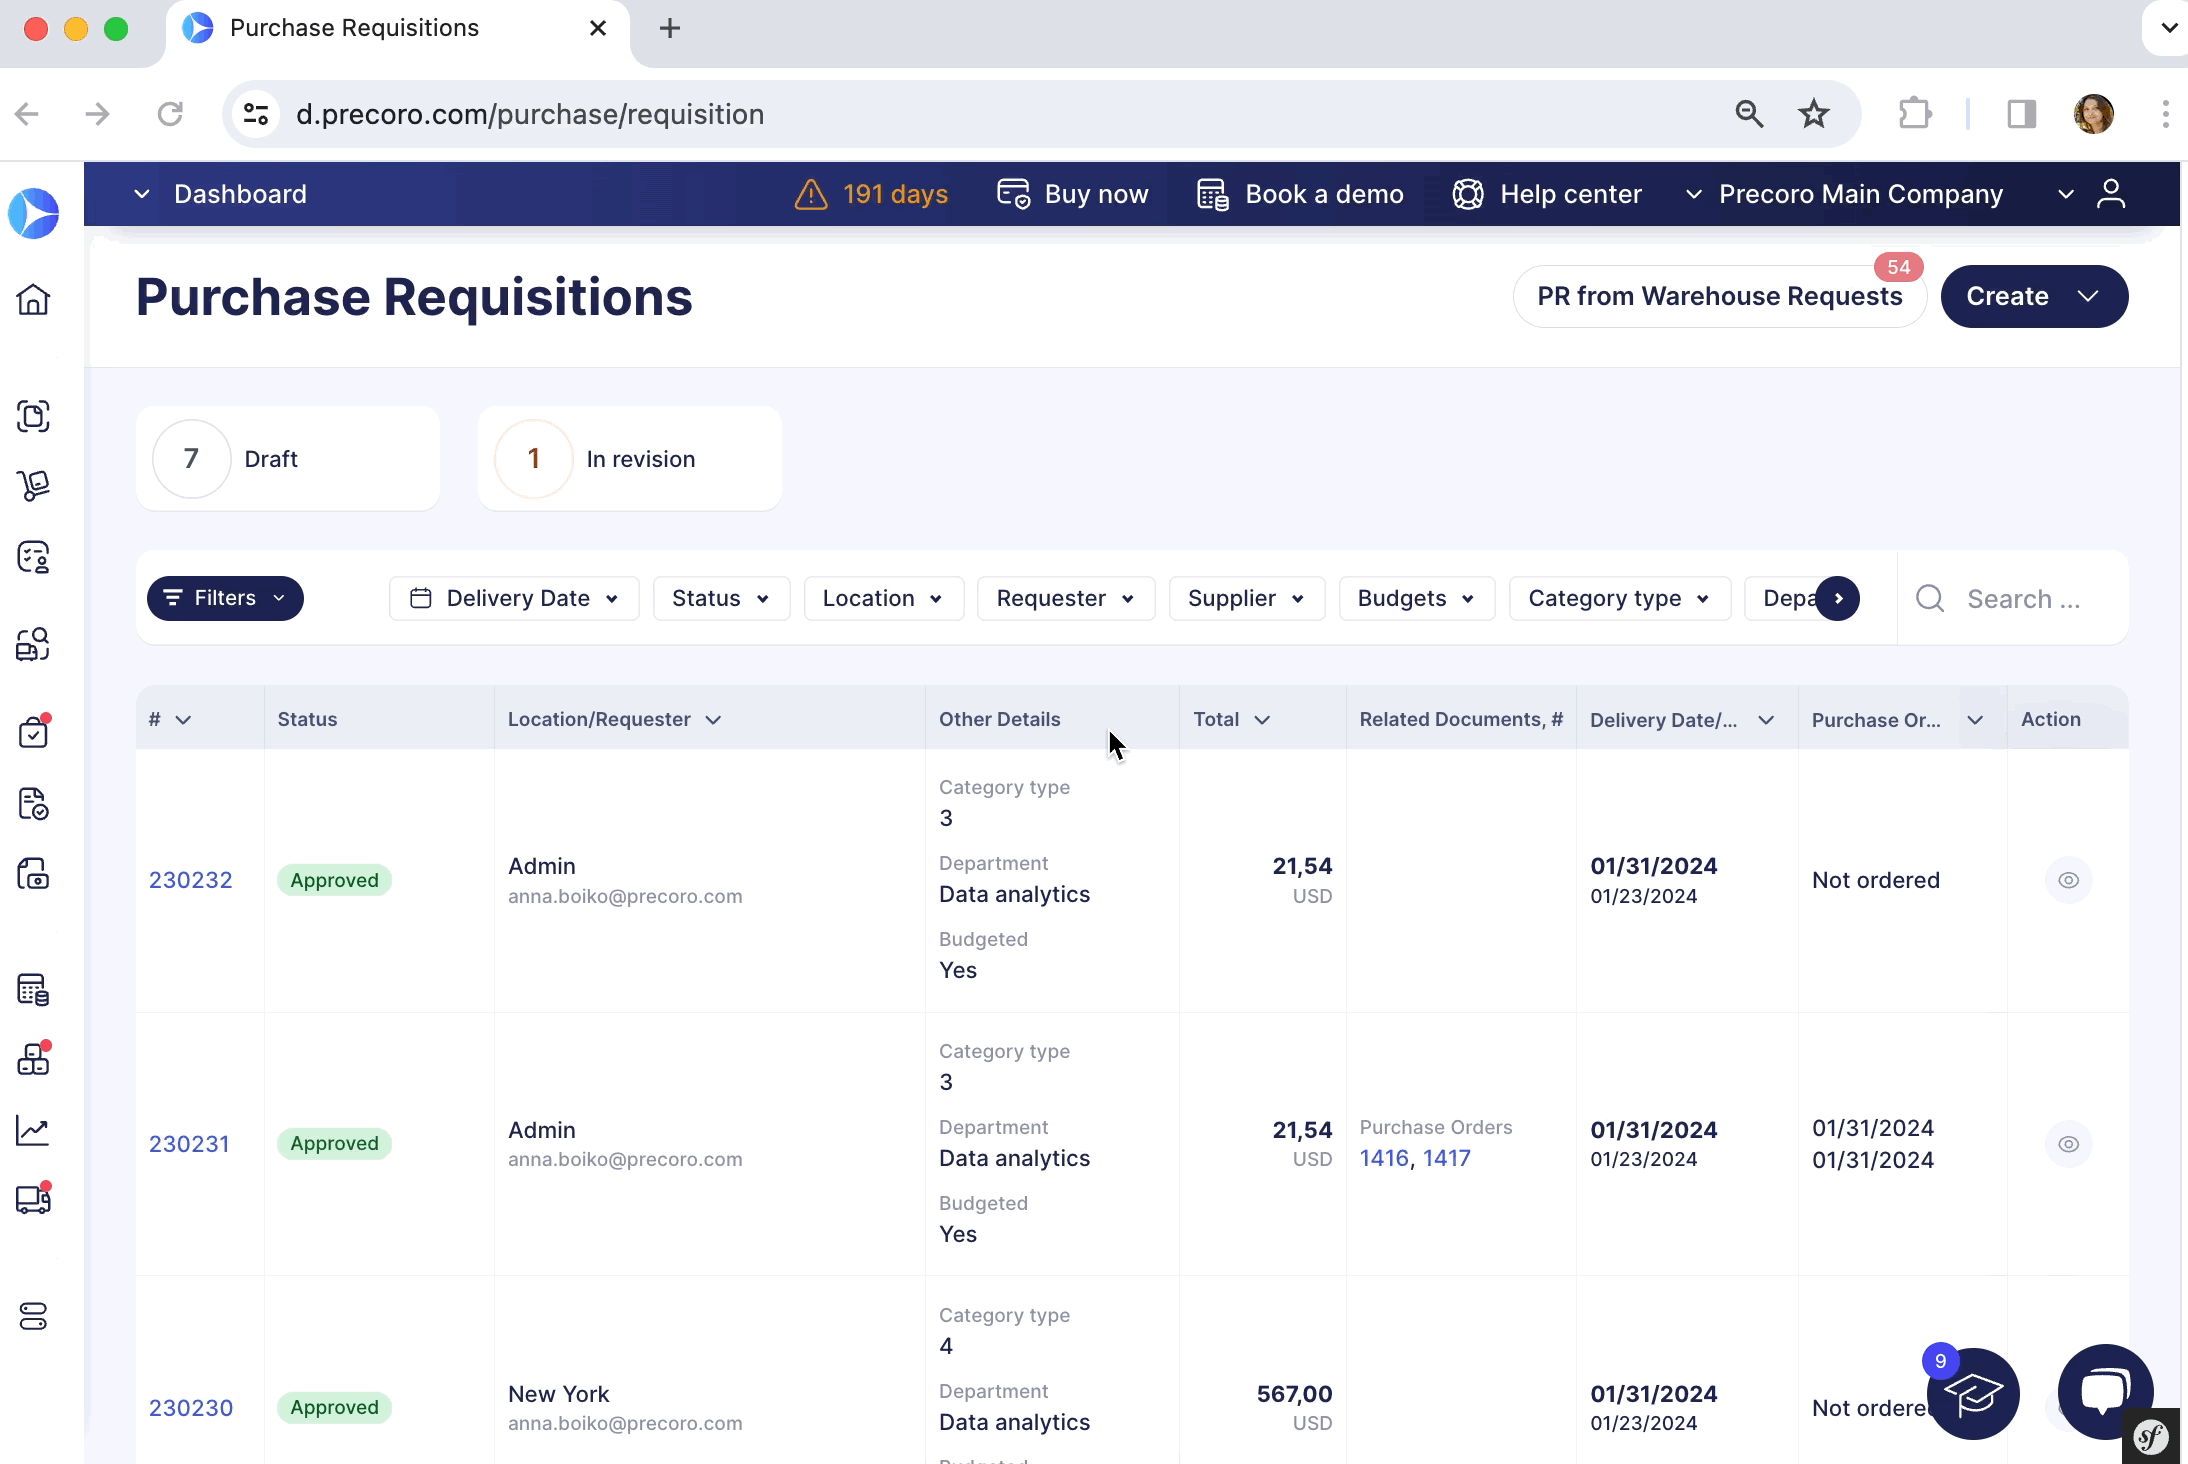
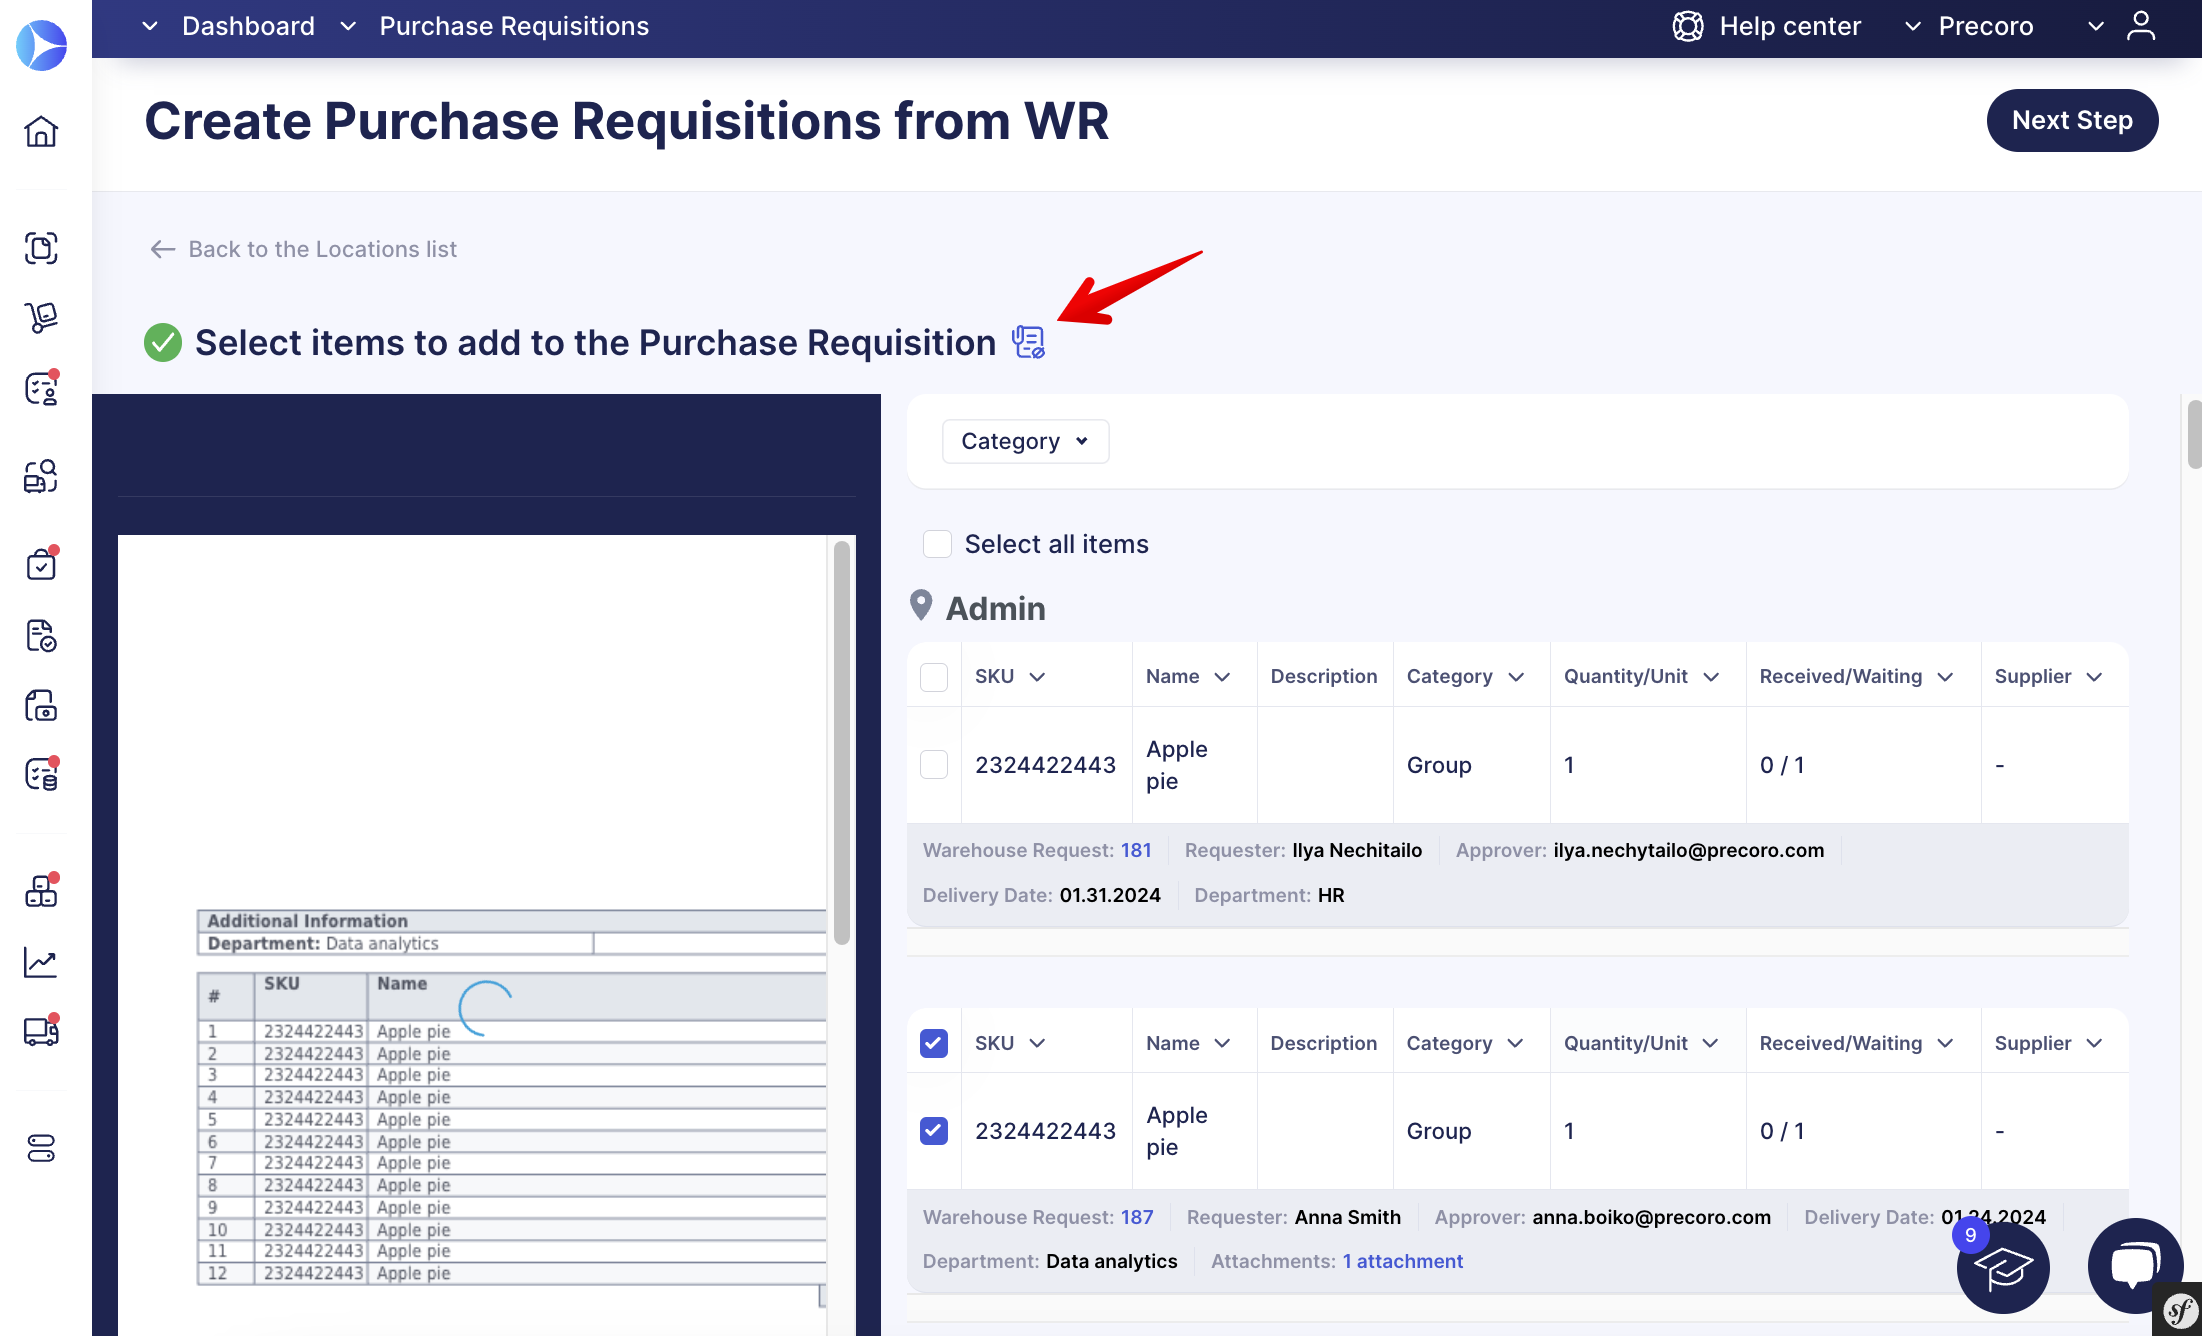
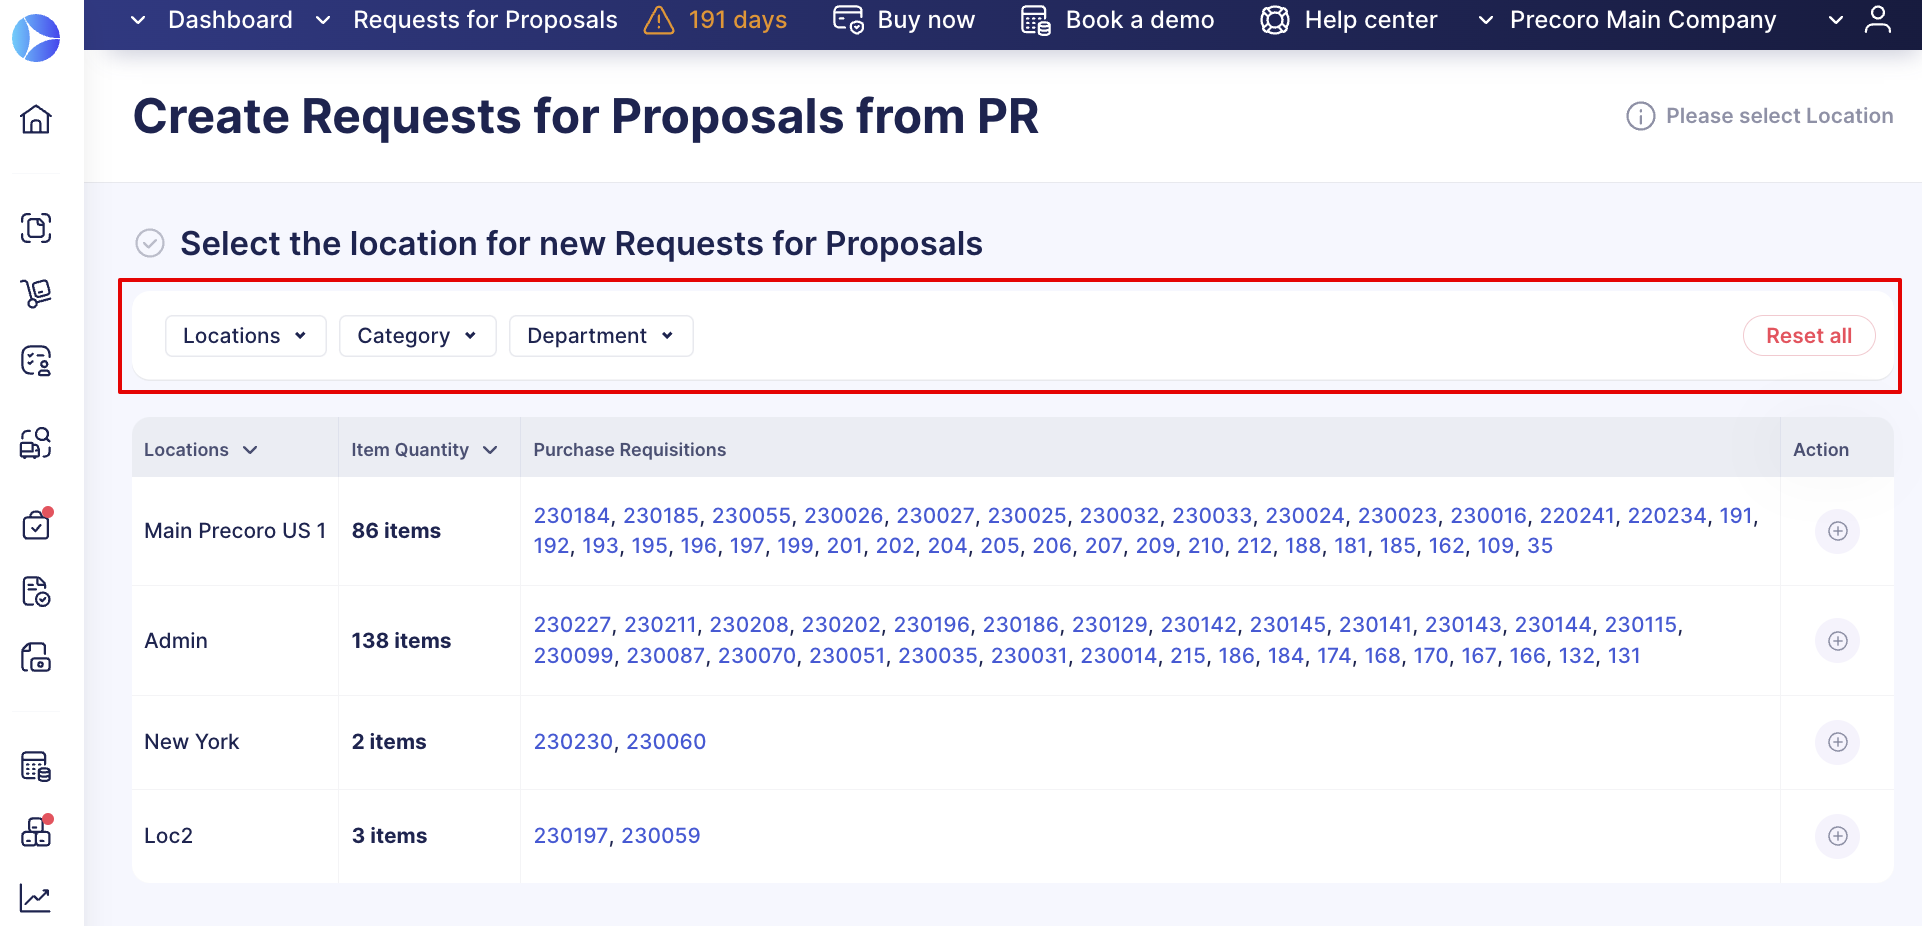
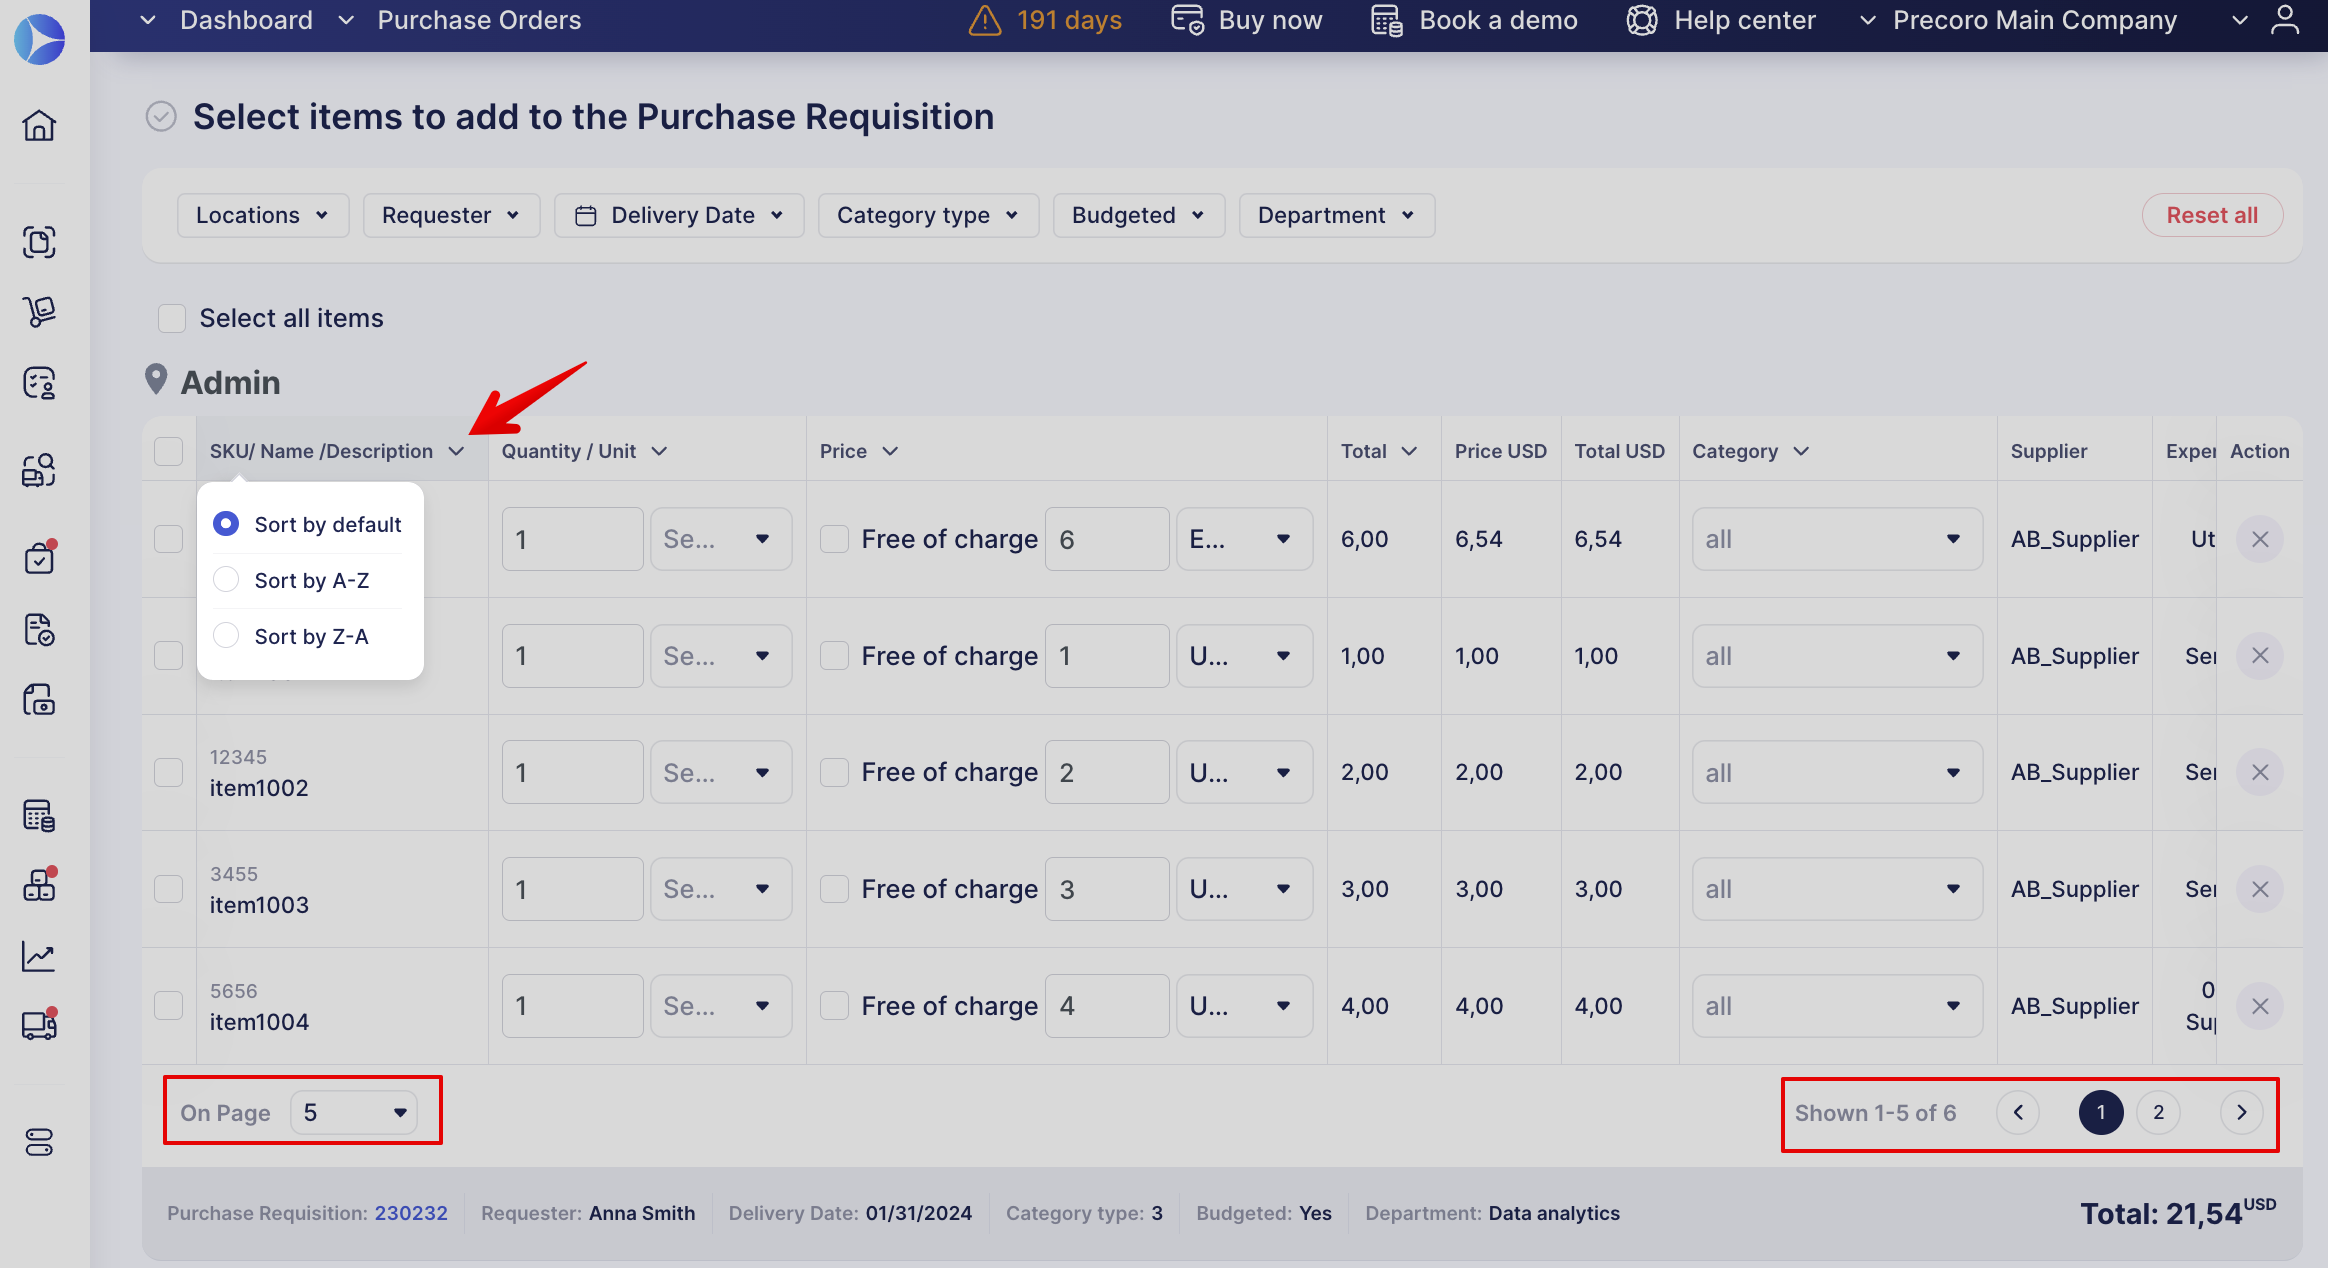
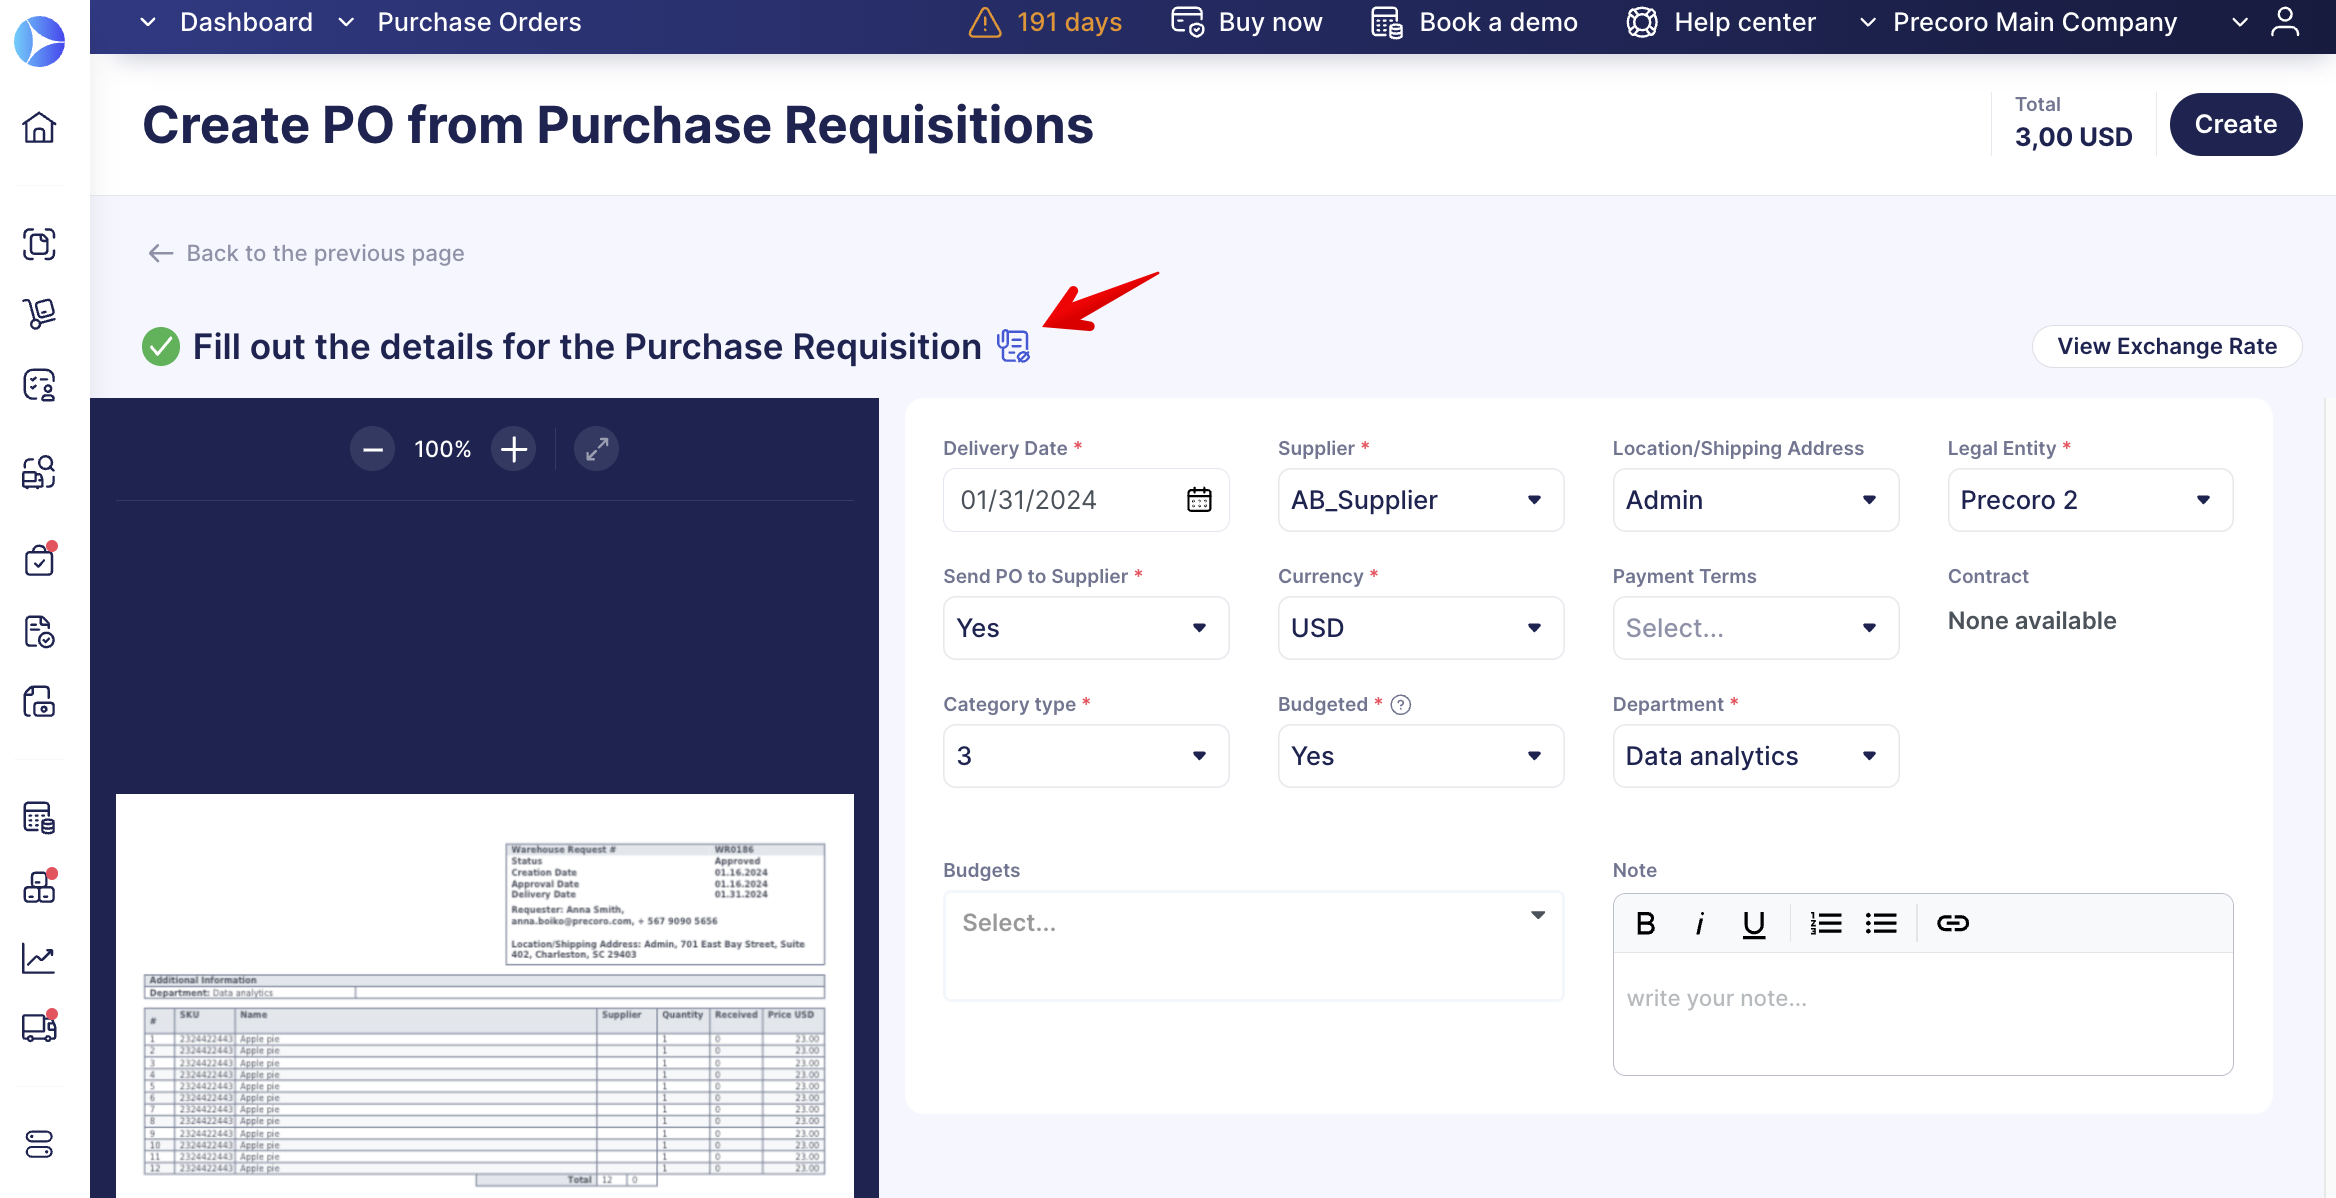
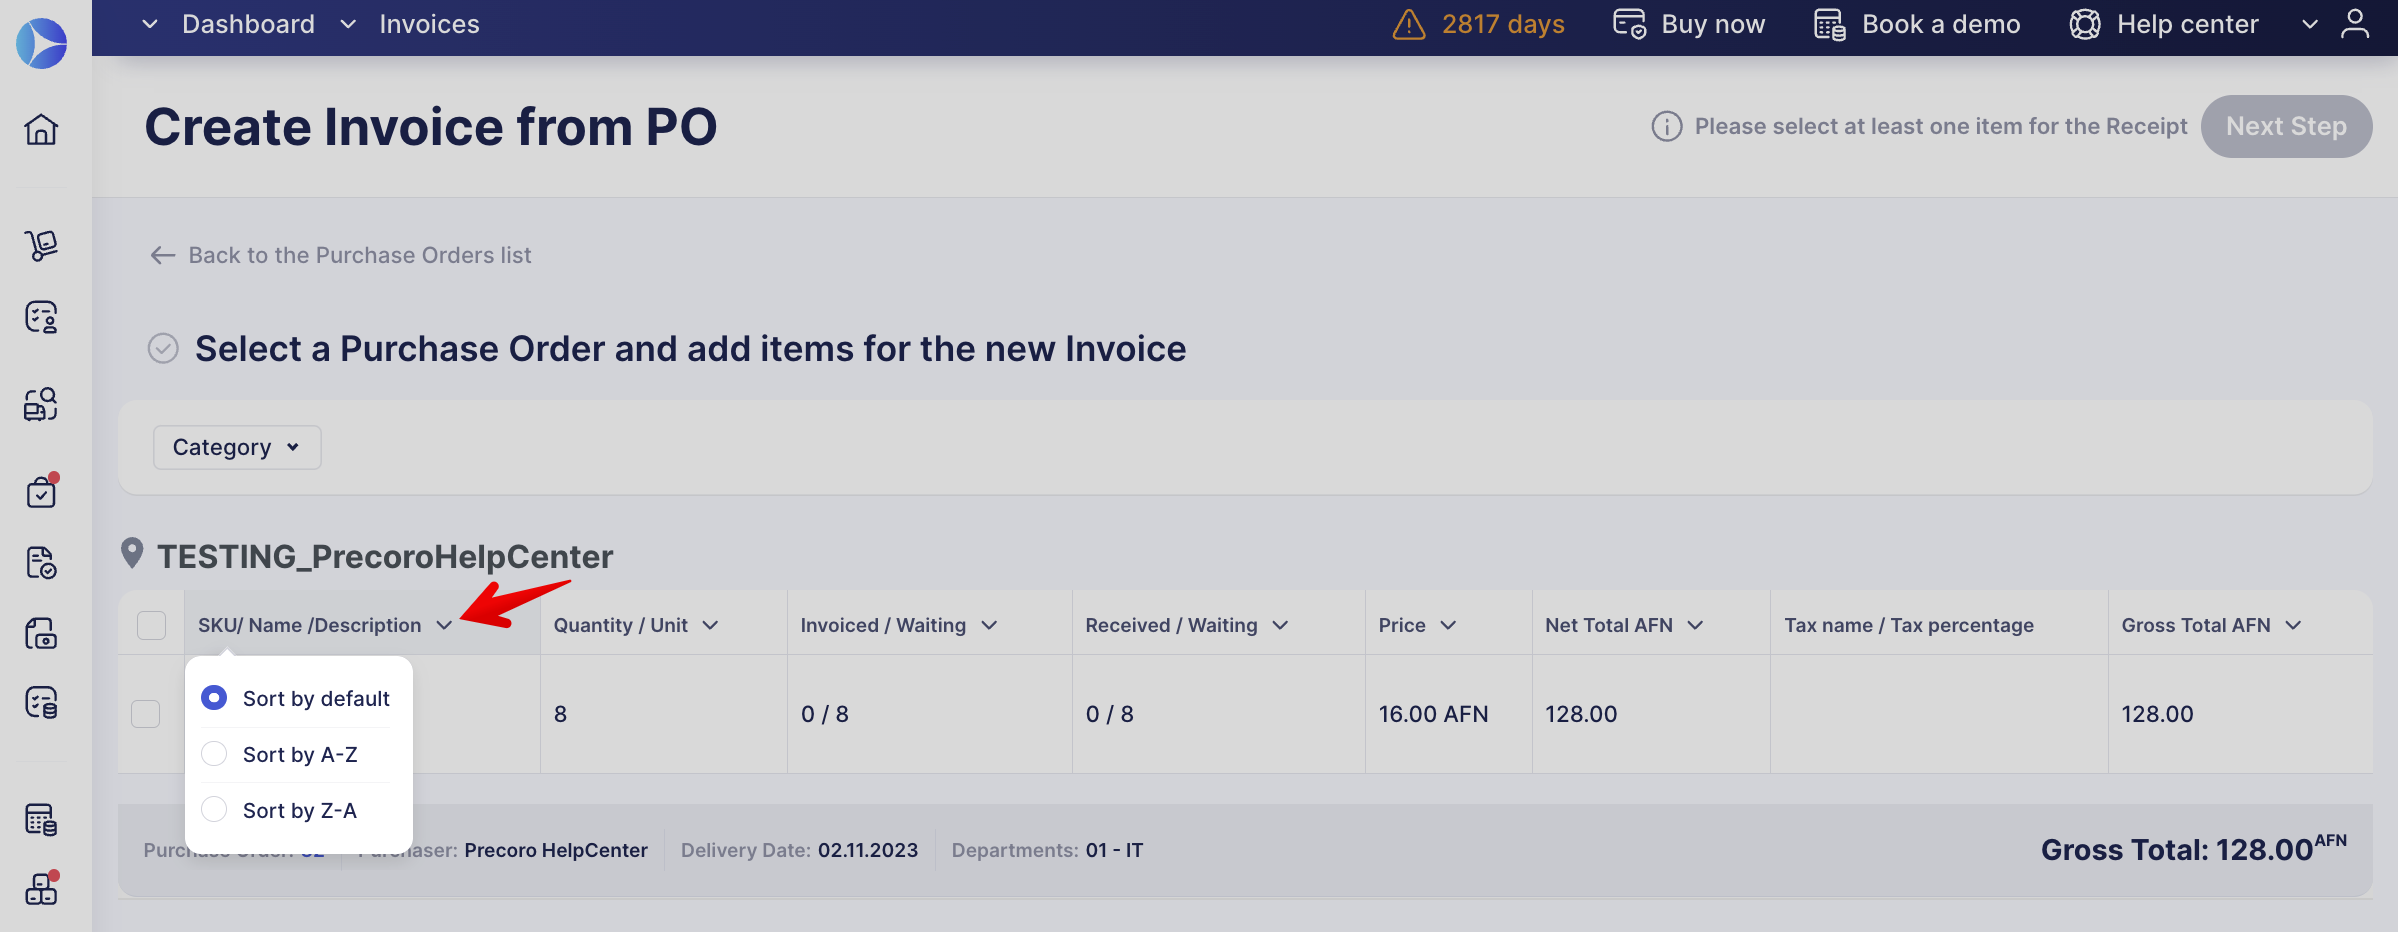
Improved Purchase Requisitions from the Warehouse Request Page
The list of updates includes the following:
-
New table design and buttons to go back to the previous pages.
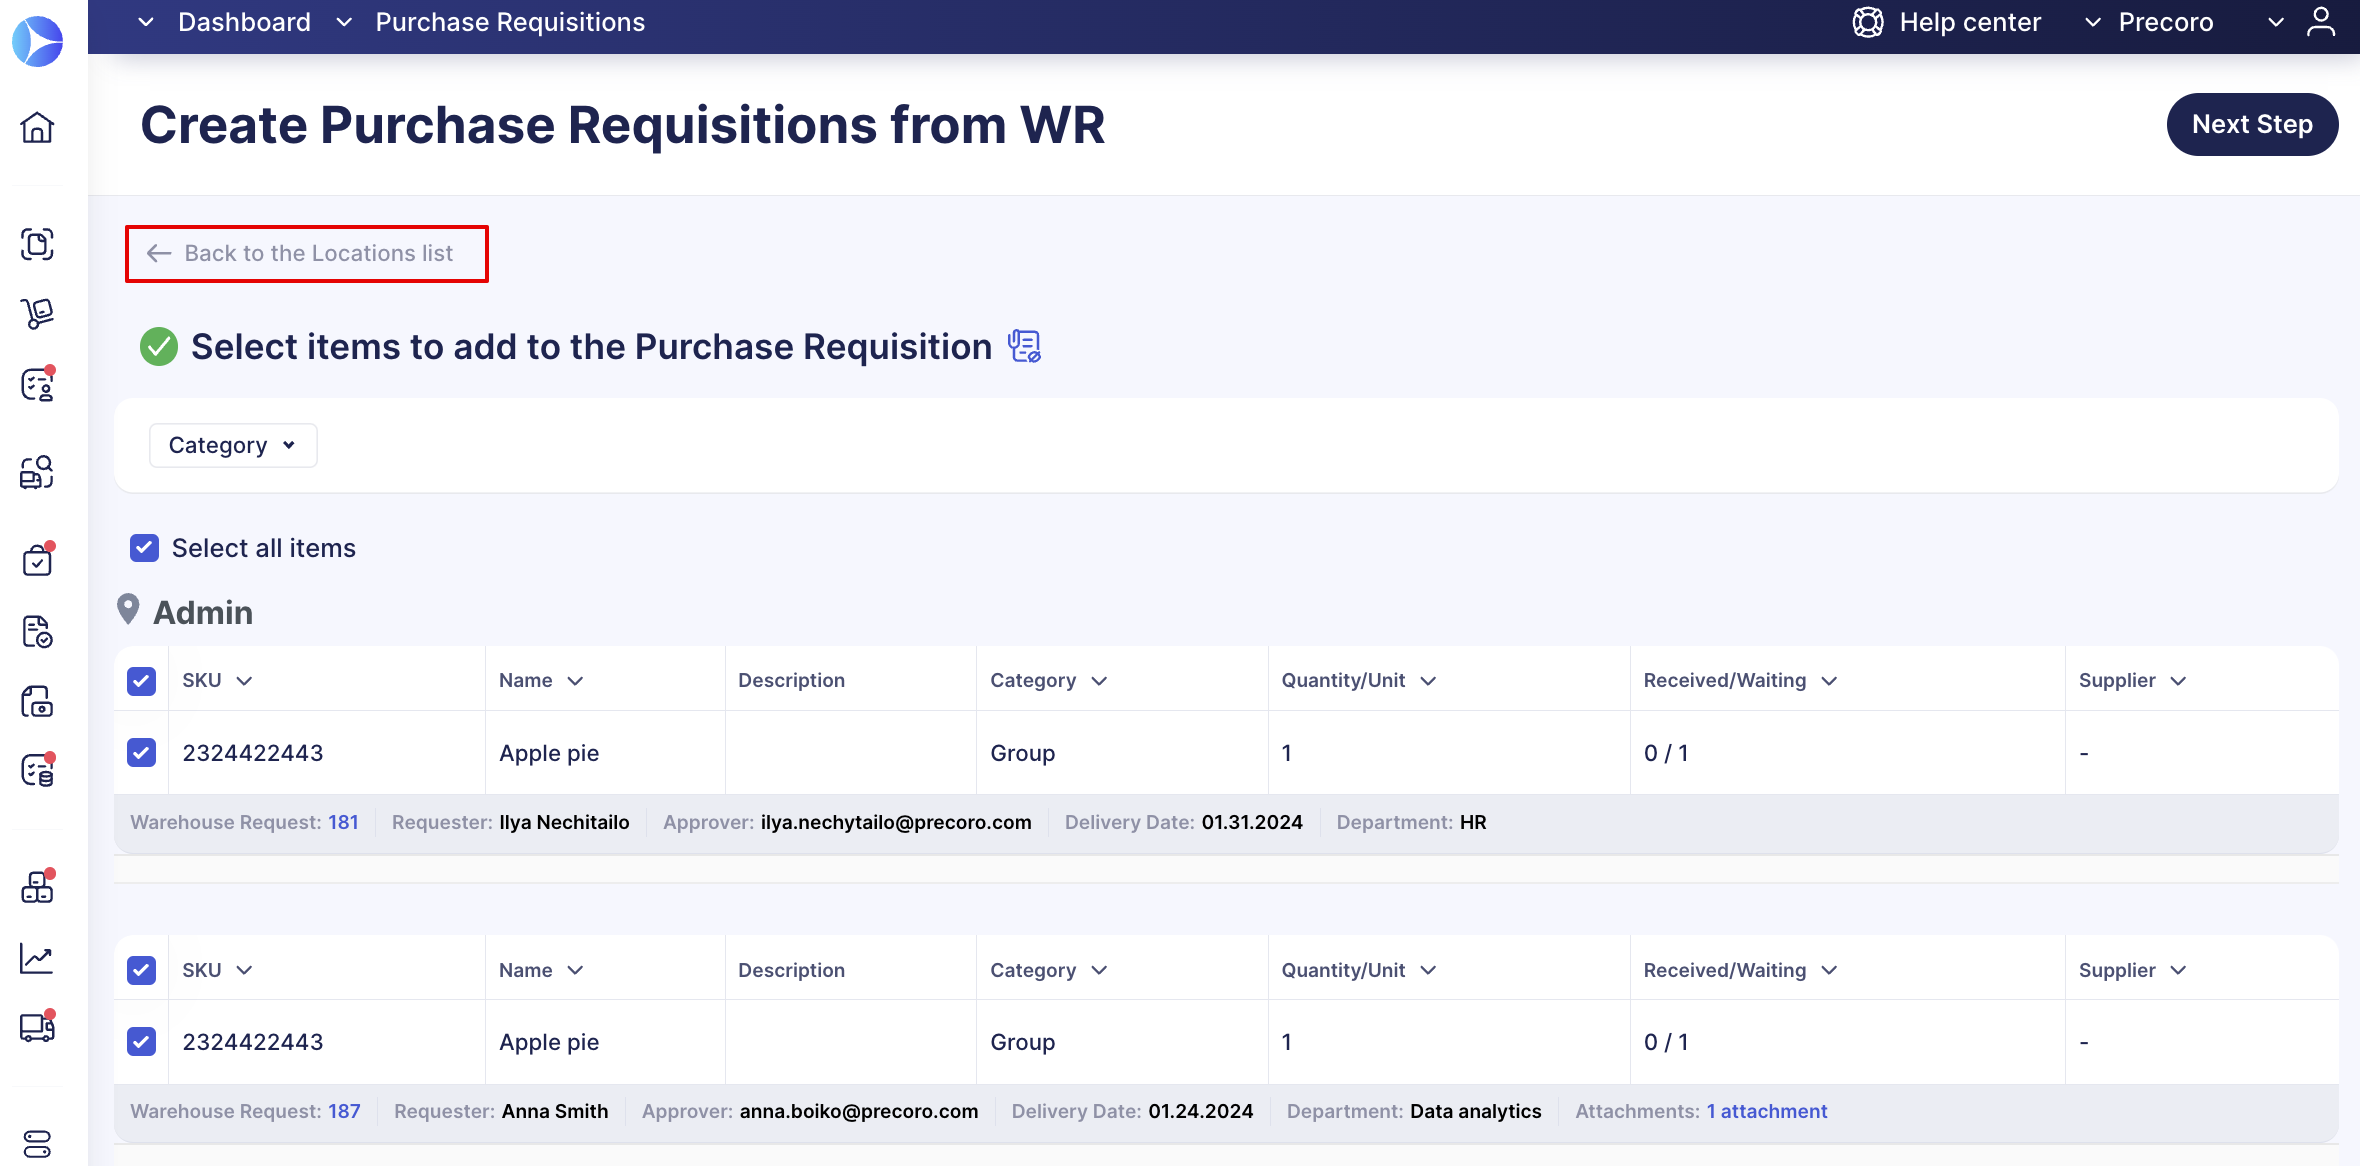
-
Fast filter panels on the Locations list and Selecting items pages.
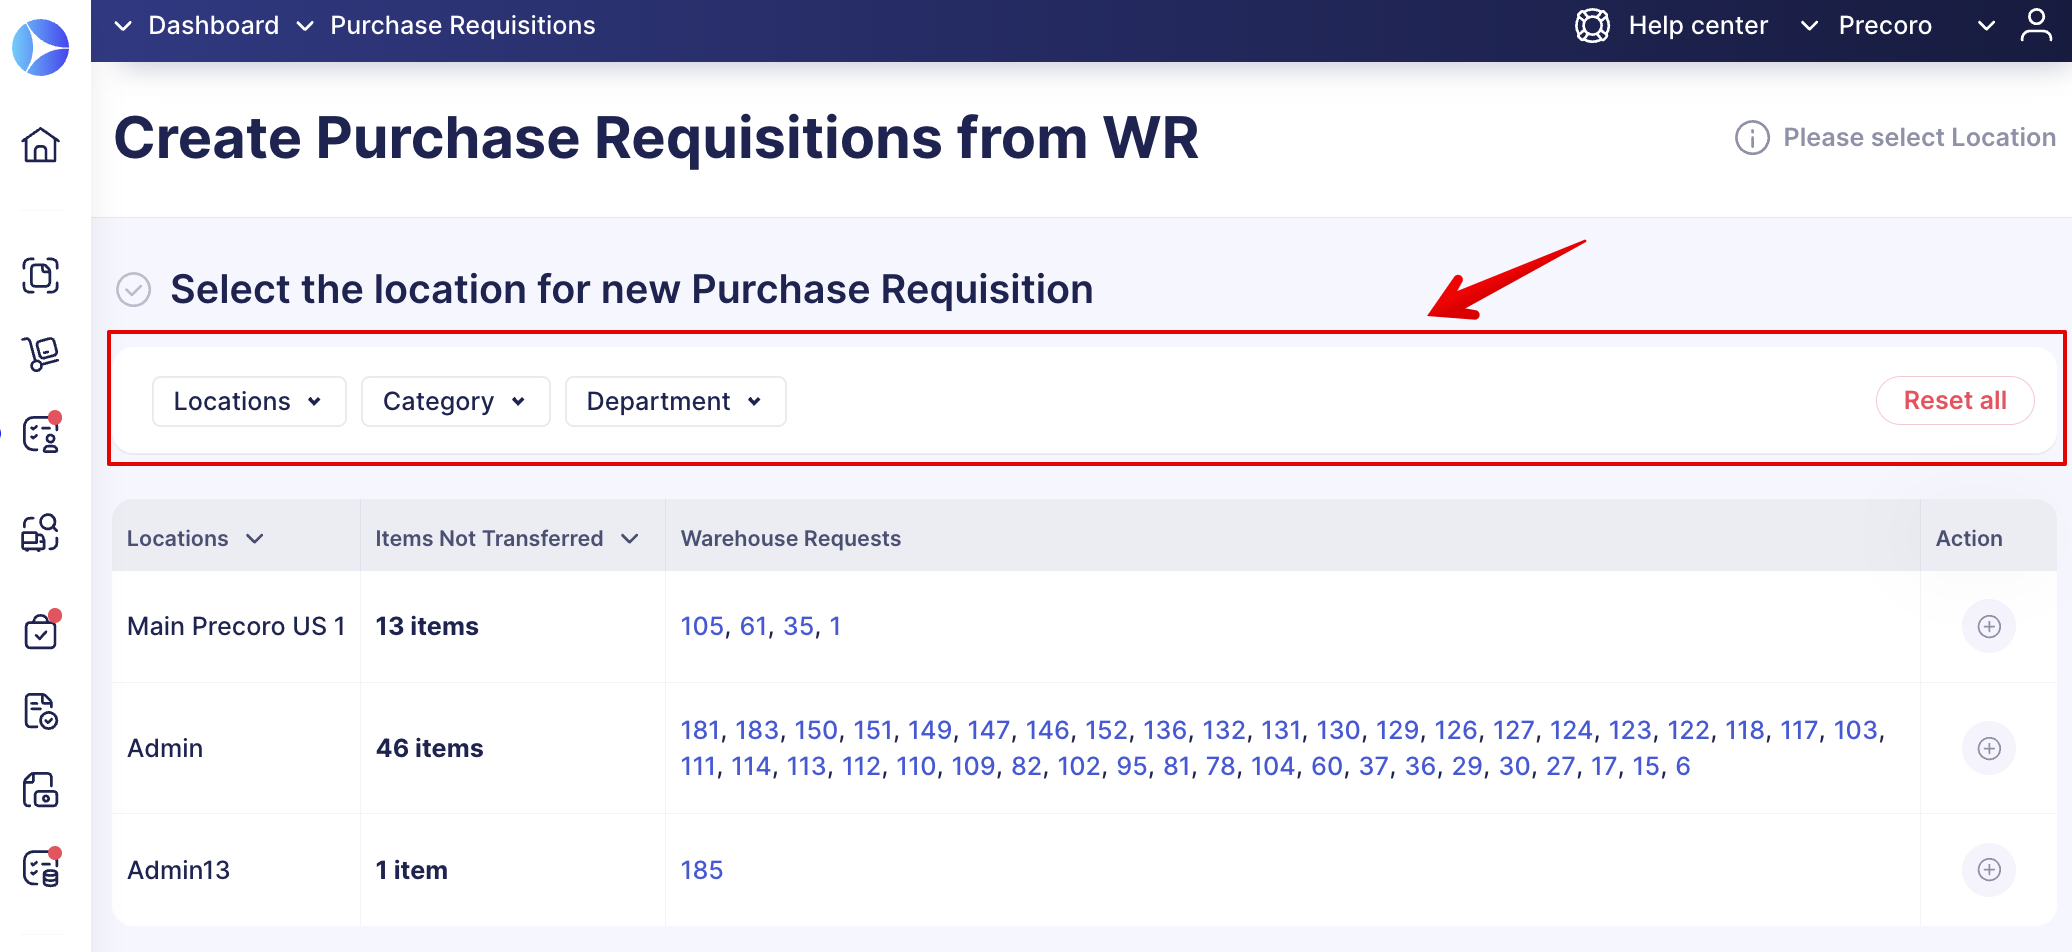
- Column sorting options and pages and Items count.
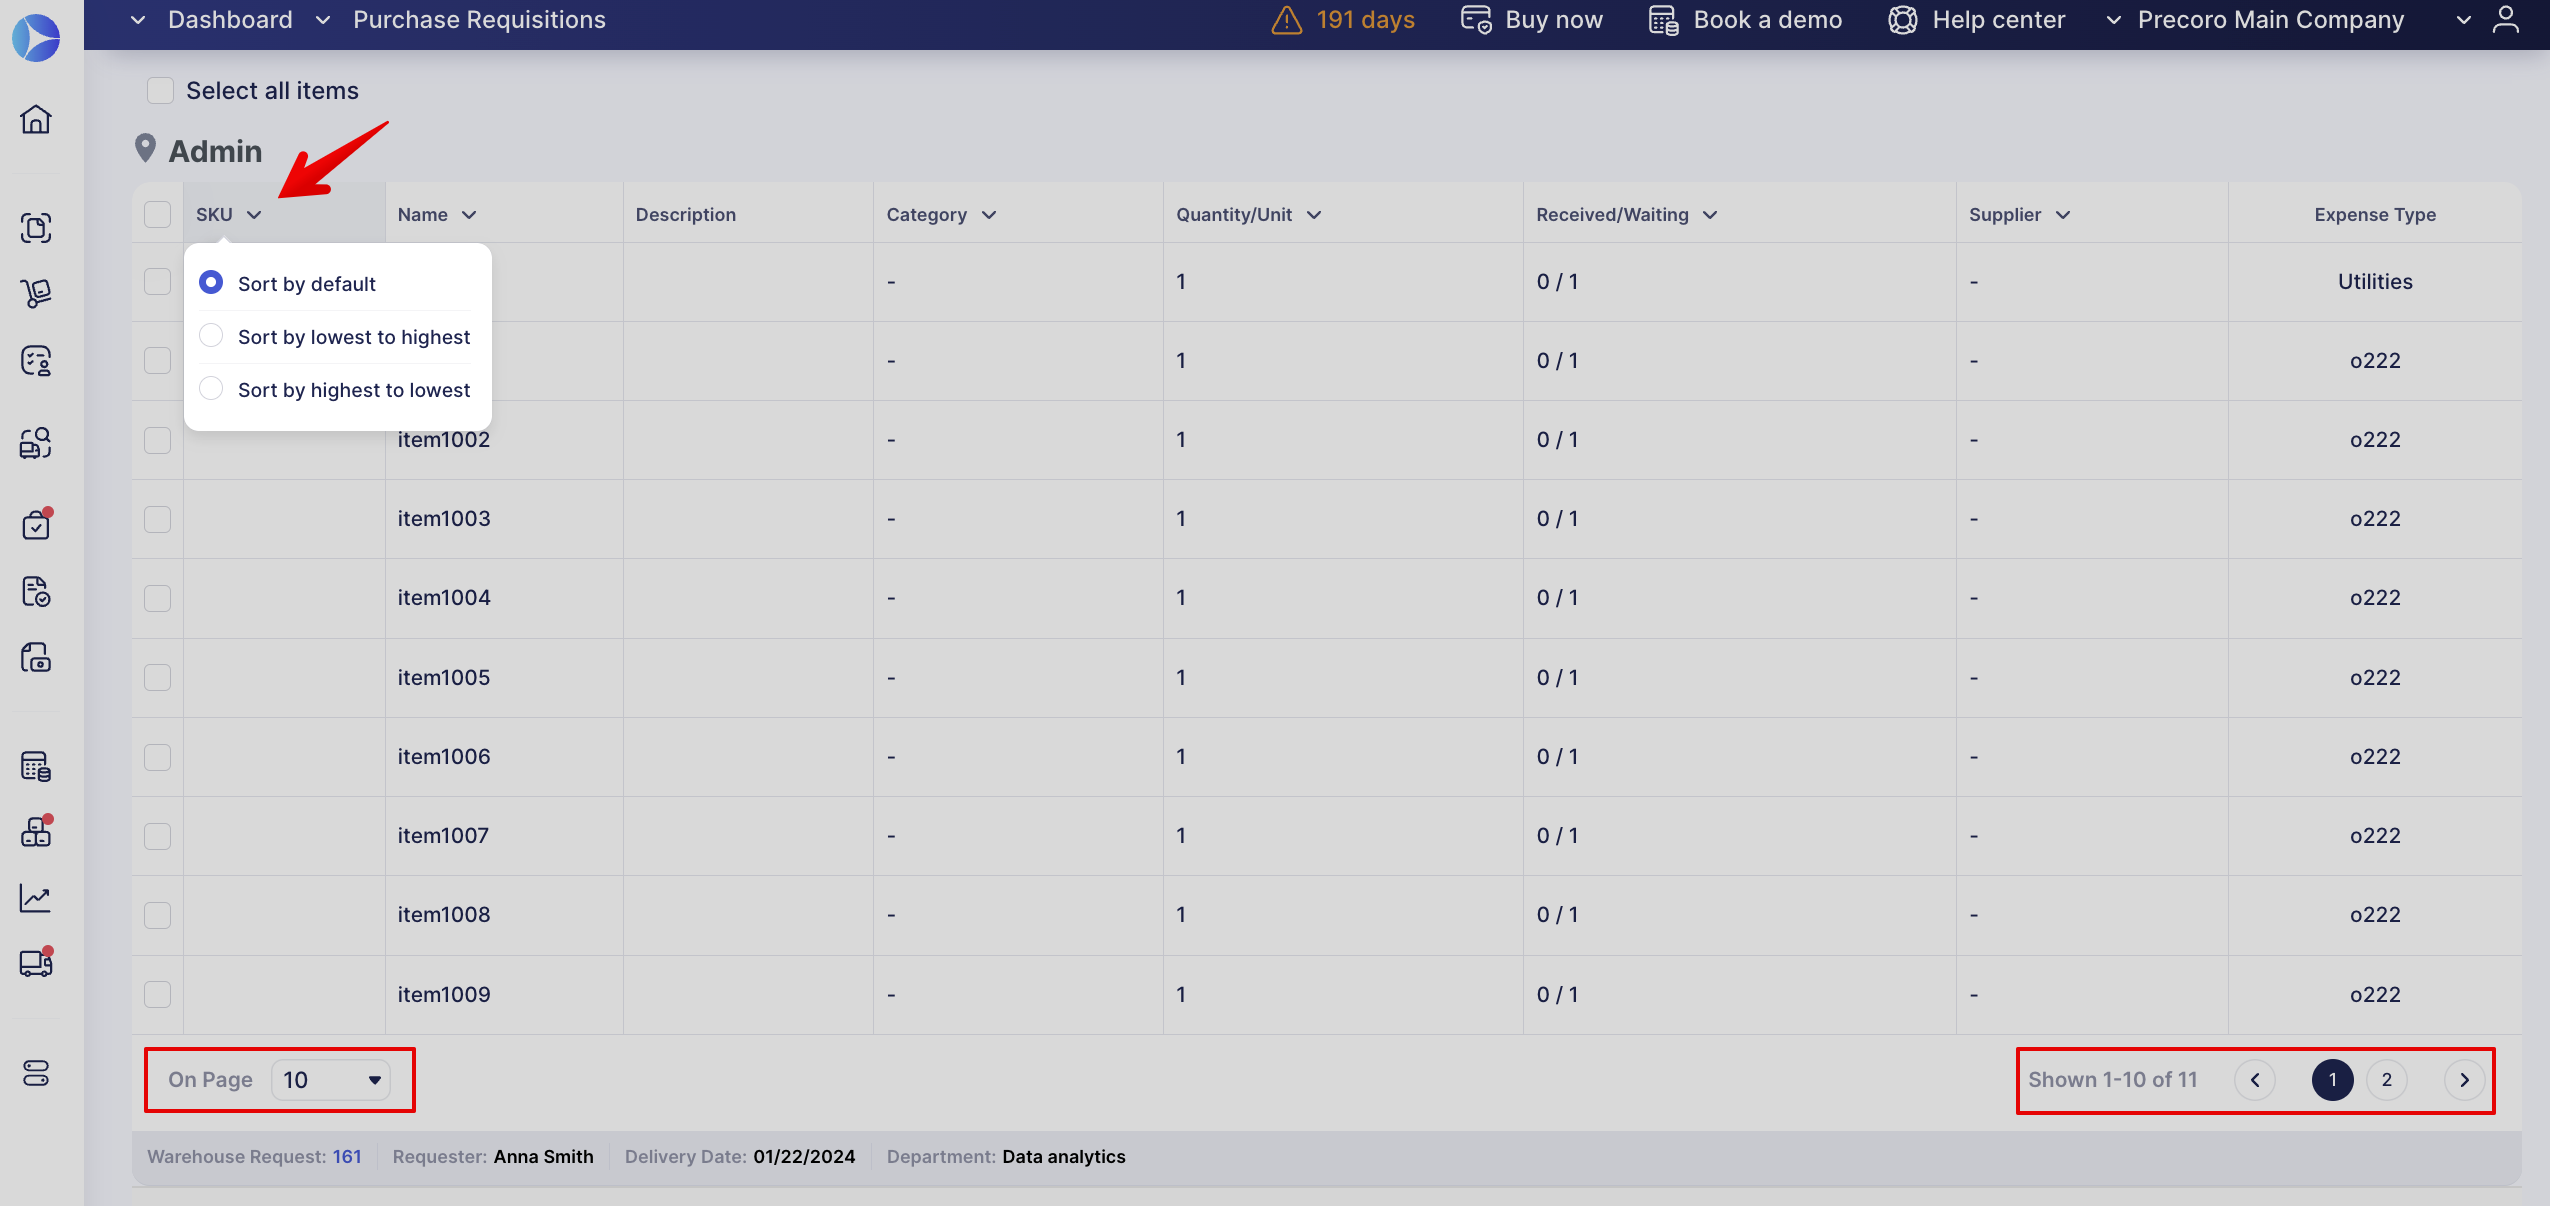
- Icon to show the attachment preview on the Select items and Fill out the details pages.
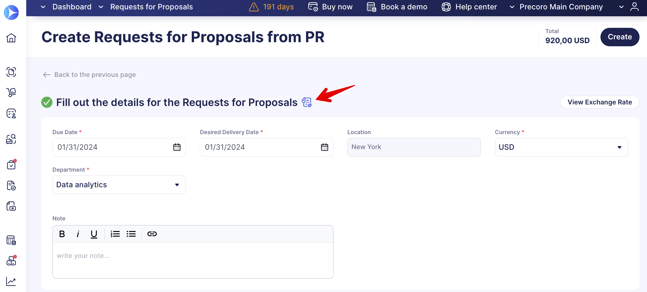
Improved Requests for Proposals from the Purchase Requisitions Page
The list of updates includes the following:
- New table design and buttons to go back to the previous pages.
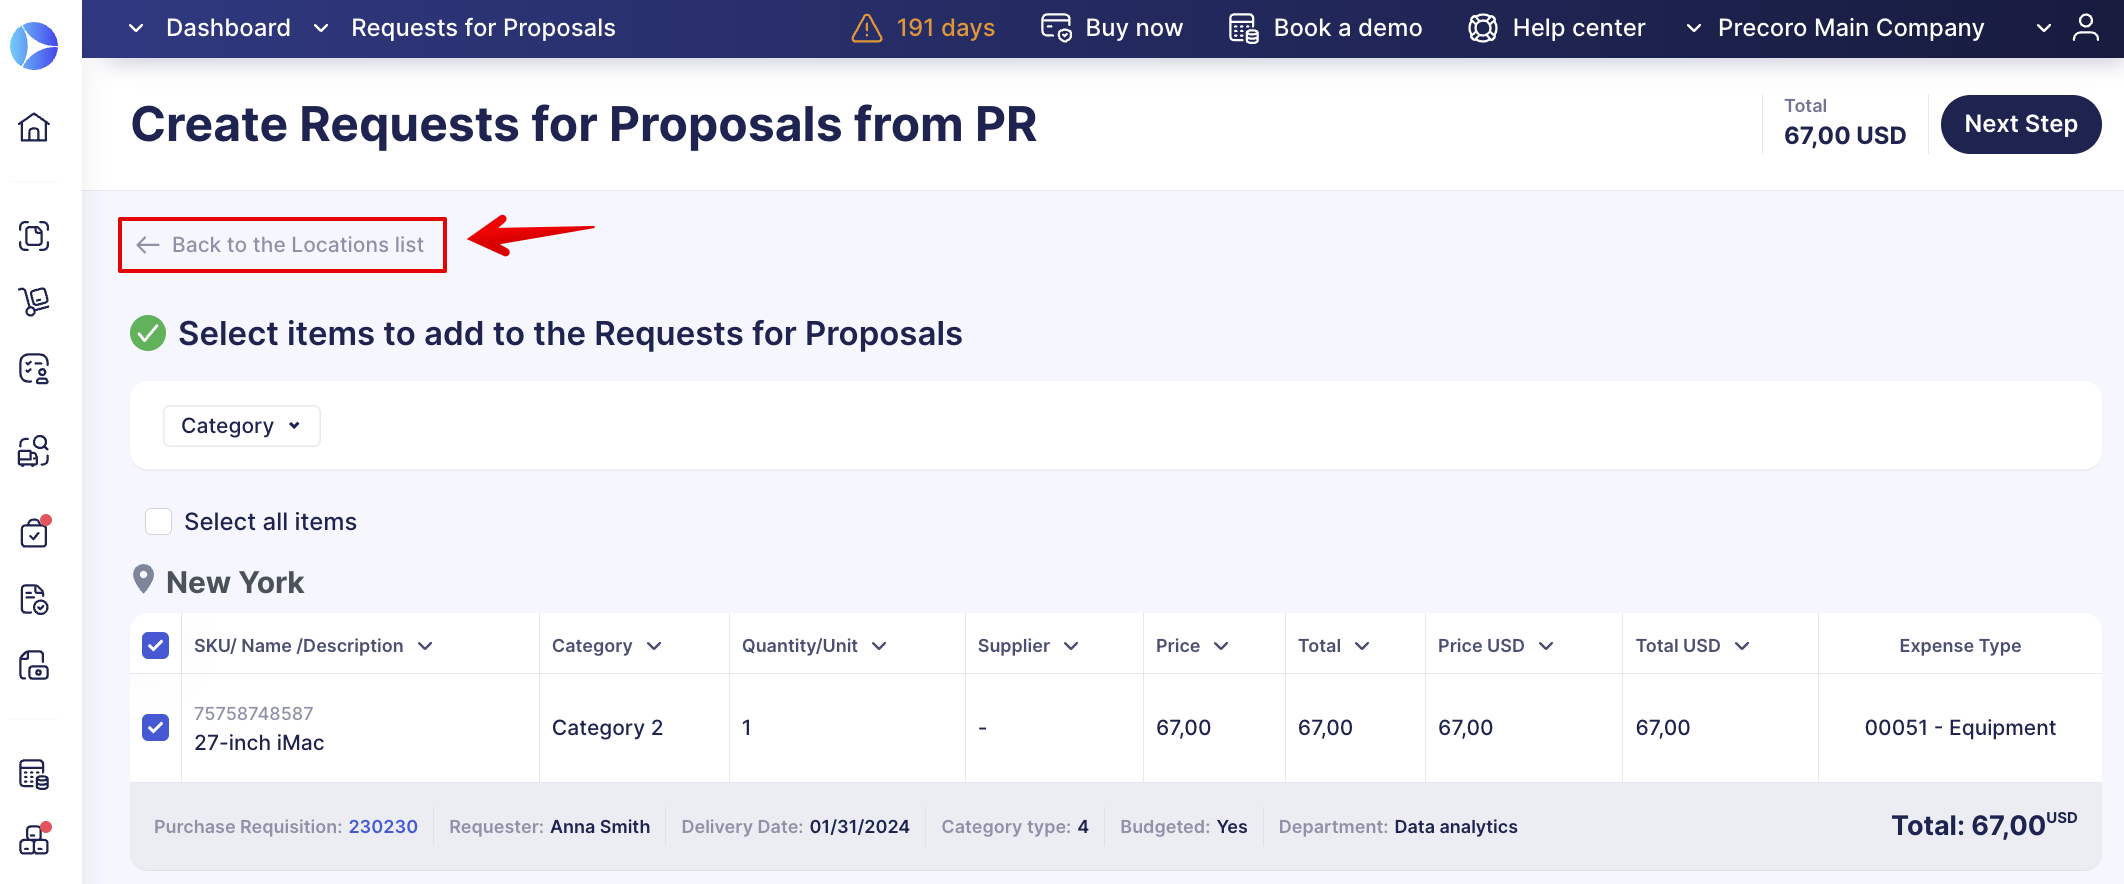
- Fast filter panels on the Locations list and Selecting items pages.
- Column sorting options and pages and Items count.
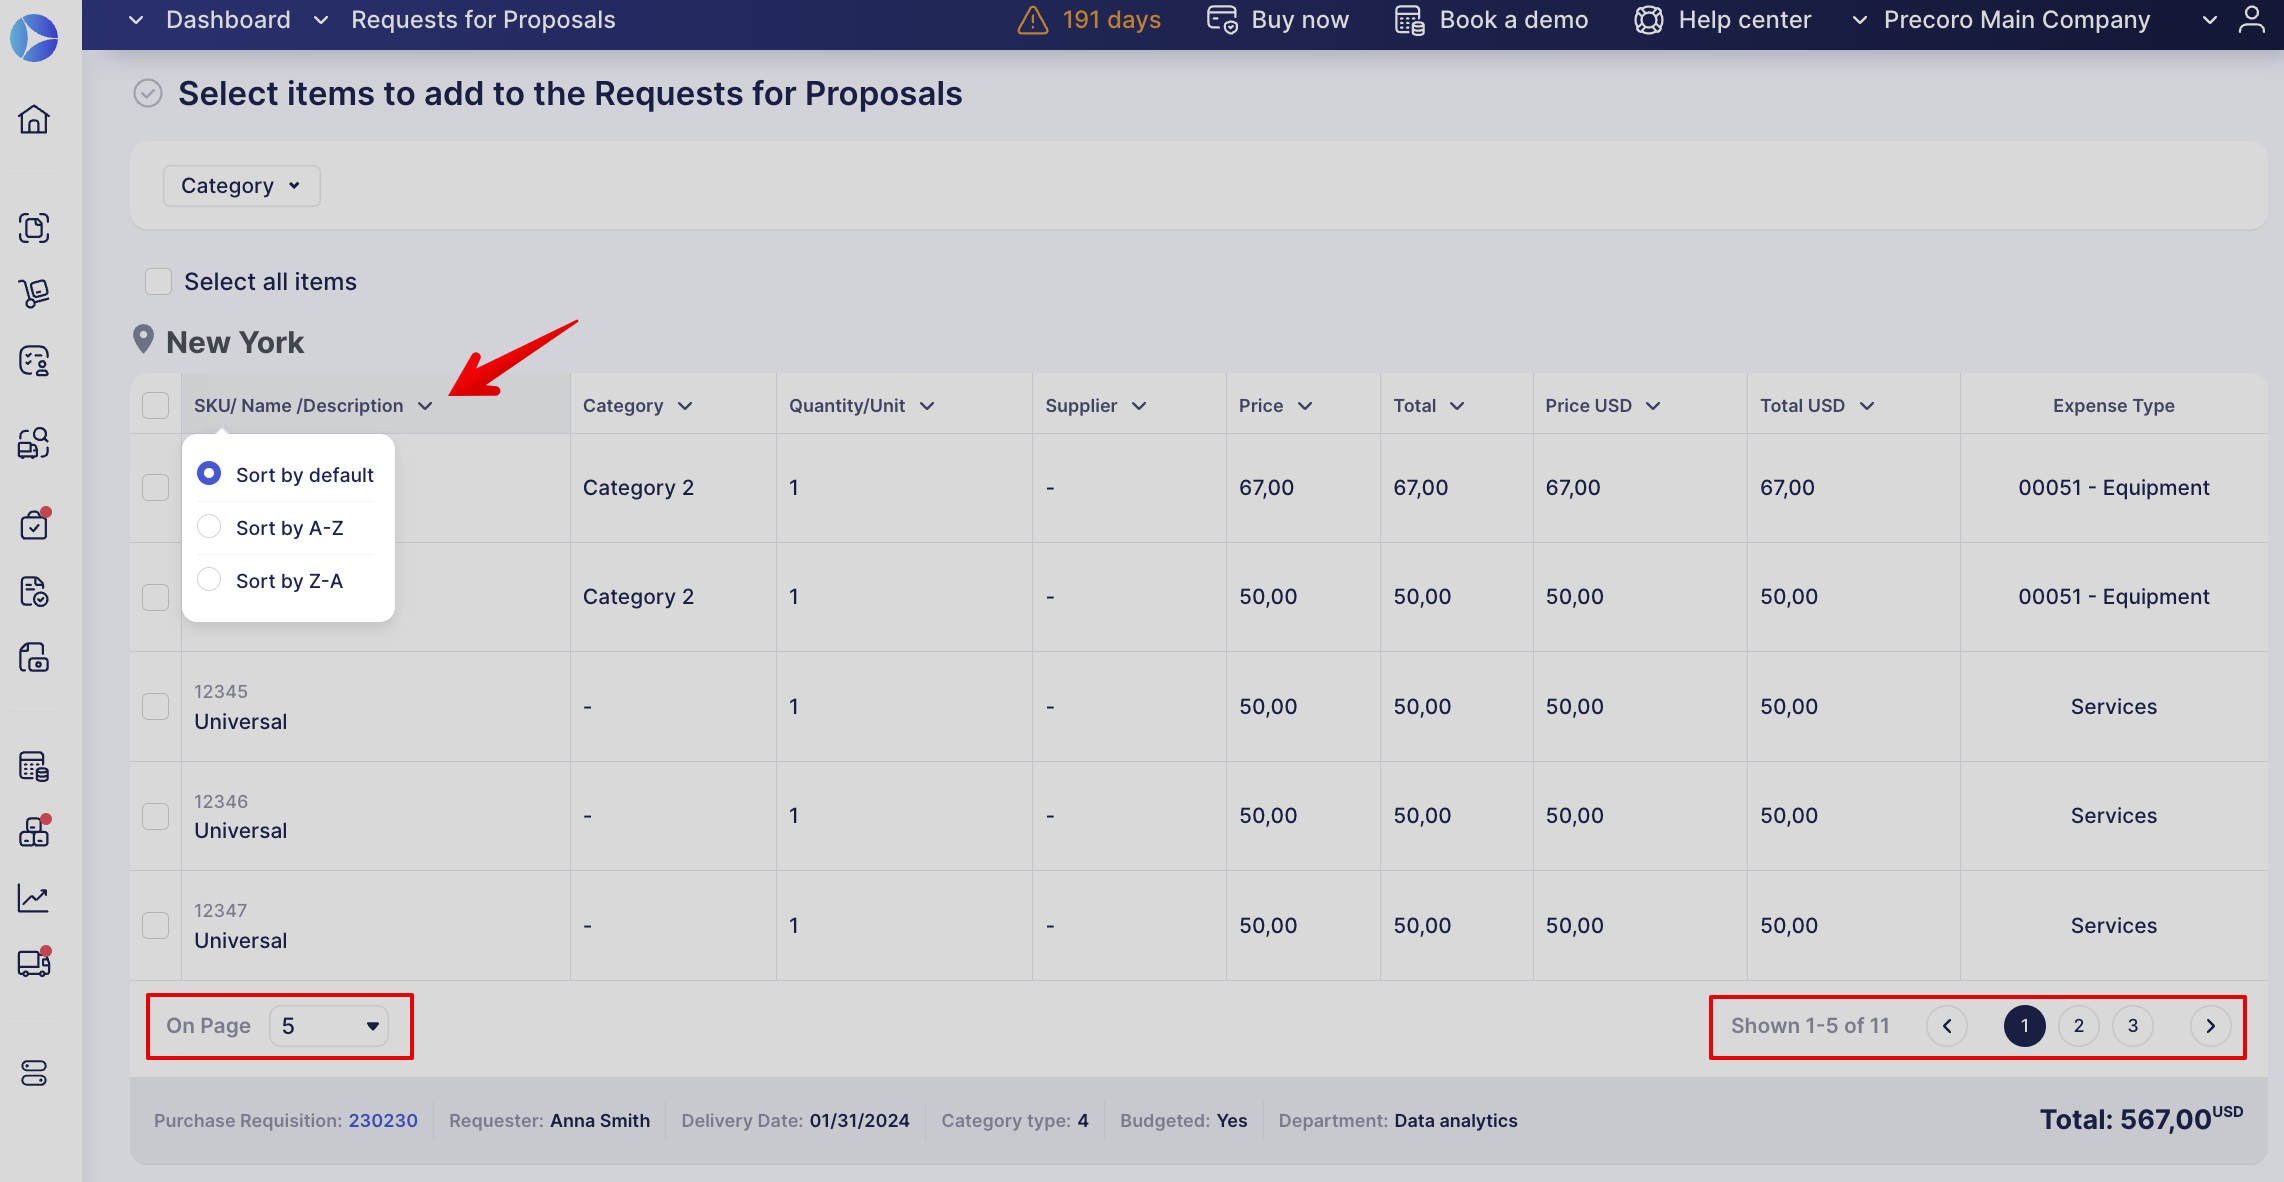
- Icon to show the attachment preview on the Select items and Fill out the details pages.
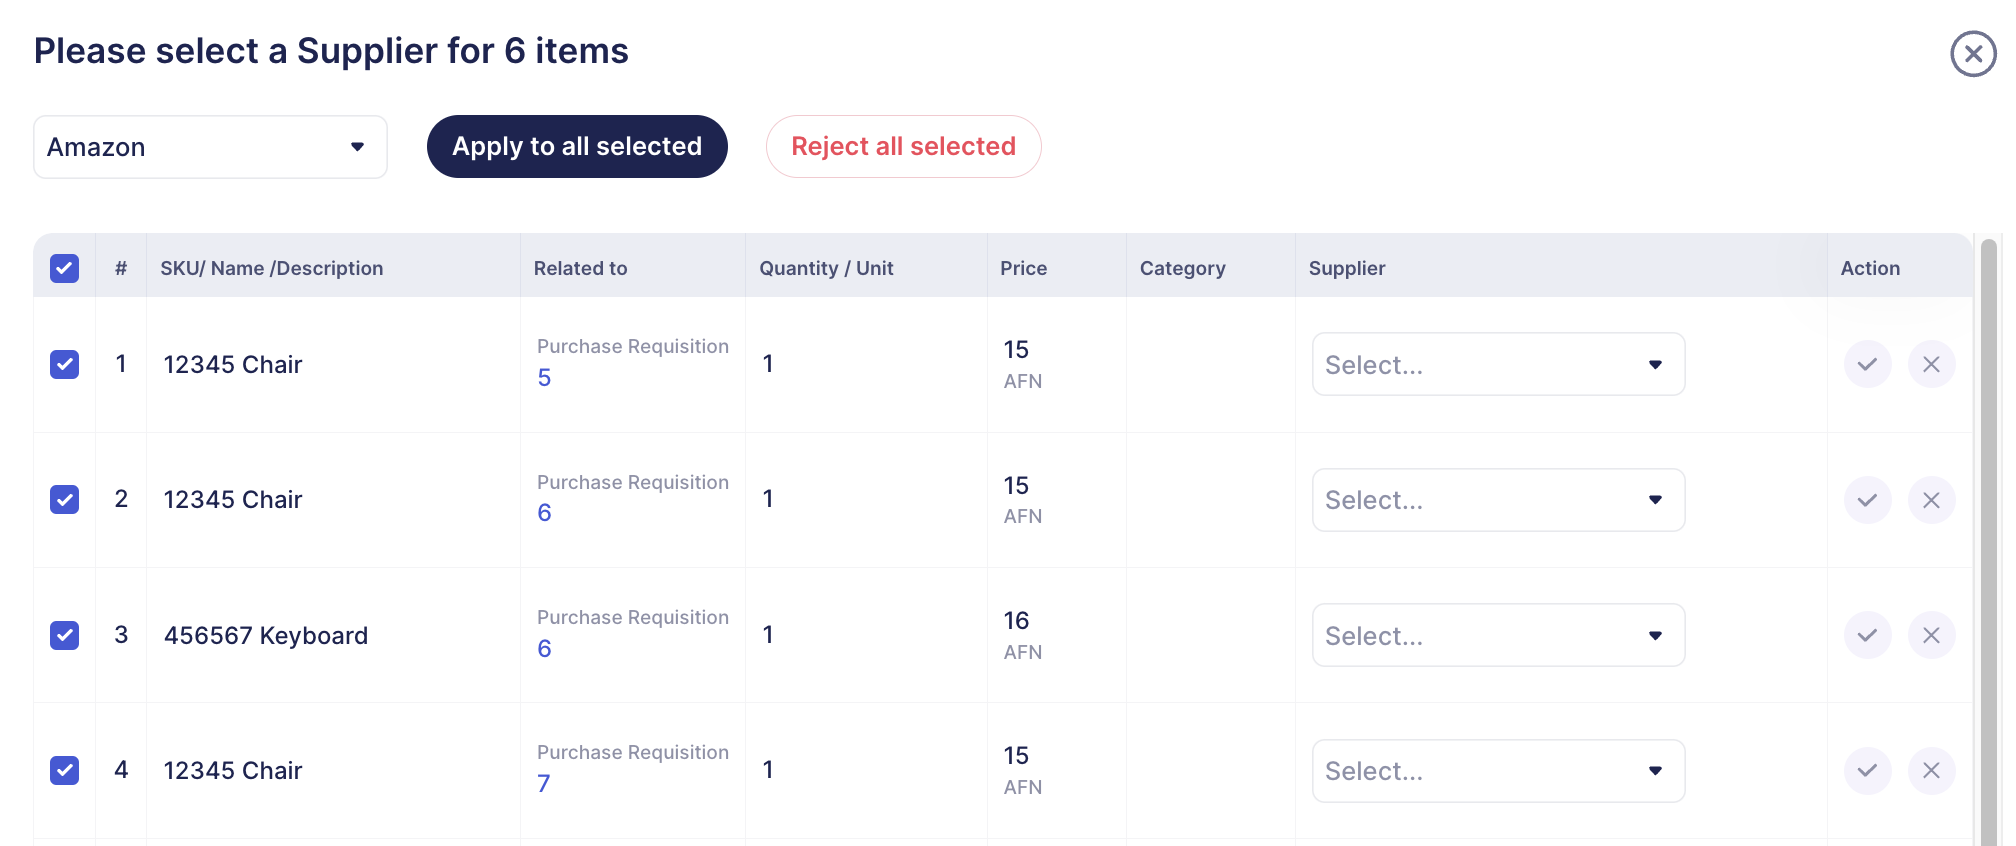
Improved Purchase Orders from the Purchase Requisitions Page
The list of updates includes the following:
- New table design and buttons to go back to the previous pages.
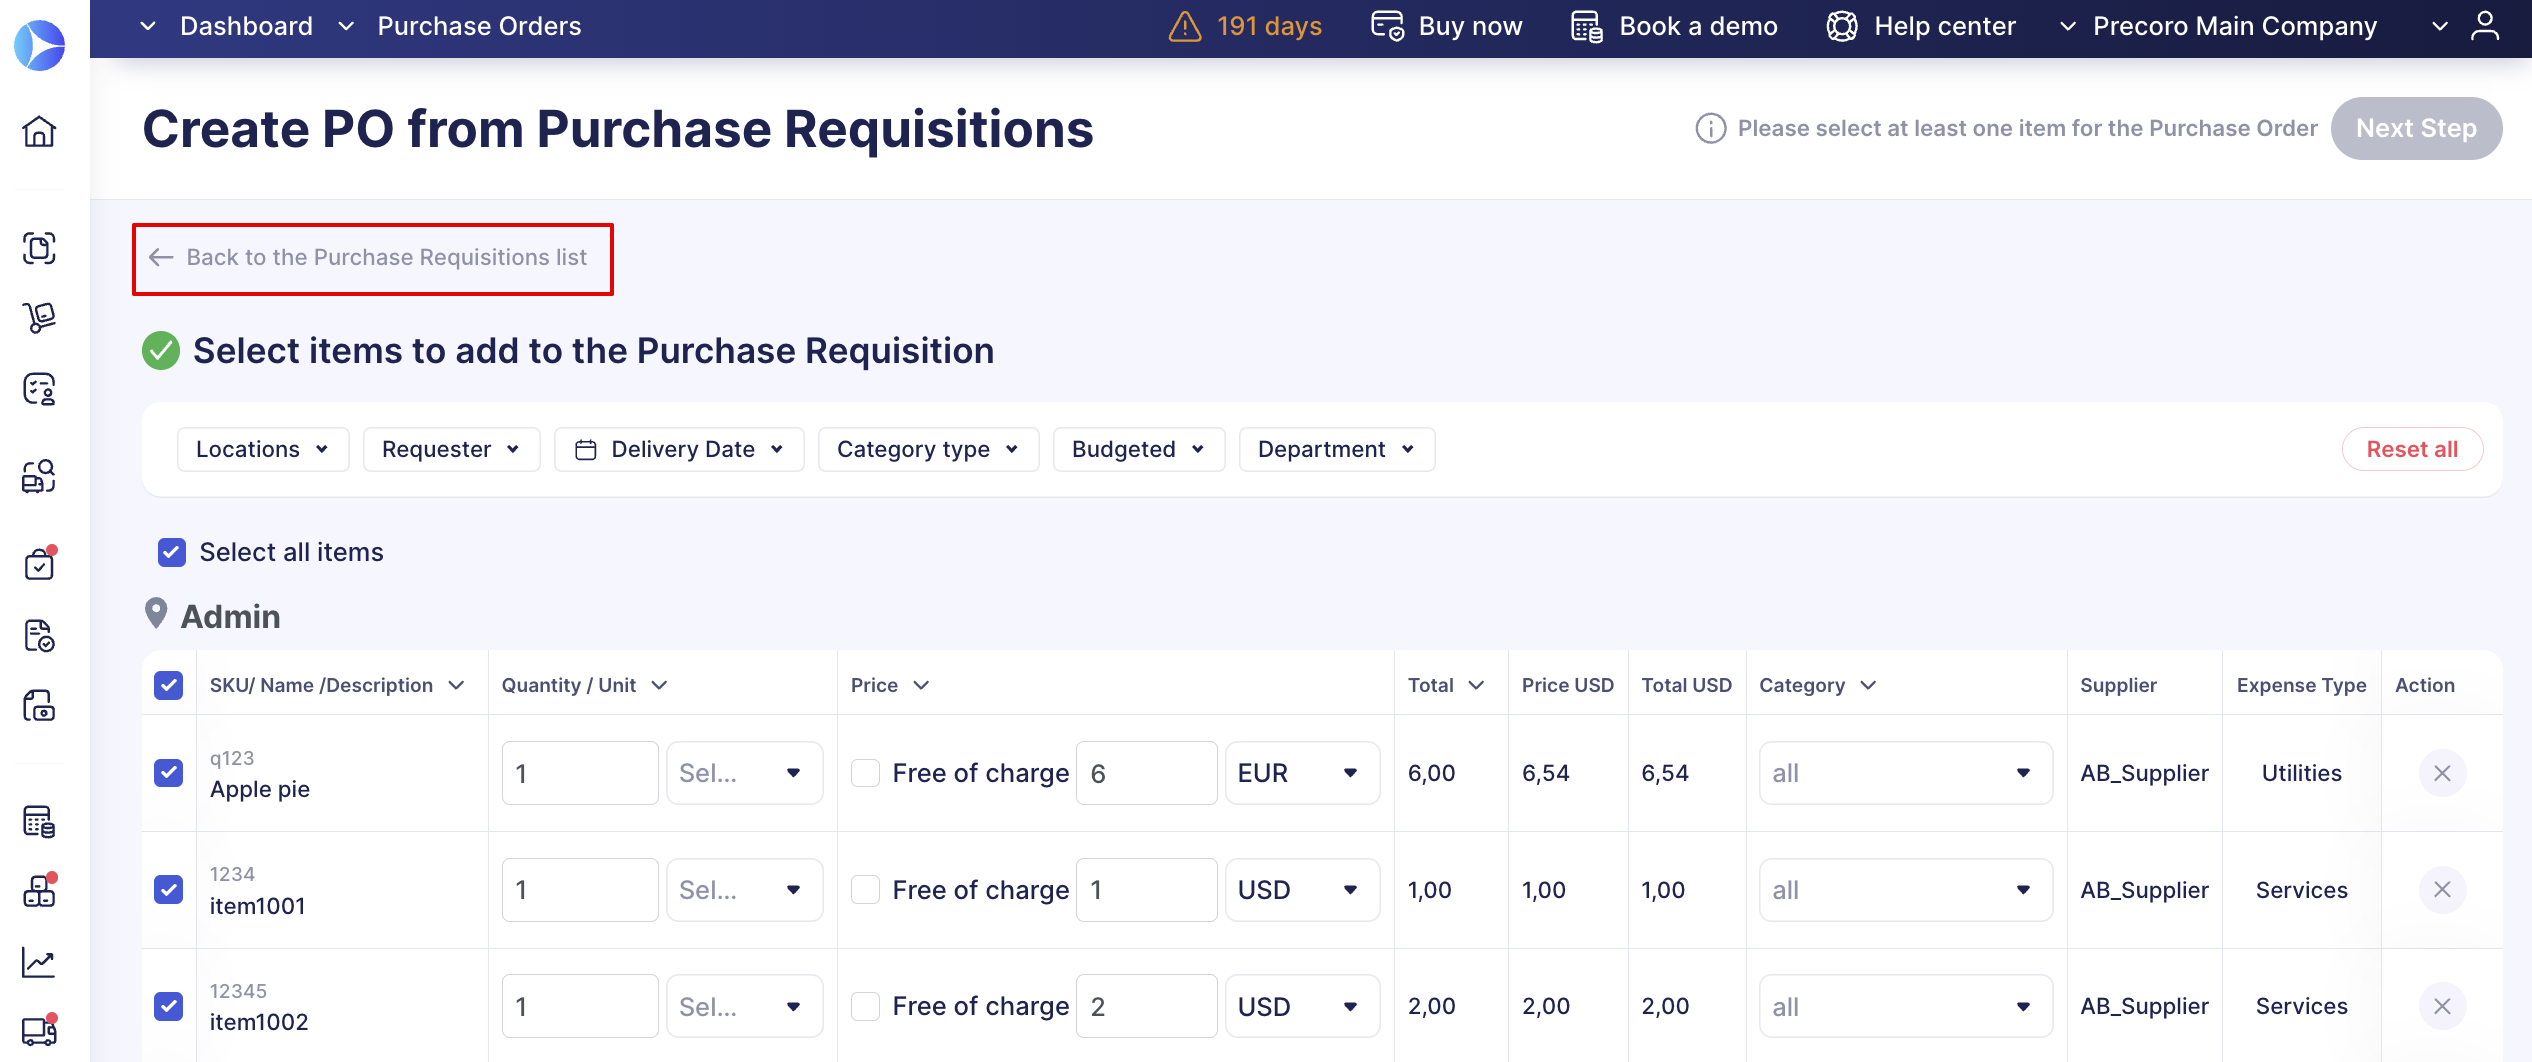
- Fast filter panels on the Select supplier and items pages.
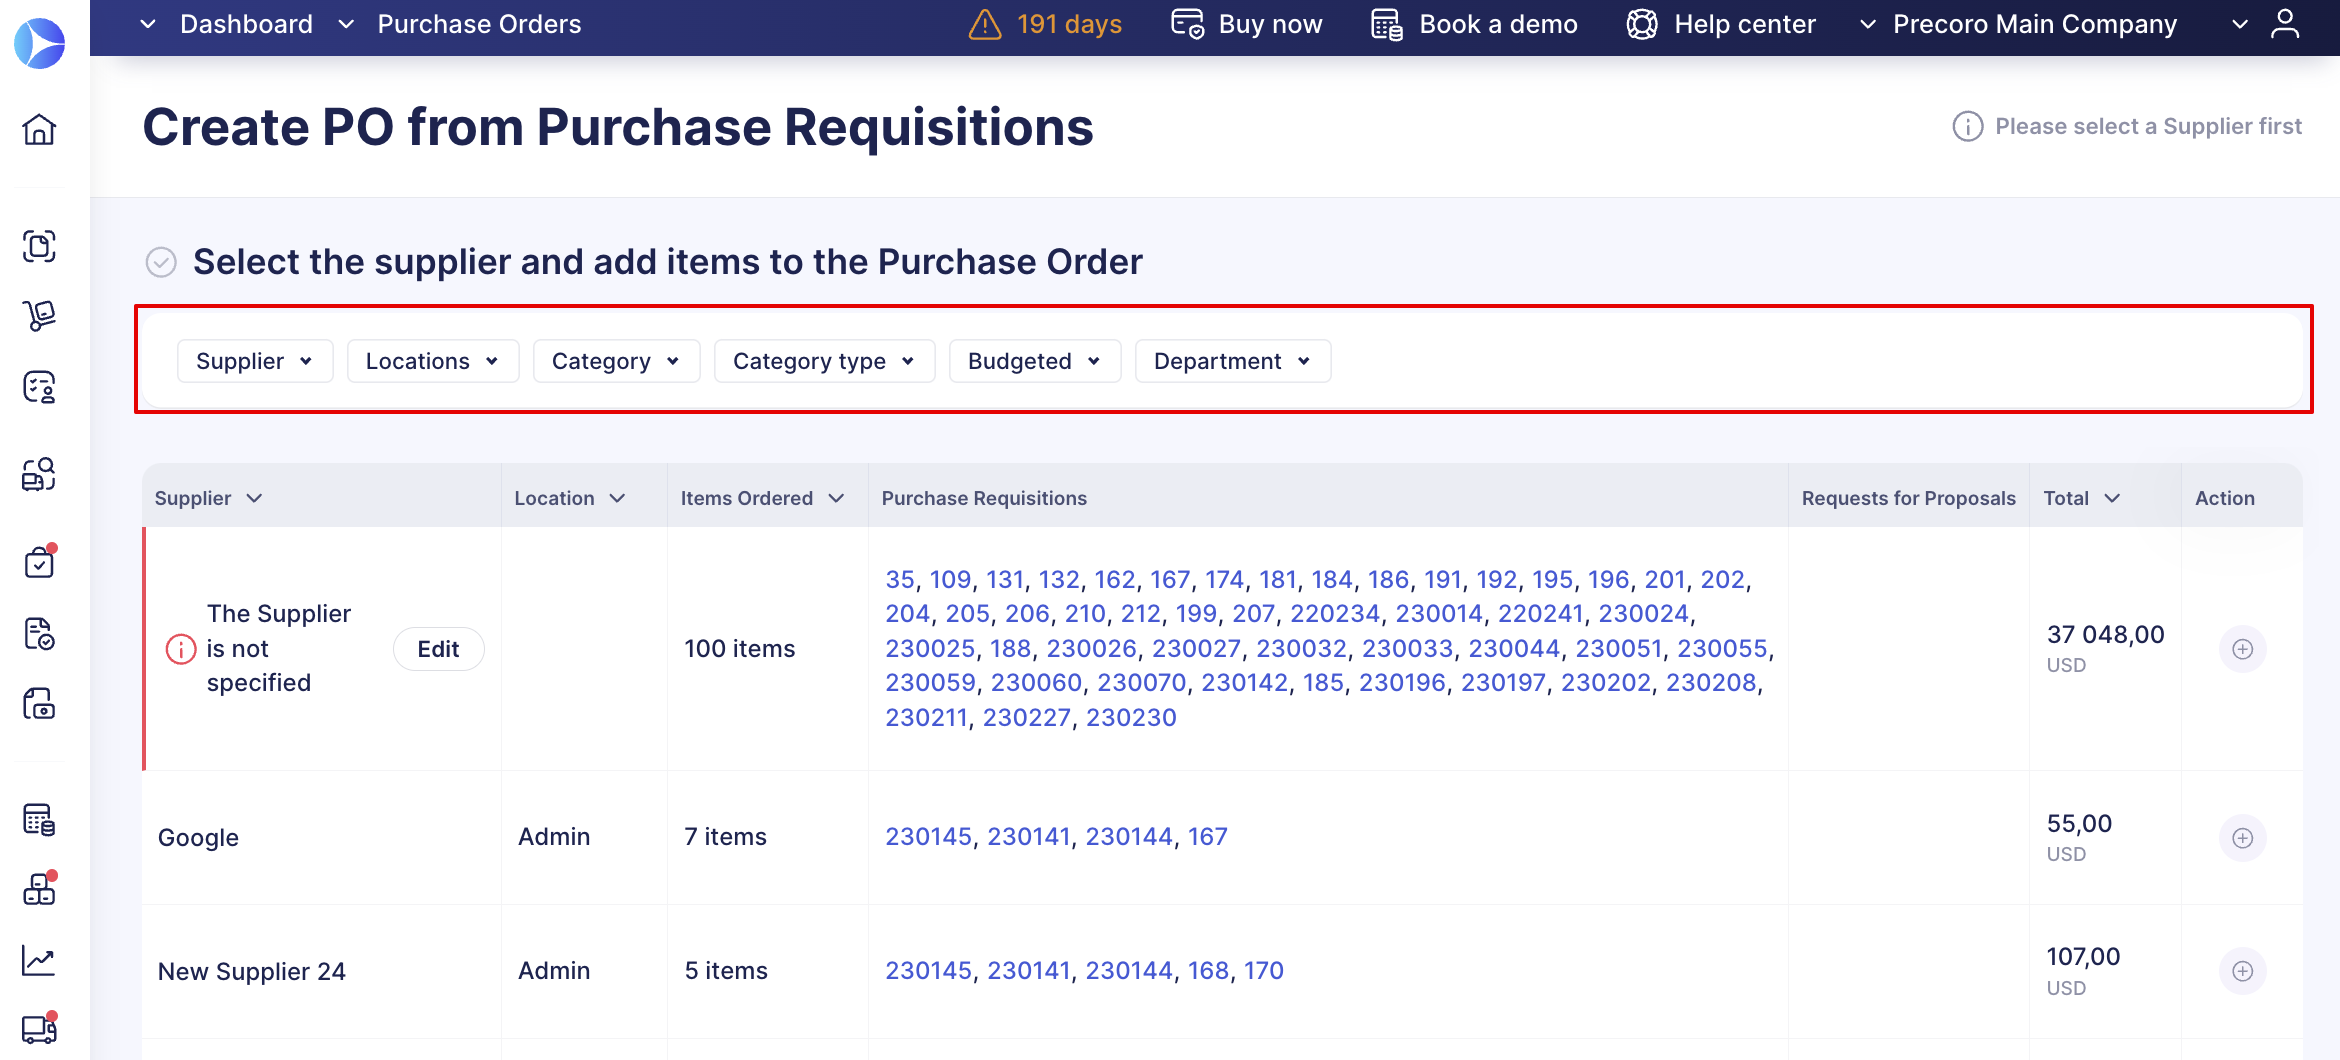
- Column sorting options and pages and Items count.
- Icon to show the attachment preview on the Select items and Fill out the details pages.
- Select a Supplier that has not been specified yet.
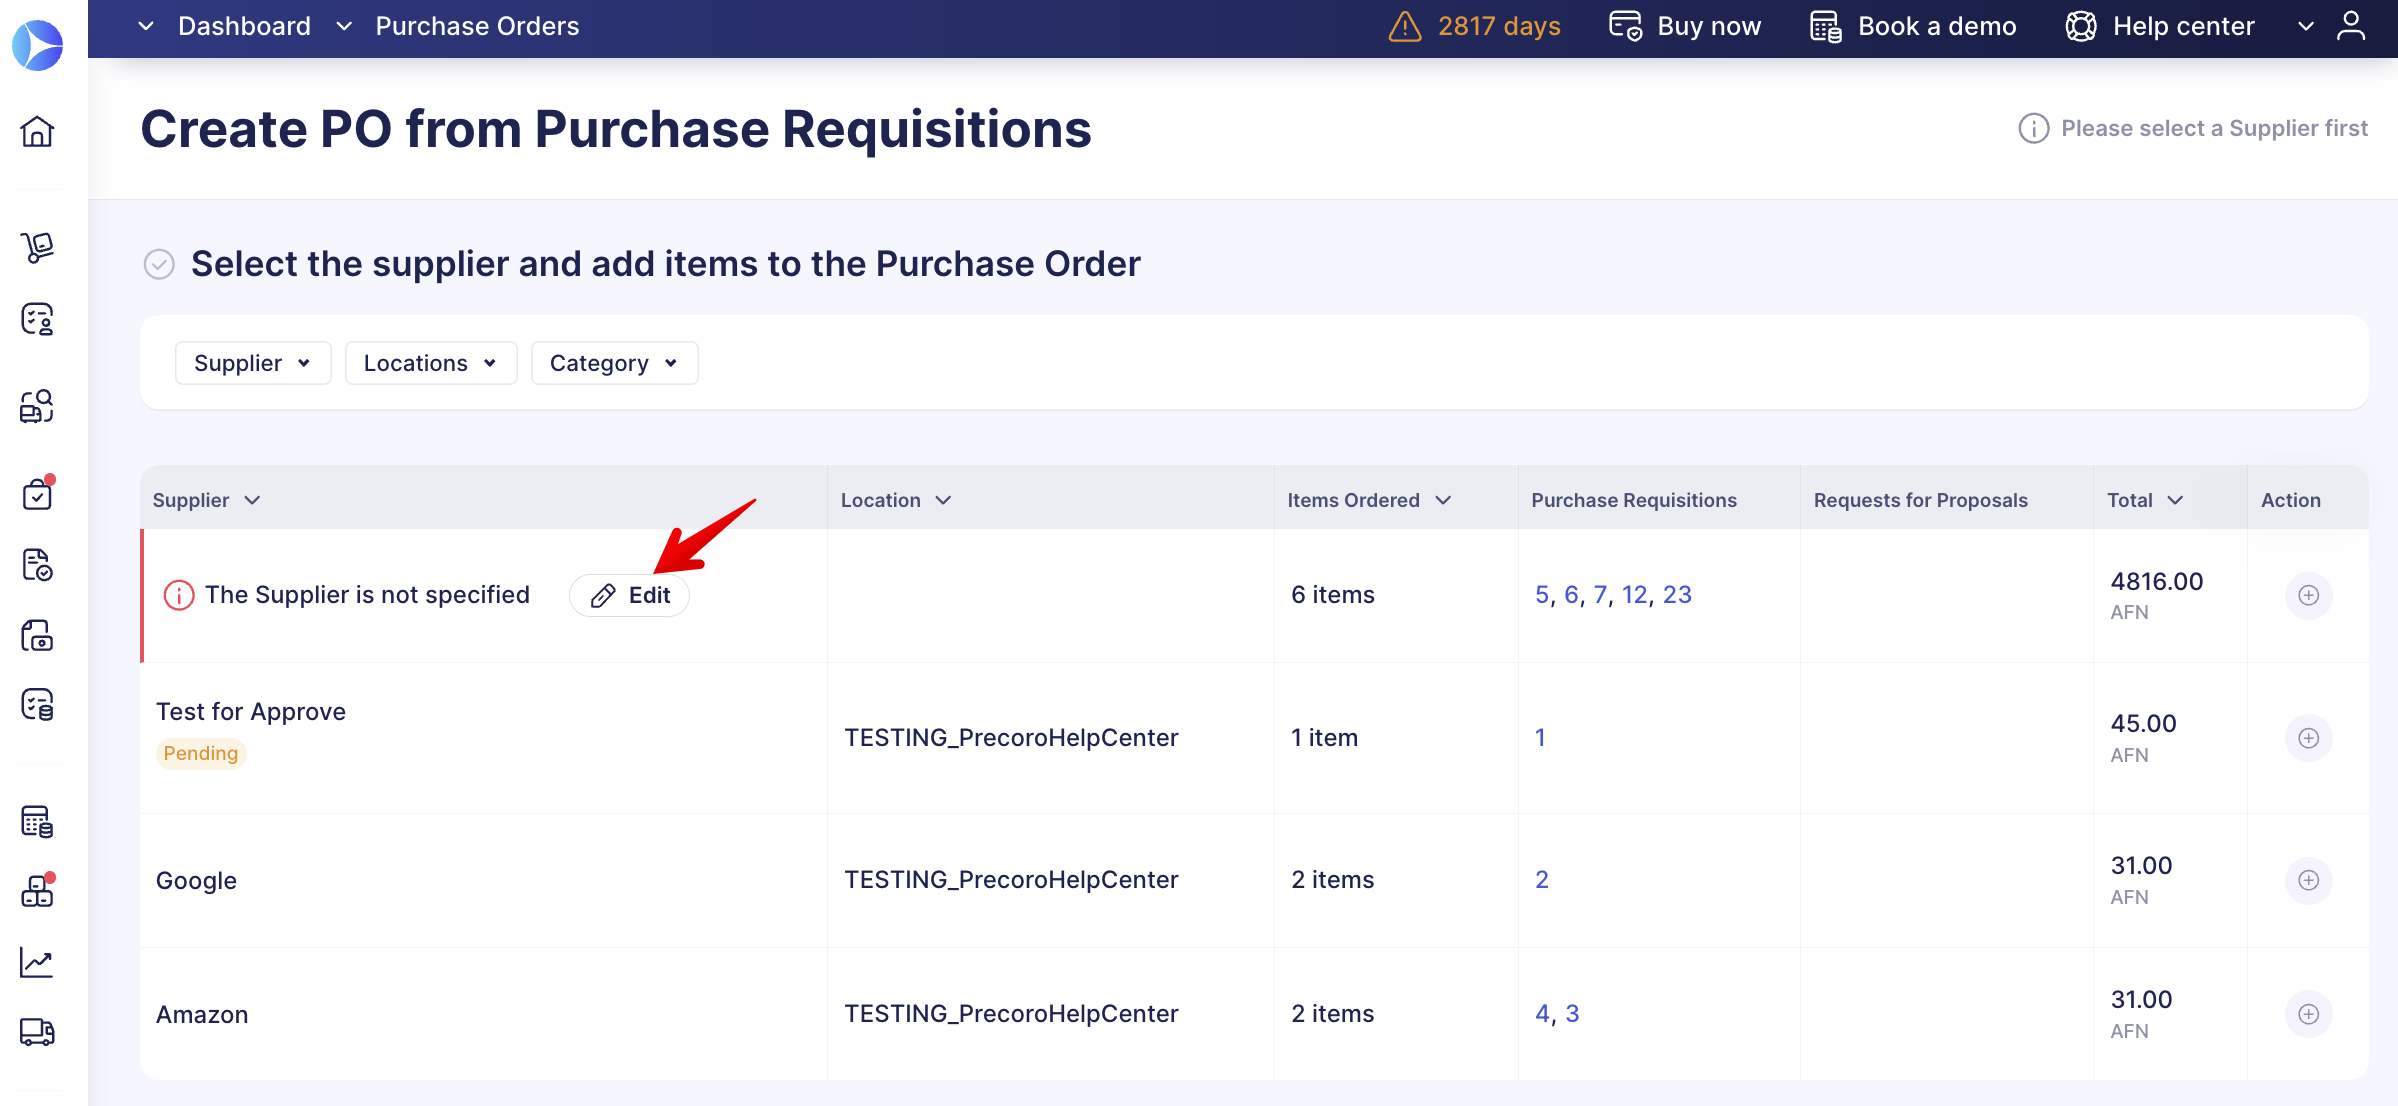
- Set a Supplier for each item individually or for all at once.
- Approve and Reject items in the list.
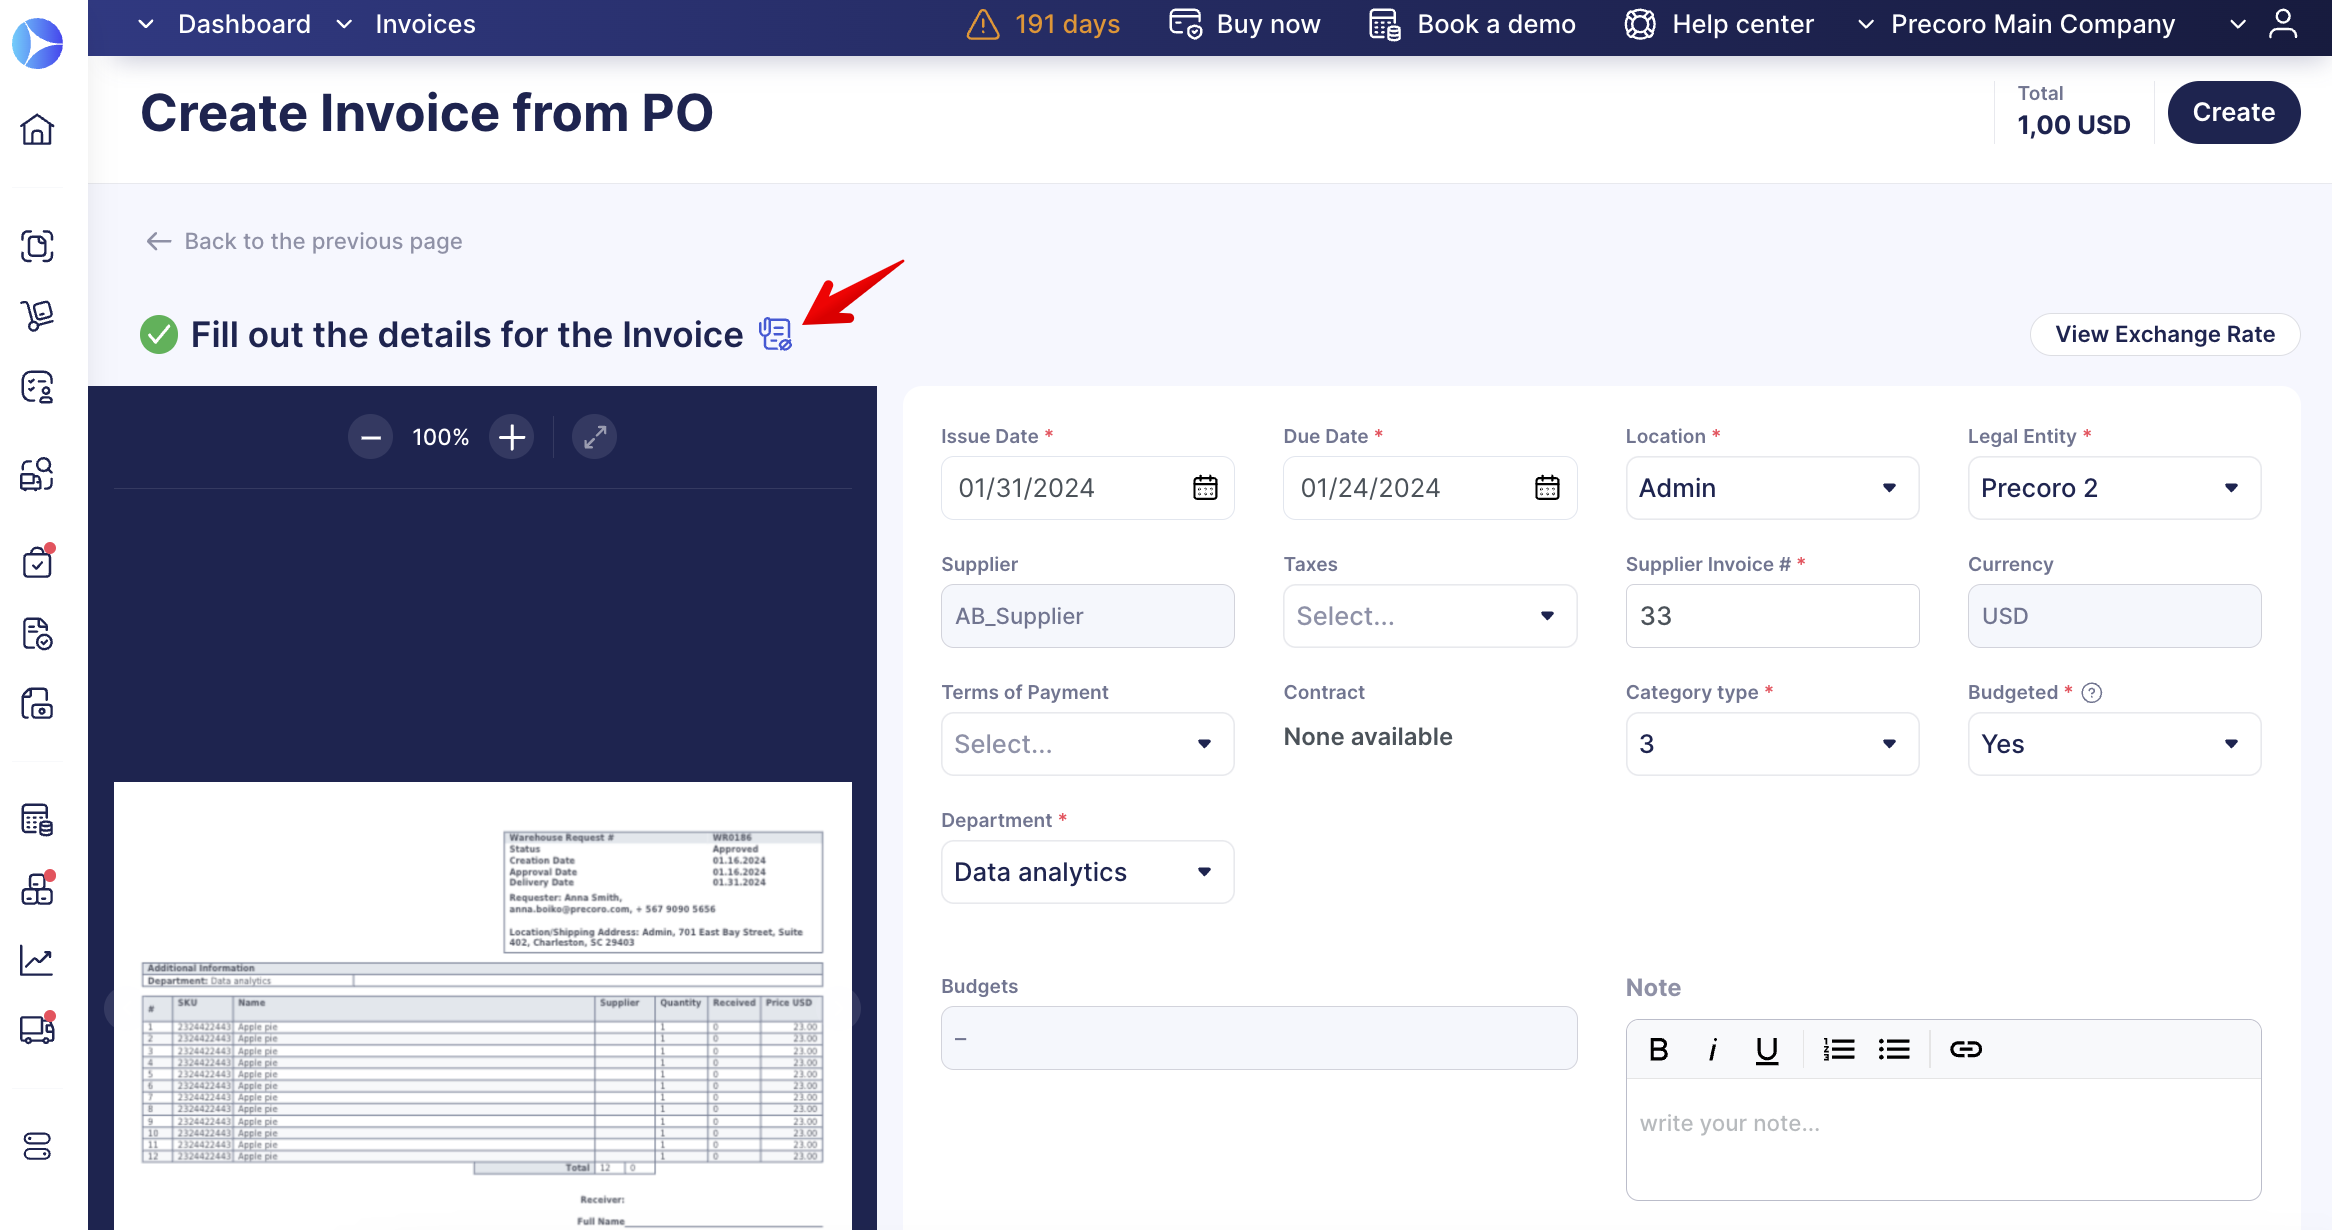
Improved Invoices from the Purchase Order Page
The list of updates includes the following:
- New table design and buttons to go back to the previous pages.
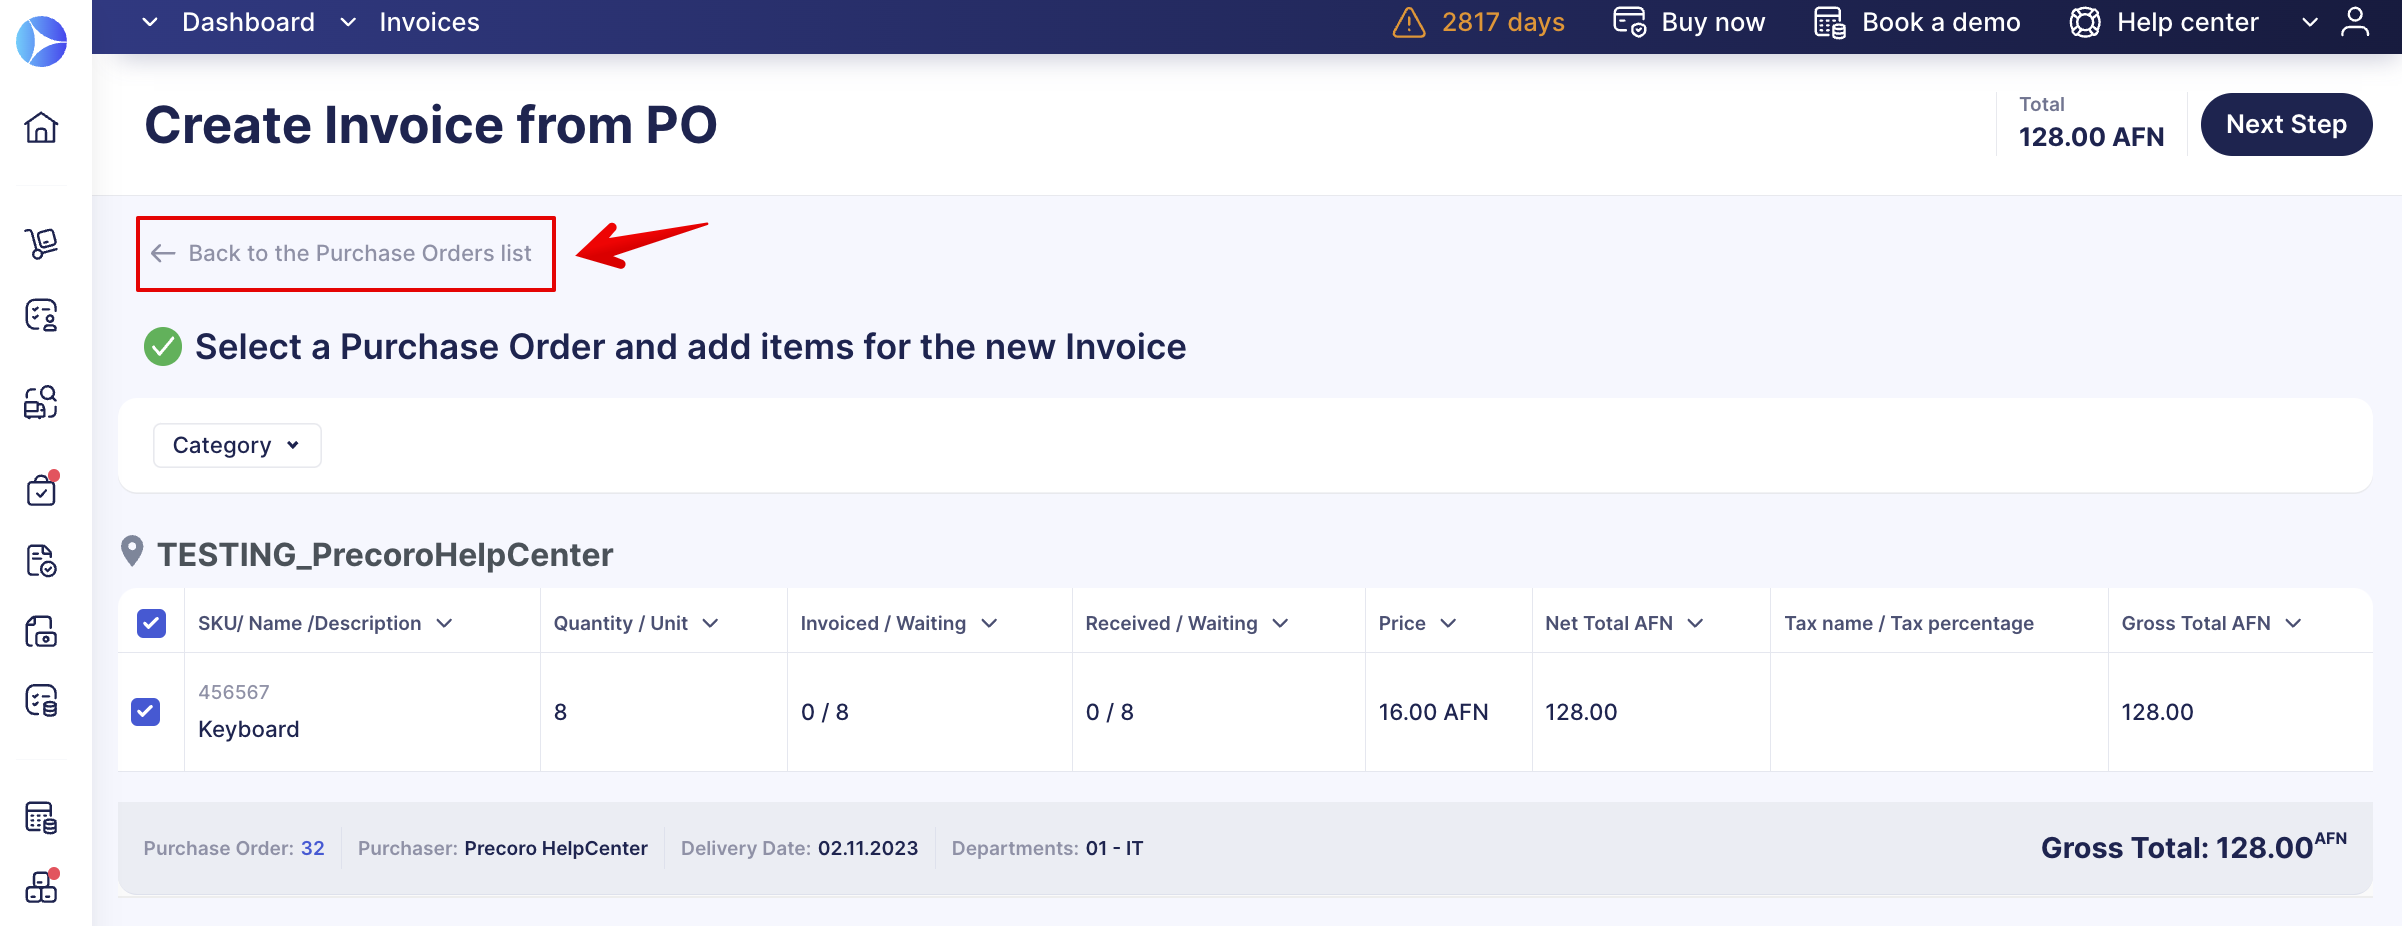
- Fast filter panels and updated advanced filter design.
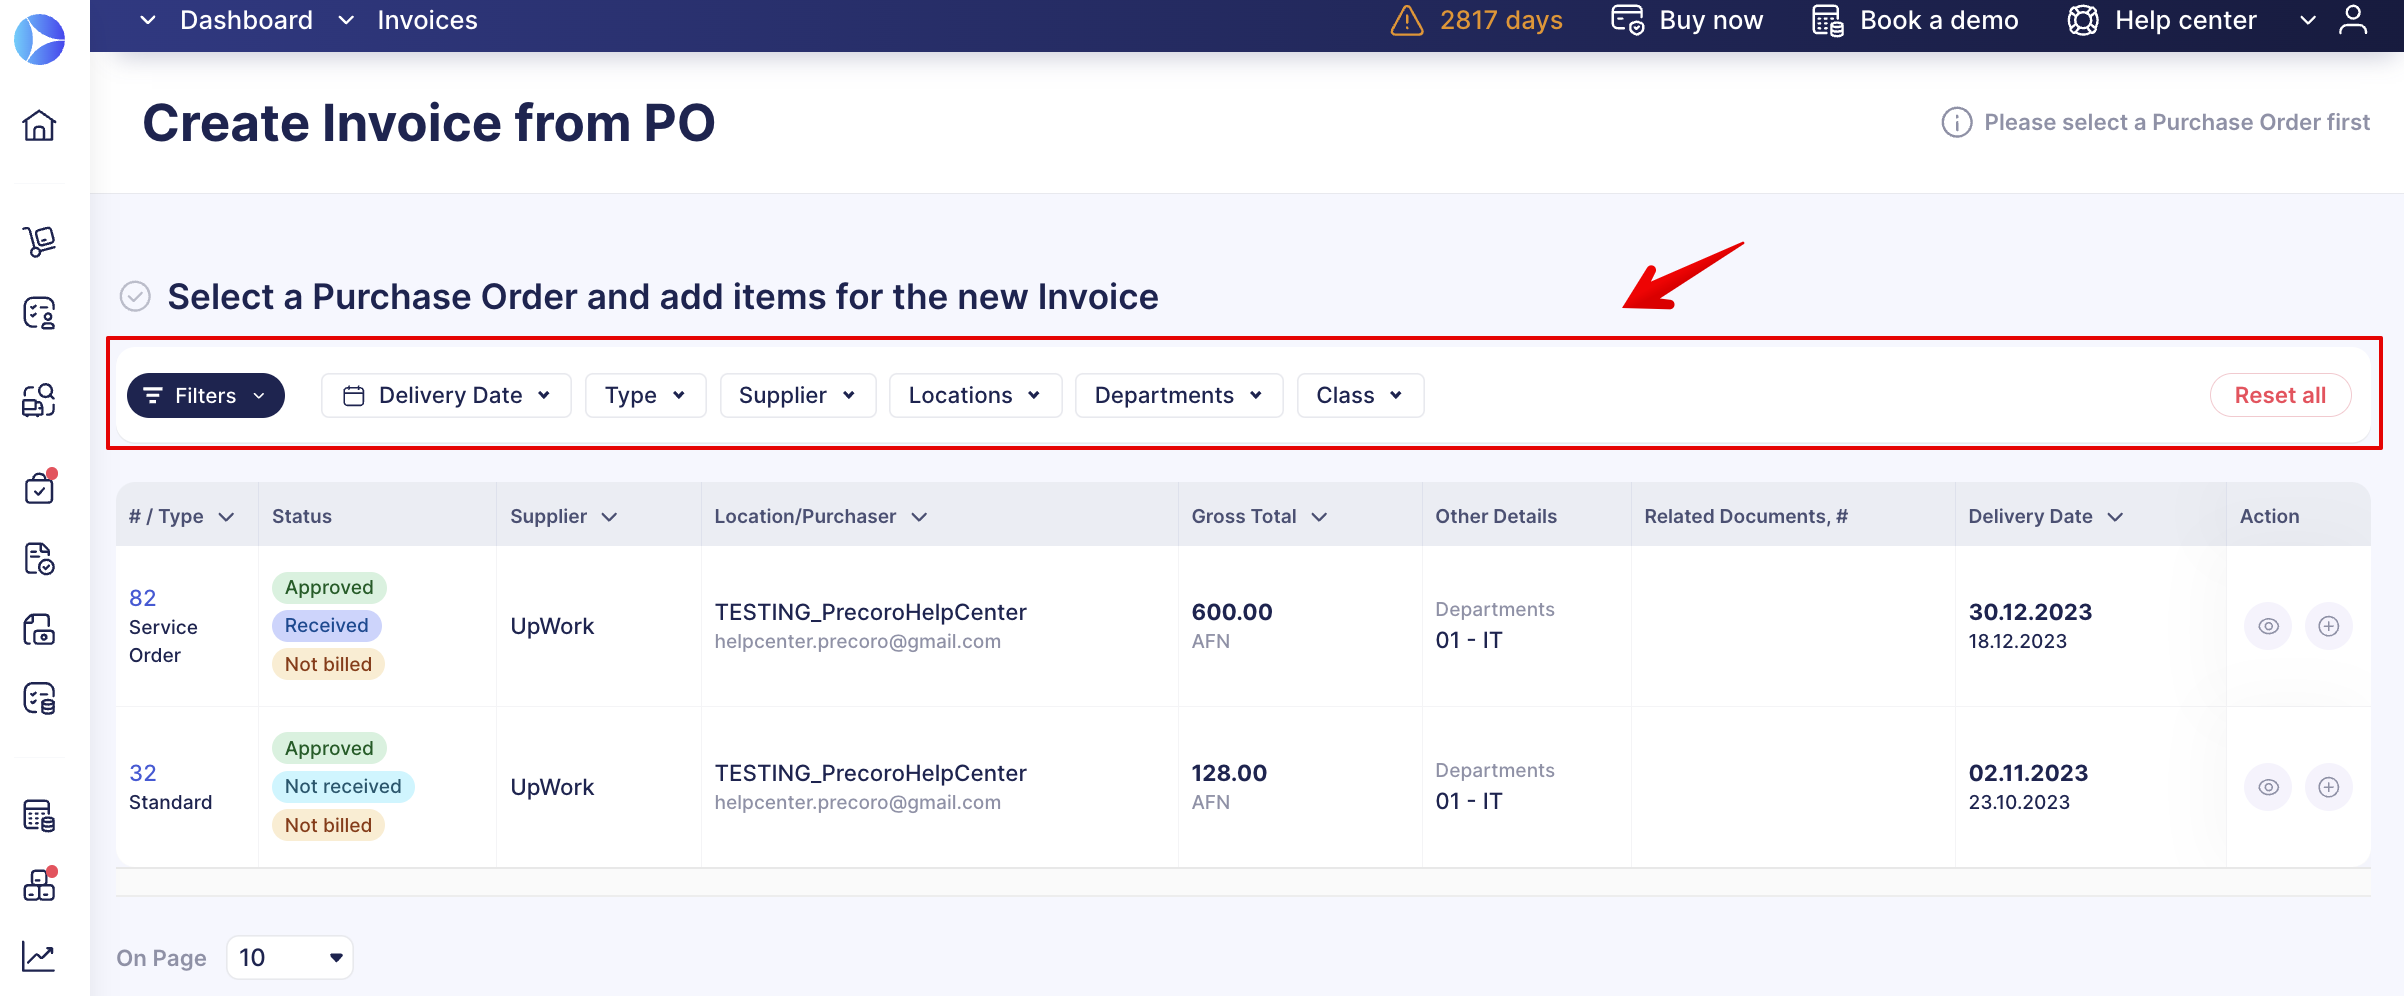
- Column sorting options.
- Icon to show the attachment preview on the Select a PO and add items and Fill out the details pages.
Improved Receipts from the Purchase Order Page
The list of updates includes the following:
- New table design and buttons to go back to the previous pages.
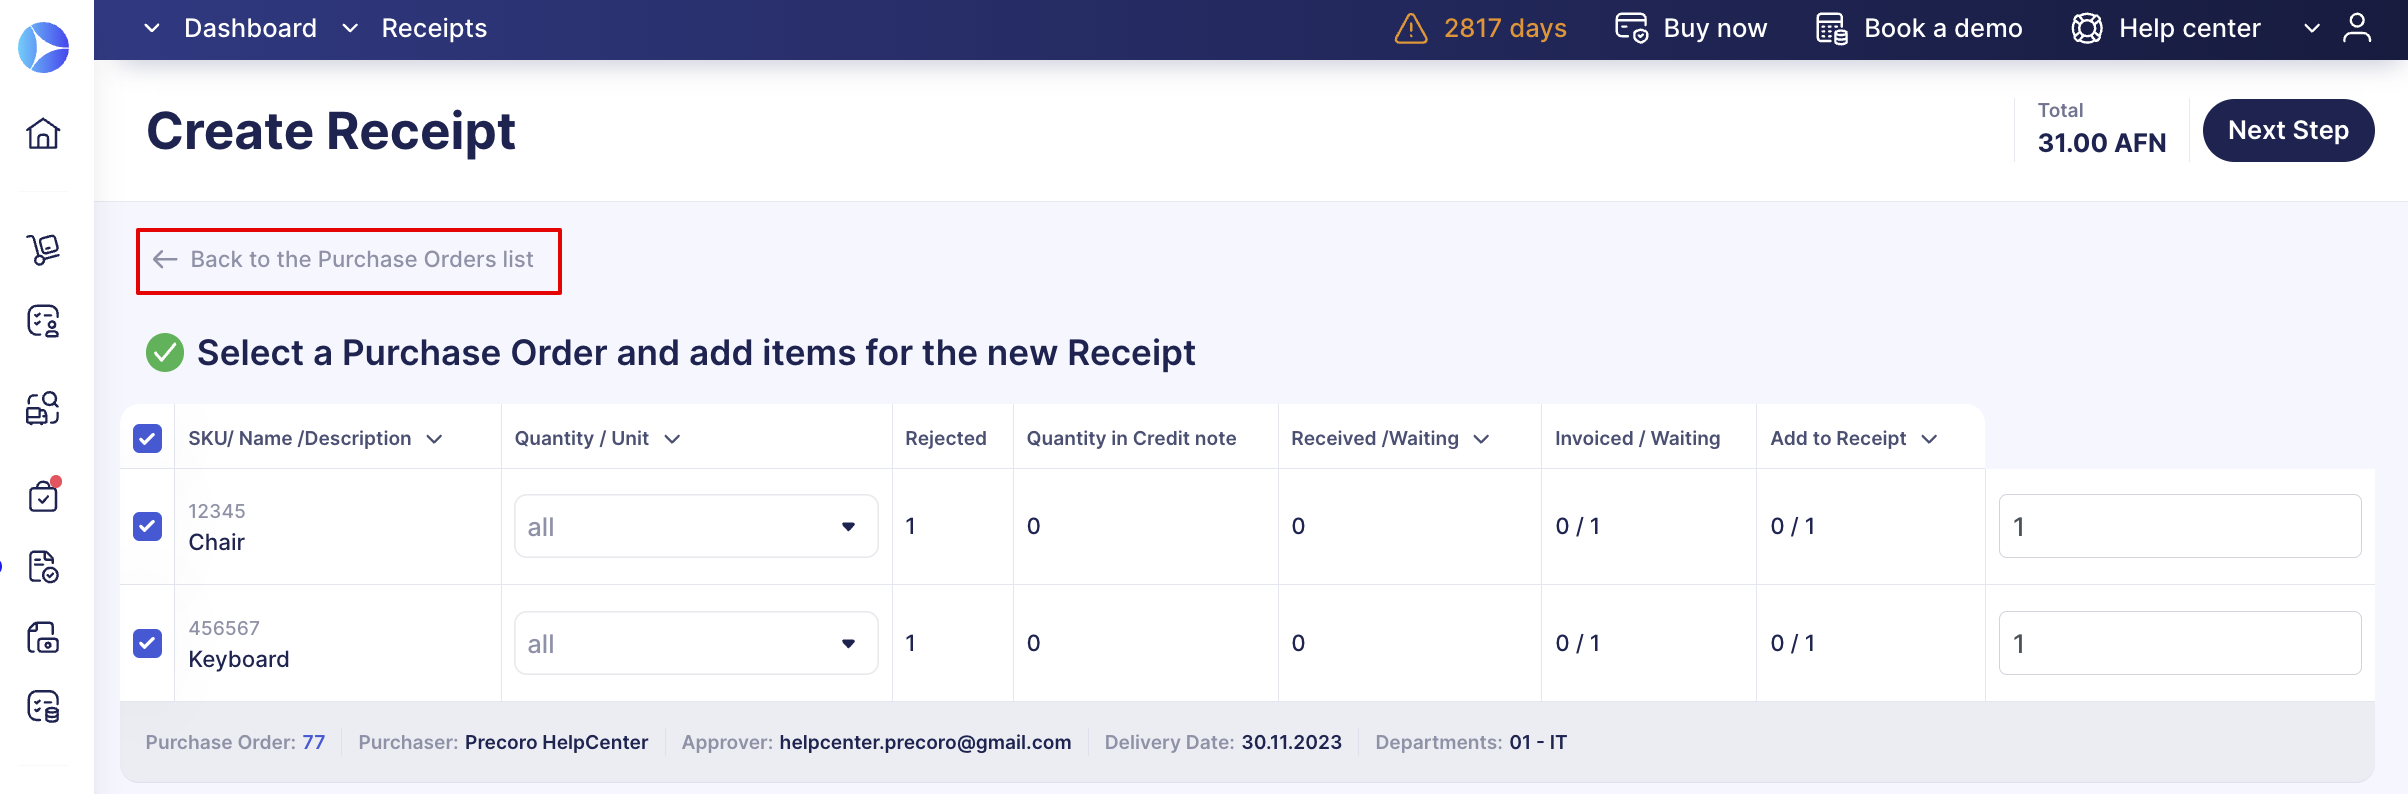
- Fast filter panels on the Select a Purchase Order and add items pages.
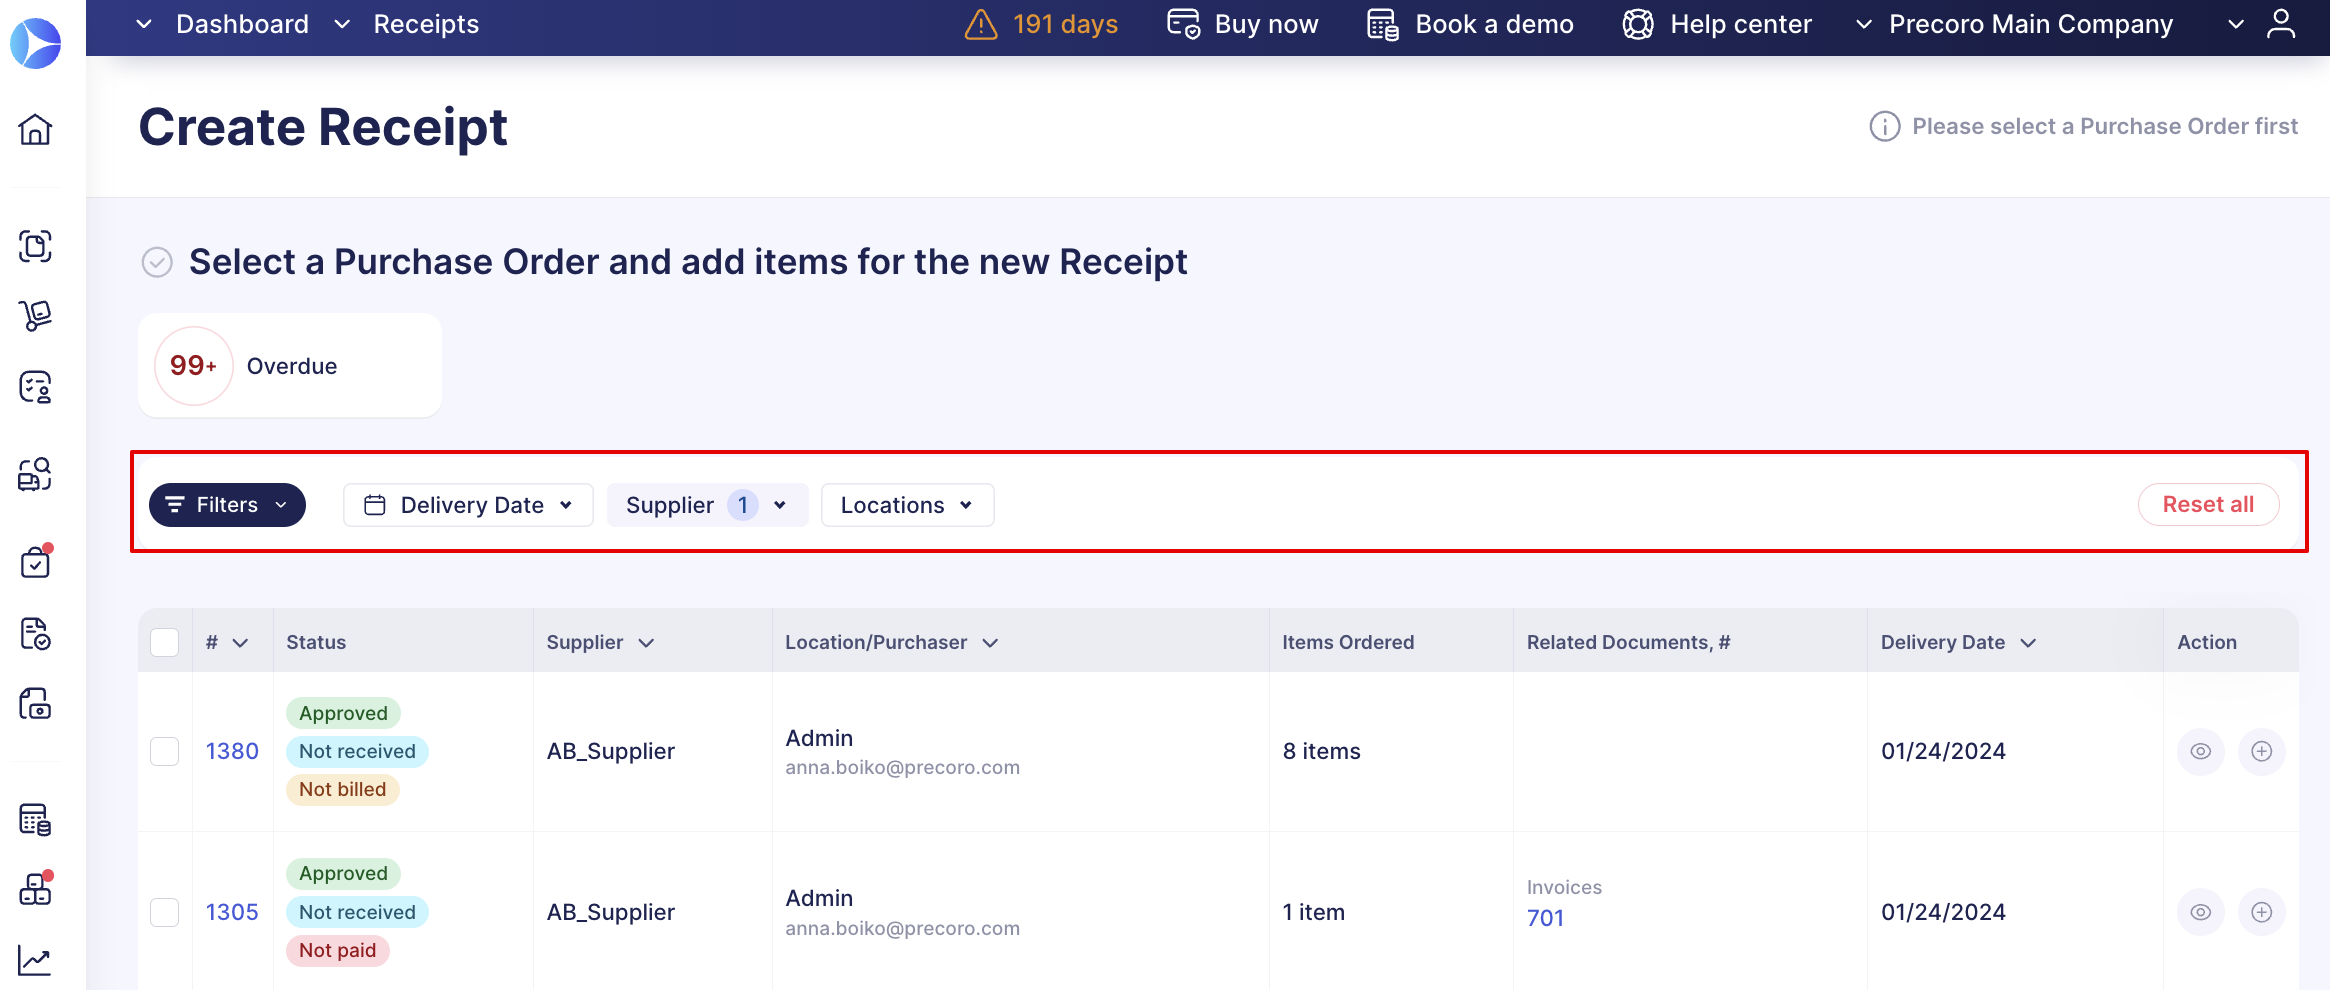
- Column sorting options and pages and Items count.
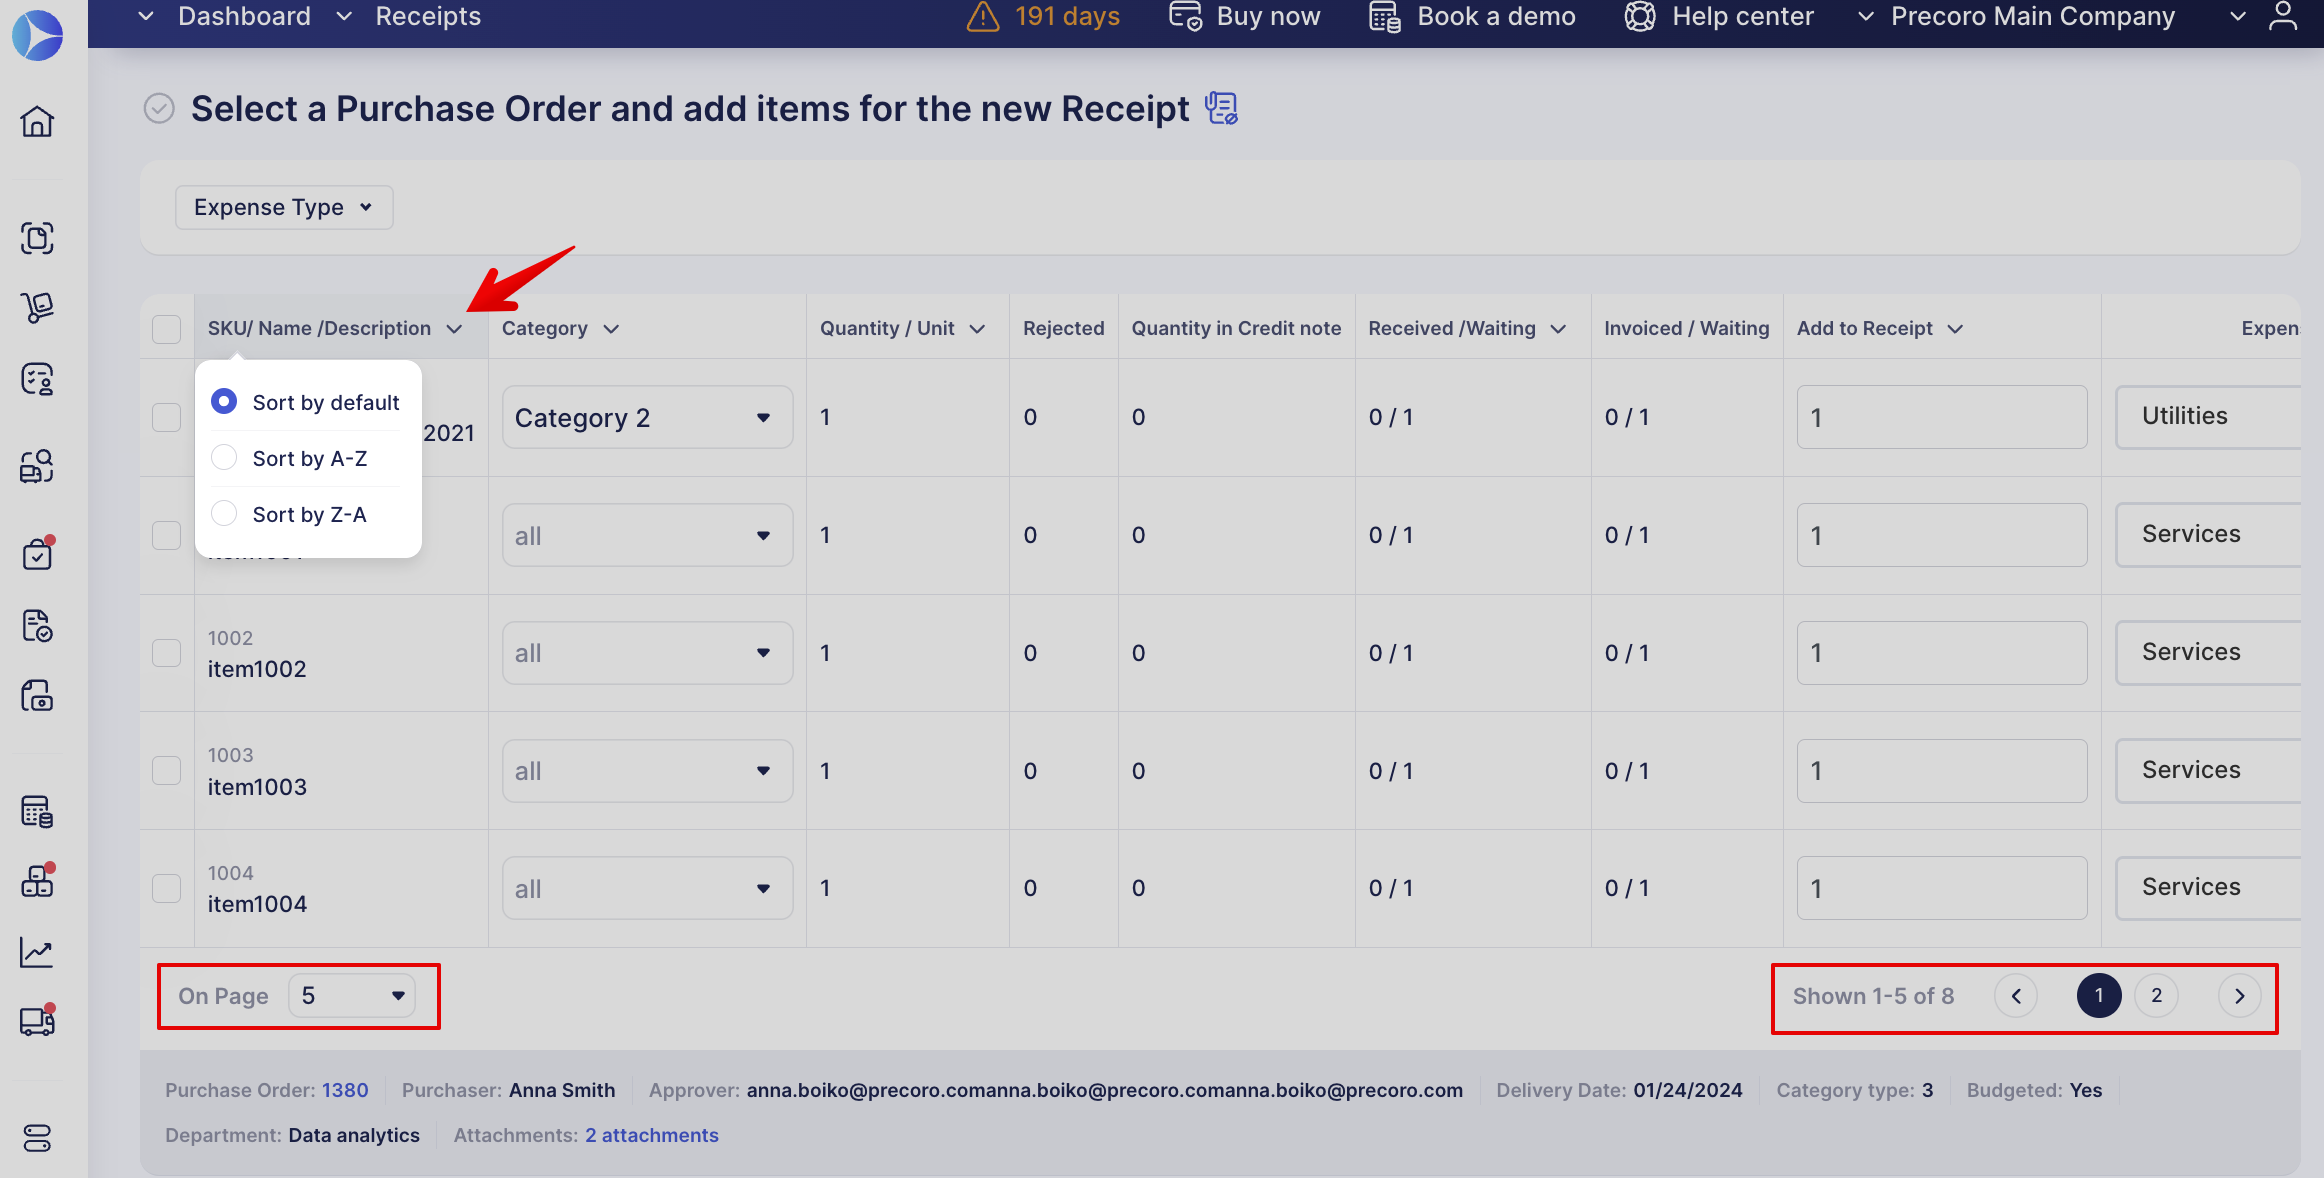
- Icon to show the attachment preview on the Select a Purchase Order and add items and Fill out the details pages.
We hope you are pleased with all the new design changes. In the near future, we will be launching a survey form to collect all your thoughts and opinions.
We would greatly appreciate your feedback, so stay tuned for the form!
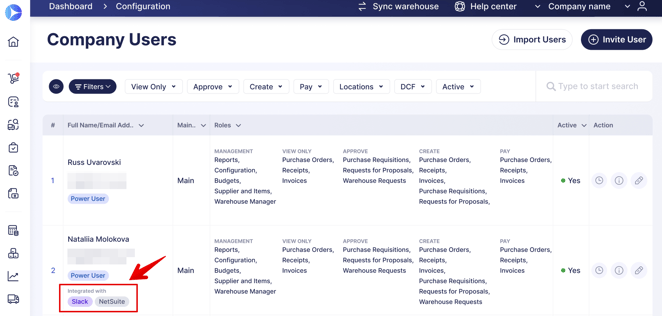
Added Clear User Integration Labels
We have added a new labels section to the User Management Page, Integrated with. In this section, you will be able to quickly identify what integrations the user has.
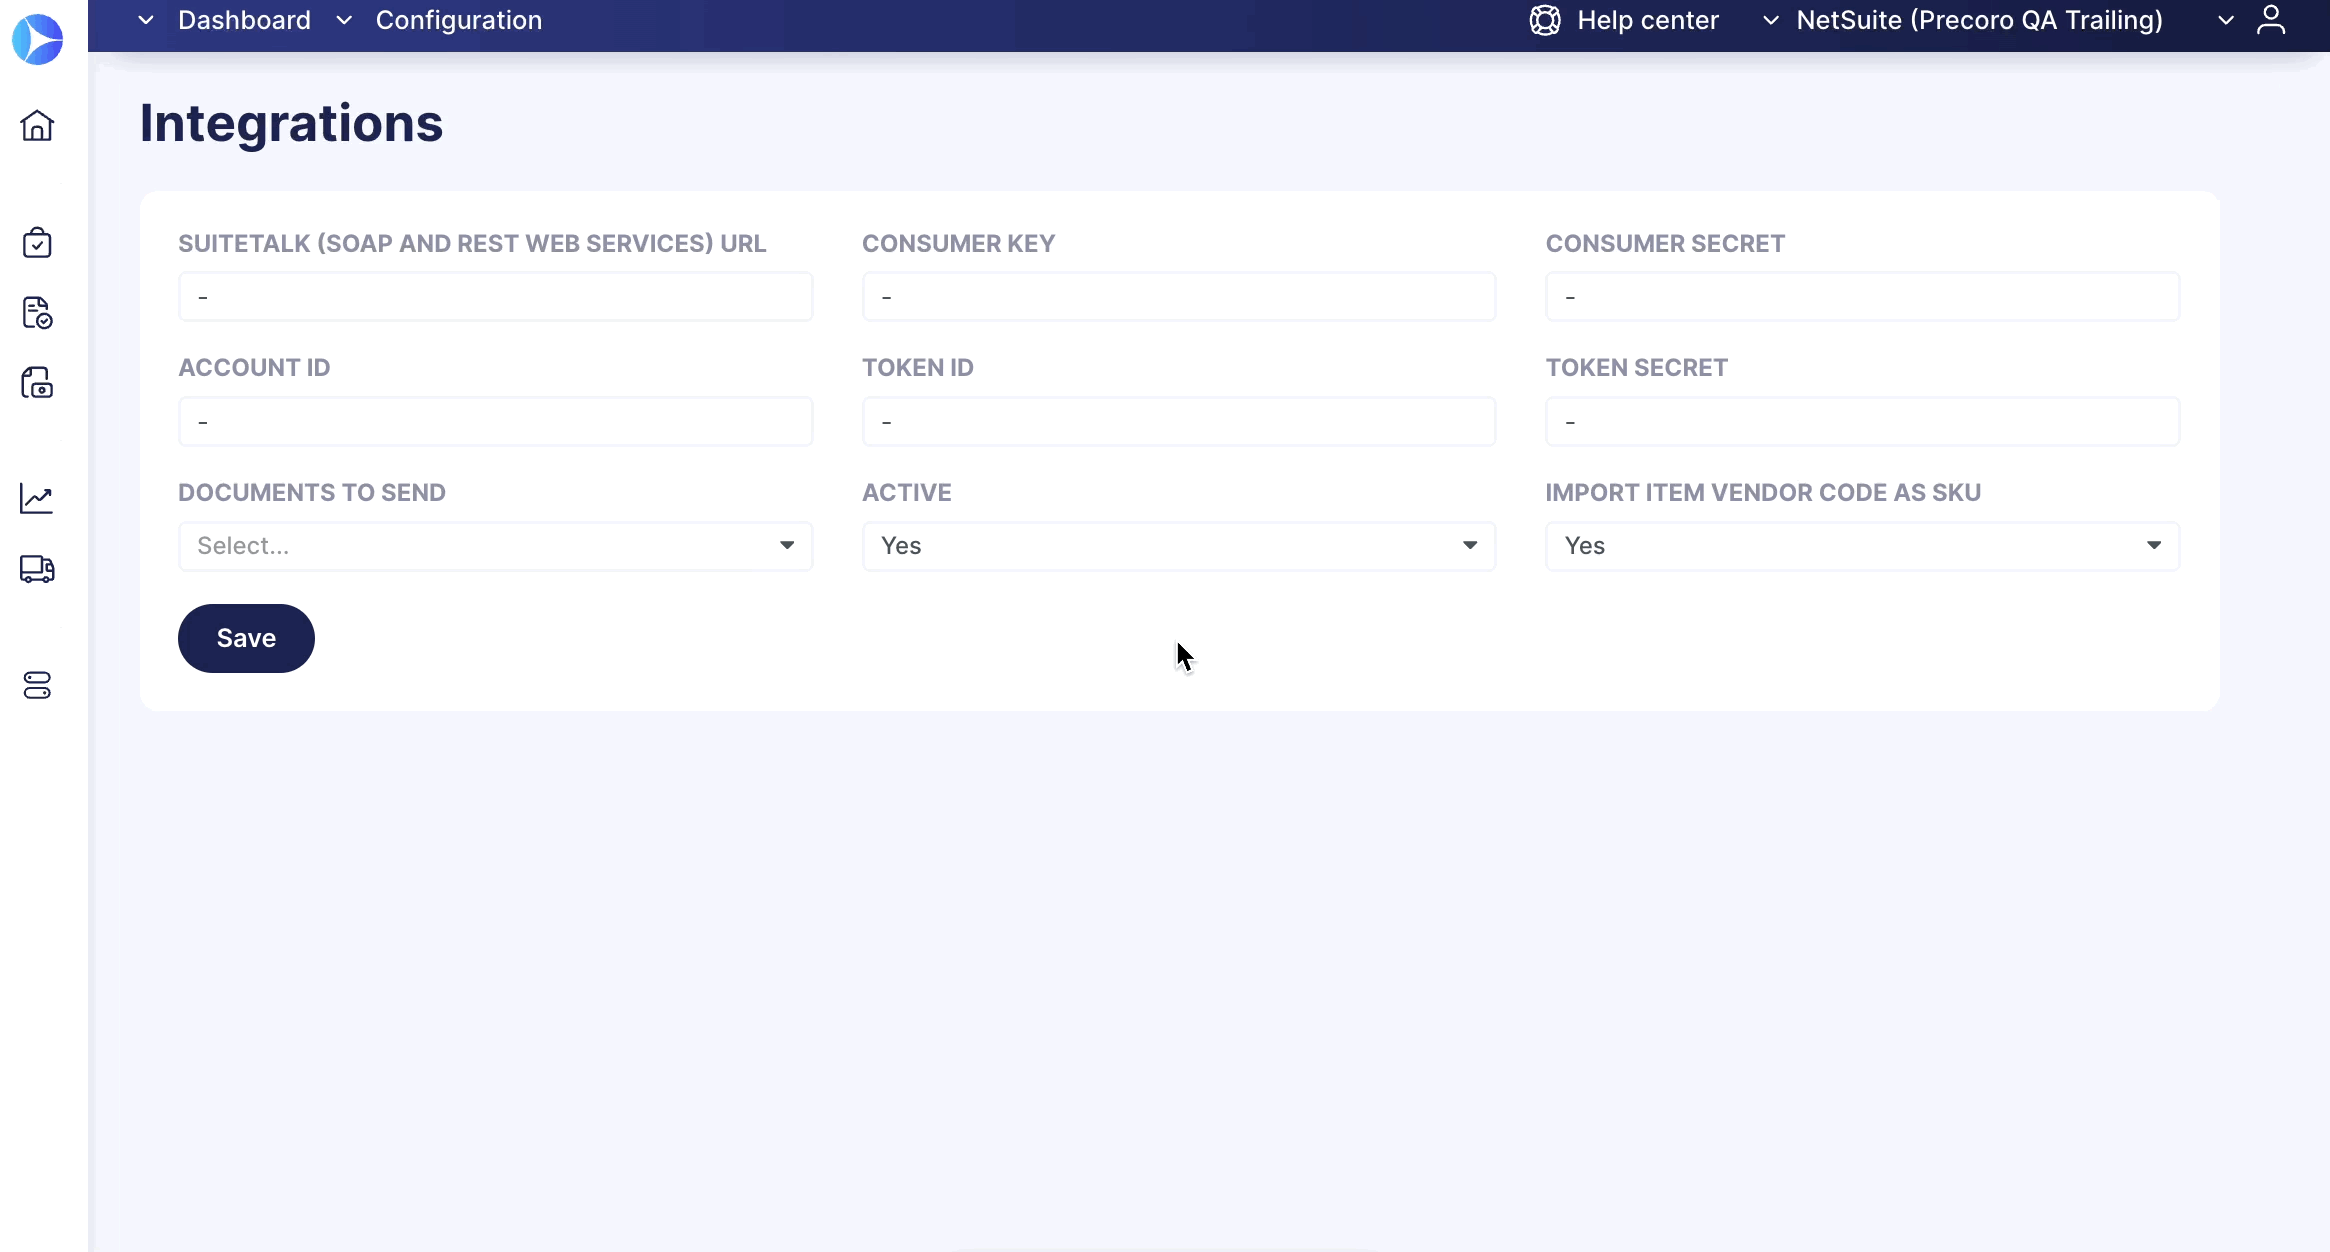
NetSuite Integration Improvements
There are a few important updates in the NetSuite functionality this week:
Removed the Default Value from Documents to Send
In the NetSuite Configurations in integration settings, the Approved PO option is selected by default in the Documents to Send field. To avoid any future issues, we have removed the default value from the Documents to Send field and made it required. So, if you are setting up the integration for the first time or need to make changes to the currently existing one, keep in mind that you need to fill out the Documents to Send field with the option you need.
Auto Mapping of New Users with NetSuite
We are adding even more automatization to the NetSuite integration so now, we are automatically mapping new users for a NetSuite-integrated company if the users in the company have been mapped before.
The automatic mapping process will be triggered when adding/importing a new user or providing access to an existing user to a new company. Such a user will be automatically mapped if the account already has users mapped with NetSuite.
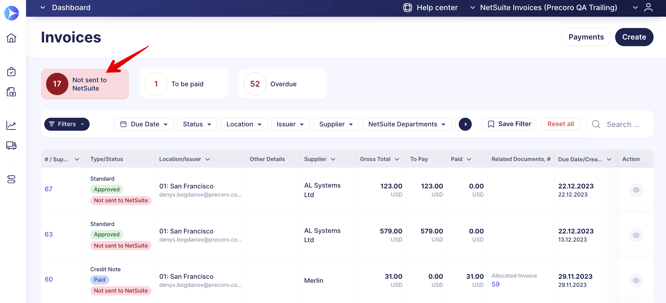
Taking Into Account Not Sent Credit Notes to NetSuite in the Corresponding Infocard
If you have an active NetSuite Approved Invoices and Credit Notes integration, you will see the not sent Credit Notes with Paid status and Invoices with Not Paid status in the Not Sent to NetSuite Infocard.
Document Auto Resend in case of an Unsuccessful Lines Request for NetSuite
If the document was successfully sent to NetSuite but the NetSuite lines were not recorded either with or without receiving an error in the logs, we will automatically resend the document in 15 seconds. If NetSuite lines are not recorded again, the retry will occur in 15 seconds. The maximum number of retry attempts is 10. You will see a log of the successful update.
Transferring the Receipt Date to NetSuite
Before, we did not transfer the Receipt transaction date. It was set automatically by the NetSuite at the time of document transfer. But suppose you closed posting periods or Accounts Payable transactions before the end of the month and then transferred the document. In that case, the generated transaction date would be the current one, the selected posting period would be the next one, and as a result, you would get a date and period mismatch error.
Now, to avoid this problem, we are transferring the Receipt Date in NetSuite to the trandate field so that you can select the date for the document in the next open period so there would be no date and period discrepancies.
Added New User Status for Slack Integration
When mapping users with NetSuite and the mapped users are not in your Slack space, they will receive the Not Integrated status as those users do not exist in Slack.
With the subsequent user mapping, those who had Not Integrated status will be mapped again in case you have added the user in your Slack space.
Improved QuickBooks Taxes Integration Process
We have improved the Tax integration process between QuickBooks and Precoro as now you can easily Import and Update Taxes through the Configuration page.
To Import Taxes from QuickBooks:
1. On the Configuration page, proceed to Step 5 and press the Import Taxes button.
2. Select the needed options by checking them.
3. Scroll to the bottom of the page and press the green Import button below.
You will see a system notification regarding the success of your import.
To Synchronize Taxes, press the corresponding button on the Configuration page. You will see the system notification with the successfully synchronized number of Taxes.
Please note that if identical Taxes exist in both systems, Precoro will automatically match them.
OCR Integration Improvements
There are a few important updates in the OCR functionality this week:
Automatically Entering Supplier’s Name When Adding New Supplier in AP Inbox
To save you time, now, when adding a new Supplier through the AP Inbox the Supplier Name field will be automatically completed with the name recognized by OCR.
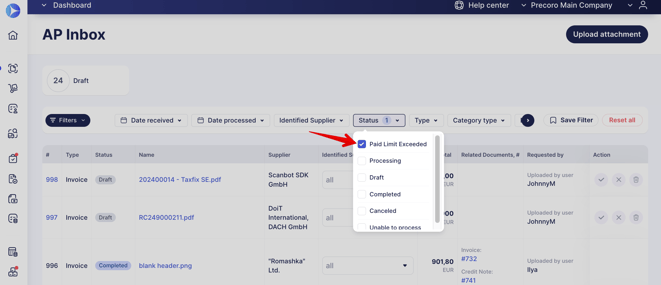
New Status for the OCR Files
We have added a new Paid Limit Exceeded status to the OCR files in the AP Inbox.
This status means that you no longer have any paid documents for processing. To continue processing documents, please proceed to Billing and replenish your balance. If you do not have access to Billing, please contact your administrator.