TABLE OF CONTENTS
- How to Create New Tax Items on the Item Management Page
- How to Create New Tax Items on the Document Page
- Main Operational Features of Tax Items
How to Create New Tax Items on the Item Management Page
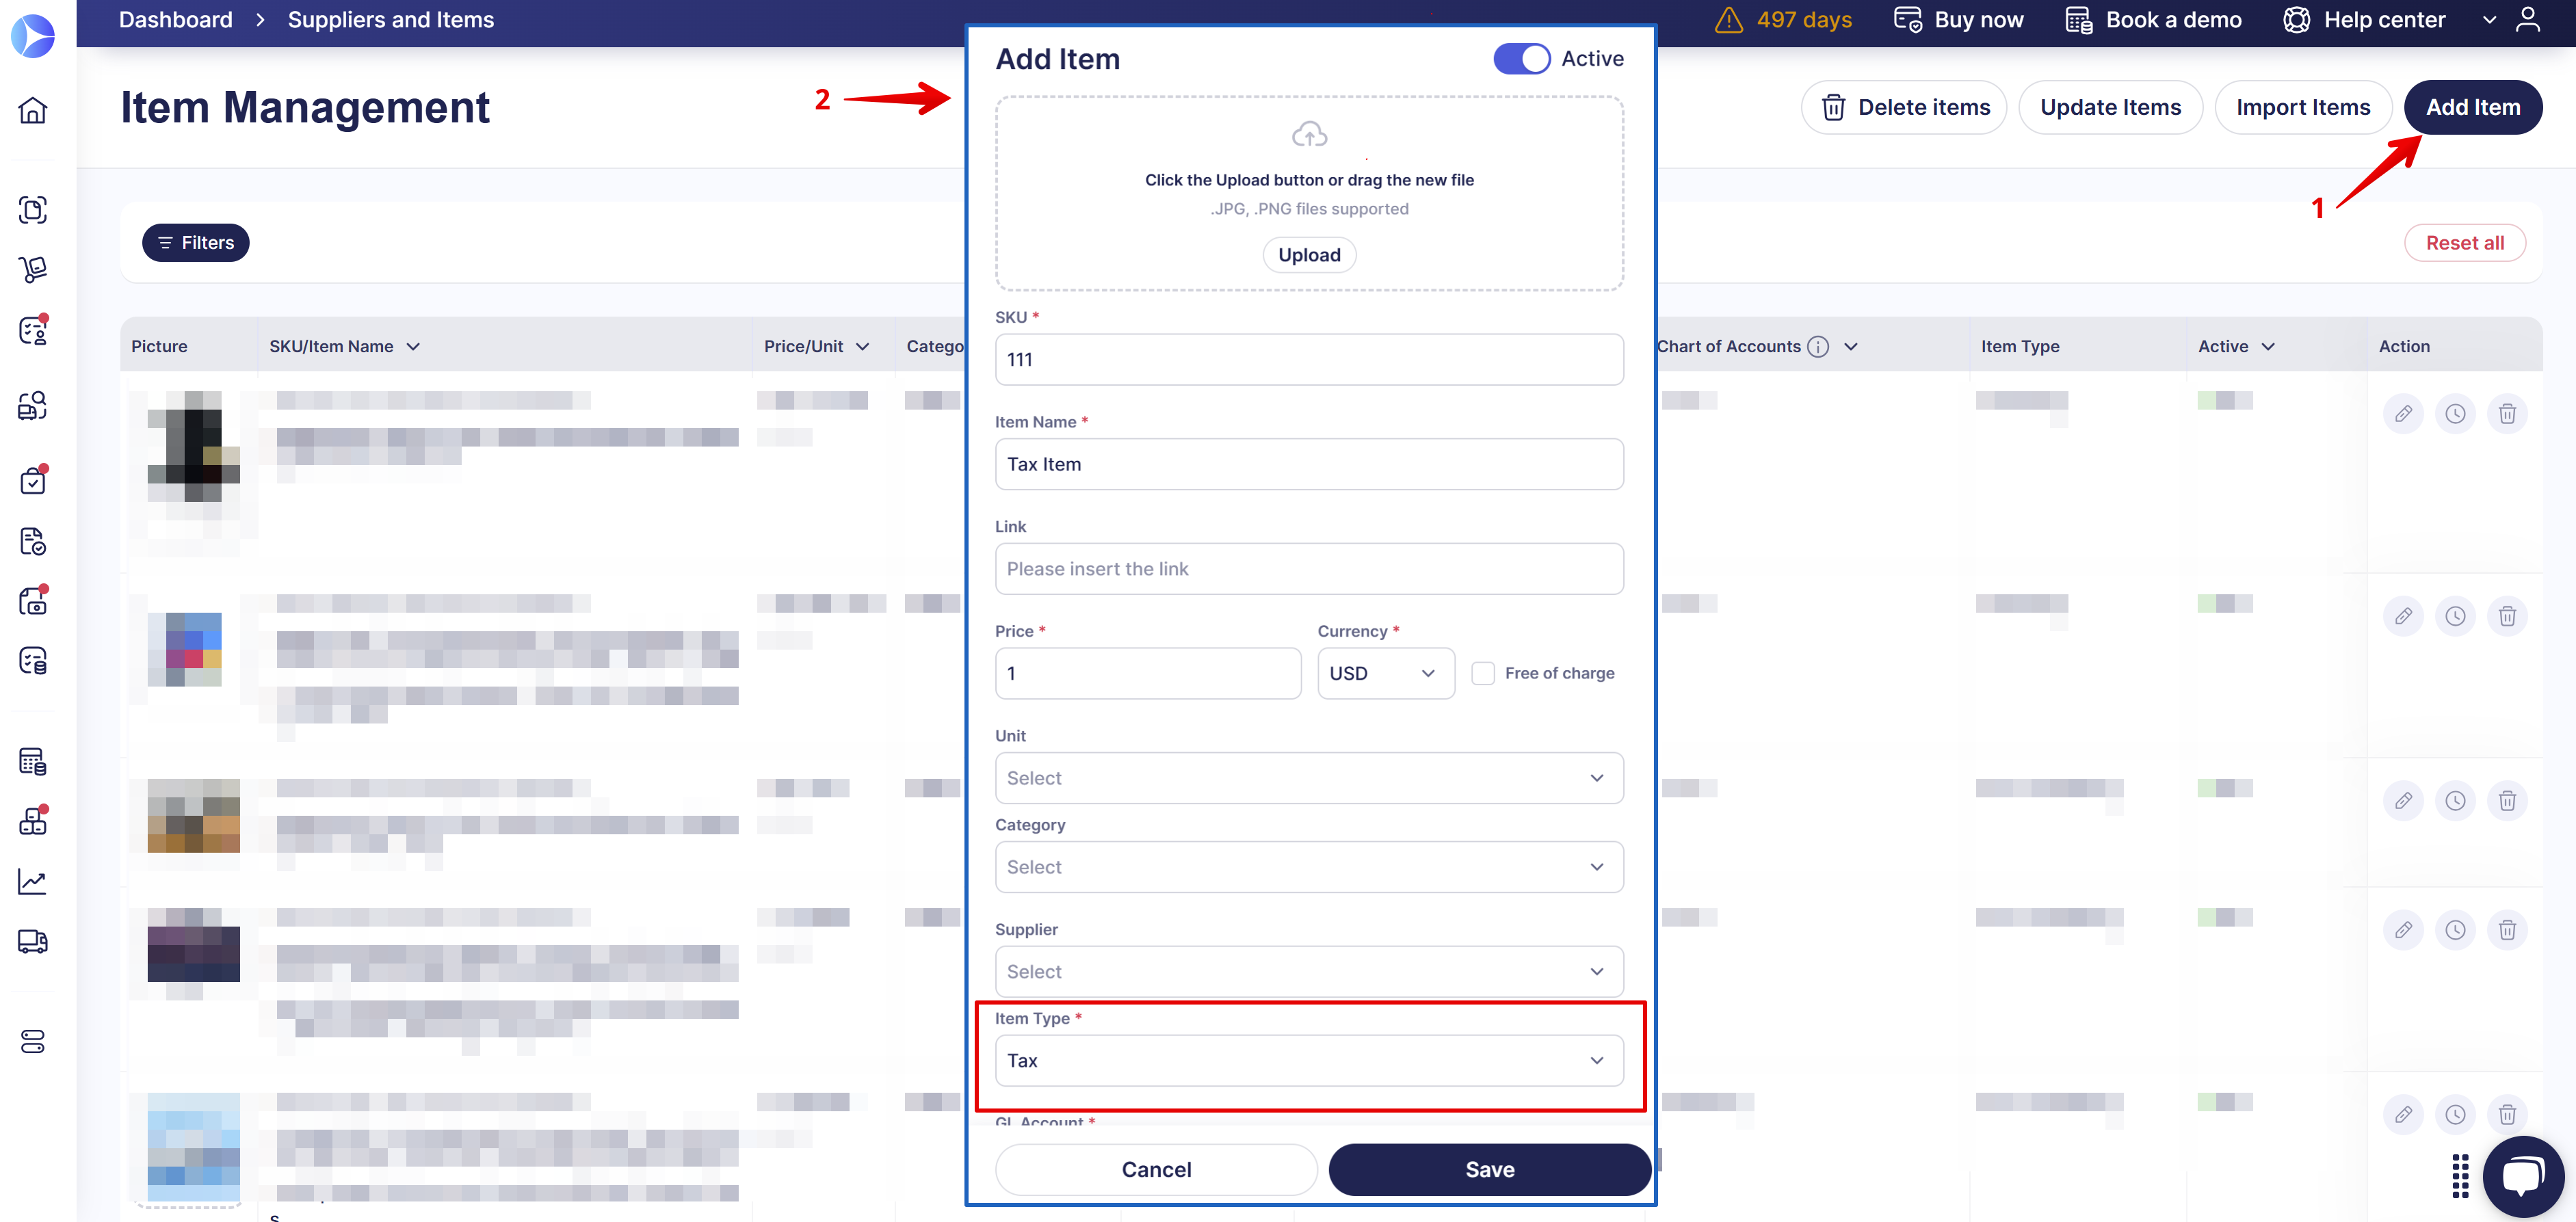
To create a new tax item on the Item Management page:
- Go to the Item Management module → Item Management.
- Click the Add Item button → enter the required information.
- In the Item Type field, select the Tax option.
- Click Save to apply the changes.
This item can be added to documents through the Catalog for future use (available for Invoices, POs, PRs, RFPs, and Service Orders).
💡 Please note: You can add a tax-type item to the catalog and use it in the documents regardless of your company’s tax settings in Configuration.
How to Create New Tax Items on the Document Page
You can add a new tax item while creating standard or custom POs and invoices.
Make sure that the tax functionality is deactivated in Configuration → Basic Settings → Document Setup → General Settings → Taxes.
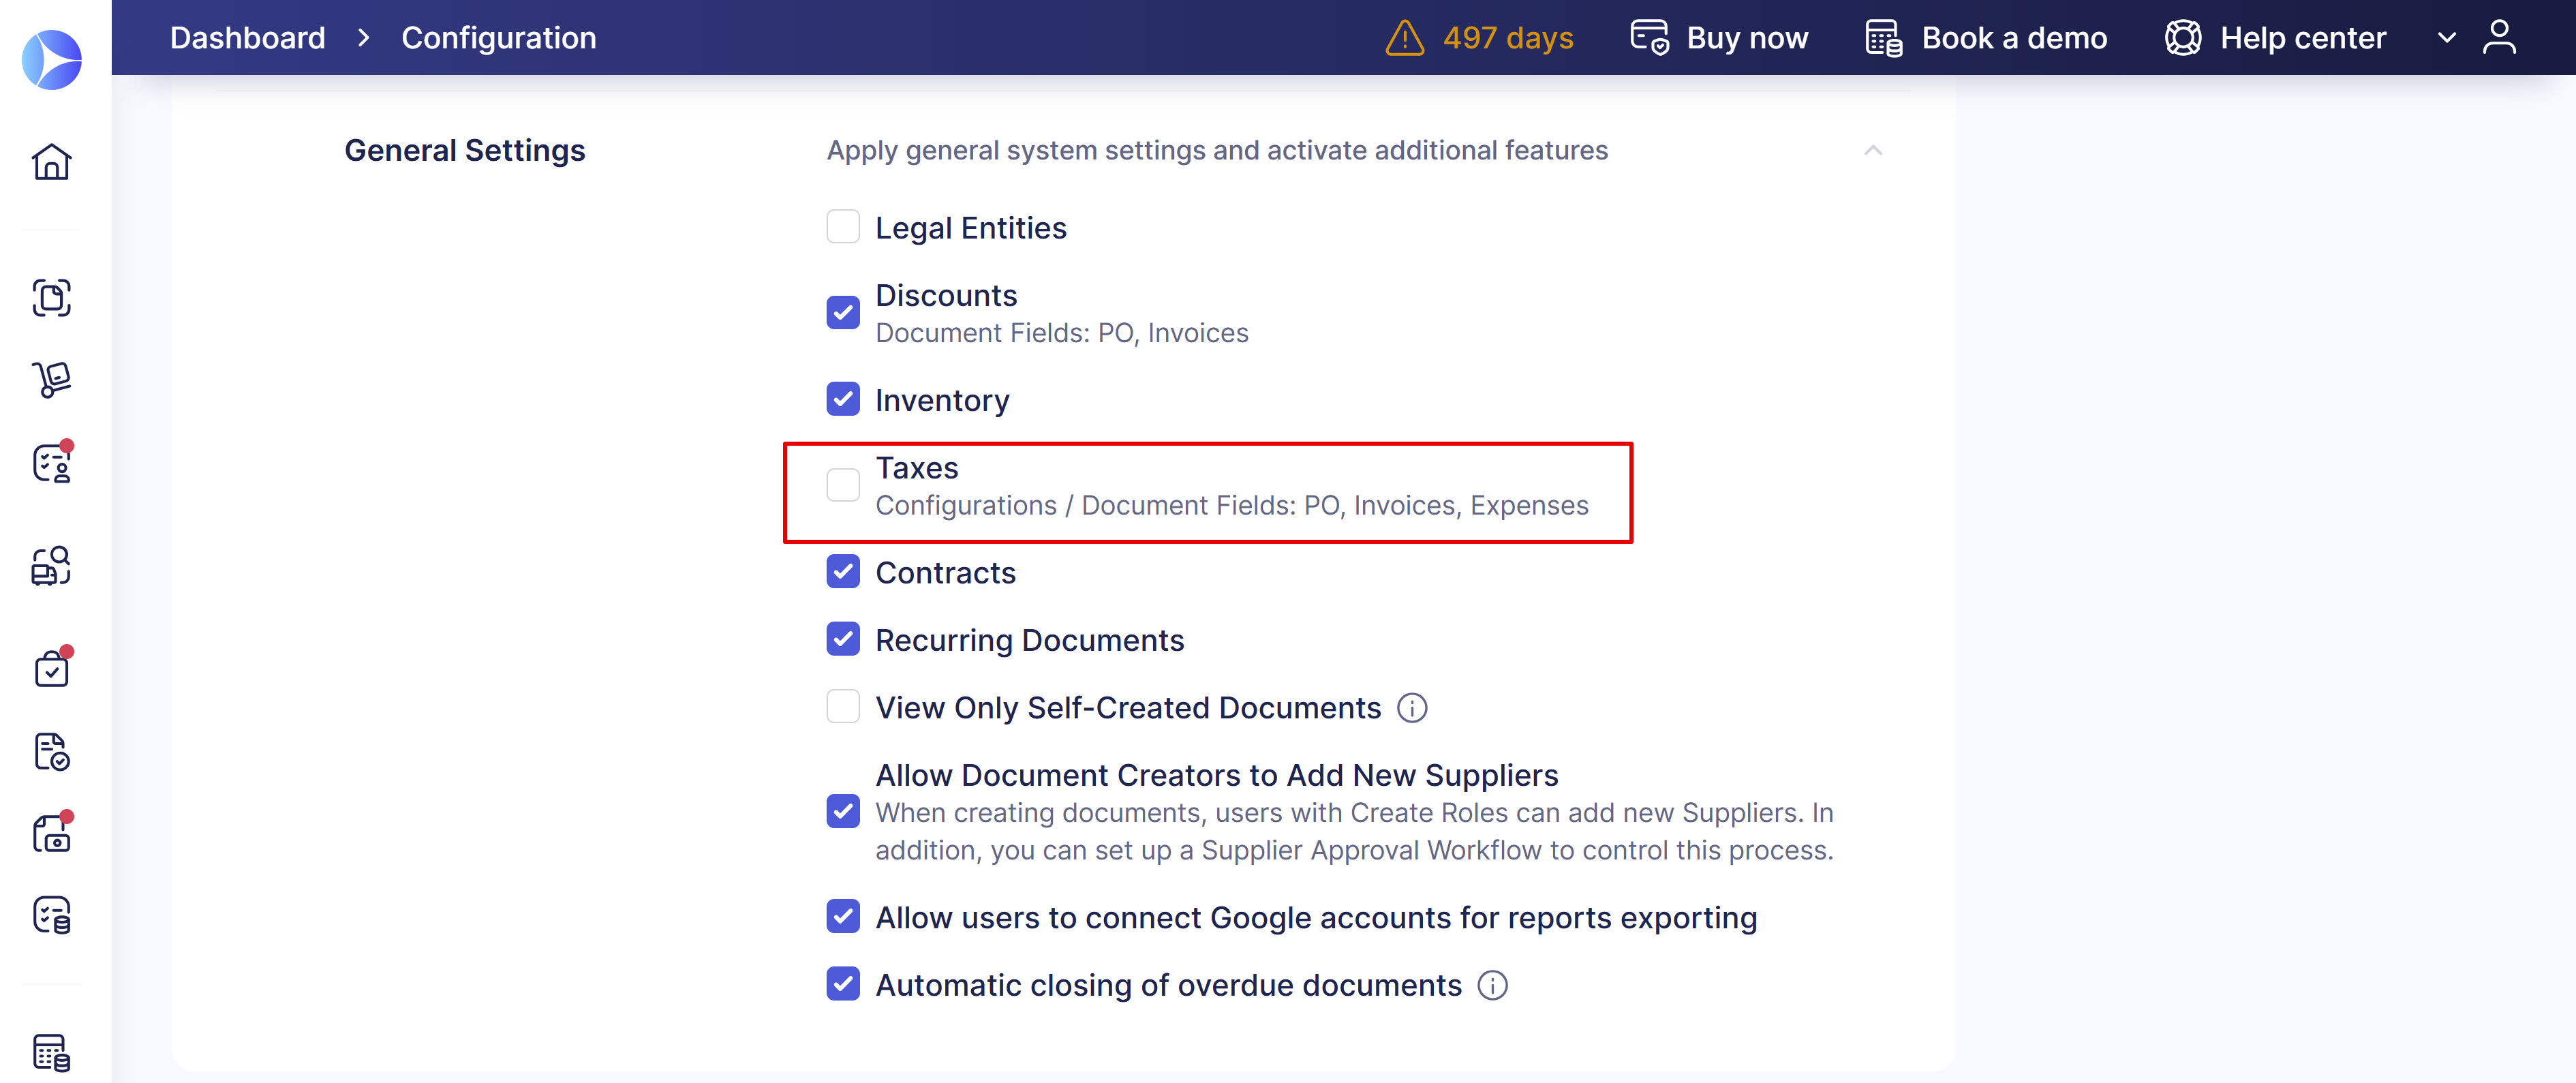
Once deactivated, follow the steps below:
- Click the Add Tax button in the created invoice or PO.
- Fill out the required information.
- Check the Add to Catalog box (optional) to save the item in the catalog with the corresponding tax type.
- Save to apply the changes.

💡Please note: If you manually add a new item line using the Add button and enter the SKU and Name of an existing tax item from the Catalog, the system will recognize it as a tax-related expense and mark it with a tax icon in the document.
![]()
As an alternative to creating tax items, you can add new taxes through Configuration. Learn more in this guide.
Main Operational Features of Tax Items
Tax items handling:
- Tax items are added as individual lines and cannot be split in Service Orders.
- No additional taxes are calculated for tax items. The “Tax %” and “Tax Sum” columns always remain empty for them.
- Tax items can be free of charge or have a negative price.
- You can add an unlimited number of tax items to a document, as well as create a document with only tax items.
- Tax items can be added to related Credit Notes.
Matching process:
- Adding tax items to an invoice from a PO does not trigger the Matching process, even if the tolerance limit is exceeded.
- Tax items are automatically transferred to the PO after invoice confirmation, and amounts are updated (including OCR-processed documents).
Receiving:
- Tax items cannot be received, so they are automatically excluded from the list of items to receive when you create a receipt for a PO.
- In Service Orders, the “Can Be Received” field is set to No by default.
PO completion:
- The Purchase Order is automatically completed if all the regular items are received (except for the non-receivable ones), invoiced, and paid (all items have to be paid, including the non-receivable ones).
- You can manually complete a Purchase Order once all received items are paid, even if the receipt amount is less than the invoice total.
- Documents containing only non-receivable items (like Tax and Shipping) will always have the “Not Received” status as these items do not require receiving.
To have the “Partly Received” or “Received” status, the document must contain at least one item that can be received.


OCR processing:
-
If taxes are disabled in your company in Configuration → Basic Settings, the tax will be added as a single tax item line. This item can be matched with a tax item saved in the catalog.
-
If taxes are enabled in your company:
-
When the recognized tax rate equals one of the existing taxes, this tax appears as tax % in the invoice.
- If there is no matching tax rate, Precoro adds the total recognized tax amount as a separate Tax-type item. It helps keep invoice totals accurate when a supplier’s tax rate doesn't match your predefined taxes, so you spend less time correcting tax discrepancies manually.
-
Check this guide to learn more about managing taxes with OCR.