Switching to US-Based Server — Guide to Power BI Update
Learn how to update your Power BI integration after switching to the US-based.
TABLE OF CONTENTS
- Step 1. Receive Access from the CSM Team
- Step 2. Reinstall the Connector
- Step 3. Generate Credentials
- Step 4. Log in to the Connector
This article is only relevant to those US-based clients who have decided to switch to the app.precoro.us server. Please find all the information regarding this migration here.
After switching to precoro.us, you must reinstall the updated version specifically for precoro.us to do that, please follow the steps below:
Step 1. Receive Access from the CSM Team
Contact our Customer Success Team and receive access to the updated connector for precoro.us
Step 2. Reinstall the Connector
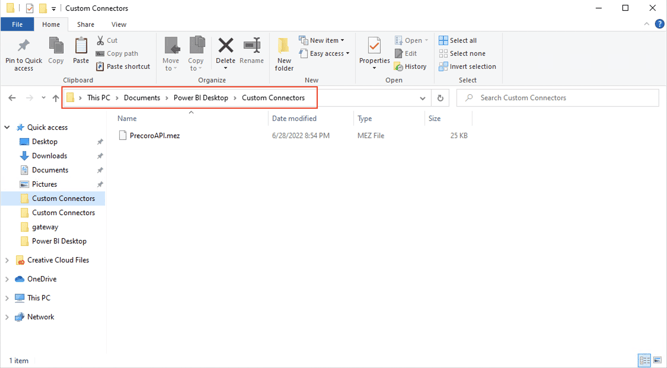
In Windows, copy the new PrecoroAPI.mez file to the following folder: C:\Users\[userName]\Documents\Power BI Desktop\Custom Connectors\.
Replace the old Сonnector with the new one when copying.

Step 3. Generate Credentials
The Power BI Data Connector will require you to have an email and X-AUTH-TOKEN (API key) during the setup.
-
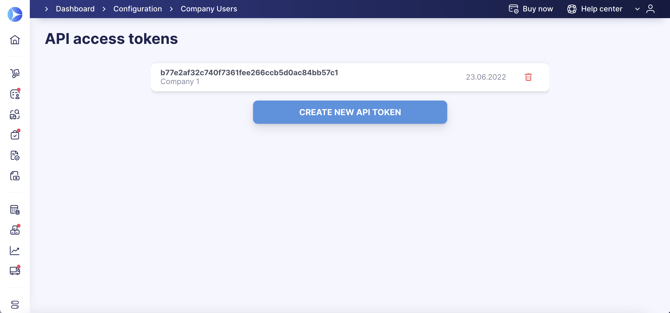
In Precoro, go to the API access tokens page.
-
If you do not have a generated token, click the Create new API token button.
-
Copy the Token so you can further use it to log into the Connector.

Step 4. Log in to the Connector
-
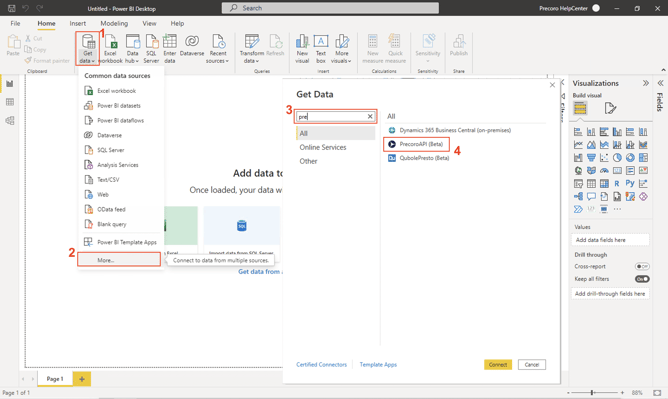
Go to the Power BI Desktop and click on Get Data.
-
Select the More... option from the drop-down menu.
-
Use the search field to find the Connector named PrecoroAPI (Beta).
-
Select it and click on Connect.

Input your credentials:
- The email you use to log in to the precoro.us account.
- X-AUTH-TOKEN from precoro.us (API Token, which you have previously created and copied in Step 3).
Then, click on Connect to load the list of data tables.