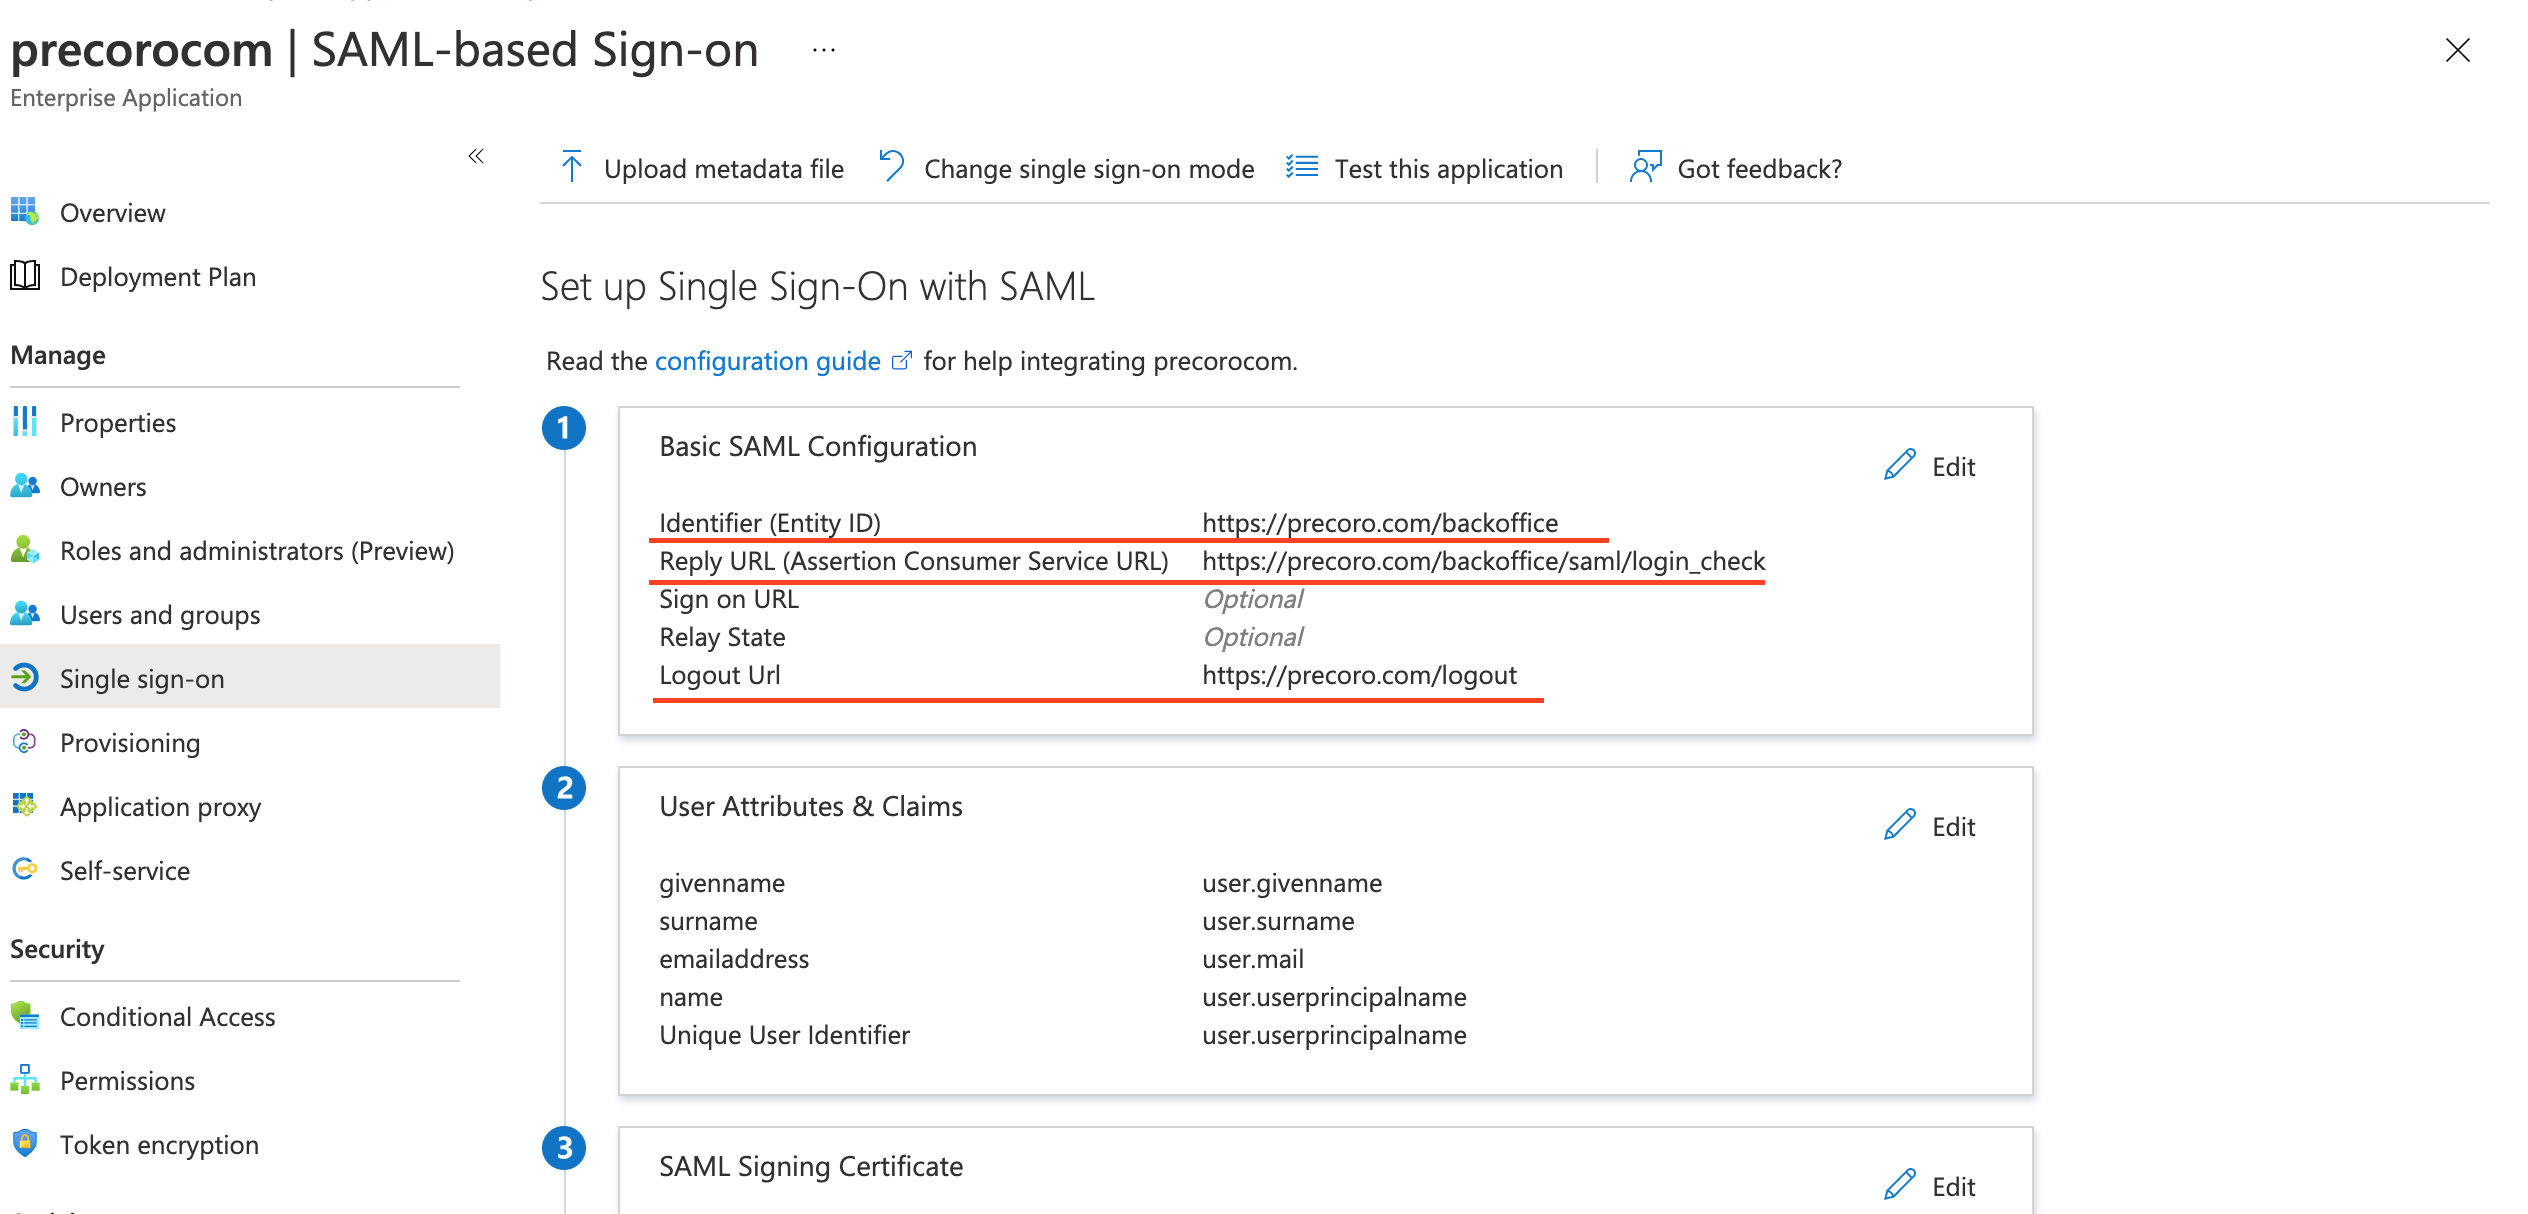
1. Incorrect Basic SAML Configurations
- Go to your Enterprise Application —> open the Single Sign-On tab on the left-side menu.
- Make sure that Identifier (Entity ID), Reply URL (Assertion Consumer Service URL), and Logout URL fields are filled out correctly.
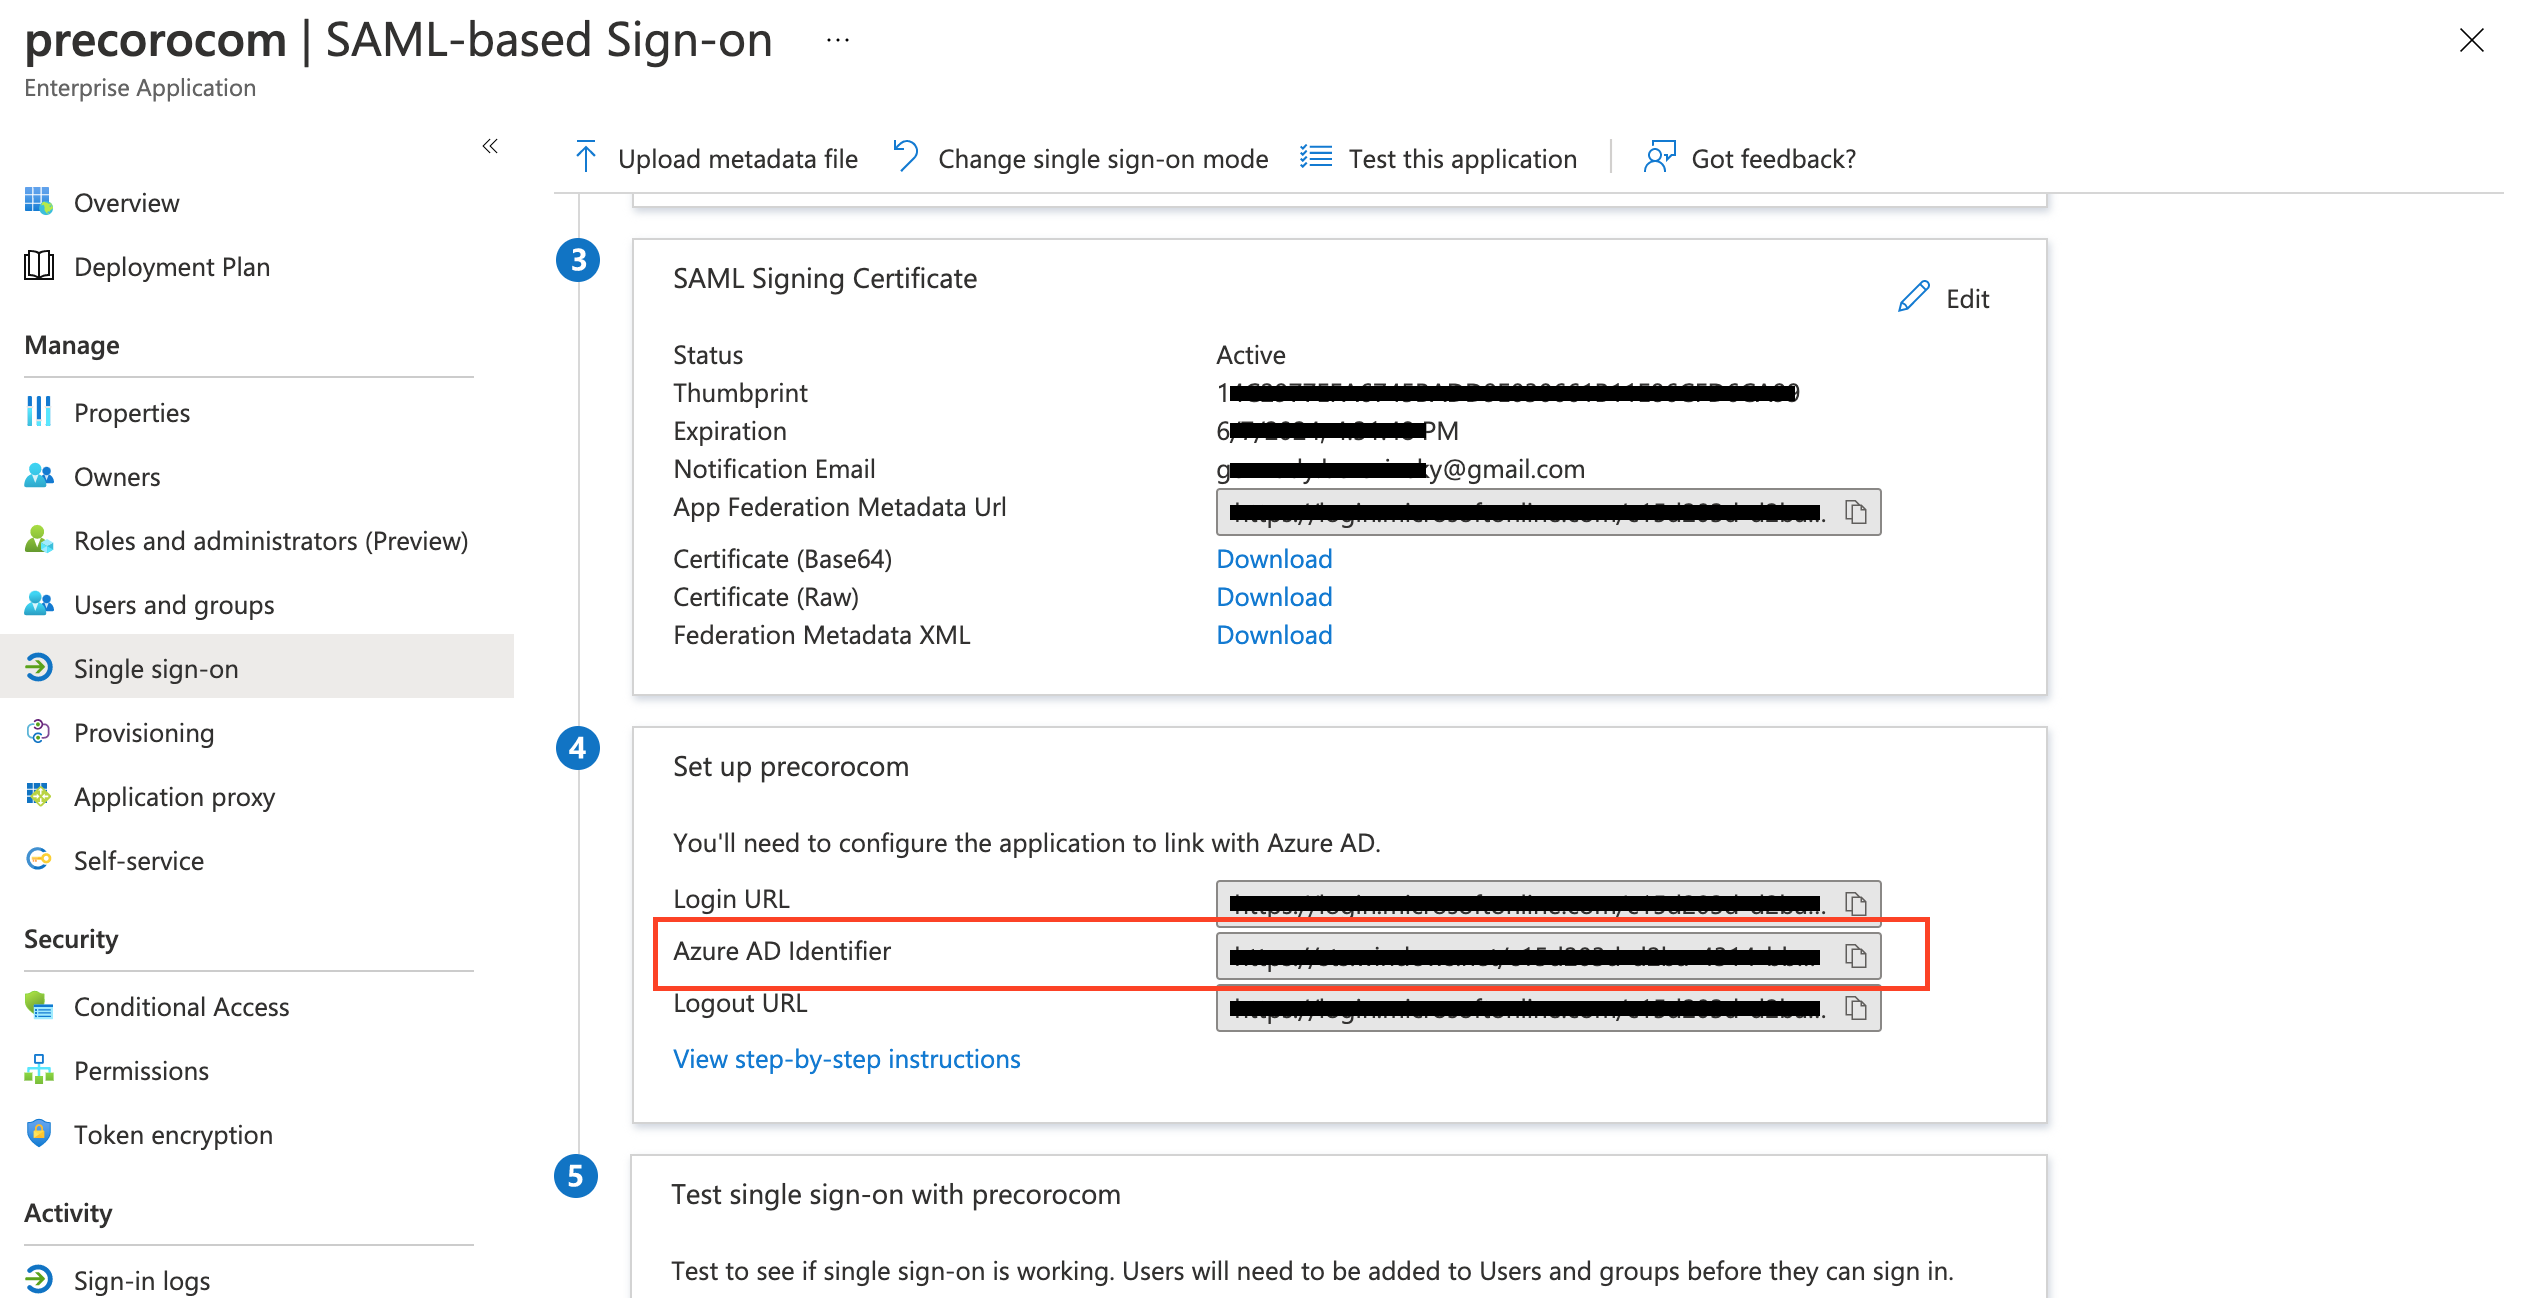
2. Incorrect Identity Provider Issuer
- Go to your Enterprise Application —> open the Single Sign-On tab on the left-side menu.
- Scroll down and find the Set up *your application name* section.
- Copy the Microsoft Entra ID Identifier and paste it in Step 3: Identity Provider Issuer in Precoro.
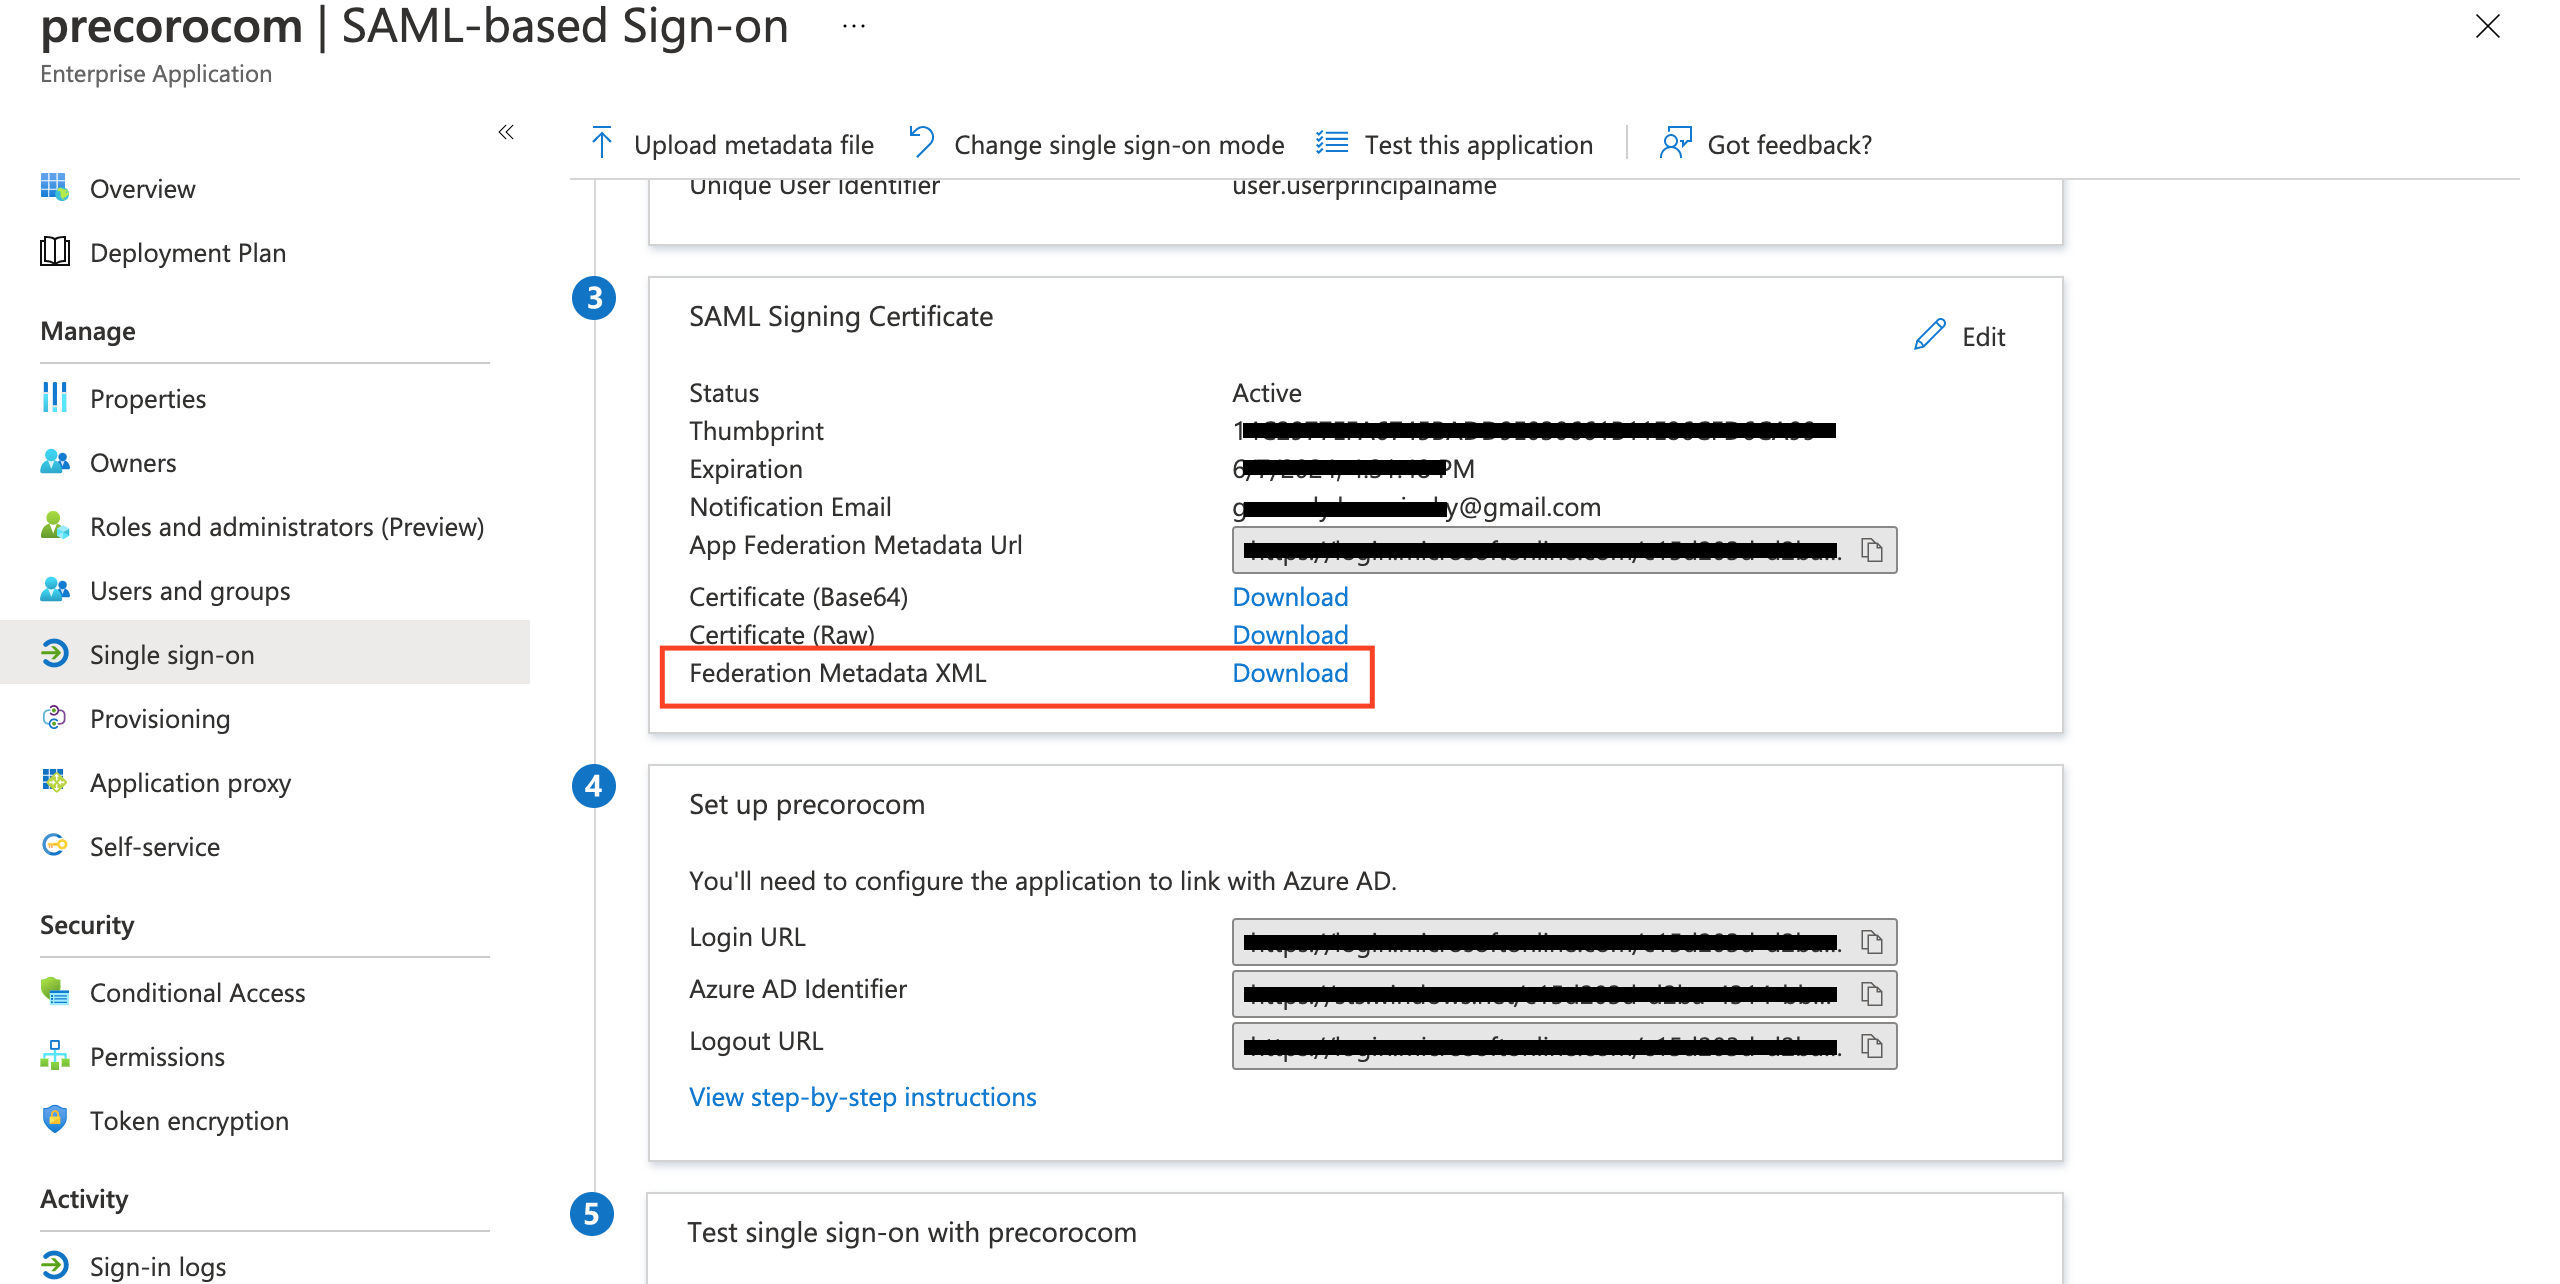
3. Incorrect Metadata was uploaded to Precoro
- Go to your Enterprise Application —> open the Single Sign-On tab on the left-side menu.
- Scroll down and find SAML Signing Certificate section.
- Download the Federation Metadata XML.
- Upload this metadata to Step 4 in Precoro.
If you still have problems with setting up the SSO, please contact us via online chat or reach out to your Customer Success Manager.