TABLE OF CONTENTS
How Custom Registration Forms Help You Collect Supplier Information
Precoro offers several ways to add and manage suppliers you work with:
-
Add and manage suppliers using the supplier’s details available to you. This option is convenient if you have established collaboration terms and you know the supplier’s contacts and payment information. It also allows you to import suppliers to Precoro in bulk.
-
Use the Supplier Portal. You can invite suppliers to the platform and make the most of centralized and direct communication.
-
Use Supplier Registration to request data. With this feature, you can send personalized emails and forms to receive information on cooperation terms from potential vendors. You can also use it to request updates from suppliers you have already added to the system.
With the Supplier Registration process, you can:
-
Get accurate and up-to-date information directly from the vendor;
-
Minimize manual and routine work researching and entering supplier details;
-
Request necessary documents as attachments;
-
Personalize your communication using multiple templates;
-
Approve a supplier submitting the form, reject them, or clarify any details by clicking Send for Revision.
Supplier Registration Settings
💡Please note: You need the Create role in Supplier Management to work with registration forms. Add the role to your user profile in Configuration — User Management (if you have the Configuration role) or contact your admin to request access.
All users with the Supplier Management role can do the following:
- See the list of invited Suppliers;
- Send a registration form to new Suppliers.
Navigate to Supplier Registration Settings (Supplier Registration Settings for precoro.us).
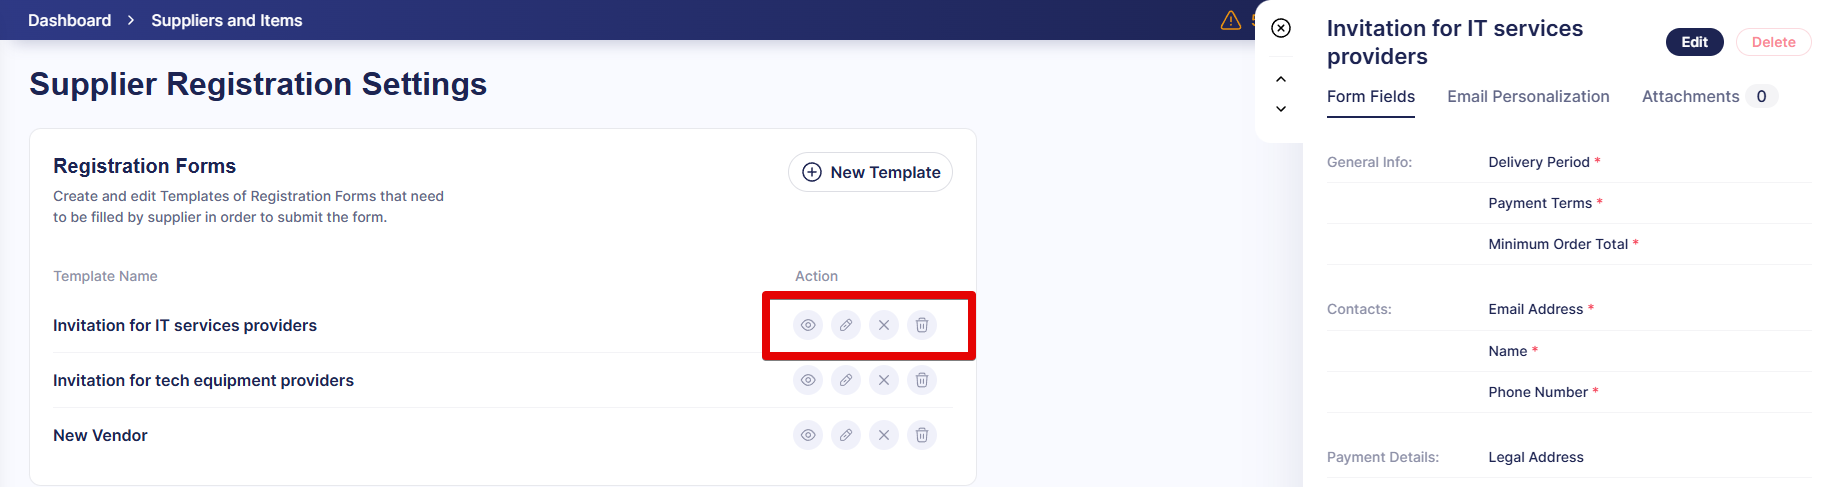
You will see the New Template button to create a new form and a list of forms that exist in your company.
You can perform the following actions with the template:
- Preview—open the right-side menu to see the information about the form.
- Edit—change a previously created template.
- Disable/Enable—activate or deactivate templates. If a form is disabled, it will not be available when sending an invitation to a supplier.
- Delete—erase a previously created template.
How to Create a Custom Registration Form
Step 1: Start Creating a Template
Go to the Supplier Management module—Supplier Registration Settings (Supplier Registration Settings for precoro.us) and click New Template.
On the New Template Creation screen, you’ll find all the information you can add and request through the form. Use the section list on the right for more convenient navigation.
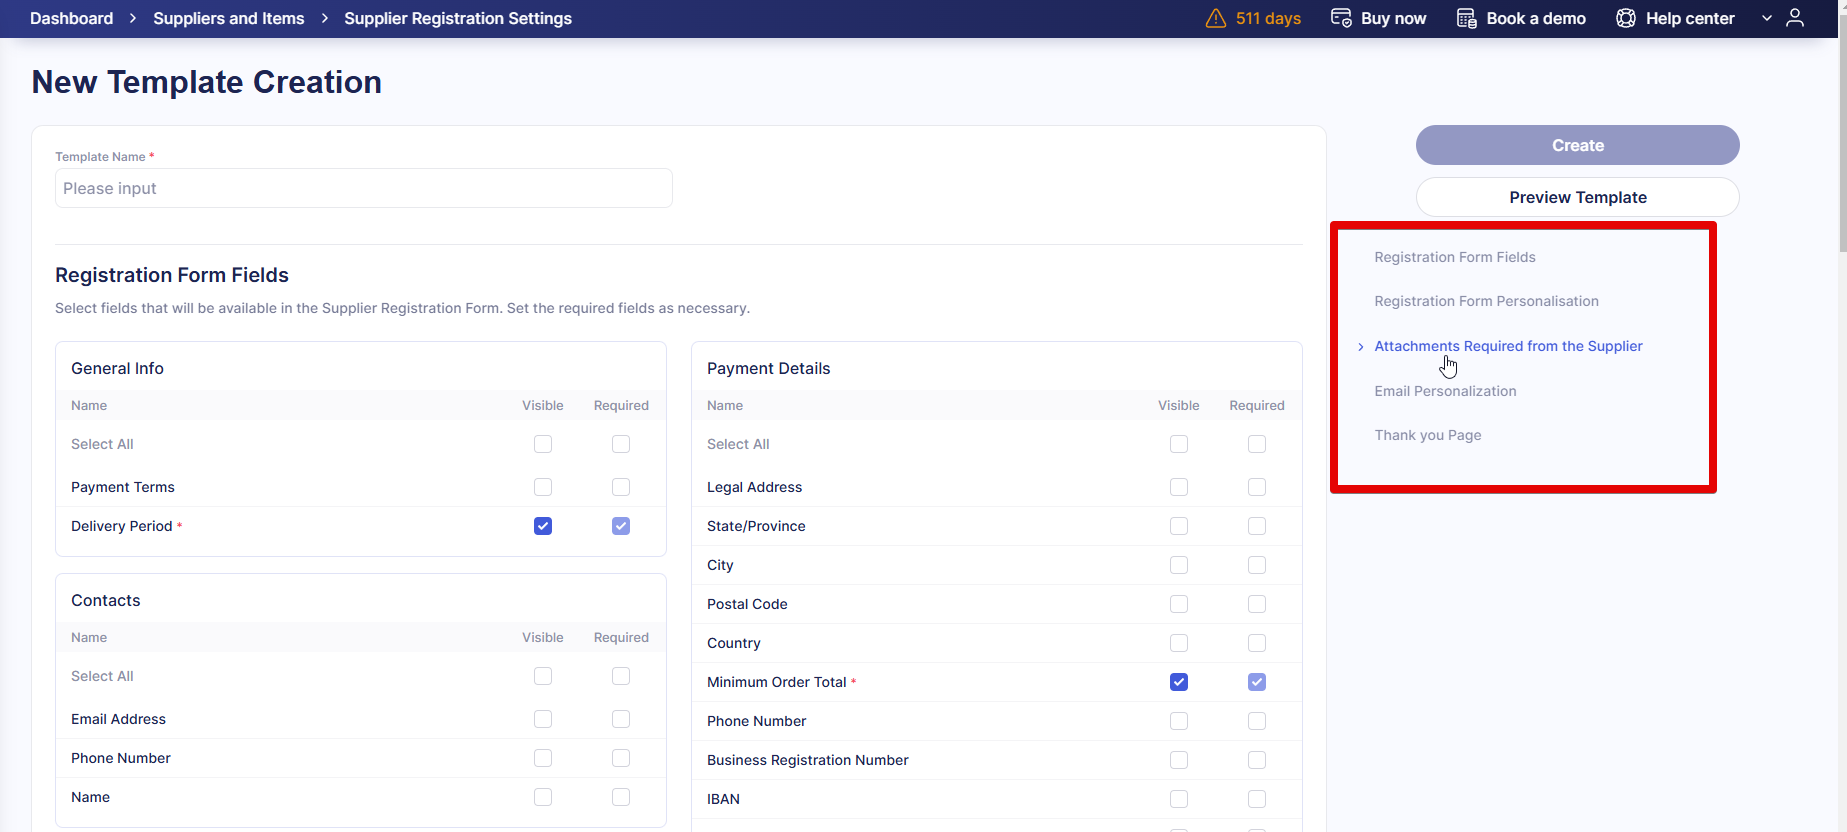
Step 2: Add a Name
Enter a Template Name at the top of the page. It is best to keep these titles informative so that you can easily find the one you need when sending an invitation.
This field is required to create a template.
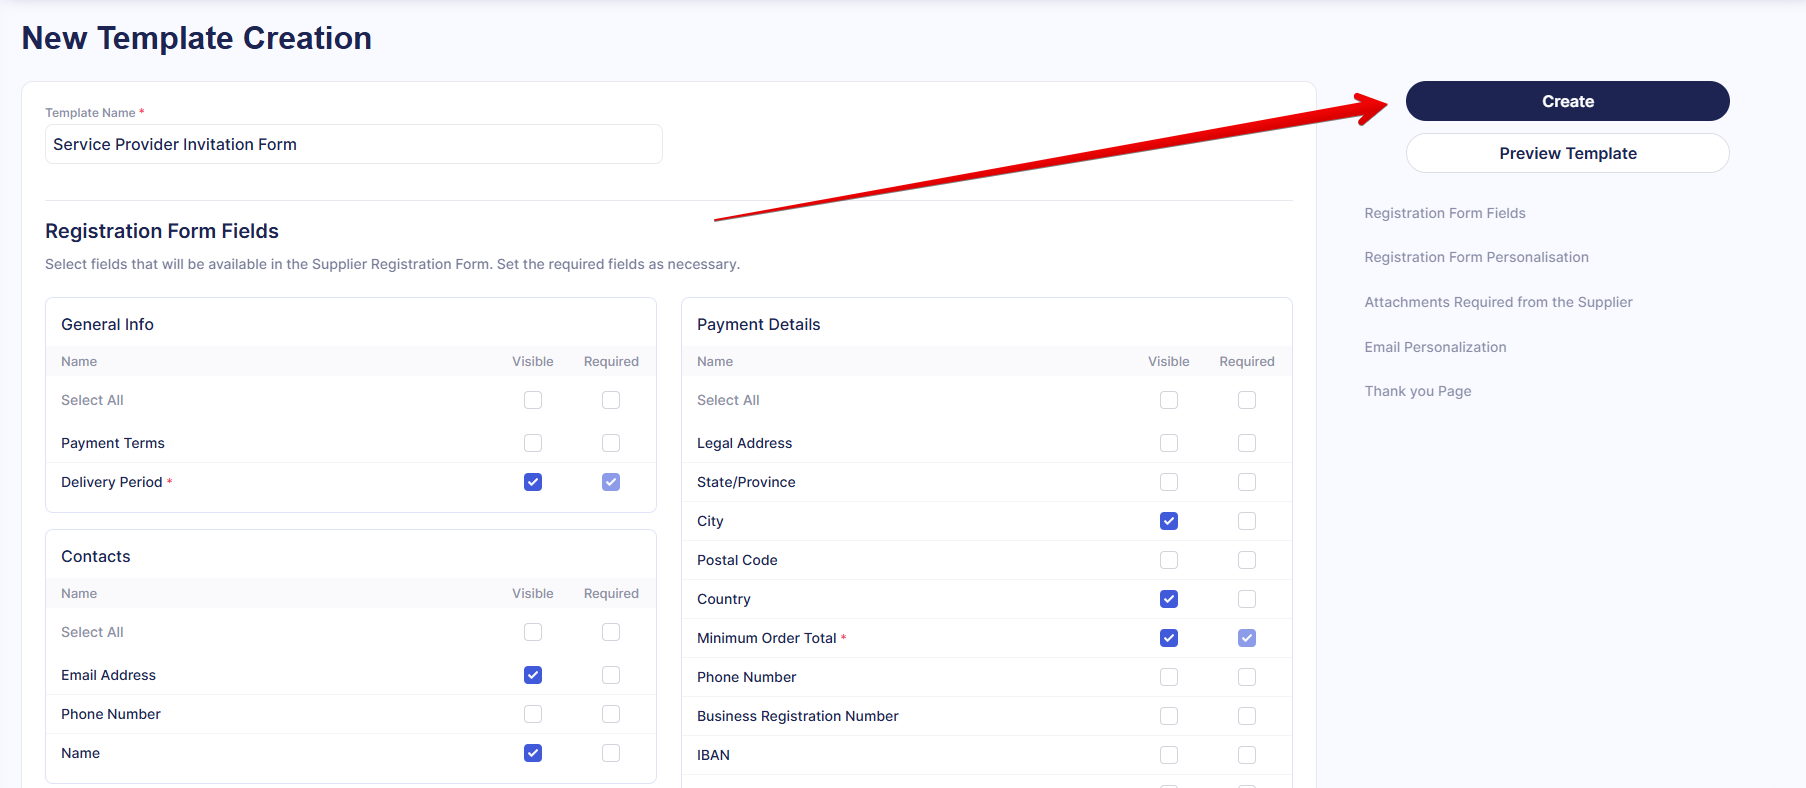
Step 3: Select Registration Form Fields
Select the information you want to receive from suppliers in the Registration Form Fields section.
For each of the options, you can select the following:
- Visible—the supplier will see this field and can choose to fill it in or leave it blank.
- Required—the supplier must complete this field before submitting the form.
Fields with both boxes unchecked will not be added to the form sent to suppliers.
💡Please note: If you want suppliers to select payment terms and currency, these options must be pre-configured in your company settings. Learn how to add currencies and payment terms in our guides.
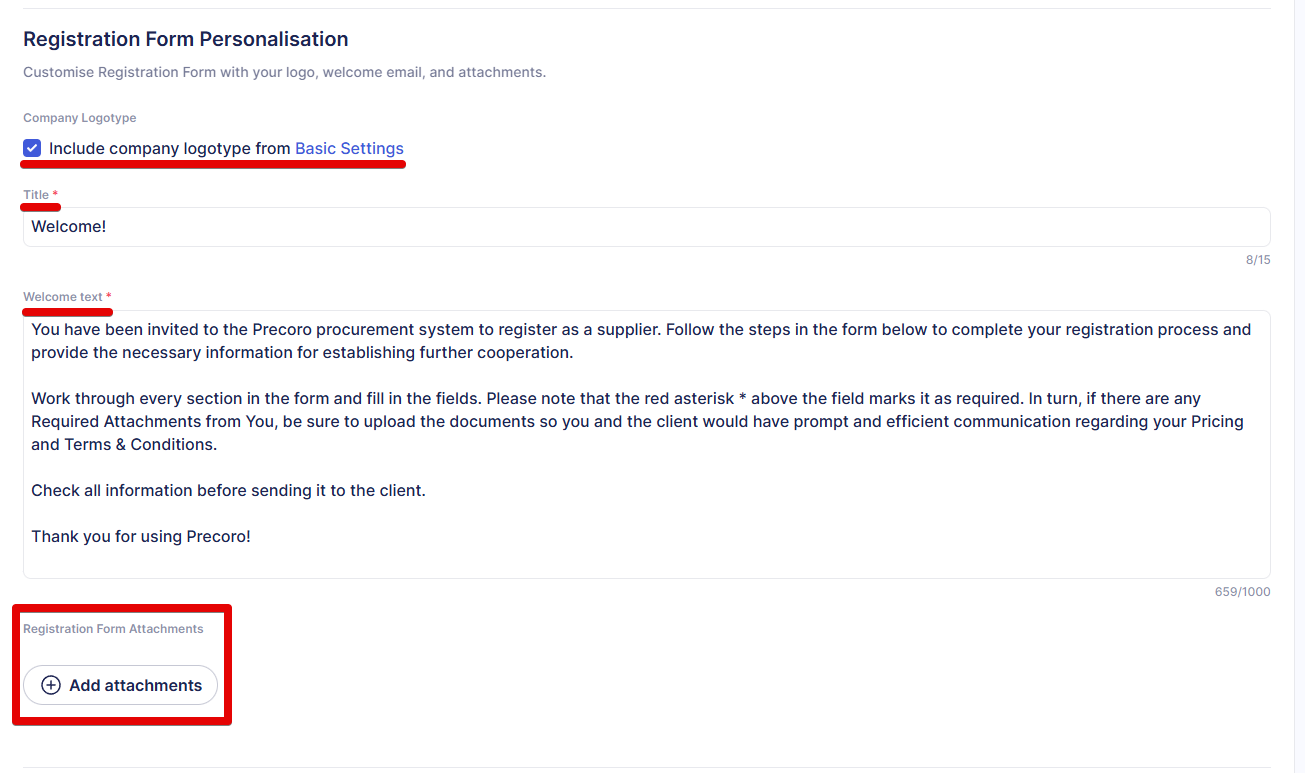
Step 4: Personalize the Form
In the Registration Form Personalisation section, you can select if you want a company logo added to the form and edit the text explaining how to fill out the template. If there are any attachments you want the supplier to review before submitting the form, add them here.
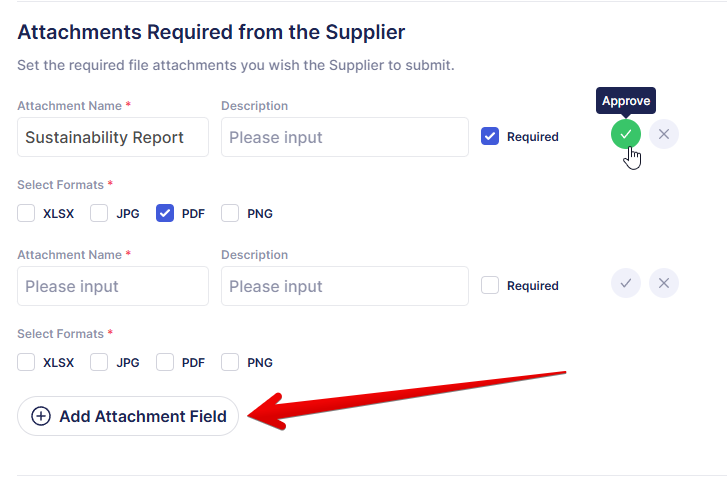
Step 5: Request Attachments from the Supplier
In the Attachments Required from the Supplier section, press Add Attachment Field, fill in information about the attachment, and specify if it is required or optional.
Press Approve to save the changes.
You can request multiple attachments by clicking Add Attachment Field again.
Step 6: Personalize Emails
During the registration process, several types of emails can be sent to a supplier: Invitation, Approval, Rejection, and Revision. Customize their content in the Email Personalization section.
The form is initially sent via email with an accompanying invitation. After a supplier submits the form, you can approve them, reject their proposal, or send the form for revision if you need to clarify anything. When you select one of these actions in Precoro, the supplier receives an email with the message specified in a corresponding tab. When an approver sends the form for revision, their comment is added to the message.

Step 7: Create a Thank You Page
After completing the form, a supplier will be directed to a page that can inform them on further process and show your gratitude. Customize its content in the Thank you Page section.
Step 8: Preview and Create the Template
Ensure you made all the necessary changes on the New Template Creation screen. You can also use the Preview Template button.
Once you know everything is correct, press Create to save the template.
You are now ready to send invitations to suppliers and track their progress. Learn how to do so here.