TABLE OF CONTENTS
How to Quickly Find the Low-Stock Items
On the Inventory Page
On the Inventory management page, you can promptly find Warehouses that contain low-stock items:
- A red dot next to the Warehouse name.
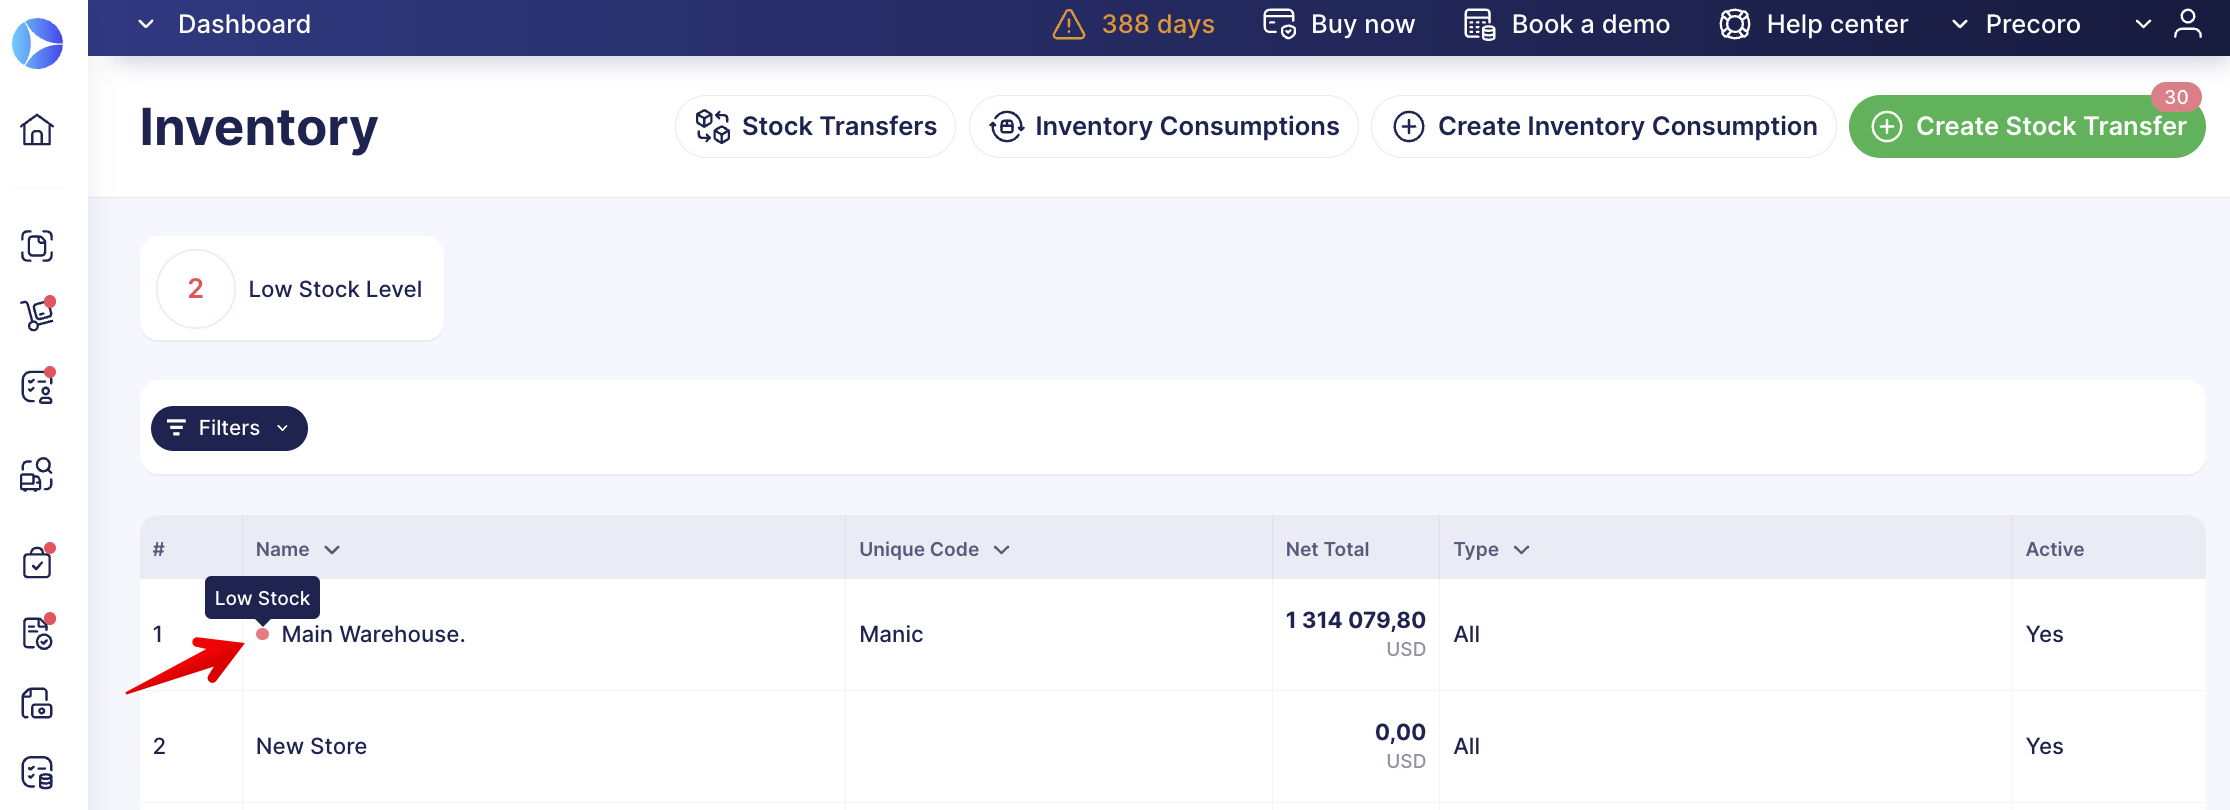
- You can sort out all Warehouses that contain low-stock items with the fast preset filter on the panel above the list:
After opening the Warehouse, you will see the list of items inside with the following information on the stock level: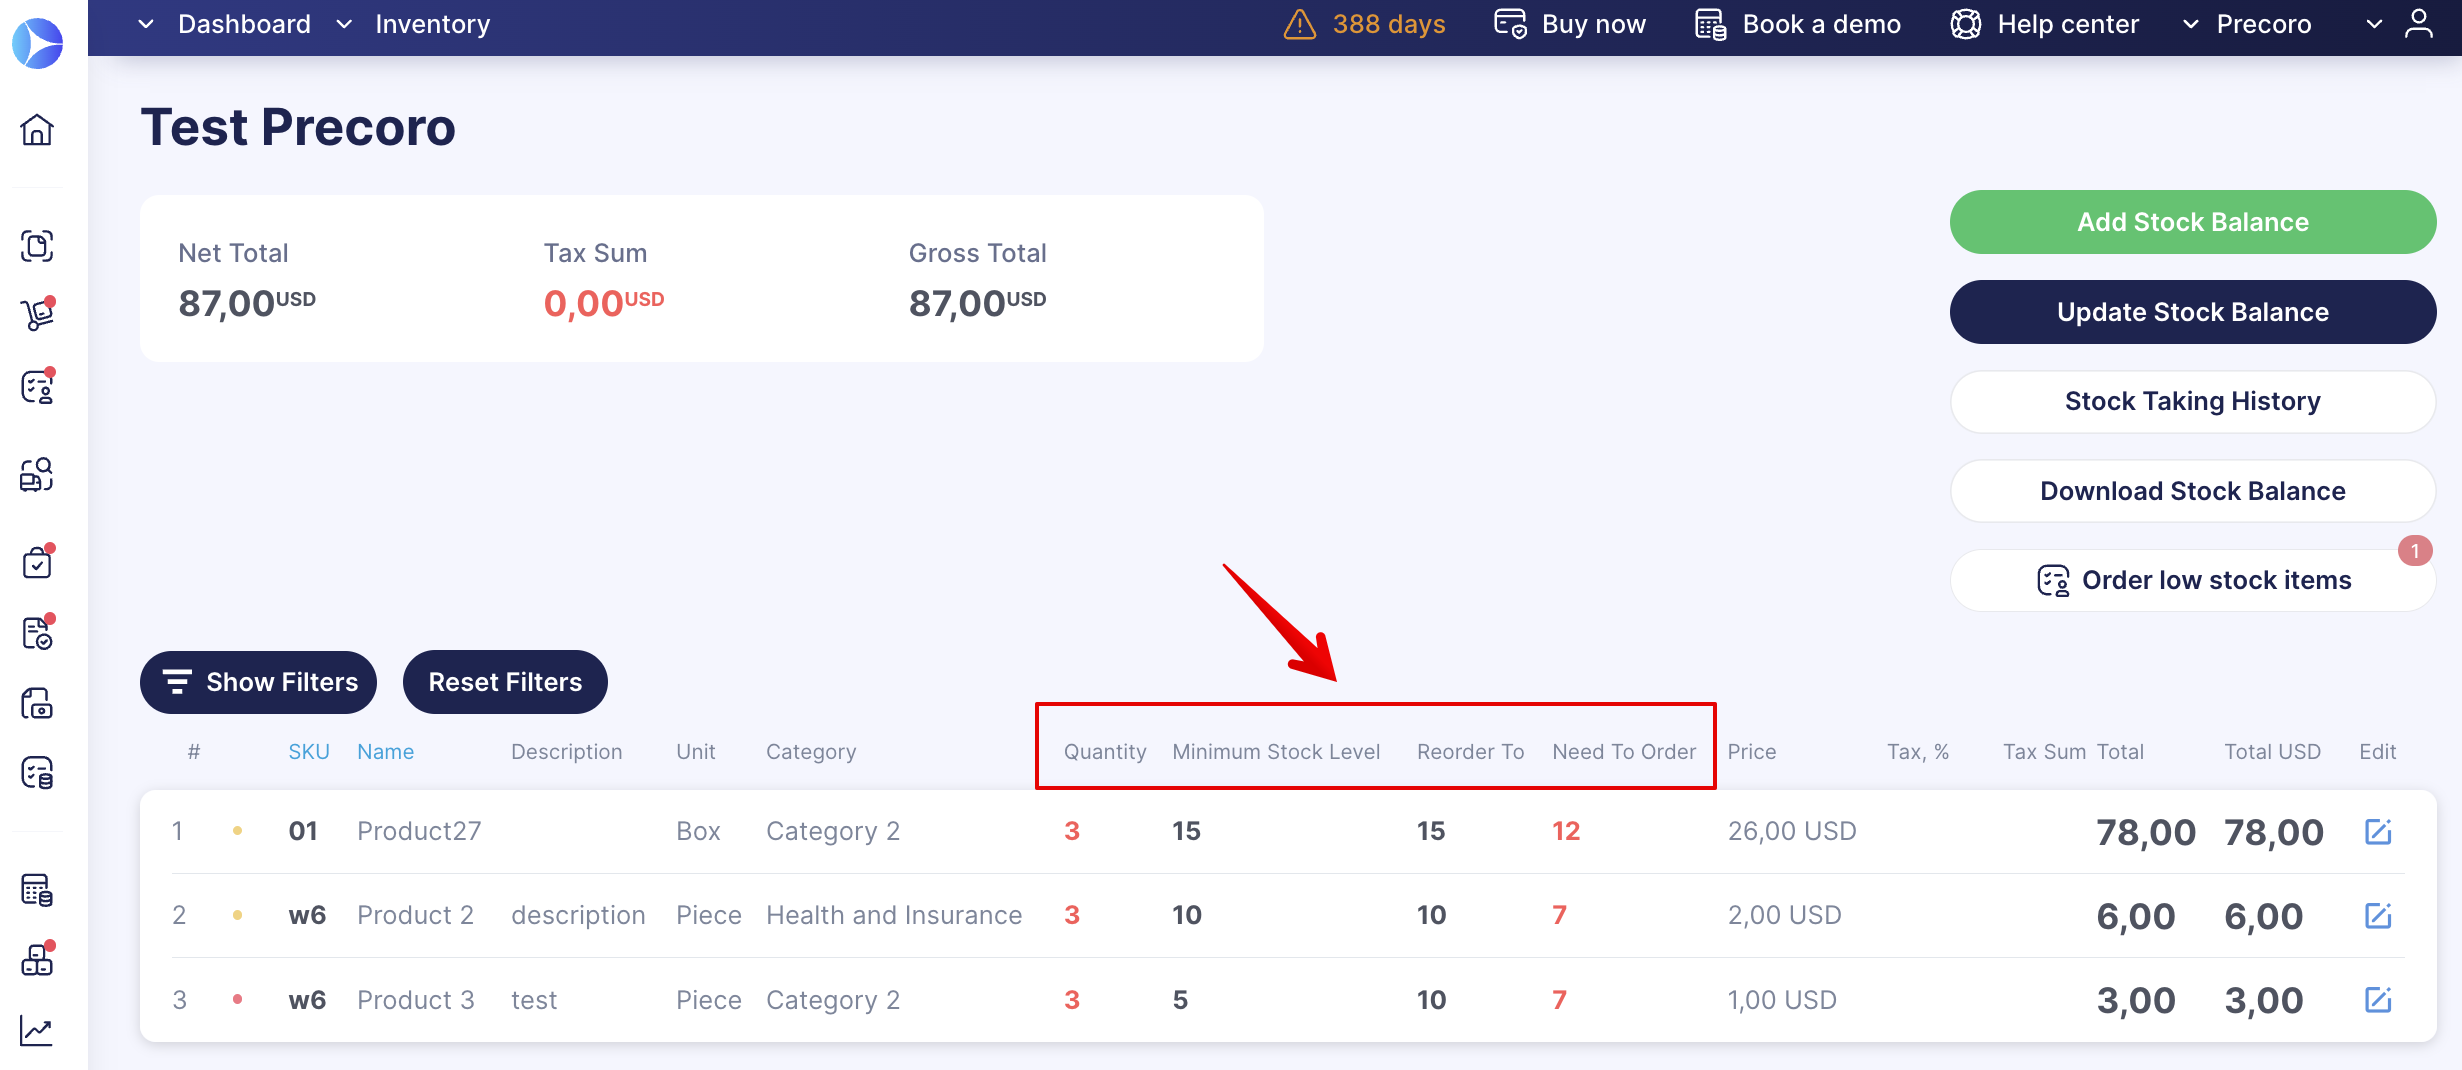
- Quantity — displays the existing current item amount.
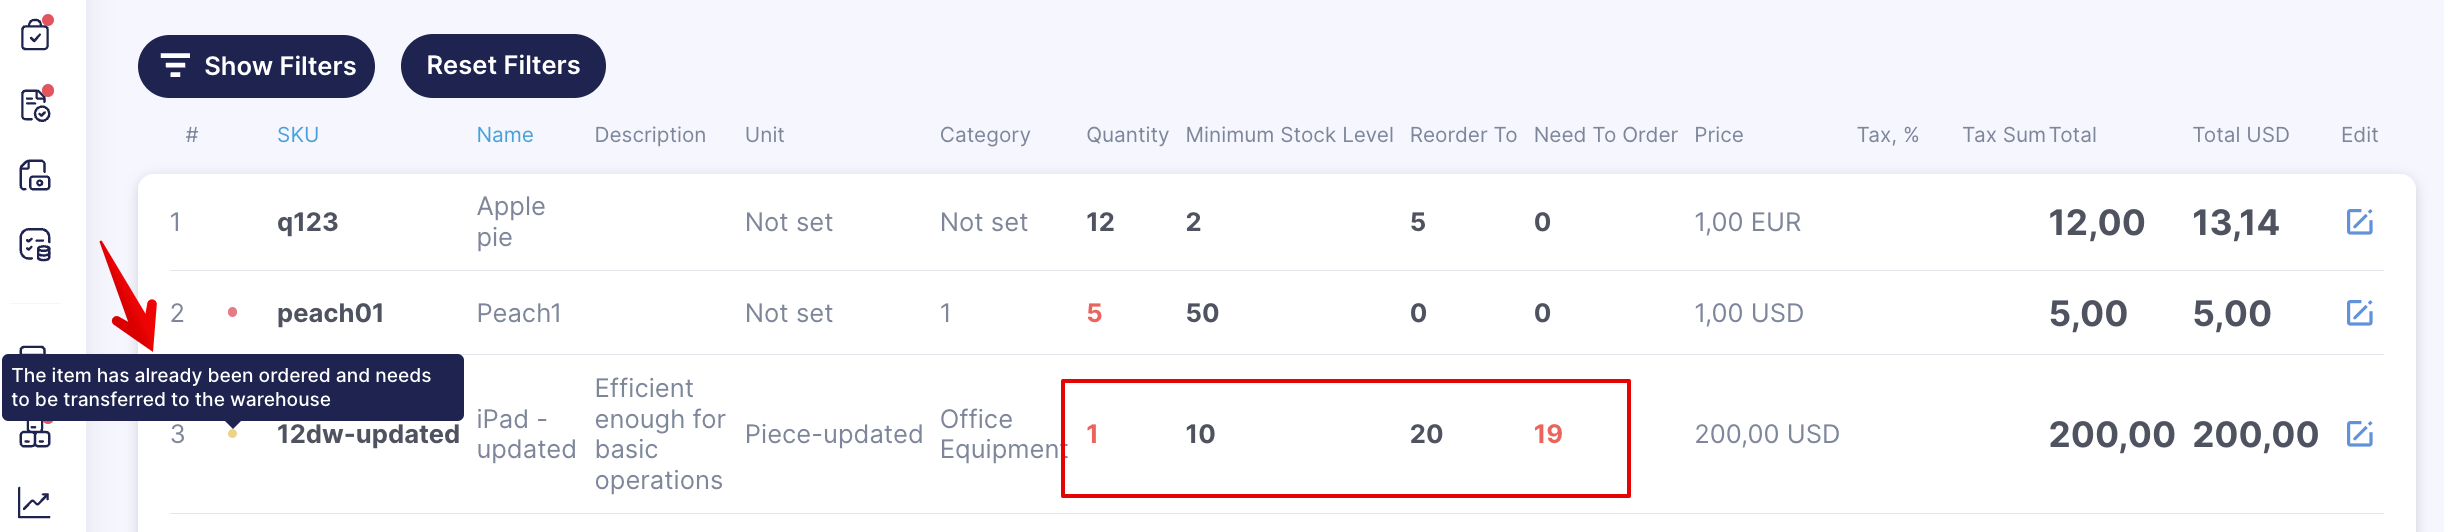
- Reorder To — you can set this value to indicate the item amount you want to have available and indicate how many you have already placed an order for. Here, you need to enter which amount you need to Reorder To, and the red Low Stock Level status will be replaced with a yellow one indicating that you have created a Purchase Order for the item.
💡 Please note: Ensure the Reorder To value equals or exceeds the Minimum Stock Level to avoid stock shortages.
- Need To Order — an automatically calculated field indicating how many items you need to order accordingly with the Reorder To value you have set.
- Minimum Stock Level — when the item quantity in stock gets below the set number, a red dot will be displayed to indicate that the item needs restocking
Using Daily Reminders
To automate warehouse managers' work and ensure the necessary items are always stocked, you can set up Warehouse items that require managing stock level reminders.
- Navigate to Configuration → Basic Settings → Daily Reminders tab and find the Warehouse items that require managing stock level section.
- Select the days on which the reminders should be sent. These emails will be sent at
- 5 p.m. UTC for the US server
- 9 a.m. UTC for the EU server
- Save the settings.
For the users to receive these emails, they need to:
- have the Warehouse Manager and Purchase Order Create roles;
- have the Inventory Low Stock reminder checkbox enabled in Email Preferences.
Precoro will send the reminders if there's at least one item in the warehouses with the quantity below the established Minimum Stock Level.
Learn more about daily reminders here.
Placing an Order for Low-Stock Items
When the item Quantity runs lower than Minimum Stock Level, you will see an Order low stock items button on the action panel that will allow you to place a new Order from the current page instantaneously.
💡 Please note: You should first enter information in the Minimum Stock Level and Reorder To fields for the Order low stock items button to display.
Also, you can only create a quick Order if you first assign a Supplier to the item.
To place an instant order:
1. Press the Order low stock items button and select a Supplier from the list of available ones.
2. Press the plus sign on the right to select items you need to add to the Order.
💡 Please note: You can find more information about creating and working with Purchase Orders in Precoro here.
3. Fill out the needed information in the Purchase Order. After the document has been created, the red dot next to the item will turn yellow, informing you and your colleagues about the Order placed on that item.
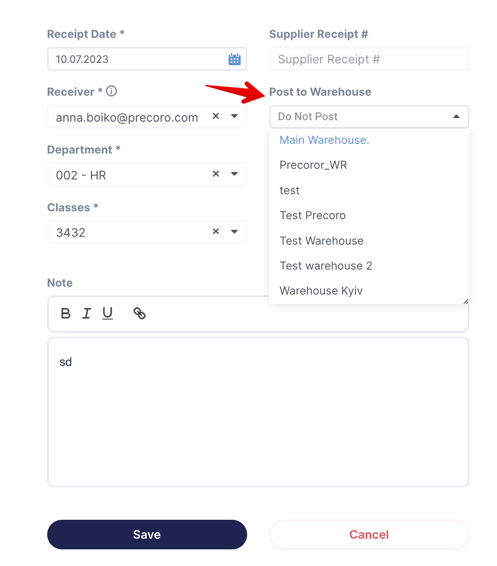
💡 Please note: Select the needed information in the Post to Warehouse field when creating a Receipt document. If you choose the Not to Post option, the numbers in the Warehouse Inventory will not be updated.
Additional Useful Materials
When working with Inventory, you might also find these articles useful: