TABLE OF CONTENTS
- Distribute Costs Precisely Across Locations, Teams, and Budgets
- New in Supplier Management
- Ensure Timely Editing Restriction with Updated Accounting Period Close
- Edit and Analyze Item Tables Easily with a New Design
Distribute Costs Precisely Across Locations, Teams, and Budgets
What are Split Costs
This update brings a new level of flexibility and precision to budgeting and collecting analytics in Precoro using Split Costs. Now, when you create a PO or an invoice, you can split it into multiple cost allocations and assign different budgets, locations, or custom document fields to these allocations. The document's total is split in a ratio you set for the document.
A few things Split Costs help you with:
- Creating a single document, even if the costs are divided between several departments or locations.
- Tracking budgets accurately without creating multiple invoices or orders.
- Monitoring and analyzing spending across your company’s units.
- Initiating the correct approval workflow for each cost allocation based on the selected locations and custom fields.
How to Create a Document with Split Costs
To enable this functionality, please contact your Customer Success Manager. After that, Split Costs will be available when creating purchase orders, service orders, and invoices.
Here's a step-by-step guide to creating a document with Split Costs.
Step 1:
Create a document you want to split.
Step 2:
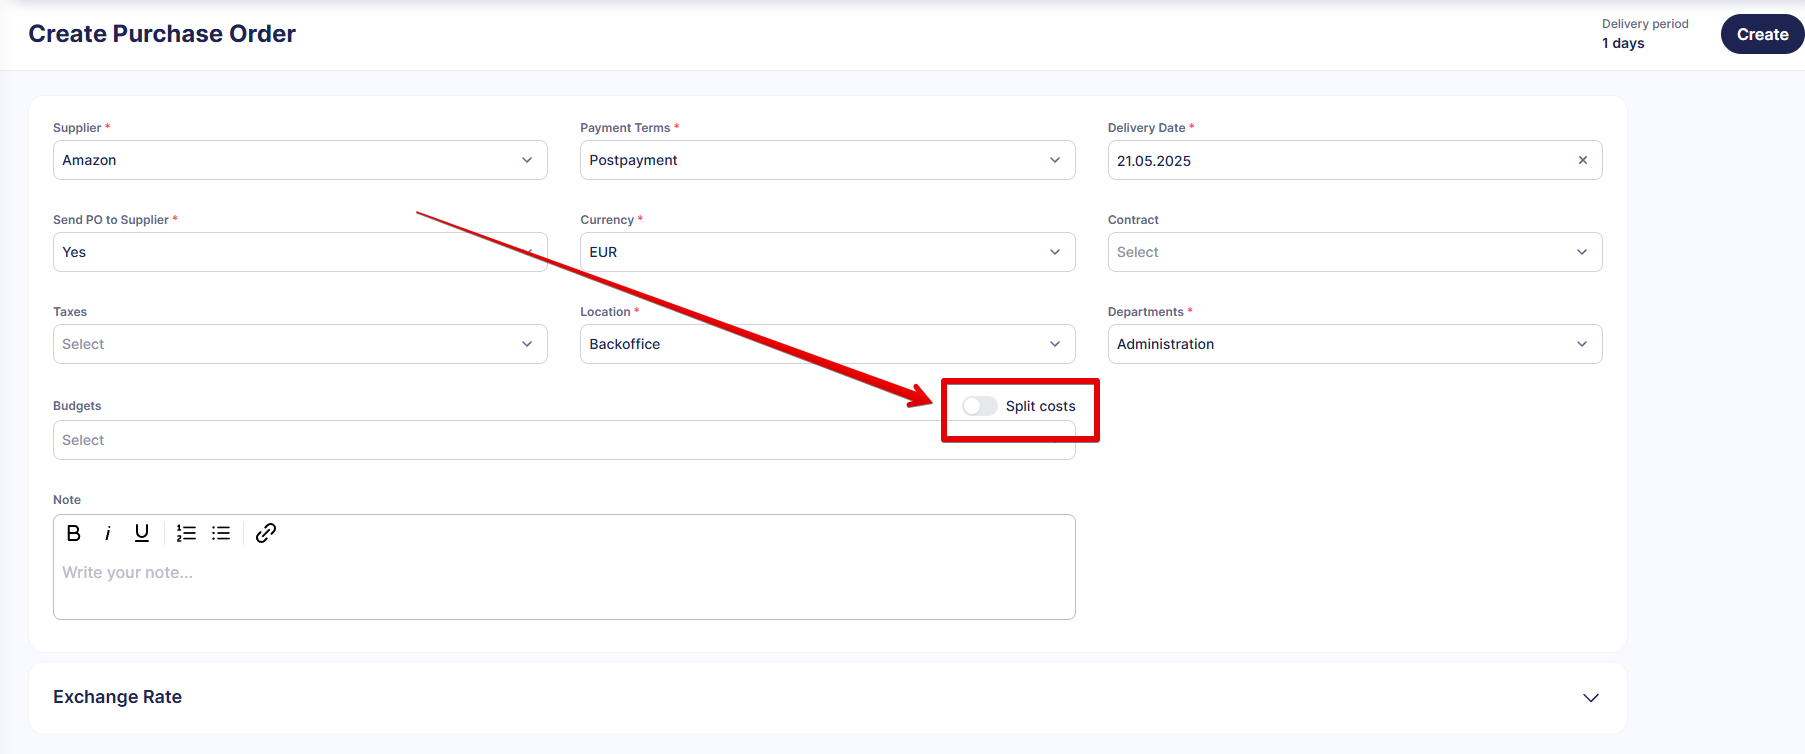
If your company uses budgets, enable the Split Costs toggle above the Budgets field. The Split Costs section will appear above the Note field. Budgets, locations, and required custom document field values can then be selected for each line of this table instead of the entire document.
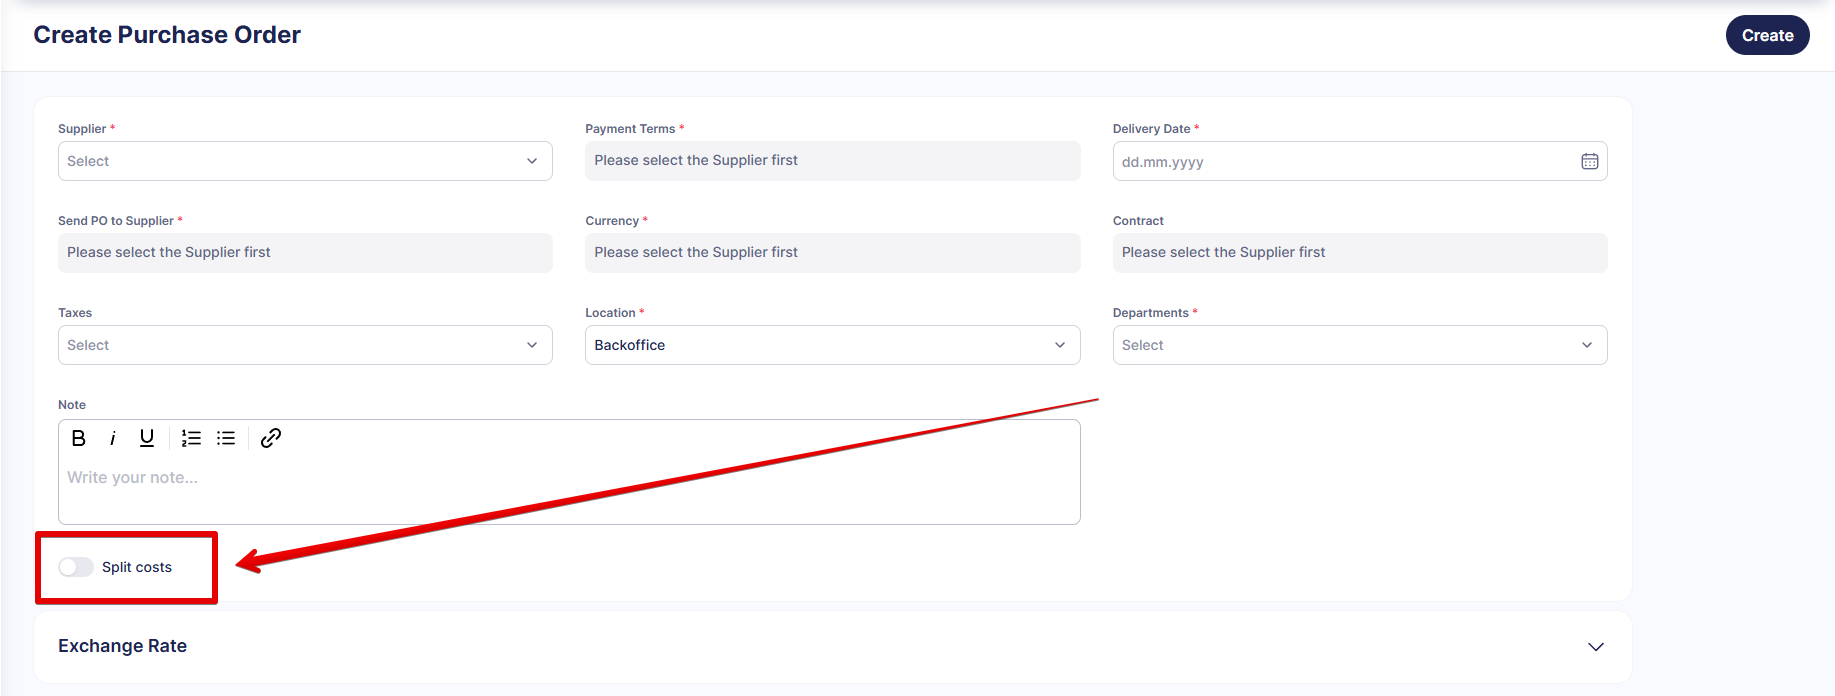
 If your company doesn’t use the Budgets module, the Split Costs toggle is below the Note field. You can still use split costs to track spending by locations or custom fields.
Step 3:
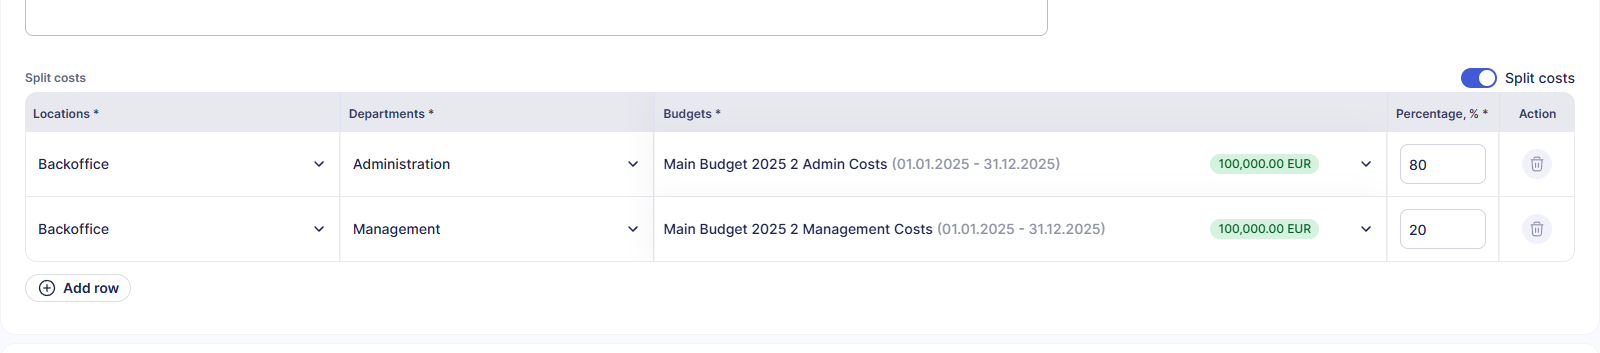
In the Split Costs section, create up to 10 lines by pressing Add Row. Then, fill out the required fields. Each line signifies a cost allocation with separate values for standard fields, custom fields, and budget.
💡Please note: you can select one type of budget for all lines in the Split Costs table: either budgets by document fields or budgets by item fields. A document can’t be split between different types of budgets. When filling out the Budgets column, you only see available options in the drop-down list.
When you use budgets by item fields, the costs are allocated according to custom field values selected in items.
When you use budgets by document fields, the document’s total is split between the cost allocations according to the percentage set in the Percentage, % column. By default, the total is divided evenly between the lines, but you can set a custom ratio as long as the sum equals 100%.
Step 4:
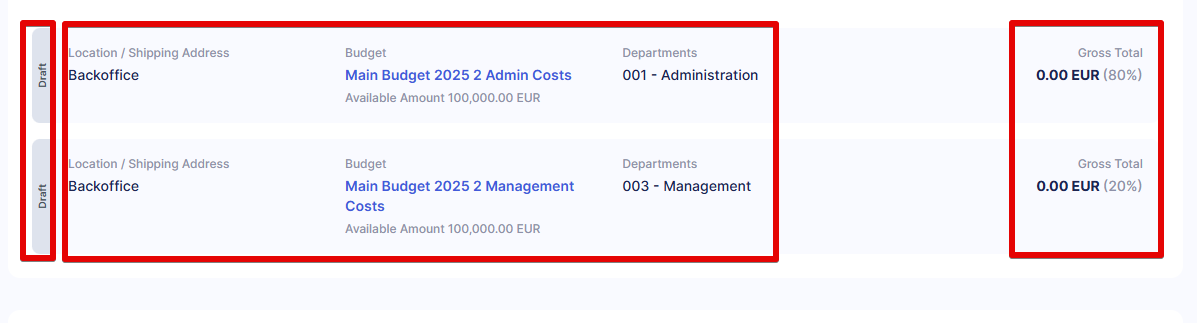
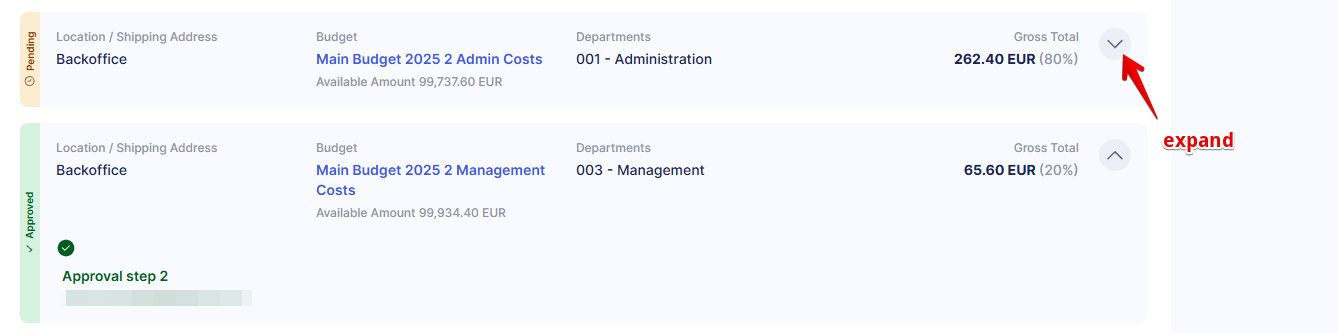
Once ready, press Create. On the document page, you will see the cards for each cost allocation below the document’s total. They display the following information:- The allocation’s status;
- Selected locations, budgets, and custom field values;
- The allocation’s total.
Step 5:
Add items to the document.You can now select different values of a custom item field for a single item. This allows you to divide a singular item’s cost between budgets. This functionality is available when using budgets by custom item fields.
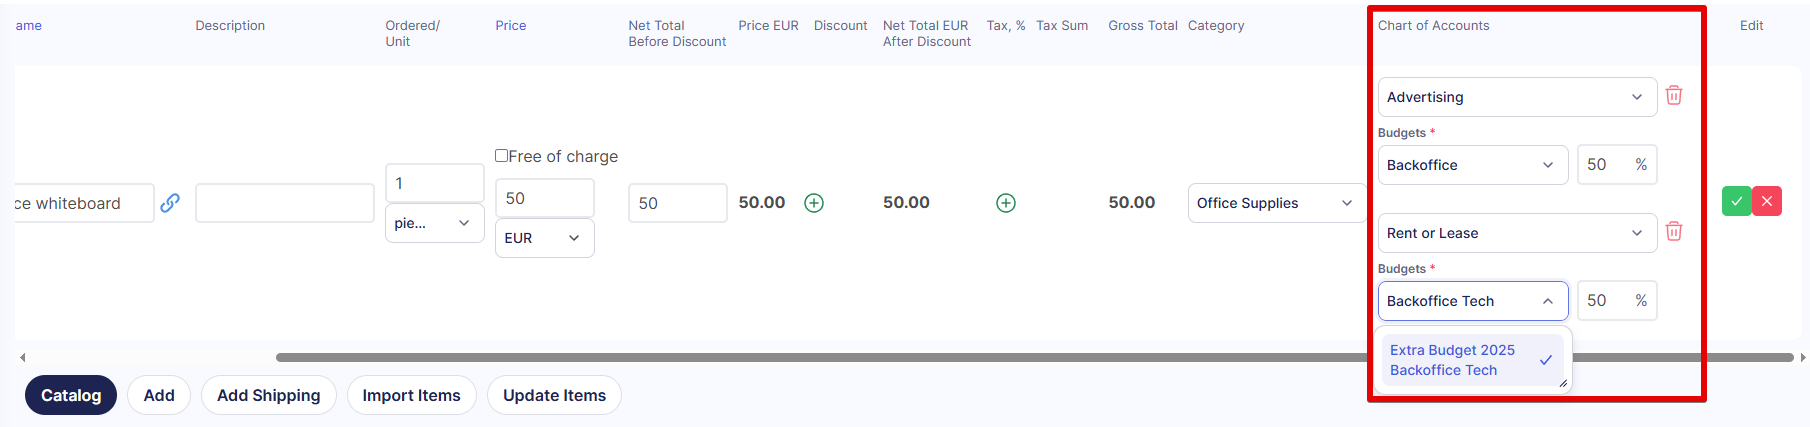
Choose the options available in the budgets assigned to cost allocations. Once you select the custom field option, choose the budget you want to add the cost to and set the percentage for this particular item.
Step 6:
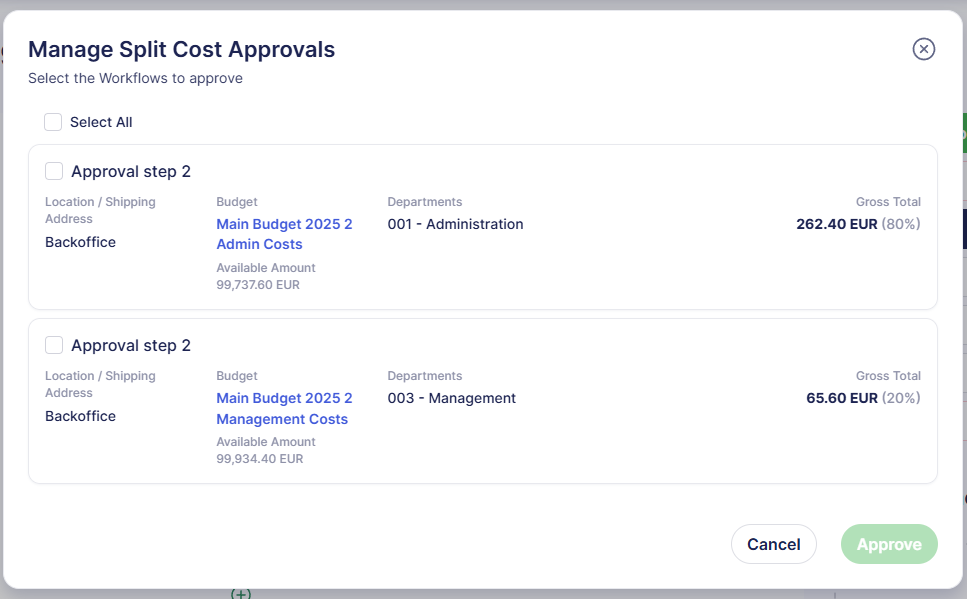
Once ready, confirm the document. Each cost allocation will proceed to the approval workflow set up in your company. You will be able to see the progress in the allocation card status. You can expand the card to see the approval steps for each allocation to which you have access rights.
How to Track and Manage Documents with Split Costs
Cost Allocation Statuses and Approval
Each cost allocation corresponding to a line in Split Costs has a separate status showing its progress. Visit the guides to learn more about PO statuses and invoice statuses.
When approving or rejecting a split document, approvers can select the allocations they wish to approve from those available to them.
Editing and Revising Split Documents
While the document is Pending, the creator can’t adjust Split Cost. To make changes, Revise the document.
When a split document is In Revision, you can modify only the Split Cost lines you have access to. However, you can correct the percentage for all lines if you can access at least one; this allows the sum to be kept equal to 100.
If you have a related PO and invoice with split costs:
- A cost allocation in a purchase order that has a related invoice can’t be deleted.
- If a split invoice is created for a split PO, split costs can’t be deactivated.
Super Users can edit or revise Split Costs in Pending documents.
💡Please note: changes to Split Costs trigger the re-approval process.
Split Costs in Reports
When exporting reports by document, you will see each cost allocation as a separate entry. These lines will have the same number as the split document while displaying the allocation’s field values and totals.
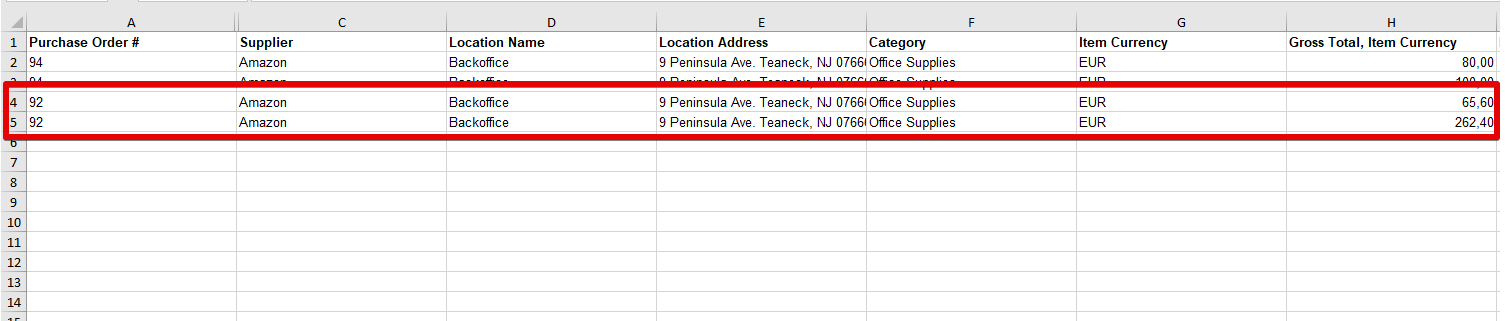
If you assign budgets by item fields to cost allocations and then add multiple values of a custom item field to one item, this item will be displayed as several lines in reports by items.
New in Supplier Management
Enjoy a Fresh Look for Custom Supplier Field Options
This update brings the updated look of option tables to Custom Supplier and Contract Fields.
Here’s what to expect when editing, creating, or viewing these fields:
- sleek modern interface;
- efficient space usage to edit field names and descriptions with ease;
- upgraded option tables providing quick access to the list;
- option hierarchy display with the ability to expand and collapse sub-level lists.
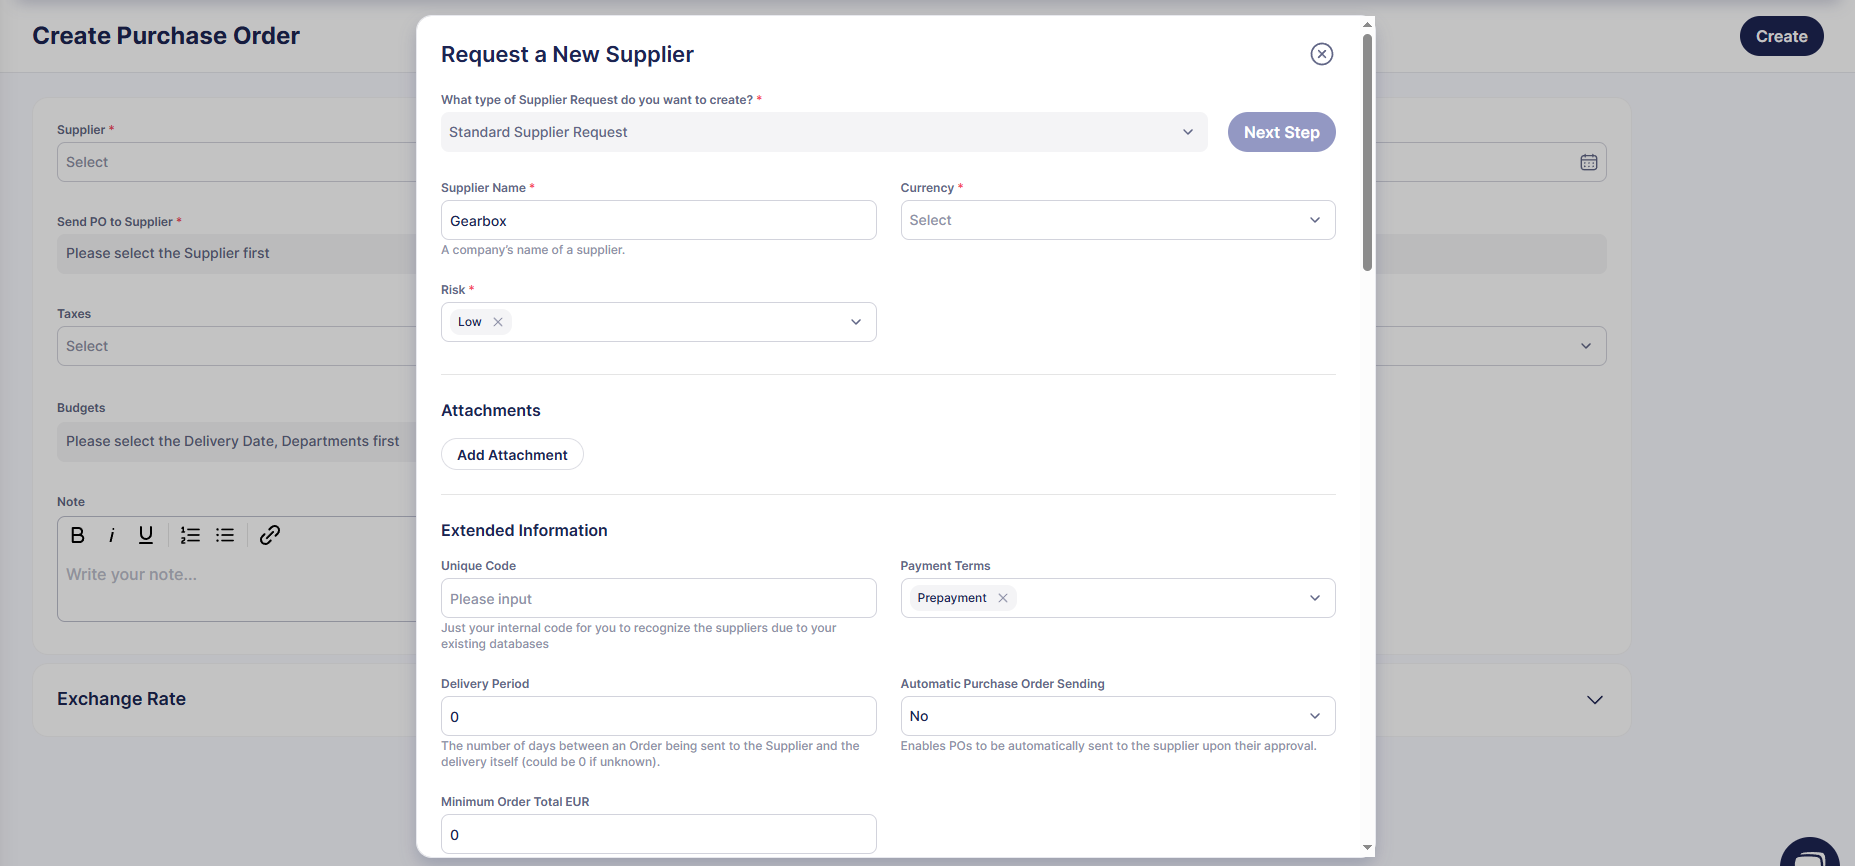
Request Suppliers Through a New Form
We updated the supplier request form to make it more straightforward and accessible. Now, when document creators request new suppliers, they will notice these changes:
- Required custom fields are added to the form’s topmost part, ensuring users don’t miss company-specific details.
- The Extended Information section has been permanently expanded, making it easier to find all the necessary fields.
- Contact, Address, Payment Details, and Custom Supplier Fields (except the required ones) can be found below Extended Information.
Ensure Timely Editing Restriction with Updated Accounting Period Close
We’ve improved the Accounting Period Close feature to help you maintain accurate and compliant records. Now, invoices, expenses, and credit notes with an Issue Date in a closed accounting period cannot be created or edited. For other document types, editing remains restricted based on Delivery or Due Dates within closed periods.
To learn more about Accounting Period Close, please refer to this article.
Edit and Analyze Item Tables Easily with a New Design
As part of our design changes, we updated the look of item tables in receipts and requests for proposals. To help you work faster and analyze the document at a glance while enjoying the interface, we made the following changes:
- The design is aligned with other updated product pages.
- Item editing is moved to a sidebar, so you can comfortably edit and fill out as many fields as necessary.
- Column totals are displayed under the table for easier tracking.