TABLE OF CONTENTS
- Limit Access to OCR Attachments by Legal Entity
- Match OCR-Processed Credit Notes Precisely
- Flexibly Assign Initiators for Auto-Created Invoices
- Skip Categories to Add Items in Fewer Steps
- Automate Custom Field Management with New Activation Criteria
Limit Access to OCR Attachments by Legal Entity
If your company uses Account Configurations with the Set Up Access by Legal Entity setting, this feature will help you work conveniently and securely. As multiple companies are managed via legal entities, we’ve added the ability to filter the AP Inbox page by legal entity. This functionality allows you to protect data from unauthorized access and speed up work by only showing relevant documents.
Here’s how it works:
- When attachment fields are recognized, the legal entity is assigned based on the name and address of the receiver.
- Attachments with a legal entity assigned are only visible to users with access to that legal entity.
- A user who uploaded an attachment can still see it even if they don’t have access to the assigned legal entity.
- If a legal entity is disabled, it can’t be selected in new attachments, but previously created documents with this legal entity remain available.
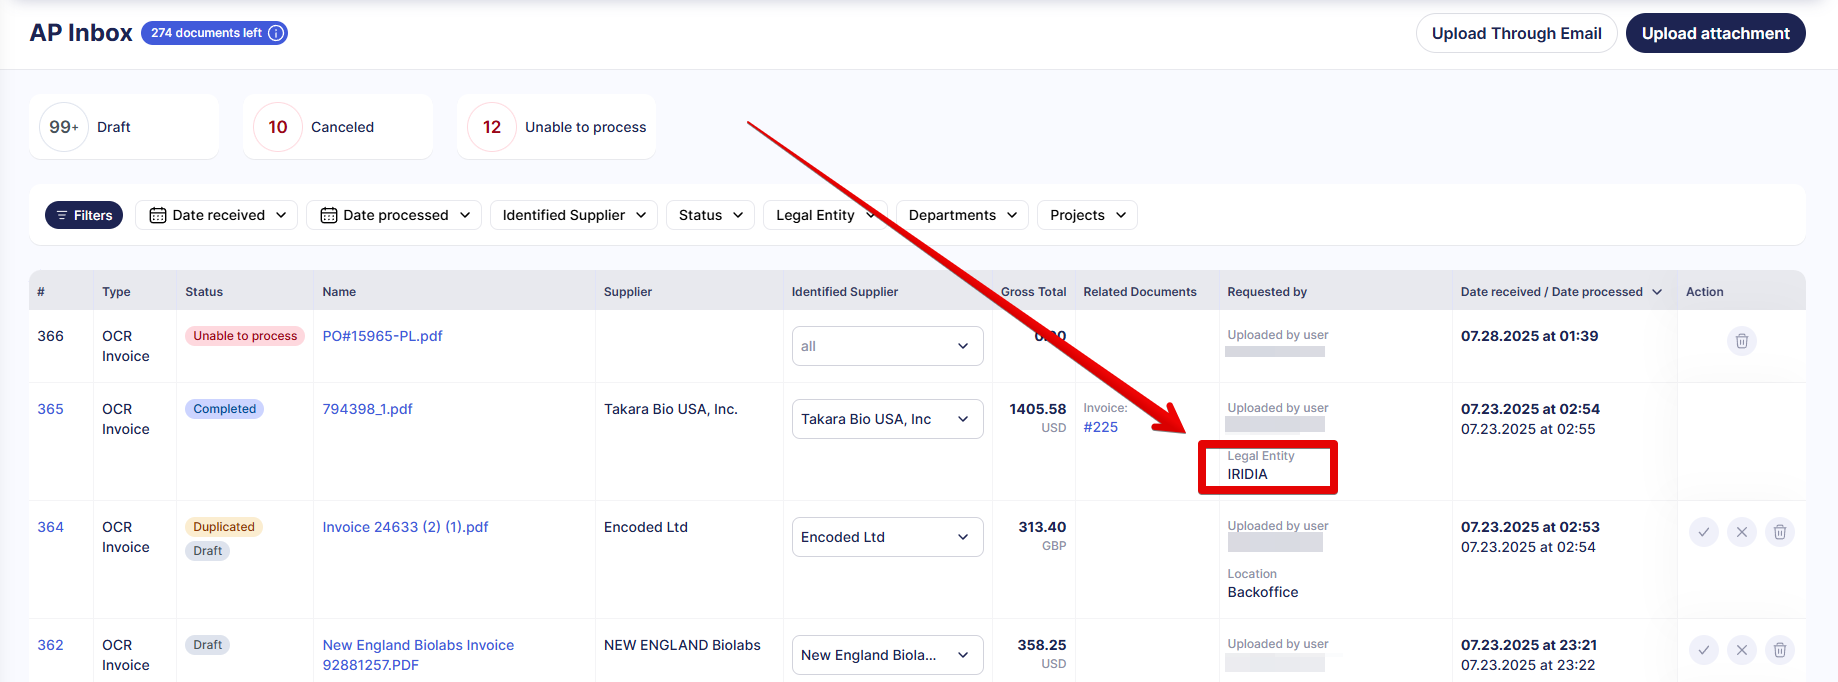
Users with access to multiple legal entities can also use the filter on the AP Inbox page to quickly find the needed attachments. 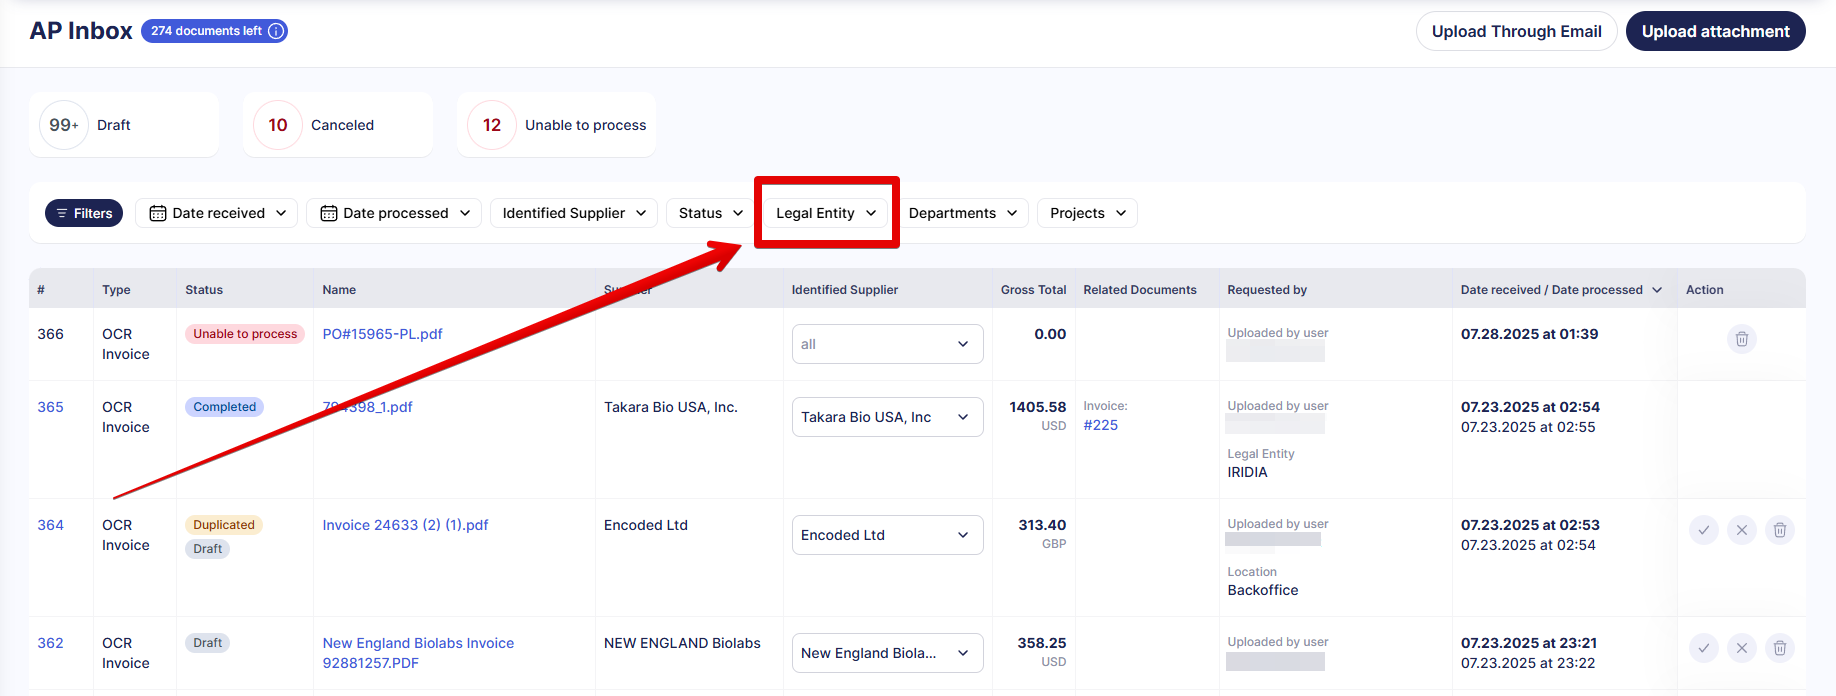
Match OCR-Processed Credit Notes Precisely
To help you track your funds with even more accuracy, we’ve added the ability to process OCR-recognized credit notes in multi-line mode. This means items in the CN will be recognized separately and matched to the items in the related invoice.
To see this feature in action:
- Find the CN attachment on the AP Inbox page, click Create (“✓” icon), and select Add Credit Note. On the following page, select the related invoice.
- You’ll be prompted to enter CN details. At the bottom of this page, you’ll see the recognized items.
- The items are matched following the rules selected for invoice-to-order matching.
- You can also match the items manually by clicking the Match button opposite any item, which opens the list of items from the invoice.
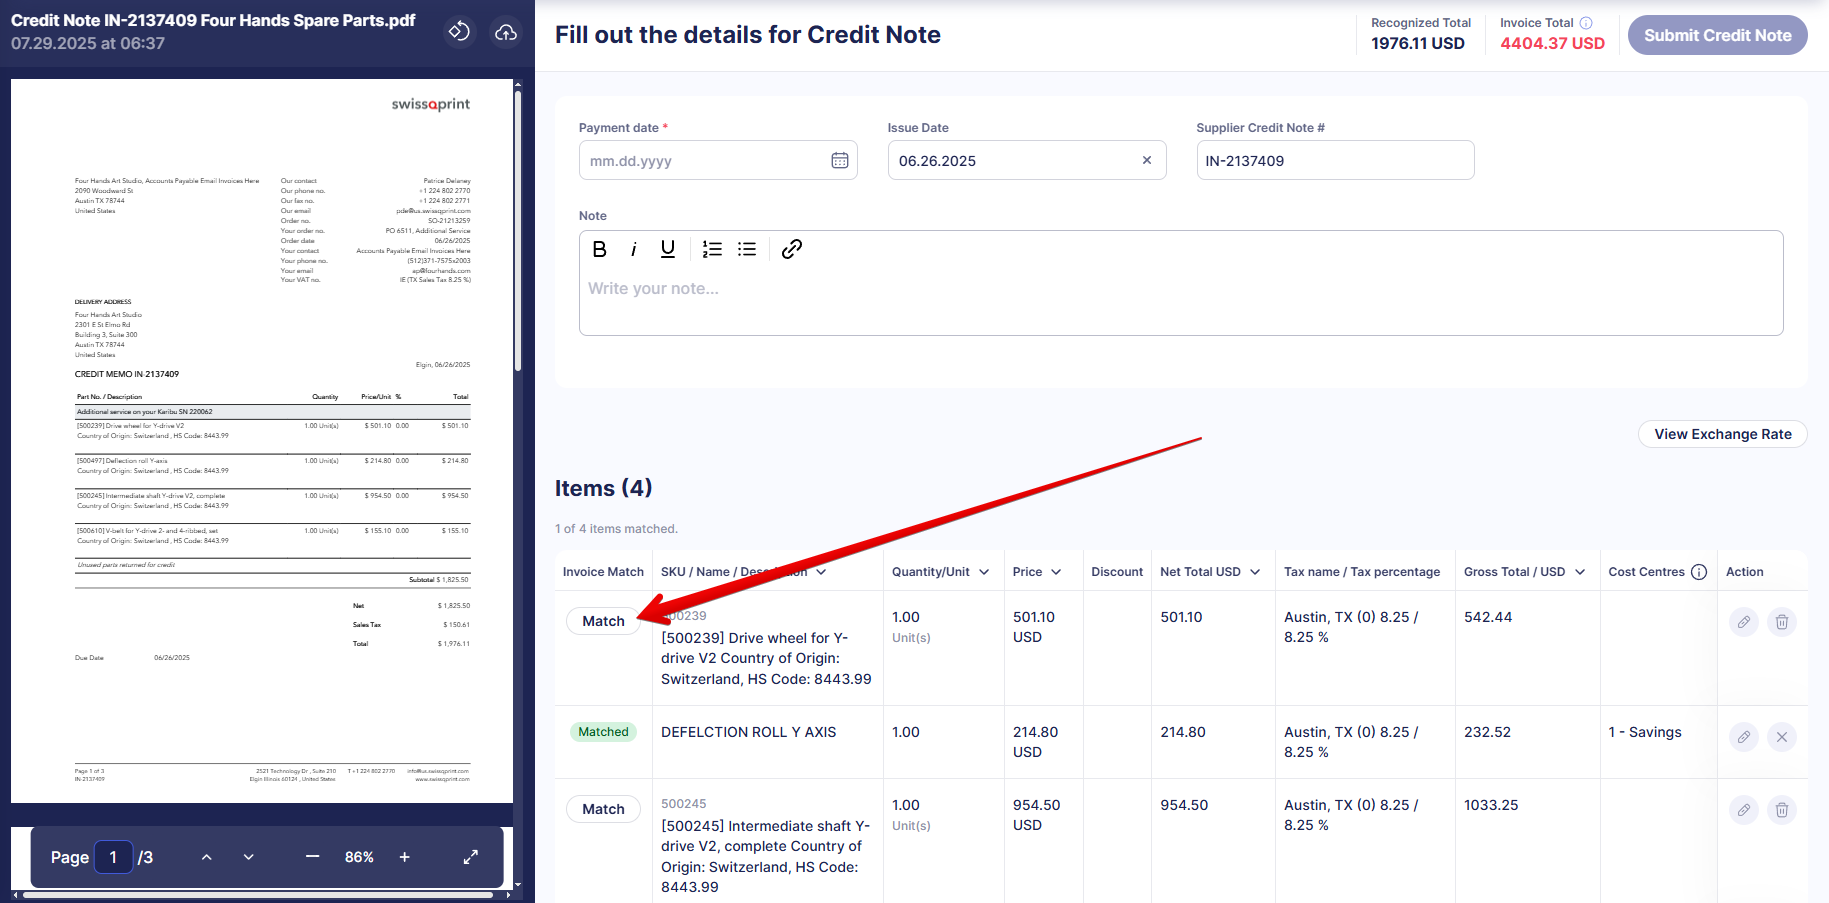
Please note the following rules to successfully edit the items and submit the credit note:
- Each item’s quantity and price in the CN can’t exceed those in the related invoice.
- The CN total can’t be greater than the invoice total. You can track the amounts in the Recognized Total and Invoice Total fields at the top of the page.
- All CN items must be matched.
- Supplier Credit Note # must be unique.
Flexibly Assign Initiators for Auto-Created Invoices
When you configure how OCR-recognized invoices are auto-created, you can choose to assign the related order issuers as initiators. The new Set the Order Creator as the Initiator setting gives you better control over user responsibilities.
To edit OCR configuration, please contact your Customer Success Manager.
Here’s how the auto-created invoice initiator is assigned:
- When the setting is enabled
- If the creator of the related order has the Invoice Create role, they are added as the invoice initiator.
- Otherwise, Precoro assigns the default initiator.
- When the setting is disabled
- The default initiator is assigned to automatically created invoices.
- However, if a user creates an invoice with the Auto-Create button on the AP Inbox page, they are added as the initiator of this document.
Skip Categories to Add Items in Fewer Steps
Custom item fields now serve as the primary source of item details, which allows them to be used instead of categories. This transition keeps Precoro’s structure sleek and easy to navigate while preserving your data.
If your company didn’t use the Categories functionality, you’ll notice the Category field was removed from items, documents, stock transfers, and reports. You can now enjoy a cleaner interface and focus on relevant item details.
Companies that previously used categories can start using the automatically created Category custom item field. Its options correspond to categories and are assigned to items (including items in documents) to keep your data intact. If you’re using categories in API integrations, please follow the instructions in this article to ensure a smooth transition.
Automate Custom Field Management with New Activation Criteria
We’ve added new rules that help you control custom document, item, and supplier fields with the Drop-down list type and ensure they always have at least one selectable option. Here’s what changed:
- When you create a custom field with the Drop-down list type, it’s disabled by default. The field is enabled automatically when you add the first option.
- When you edit a previously deactivated field, it’ll remain disabled even if you add new options.
- If you disable all options of a custom field, it’ll be automatically disabled too.
This update ensures that users can’t accidentally enable a field with no available options. This, in turn, guarantees that fields in documents and items always have at least one option you can select.