TABLE OF CONTENTS
- How to Set Up the Receipt Integration
- How to Send Receipts to NetSuite
- Integrated Fields and Data
- How to Cancel a Receipt
- Receipt through the Purchase Order
- Other Receipt Integration Features
How to Set Up the Receipt Integration
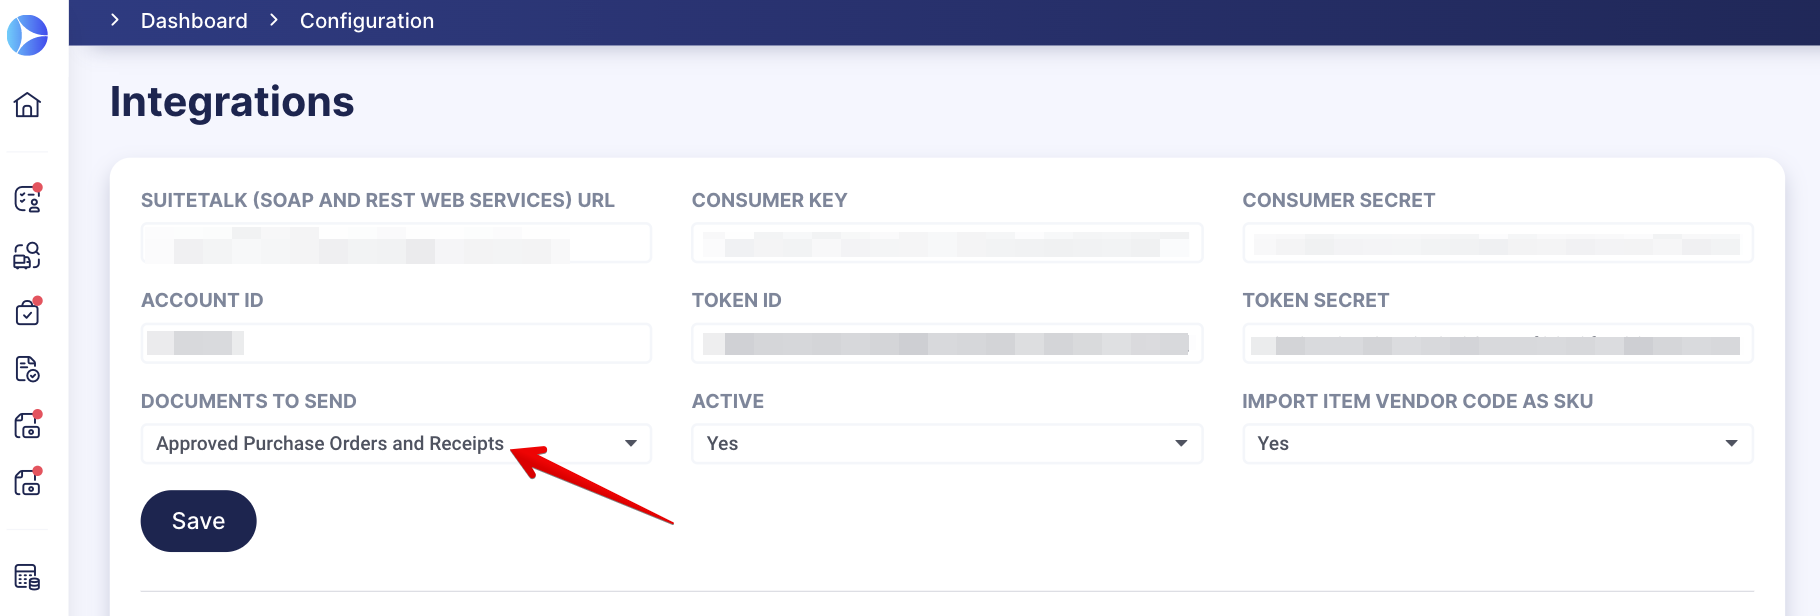
To set up the Receipts integration:
- Open the NetSuite integration page.
- Select the Approved Purchase Orders and Receipts in the Documents to Send field.
- Press the Save button to confirm changes.
You can also integrate only the Approved Purchase Orders without Receipts. To do that, select this type of form in the Documents to Send field. Find more information on this type of integration here.
In NetSuite, the Receipt will be integrated into the Transactions → Purchases → Receive Orders → List.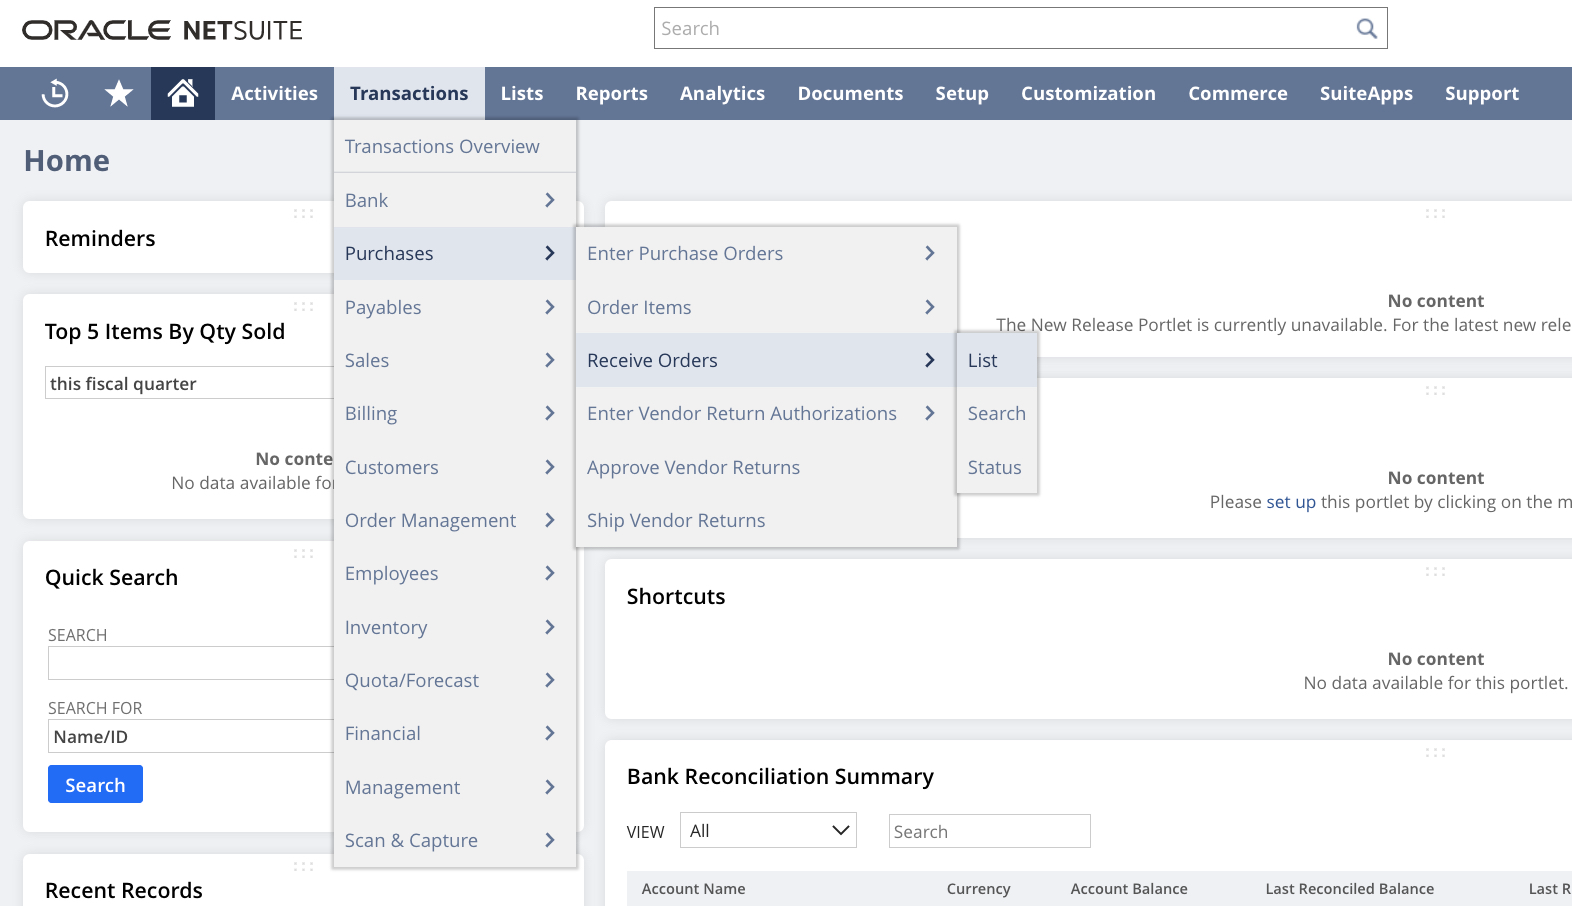
How to Send a Receipt to NetSuite
1. Open the previously created Purchase Order and click on the Create Receipt button.
2. Select items to add to the Receipt.
3. Create a Receipt by filling out all the necessary details.
4. The Receipt will be automatically sent to NetSuite.
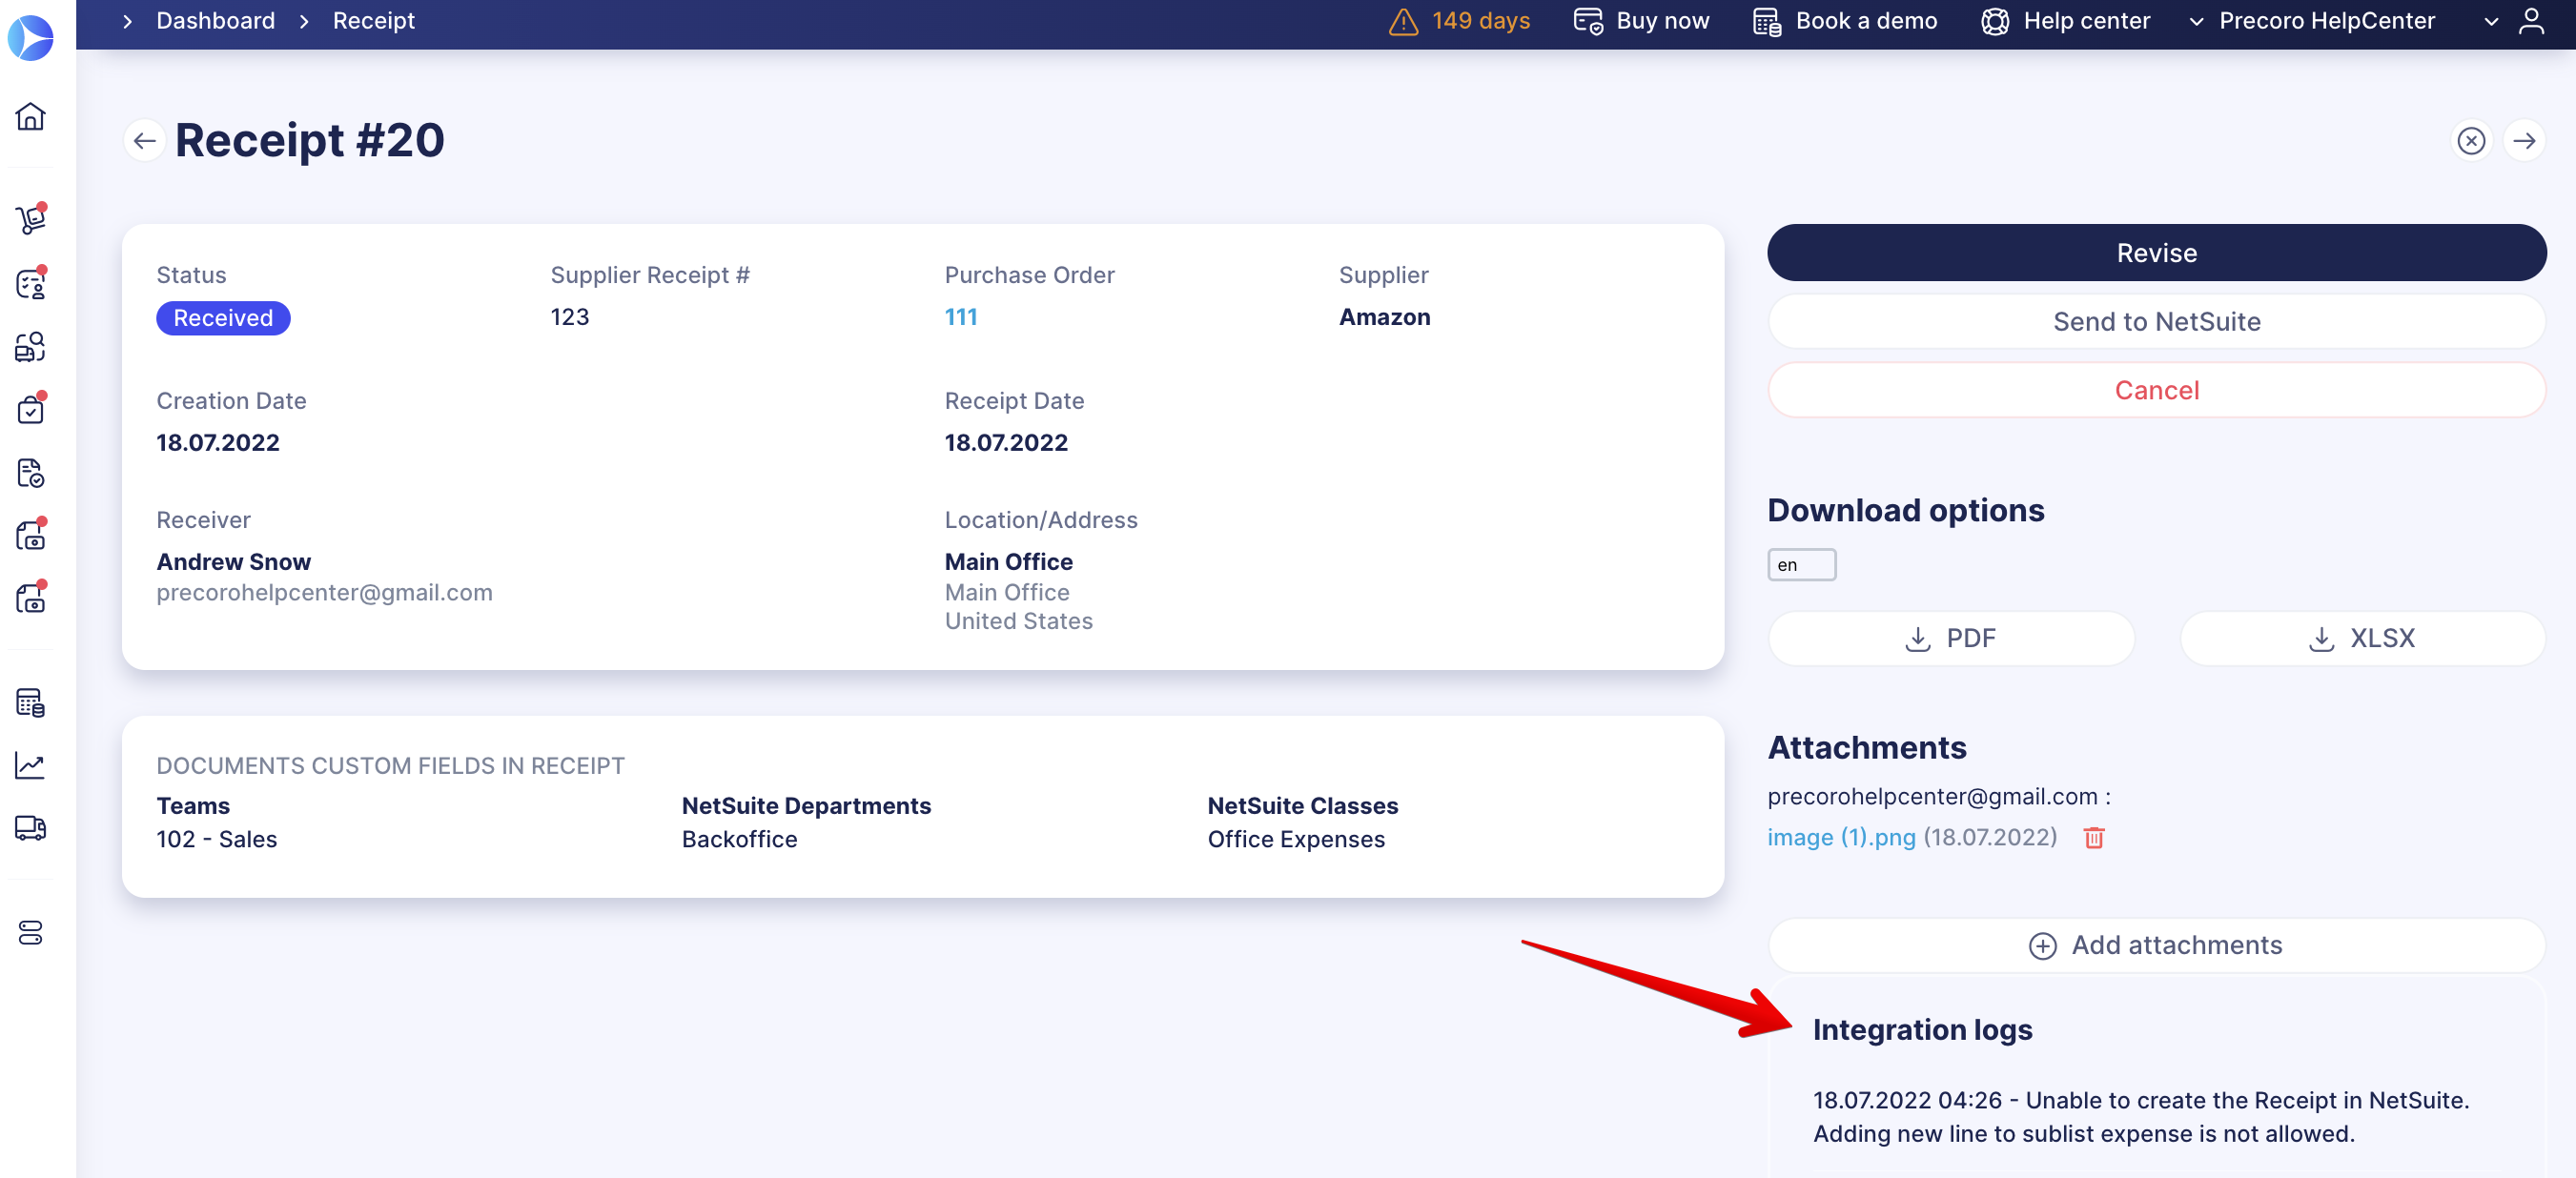
In case you have made changes you wish to import into NetSuite, use the Send to NetSuite button on the Receipt page to do it manually.
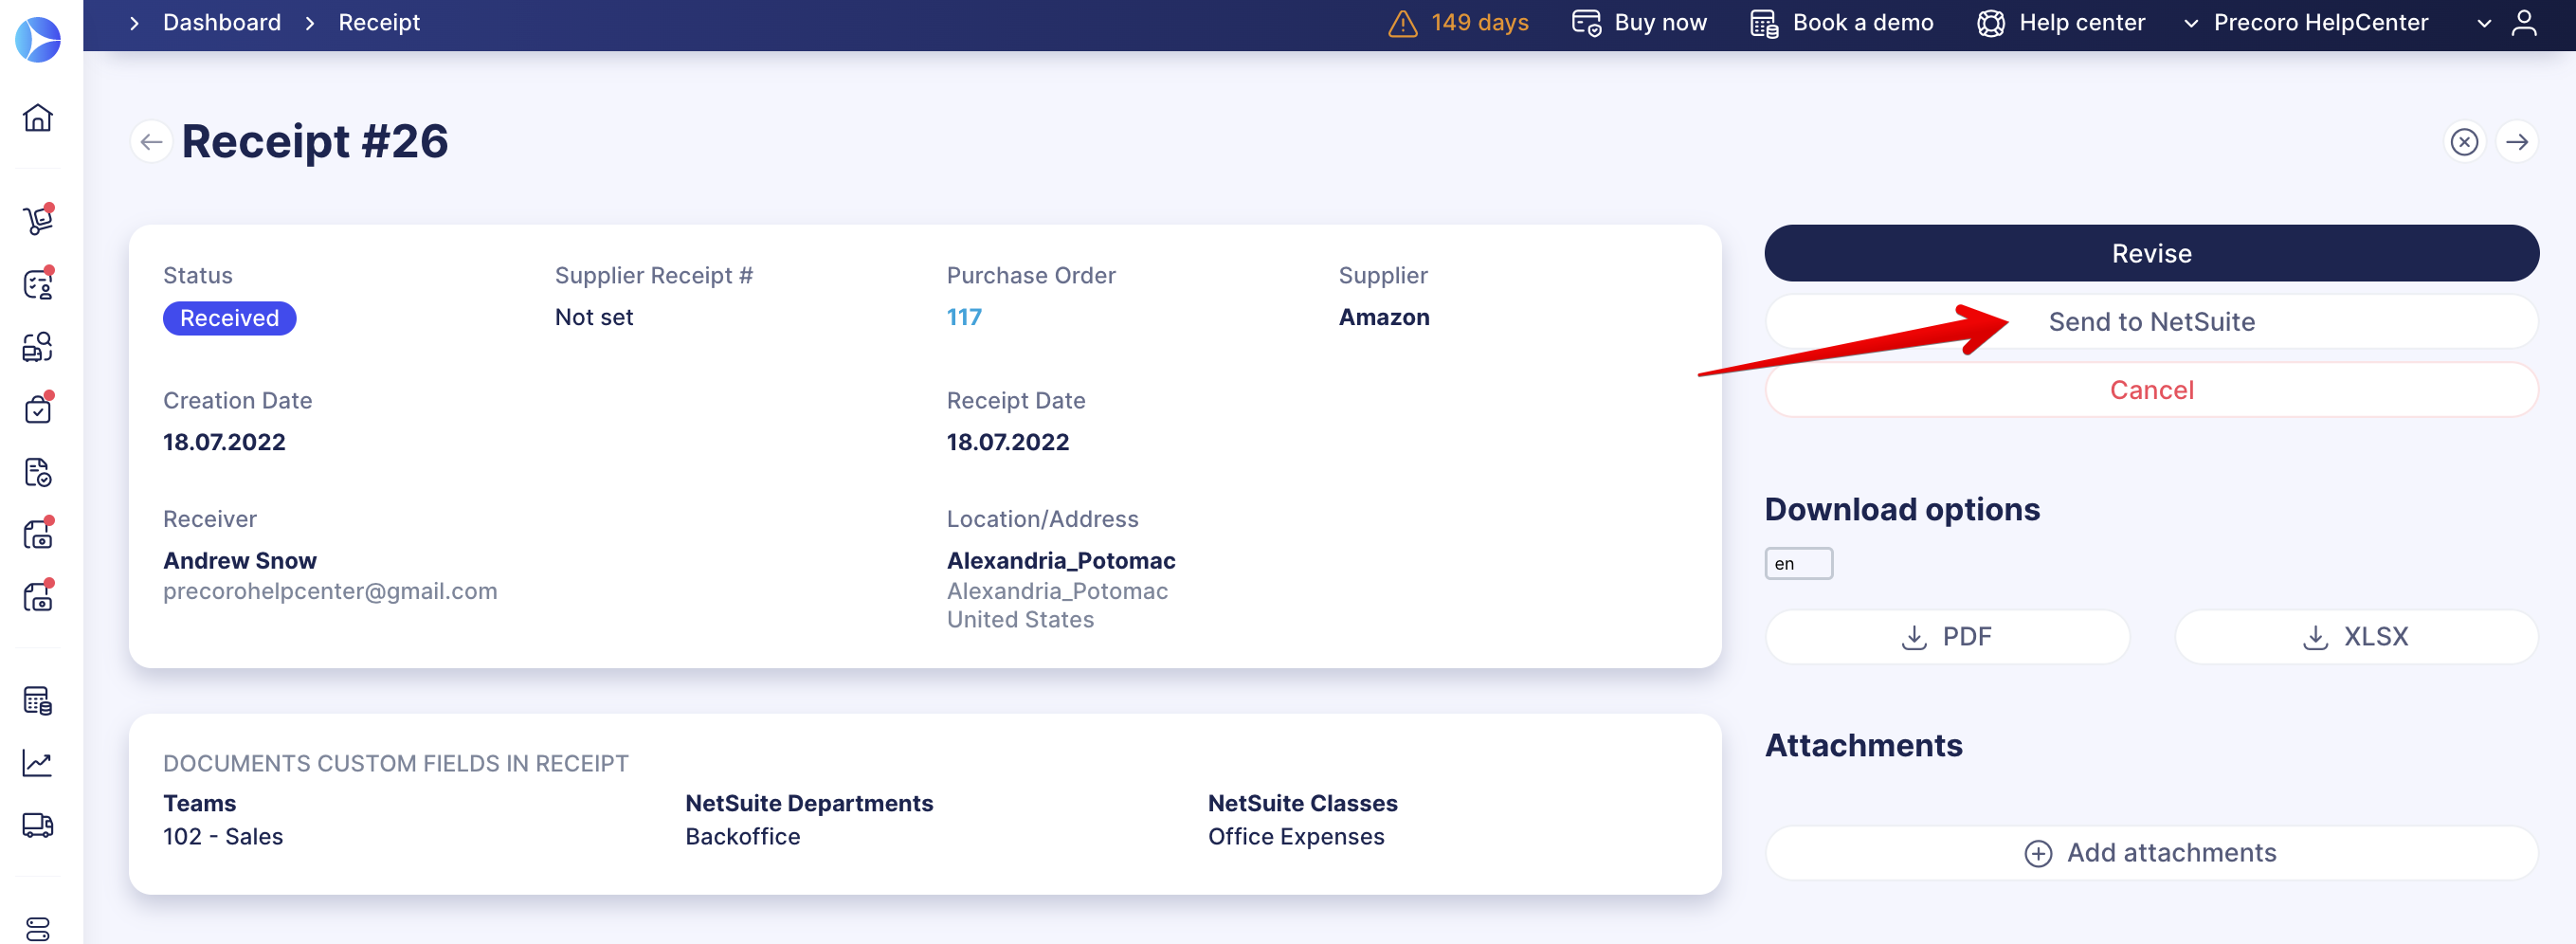
In the Integration logs, you can receive information in case there are any troubles with the Receipt import as well as see the message that the Receipt was successfully imported.
Integrated Fields and Data
In Receipts, the synchronization of all the fields works by the one-way method. Therefore, the documents created in Precoro will be transferred into NetSuite.
Primary Information Mapping
| Fields in Precoro | Fields in NetSuite |
| Purchase Order | Created From |
| Supplier | Customer |
| Receipt Date | Date |

Before, we did not transfer the Receipt transaction date. It was set automatically by the NetSuite at the time of document transfer. But suppose you closed posting periods or Accounts Payable transactions before the end of the month and then transferred the document. In that case, the generated transaction date would be the current one, the selected posting period would be the next one, and as a result, you would get a date and period mismatch error.
Now, to avoid this problem, we are transferring the Receipt Date in NetSuite to the trandate field so that you can select the date for the document in the next open period so there would be no date and period discrepancies.
Items and Expenses Mapping
General information on the item’s integration can be found here.
When integrating Receipt items, you should consider the way of adding them.
-
If the items were added from the Item Management using the Add Item button, and the items were previously integrated, they will be displayed in the Items tab in NetSuite.
Only previously integrated items will be transferred into the Items section in NetSuite.
In case you have added non-integrated items from the Item Management list, they will still be integrated into the Expenses section.
-
If the items were added manually using the Add empty row button, they will be displayed in the Expenses tab in NetSuite.

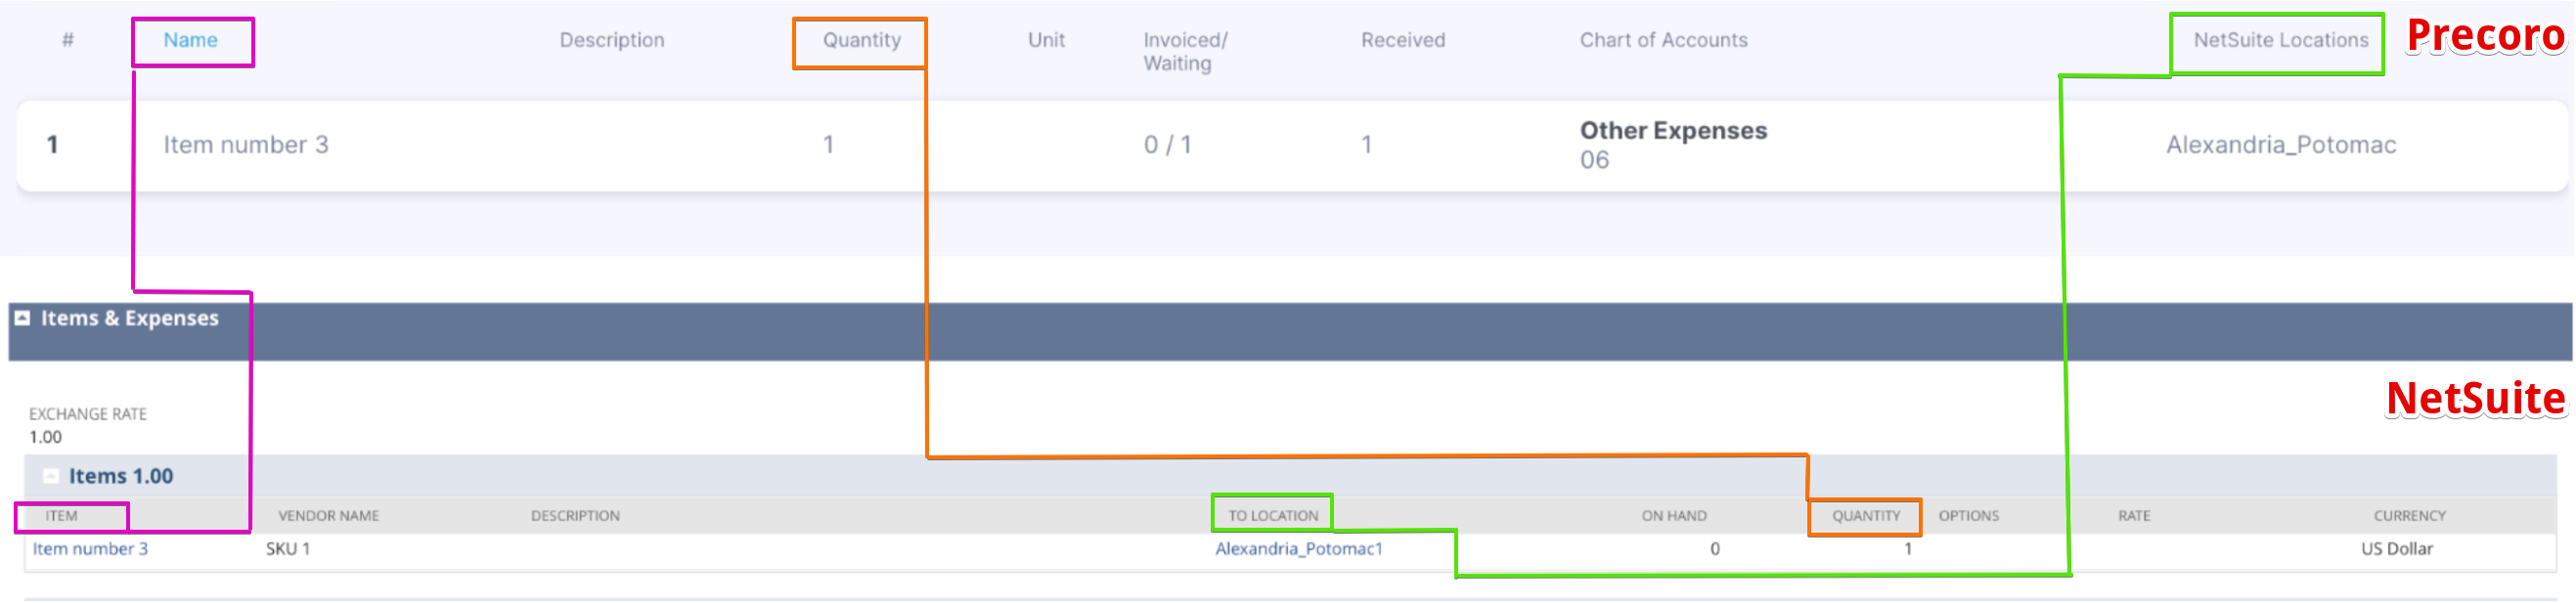
Mapping of the items added from the Item Management list
| Fields in Precoro | Fields in NetSuite |
| Name | Item |
| Quantity | Quantity |
| Document Custom Field — NetSuite Locations | To Location |
Mapping of the manually added items
|
Fields in Precoro |
Fields in NetSuite |
|
Name |
Description |

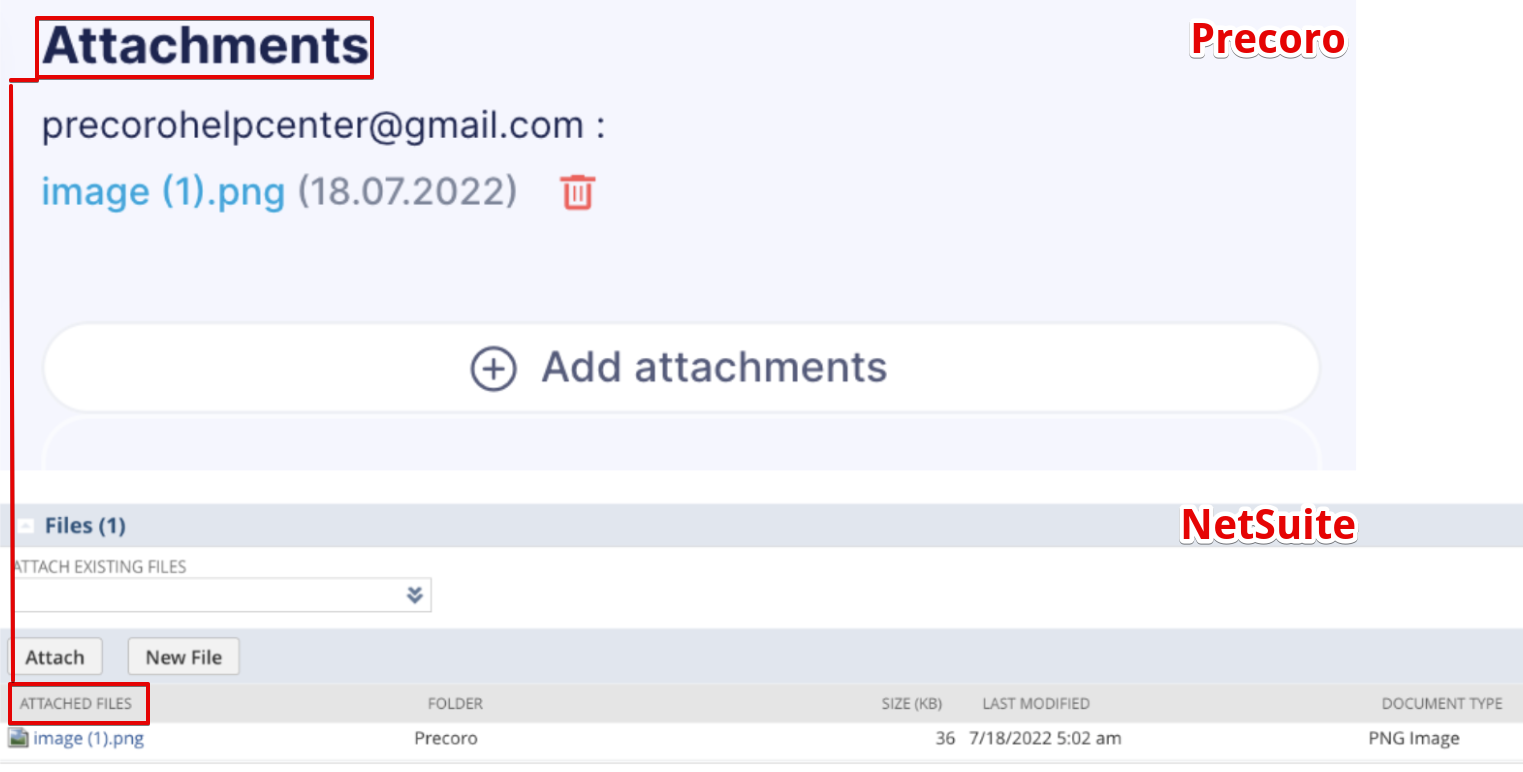
Attachments Integration
In NetSuite, Attachments are transferred to the Files tab:
How to Cancel a Receipt
If you cancel the document in Precoro, it will be automatically removed from NetSuite.
Receipt through the Purchase Order
You can see the integrated Receipt in the Purchase Order in NetSuite in the Related Records → Receipts & Bills tab.

Other Receipt Integration Features
1. If you have created and sent the Purchase Order to NetSuite and then created the Receipt there.
In Precoro, you would not be able to create and send the Receipt to that Purchase Order because the items were already received.
2. In case you have created and sent the Purchase Order to NetSuite, edited it, and deleted the items.
In Precoro, you would not be able to create and send the Receipt to that Purchase Order because the items were already deleted.