QuickBooks Invoices, Payments, and Credit Notes
You can decide at the Integration setup stage which documents to send to QuickBooks: Purchase Orders or Invoices.
To integrate QuickBooks with Precoro, you should have a Plus, Advanced QuickBooks, or Essential subscription. A Simple Start plan does not offer such an option.
The Essential plan allows the integration of Invoices only.
TABLE OF CONTENTS
- How to Send Invoices to QuickBooks
- Revising and Editing an Invoice
- Canceling an Invoice
- How to Import Payments to Precoro
-
How to Activate the Only Payers Can Send Documents to QuickBooks Feature
- How to Use the “Close the Books” Function
How to Send Approved Invoices to QuickBooks
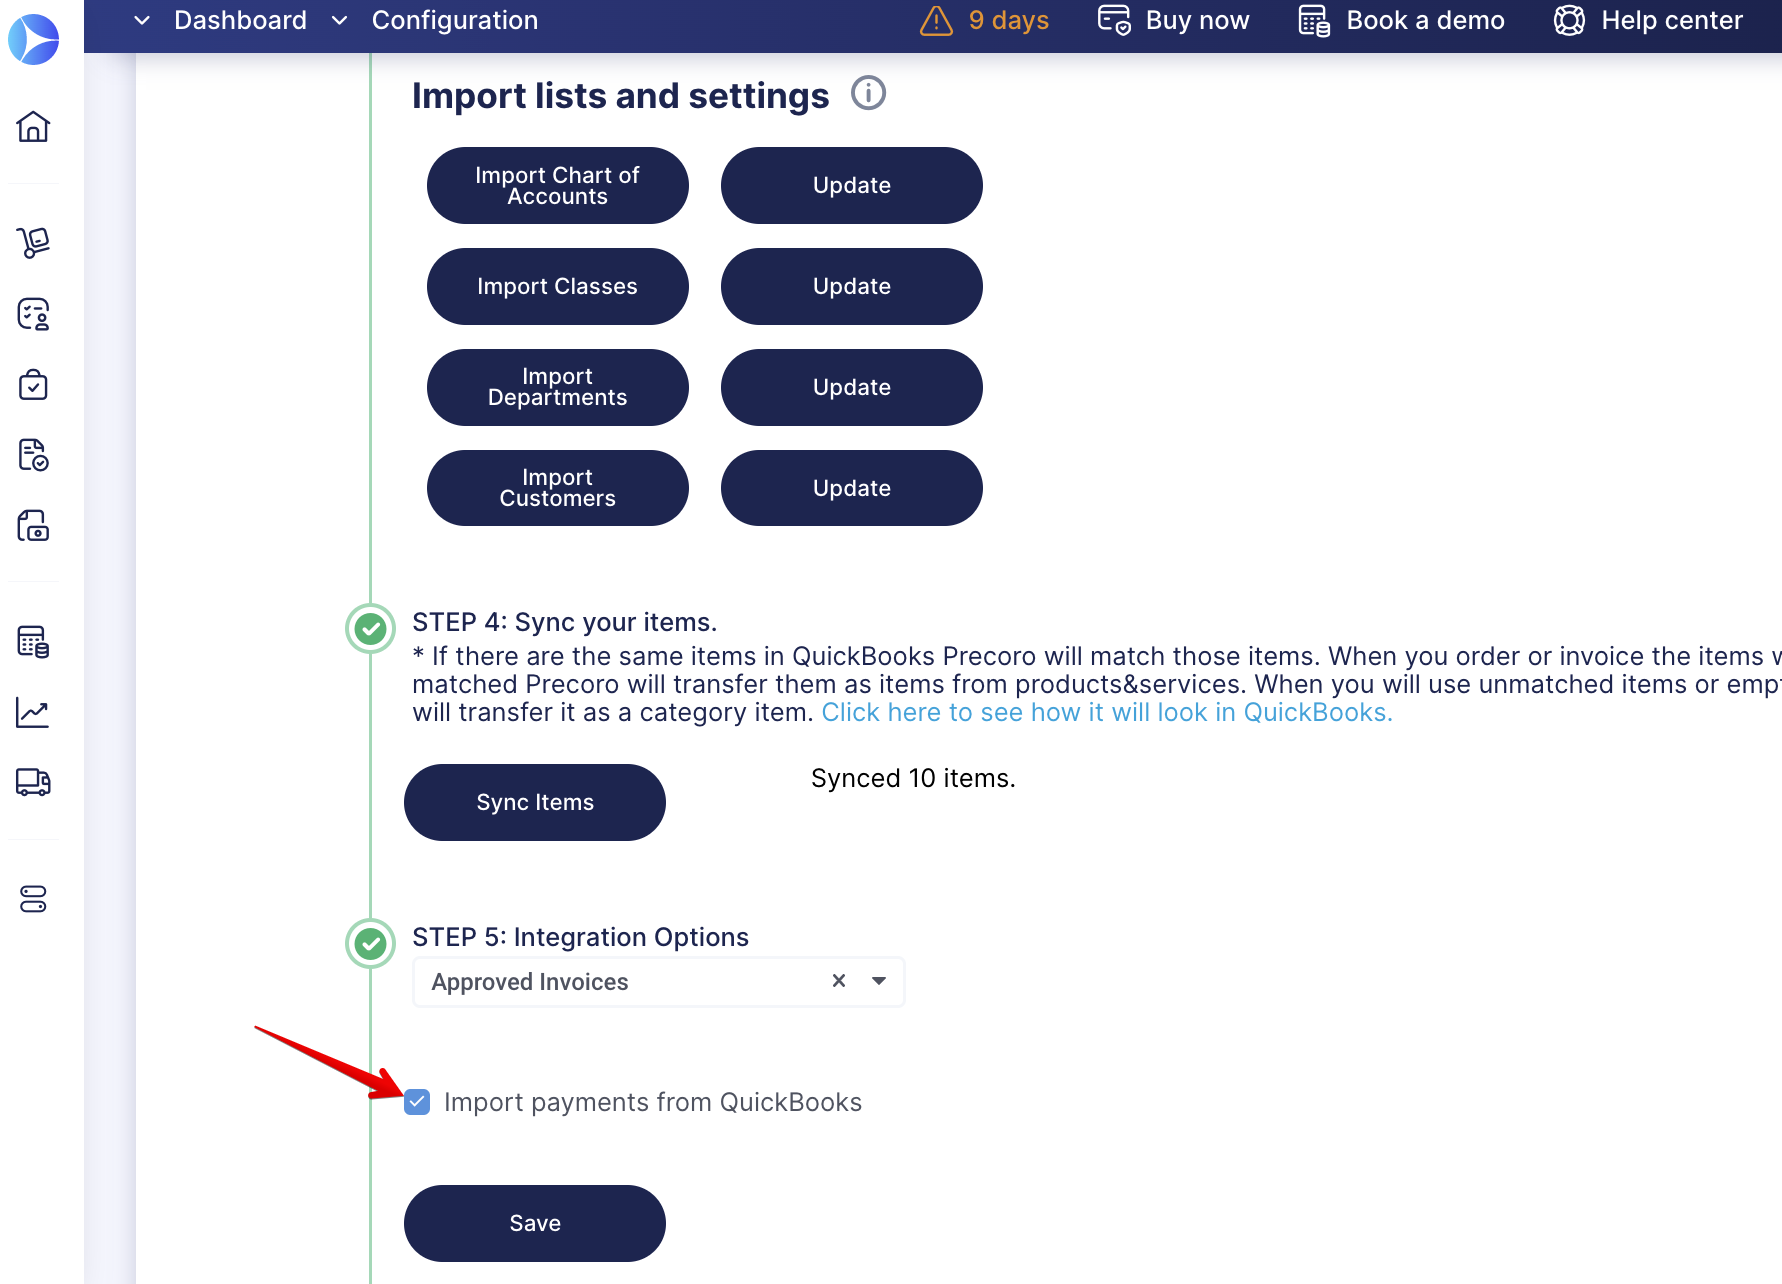
On the Integrations page, choose the Approved Invoice type of document in Step 5. Save the settings, and invoices will be sent automatically after the approval.
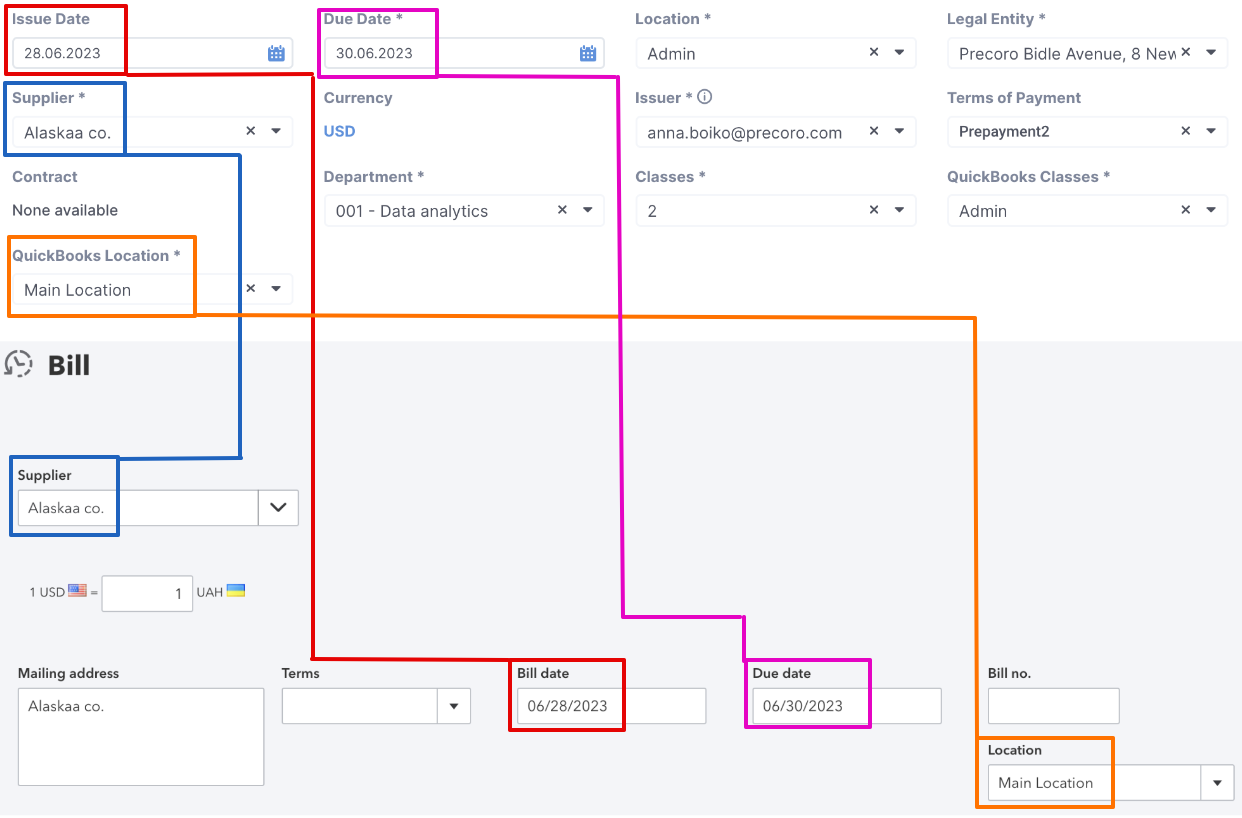
Here's how the data flows between Precoro and QuickBooks Online:
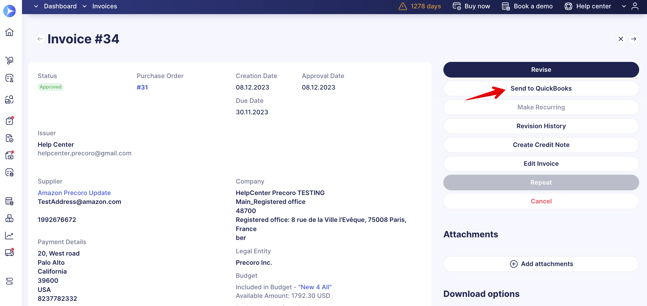
You can also send an Invoice manually by using the Send to QuickBooks button on the right action panel:

Please note that you cannot add zip and heic format attachments for companies integrated with QuickBooks. If you attach a zip and heic format file to a document in Precoro and send it to QuickBooks, it will be transferred without this attachment.
How to Find the Not Sent to QuickBooks Invoices
To view all invoices and credit notes that haven't been sent to QuickBooks, find the “Sent to QuickBooks” filter and set the value to No. You will see the complete list of documents regardless of their other statuses.
To view all documents you can still send, use the “Not Sent to QuickBooks” infocard. It filters only invoices that were not exported due to a possible error and have the Approved status.
Send Pending Invoices to QuickBooks
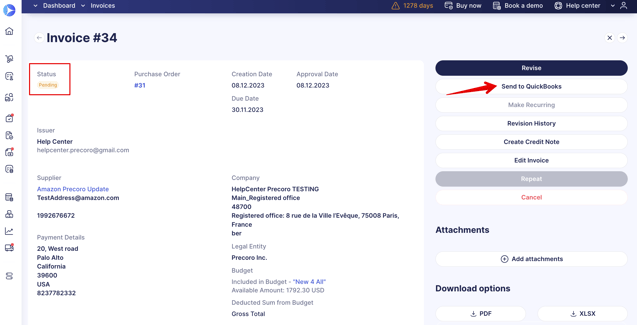
You can send the documents with Pending Status to QuickBooks.
To activate this feature, please contact our Support Team, who will happily assist you on the matter.
This feature will work for the chosen Invoice integration document type. It will be available for users with the Create and Approve Roles for Invoices.
If you have activated the option to send documents to QuickBooks automatically, then Invoices in Pending Status will be sent automatically to QuickBooks.
Regardless, if you send the Approved or Pending Invoice from Precoro in QuickBooks, the Bill will be created, and you will be able to perform the same actions with it in QuickBooks.

What data will be sent to QuickBooks
| Precoro Field Name | QuickBooks Field Name |
| Issue Date | Bill date |
| Due Date | Due date |
| Supplier | Supplier |
| QuickBooks Locations (Documents Custom Fields) | Location |

Item and Category details:
| Precoro Field Name | QuickBooks Field Name |
| Name | Description |
| Price / Currency | Amount (Currency) |
| Tax,% | Tax |
| QuickBooks Chart of Accounts (Items Custom Fields) | Category |
| QuickBooks Customers (Items Custom Fields) | Customer / Project |
| QuickBooks Classes (Documents Custom Fields) | Class |

Notes, Attachments, and Total
| Precoro Field Name | QuickBooks Field Name |
| Note | Memo (includes a link to the Invoice document in Precoro) |
| Attachments | Attachments |
| Gross / Net Total | Total (if Taxes are enabled then includes Tax amount) |

- The discounts applied to the documents or item lines in Precoro will be synchronized with QuickBooks. Therefore, there is no need to modify the Total per line or document in QuickBooks after sending it from Precoro.
- The Invoice # (or Invoice custom number) is not displayed in QuickBooks. Instead, the Supplier Unique Code is displayed.
Revising and Editing an Invoice
If you wish to make any alterations to the Invoice document or items fields, you need to do the following:
1. Take the document in revision by pressing the Revise button on the right action panel.
2. Make the necessary changes to the document or item fields.
3. Confirm the altered document.
You will see a system message that the changes were successfully sent to QuickBooks, and the information about the update will also be available in the Integration Logs.
Please note that if you edit an Invoice in QuickBooks, the changes will not be sent to Precoro.
Canceling an Invoice
You can cancel an Invoice in Precoro, and it will be automatically removed from QuickBooks.
Please note that if you edit or cancel an Invoice in QuickBooks, the changes will not appear in Precoro.
How to Import Payments to Precoro
Consider the type of payment methods that can be imported from QuickBooks:
- Bill Payments
- Cheque
- Credit/Debit Card Payment
- Supplier Credit.
To be able to import payments, make sure that on the Integrations page in Step 5 the Import payments from QuickBooks checkbox is active.

You can import payments to Precoro in the following ways:
1. Automatically (main option)
After payment is recorded in QuickBooks, it will be imported to the Precoro account. As a result, the status of the Invoice will change to Paid.
Payments recorded in Precoro are not imported into QuickBooks.
2. Manually (in case QuickBooks did not import some payments)
If some payment has not been automatically imported to Precoro or canceled, you can use the Import from QuickBooks feature to import payments based on the selected date range:
1. On the Payments page, select a date range in the Invoice Issue Date field to get the previous payments that were not automatically imported from QuickBooks.
2. Click on the Import from QuickBooks button. All payments within the selected date range will be updated/added to Precoro.
Please note that no matter which user created a Payment in QuickBooks in Precoro, that payment will be recorded as created by the document initiator.
That is, the payment is always imported from the Invoice Initiator — even if it was created in QuickBooks by another user.
Canceling Payments in QuickBooks
If you cancel a Payment in QuickBooks, then in Precoro this document will be canceled automatically.
However, please note that if you cancel the payment in Precoro, the changes will not be sent to QuickBooks.
Integrate Credit Notes with QuickBooks
You can integrate Credit Note documents with QuickBooks. To do that, follow the steps below:
1. On the Integration page in Step 6 for Integration Options, select the Approved Invoices one.
2. You will see the Send Credit Notes checkmark. If activated, the Credit Note documents will be automatically sent to QuickBooks when Approved.
3. When the Credit Note is created in QuickBooks, you will see the corresponding message in the Integration Logs in Precoro.
In QuickBooks, you will be able to find the integrated Credit Notes in Bill Payment transactions of the Credit Card type in Expenses:

How to Activate the Only Payers Can Send Documents to QuickBooks Feature
You can use a feature that allows only those users who have the Payer roles in Precoro to send documents to QuickBooks. It will work if the Approved Invoices are selected as integration options in the document types.
To activate this feature, please contact our Support Team, who will enable the settings for you.
Please note that this option will not be available if you have activated the pending documents feature or selected the Purchase Order type of document to be integrated.
How to Use the “Close the Books” Function
Using the “Close the books” function in the financial reporting period in QuickBooks will close a certain accounting period during which users will not be able to send the documents.
For example, your closing date is 31.12.2020 in QuickBooks, but in Precoro you have an invoice on 30.12.2020. You can not send this invoice to QuickBooks after 31.12.2020 because the accounting period has already been closed.
