TABLE OF CONTENTS
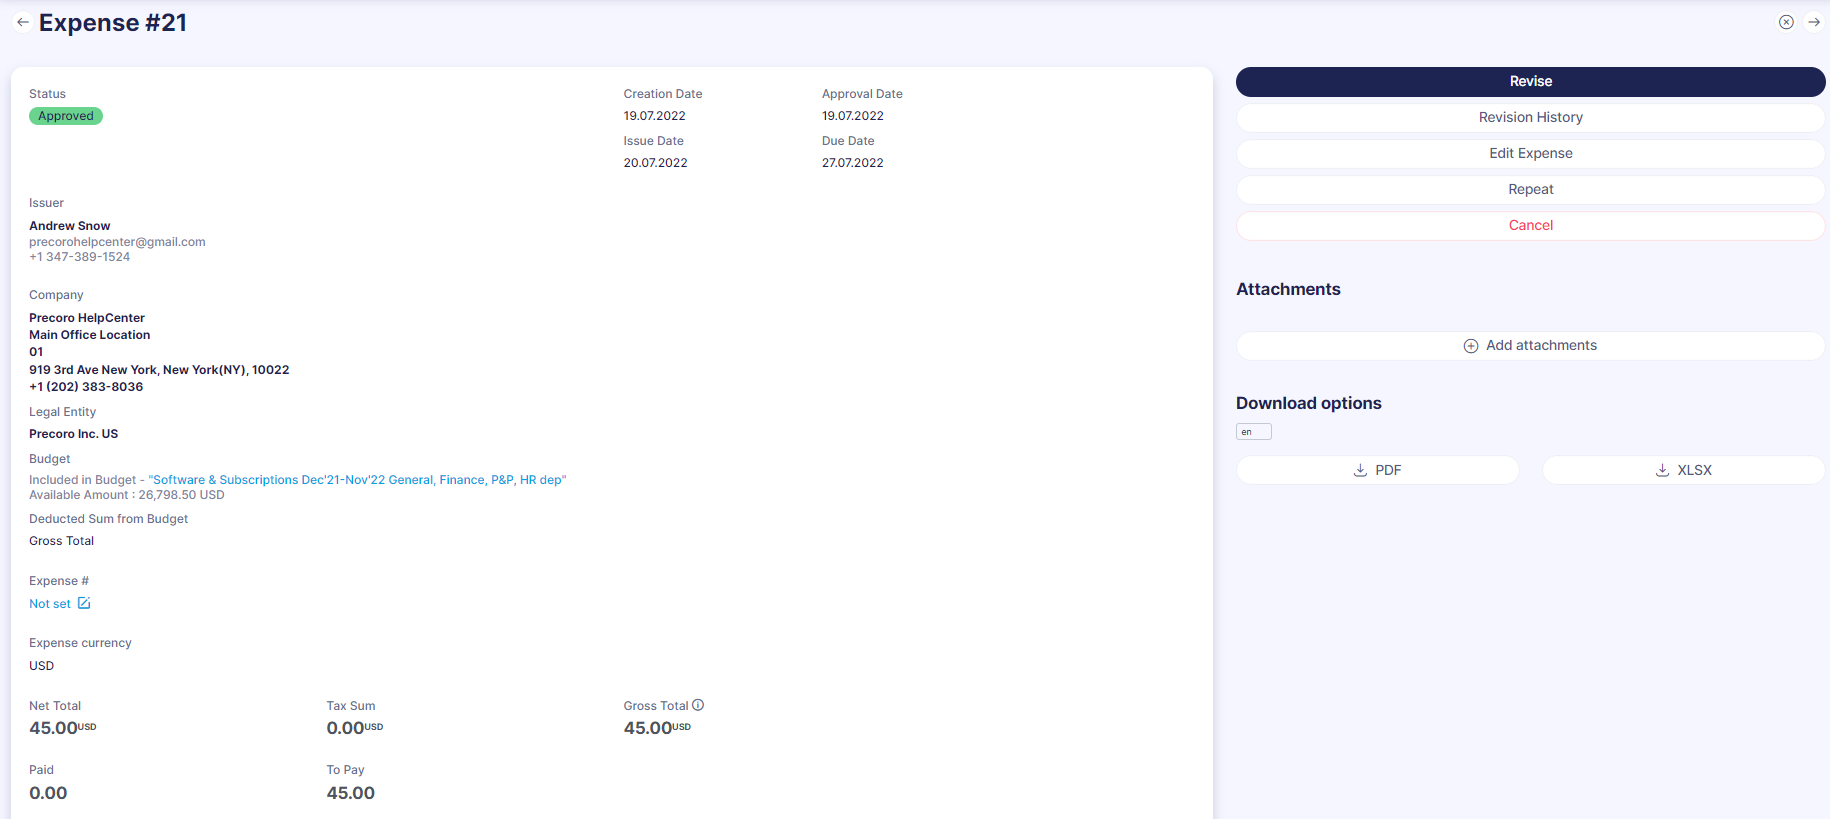
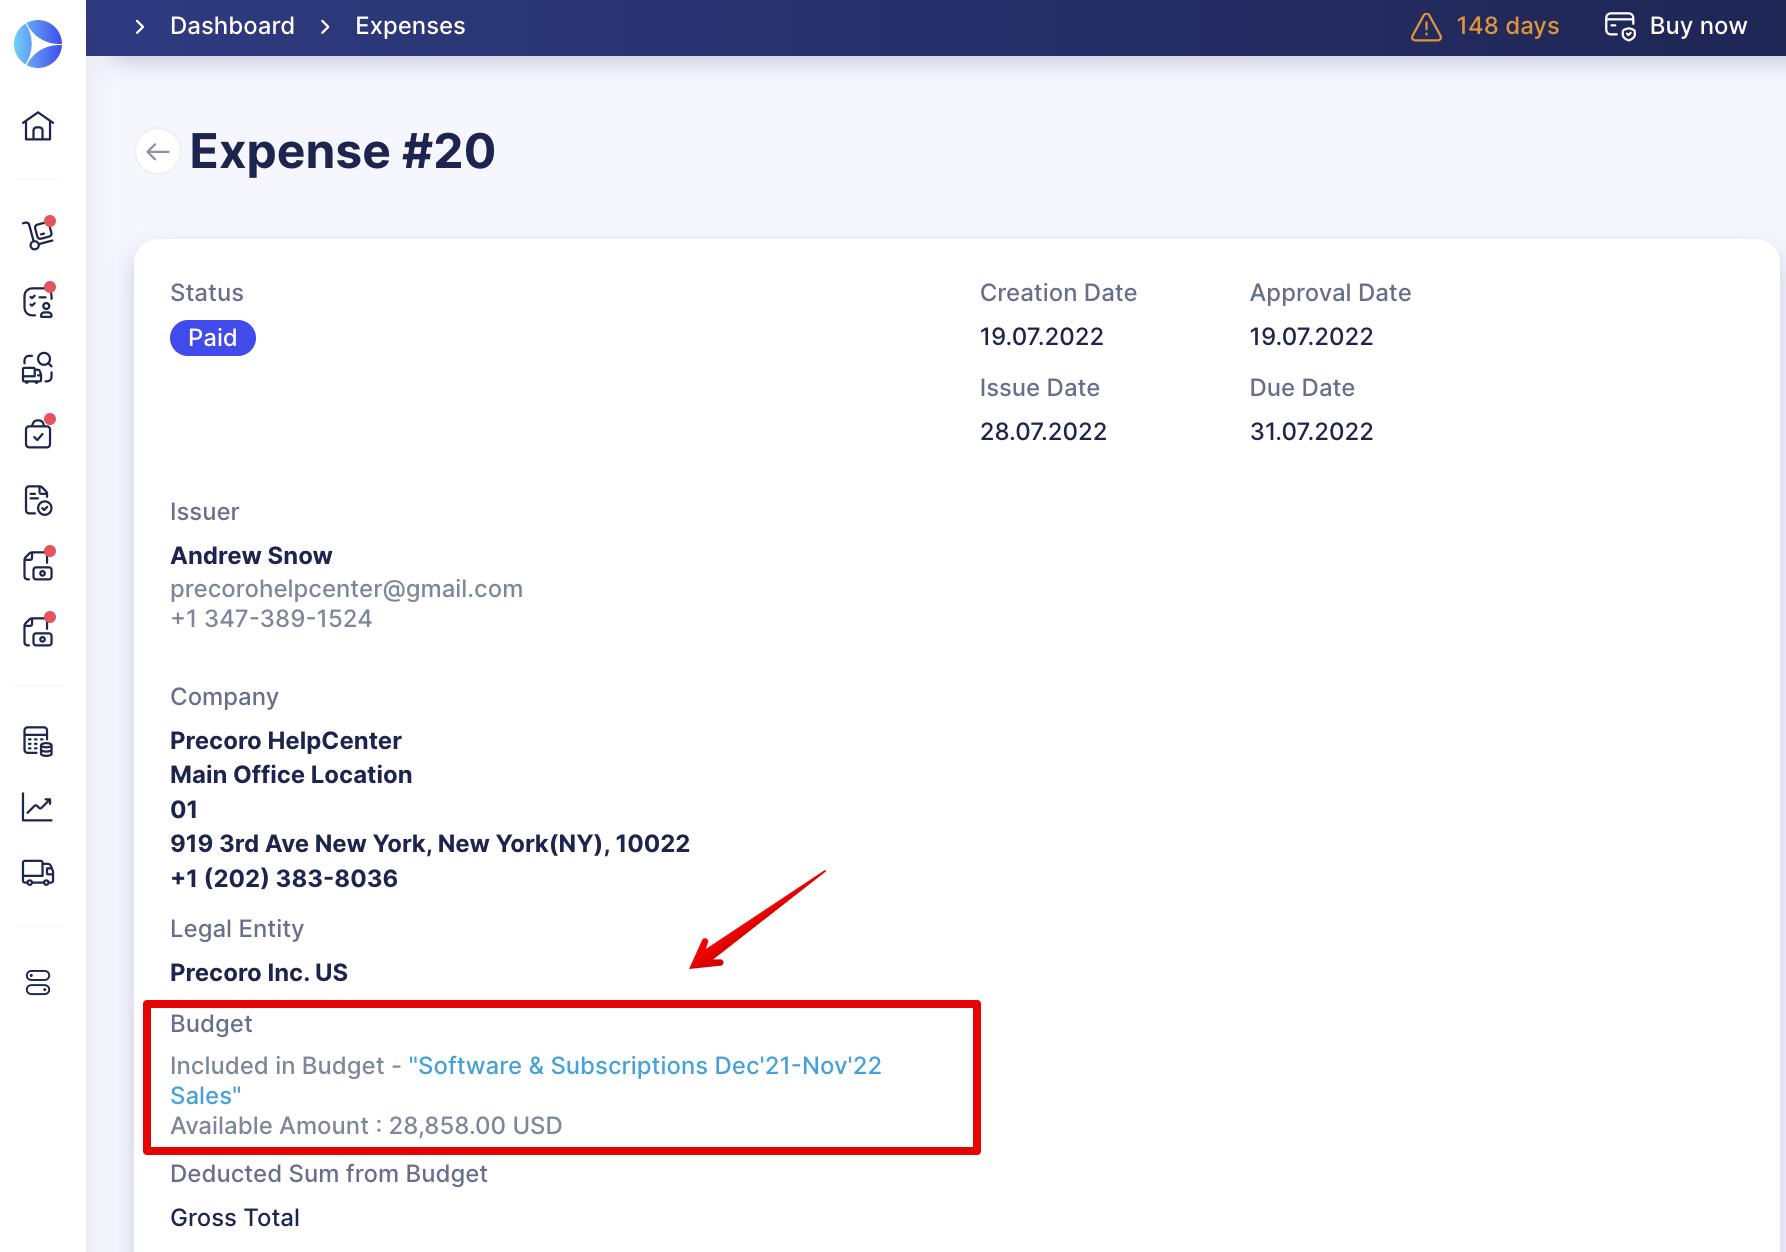
An Expense is a document type that allows you to create expense reimbursement requests.
The Expenses module allows you to cover requests for reimbursement of spent money and corporate expenses.
What Are Expense Documents
Usually, an Expense document contains the following information:
-
Expense Initiator
-
Goods and services, their price, and quantity
-
The currencies of each individual expense item
-
Date of Expense
-
Date when the Expense is to be reimbursed/paid
-
Legal entity
-
Taxes
- Budget applied (if any)
Best practices to use expenses:
Expenses occur when employees:
- Spend their own money on behalf of the company and request reimbursement within their salary or separately;
- Have a corporate card and should report payments made with it.
Each company has individual processes. We will look through the most common case:
1. If necessary, the employee attaches receipts or other documents to prove the Expense.
2. This request then goes to the manager of the employee or department for approval. The manager verifies all information and approves the request.
3. Once approved by the manager, the Expense goes to the accounting department. The accountant reimburses the amount of the Expense and adds the payment to Precoro.
To start using this document type, please follow these steps:
- Enable Expenses in the Configuration → Basic Settings → Documents Setup → Expenses, press Save to apply the changes. Also, make sure you have activated the necessary functions in the module by checking them. They will help you track the cost of operations that your company incurs.
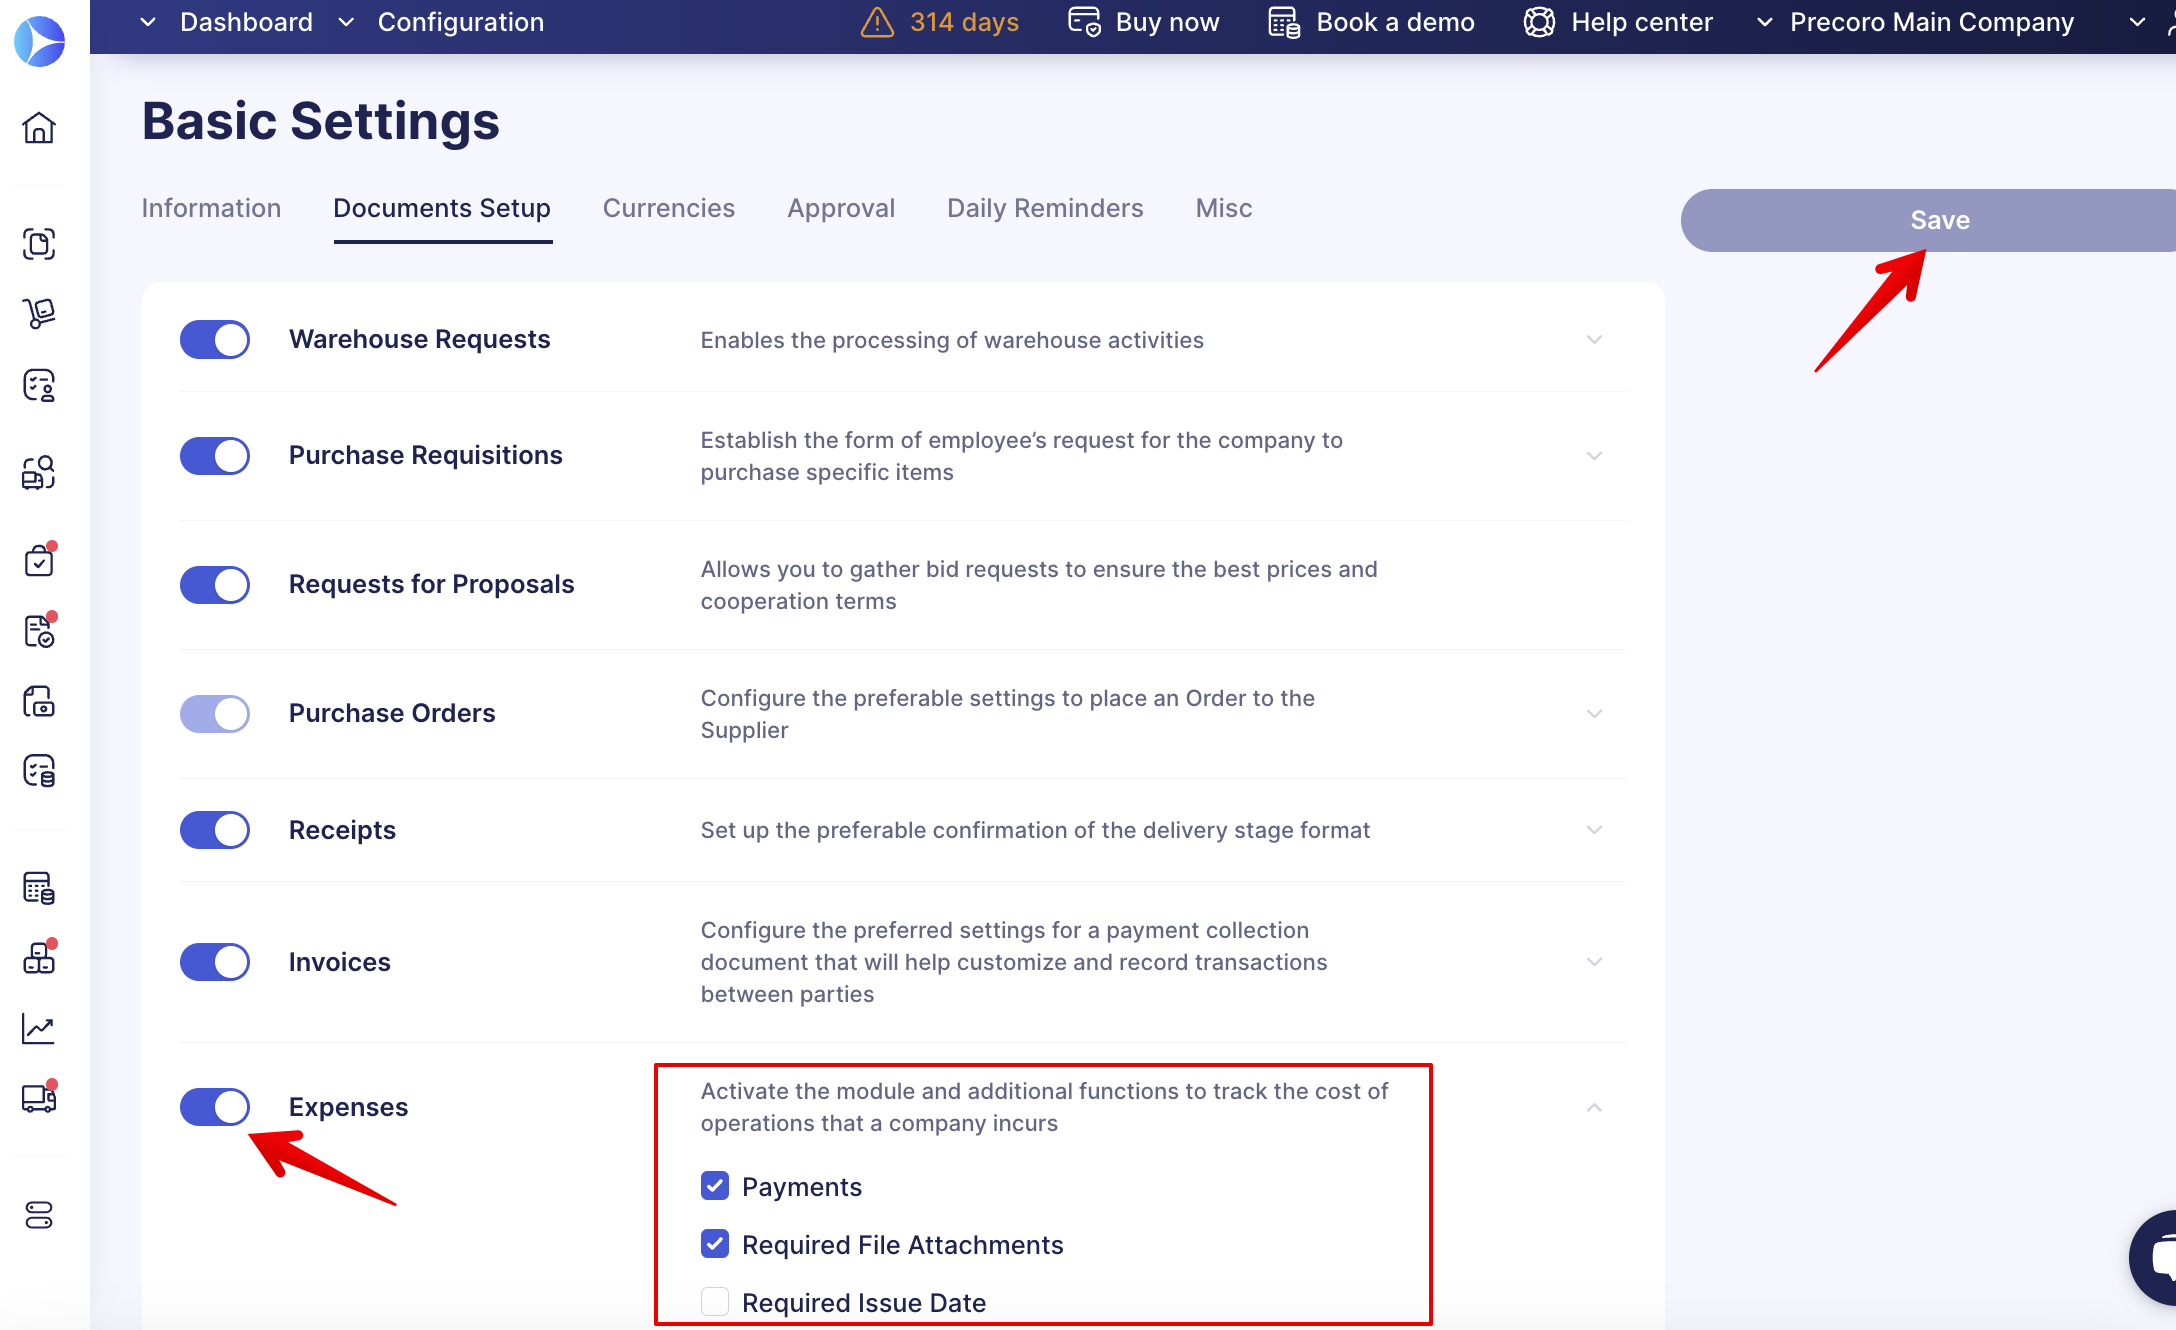
- Payments — this function helps conduct an internal audit of payments for expenses created by employees. After making the payment, the document acquires a Paid status.
- Required File Attachments — this function disables users from saving the created Expense without an attachment.
- Required Issue Date — this function disables users from saving the created Expense without specifying the Issue Date.
- Budget — this function shows which Budget includes the created Expense as well as the available budget amount.
💡 Please note: The selected Budget will be saved in the documents with Paid or Approved statuses. But it will be unavailable in Pending and Draft Expenses and will be removed after the document’s revision.
2. Set up proper roles for users to give them access to the Expenses module:
- Go back to the Configuration page → User Management.
- Select related to the Expenses roles and press the Update button.
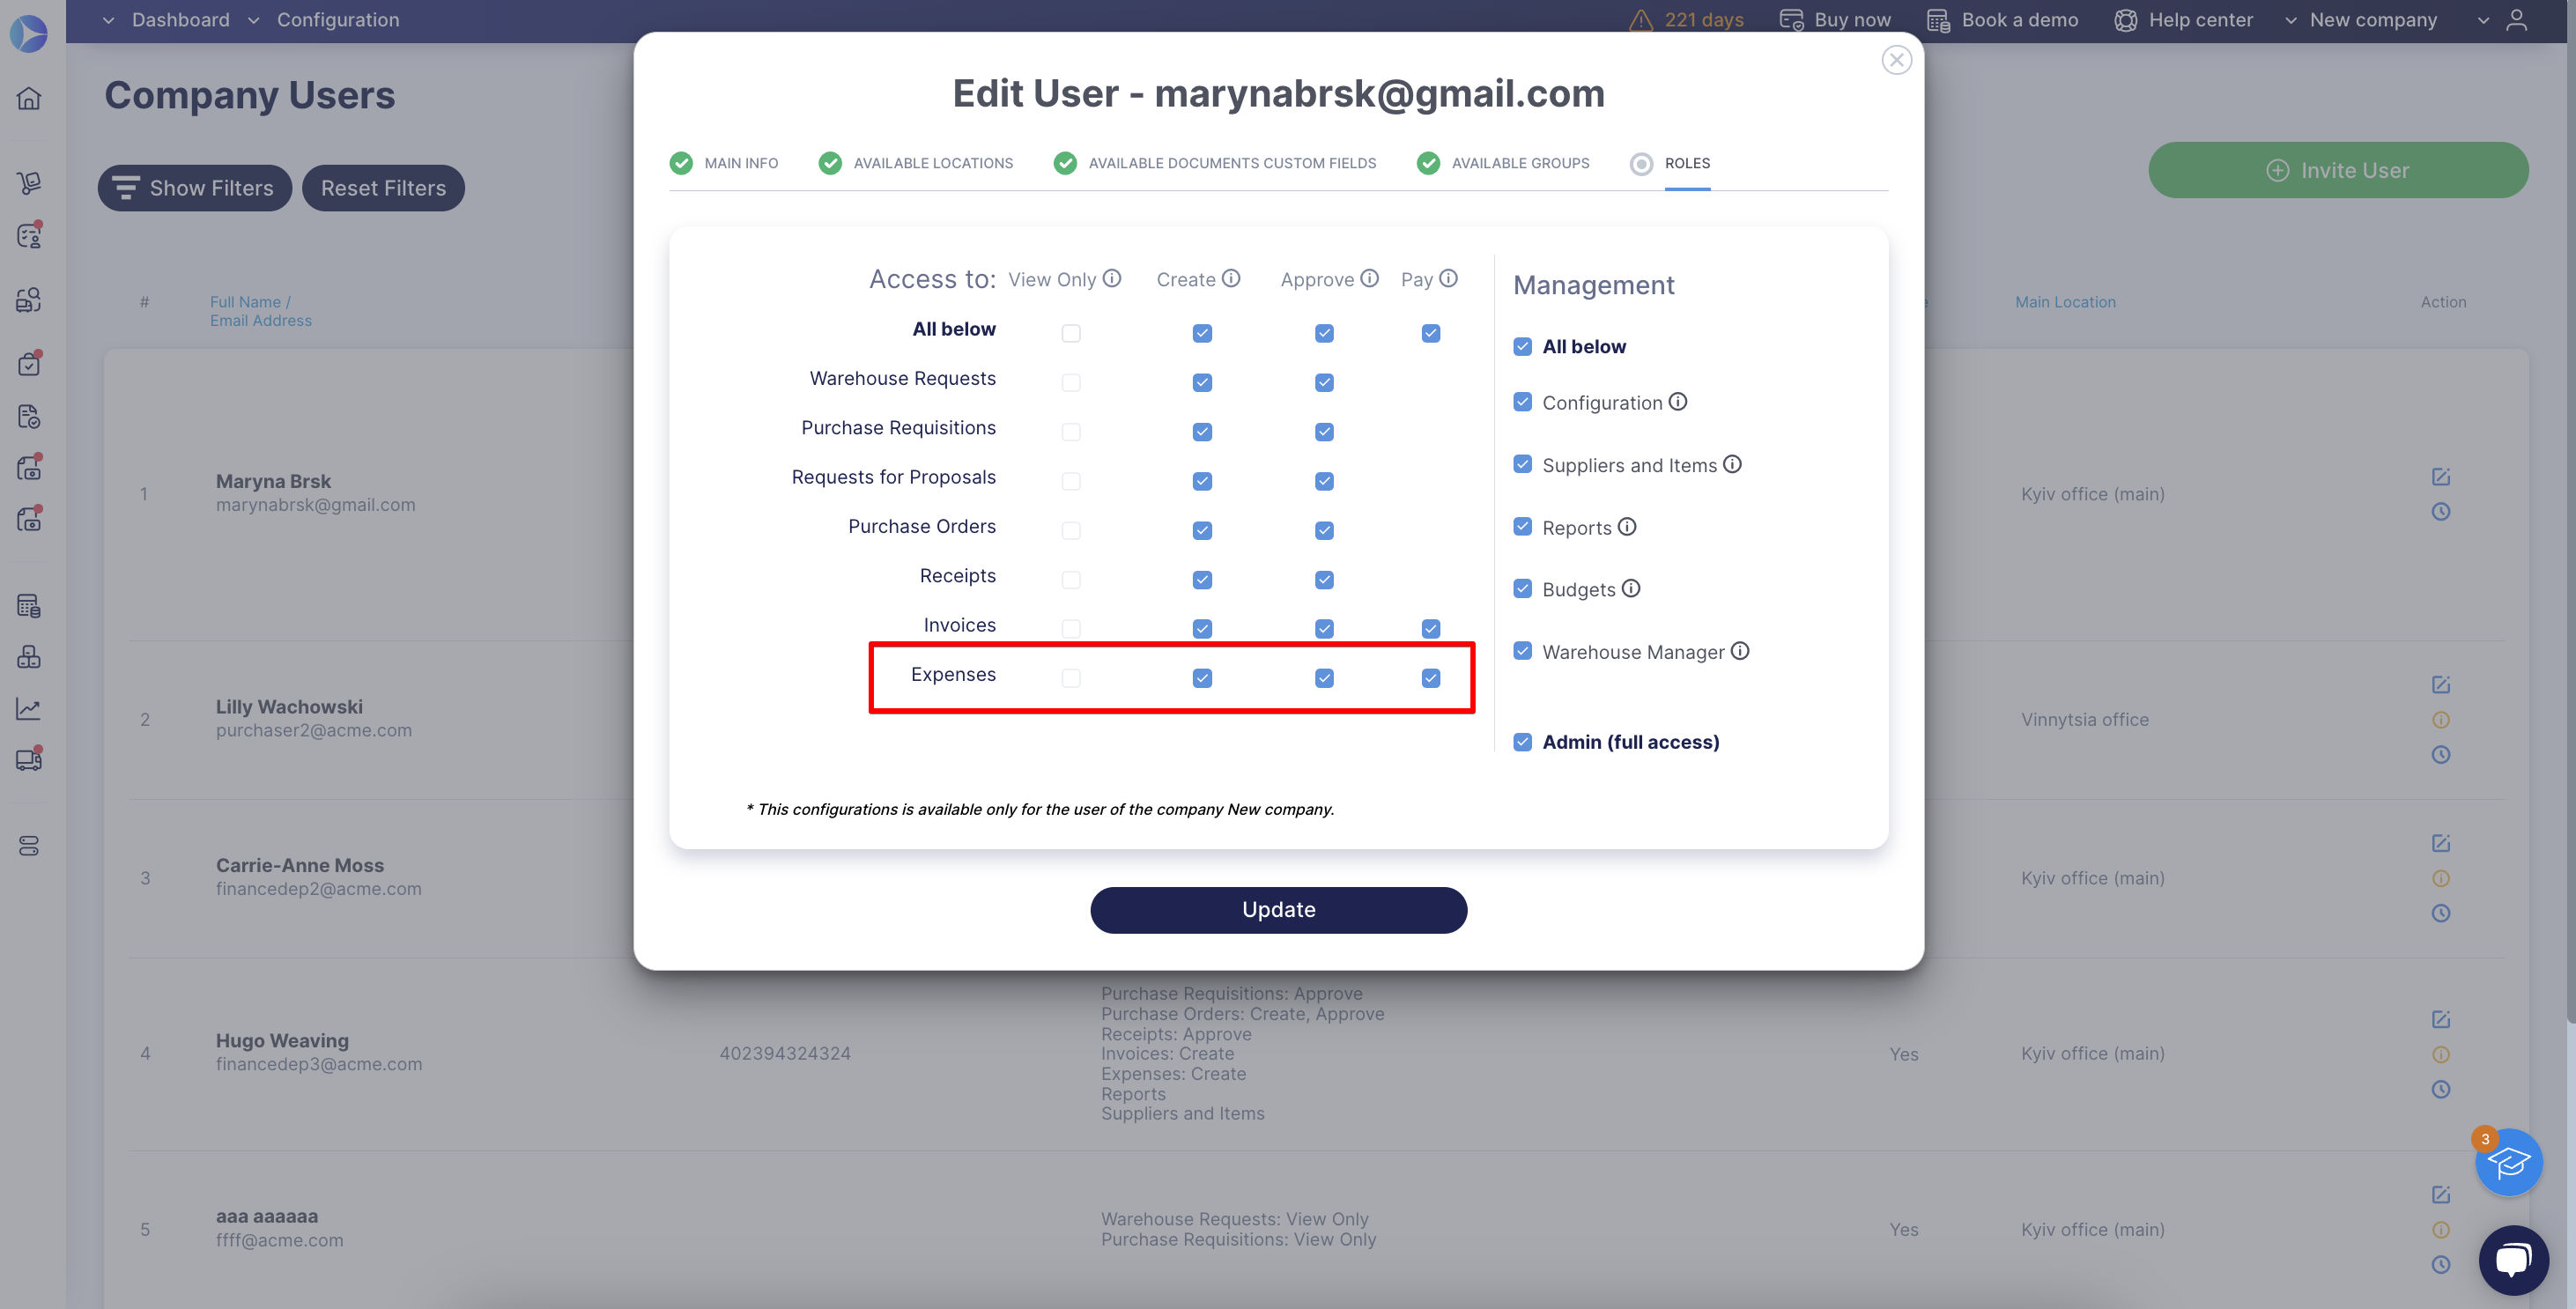
- The View Only role grants document viewing without editing or approving rights.
- The Create role provides access to document creation and editing.
- The Approve role allows approving the documents created by other users.
- The Pay role enables making payments for Expenses.
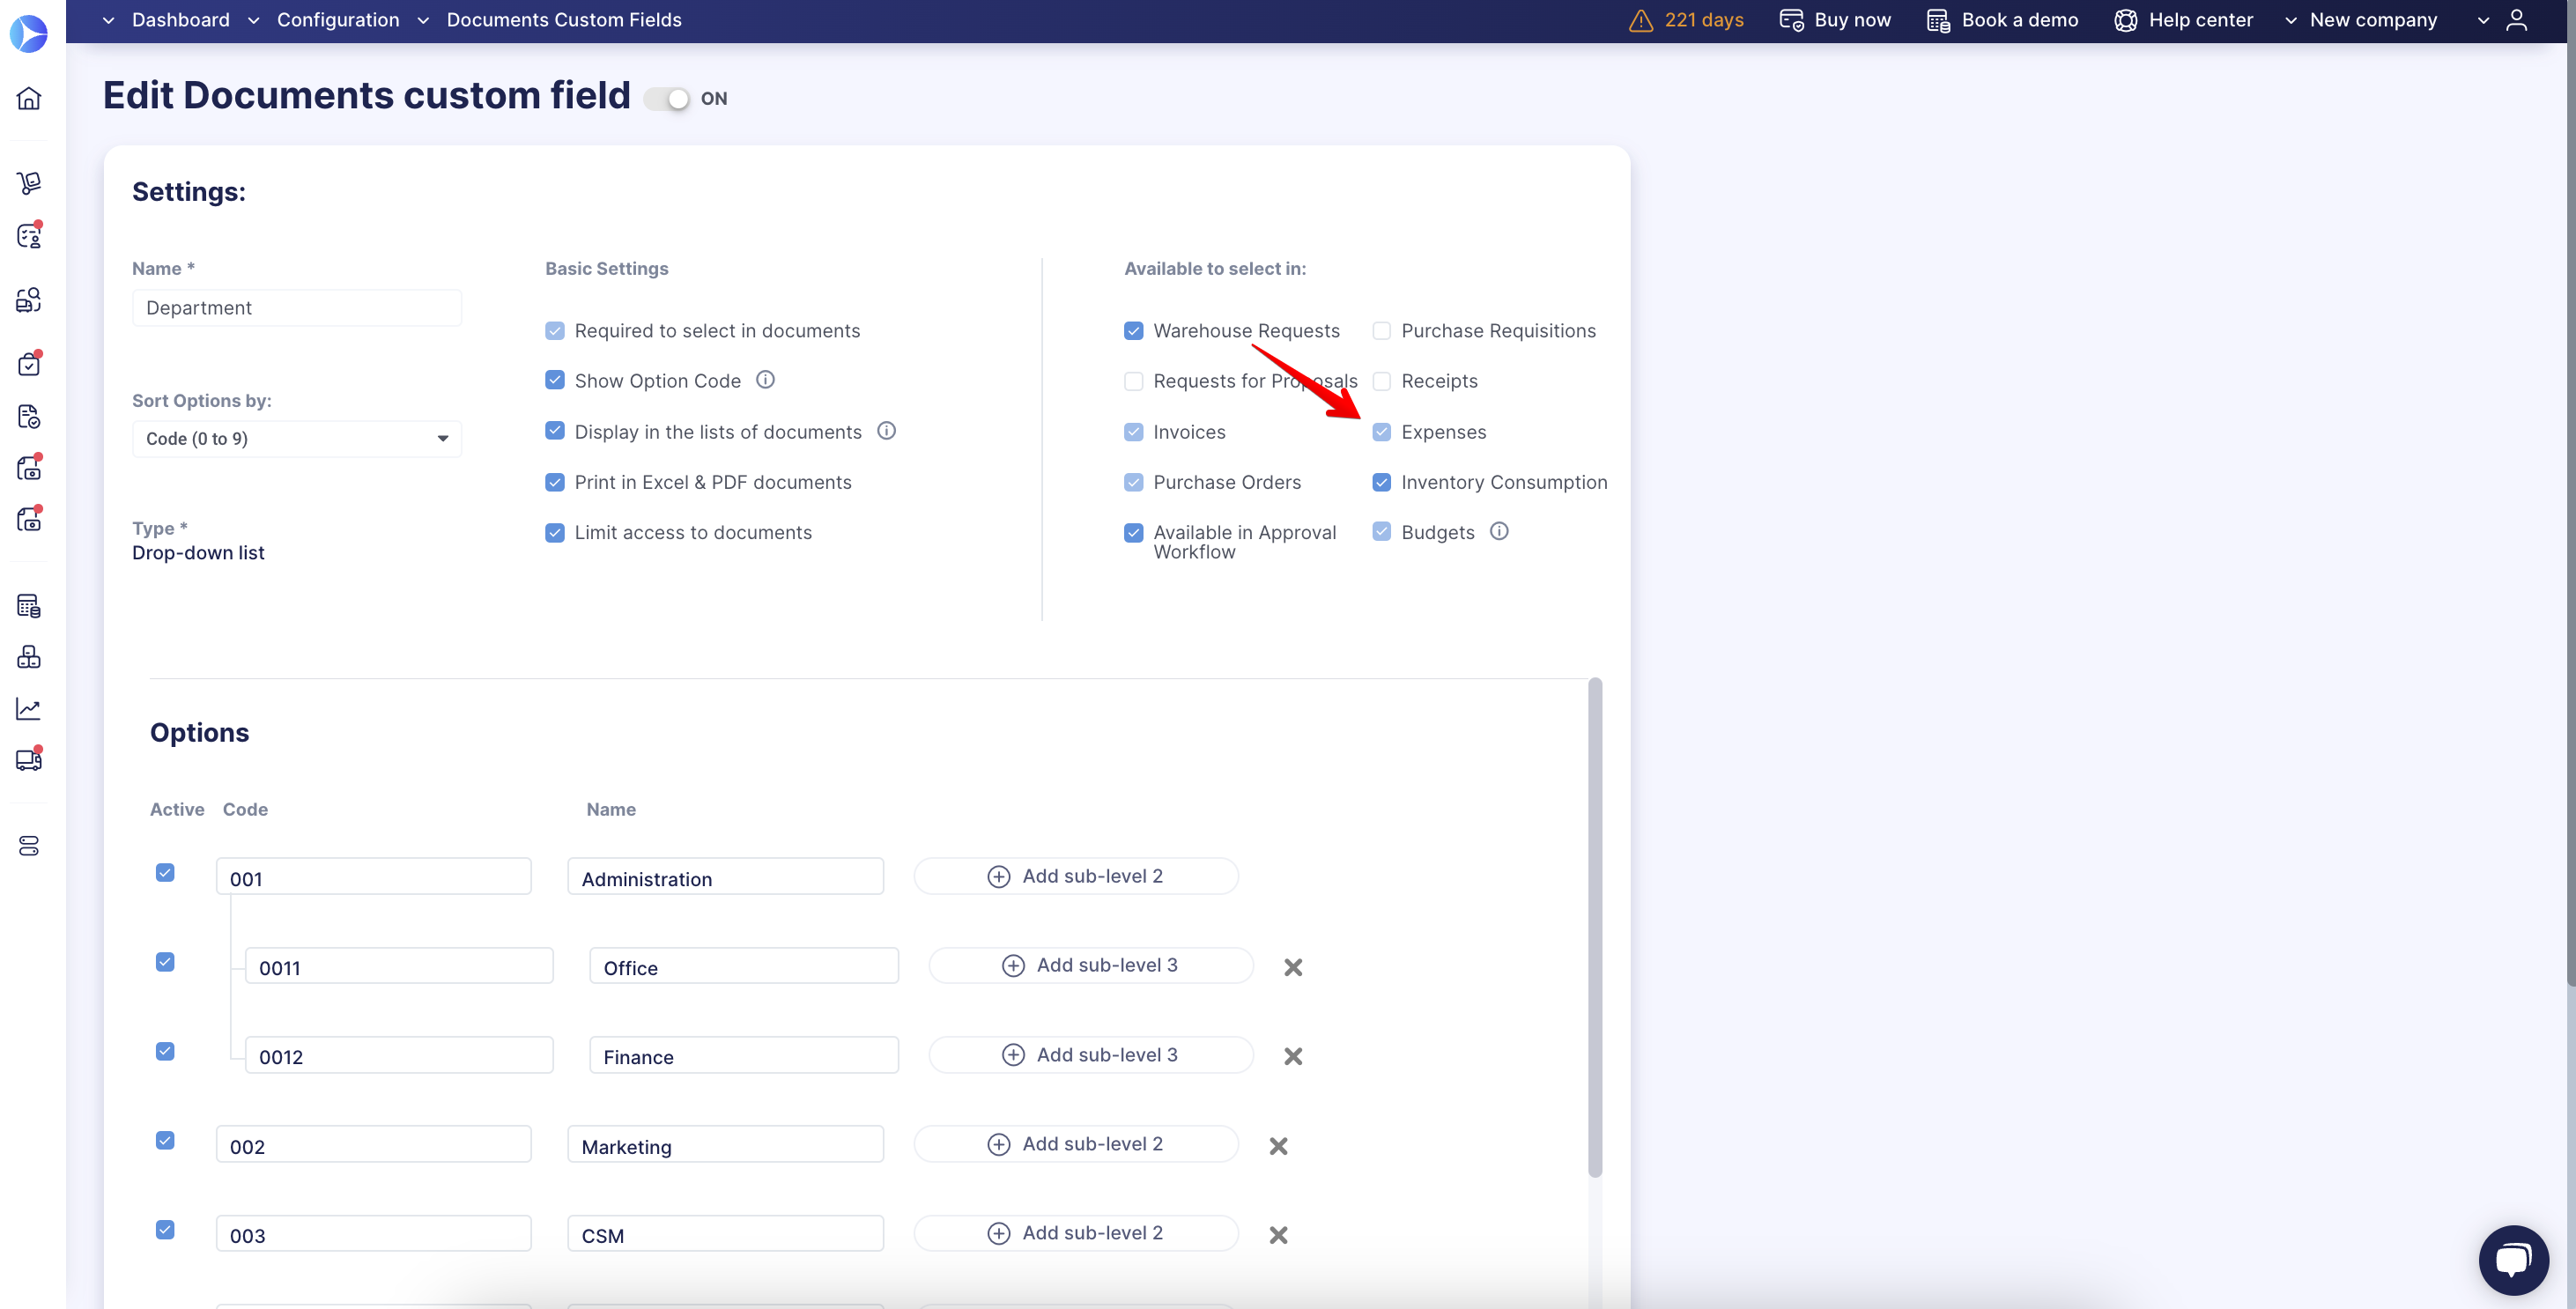
- Open Configuration → Custom Fields for Documents/Items.
- Select the Custom Field and click the Edit button.
- Mark the Expenses checkbox as active and click the Update button.
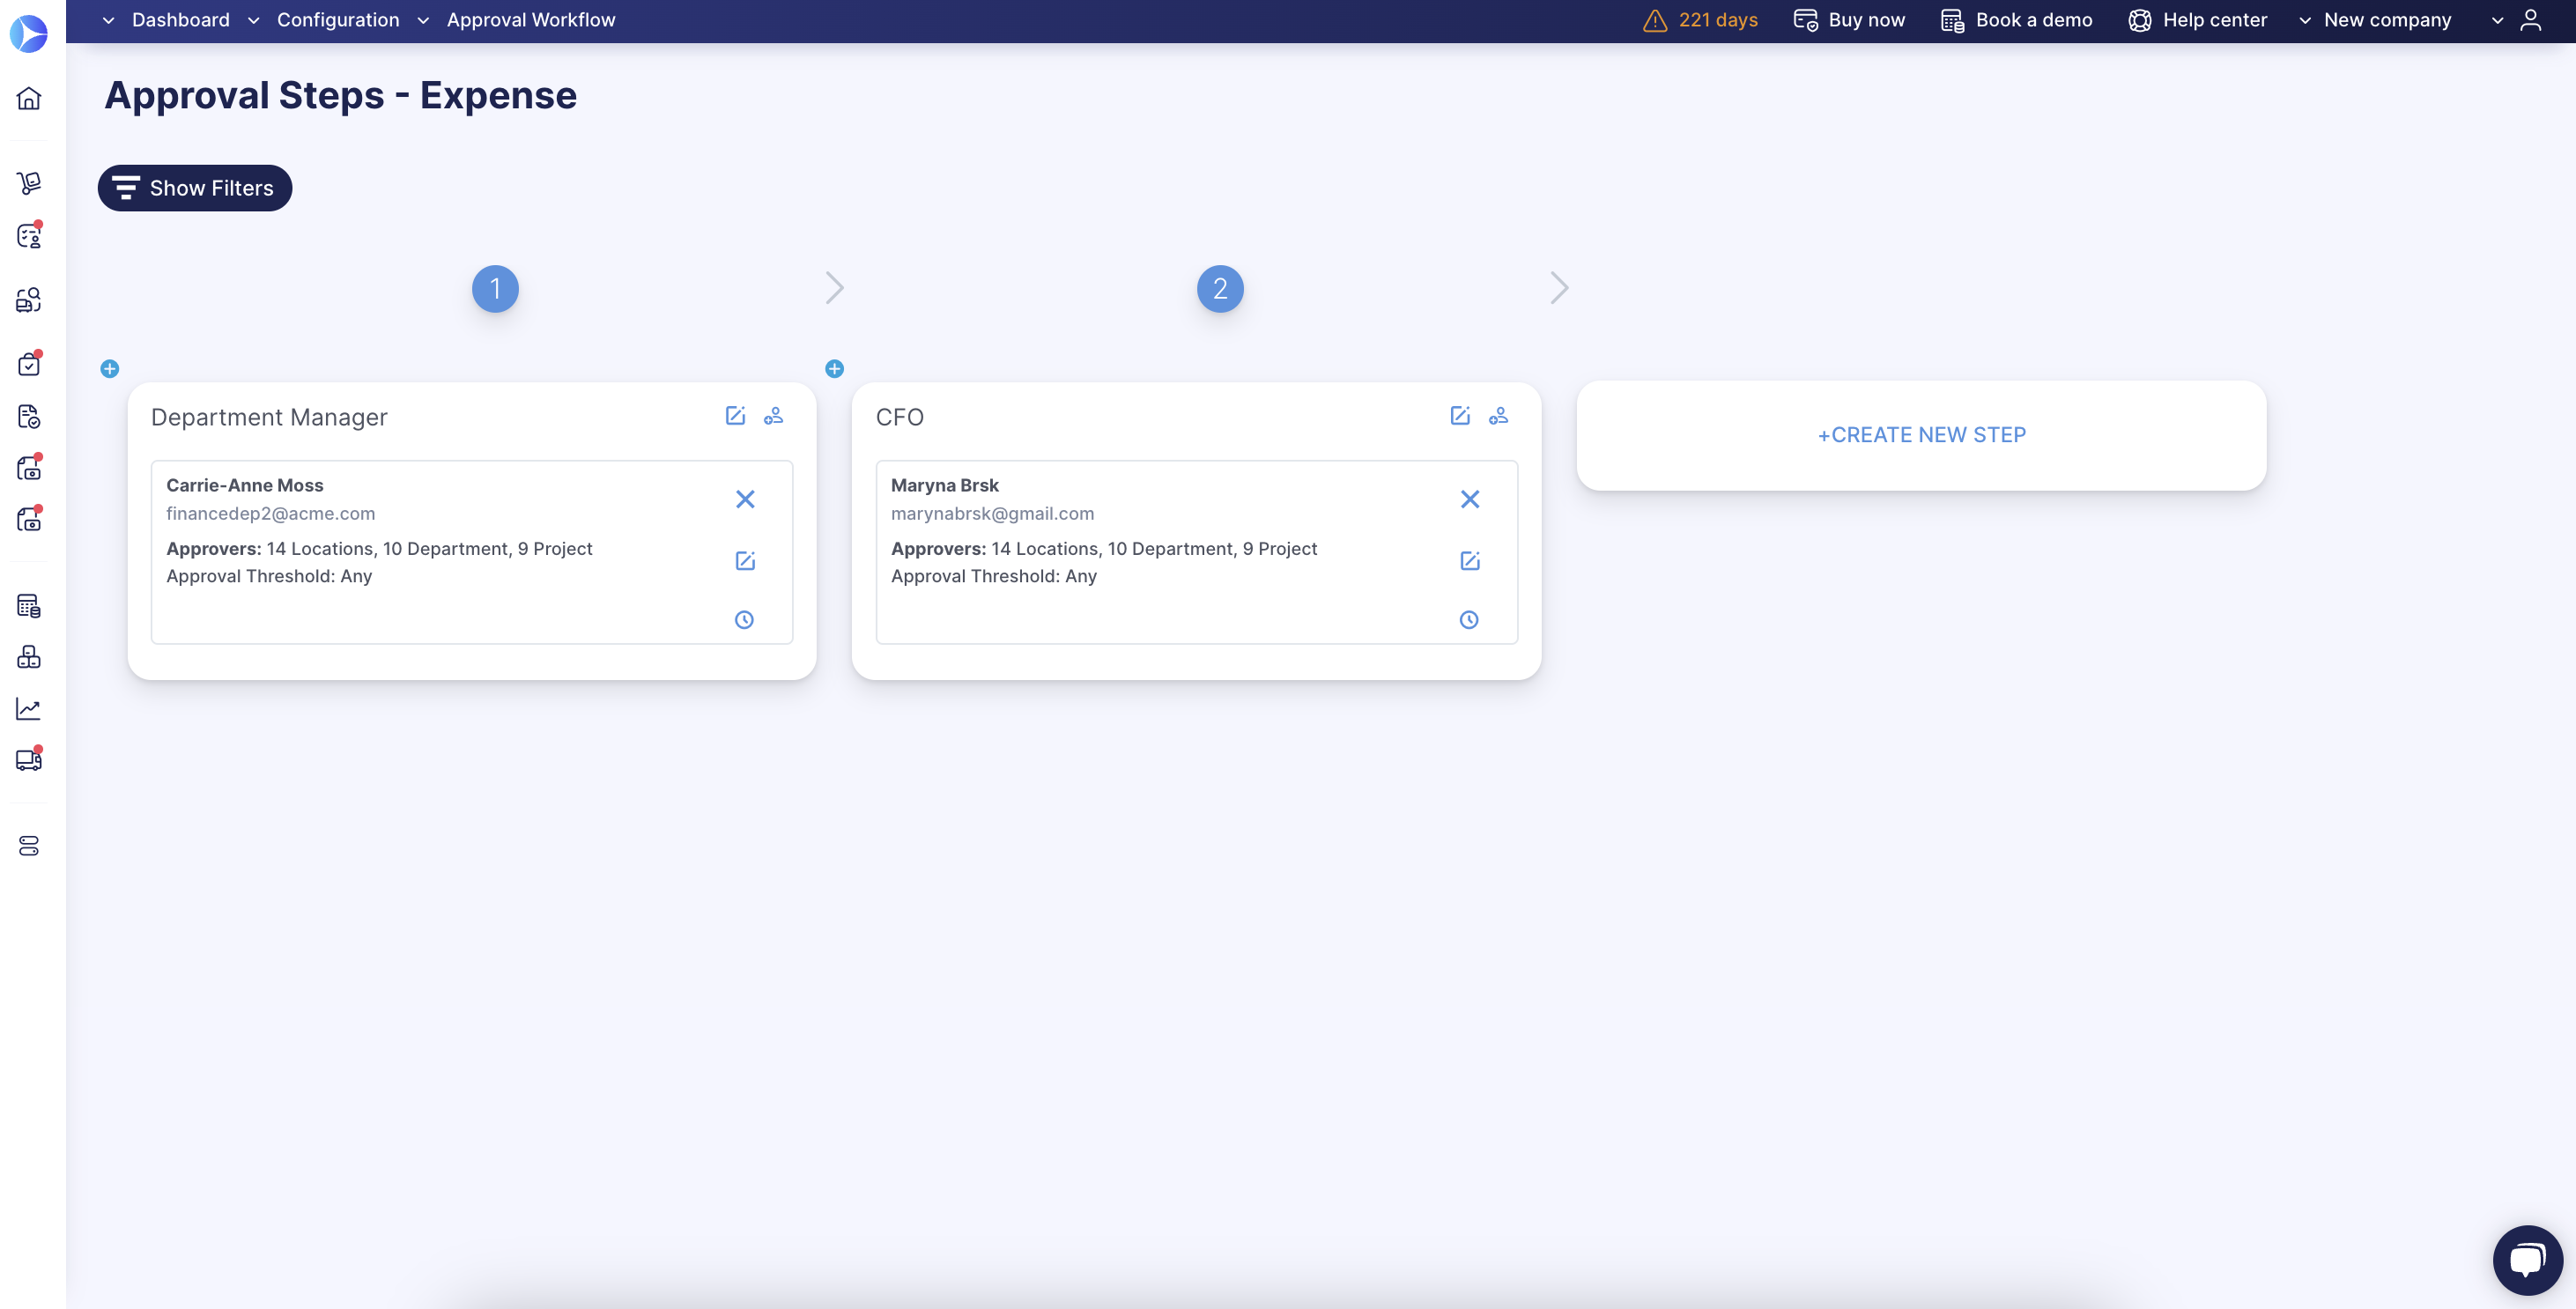
4. Set up the Approval Workflow for Expenses:
- Go to Configuration → Approval Workflow → Expense Approval Workflow.
- Set up the approval workflow based on your needs.