TABLE OF CONTENTS
Follow these steps to set up SSO with Okta:
- Open the Configurations tab on the left side of the screen, go to the SSO Settings tab, and move the switch to On.
- Open your account in Okta and create a new App Integration or choose an existing one.
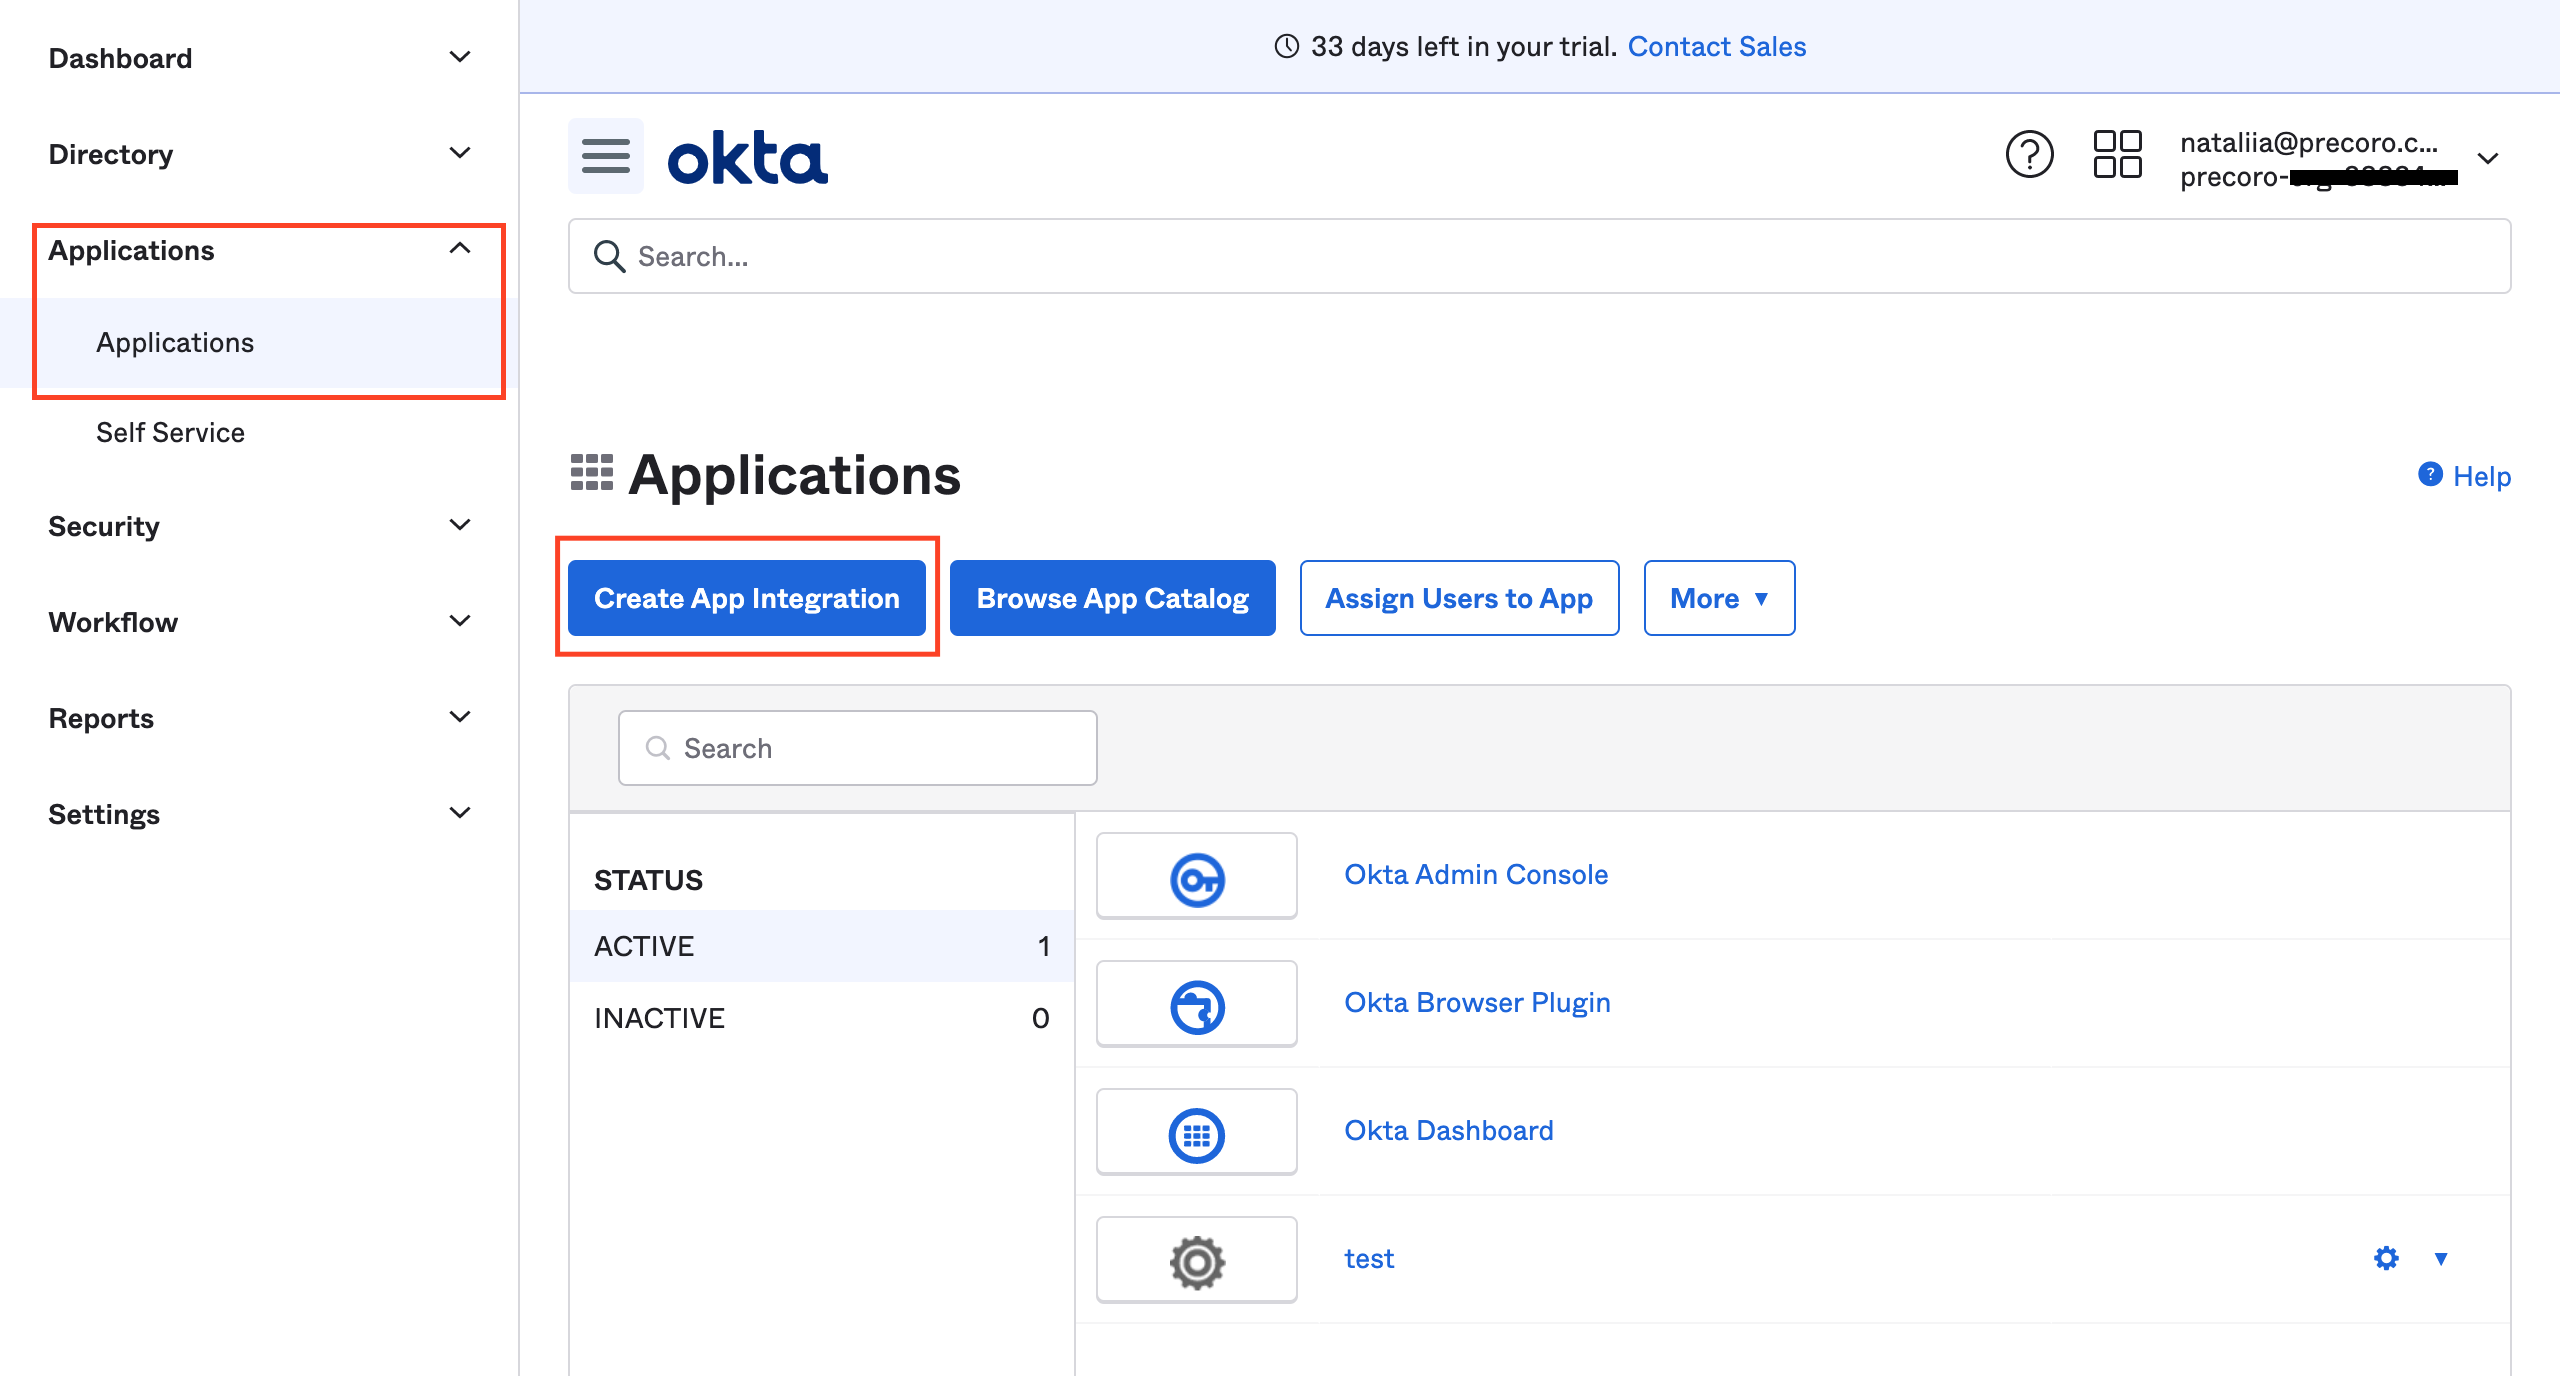
Configure the App Integration
- Click the Create App Integration button and select the SAML-based sign-in method.
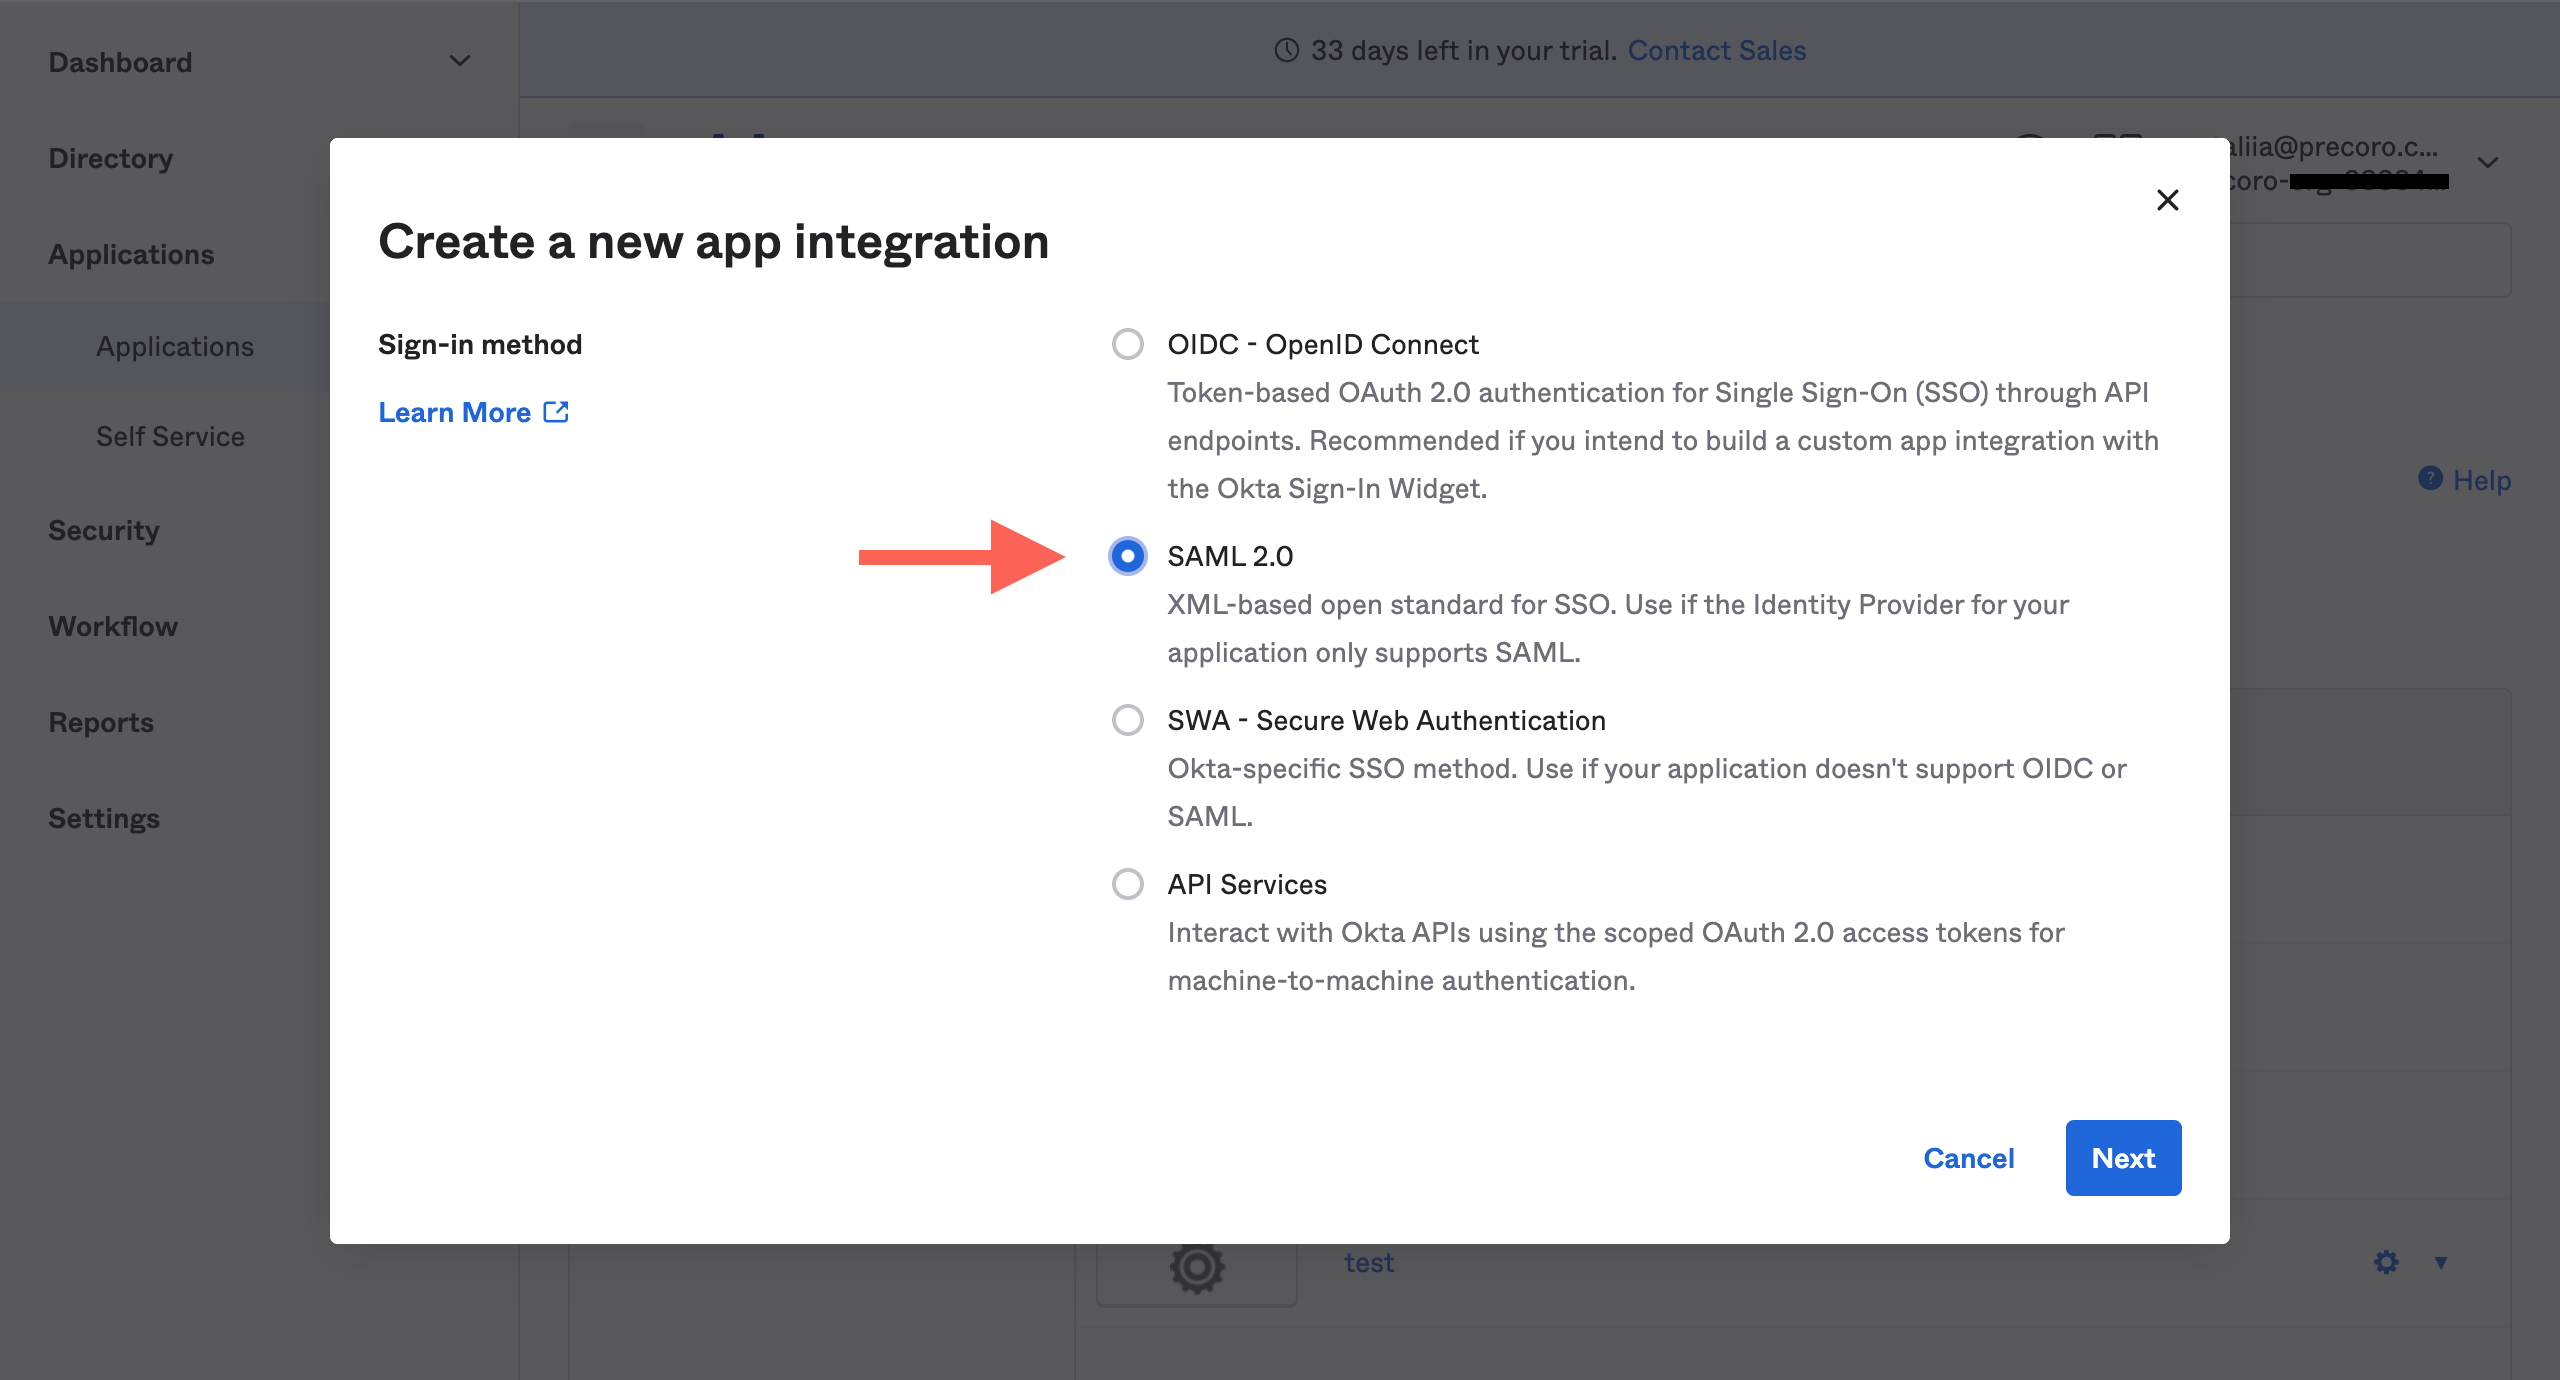
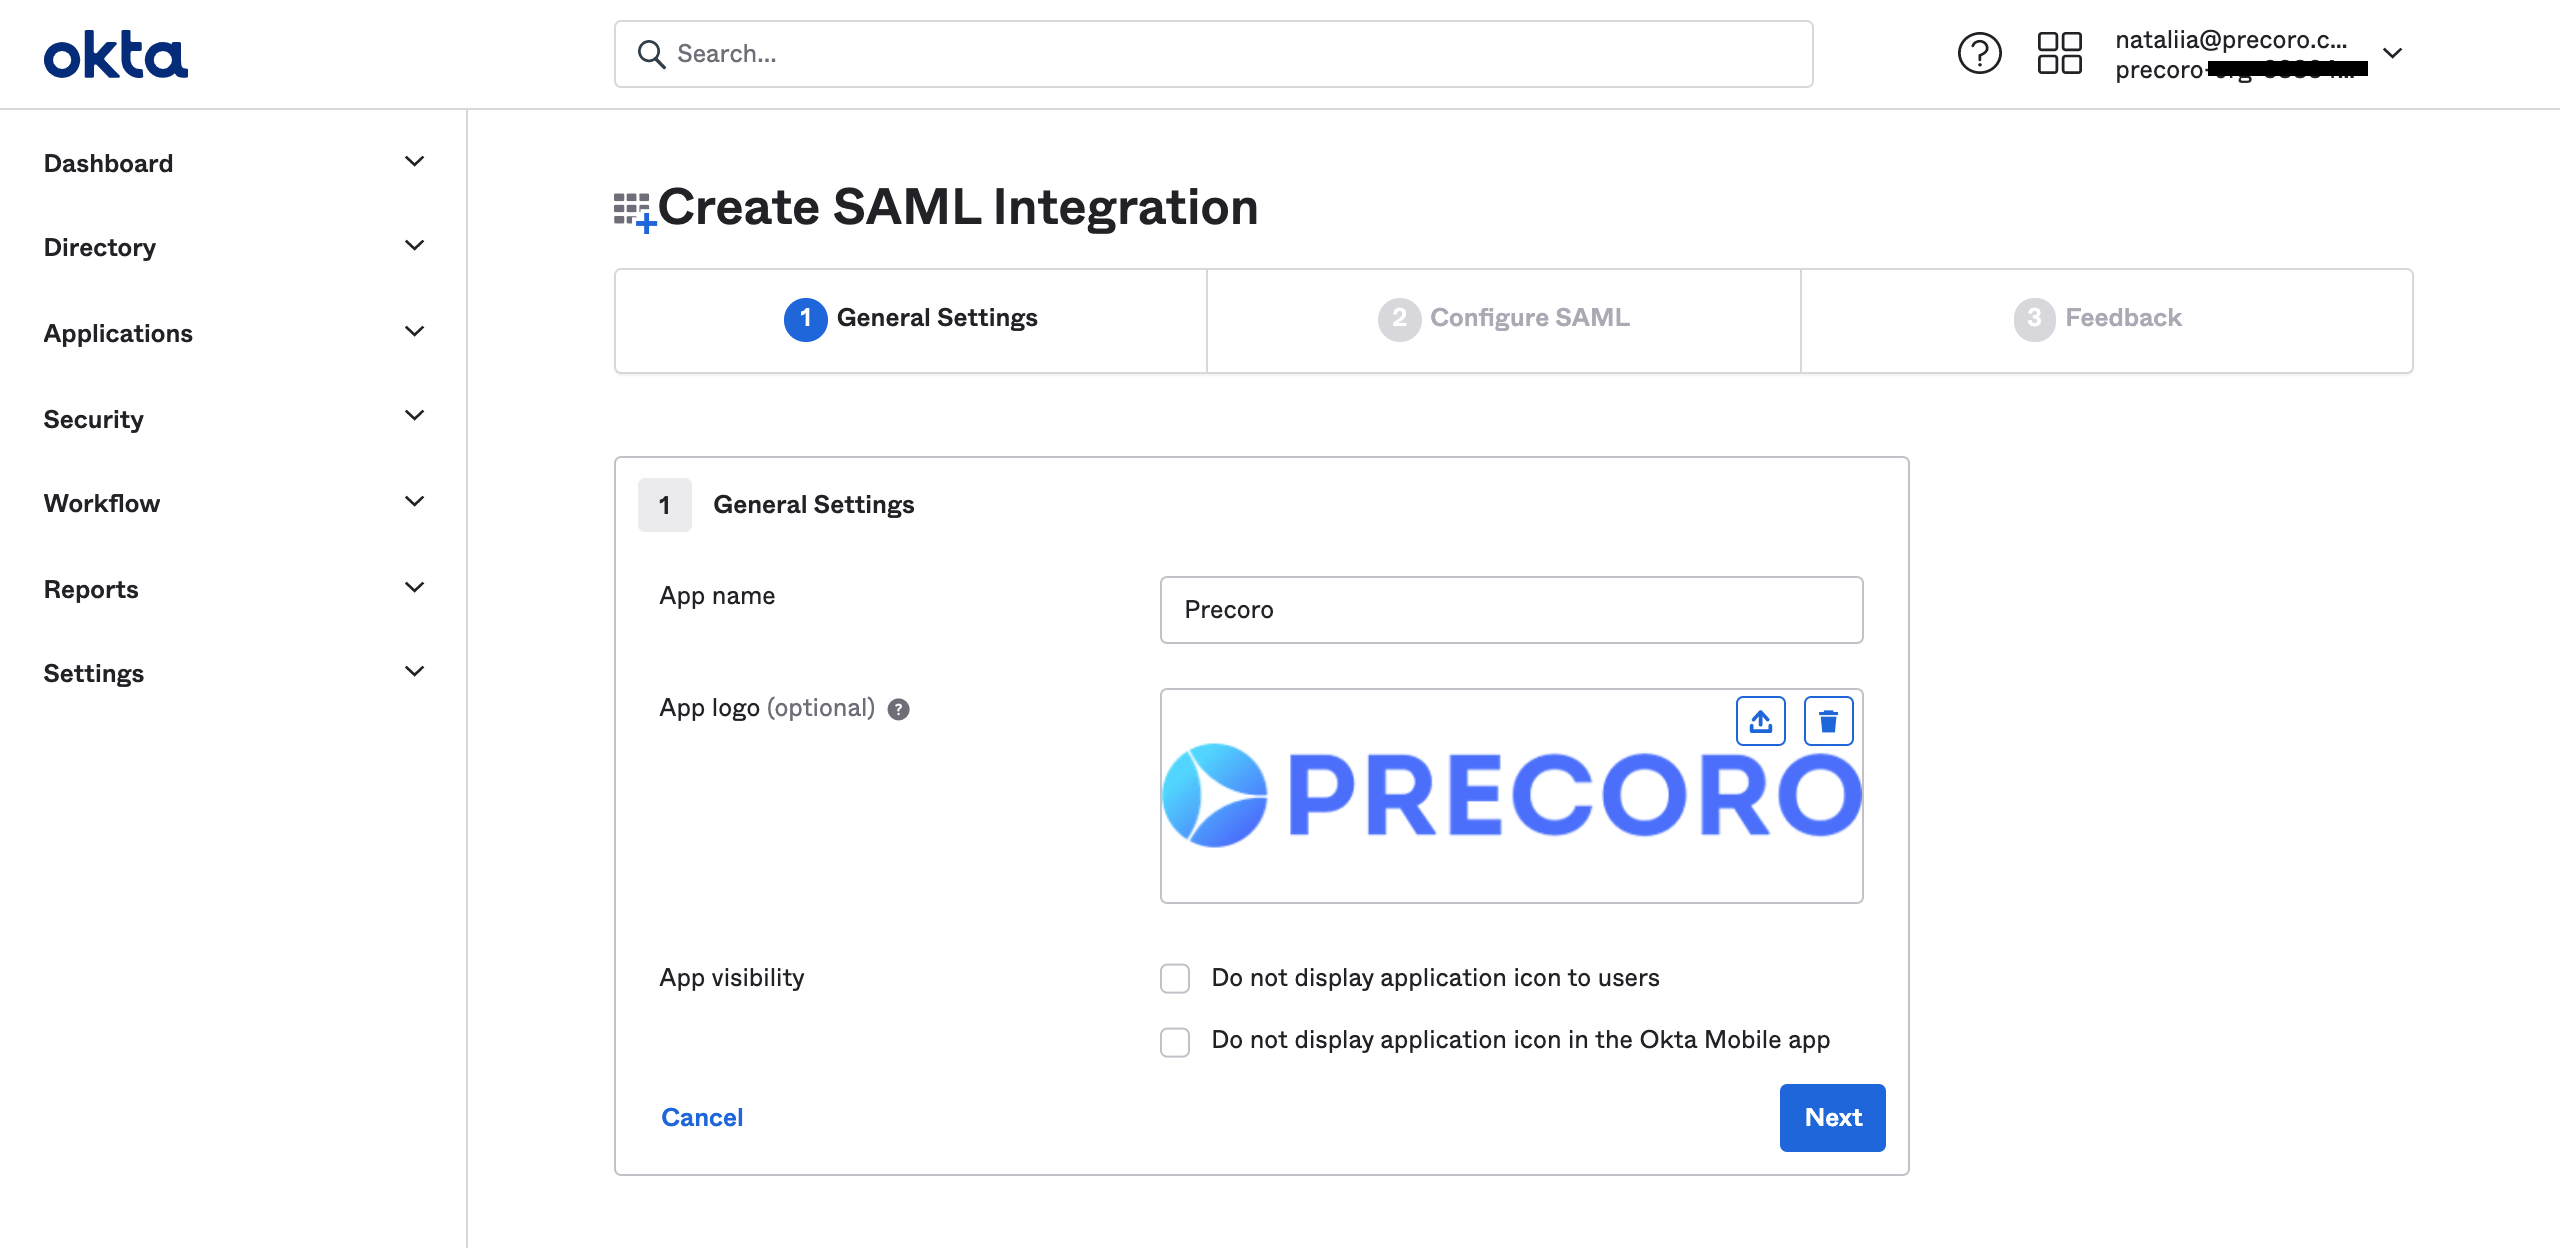
- Fill in all necessary fields in Step 1: General Settings and proceed to the next step.
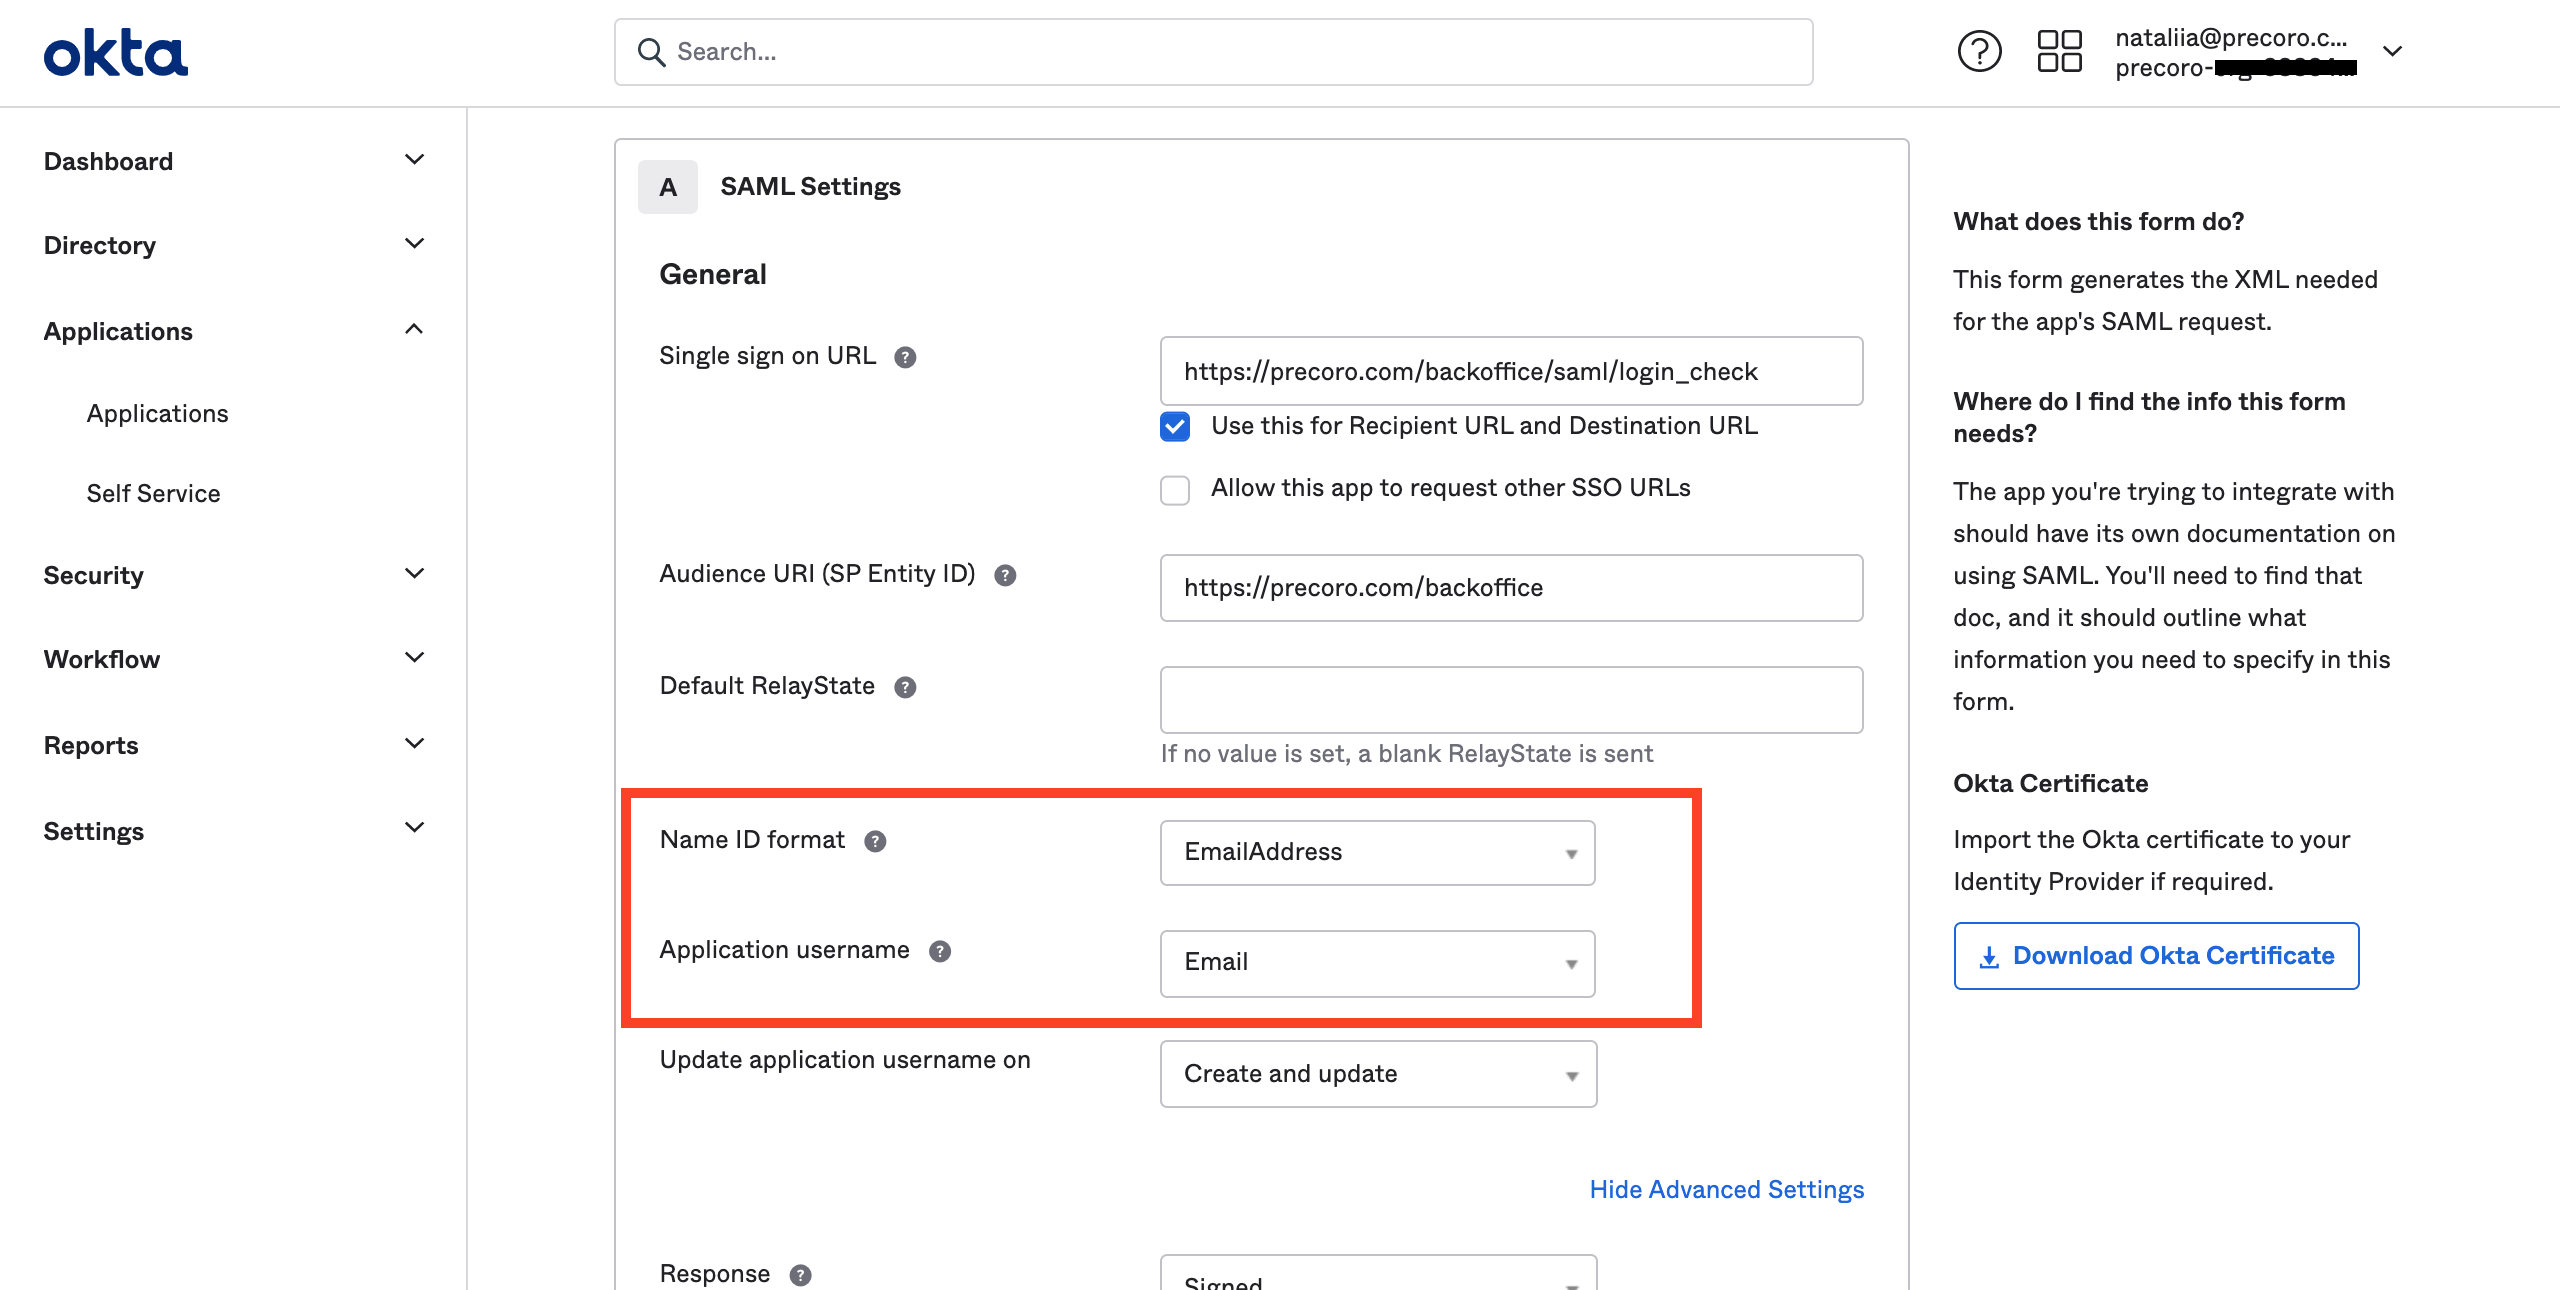
- Configure SAML Settings:
- Fill in the fields in the General section. Make sure that the data in Okta matches your data in the Precoro SSO configuration tab:
- Single Sign-On URL —> Assertion Consumer Service (ACS).
- Audience URI (SP Entity ID) —> Entity ID.
- Mark the Use this for Recipient URL and Destination URL checkbox as active (only under the Single Sign-On URL field).
- Select the EmailAddress parameter for the Name ID format field.
- Select the Email parameter for the Application username field.
- Set Assertion Encryption as Encrypted.
- Download Precoro Certificate and upload it into the Encryption Certificate and Signature Certificate fields.
- Enable Single Logout by marking the Allow application to initiate Single Logout checkbox as active.
-
- Single Logout URL —> Single Logout Response Endpoint.
- SP Issuer —> Entity ID.ake sure the data in Okta matches your data in the Precoro SSO configuration tab:
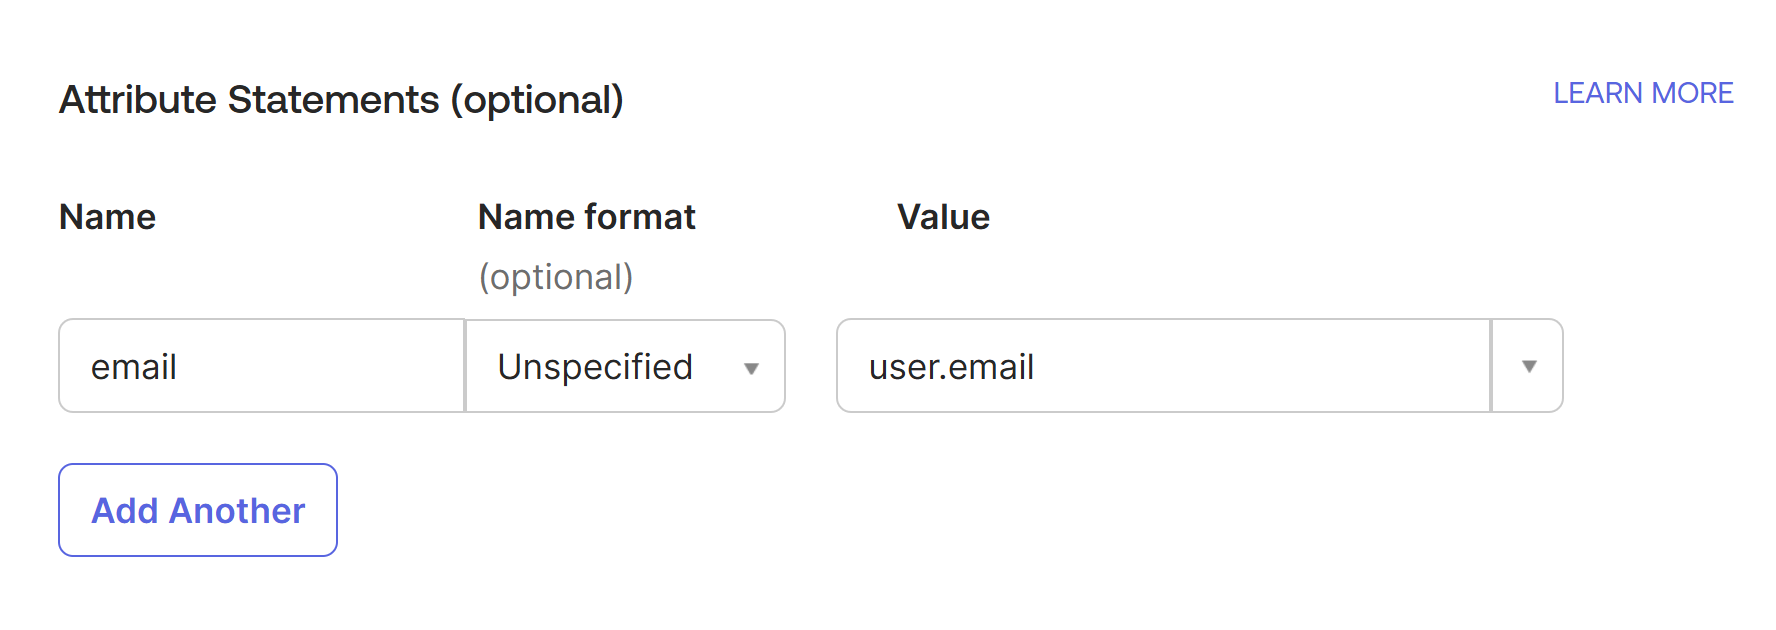
- Type “email” in the Name field.
- Select “user.email” for the Value field.

6. Proceed to the last step and click the Next button. Provide your Feedback and press Finish.
Configure SSO in Precoro
1. Fill in Step 3: Identity Provider Issuer:
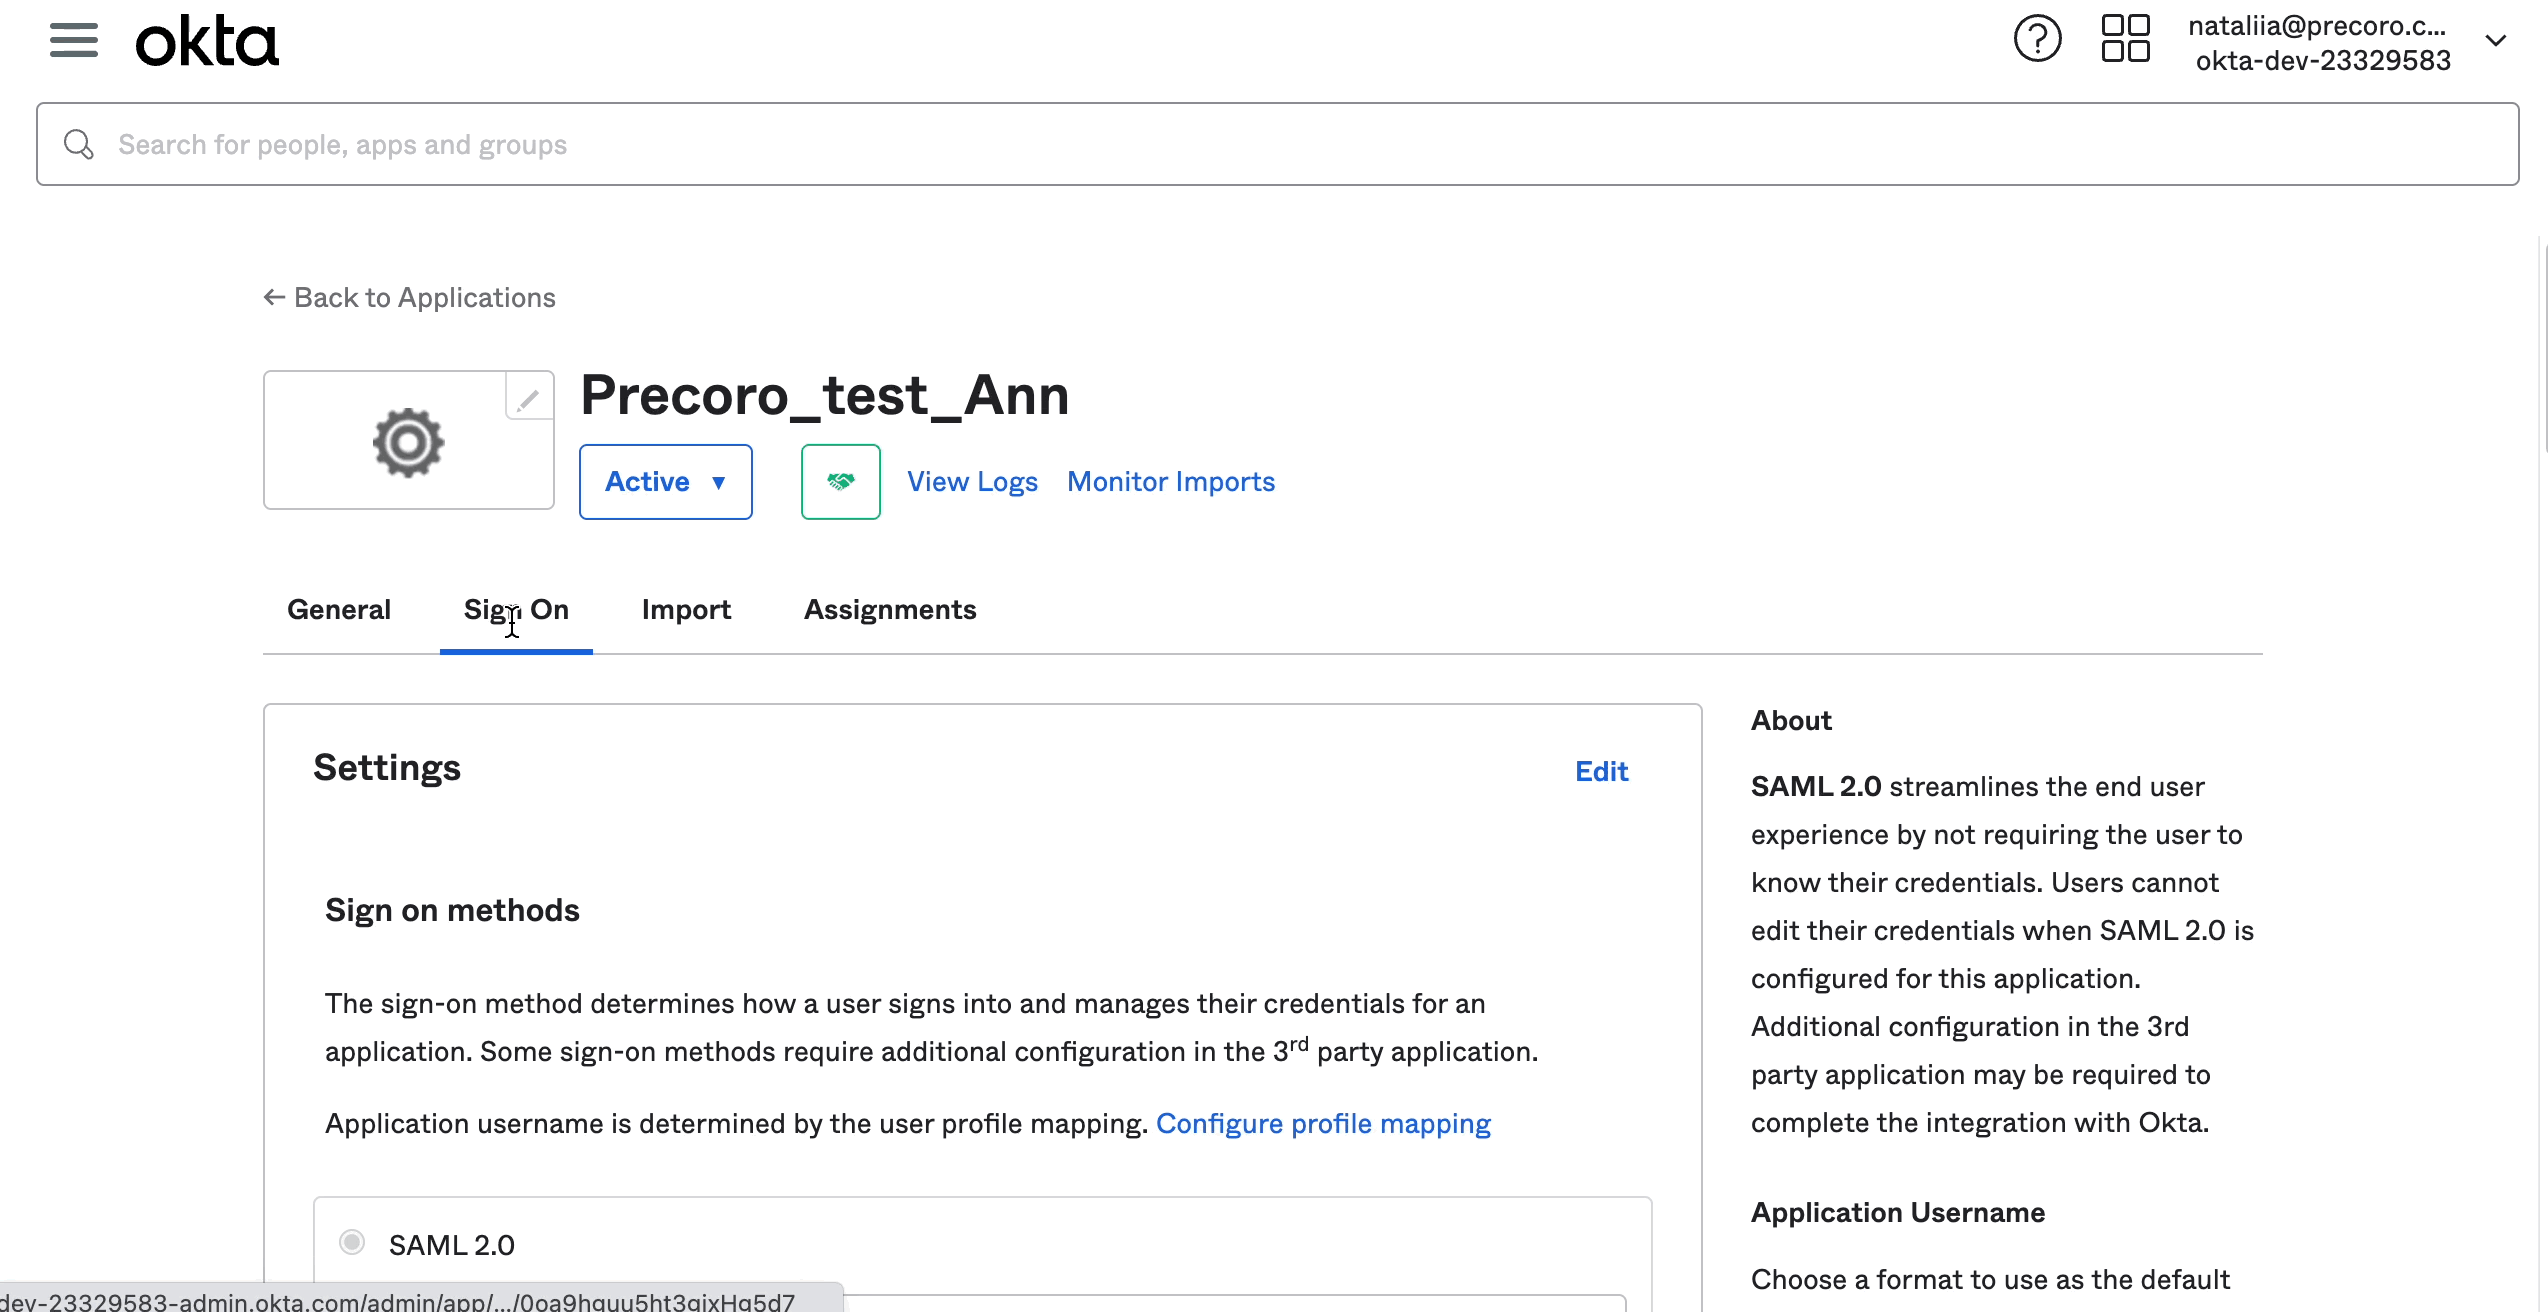
- Go to the Sign-On tab in the just configured App Integration.
- On the right-side panel, find, and click the View Setup Instructions button.
- Copy the value of Identity Provider Issuer and paste it to Step 3: Identity Provider Issuer in Precoro.
2. Upload Metadata to Precoro:
- On the Sign-On tab find the Metadata URL.
- Open the link and save the Metadata on your computer.
- Upload this file to Step 4 in Precoro.
3. Click the Update button. Now the SSO is configured.
4. Please remember to assign users to this Application.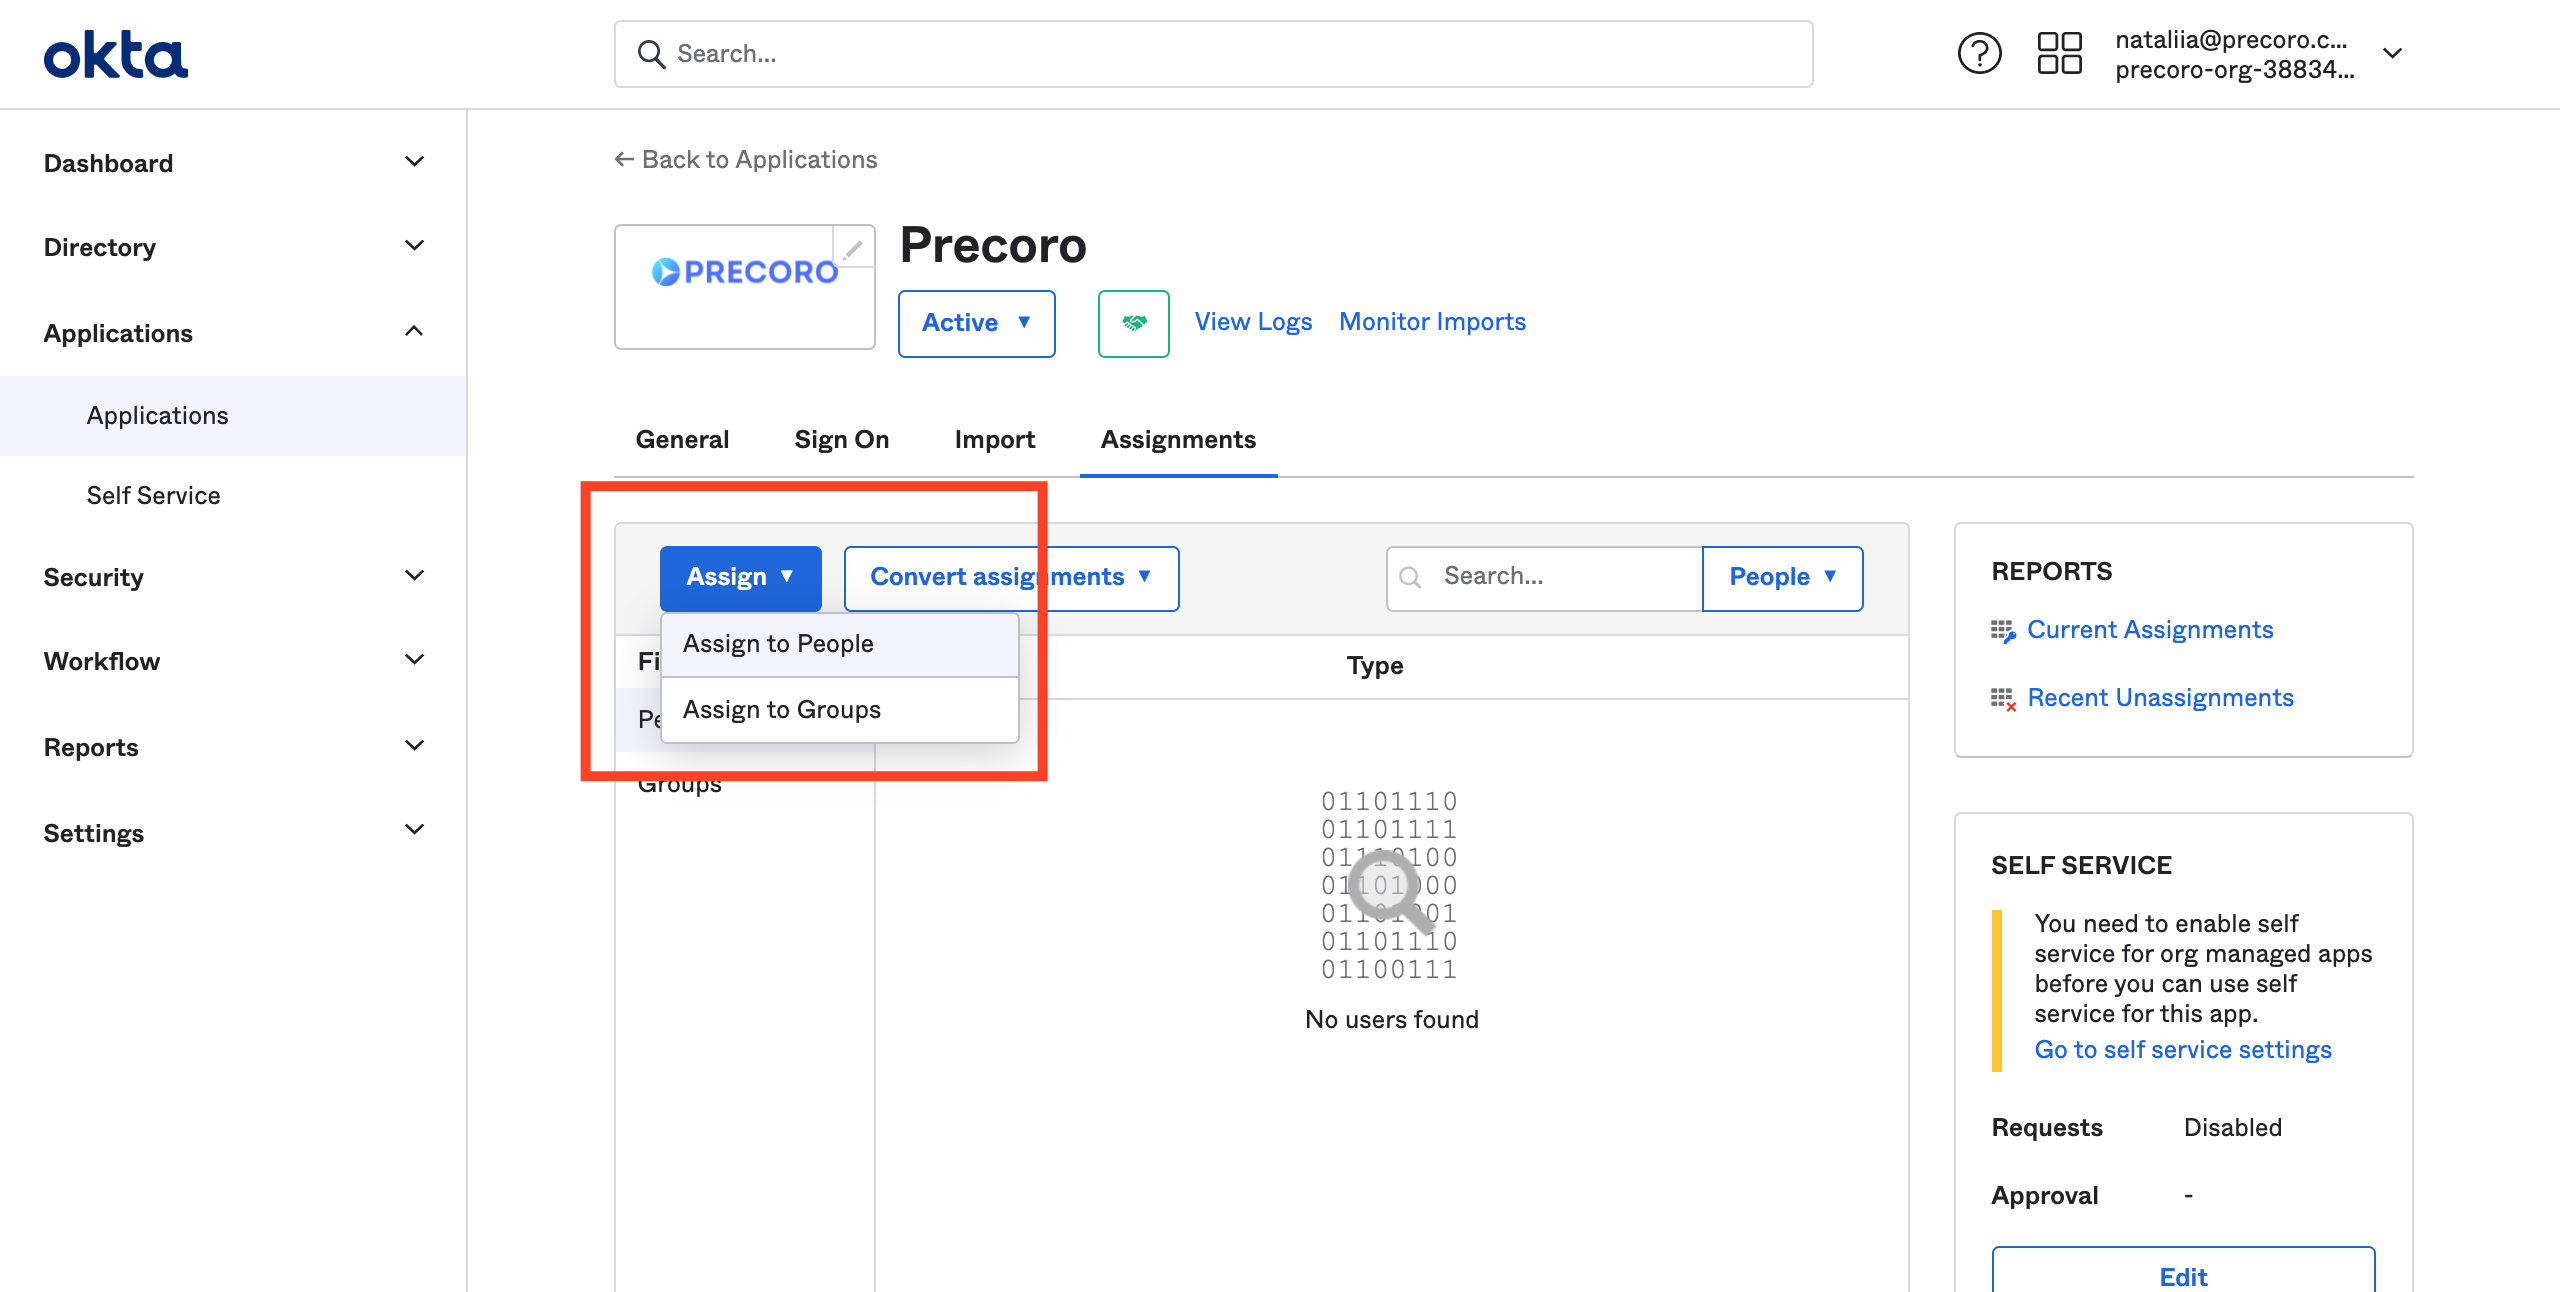
After configuring the SSO, you can easily log in with one click in Precoro by pressing the corresponding Okta tile. You will be redirected to the main dashboard page in Precoro.
-png.png)
Frequently Asked Questions