TABLE OF CONTENTS
- Simple Steps to Set Up SSO with Microsoft Entra ID
- How to Set Up SSO for Several Companies
- How to Invite New Users to Precoro if the SSO is Enabled
- Frequently Asked Questions
Simple Steps to Set Up SSO with Microsoft Entra ID
1. Open the Configurations tab on your left, go to the SSO Settings tab, and move the switch to On.2. Please skip steps 3-5 if you have already set up the tenant or created the enterprise application, and added users.
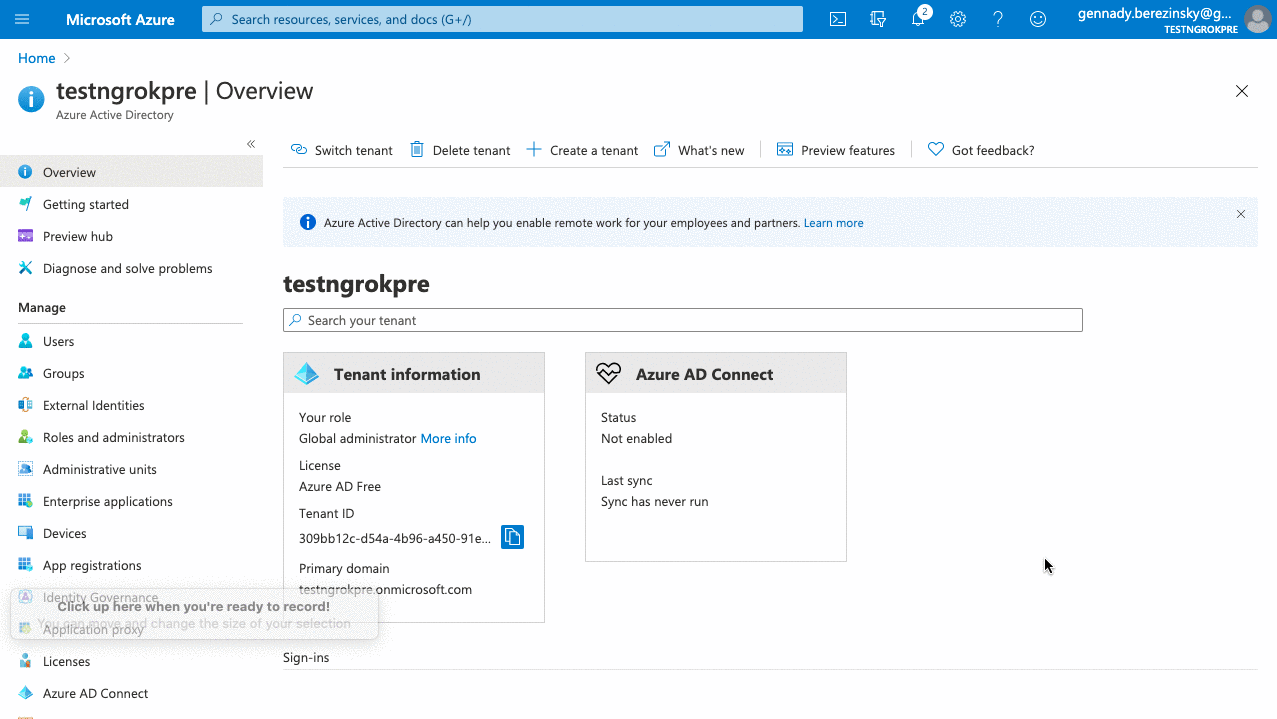
3. Open your account in Microsoft Entra ID, choose an existing tenant, or add a new one.
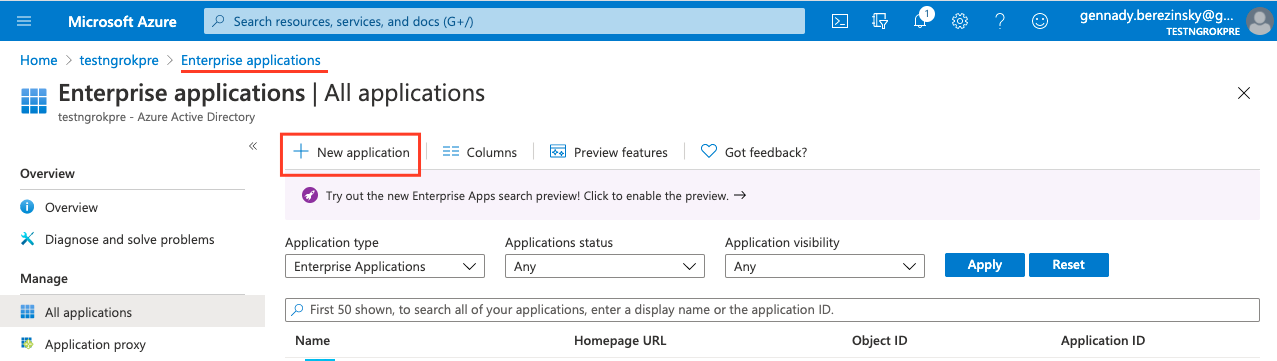
4. Create your own enterprise application or choose an existing one in your tenant.

5. Open your tenant, go to Manage —> Users, and Invite a new one:
- Enter a valid email from Precoro.

- Add this user to your Enterprise Applications.
6. Set up your SSO in the application. Go to Manage (from your Enterprise Applications) —> Single Sign-On —> choose the SAML method.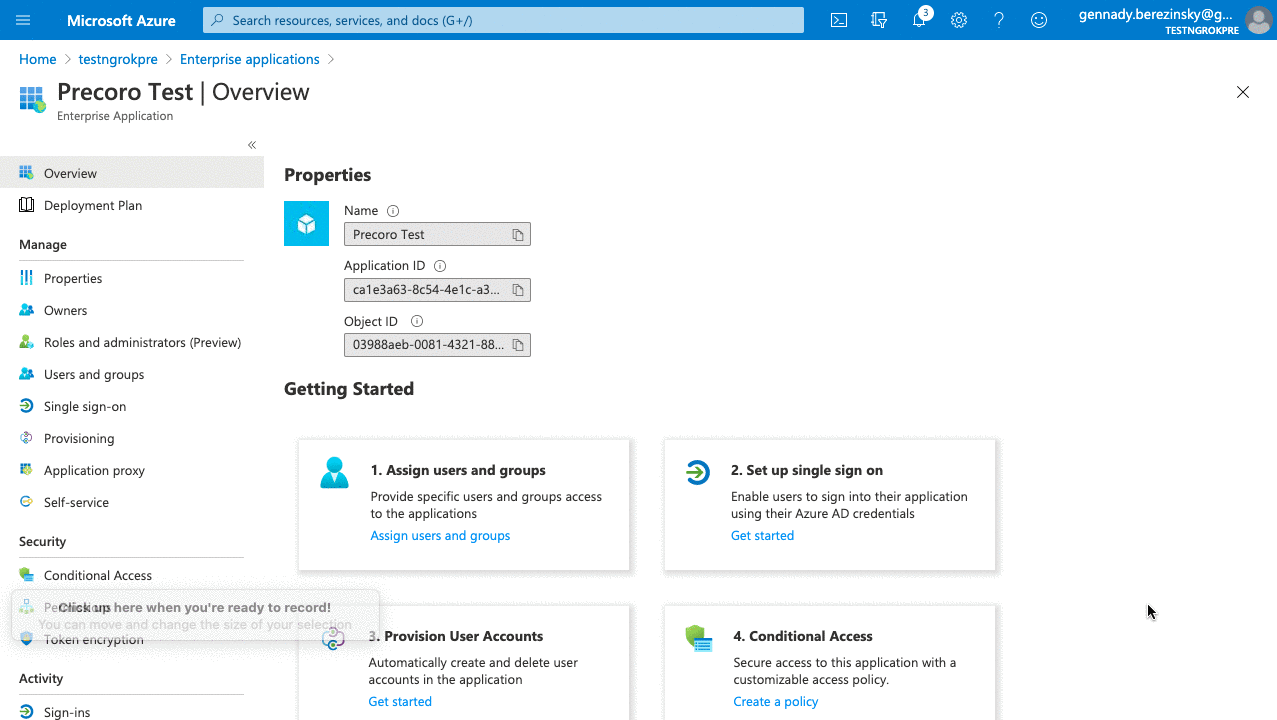
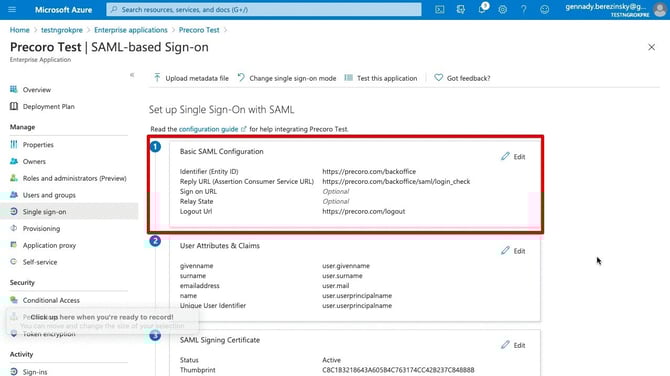
7. Fill out Step 1 (Basic SAML Configuration). The data in Microsoft Entra ID needs to match your data from the SSO Settings tab in Precoro:
- Entity ID —> Identifier (Entity ID).
- ACS —> Reply URL (ACS URL).
- Single Logout Response Endpoint —> Logout URL.
8. Download Federation Metadata XML from Step 3 (SAML Signing Certificate) and upload it to Step 4 in the SSO Settings tab in Precoro.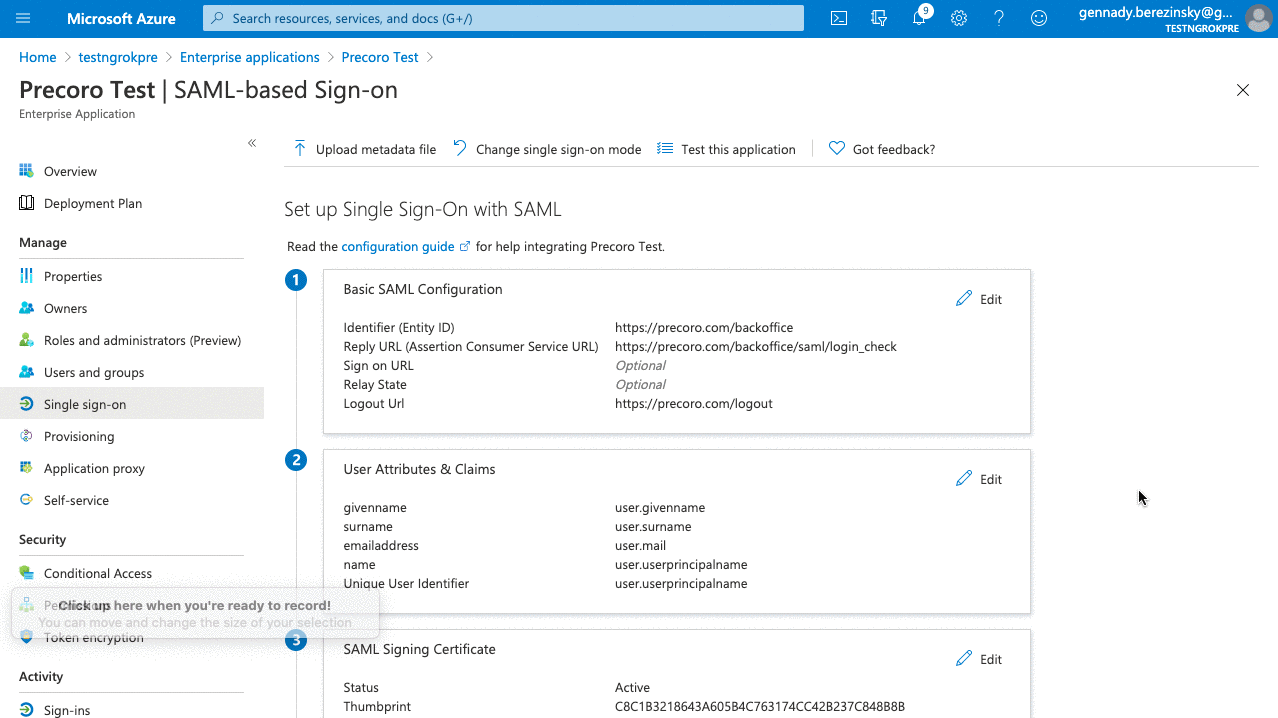
9. Copy Microsoft Entra ID Identifier from Step 4 (Set Up) and paste it to Step 3 (Identity Provider Issuer) in Precoro SSO Settings.
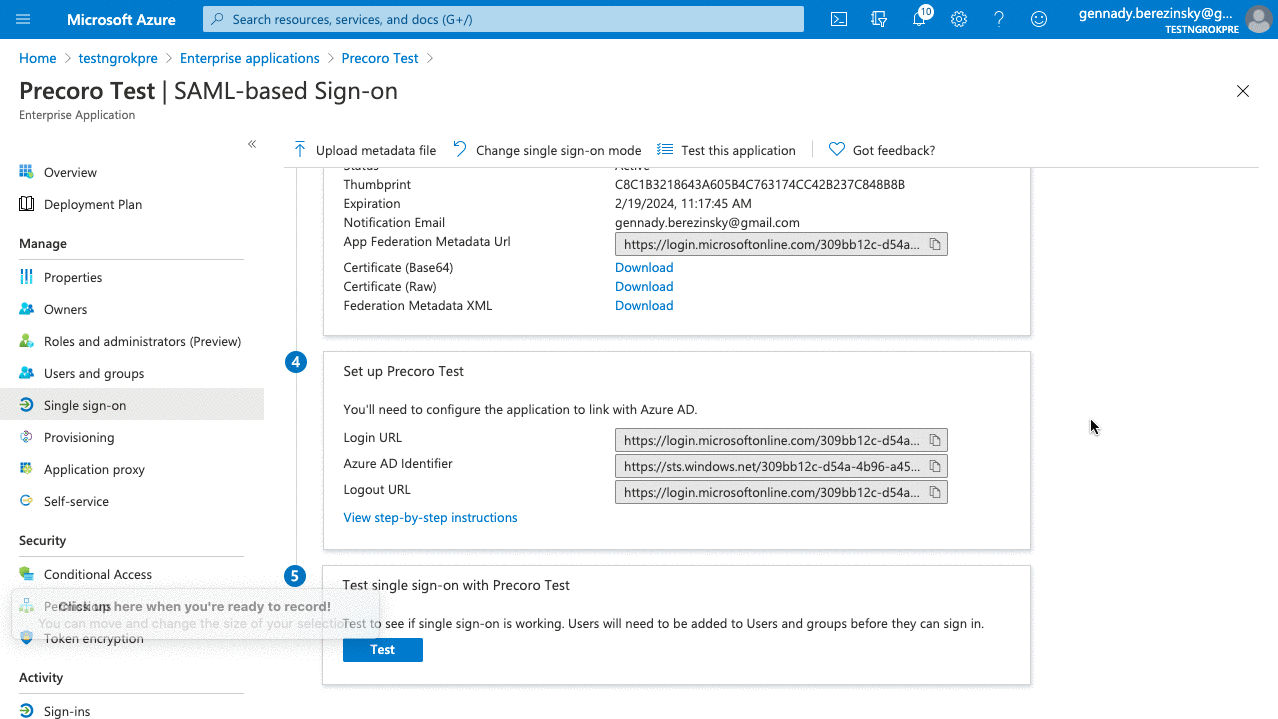
10. By default, the Certificate will expire 3 years after its creation. To renew the certificate to Precoro SSO Application, go to SAML Certificates → Edit → New Certificate. Save a new certificate and deactivate an old one if needed.
Please ensure that Microsoft Entra Identifier and Federation Metadata XML are not changed. If needed, please upload updated data to Precoro.
How to Set Up SSO for Several Companies
In Precoro’s Step 3 Identity Provider Issuer, you can input the same data for several companies. To do that, make sure you have:
1. Created application in Microsoft Entra ID.
2. Added necessary users to the application.
3. Updated settings for all Precoro companies.
You can work with one application within several accounts in Precoro.
How to Invite New Users to Precoro if the SSO is Enabled
- You can still invite users to your Precoro company account from the User Management tab. But first, this user must be added to your user list in Microsoft Entra ID.
- A new user will be redirected to the Company Login page from the invitation email.
If you have any questions, do not hesitate to contact us via online chat.
Frequently Asked Questions