TABLE OF CONTENTS
How to Set Up OCR in Precoro
💡 Please note: OCR is a paid add-on. To enable the OCR feature, please reach out to your Customer Success Manager.
Upon activation of the add-on, you'll receive 15 free credits for invoice processing and can purchase more anytime through the Billing page.
Once the Precoro Team enables the feature, you can start customizing it for your needs. Follow these steps:
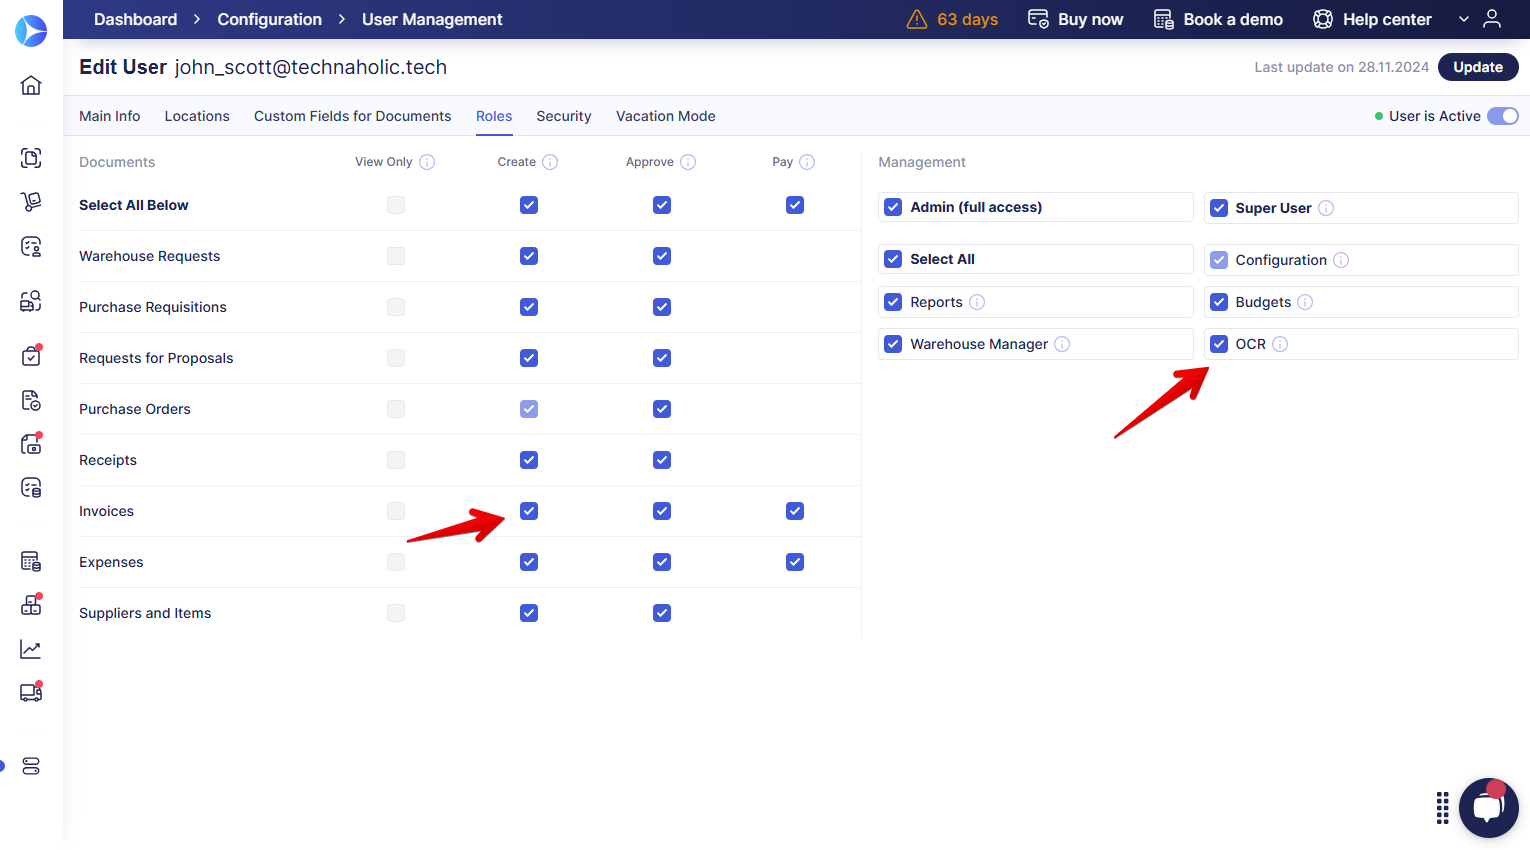
Step 1: Assign User Roles
Decide which users will use the OCR feature and assign them the following roles:
-
Invoice Creator: This role allows users to create and edit invoices.
-
OCR: This role enables users to interact with the AP inbox and manage recognized documents.
Step 2: Choose Your Invoice Upload Method
In Precoro, you have three options for uploading invoices for OCR processing. Pick the one that works best for you:
-
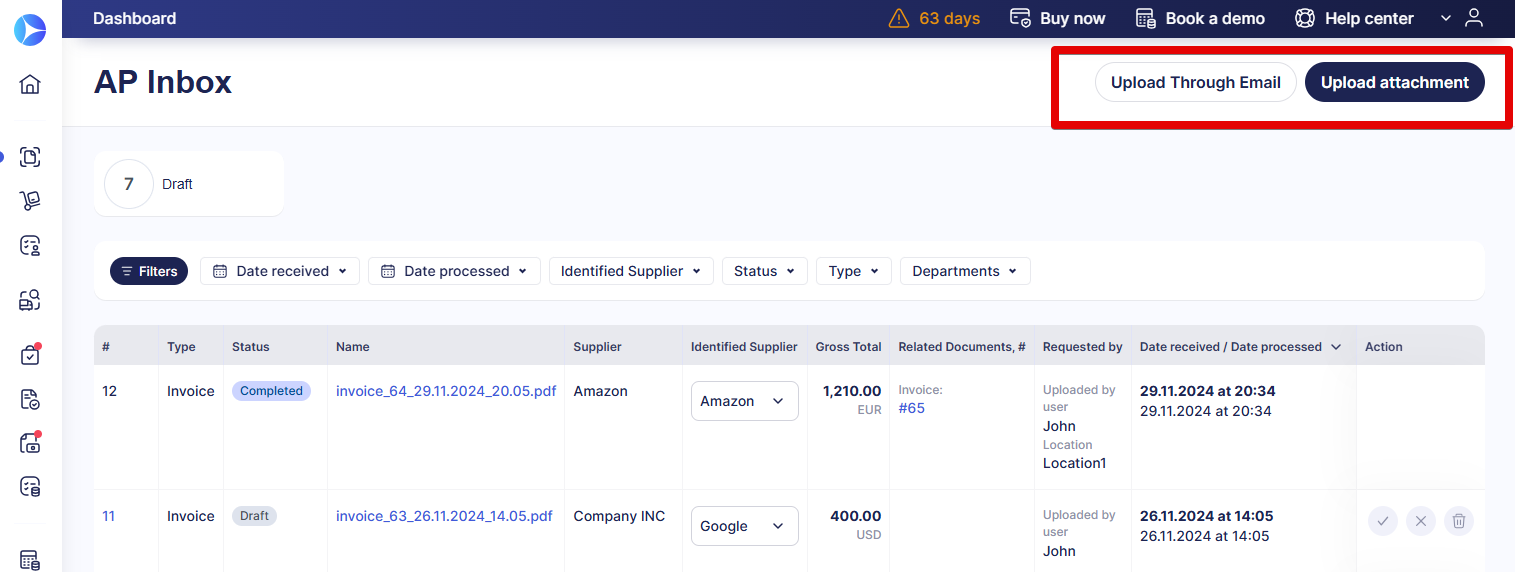
Via Precoro inbox email: This is a dedicated email address for your suppliers to send invoices to. Once sent, Precoro will automatically scan and upload them as drafts to your AP Inbox where you can track their processing status. To get the email address, click the “Upload Through Email” button at the top of the AP Inbox page and share it with your suppliers.
💡Pro tip: If you have multiple companies in Precoro with different emails where suppliers send invoices, you can set up auto-forwarding to the shared email on the AP Inbox page. This way, all documents will be sent to all AP inboxes at once.
-
Via the AP Inbox page: Alternatively, you can upload invoices directly to the AP Inbox. Simply click the Upload Attachment button, select the document, and it will be processed for OCR recognition.
-
Via the Invoices page: Go to the Invoices page, click Add Invoice with OCR, enter the required CFD information, attach the document, and click Create to begin processing.
Step 3: Enable Automated Invoice Creation (Optional)
To further streamline your invoicing process, Precoro can automatically create invoices from incoming documents. This feature helps reduce manual work by generating invoices based on received files and matching them to existing purchase orders when possible.
Depending on your company’s needs, invoices can be auto-created as standalone documents or linked to corresponding purchase orders. The system can also assign initiators automatically — either the creator of the related order or a designated default user.
If you’d like to enable Automated Invoice Creation in your account, please contact your Customer Success Manager for assistance.
Step 4: Activate the Enter Invoice as One Line feature (Optional)
The Enter Invoice as a Single Line feature in Precoro allows you to consolidate all items on an invoice into a single line entry with the total amount. This feature is particularly useful for invoices where item-level detail isn’t necessary, such as service invoices or consolidated billing.
If there’s a matching purchase order, Precoro will link this line to the first item in the PO. Additionally, when enabled, Precoro’s OCR automatically applies this setting for new suppliers.
Please contact your Customer Success Manager to enable this feature.
Step 5: Configure Tax Handling (Optional)
Precoro can track tax amounts as separate line items on documents. When taxes are disabled in your company settings, each tax will be recorded as “TAX {tax rate}” with the correct amount. If a document includes multiple tax rates, each one will get its own line.
If taxes are enabled, Precoro first compares the recognized tax rate with the taxes set up for your company or legal entity.
-
If there is a match, the tax is applied as a tax percentage in the invoice.
-
If there is no match, Precoro adds the total recognized tax amount as a separate Tax-type item.
This helps keep invoice totals accurate even when a supplier’s tax rate does not match your predefined taxes.
Learn more about how to handle taxes with OCR here.
💡 Please note: This setting only applies to the document-level tax and not to individual items.
How to Keep Track of OCR Credits
A tracker at the top of the AP Inbox page shows the number of documents processed with OCR and how many are still available. It gives a clear understanding of OCR usage even without access to the Billing page.
The number of documents you can still process is displayed in the "documents left" tag by the page heading. Hover over the tag to view the detailed tracker.
![]()
Here's what you can see in the tooltip:
- Used this month—number of documents processed with OCR this month.
- Total (deleted excluded)—total number of documents processed throughout the time your company was using OCR, excluding deleted attachments.
Users with the Configuration role also have access to the Buy more button that redirects you to the Billing page. When there are no documents left for processing, this button becomes visible to other users. However, it remains inactive and is followed by a recommendation to contact an admin.
How to Stay Updated on Document Processing
To stay informed when your documents have completed OCR processing, you can configure email notifications. Follow these steps:
-
Go to Email Preferences → Misc.
-
Check the box for Document has been processed with OCR.
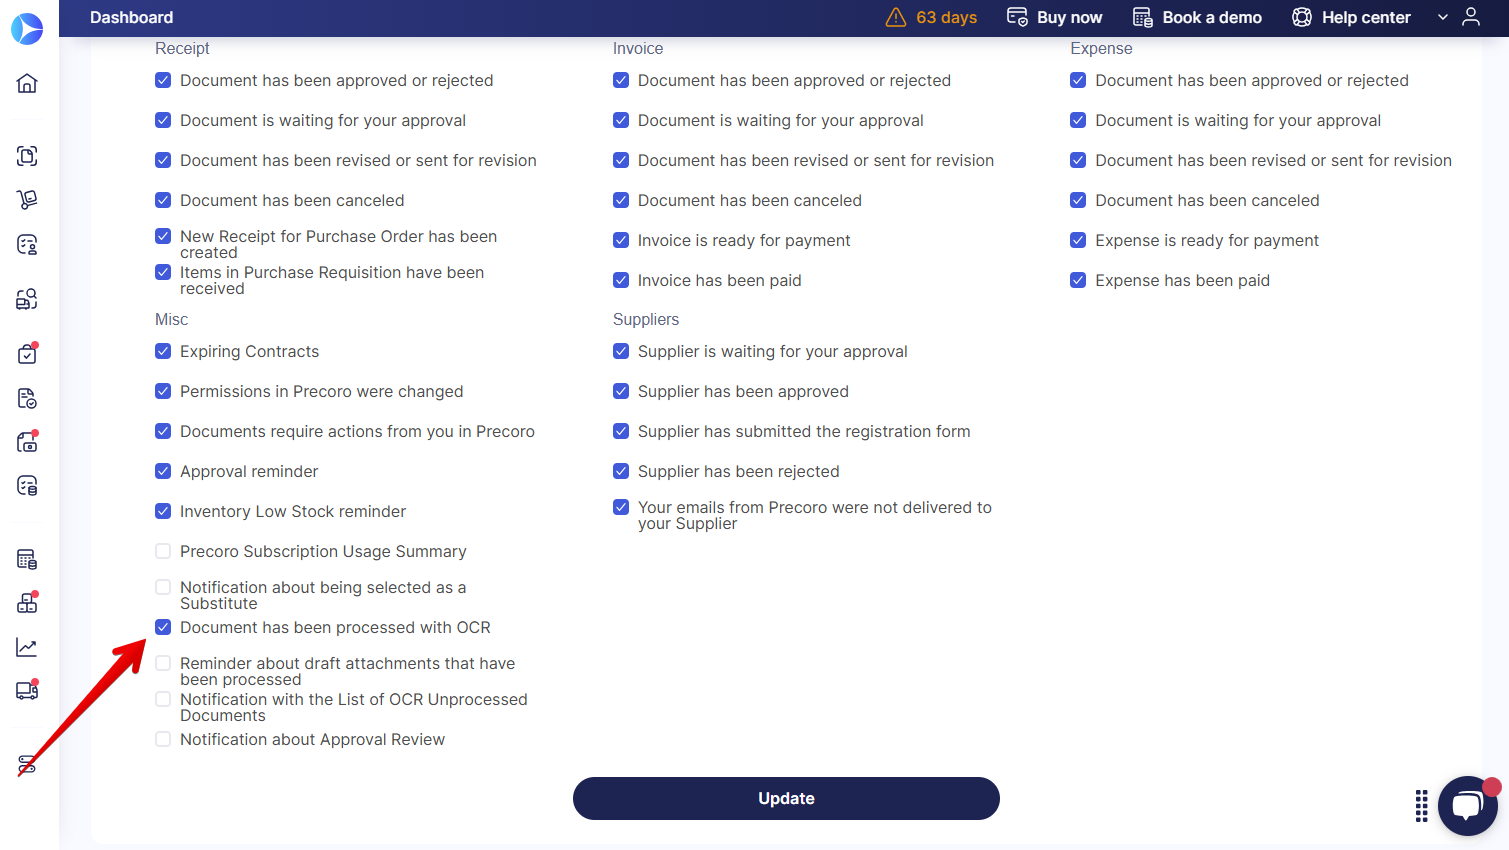
You can also keep track of documents that were not processed. To receive updates on these unprocessed documents, select “Notification with the List of OCR Unprocessed Documents” in the same menu.
When activated, users with OCR roles will receive a weekly email listing all documents that were not processed.
Here are some common reasons why a document might not be processed:
-
The document is not an invoice.
-
It is not in PDF, JPEG, PNG, or TIFF format.
-
The file size exceeds 25MB.
-
The document is password-protected or encrypted.
Frequently Asked Questions