TABLE OF CONTENTS
- Step 1: Install On-Premises Data Gateway
- Step 2: Configure the Data Gateway
- Step 3: Publish Your Report and Configure the Data Connection
- Step 4: Set Up Scheduled Refresh
After setting up the Power BI Custom Connector and building your visual reports, you can customize automated data updates to keep your analytics current.
Step 1: Install On-Premises Data Gateway
The on-premises data gateway bridges secure data transfer between the Power BI Desktop application and Power BI online (app.powerbi.com).
When you build reports in Power BI Desktop using Precoro Power BI custom connector, you can use the on-premises data gateway to publish and refresh those reports from app.powerbi.com.
To install the on-premises data gateway:
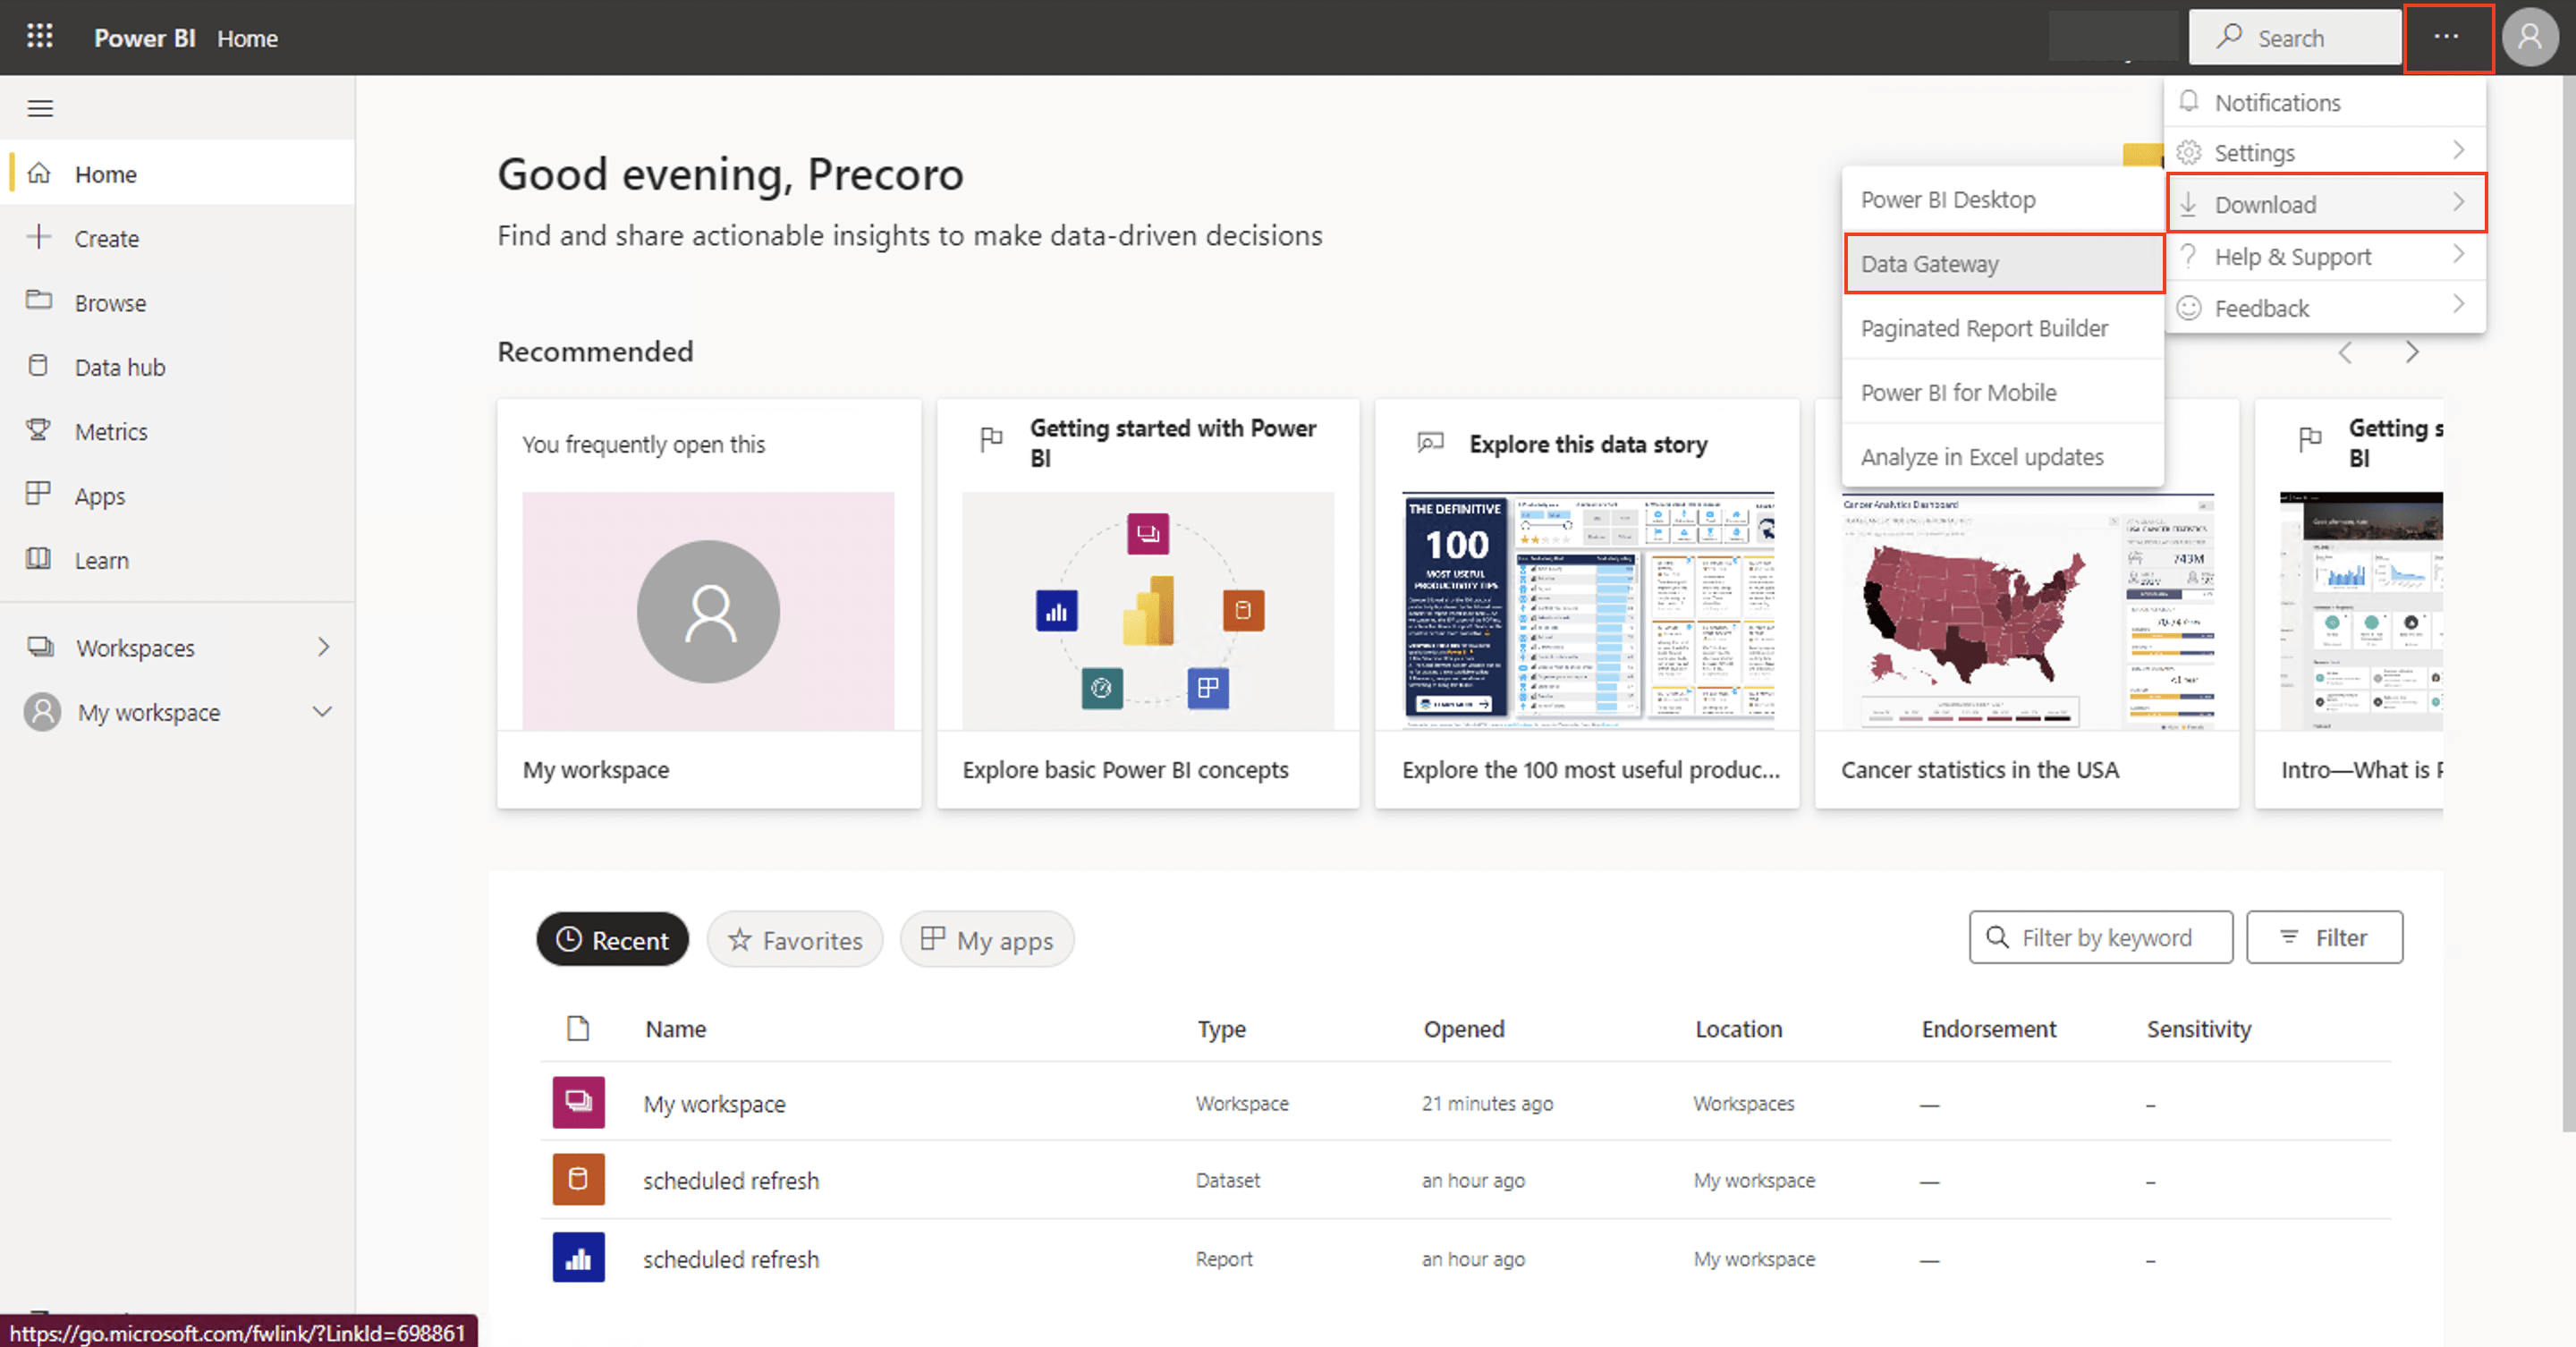
- Go to app.powerbi.com.
- Navigate to Settings → Download → Data Gateway.
- Choose your gateway type (Standard or Personal) → download the setup file.
💡Please note: Standard (also known as Enterprise) mode is recommended for most scenarios, but you can select personal mode if preferred. Learn about the difference between modes here.
Step 2: Configure the Data Gateway
- Open the downloaded file as an administrator and complete the installation.
- Sign in with the email address linked to your Power BI Service account.
💡Please note: You should have administrative rights in the Power BI workspace for this.
-
Select Register a new gateway on this computer;
-
Provide a name (e.g., ‘Precoro API’) and create a Recovery Key (a password to restore the gateway).
-
Locate the folder where the On-Premises Data Gateway was installed. The standard path is C:\Program Files (x86)\On-premises data gateway.
-
Create a folder named Custom Connectors inside that directory.
-
Place the .mez connector file provided by your CSM manager (as described here) into the Custom Connectors folder.
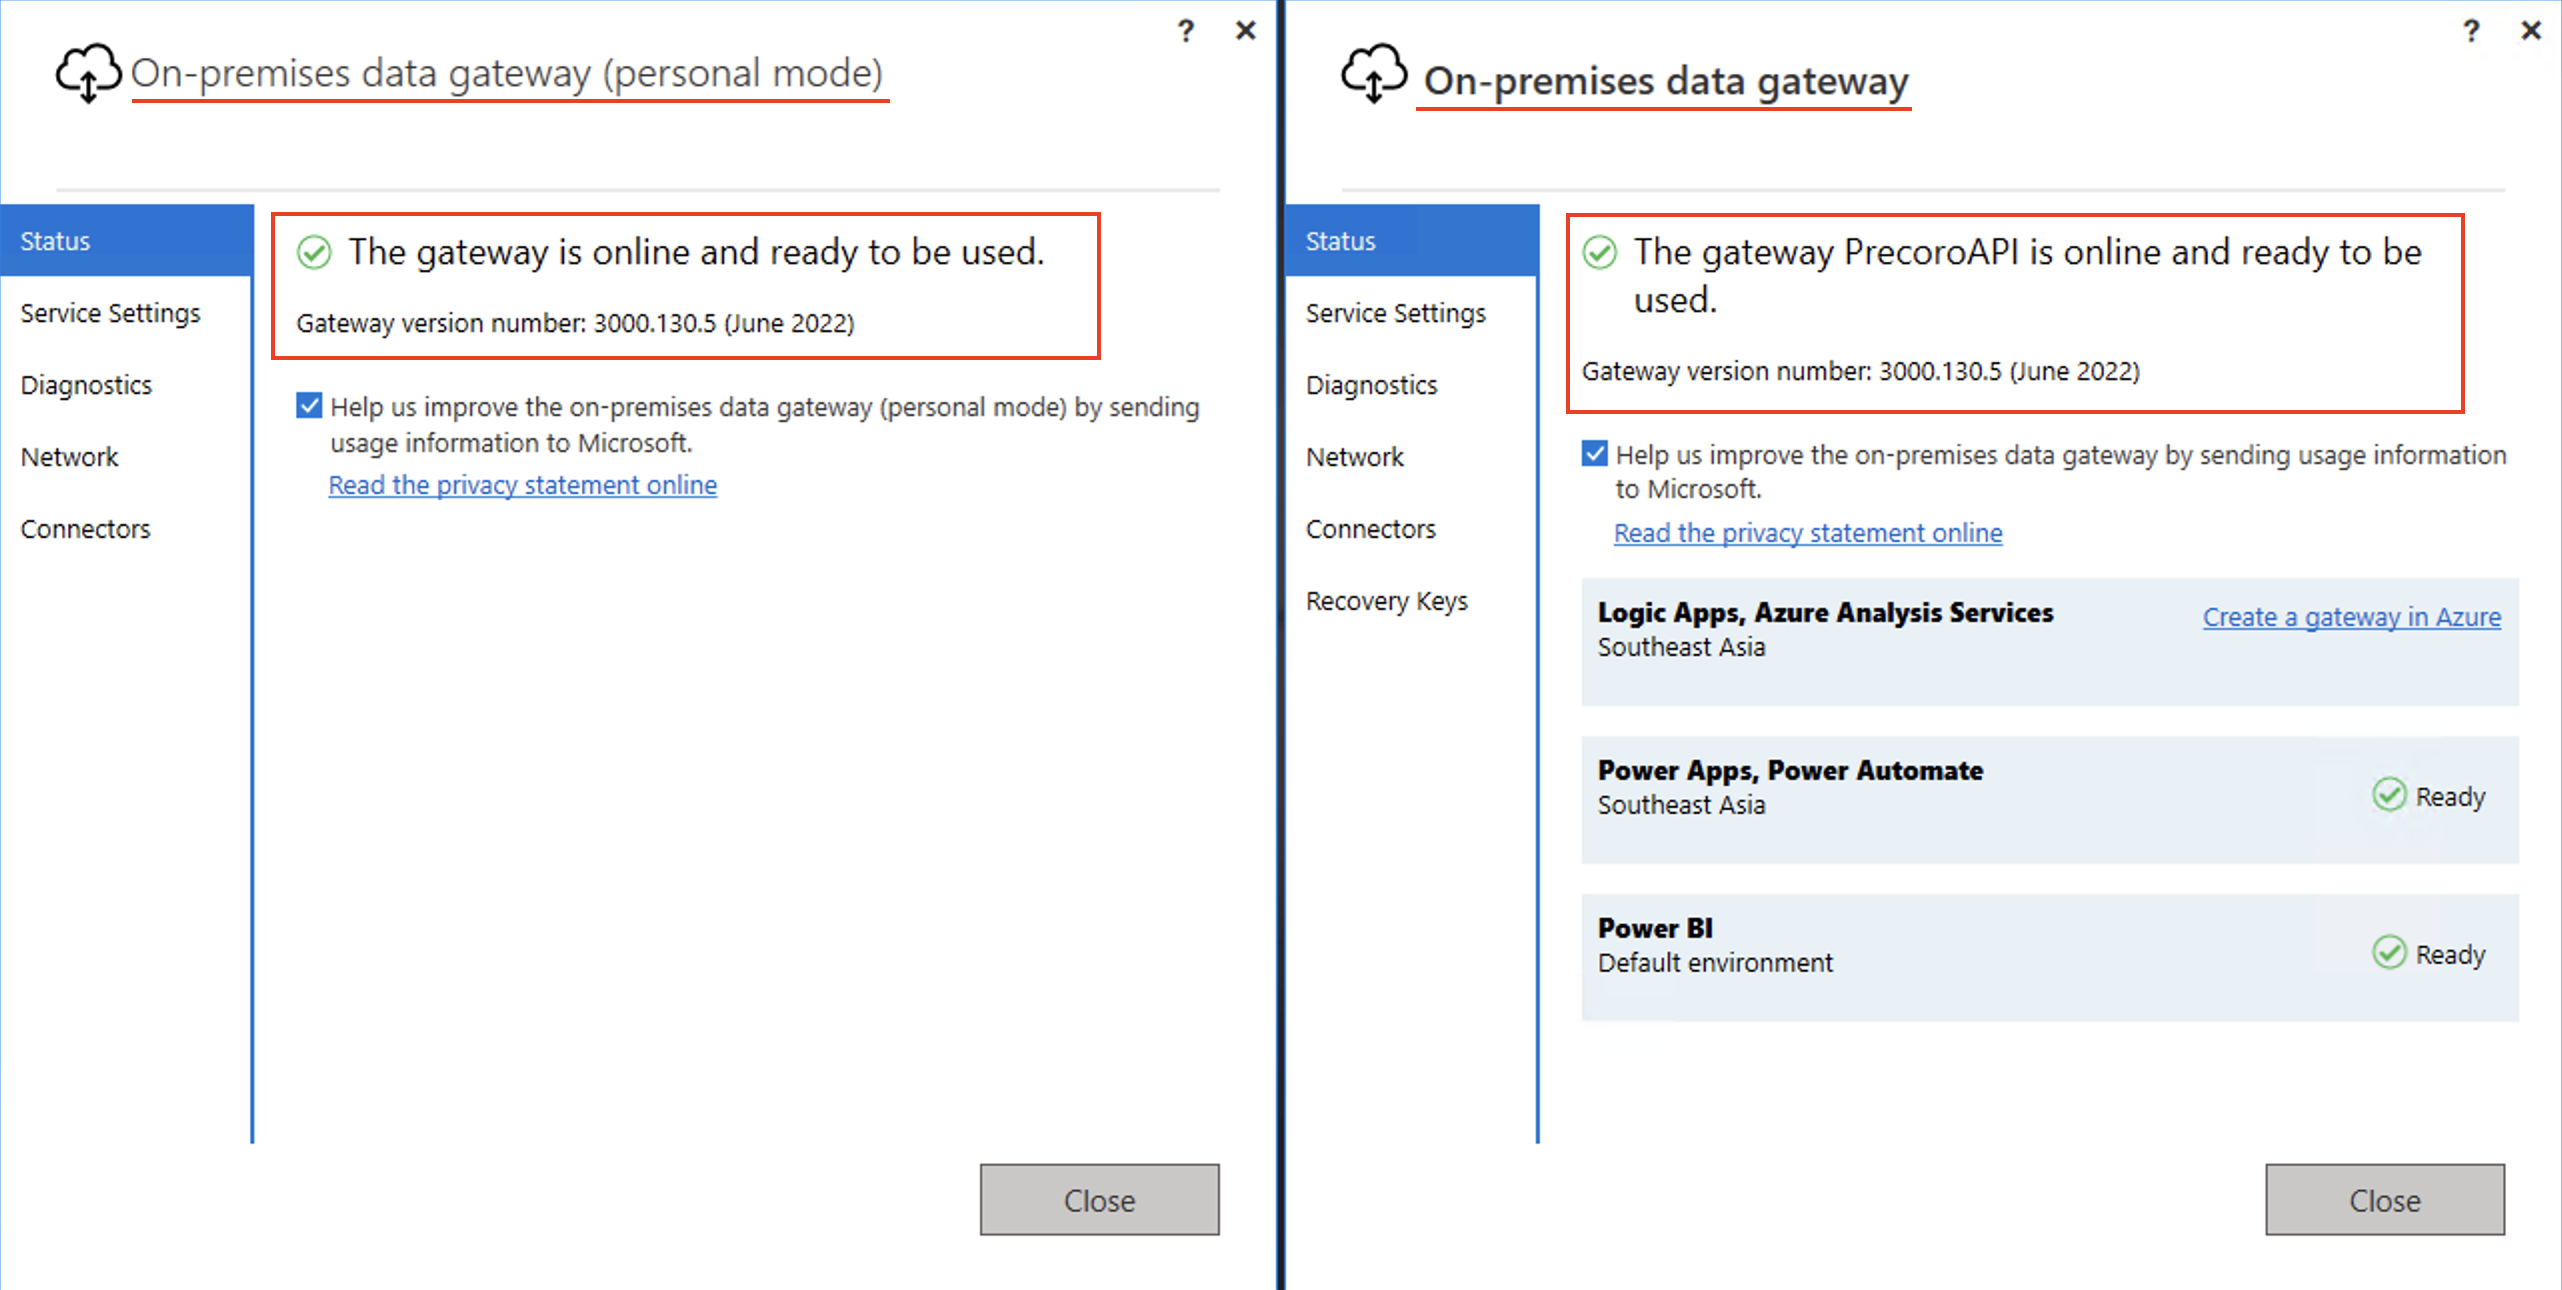
4. Verify the gateway status under the Status tab.
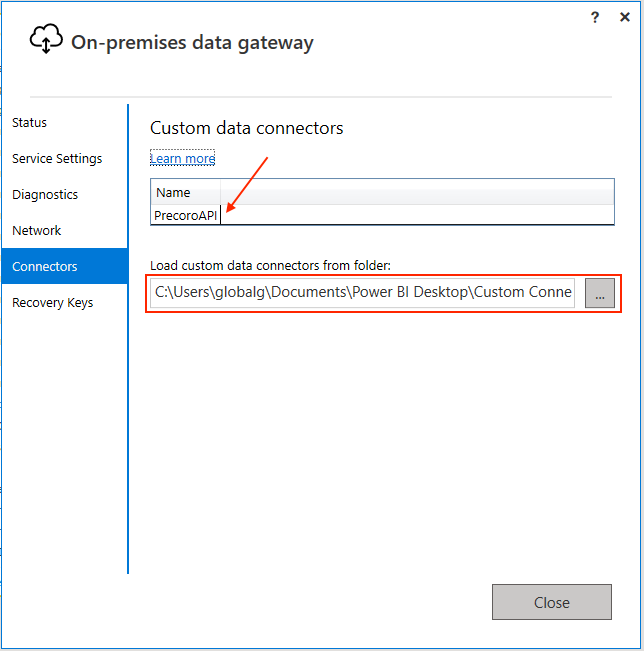
5. Check the Connectors tab to confirm the Precoro API connector is listed. If not, check the provided path and change it to the one where your connector is placed. In the Load custom data connectors from: field, you need to paste the path to the Custom Connectors folder. The standard path is C:\Program Files (x86)\On-premises data gateway\Custom Connectors.
It may take a few seconds for the Precoro API connector to show up in the list.
6. Only for standard gateway type: make sure your folder can be accessed by the user running the gateway service, which is NT SERVICE\PBIEgwService by default.
💡Please note: When adding or changing a connector, you should restart the on-premises data gateway.
Step 3: Publish Your Report and Configure the Data Connection
After finishing building your report in Power BI Desktop, follow the steps below:
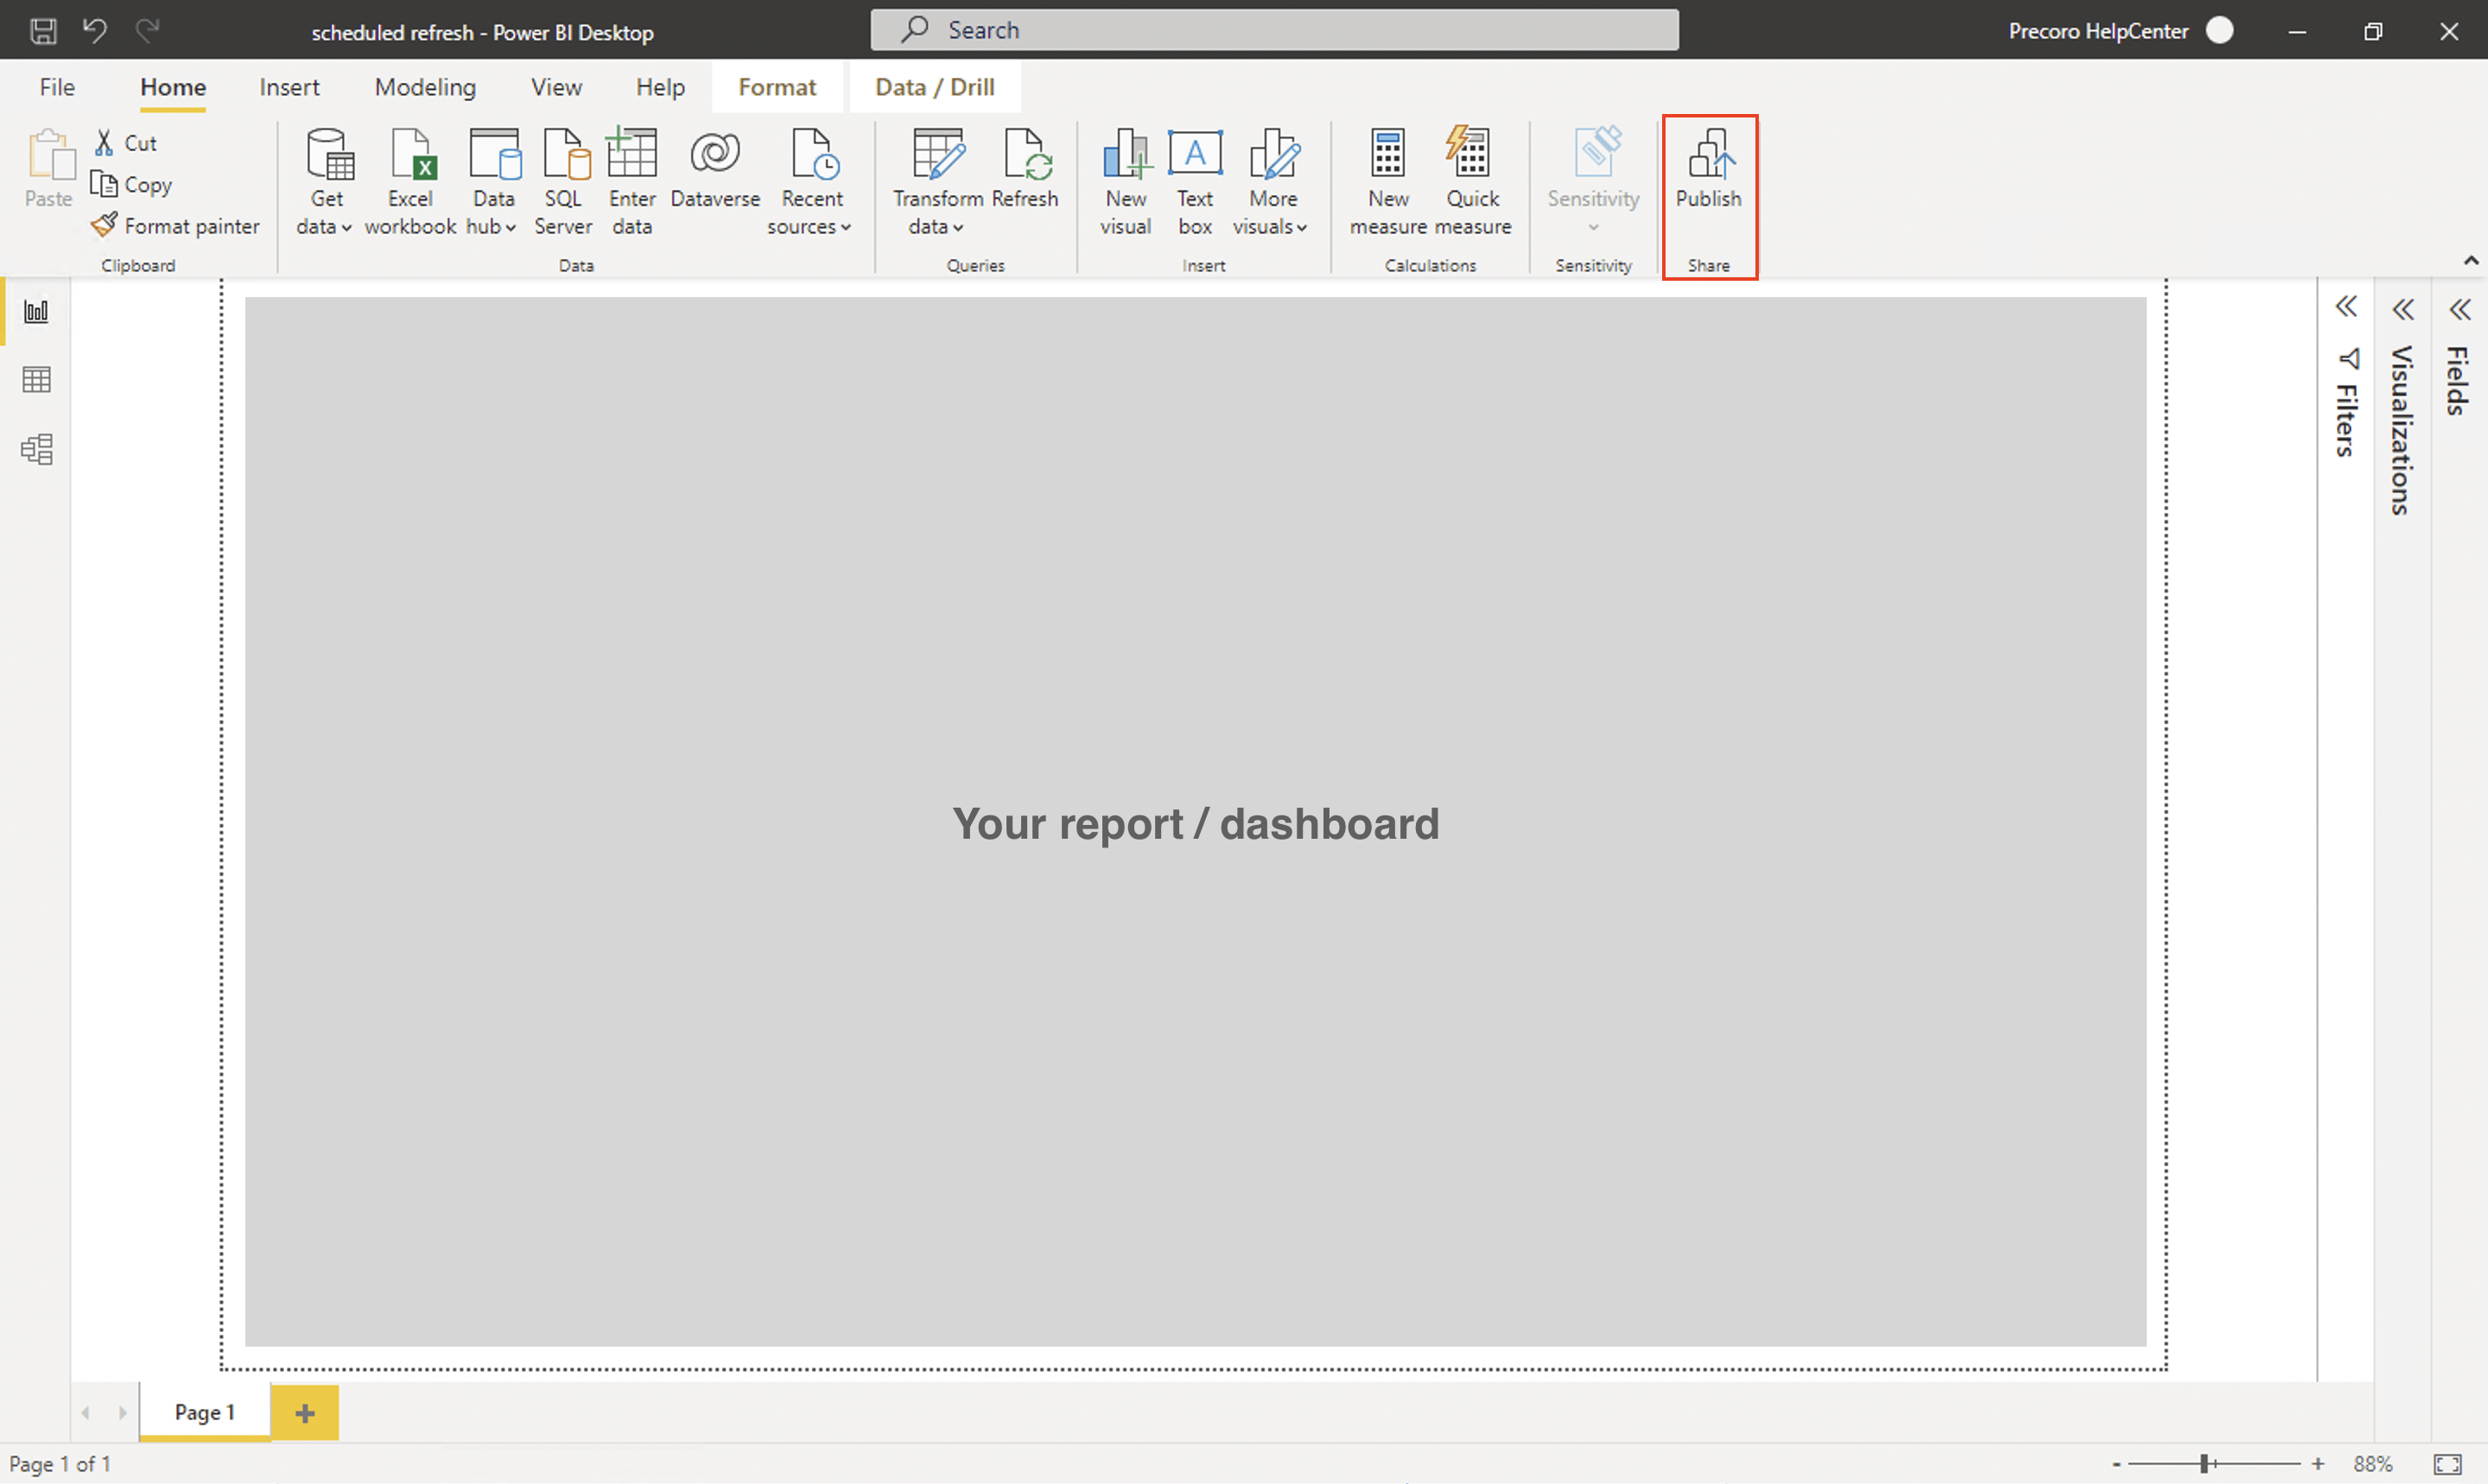
- Publish your report from Power BI Desktop using the Publish button.

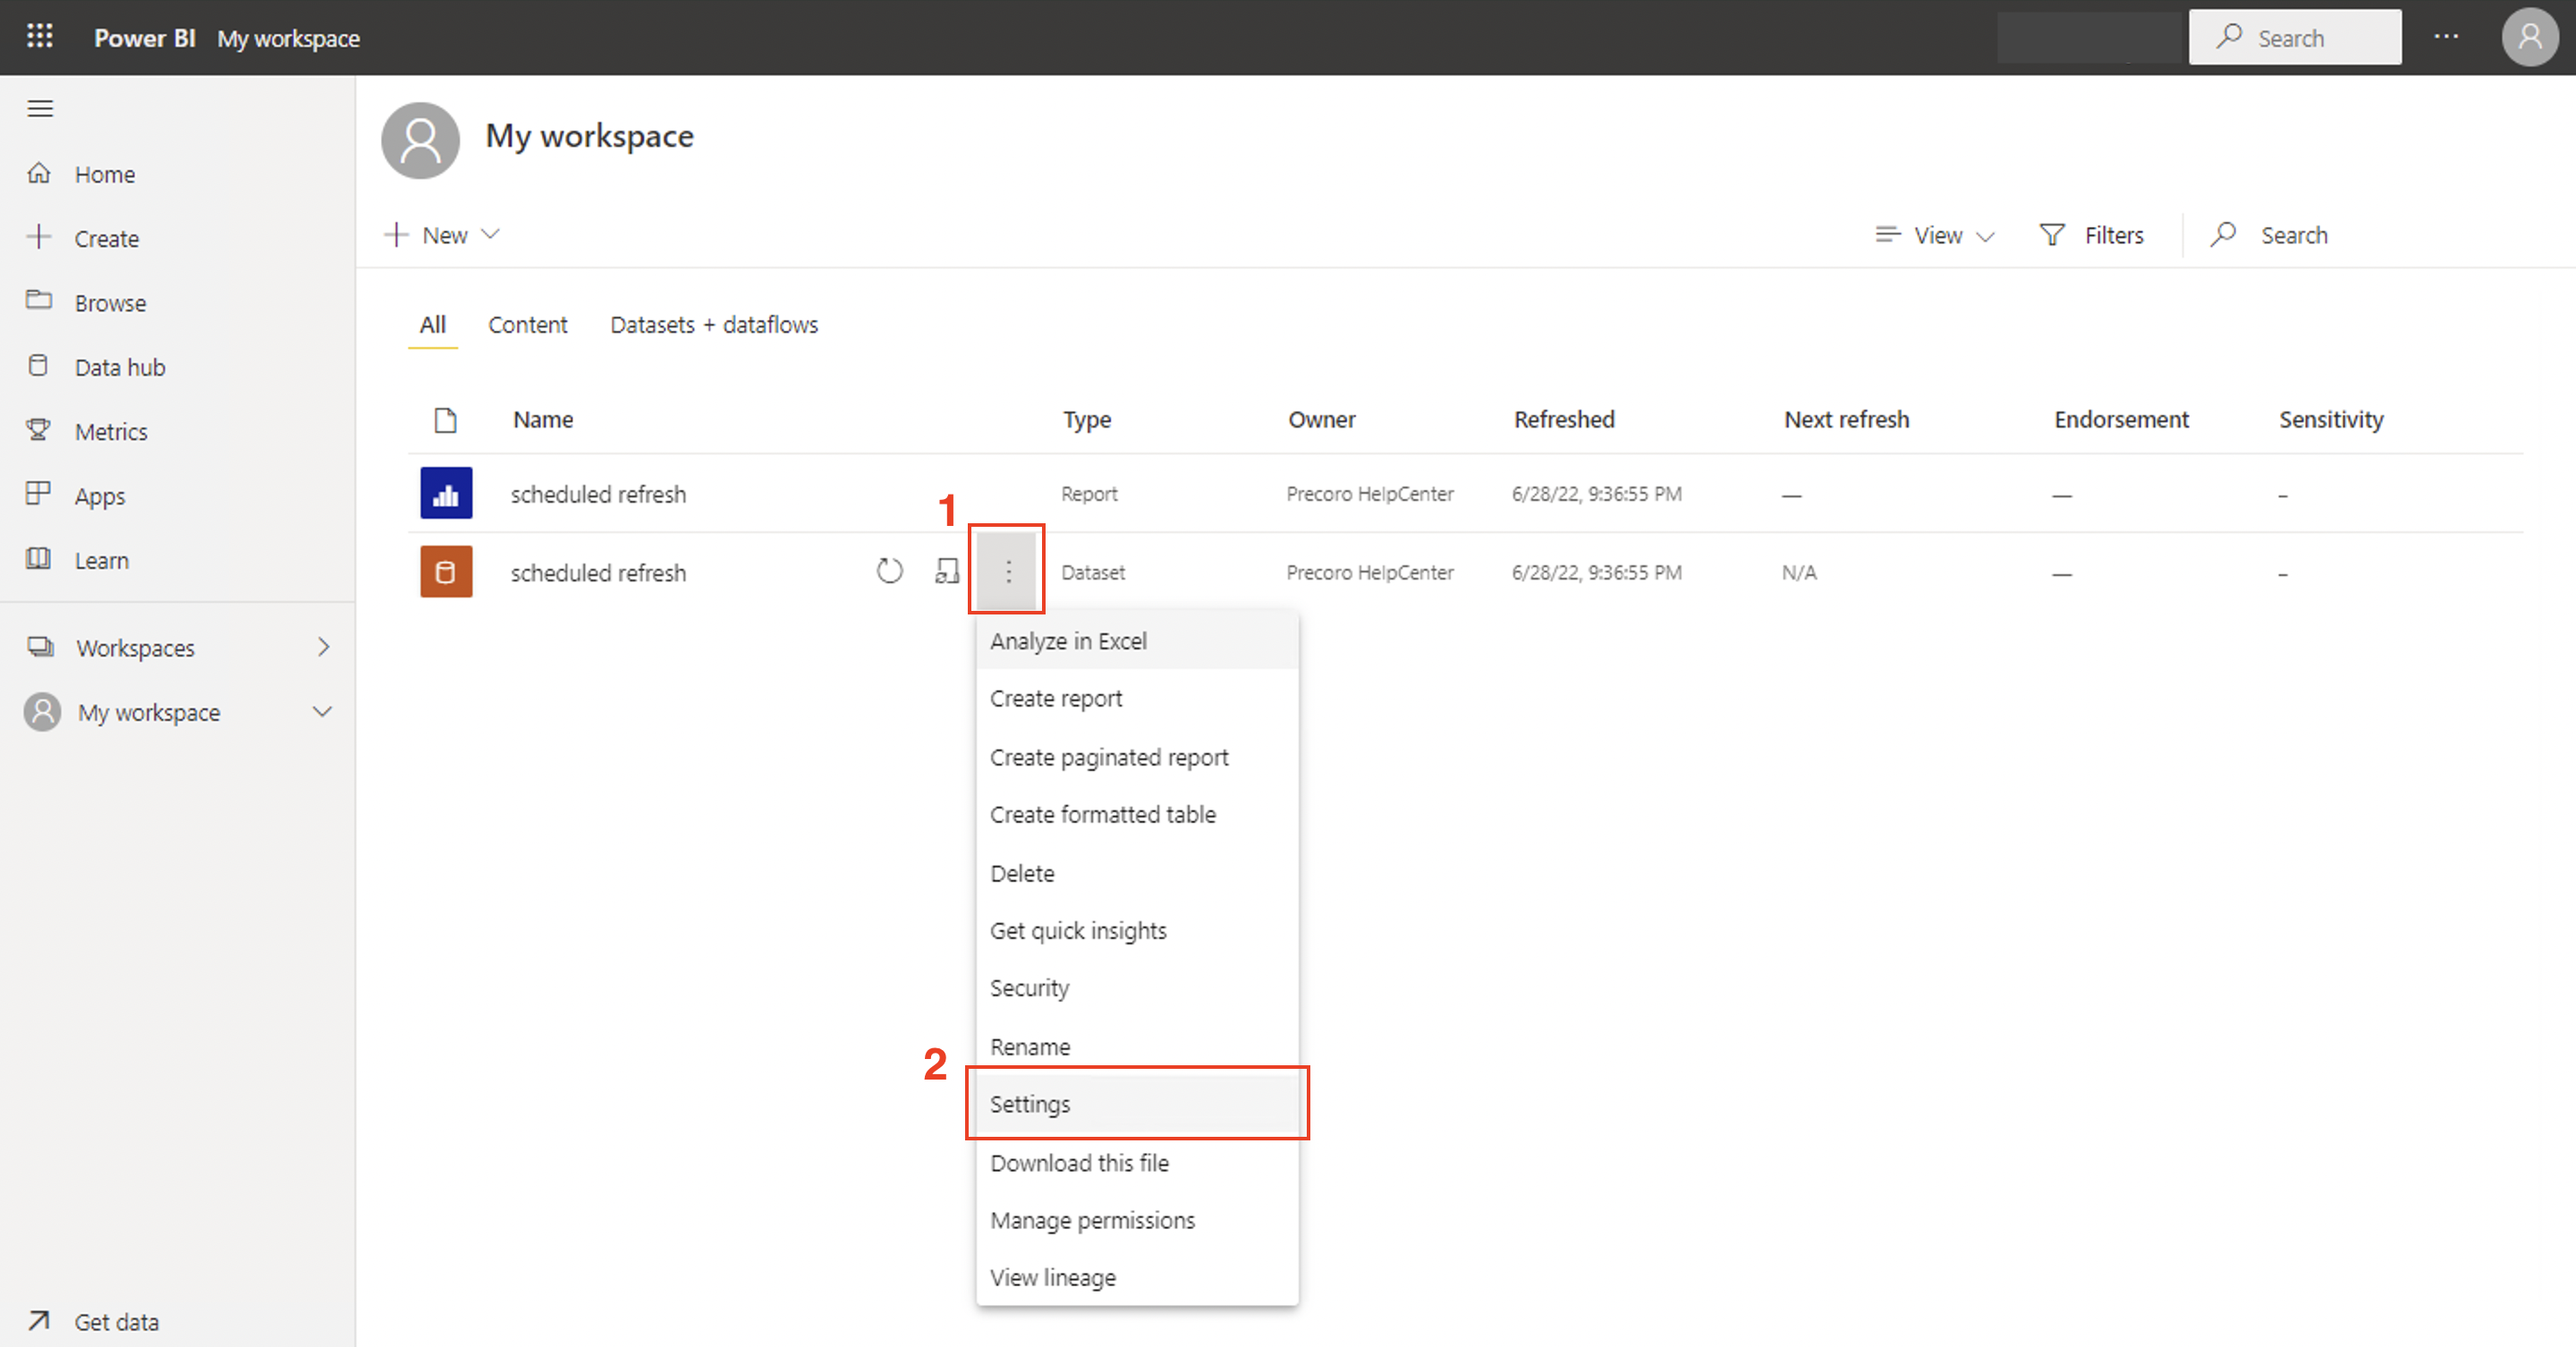
- Go to app.powerbi.com → locate the dataset for your report.
- Click More Options (...) → Settings next to the listed dataset.

- Depending on your gateway mode, follow further instructions provided in Option 1: On-Premises Data Gateway (Standard Mode) or Option 2: On-Premises Data Gateway (Personal Mode).
💡Please note: If you are a multi-companies or multi-accounts user in Precoro, refer to the Specifics of Using Precoro Power BI Connector for Multi-Companies article for the next steps.
Option 1: On-Premises Data Gateway (Standard Mode)
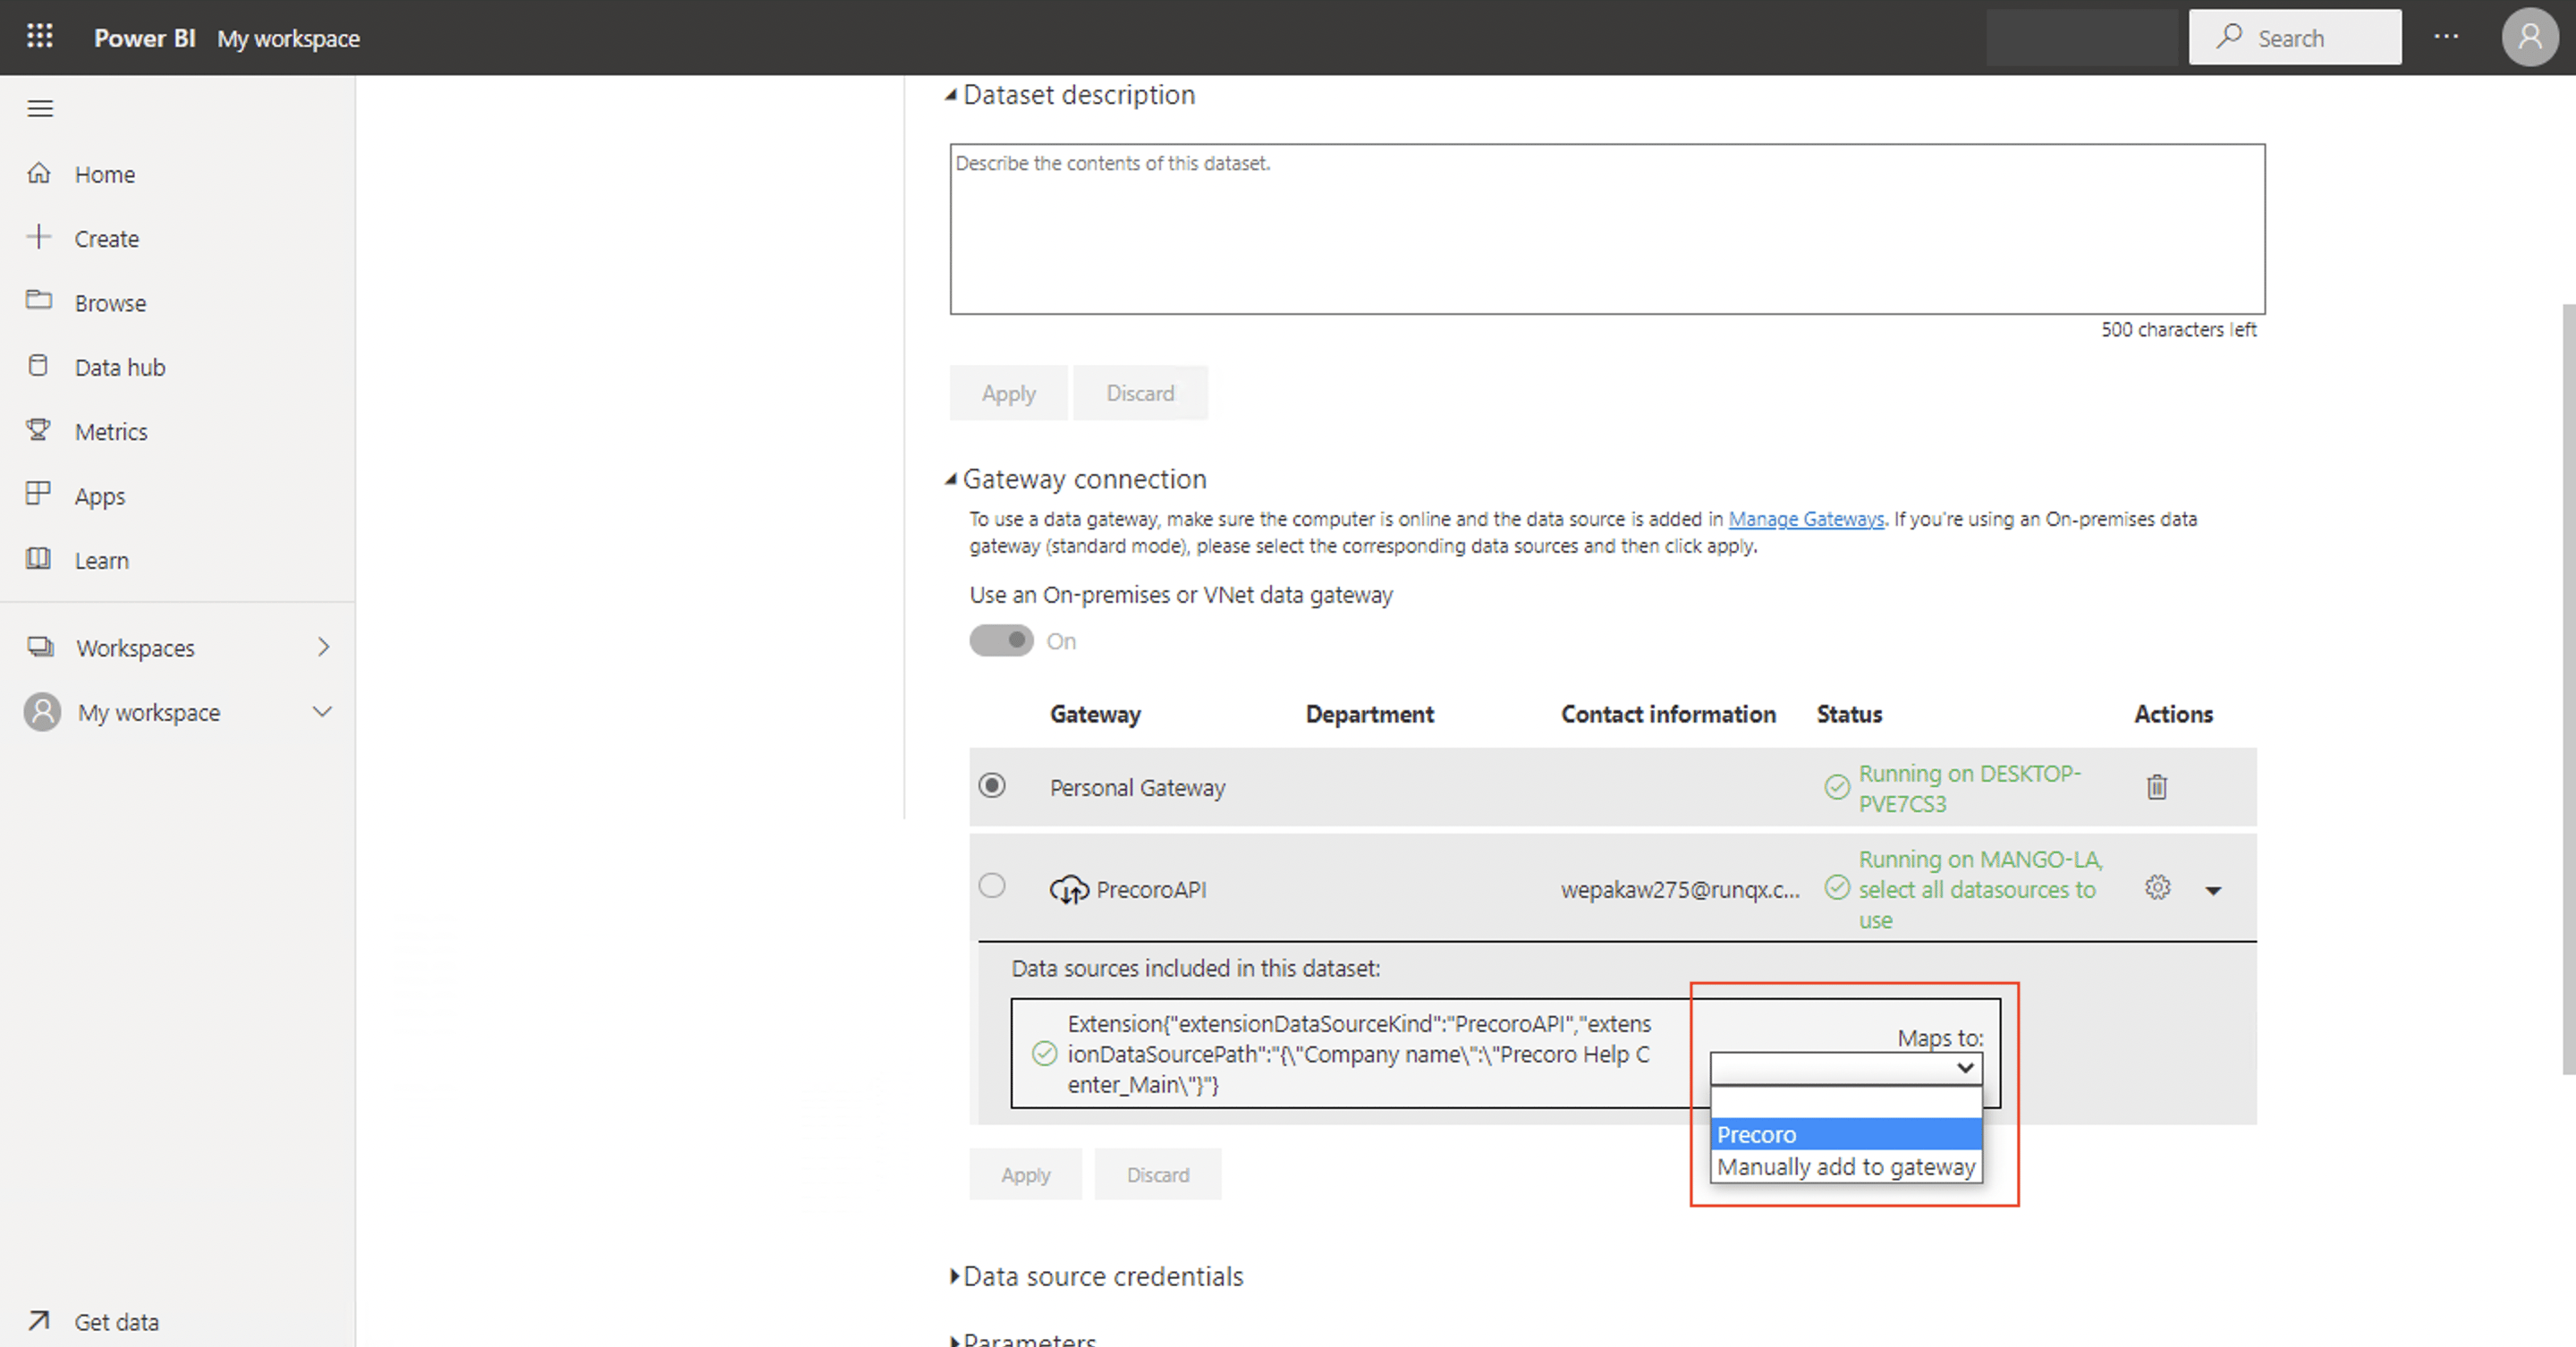
- In the Gateway connection section, select your Precoro API (or whatever you named it in the second step) gateway. If it shows "Not configured correctly":
- Click the Manage Gateways icon:

- Enable "Allow user's custom data connectors to refresh through this gateway cluster" → Apply:


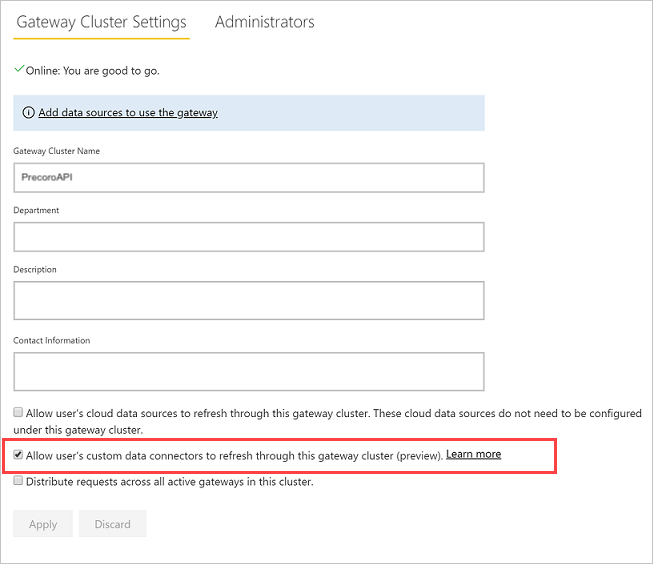
This window may look different on your side. However, the list of settings and options should be the same.
2. Return to the dataset settings and click on the Manually add to gateway link.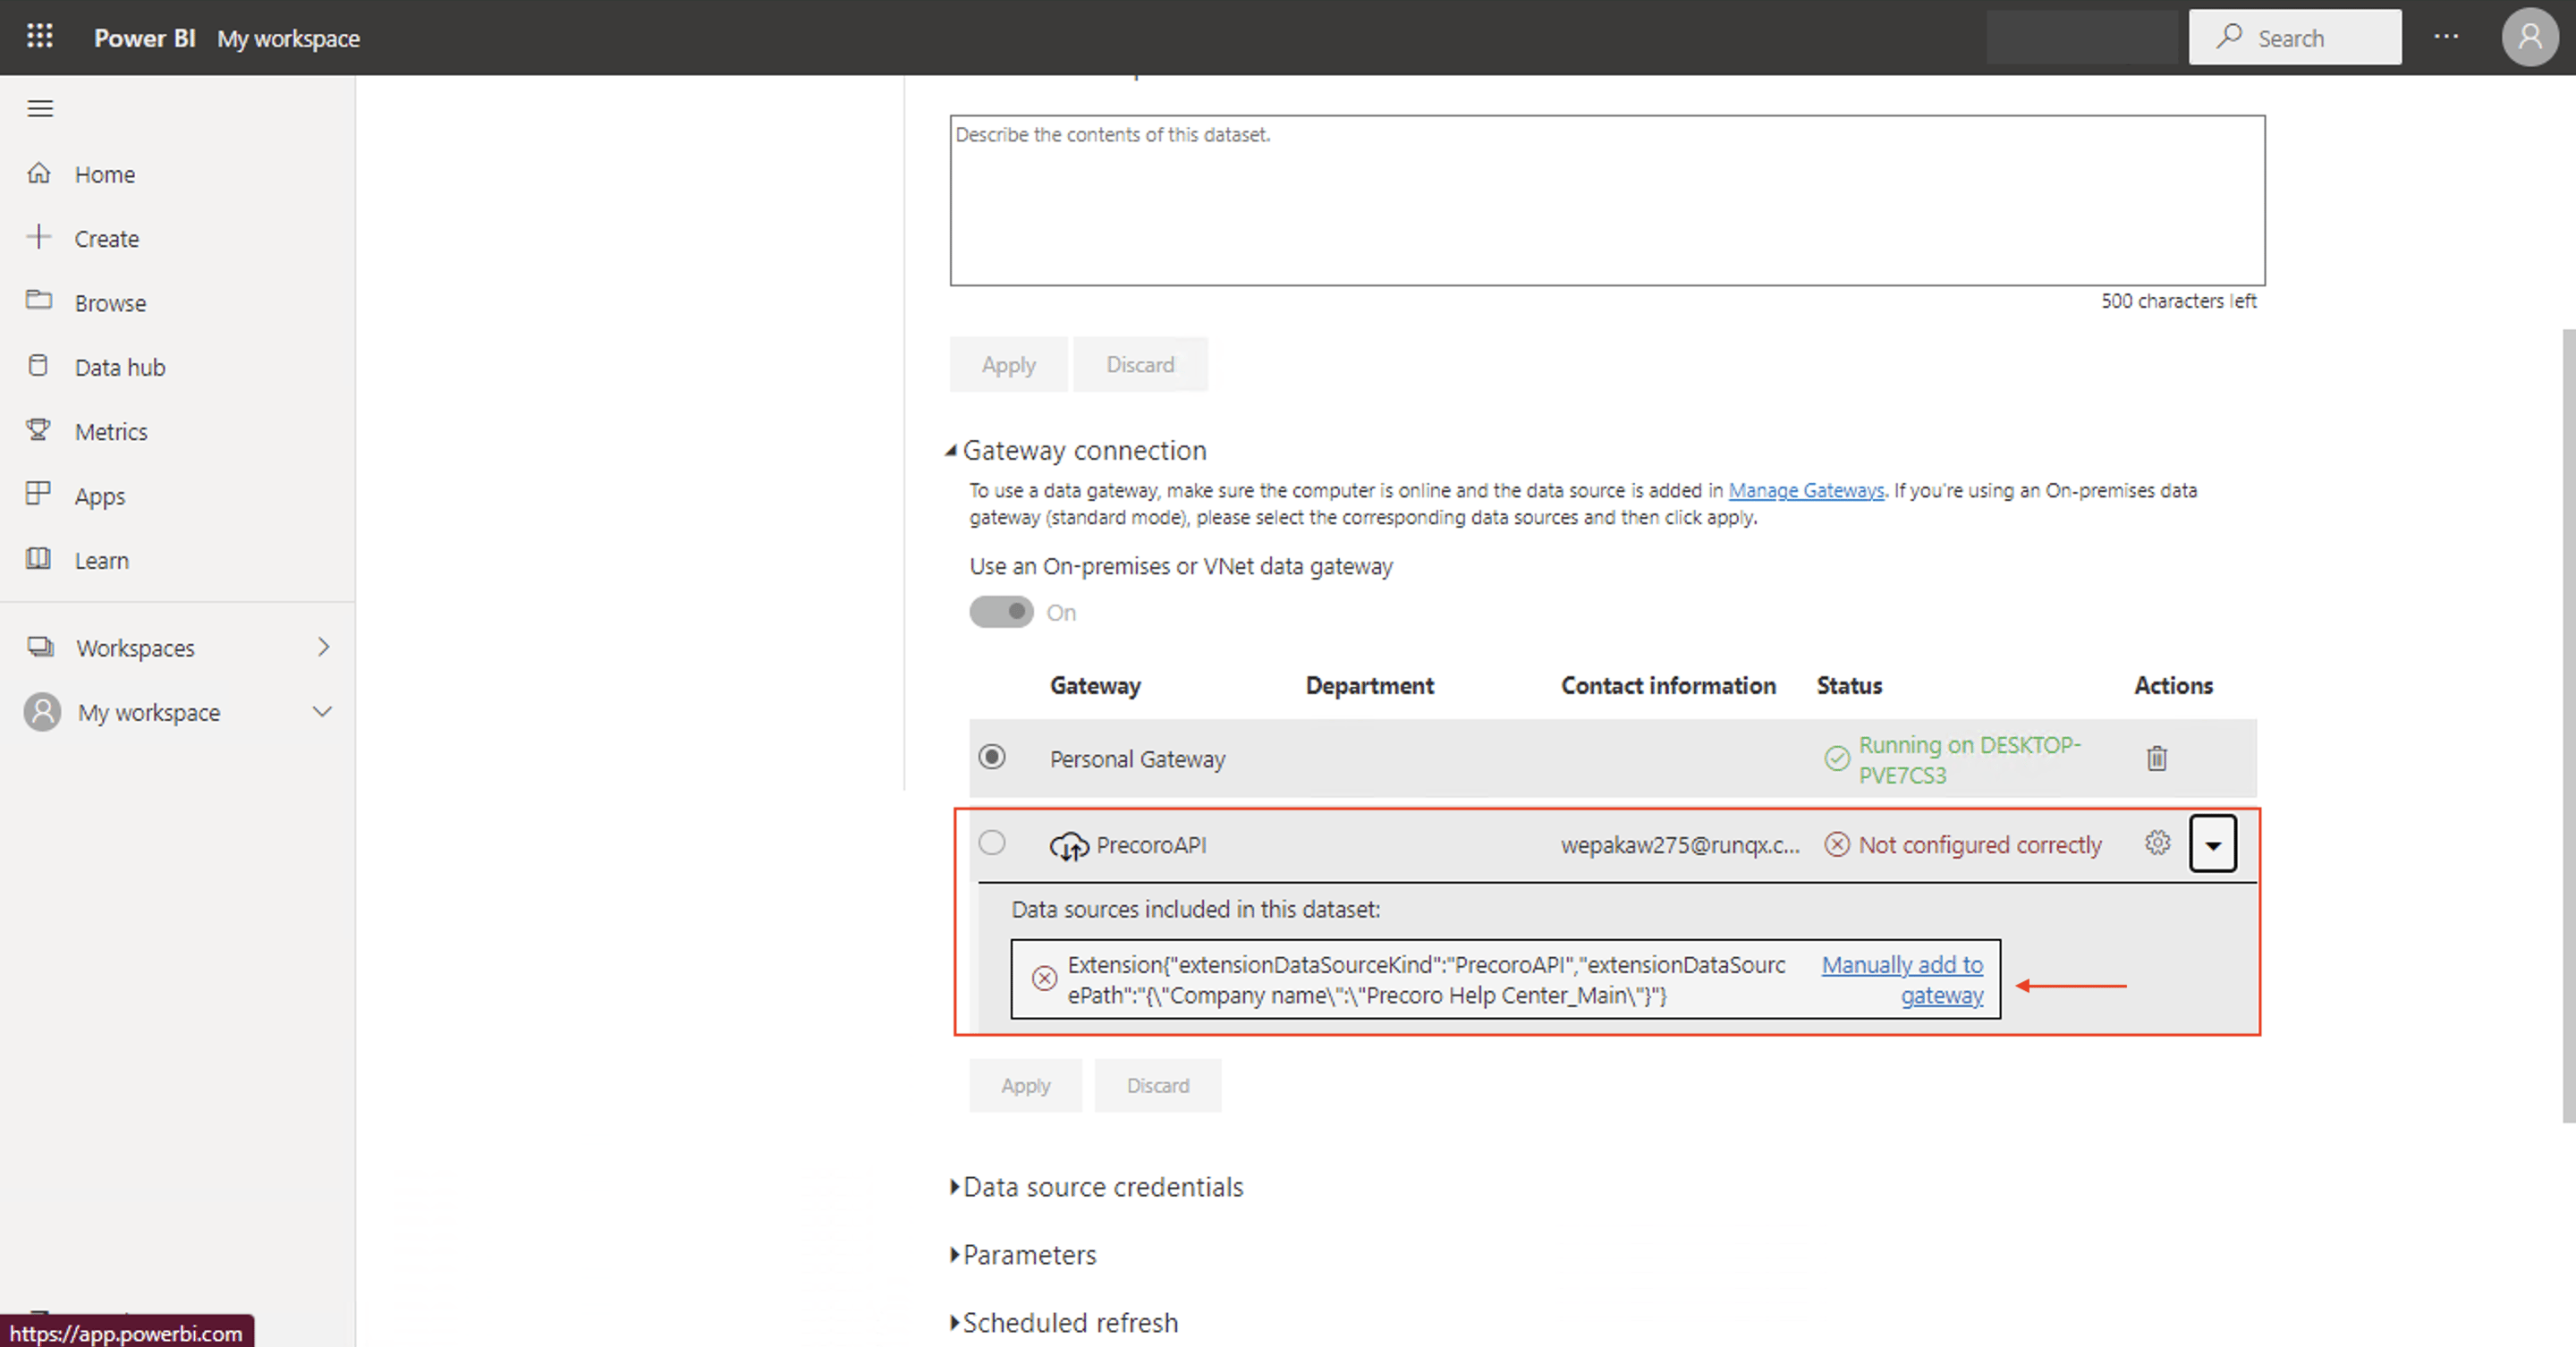
3. In the opened window, configure a new data source: select a name and fill up your credentials (email and API token used with the connector).
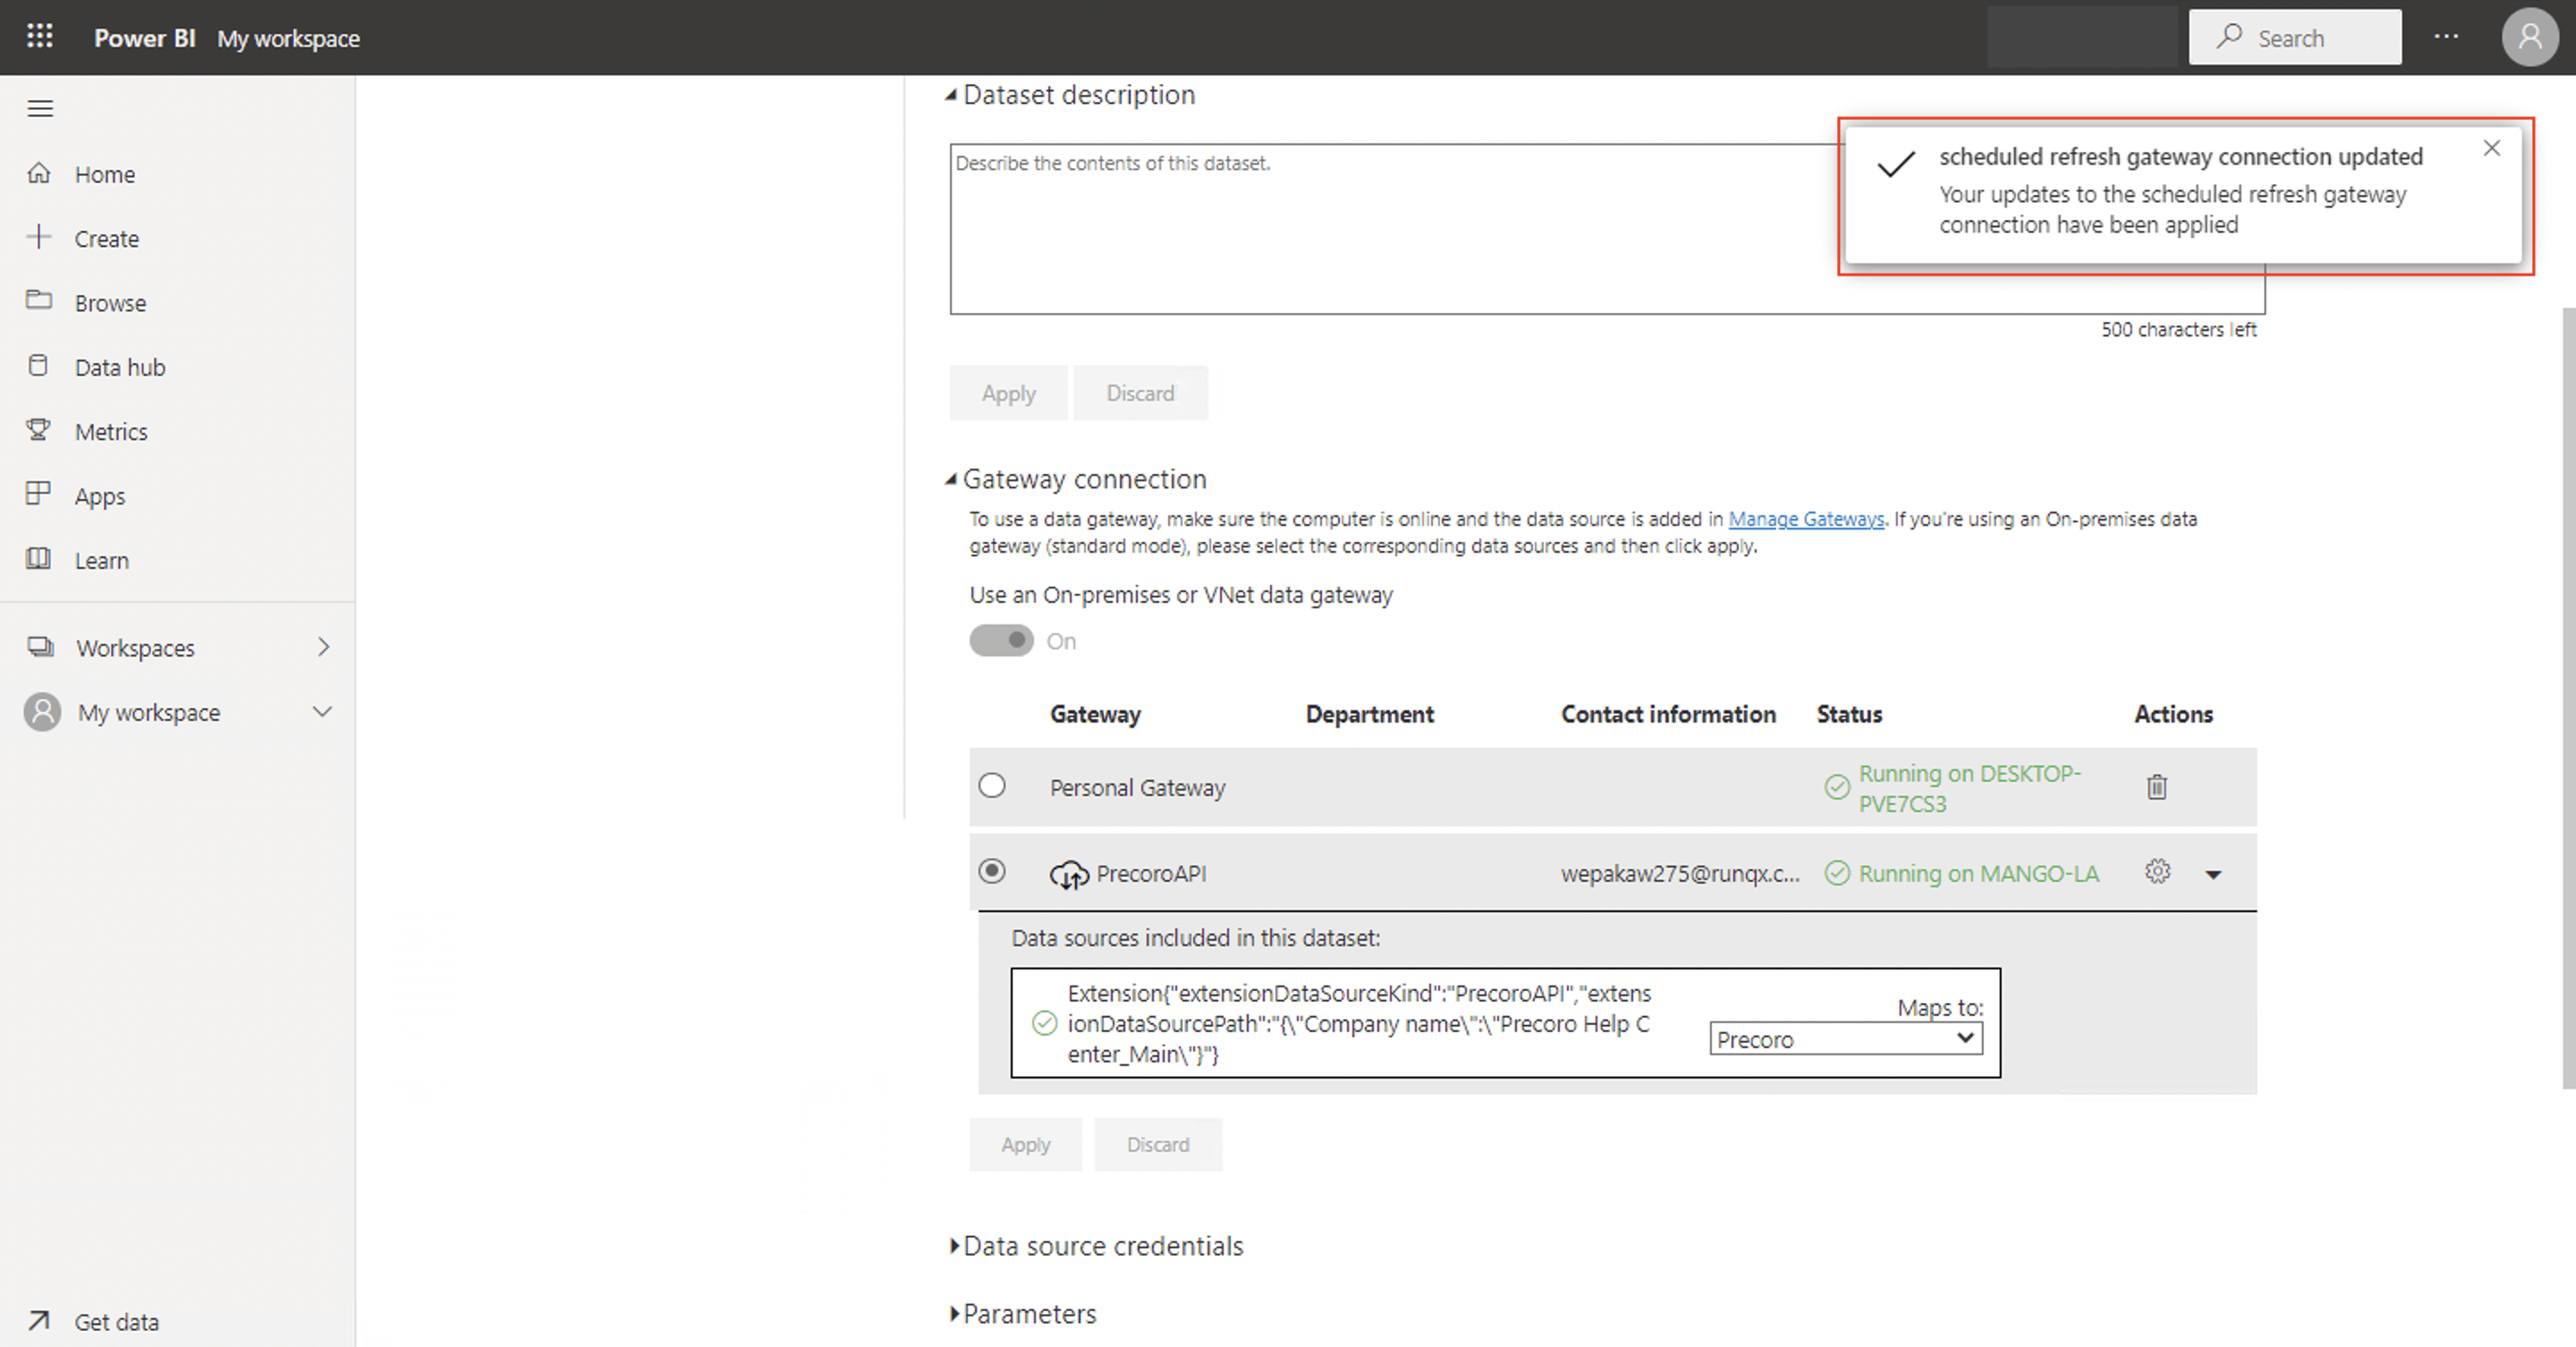
4. Get back to the dataset settings → map your new data source.
5. Click Apply. A success message should appear:
Option 2: On-Premises Data Gateway (Personal Mode)
- In Gateway connection, select your personal gateway option. Make sure it is running ( with a green status).
- Navigate to the Data source credentials → click Edit credentials.

- In the pop-up window, input the email and API token used for logging in to the connector.

- Click Sign in. A success message should appear.


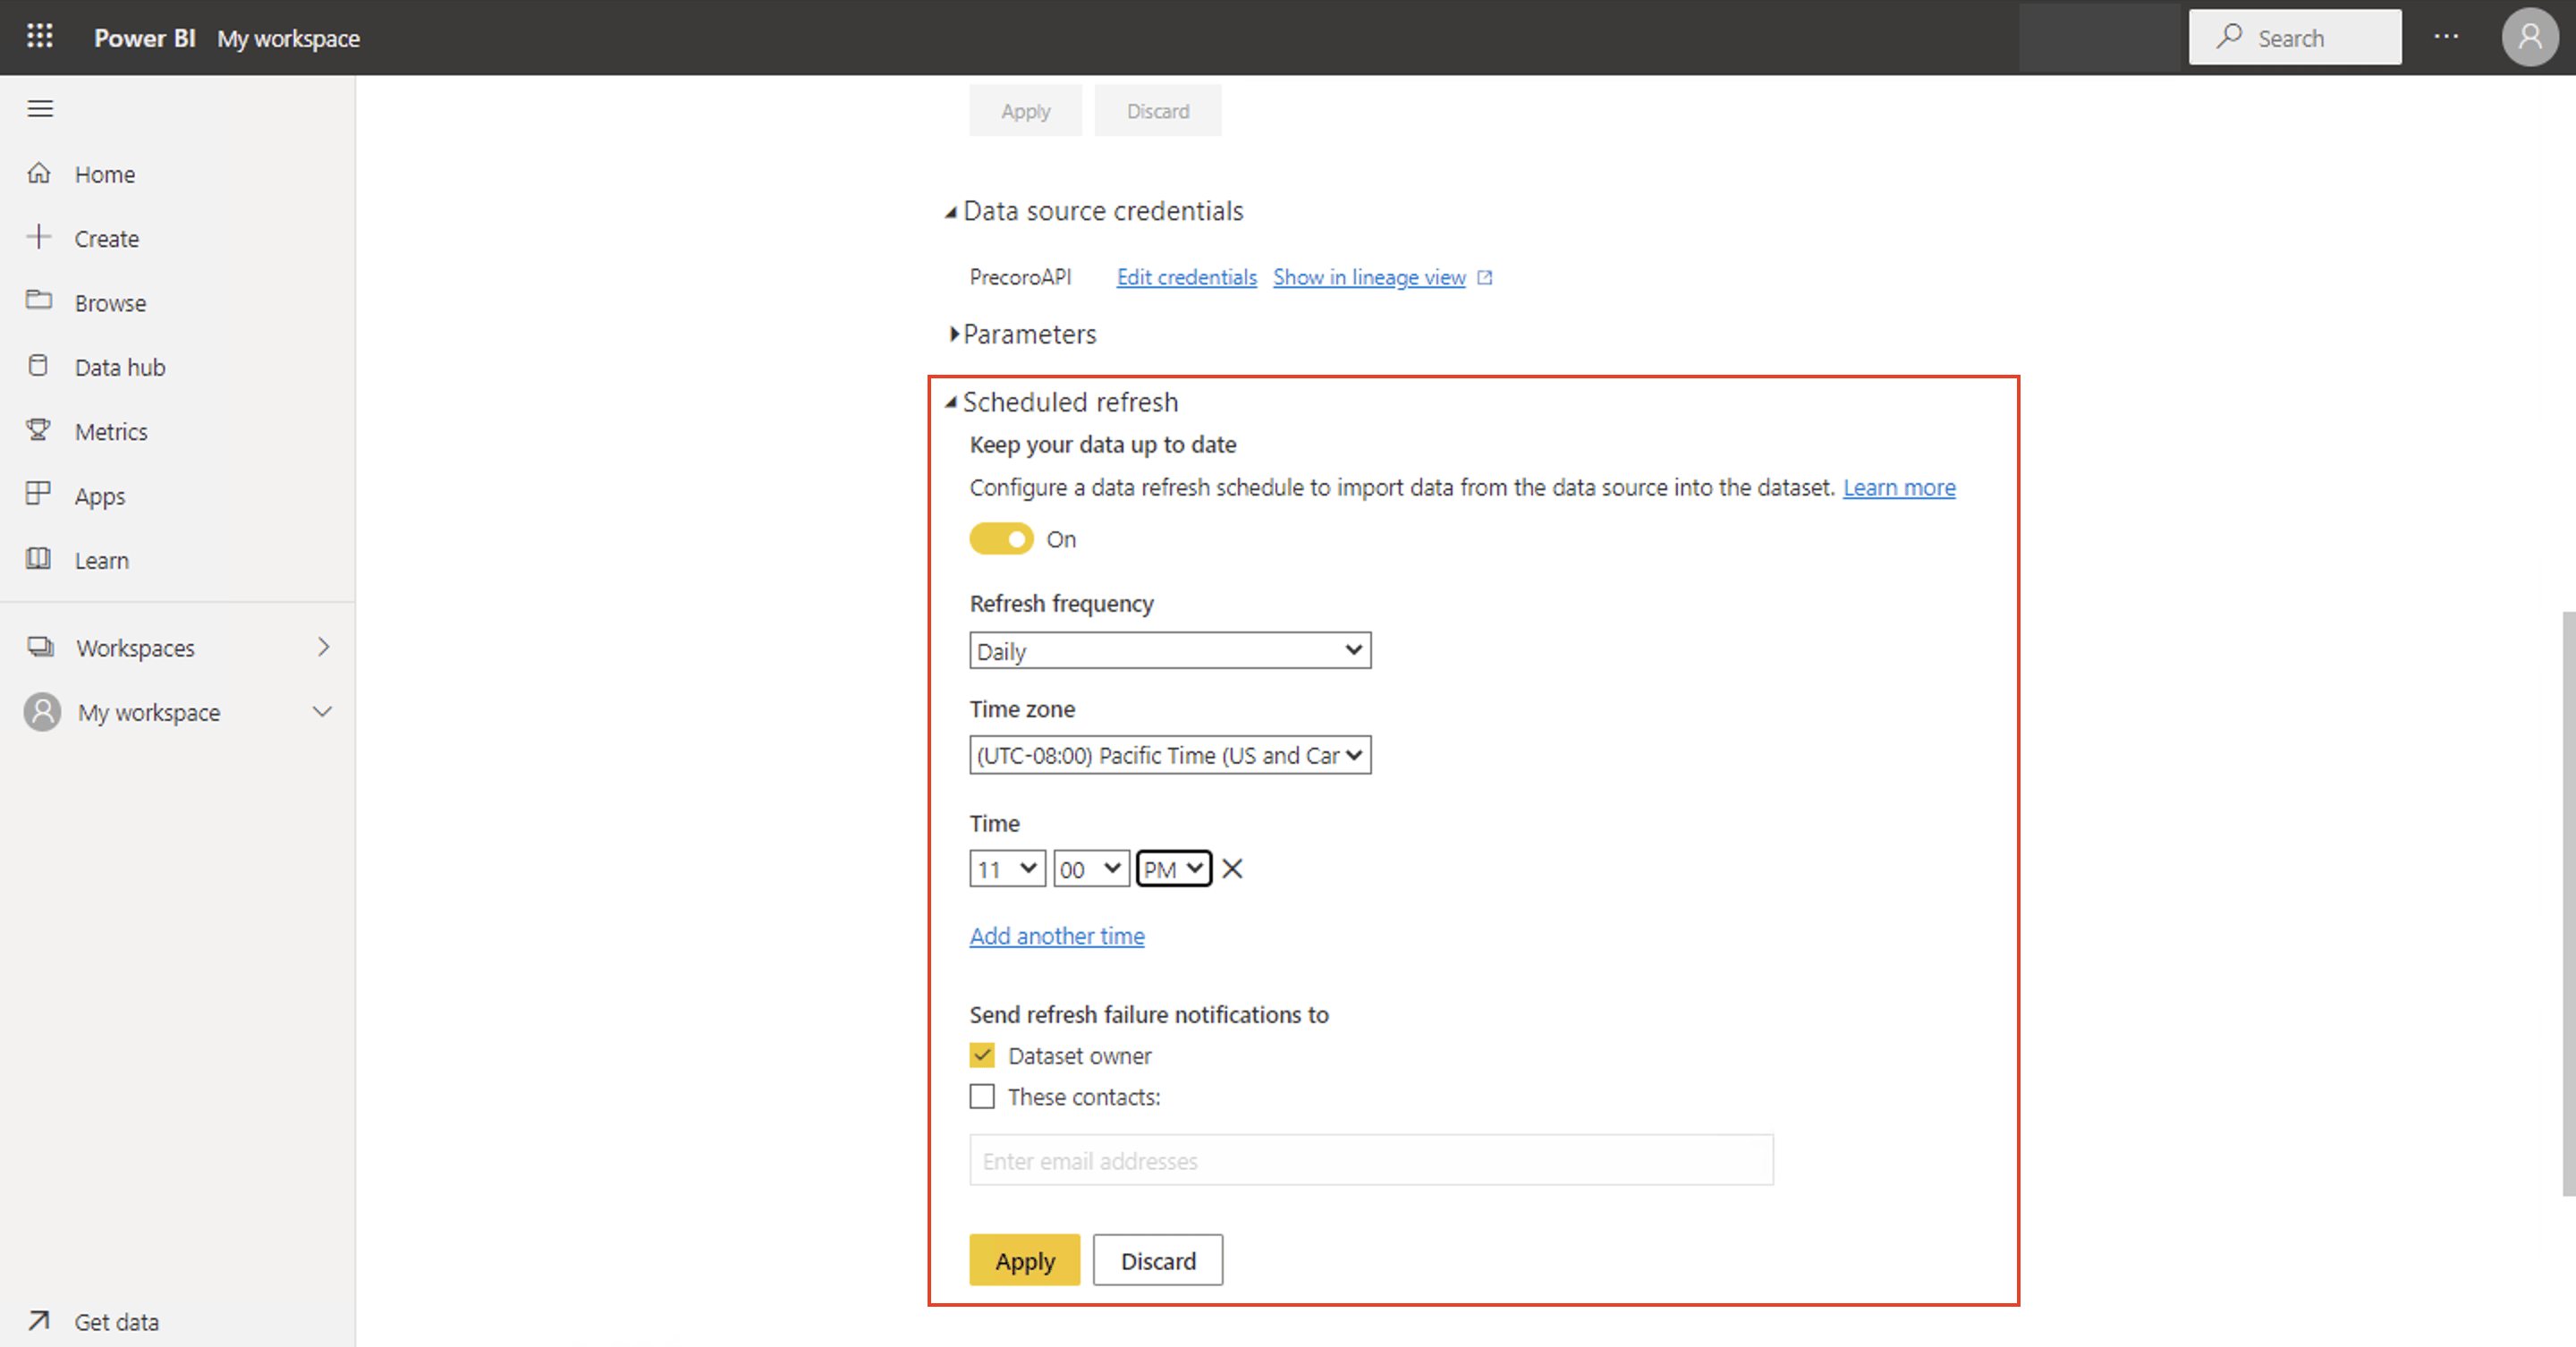
Step 4: Set Up Scheduled Refresh
To schedule refresh in Power BI:
- Switch the toggle to On in the Scheduled refresh section.
- Adjust frequency, time, and other parameters to suit your needs.
- Click Apply to complete the process.

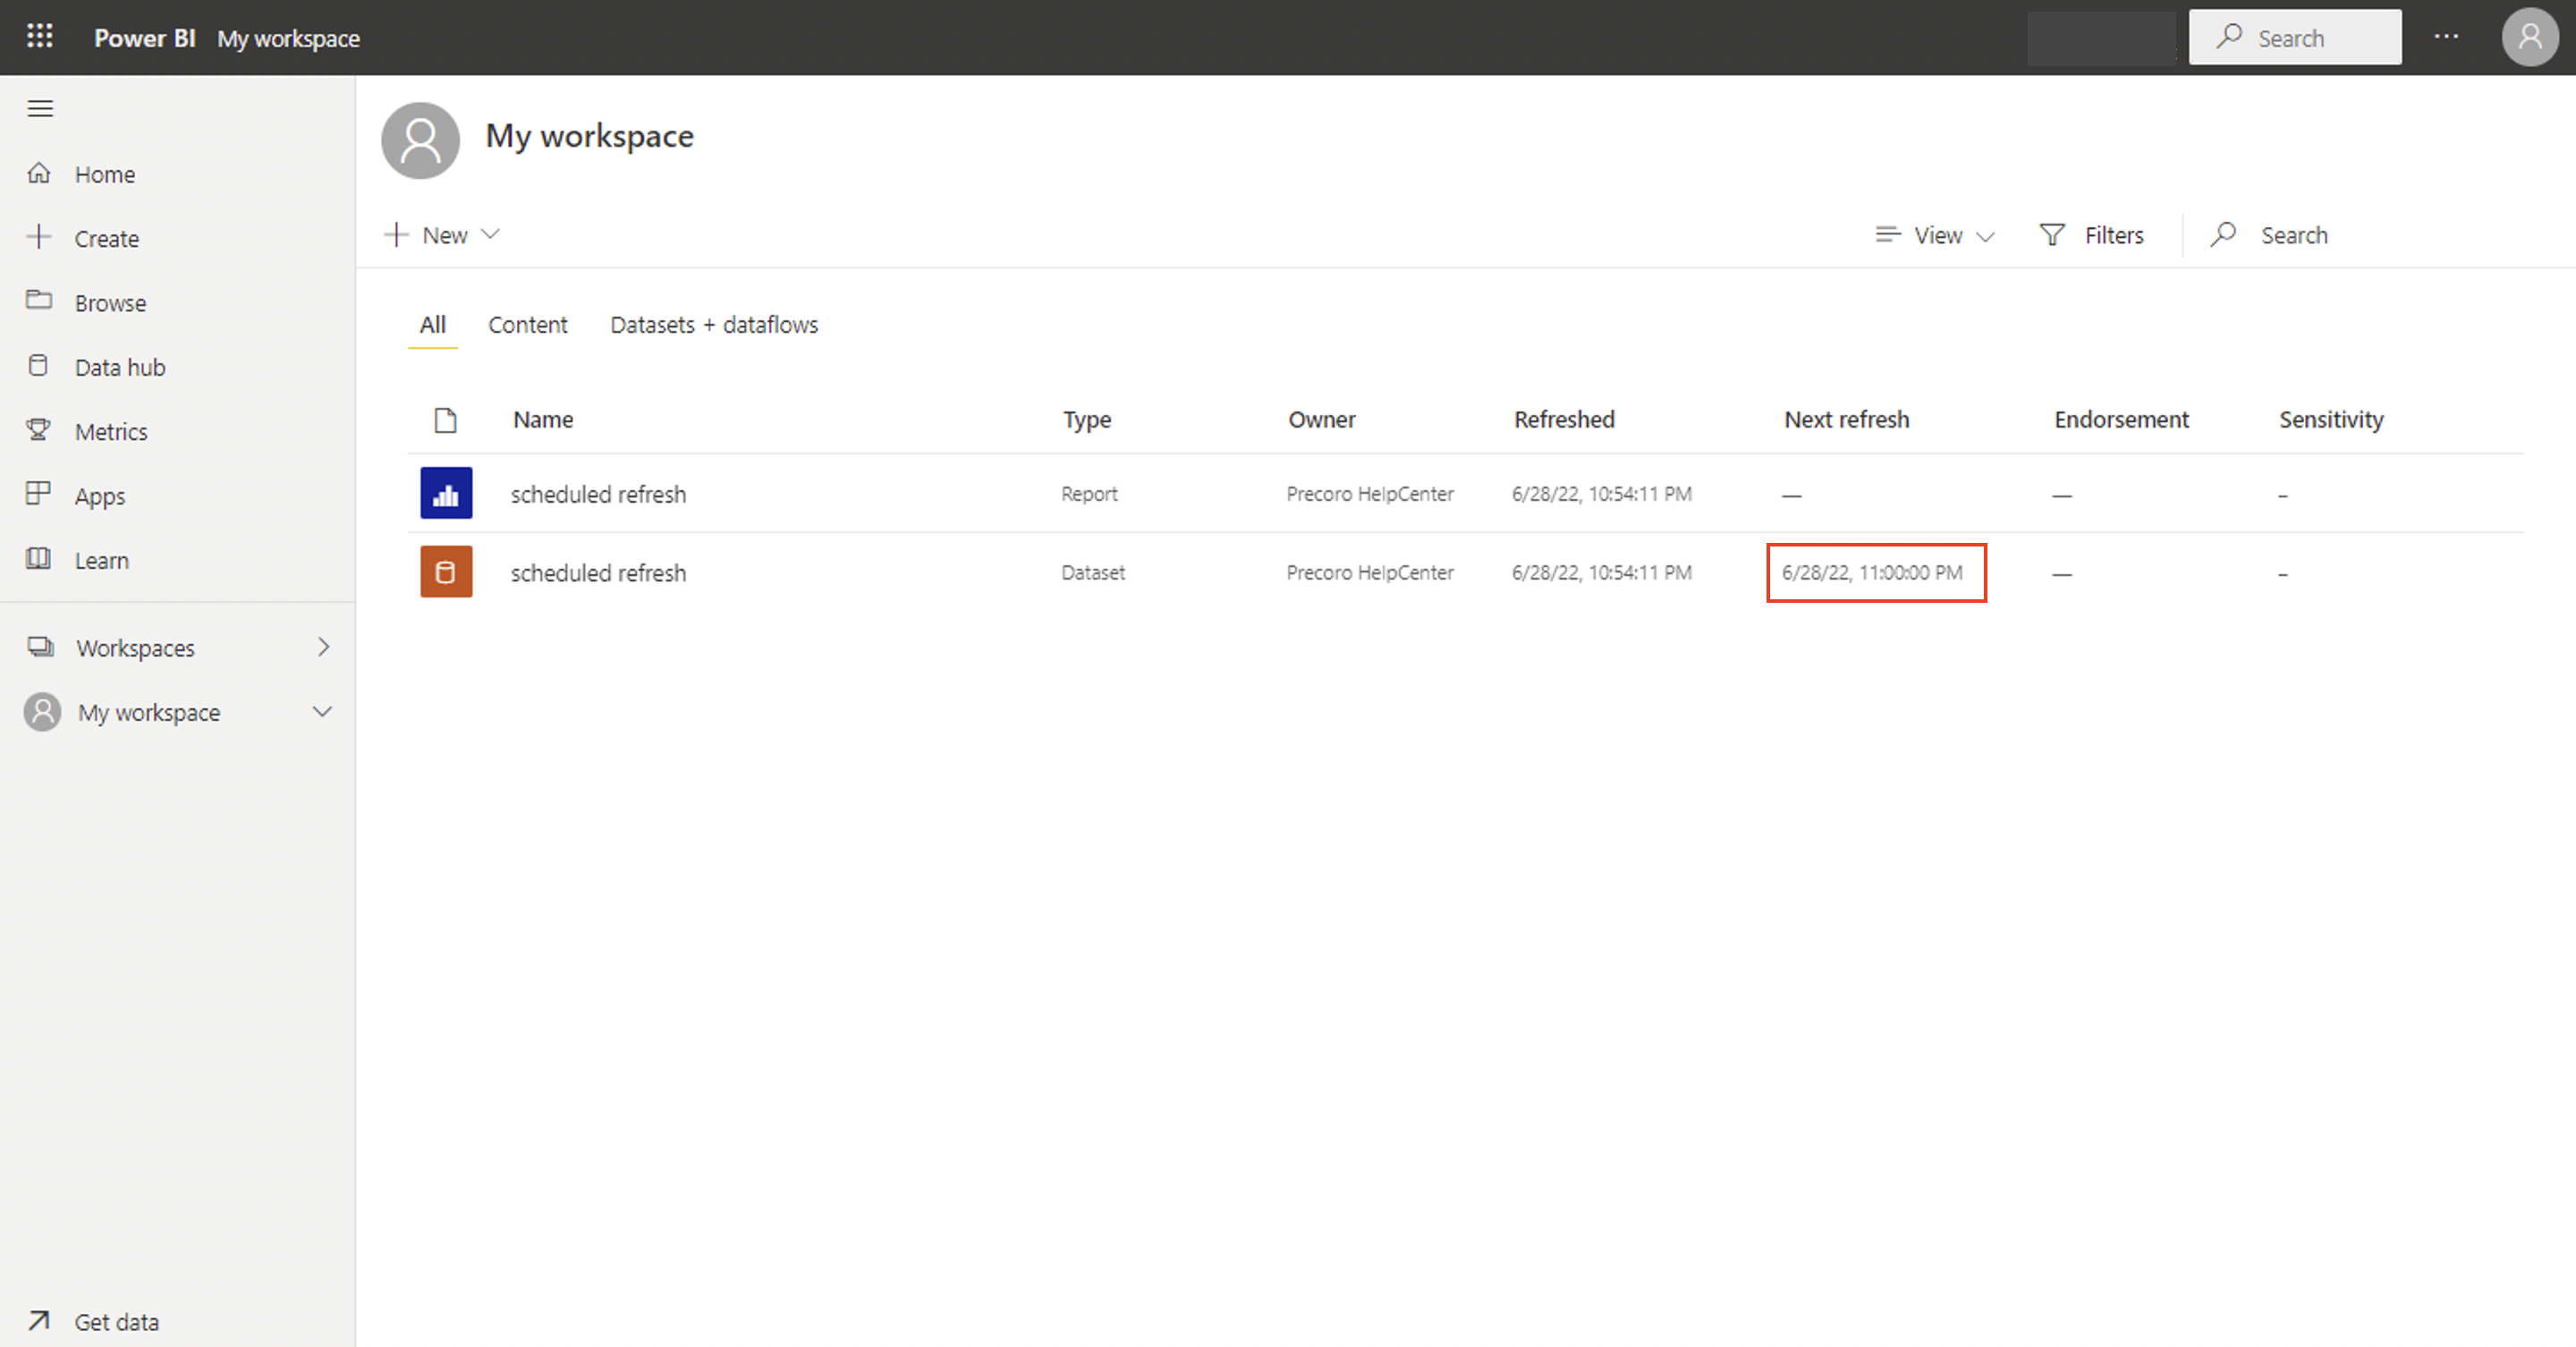
Your scheduled refresh is now configured! The next refresh time will appear in the Next refresh column beside your dataset: