TABLE OF CONTENTS
You can send Purchase Order #, Invoice #, Custom Purchase Order #, or Custom Invoice # to NetSuite. To do this, you should make some changes to your NetSuite account. Please follow the next steps to set up this integration feature:
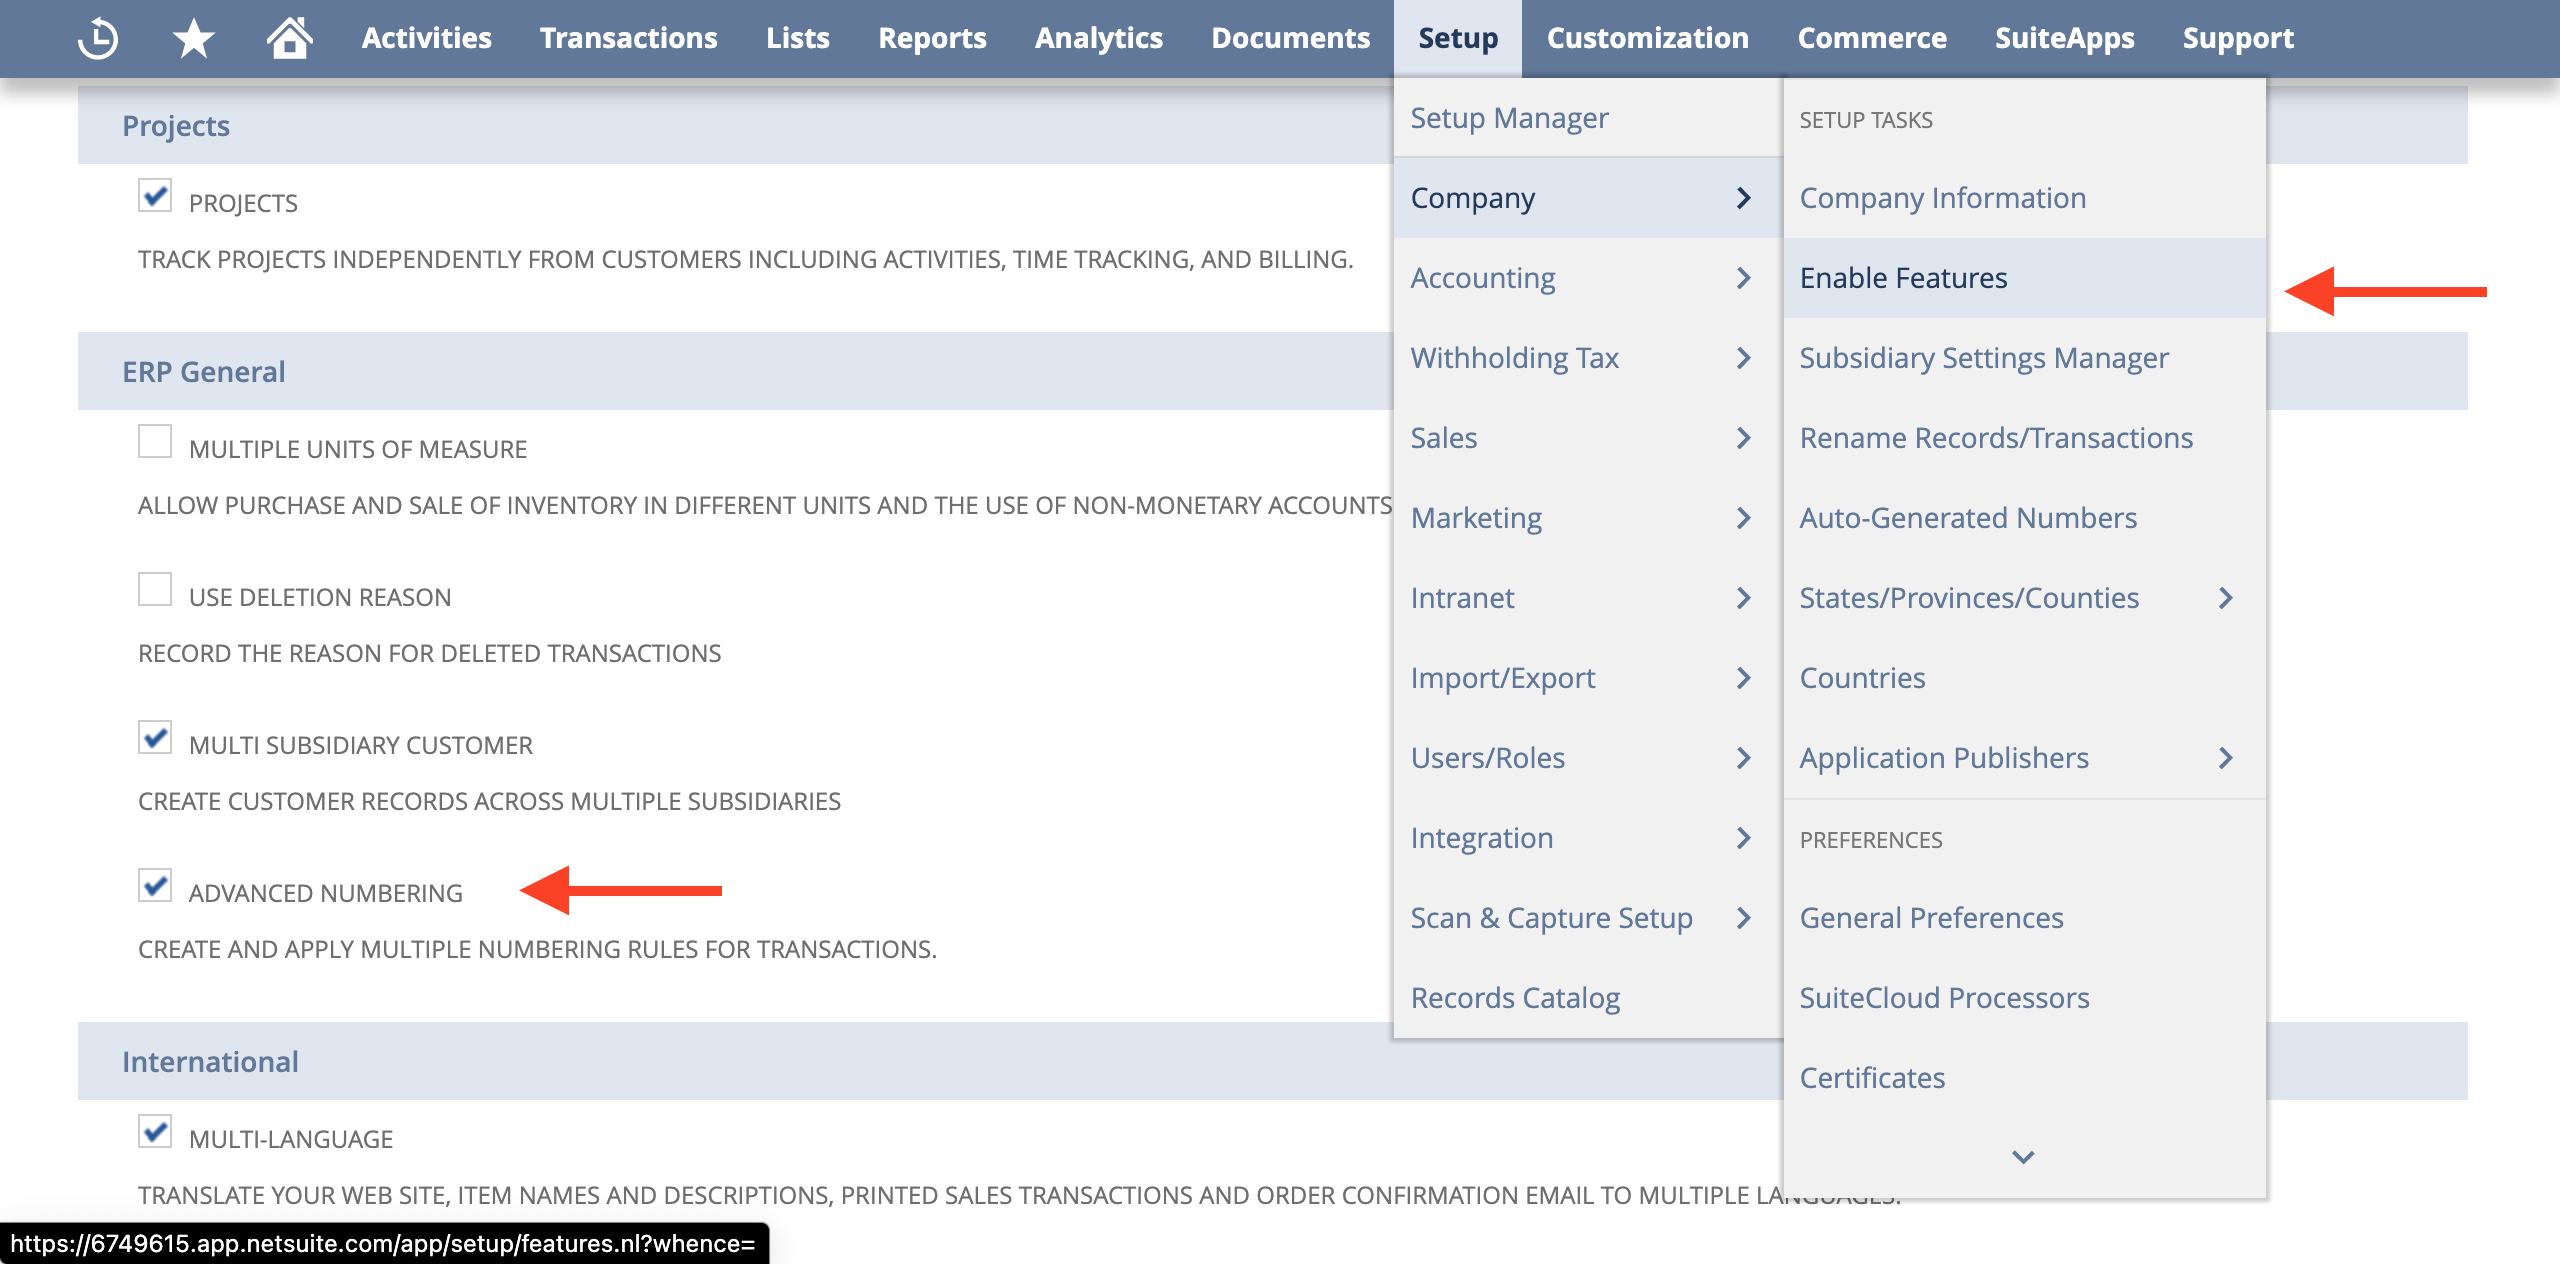
1. Enable Advanced Numbering in your NetSuite account:- Go to Setup —> Company —> Enable Features.
- Open the Company tab and find the ERP General section.
- Mark the Advanced Numbering checkbox as active.
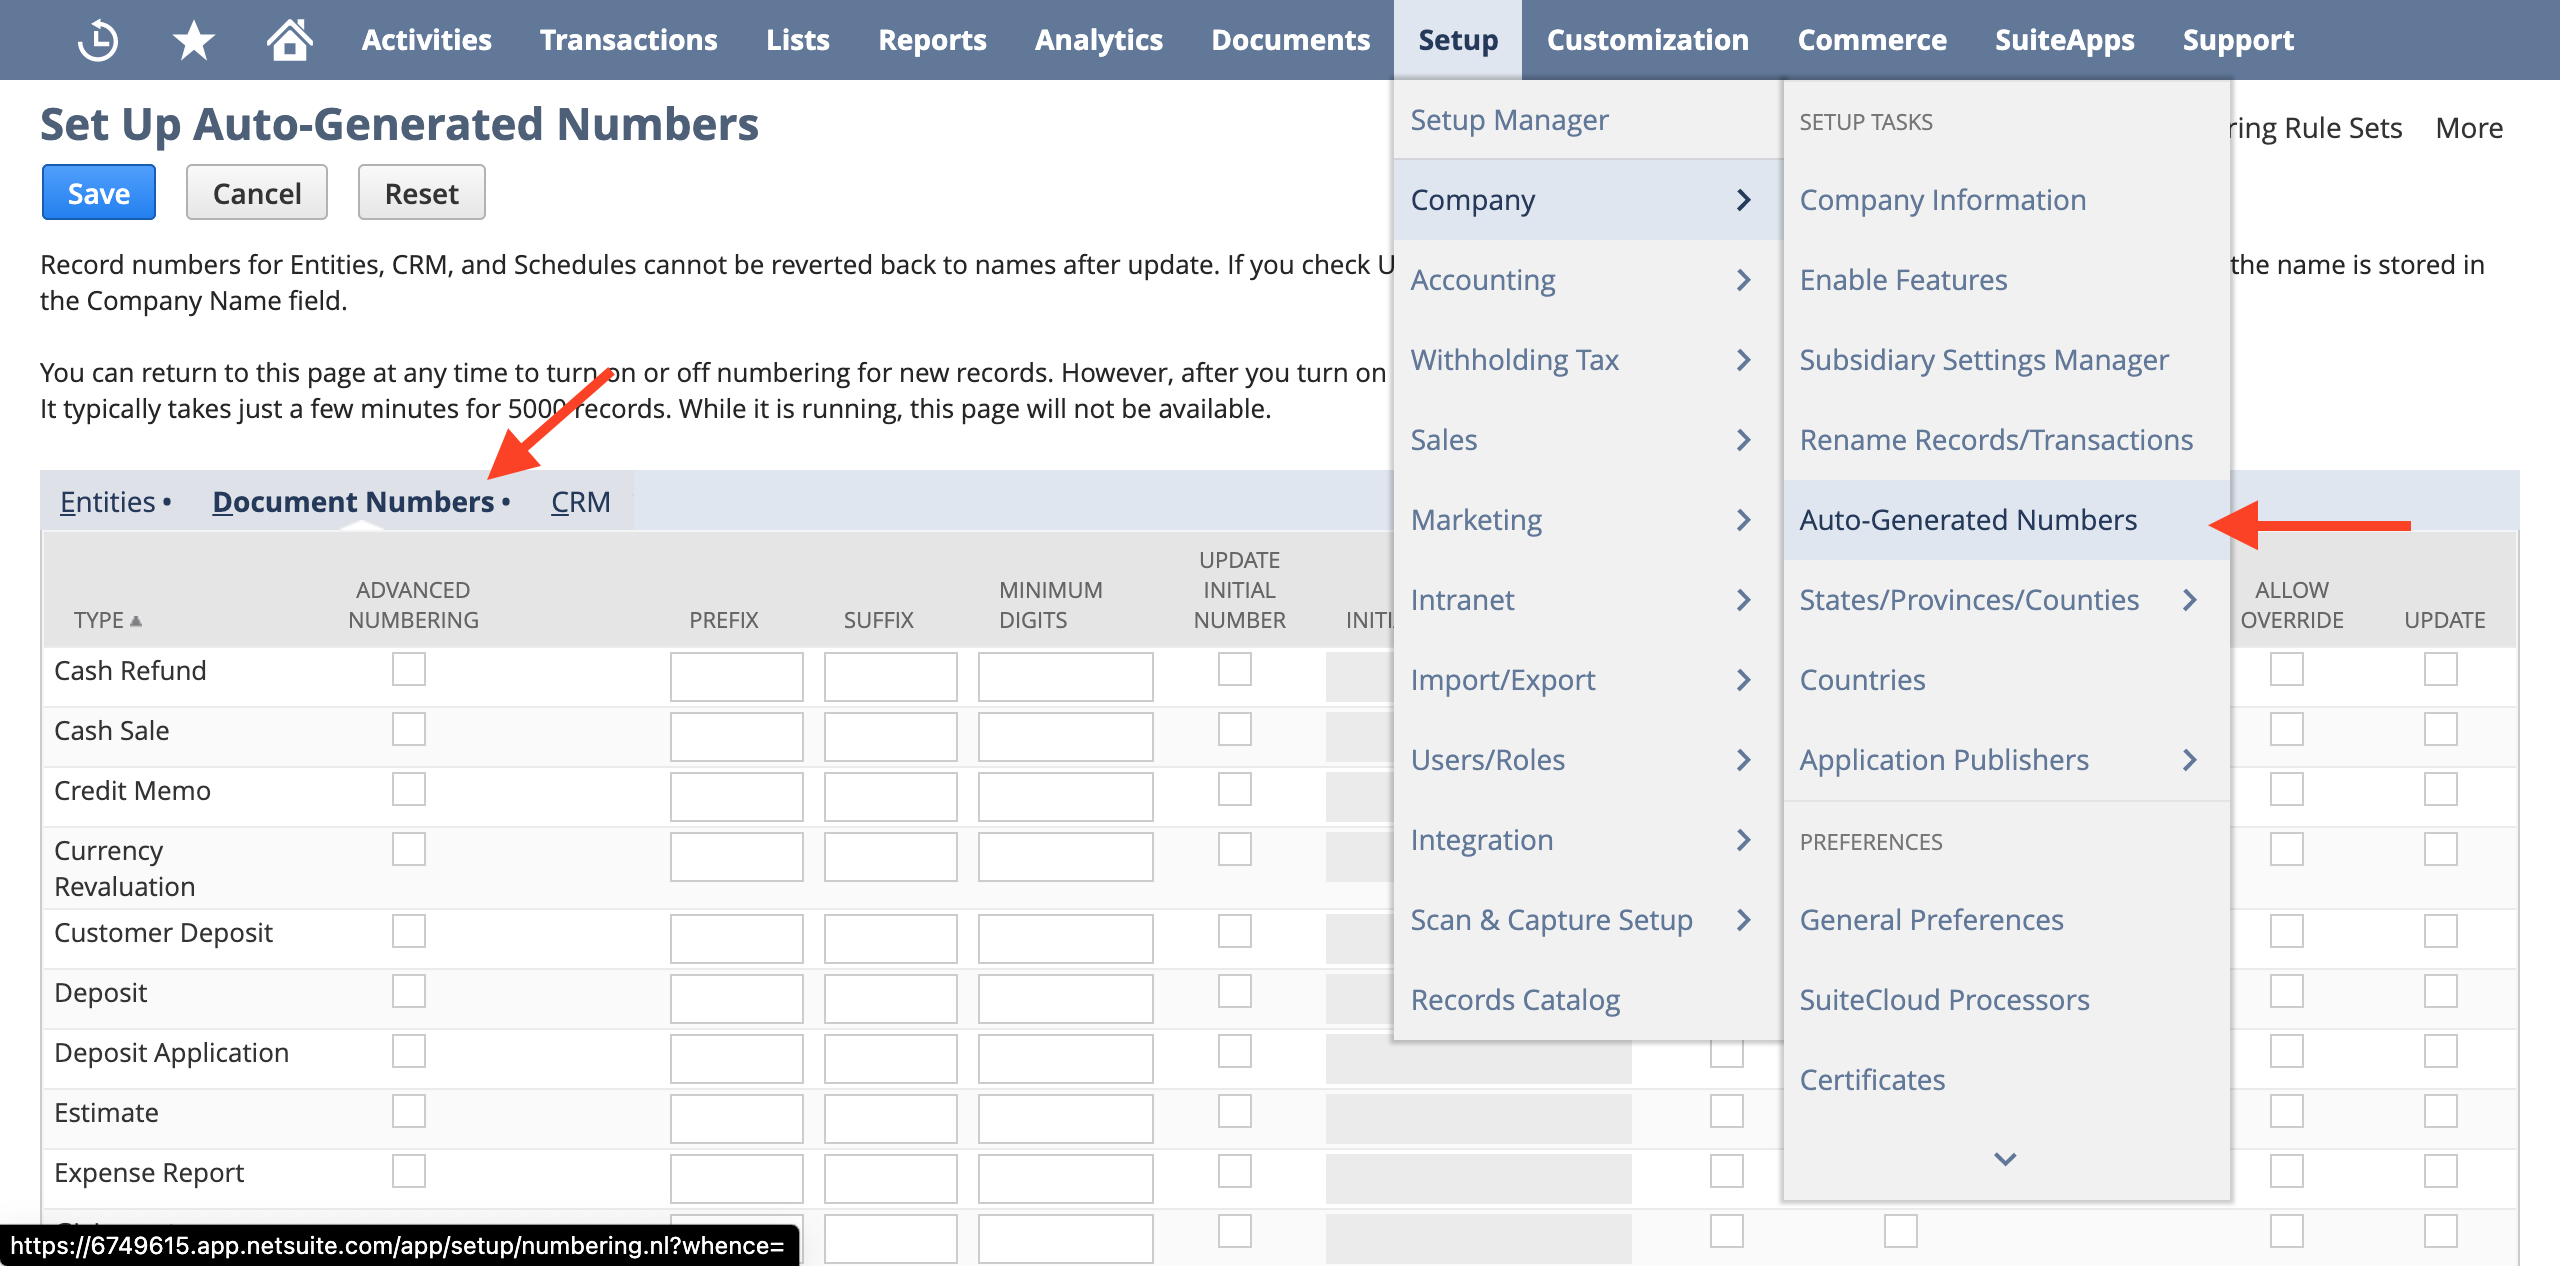
- Go to Setup —> Company —> Auto-Generated Numbers.
- Open the Document Numbers tab.

- Find the document you send from Precoro to NetSuite. It can be Invoice/Bill or Purchase order.
- Mark the Allow Override checkbox as active.
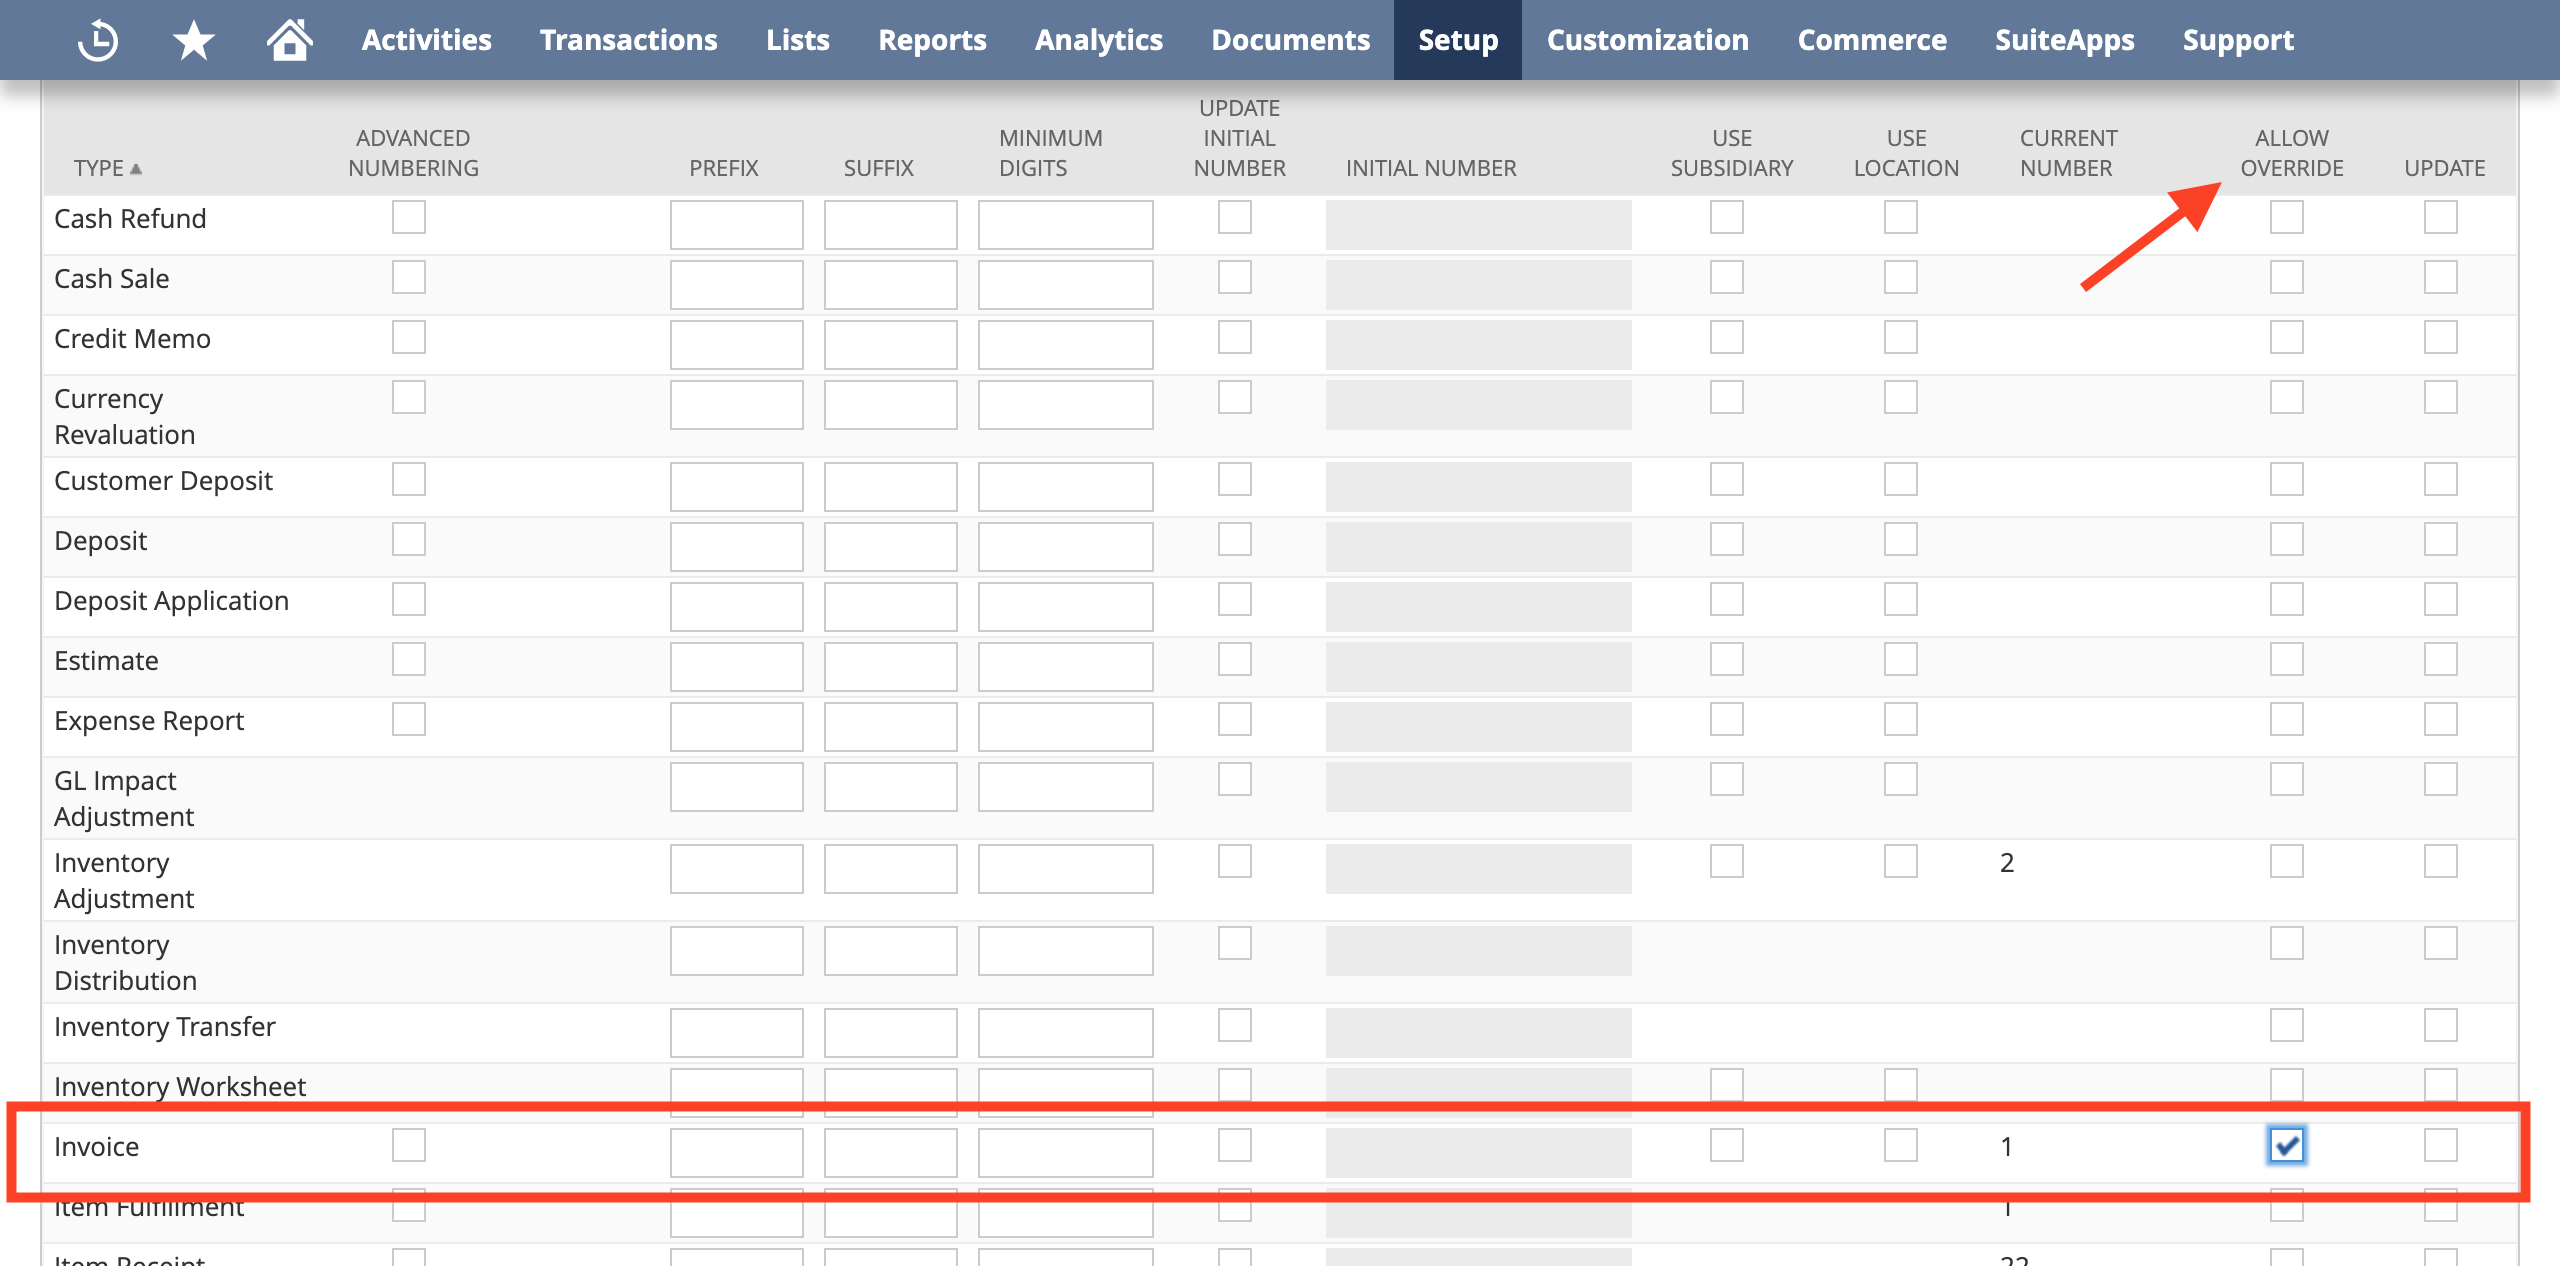
- Remember to save changes.

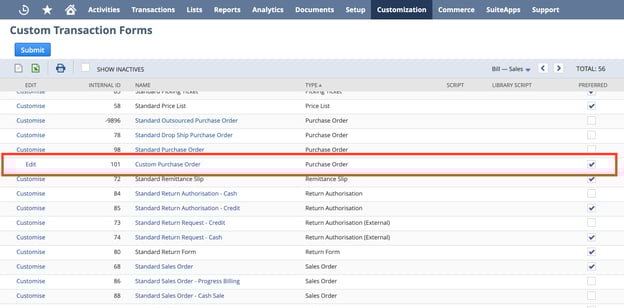
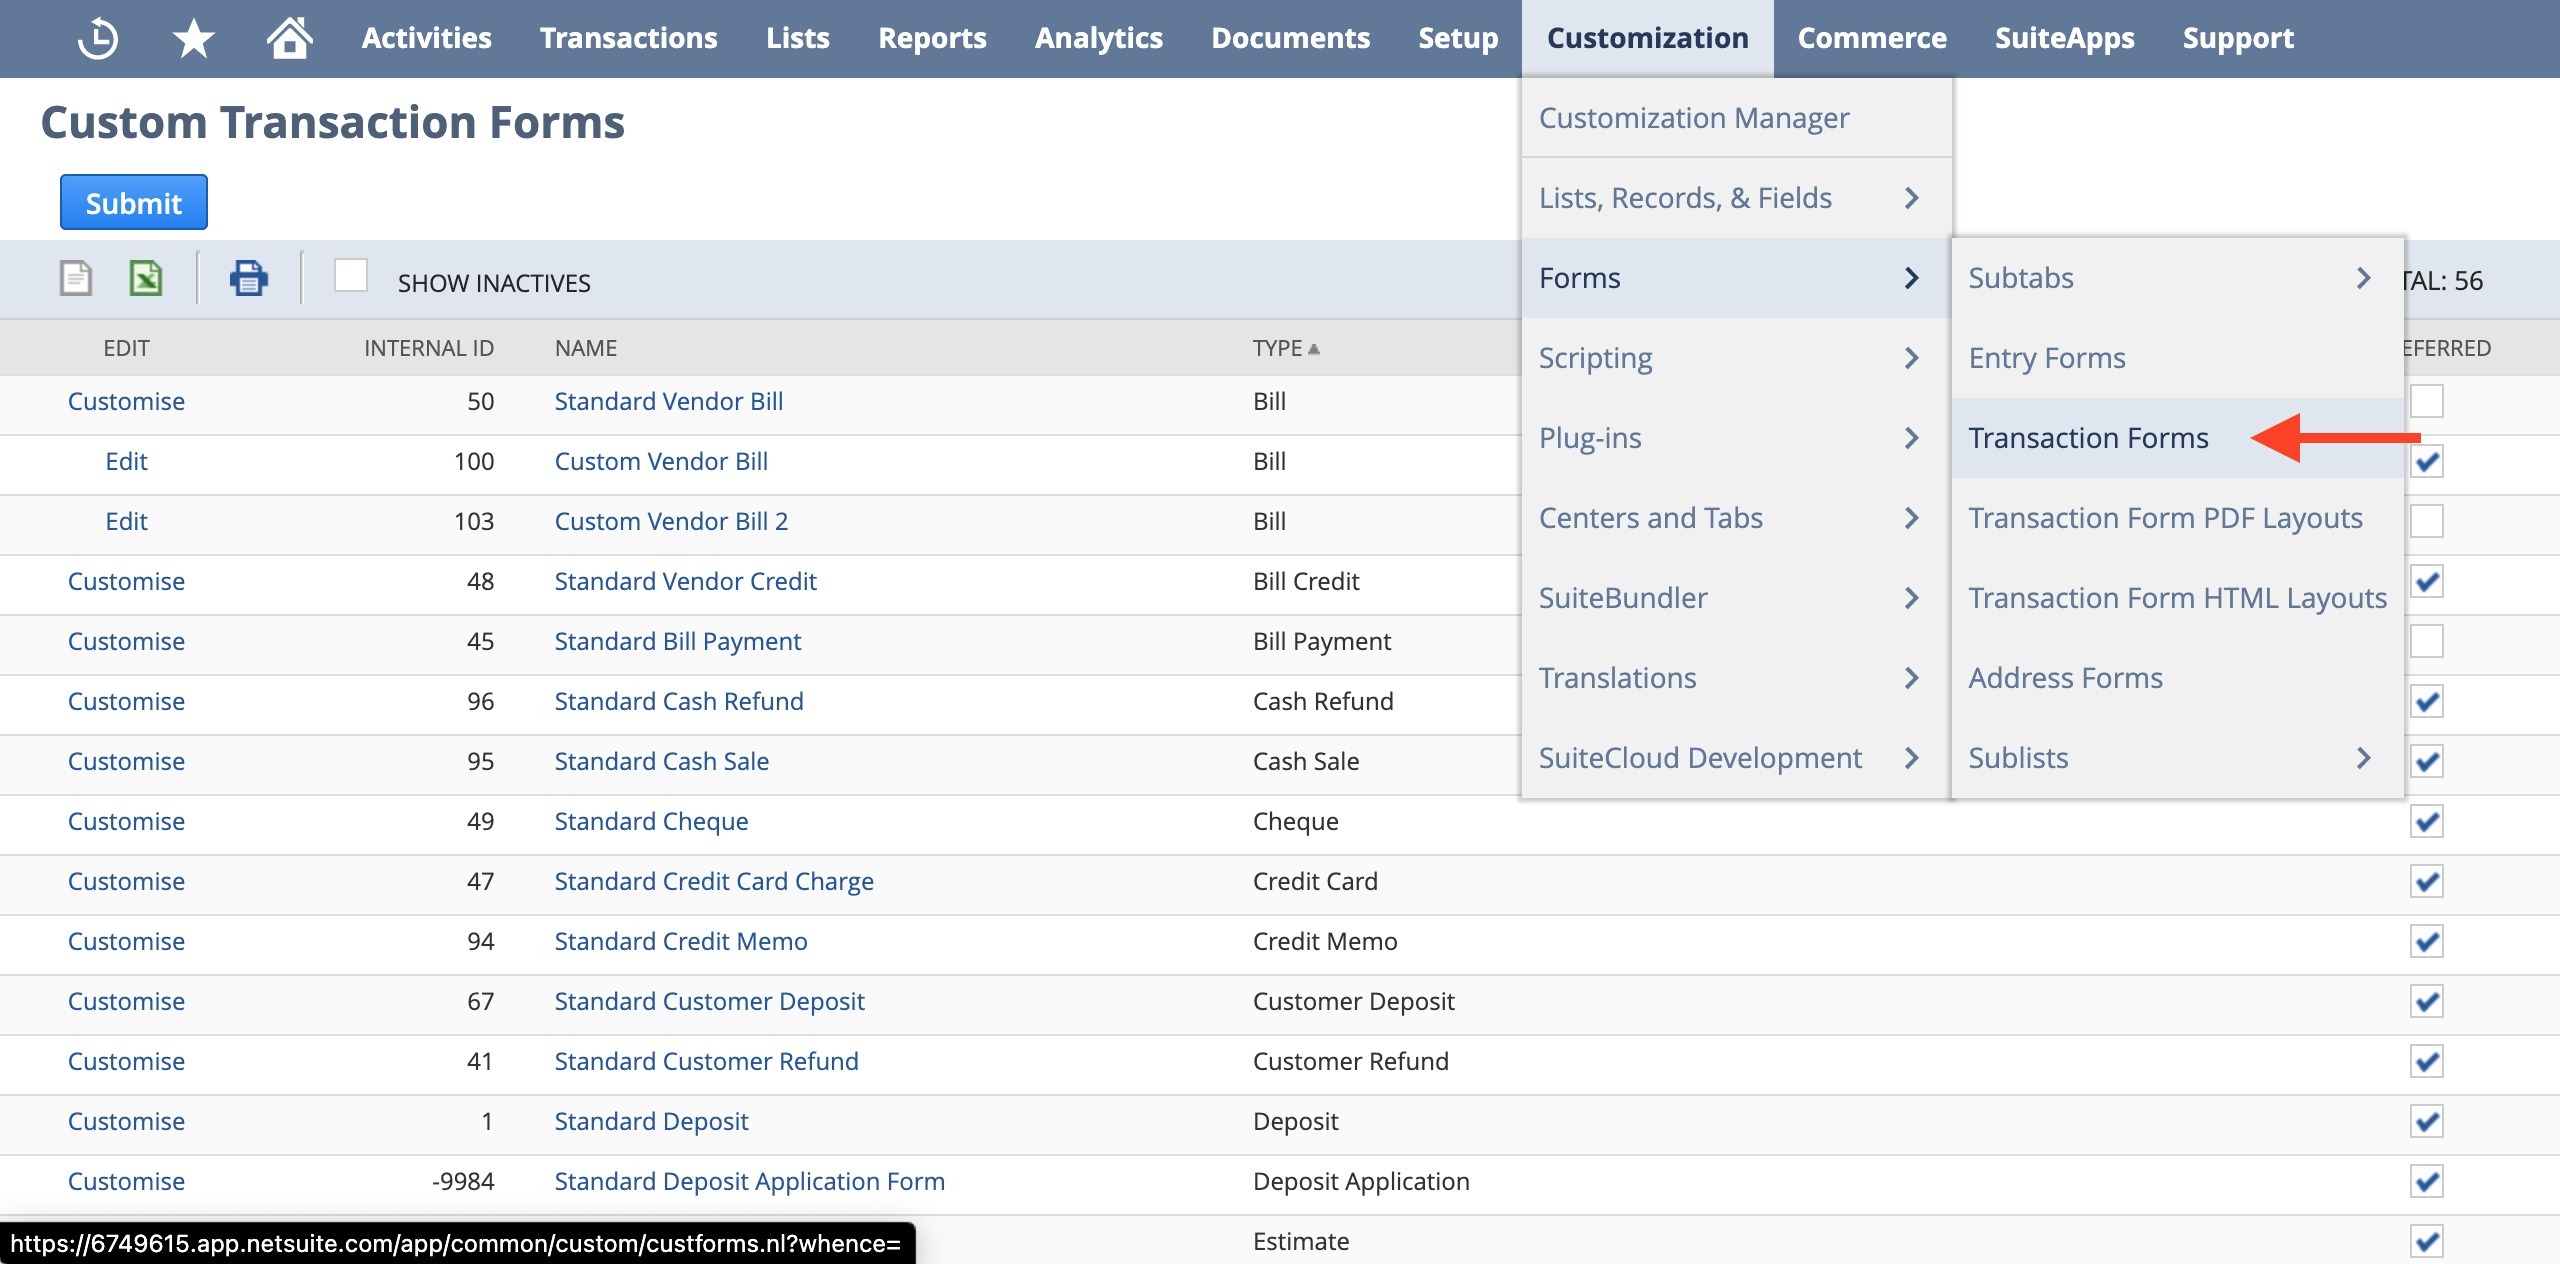
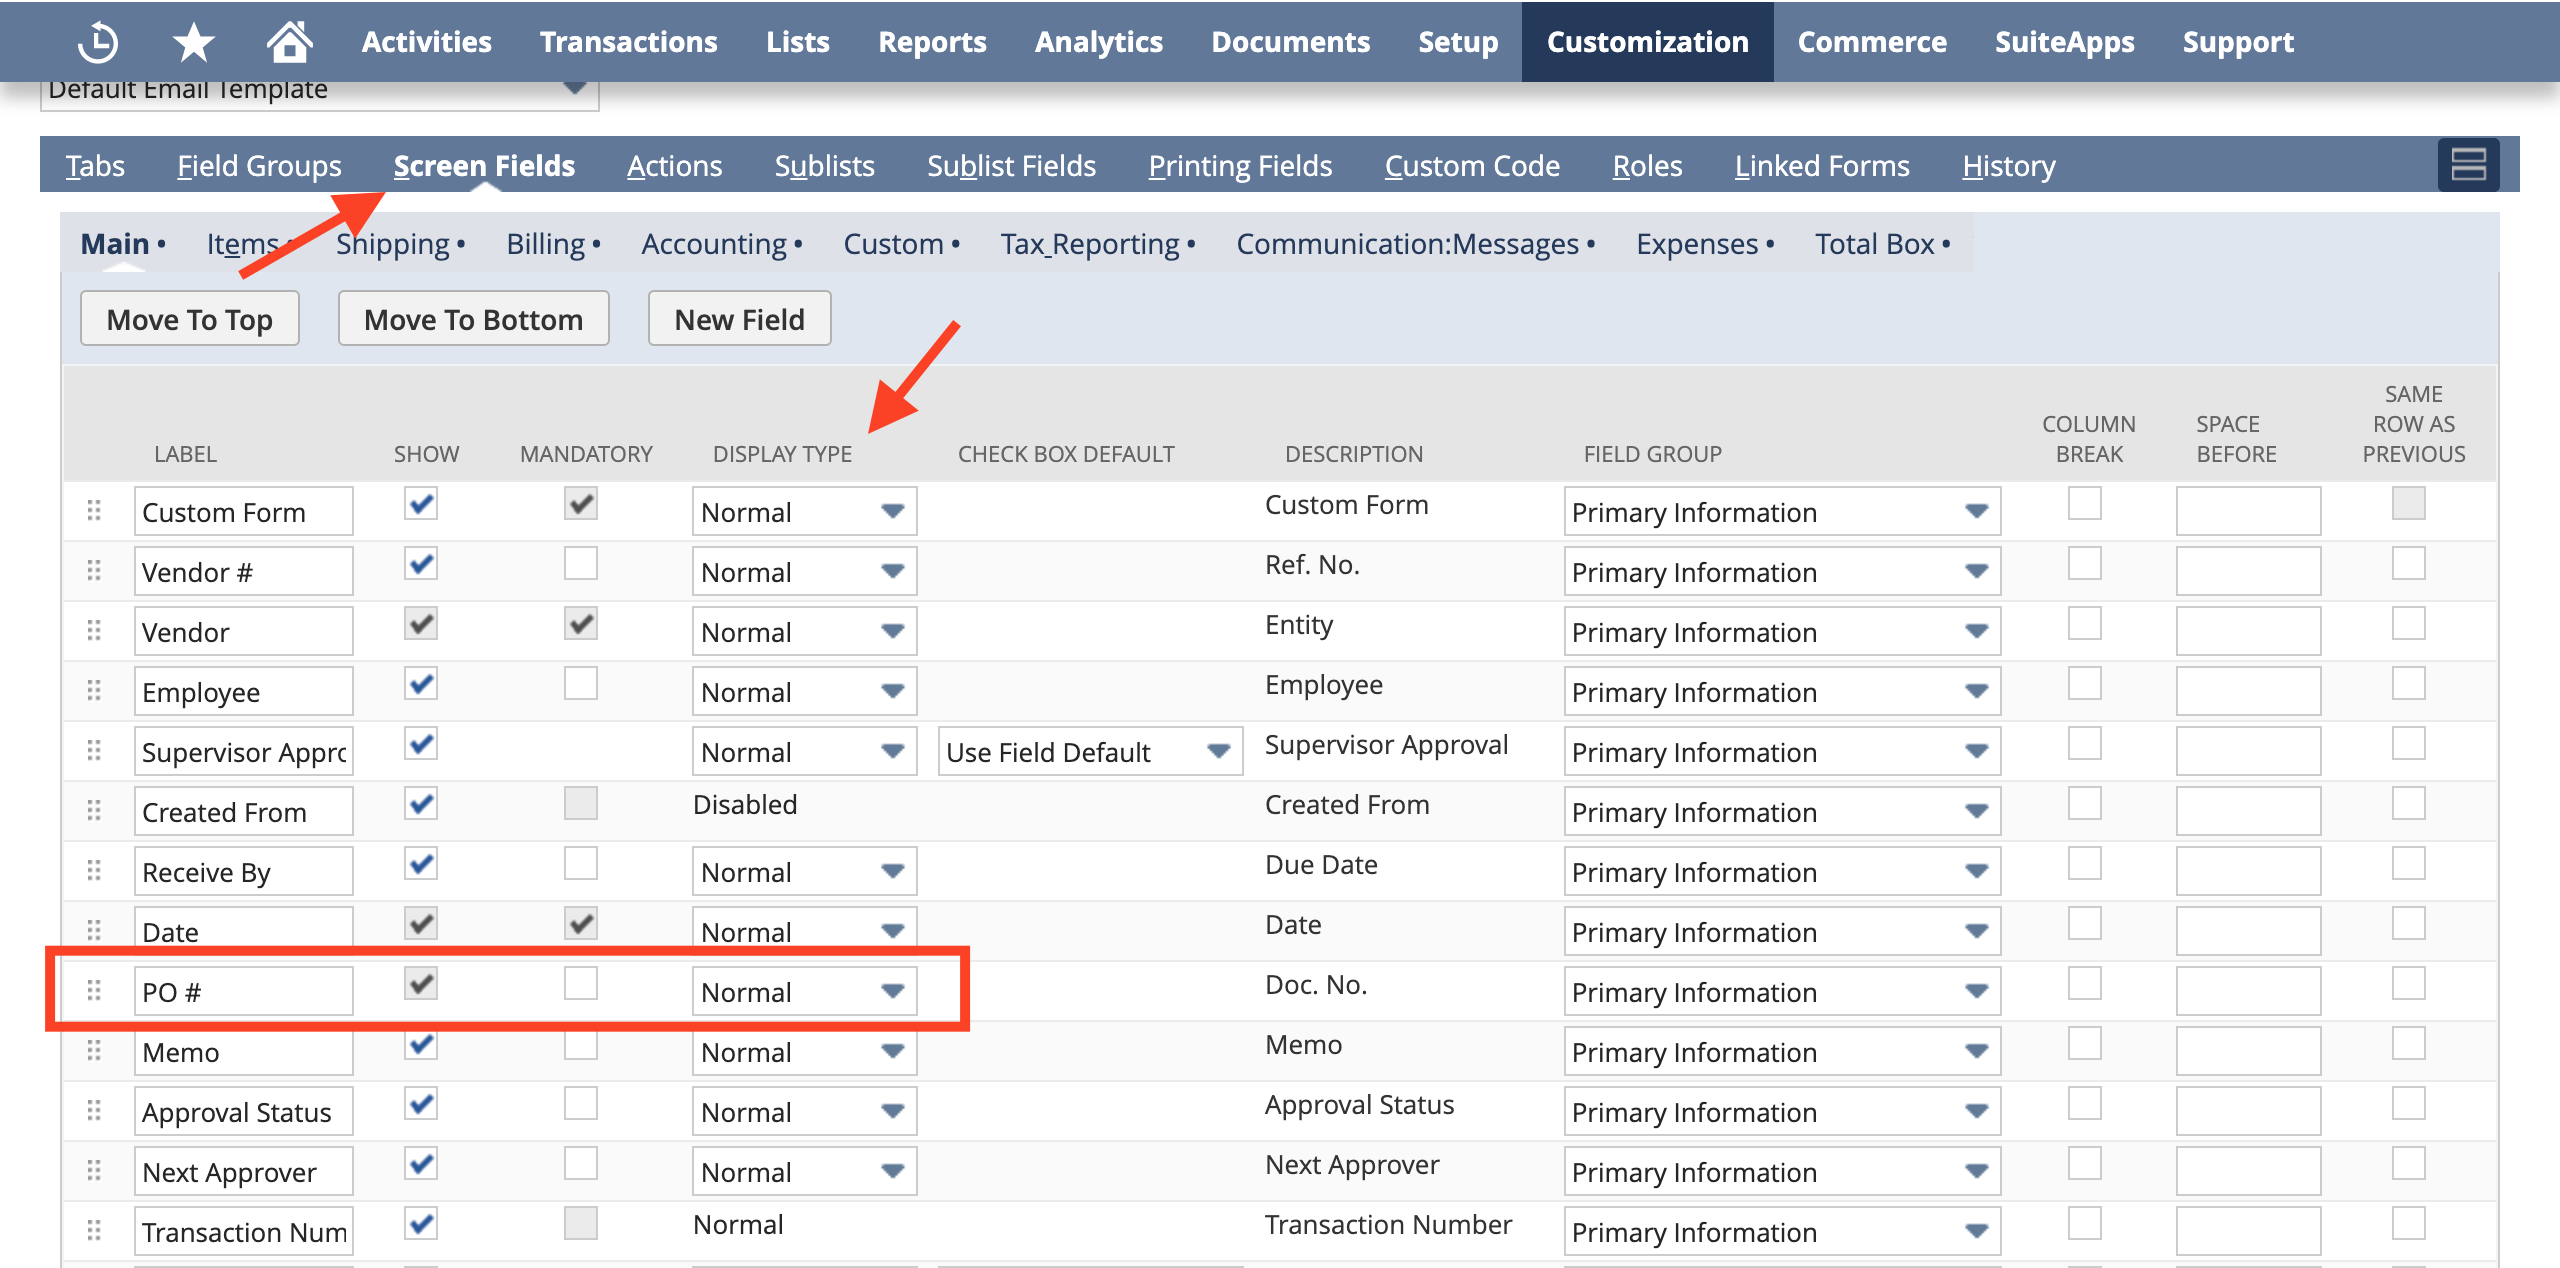
- Go to Customization —> Forms —> Transaction Forms.
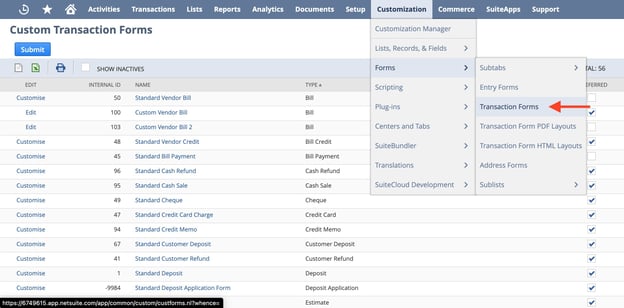
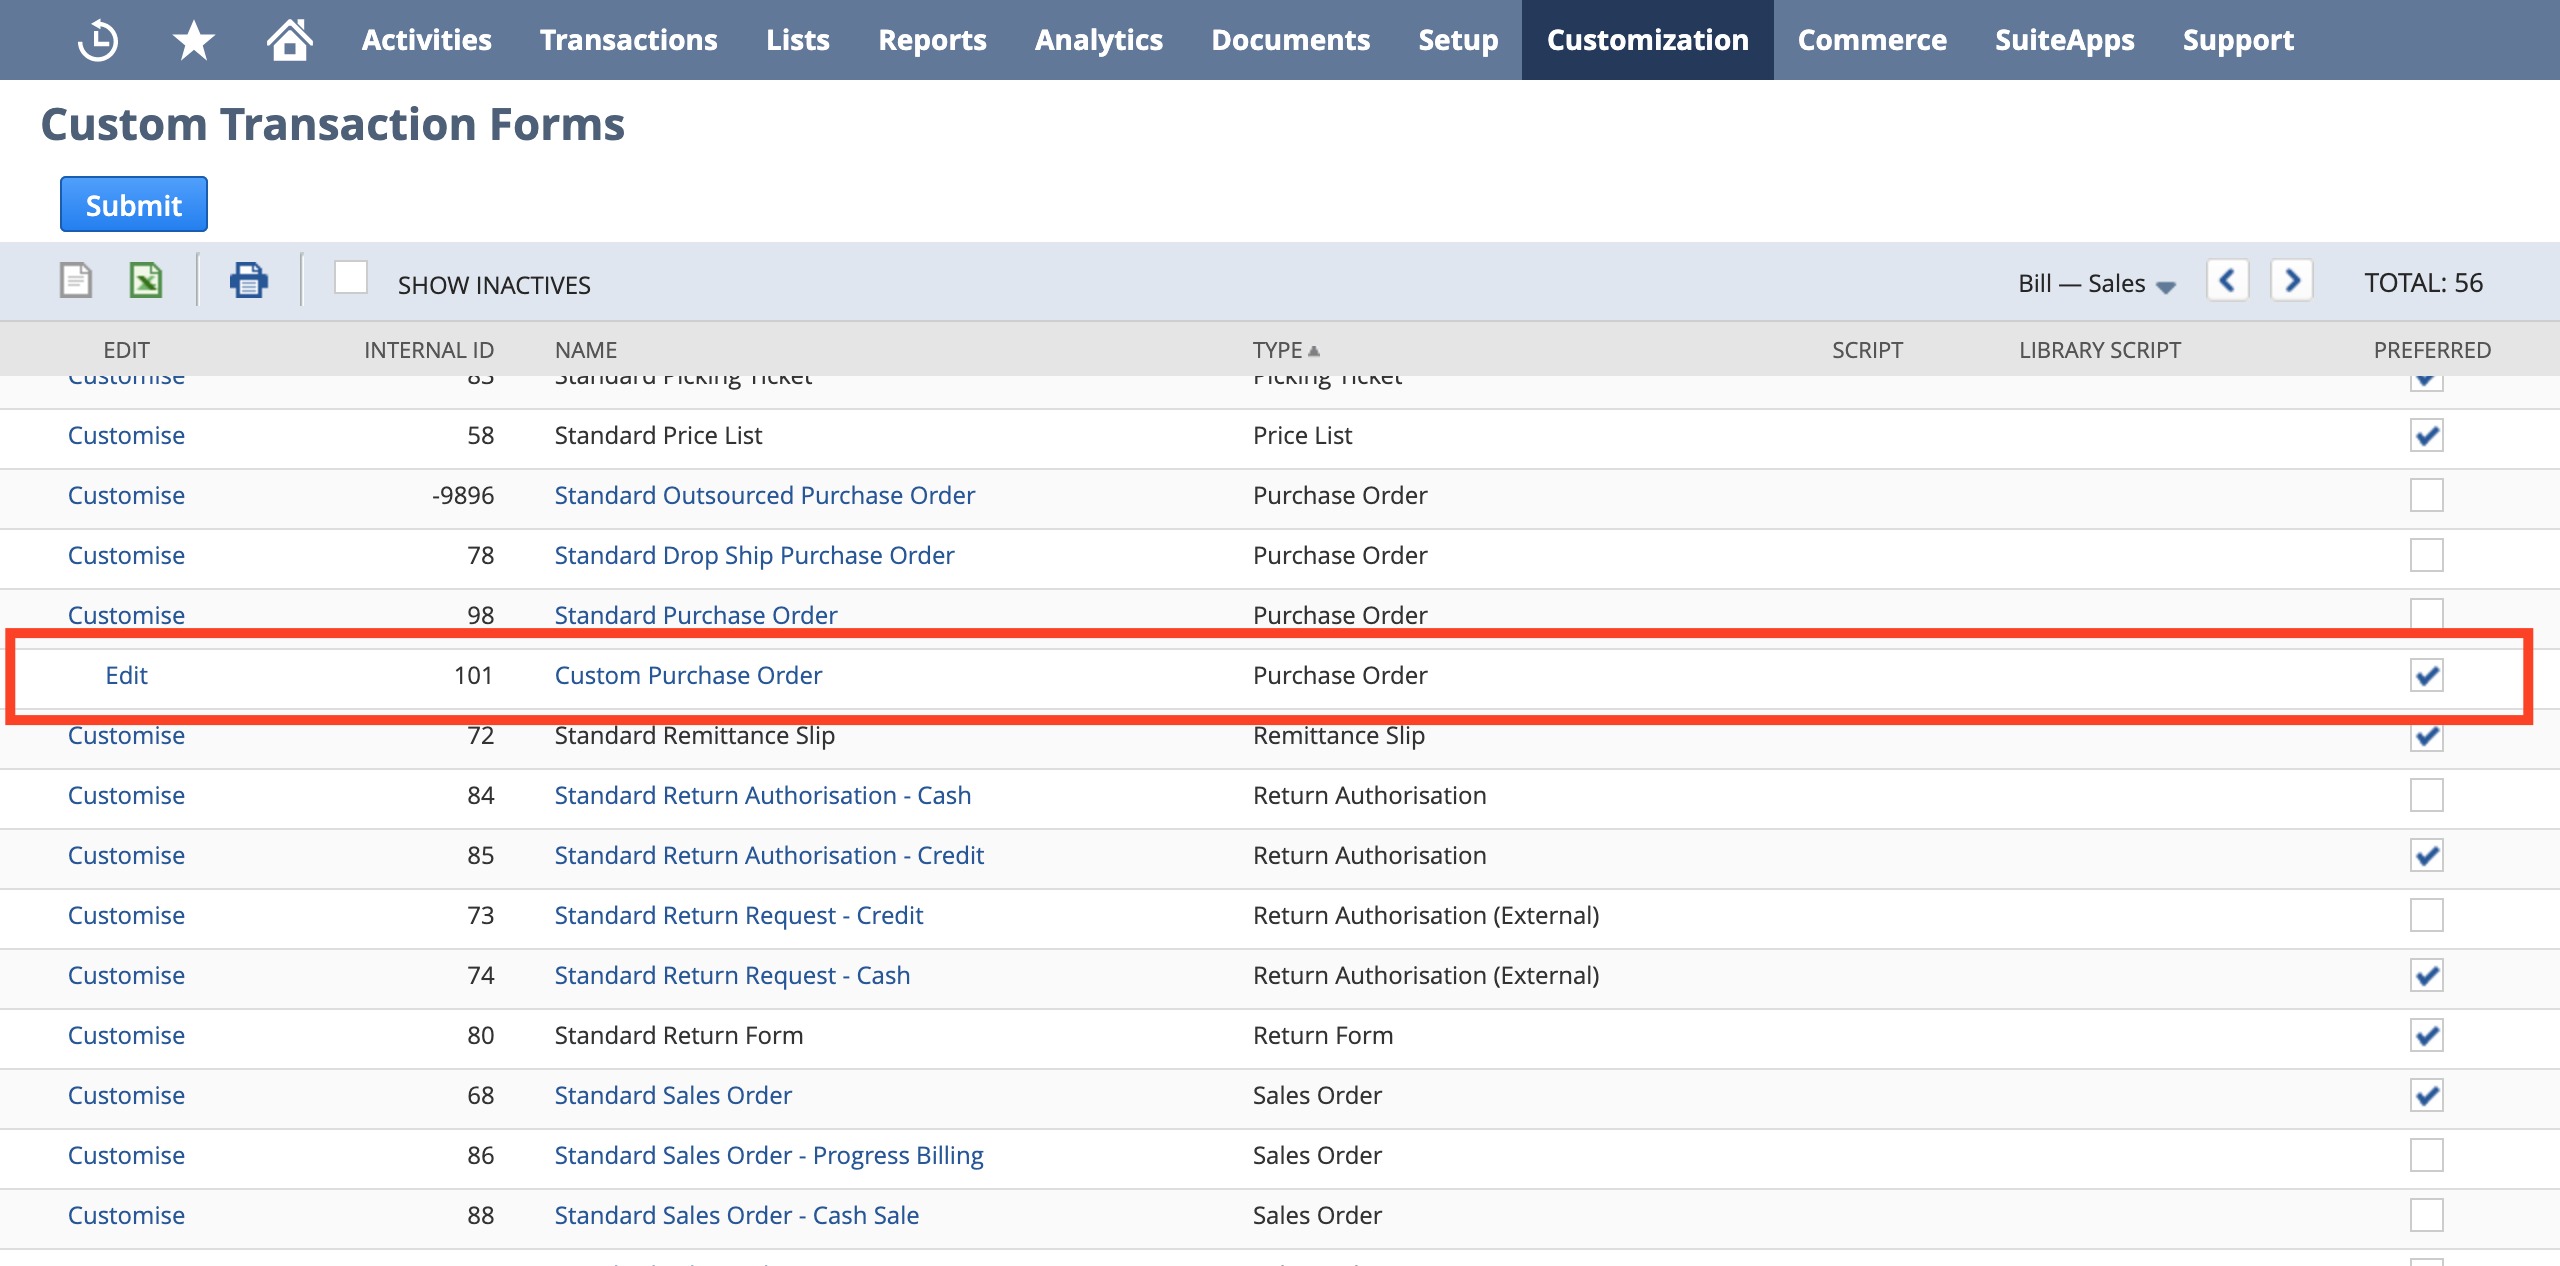
- Find the preferred form for Purchase Order or Invoice/Bill (the one that you always use) and click the Edit button.
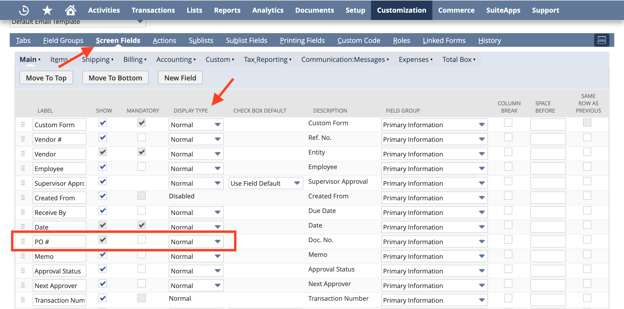
- Open the Screen Fields tab —> set the Display Type for PO # as “Normal”.
How It Works With Integration
For Purchase Orders:
- If you have a custom numbering for Purchase Orders in Precoro, a custom PO # will be sent to NetSuite.
- If you do not have a custom numbering, the usual (auto-generated) document number will be sent.
For Invoices/Bills:
- If there is a Supplier Invoice Number, it will be sent to NetSuite.
- If there is no Supplier Invoice #, a custom Invoice # will be sent instead.
- If you do not have custom numbering or Supplier number, the usual (auto-generated) document number will be sent.