TABLE OF CONTENTS
- How to Create a Warehouse Request
- How to Track Warehouse Requests
- How to Track Changes with Revision History
- Frequently Asked Questions
How to Create a Warehouse Request
To create a Warehouse Request, follow these steps:
- Go to the left side of the screen and choose Warehouse Request.
- Click the Create button.
- Choose a location, and the desired delivery date, Post to Warehouse (if available and needed), and click the Create button.
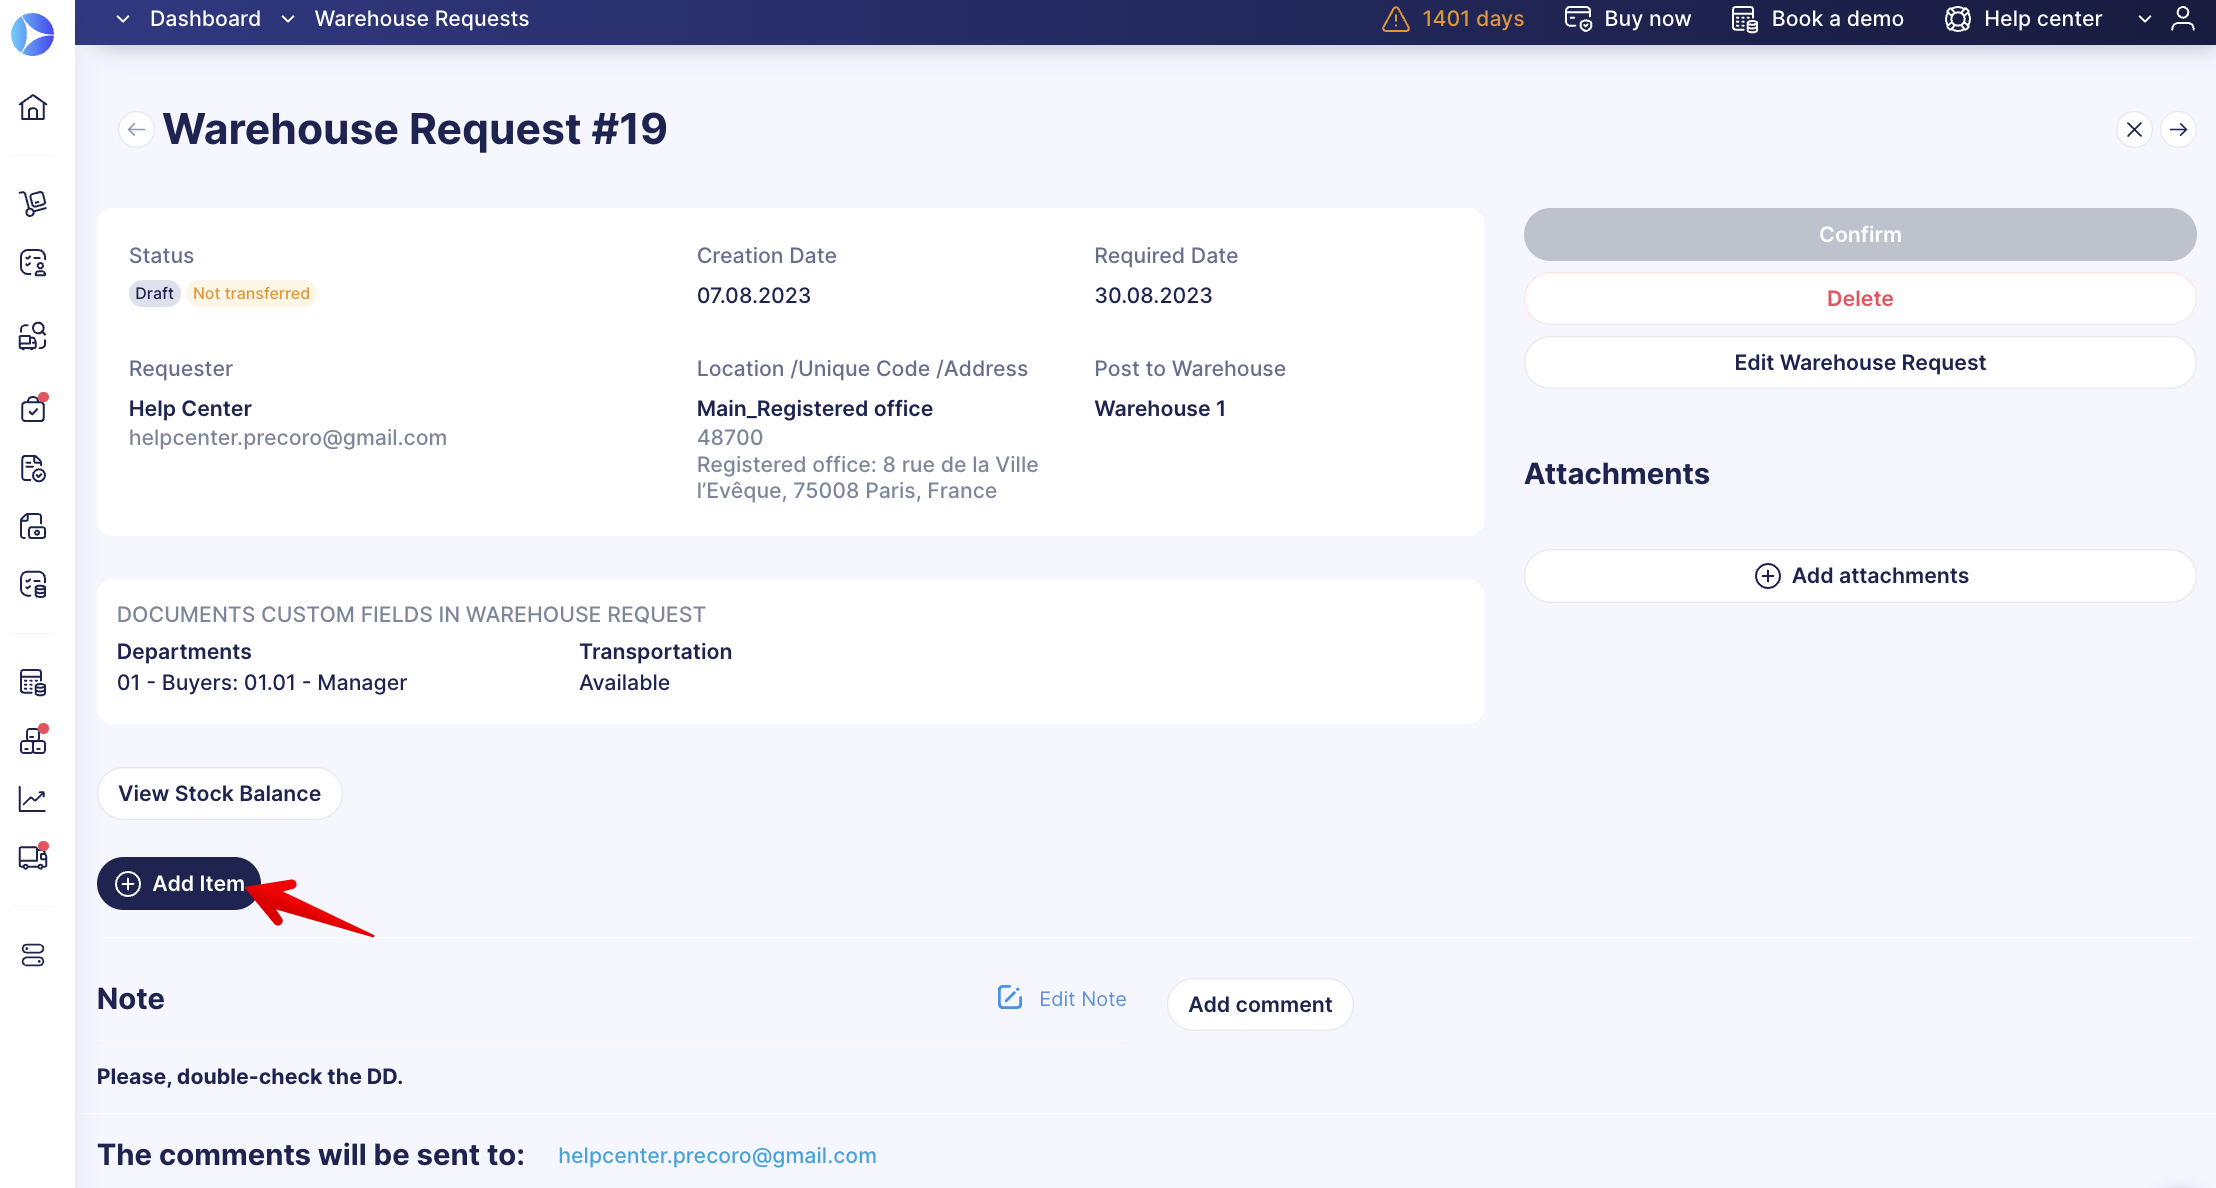
4. Now, you need to add some items to your Warehouse Request. Click Add Item to choose items from the catalog.
When adding items, you can enter the Unit of measurement by selecting previously created options in the Item Management → Unit Management page, or by entering new ones directly into the document (in that case, new Units will be added only to the document and will not be saved in Unit Management).
Place the cursor in the field and enter the data to add the new option to the document.
The Unit will also be displayed in the related Purchase Order and Purchase Requisition from Warehouse Request.
You can also edit the location in your Warehouse Request when the document is in Draft or In Revision. You can choose the location that is accessible to you within your organization. Then, confirm your request.
And you can view and correct information in the Post to Warehouse field.
💡Please note: The Post to Warehouse field can only be edited in Draft or In Revision Statuses. When the document is Approved, the Post to Warehouse field will not be available for editing.
And now, all you need to do is to track statuses — Approval and Transferring.
Precoro will notify you regarding the approval decision and all the transfers. You can also enable the Warehouse Request initiator to receive email notifications on the new Stock Transfer creation. To learn more about its function, please consider this article.
💡Pro Tip: You can preview a related Stock Transfer without leaving the Warehouse Request. Find it in the related documents section and click the eye icon to see the transfer details, so you don't need to open the full document.
How to Track Warehouse Requests
You can gather the basic needed information without having to actually open the document by Statuses. On the Warehouse Requests management page, you can see them in the corresponding column:
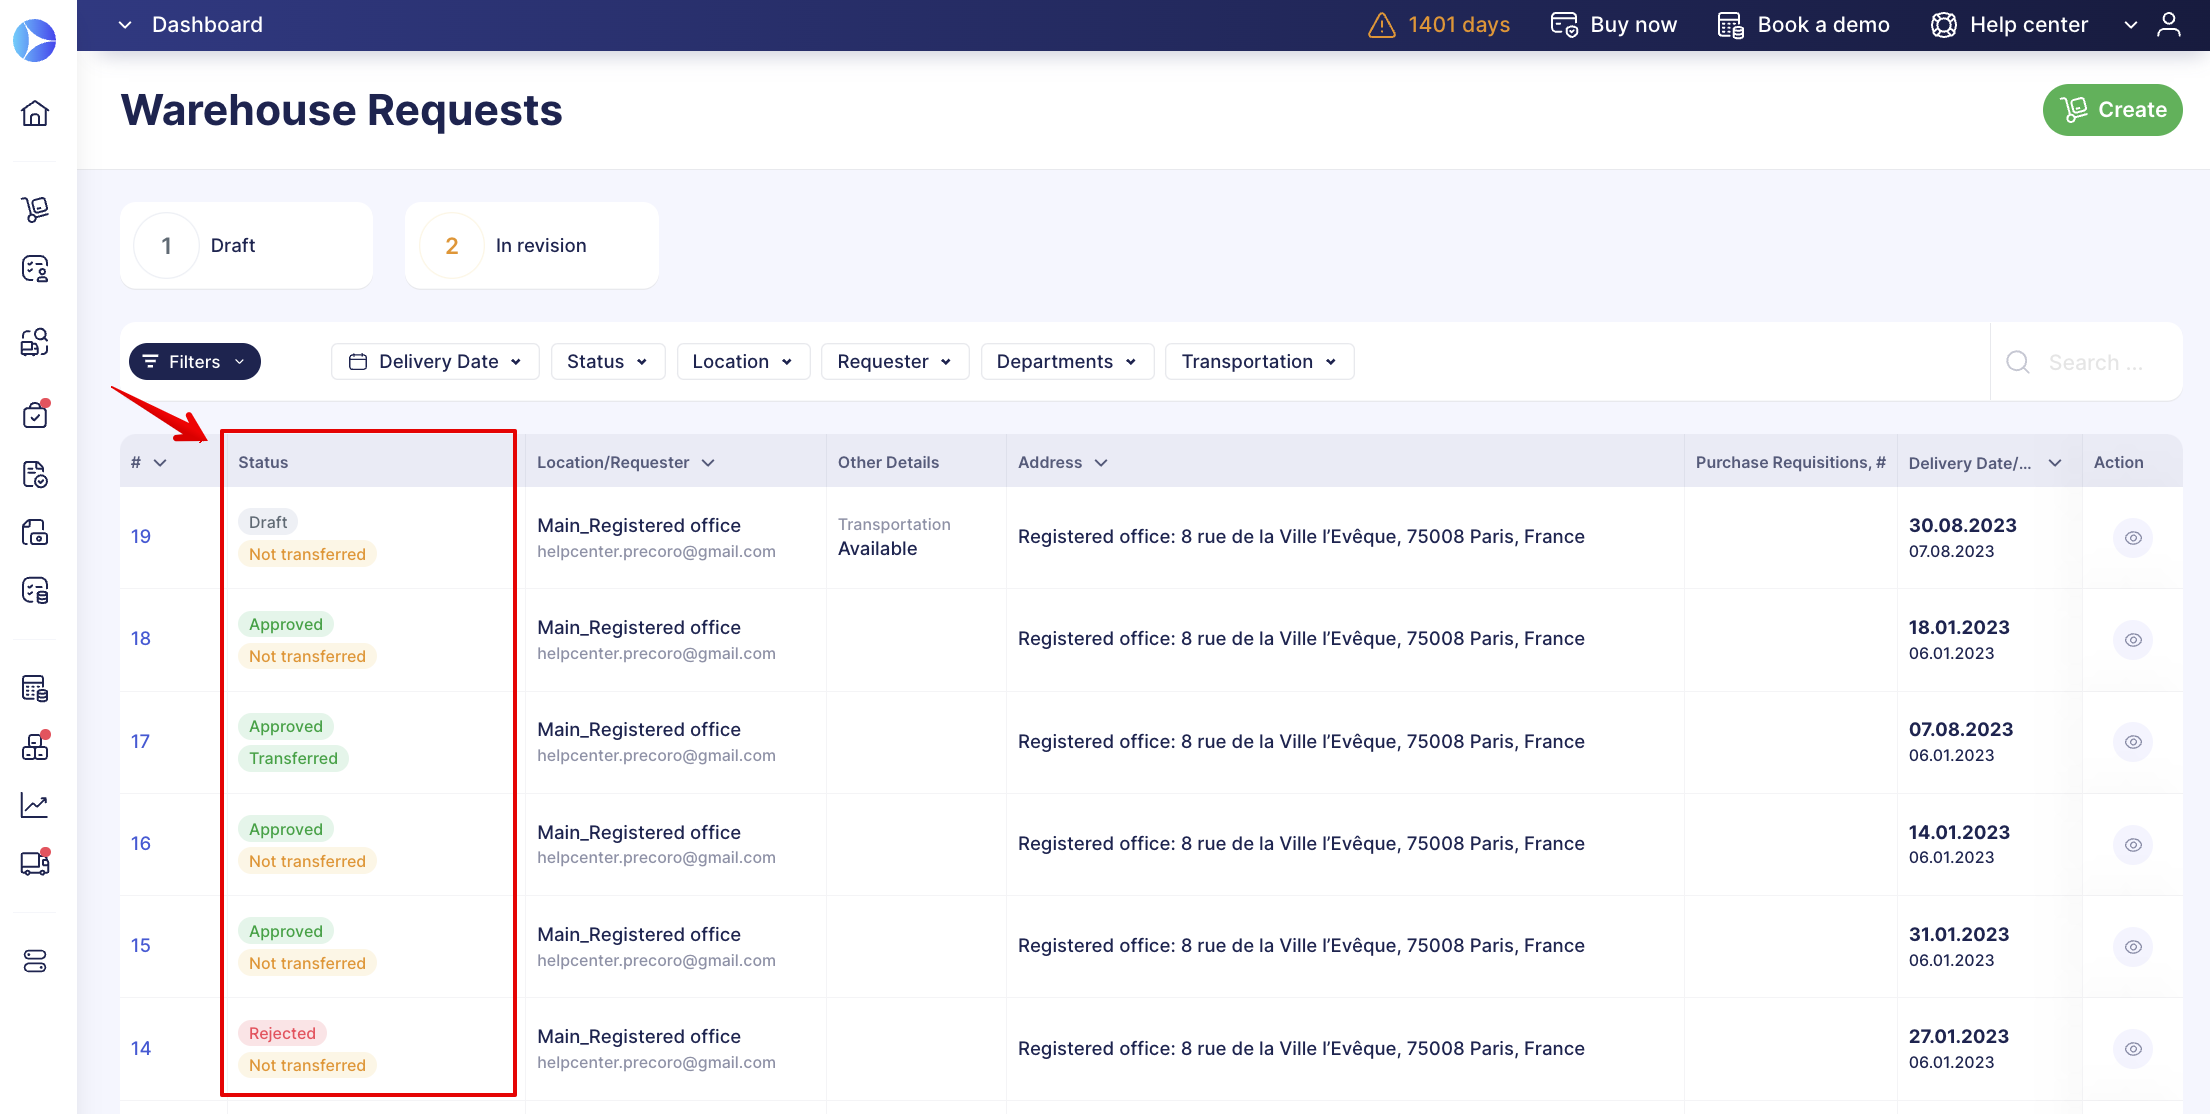
- Draft — the request was created, and you can edit it and add items there.
- Pending — your request was submitted and is waiting for approval by a manager in charge.
- Approved — your request was approved by the manager in charge.
- Rejected — your request was not approved by one of the approvers in the approval flow. Therefore, it will not be transferred.
- Received — items from your request were received.
- Canceled — initiator canceled the request.
To expedite and optimize searches you can utilize the advanced or fast set of filters available on every document management page. A more detailed guide on How to Use Filters in Precoro you can find in the corresponding link.
To use advanced filters for Warehouse Requests click Filters and set the parameters you need in the appropriate fields, then click:
- Filter results — to apply the selected filtering parameters.
- Save current filter — to save the selected filtering instantly.
- Reset all filters — to reset the selected filtering parameters.
Use the fast filters on the panel above the document’s list to quickly get the needed results.
💡Please note: You can filter results by both Custom Fields for Items and Custom Fields for Documents in Warehouse Requests but first, you need to activate them as described in the instructions here.
Also, you can set the Warehouse Requests Default Custom Fields for Items directly through the Supplier card. Learn more about this function here.
How to Track Changes with Revision History
Use the Revision History button to track all the changes made in a document. Select two document versions to compare them.
In Revision History, you can see all attachment alterations as well.