TABLE OF CONTENTS
What Is a Service Order
Service Order document will allow you to conveniently create, pay, and track all your utilities and services. The major difference between Service and Purchase Orders is that you order actual items in Purchase and need to track their receipt. In Service, on the other hand, you will have the ability to:
- Pay for services instead of items. The document does not have a quantity field. Therefore, you will not be necessarily required to create Receipt documents.
- Create multiple Invoices and break the item total into partial amounts. It can be helpful if you, for example, want to create a payment for a 12-month service.
- Add such Orders to the Budget.
Important to consider when creating a Service Order:
- It is a document made based on a standard Purchase Order, but which does not have Quantity and Price fields at all.
- The document is created for the amount-based sum. Receipts and Invoices are amount-based as well. Those related documents also do not have the Quantity field, only the sum.
- Net Total is available for editing instead of Price.
- The document is created for a certain Service Period, not a specific date.
- You can add it to the Budget and set a Budget Breakdown function (select periods needed to be included in the Budget).
💡 Please note: More information about the Budget Breakdown function can be found here.
How to Create a New Service Order
In order to use the Service Order functionality, you must first activate this setting in the Configuration → Basic Settings → Documents Setup → Purchase Order → Service Order checkbox. Press Save to apply the changes.
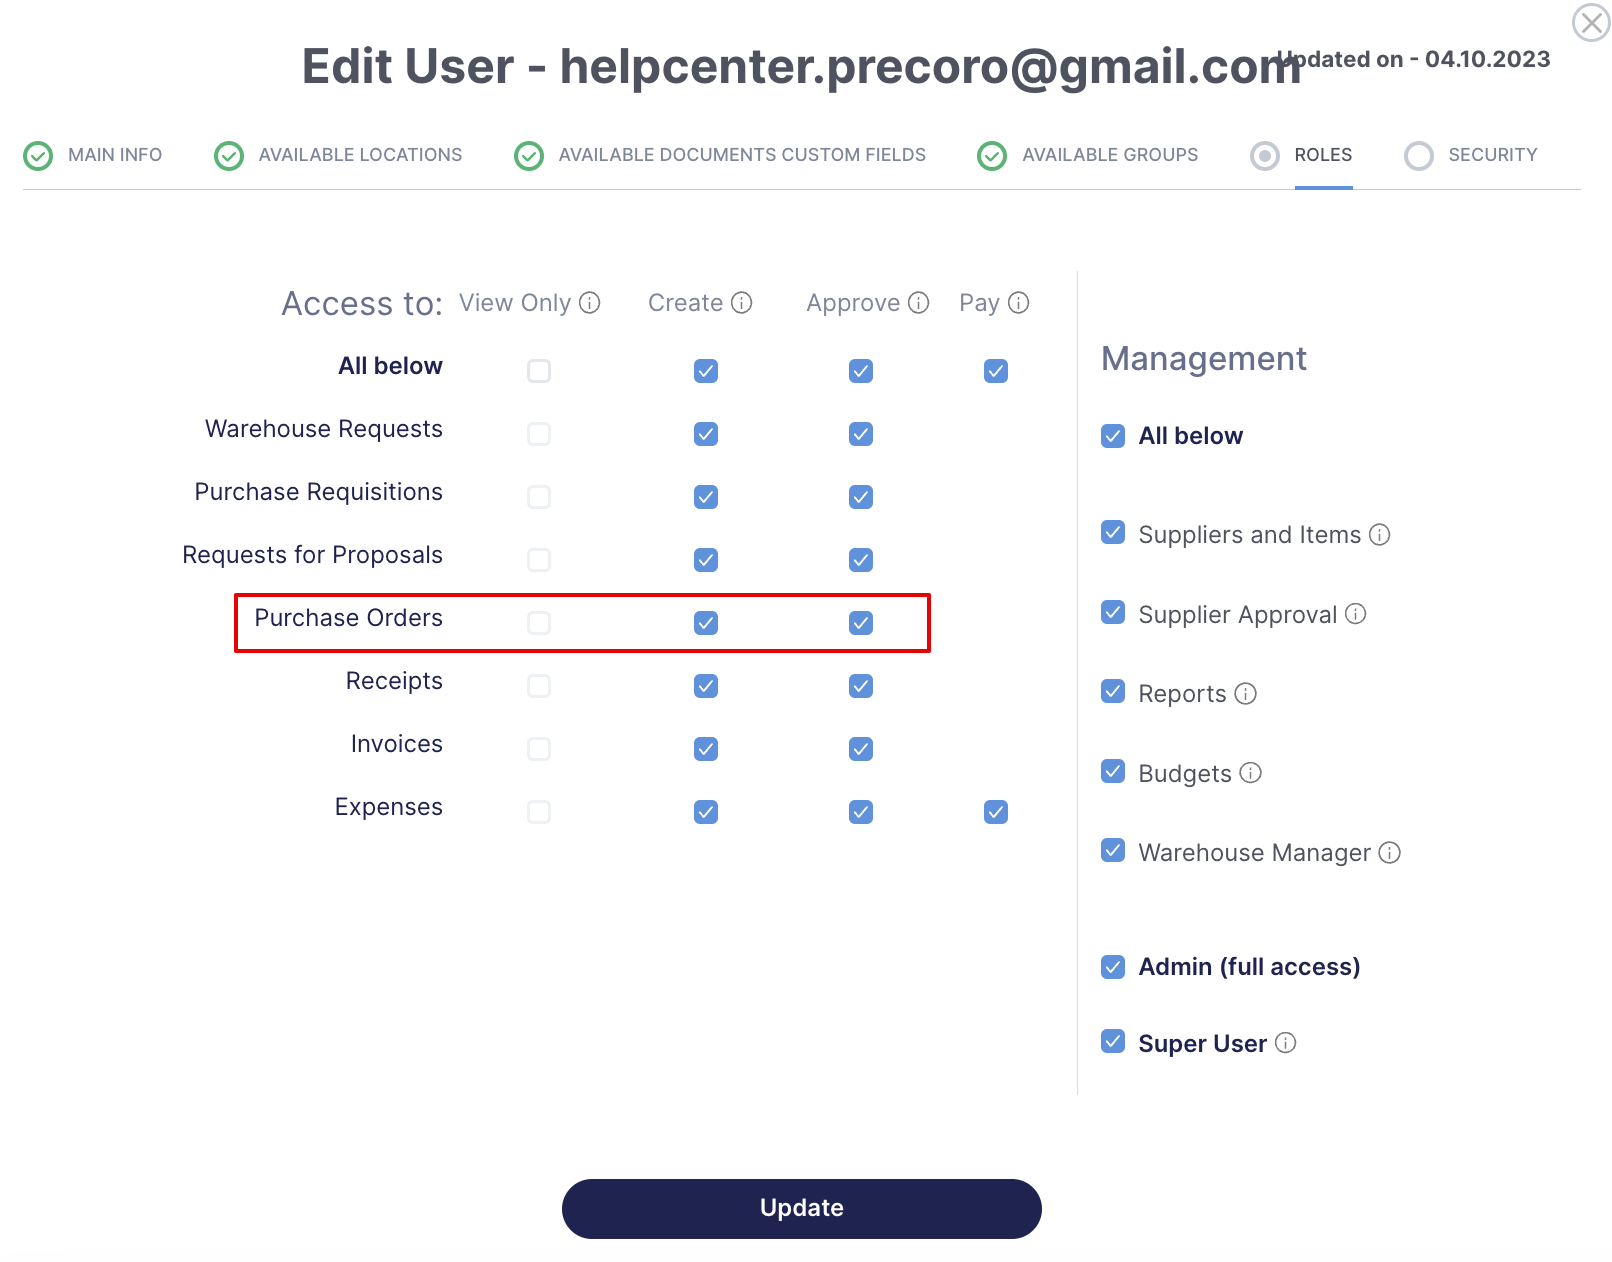
The access to Create and Approve Service Order documents is directly related to the set Roles for the Purchase Order module in User Management:
To create a new document, open the Purchase Orders management page and follow these steps:
1. Create a New Document and Fill Out the Necessary Fields
On the top action panel, click the Create Service Order button. Fill out all the required fields and note that the document is created for a certain Service Period, not a specific date. You can also add it to the Budget and activate a Budget Breakdown function:
You can also enable Split Costs functionality here.
2. Add Items to the Document
Click the available options to add items to the document. Learn more about adding items to documents in this article.
💡 Please note: Only the Non-Inventory and Service types items can be added to the Service Order.
The Inventory type items are not available to select. They will not be displayed in the catalog for choice.
Please pay attention to the Can Be Received field in added items — this field determines whether you need to create a Receipt document or not.
If you activate the Can Be Received checkbox, you will be able to create a Receipt for the current item. If the checkbox is turned off for all item lines, you will not see the option to create a Receipt on the right action panel.
💡 Please note: You can individually activate the Can Be Received checkbox for each item row.
How to Add Service Items to the Catalog Directly Through the Document
Create a more automated workflow by adding items to the Catalog directly from the Service Order or related Invoice documents.
To be able to do that, please make sure:
1. Your company has activated the Save Items from Documents to Catalog option in the Configuration → Basic Settings → Document Setup → Item Management.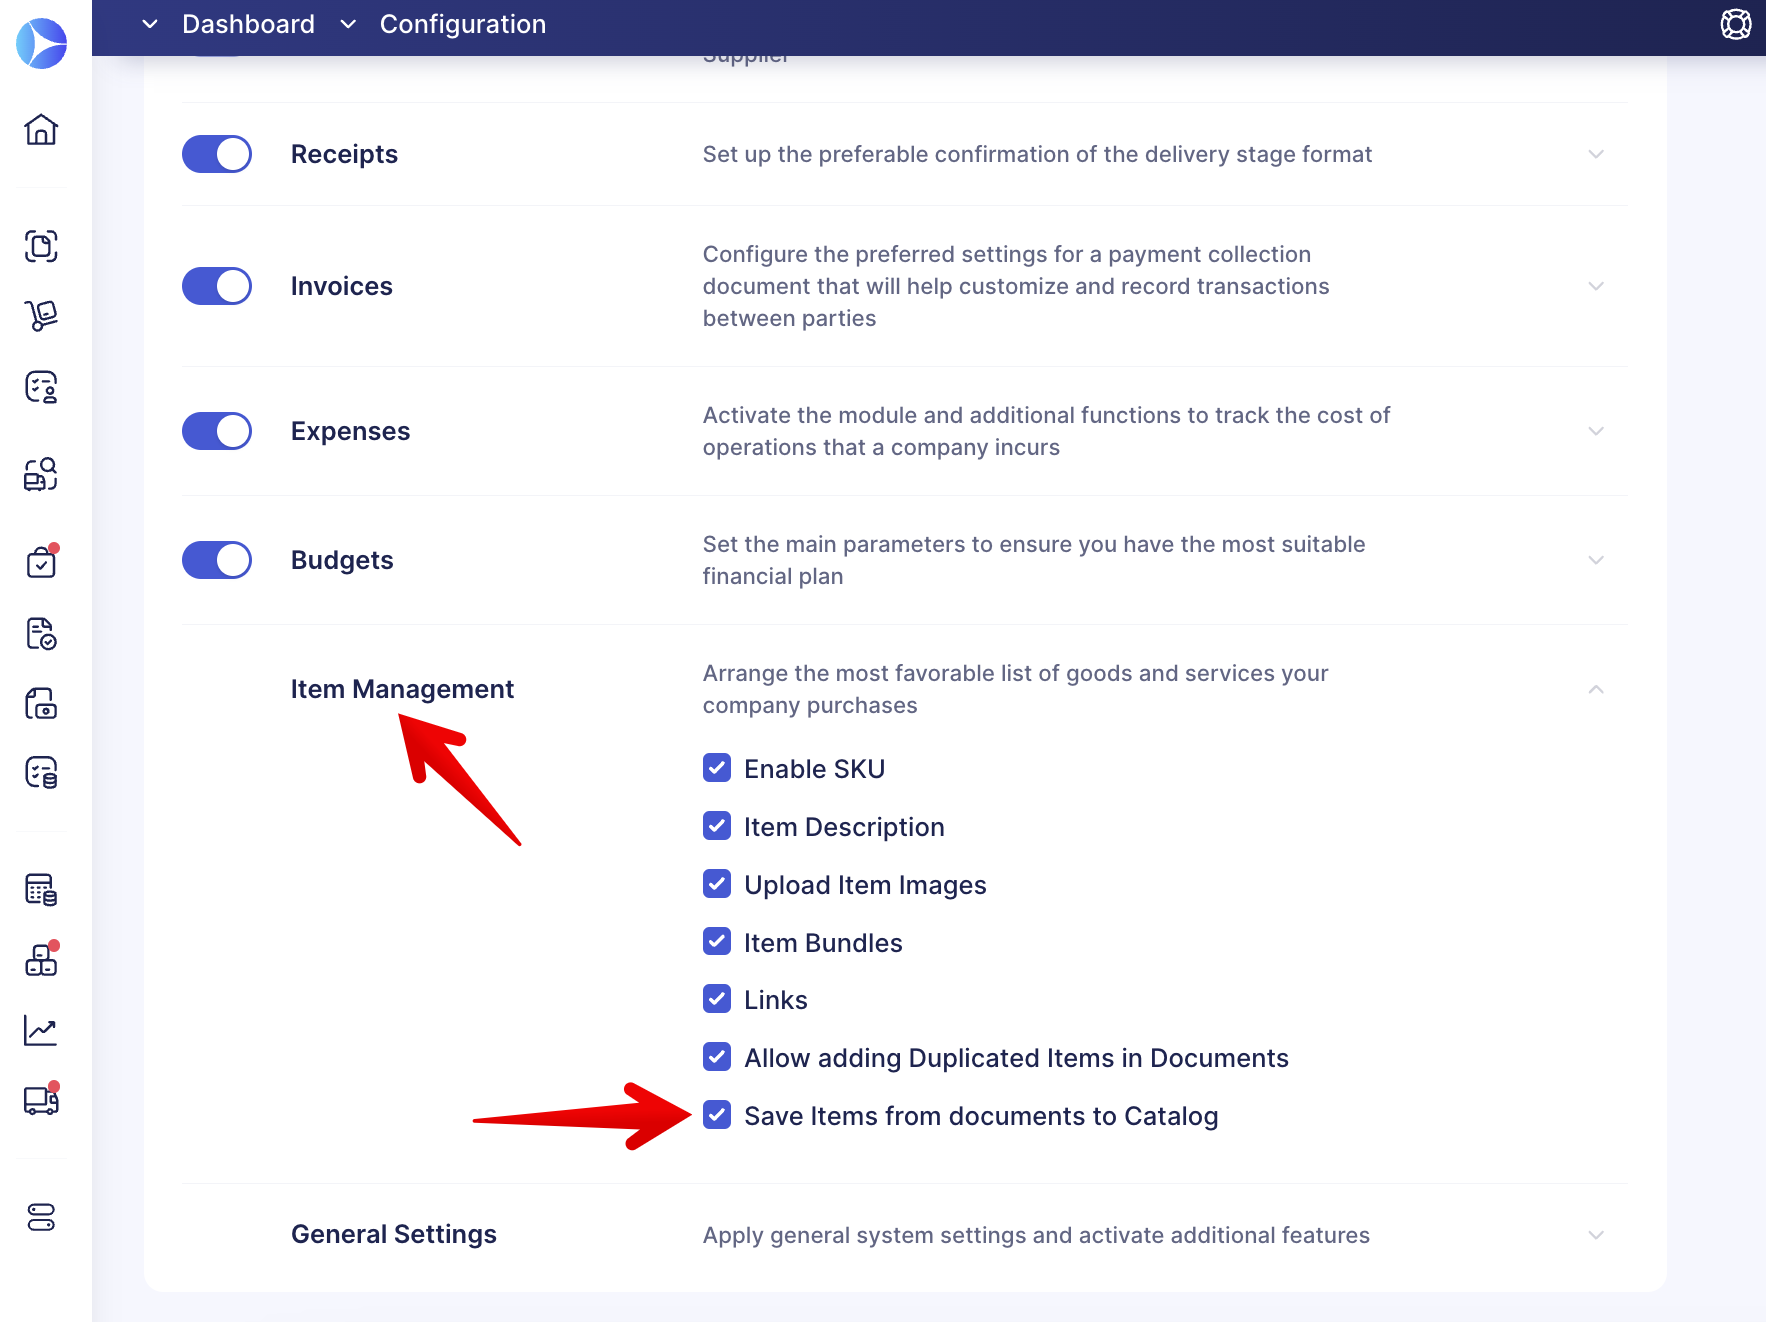
2. Users have the Item Management Create role to add new items to the Catalog.
The process of adding new items works as follows:
1. When you are adding new items in the Service Order or its related Invoice, you will see the Add to Catalog checkbox. Please note that this setting is, by default, not activated.
2. After saving the newly created item with the activated checkbox, it will be automatically added to the Catalog.
3. In the Catalog, the item will be created with the Service type, and the following data will be transferred:
- SKU
- Name
- Description
- Net Total will be transferred to the Price field in the Catalog
- Supplier.
How to Reject Items in Service Order
If the Supplier cannot deliver the goods you ordered in full and you do not expect them to deliver the remaining amount later, you can mark such items as Rejected.
This way, you can properly complete the Service Order document.
To do that, open the Service Order, press the edit action in the item, and enter the quantity of the Rejected ones.
💡 Please note: You can see and edit the Rejected column in item lines when the document is on Pending or In Revision statuses.
3. Enter Additional Information and Confirm
- Write Notes and Comments. Learn more about this here.
- Upload Attachments. This functionality works the same as for the Purchase Order. Follow this link to find more detailed information.
- Check the info and click the Confirm button. The Service Order status will be changed to Pending in case you have to get approval before sending the Order to the supplier.
The Approval process for the Service Order works the same as for the Purchase Order, and you can set it on the Purchase Order Approval Workflow page.
- Download and Print the document. Those settings can be set and managed in the same way as for the Purchase Order.
After creating and confirming an Order, proceed to create the related Invoice and Receipt (if needed) documents.
Frequently Asked Questions