TABLE OF CONTENTS
How to Import Items from NetSuite
You can find the list of your Items in Lists —> Accounting —> Items.

To import Items from your NetSuite account to your company in Precoro, follow these steps:
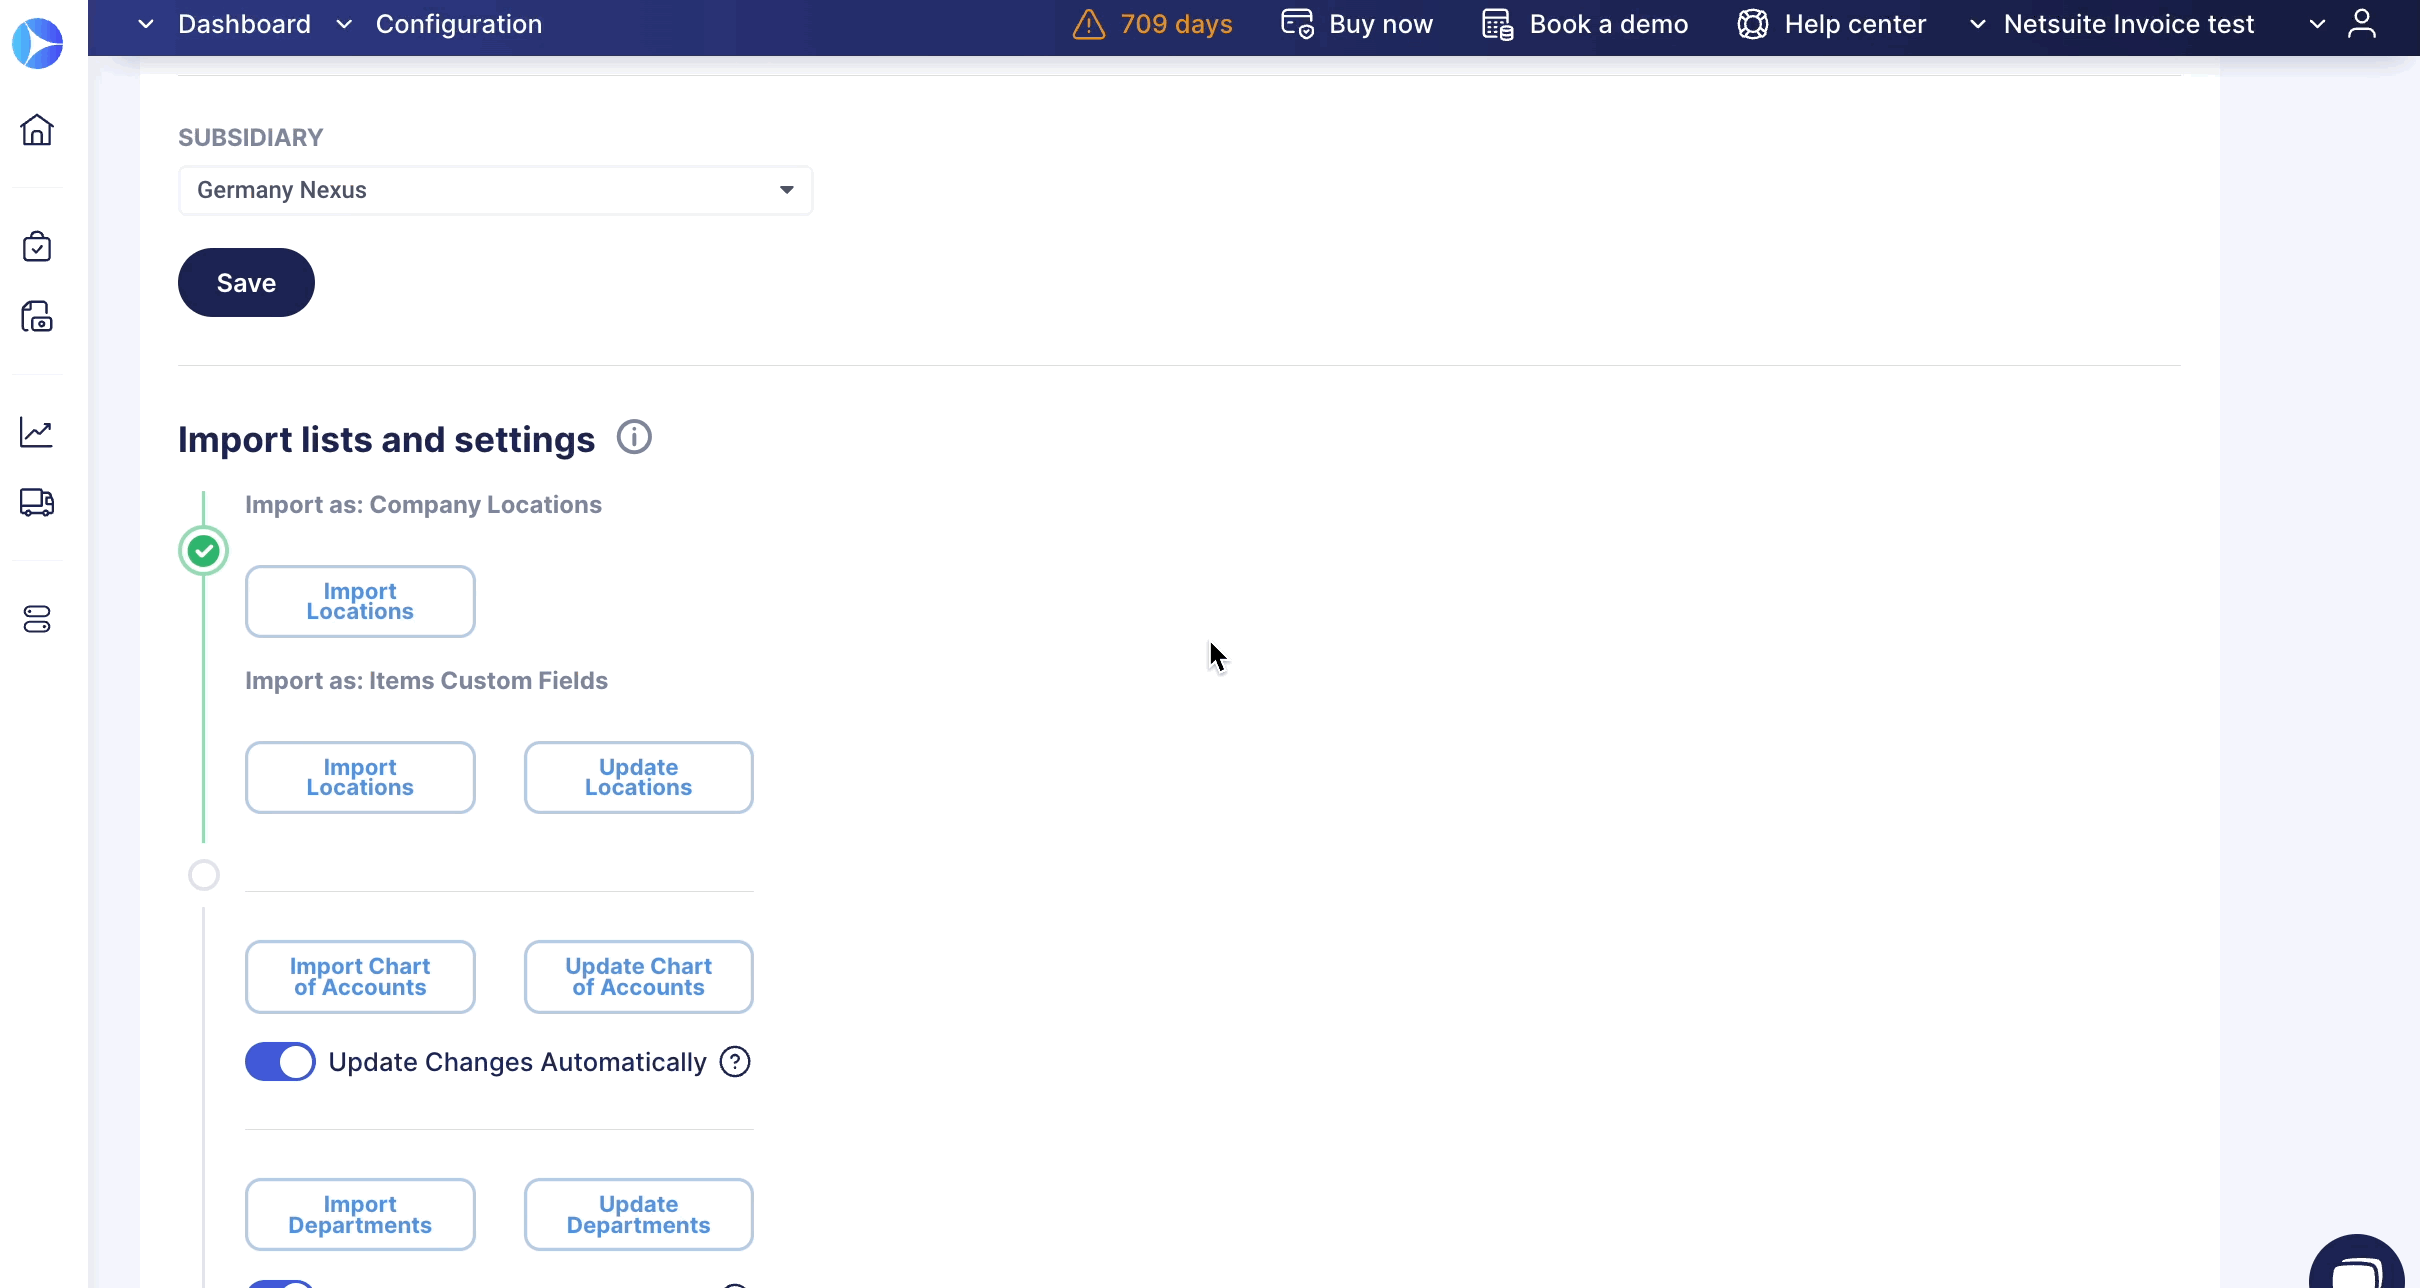
Note: You should import the lists used in your Items in NetSuite (these can be Accounts, Departments, Customers/Projects, Vendors, or Locations).
2. When all lists are imported, go to your NetSuite integration page and click the Import Items button. Alternatively, go to the Item Management page and select Import from NetSuite.
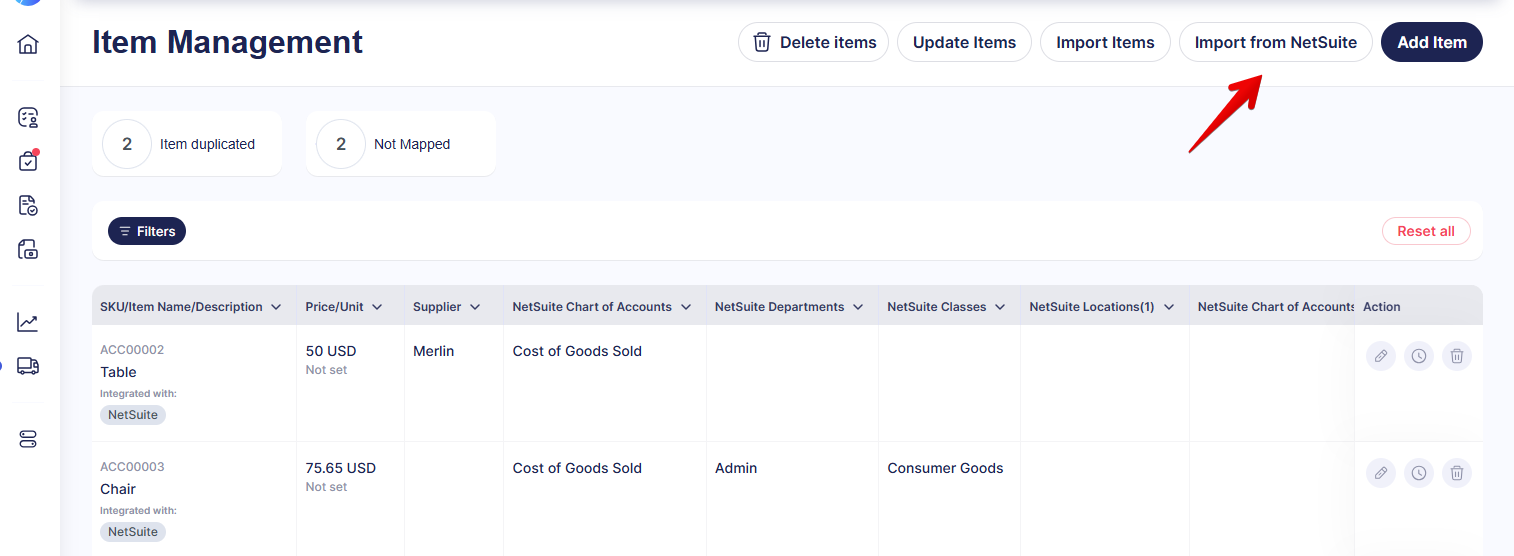
3. Select the Items to import or click Select All (if you need to integrate all of them).
Use Search if you need to find and integrate particular Suppliers. You can also see the Currency imported from the main Supplier Currency.
Please note: When you clean the search, all selected suppliers become unmarked. This prevents importing the suppliers that you do not see while searching.
4. Click the Import button.
Congratulations, the Items list has been imported.
Please note: Only items associated with the integrated Subsidiary will be imported to Precoro.
How to Update Items
Go to your NetSuite integration page and click the Update Items button.
After the update, you will receive a system notification regarding the success status.
Item Types That Can Be Integrated with Precoro
The following item types are supported by Precoro:
- Inventory Item
- Non-Inventory Item:
- For Purchase
- For Resale
- Other Charge:
- For Purchase
- For Resale
- Service:
- For Purchase
- For Resale.
When integrating document items, consider the way of adding them:
- If the items were added from the Item Management with the Add Item button and the items were previously integrated, they will be displayed in NetSuite in the Items tab.
Only previously integrated items will be transferred into the Items block in NetSuite.
In case you have added non-integrated items from the Item Management list, they will still be integrated into the Expenses block.
- If the items were added manually with the Add Empty Row button, they will be displayed in NetSuite in the Expenses tab.

All Item types in NetSuite have a System Preferences setting: Can Be Fulfilled/Received. To successfully export document items from Precoro into NetSuite, make sure that this setting is activated.
To activate the Can Be Fulfilled/Received item setting in NetSuite, open List → Accounting → Items → Preferences.
Integrated Fields and Their Synchronization Method
There are two ways to integrate your items between Netsuite and Precoro. It depends on what fields you use in the Item form in Netsuite.
The first type of Item integration
Please note: The Item integration uses the *one-way synchronization method.
| # |
Item Field in NetSuite |
Item Field in Precoro | Notes |
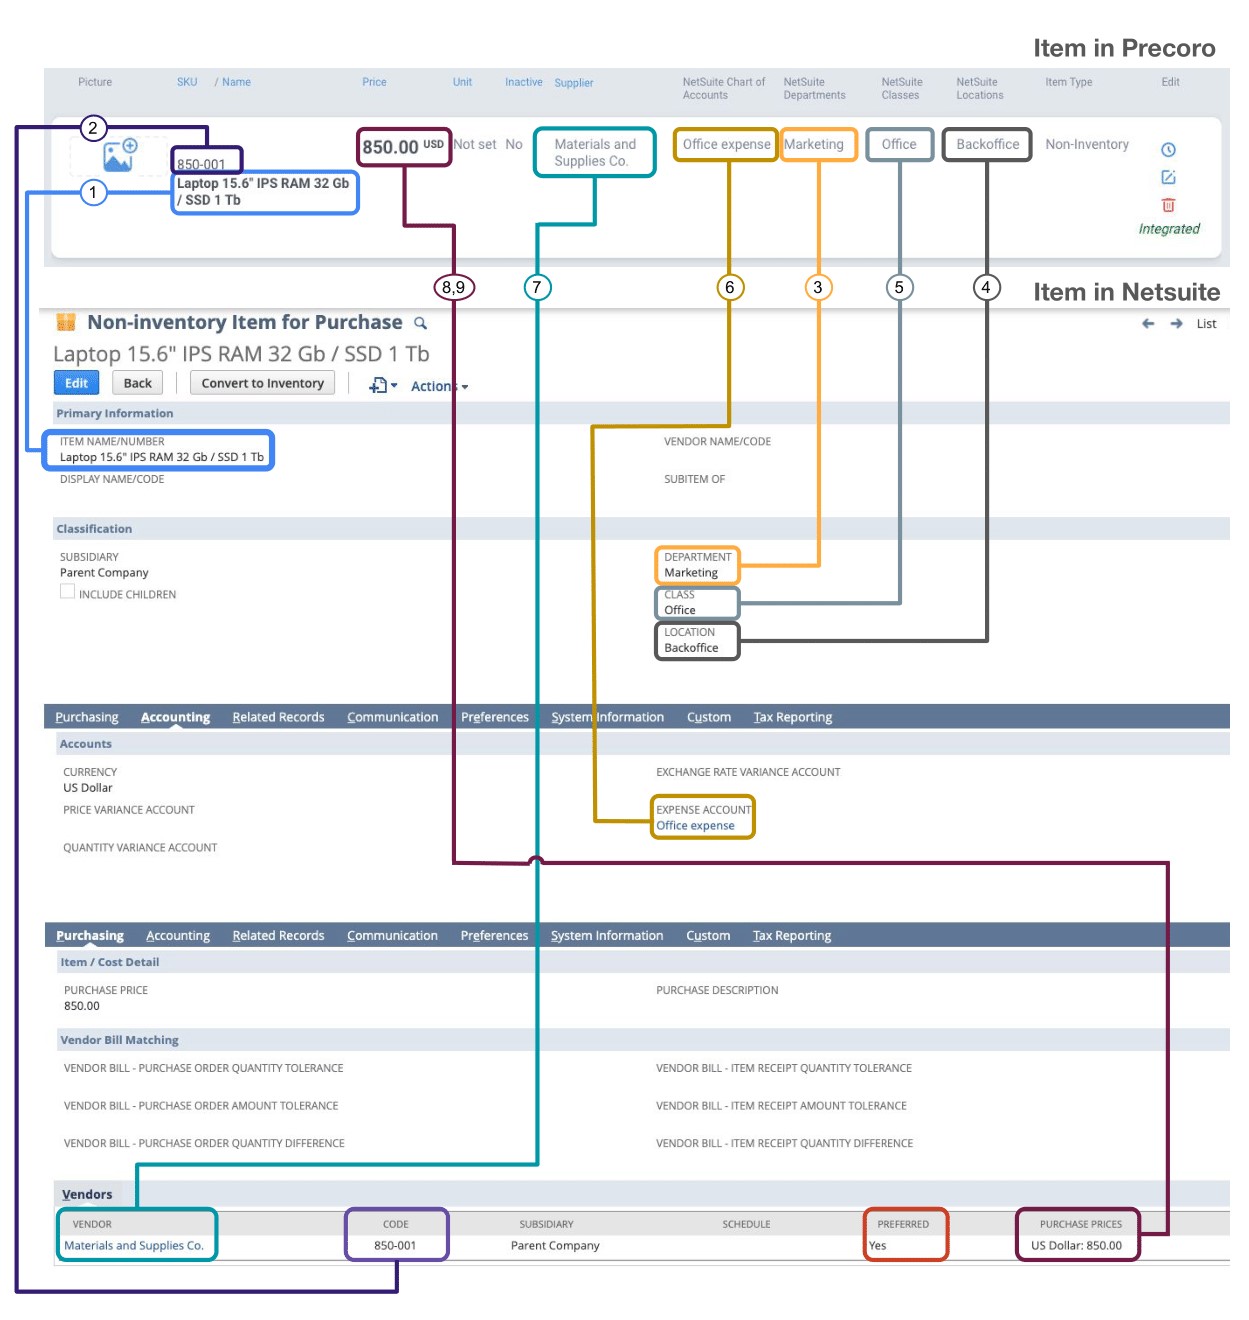
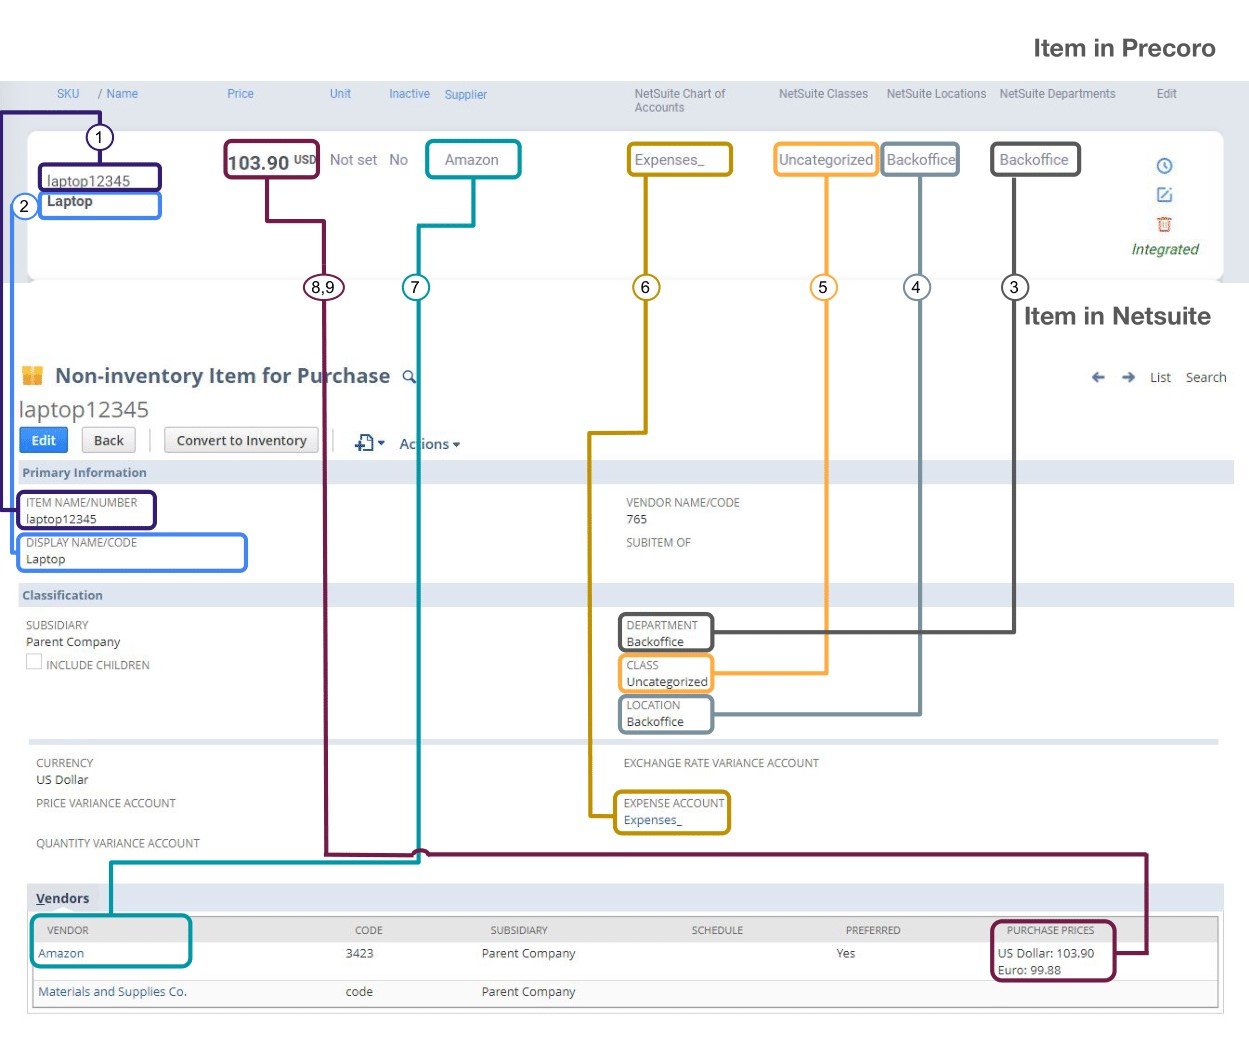
| Primary Information Section in NetSuite | |||
| 1 | Item Name / Number | Name | |
| Vendors Section in NetSuite | |||
| 2 | Vendor Code | SKU | The Vendor should be marked as preferred |
The second type of Item integration
Please note: The Item integration uses the *one-way synchronization method.
| # | Item Field in NetSuite | Item Field in Precoro |
| Primary Information Section in NetSuite | ||
| 1 | Item Name / Number | SKU |
| 2 | Display Name / Number | Name |
Item information from NetSuite, which Precoro also currently syncs
Please note: The Item integration uses the *one-way synchronization method.
| # | Item Field in NetSuite | Item Field in Precoro | Notes |
| Classification Section in NetSuite | |||
| 3 | Department | NetSuite Departments (as Items Custom Field) | |
| 4 | Location | NetSuite Locations (as Items Custom Field) | |
| 5 | Class | NetSuite Classes (as Items Custom Field) | |
| 6 | Expense Account | NetSuite Chart of Accounts (as Items Custom Field) | |
| Vendors Section in NetSuite | |||
| 7 | Vendor | Supplier | The Vendor should be marked as preferred |
| 8 | Purchase Price | Price | The Vendor should be marked as preferred |
| 9 | Currency | Currency | The Vendor should be marked as preferred |
*one-way synchronization — changes made in Precoro will not be displayed in NetSuite. Changes made in NetSuite will be displayed in Precoro after the data update.
*two-way synchronization — changes made in Precoro affect the integrated data in NetSuite. Changes made in NetSuite will be displayed in Precoro after the data update.
If the document was successfully sent to NetSuite but the NetSuite lines were not recorded either with or without receiving an error in the logs, we will automatically resend the document in 15 seconds. If NetSuite lines are not recorded again, the retry will occur in 15 seconds. The maximum number of retry attempts is 10. You will see a log of the successful update.
Character Limits for Items Fields in NetSuite
In NetSuite, you cannot enter more symbols than allowed by the system. Here are the character limits:
- Item name / number = 250 symbols
- Vendor Code / name = 250 symbols
- Display name / code = 250 symbols
- Purchase price = values must be numbers up to 10,000,000,000,000,000.999999999999999
- Purchase description = 4000 symbols.
Other Items Integration Features
1. What if an item has several subsidiaries?
If one of those subsidiaries is integrated with Precoro, the item can be integrated.
2. Updating one of the synced fields for an Item
- In Precoro — a related field in NetSuite will not be updated.
- In NetSuite — click on the Update Items button on the Integration page in Precoro to sync changes.
3. Adding a new Item
- In Precoro — it will not be added to NetSuite.
- In NetSuite — click on the Import Items button on the Integration page in Precoro to sync the new Item.
4. Removing or Deactivating an Item
- In Precoro — the Item will remain active in NetSuite. If you want to deactivate it in NetSuite, do this manually by clicking the Edit button.
- In NetSuite — click on the Update Items button on the Integration page in Precoro to sync the inactive status of the Item.