TABLE OF CONTENTS
How to Import Customers and Projects from NetSuite
You can find the list of your Customers and Projects in Lists —> Relationships —> Customers.

If you cannot find Projects in your lists, make sure that this feature is enabled in your NetSuite account.
1. Go to Setup —> Company —> Enable Features.
2. To use basic projects, check the box next to Projects.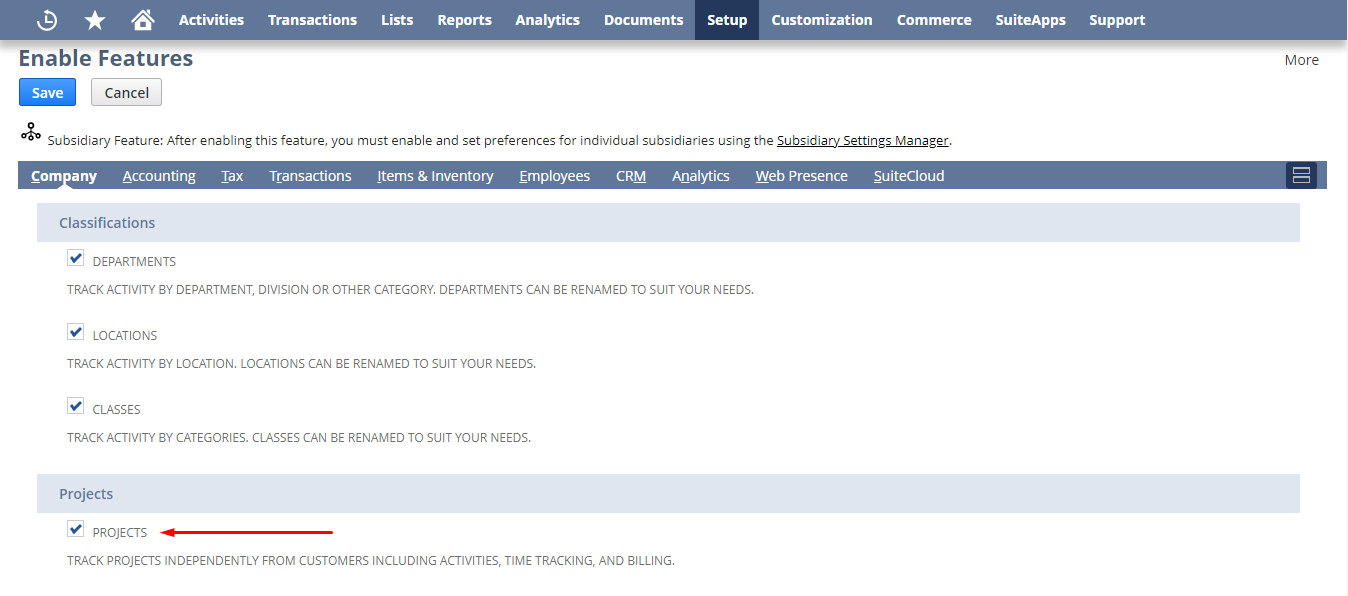
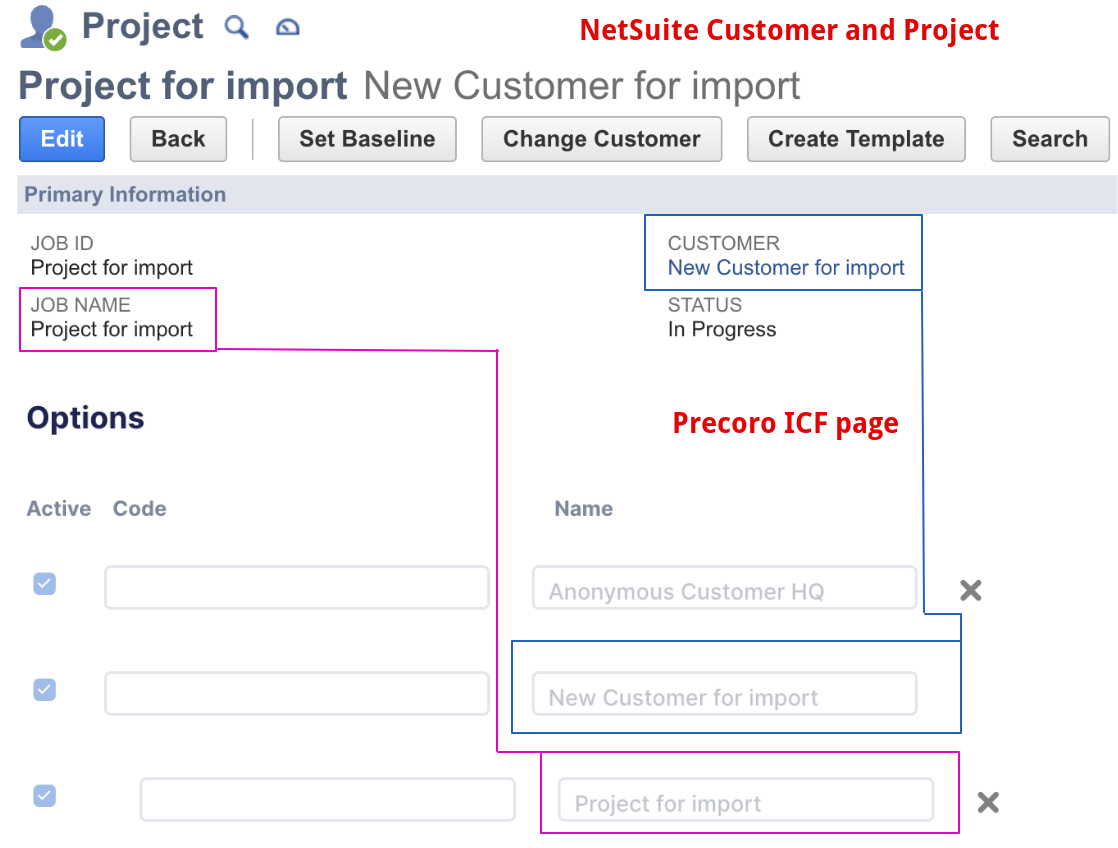
In Precoro, you can integrate Customers and Projects as Items Custom Field where:
- Customers are the first-level options.
- Projects are the second and third-level options.
To import Customers and Projects from your NetSuite account to your company in Precoro, follow these steps:
- Make sure that your Customers and Projects are associated with the integrated Subsidiary.
- Go to your NetSuite integration page and click the Import Customers button.
- Select the Customers and Projects to import or click Select All (if you need to integrate all of them).
- Click the Import button.
- Congratulations, the Customers and Projects list has been imported.
Please note: Only Customers and Projects associated with the integrated Subsidiary will be imported to Precoro.
You can also optimize your work with NetSuite integration by using the Search functionality.
To perform a search, enter the needed information in the Search field above the list and press the Search button on the right.

How to Update Customers and Projects
Manual Update
Go to your NetSuite integration page and click the Update Customers button.
After the update, you will receive a system notification regarding the success status.

Auto-Update
You can also, turn on or off NetSuite Customers auto-updating from the Integration page. This functionality can help you eliminate manual and routine tasks of constant data updates.
Updates occur weekly on Mondays.
To Update Changes Automatically, toggle the corresponding switch to turn it blue. The deactivated toggle is gray, which means that information will only be updated manually.
Integrated Fields and Their Synchronization Method
Customer information from NetSuite, which Precoro currently syncs
Please note: Customer integration uses the *one-way synchronization method.
| Customer Field in NetSuite | Customer Field in Precoro |
| Company Name | Name |
Project information from NetSuite, which Precoro currently syncs
Please note: The Project integration uses the *one-way synchronization method.
| Project Field in NetSuite | Project Field in Precoro |
| Name | Name |
Please note: Precoro does not import/integrate Project Number. Contact your CSM manager if you need to display the Project’s Number in Precoro.
*one-way synchronization — changes made in Precoro will not be displayed in NetSuite. Changes made in NetSuite will be displayed in Precoro after the data update.
*two-way synchronization — changes made in Precoro affect the integrated data in NetSuite. Changes made in NetSuite will be displayed in Precoro after the data update.
Character Limits for Customers and Projects Fields in NetSuite
In NetSuite, you cannot enter more symbols than allowed by the system. Here are the character limits:
- Customer's Company Name = 83 symbols
- Project's Name = 256 symbols.
Other Customers and Projects Integration Features
1. Updating the name of an integrated Customer or Project
-
In Precoro — the names of a Customer or Projects cannot be updated.
-
In NetSuite — click on the Update button on the Integration page in Precoro to sync changes.
2. Adding a new Customer or Project
-
In Precoro —you cannot edit the integrated Items Custom Field.
-
In NetSuite — click the Import Customers button on the Integration page in Precoro to sync the new Customer or Project associated with it.
3. Removing a Customer or Project
-
In Precoro — the Customer or Project will remain active in NetSuite. If you want to deactivate them in NetSuite, do this manually by clicking the Edit button.
-
In NetSuite — click the Update button on the Integration page in Precoro to sync the inactive status of the Customer or Project.
4. Making a Customer or Project inactive
-
In Precoro — an integrated Customer or Project cannot be deactivated. If you want to deactivate them in NetSuite, do this manually by clicking the Edit button.
-
In NetSuite — click the Update button on the Integration page in Precoro to sync the inactive status of the Customer or Project.
5. Auto-updating integrated Customers and Projects in Precoro
Integrated customers and projects in Precoro can be automatically updated weekly on Mondays. Thanks to this feature, all Customers and Projects you import from NetSuite to Precoro are automatically updated based on the changes you make in NetSuite.
Please contact your Client Success Manager so we can assist you in this matter.