TABLE OF CONTENTS
Why Use Xero Integration
Xero is an accounting software solution designed for small businesses.
Integrating it with Precoro will:
- Accelerate and automate the working process in your company.
- Allow your purchasing operations to run continuously with no irregularities.
- Help maintain valuable communication within the team so that departments always have up-to-date information.
With Xero integration, you will get a fully automated process:
- Create the Purchase Orders or Invoices in Xero whenever they obtain the Approved status.
- Connect the Purchasing/Procurement departments with the Accounting department.
Basic Requirements
1. To set up this integration, you need to have both Xero and Precoro accounts with administrative roles.
2. If you have registered multiple company's accounts, you need to set the integration for each of them separately.
Step-by-Step Xero Integration
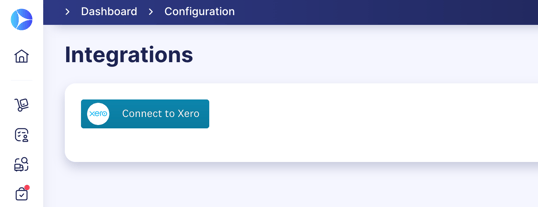
Step 1. Connect your accounts
Open the Integrations page in Precoro, click on the Connect to Xero button, and enter your credentials to access your Xero account:
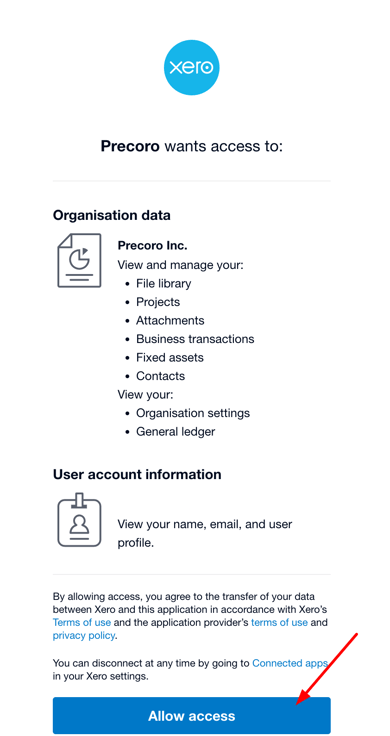
Click on the Allow Access button for Precoro to access the necessary information:
Step 2. Import the necessary data
Once you have allowed access, choose the information you wish to import.

- To import the Chart of Accounts, click on this option, select data, and press the Import button.
If you want to speed up your setup, use Smart Integration to automatically import the most relevant data from Xero based on your recent activity.
See how it works in this article.
To promptly work with data use the Search functionality. It works with matches by words, part of a word, or symbols throughout the whole list.
When transferring the Chart of Accounts from Xero, there are several account types Precoro cannot support. So please, check out the table below to ensure you are importing the compatible options.
Chart of Accounts options that are compatible with Precoro:
| Category Name | Type |
|
Assets |
|
|
Expenses |
|
|
Liabilities |
|
|
Other income |
|
|
Equity |
|
|
Revenue |
|

- To import Tracking Categories, click on this option, select data, and press the Import button.
Please note that you can have only two Tracking Categories in Xero. Those might be Projects, Departments, or Classes. In Xero, these categories are available on the items level only, so they will be imported as Custom Fields for Items.
- To import Suppliers, click on this option, select data, and press the Import button. To optimize the searching process, use Search by name.
Please note you can load 100 suppliers at a time. If you wish to see all of your suppliers from Xero, click the Load more button.
- To import Items, click on this option, select data, and press the Import button.
There are two options for importing items with different types:
-
Xero Purchase items are imported as Non-Inventory Items in Precoro.
-
To import an item as an Inventory Item in Precoro, please enable the Track inventory item option in Xero.

- To import Tax Rates, click on this option, select data, and press the Import button.
Please note that you can only import the new Taxes from Xero and are unable to add Taxes to Precoro from the Tax Management page.
Step 3. Chose the Document Type and Status to Send and Save
The final steps are to select the type of document you wish to send to Xero:
- Approved Purchase Orders
- Approved Invoices
- Core Document Set
When Core Document Set is selected, Precoro sends Purchase Orders, Invoices, and Credit Notes to Xero as a connected document flow.
Here’s how it works:
- If a PO is already synced, an Invoice created from that PO is sent to Xero with a reference to the related PO.
- If an Invoice is created from a PO that hasn't been synced yet, the Invoice isn't sent until the related PO is synced.
- Standalone Invoices, created without a PO, are sent to Xero normally.
- If a PO is marked as Internal, any Invoice created from that PO is also marked as Internal and isn't sent to Xero.
- Service POs are supported and can be synced as part of the Core Document Set flow.
Select the Xero Document Status from the list of available: Approved, Awaiting Approval, and Draft. The Approved document from Precoro will obtain your chosen status in Xero.
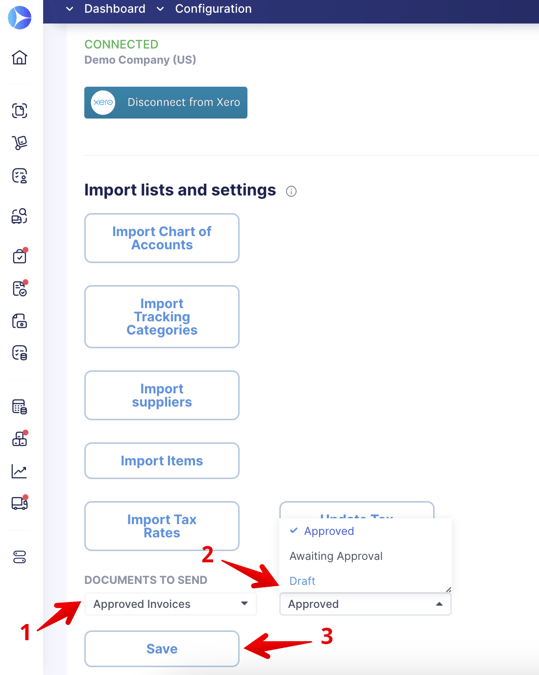
To save the changes made, press the Save button.
Please note that you should use the same Rounding Settings in both systems. In Xero, the Rounding is set to two digits after the comma by default.
Consider reading this article to learn more about Rounding Settings in Precoro.
How to Disconnect or Remove Options for Xero Integration
To turn off the integration, go to the Configuration page, press the Disconnect button, then proceed to select the option that suits your process the best:
- Remove Integration—all data will be unsynced, and you will be able to set up a new integration from scratch.
- Disconnect Integration—your settings and field synchronization will be saved, allowing you to reactivate it anytime.

Established Privacy Policy with Xero
According to the established Privacy Policy, Precoro will have access to the following information:
Organization data
View and manage your:
-
File Library
-
Projects
-
Attachments
-
Business transactions
-
Fixed assets
-
Contacts.
View your:
-
Organization settings
-
General ledger.
User account information
- View your name, email, and user profile.
By allowing access, you agree to the transfer of your data between Xero and this application in accordance with Xero’s Terms of use and the application provider’s terms of use and privacy policy.
You can disconnect at any time by going to Connected Apps in your Xero settings.
Email Notifications
You can set up notifications to always know the status of your Xero Integration.
Go to the Email Preferences and activate the Notification about the disconnected Xero integration letter. When activated, users with Configuration roles in Precoro will receive an email notifying them of the possible issues:
-
Xero subscription has been transferred to another user.
-
Xero subscription has been canceled.
-
Xero subscription expired.
-
Your Xero admin has been removed from the Xero organization.
And prompting the administrators to take action and establish the integration. In the meantime, your company’s documents, suppliers, items, and tracking categories will not be created or updated until the integration has been established again.
Useful Articles
Data Synchronization Between Xero and Precoro
Exporting Approved Purchase Orders to Xero
Exporting Approved Invoices to Xero