TABLE OF CONTENTS
Get Visibility and Control over Payments with Bill.com
Precoro integration with Bill.com allows you to track the entire procurement process, from requisition to payment, in one place. At the same time, the integration saves you from double work, since you won’t have to re-enter and re-check your data! Once the invoice is approved in Precoro, it can be sent to Bill.com for payment, and the updates are sent back to Precoro for easy monitoring.
Here’s what the integration will help do:
- Keep the payments compliant and aligned with your spending rules.
- Automatically ensure all invoices are approved before proceeding to payment.
- Minimize inconsistencies and errors that increase spend.
- Stay updated on order and invoice status without manually checking if everything’s been paid yet.
How to Establish the Integration
Step 1: Connect Precoro and Bill.com
💡 Please note: To establish the integration, ensure you have the Administrator role and the Connection manager option enabled in Bill.com. You’ll also need the Configuration role in Precoro.
For now, Bill.com integration can’t be connected if your company is already integrated with QuickBooks, Xero, or NetSuite. Our team is working on the ability to set up integrations simultaneously while maintaining data integrity
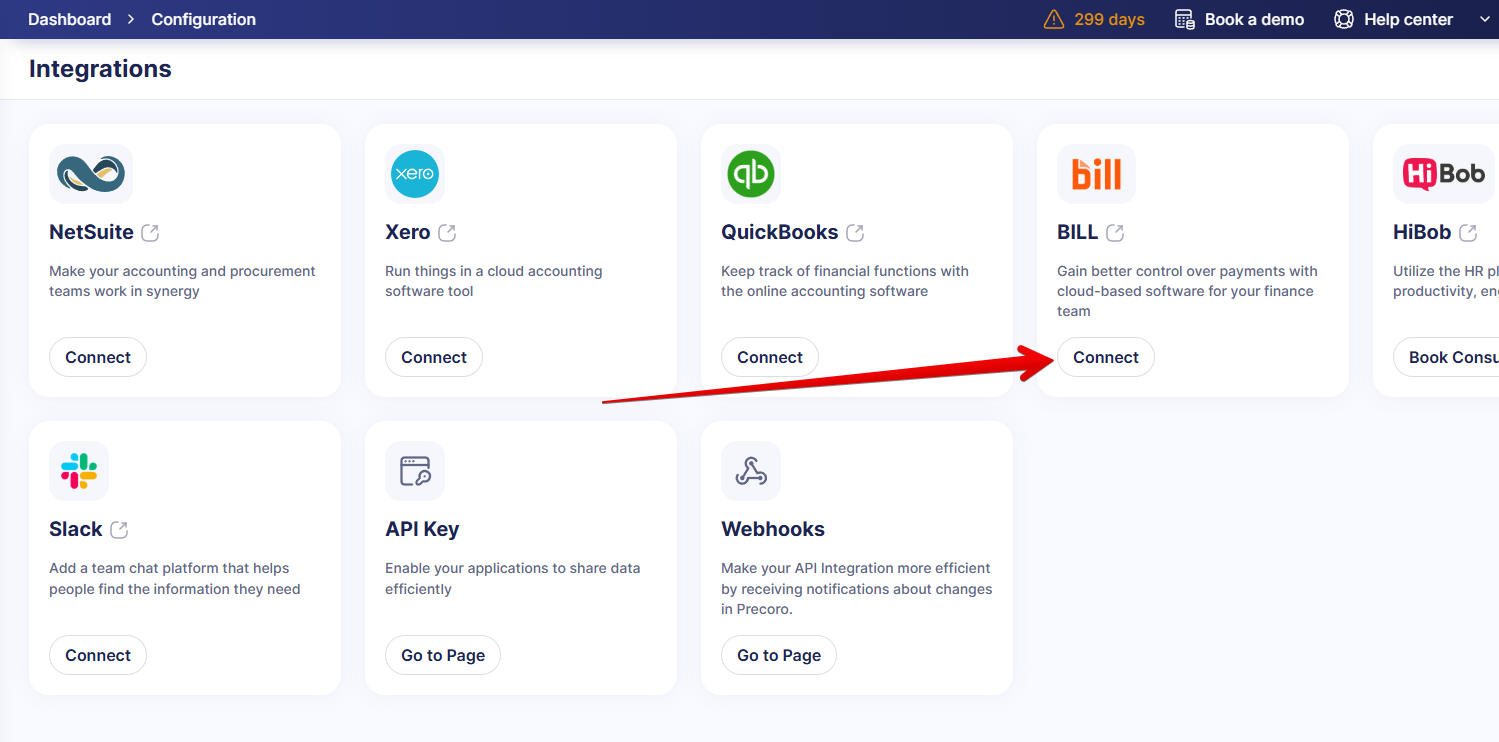
In Precoro, navigate to Configuration → Integrations, find BILL, and press Connect.
This action will redirect you to the BILL Configuration page. To connect the integration, you’ll need to fill out the following form:

Please fill in the Username and Password fields with the username and password of the Bill.com Administrator with the Connection manager option set to Yes.
You can generate a developer key (Dev Key) in Bill.com in Settings → Sync & Integrations → Manage Developer Keys. The Organization ID is also available on the Manage Developer Keys page. Please refer to this article provided by Bill.com for more details.
Press Connect after filling in all the necessary information. Once connected successfully, the integration will be displayed on the Integrations page with the Connected status.
Step 2: Import the Necessary Data
Once the connection is established, you’ll see the lists available for import on the BILL Configuration page. Learn how to import the necessary entities and options in this article.
💡 Please note: Only invoices from integrated suppliers will be sent from Precoro to Bill.com. Additionally, all integrated fields will be required, and you’ll only be able to select the imported options. Please ensure you’ve synced all the required information for document integration.
How to Integrate Invoices and Payments
After setting up the integration and importing the necessary fields and options, you can start integrating documents.
Please learn how invoice integration works here.
Payments from Bill.com can be imported either from the BILL Configuration page or from the Payments page in Precoro. Please refer to this article for more details.
How to Disconnect or Remove Bill.com Integration
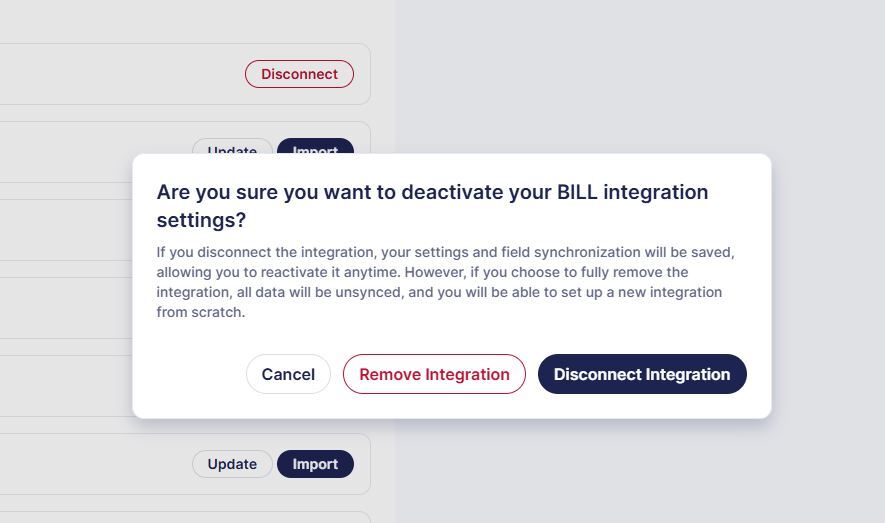
If needed, you have the option to disconnect the integration permanently or temporarily. To do so, go to the BILL Configuration page, press the Disconnect button, then select the necessary option:
- Remove Integration—all data will be unsynced, and you will be able to set up a new integration from scratch.
- Disconnect Integration—your settings and field synchronization will be saved, which allows you to reactivate it anytime.