TABLE OF CONTENTS
- How to Send Approved Invoices and Credit Notes to Xero
- How the Invoice Is Sent to Xero
- What Data Is Sent
- How to Find the Invoices Not Sent to Xero
- Editing or Revising the Invoice
- Invoice Cancellation
In Precoro, you can choose the documents and data you wish to send or import from Xero. Here are a few helpful articles for you:
1. Set Up the Xero Integration.
2. Learn more about data synchronization between the two systems.
3. Export the Purchase Order type of document.
How to Send Approved Invoices and Credit Notes to Xero
To send an Approved Invoice to Xero, open the Integrations page in Precoro and select the corresponding type in the Documents to Send field. Then, choose the preferred Xero Document Status from the available options: Approved, Awaiting Approval, or Draft. The invoice will be sent to Xero with the selected status.
You can also send Credit Notes to Xero. To enable this:
-
Make sure Approved Invoices is selected in the Documents to Send field.
-
Check the Send Credit Notes option.
-
Click Save to apply the changes.
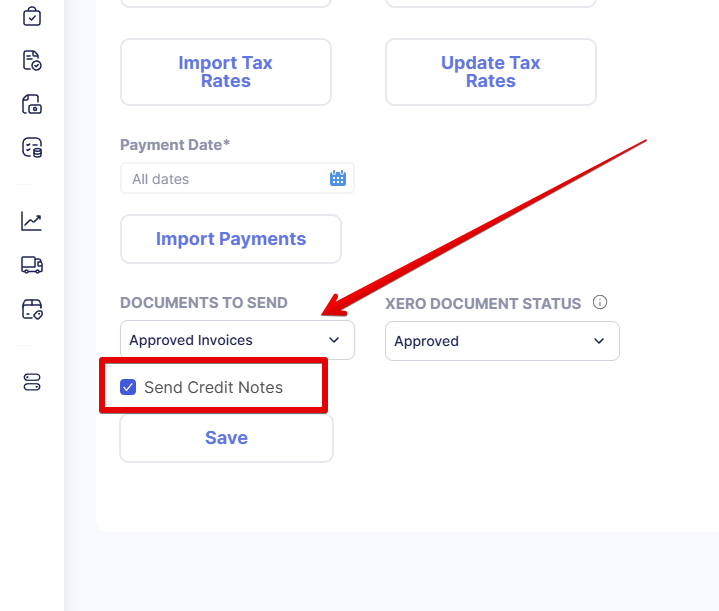
Once this setting is enabled, Approved, Paid, or Partly Paid Credit Notes will be automatically sent to Xero. Credit notes without invoices (standalone) are also integrated.
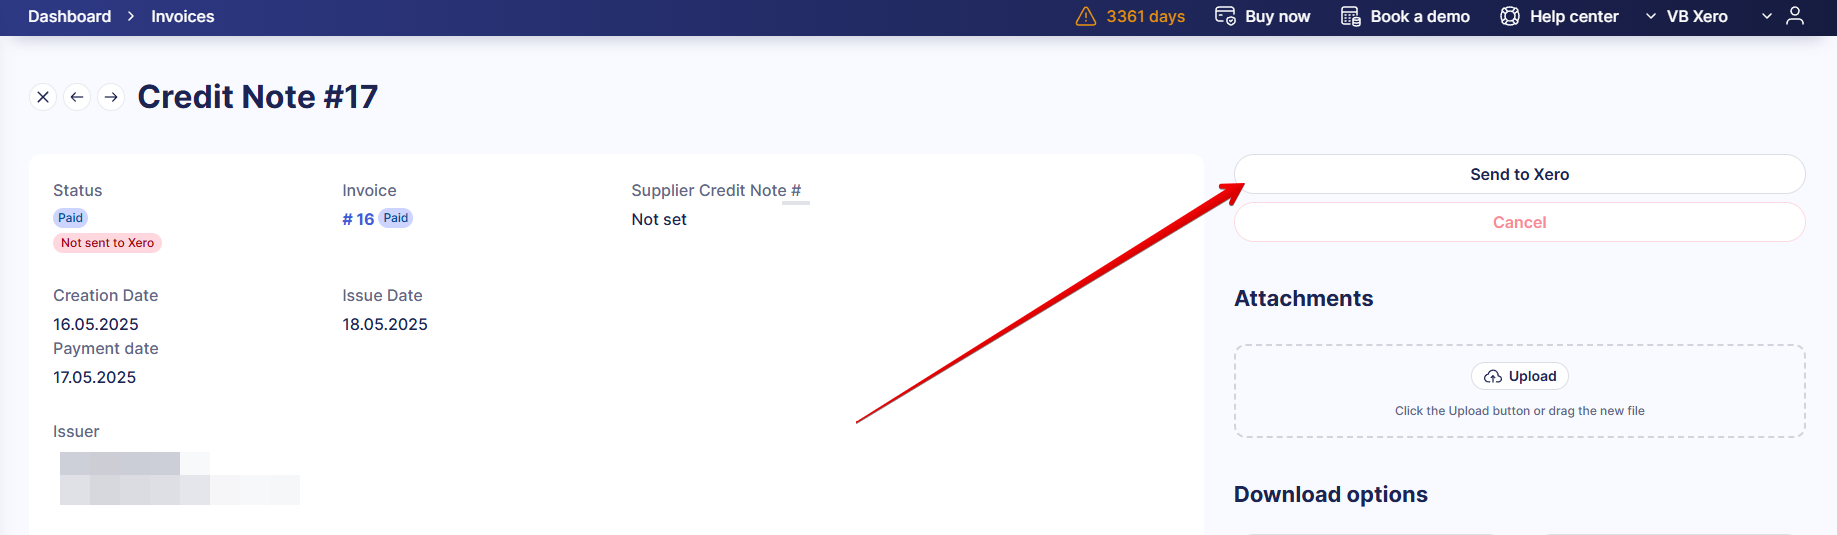
When viewing a document, you will see integration logs stating if the credit note was created in Xero. If not, the logs will explain the reason, and the document will have the Not sent to Xero status. Once you resolve the issue, you can manually send the document using the Send to Xero button in the action panel.
How the Invoice Is Sent to Xero
Once the Invoice document has received the status Approved in Precoro, it is automatically sent to Xero.
In Xero, the document will receive the status you have set on the Integrations page in the Xero Document Status field. Standalone credit notes by default have the Awaiting Payment status.
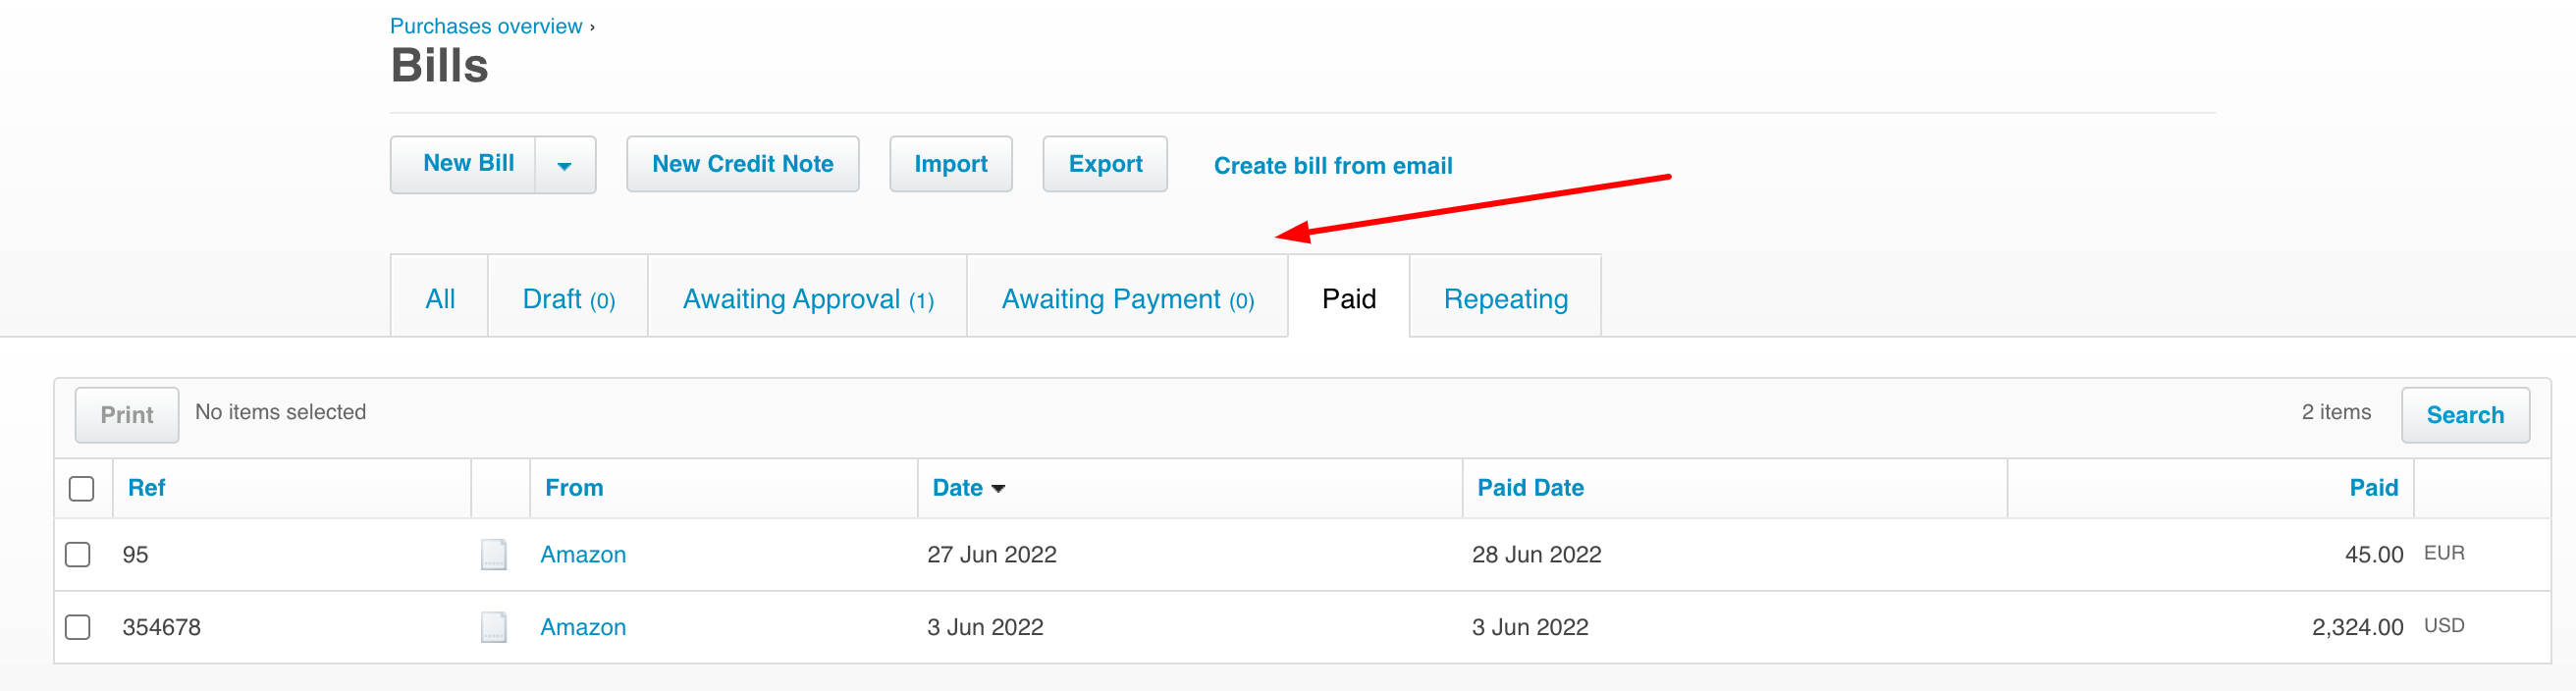
The invoice document in Xero can have the following statuses:
- Draft — available only if you start creating an invoice via Xero.
- Awaiting Approval — all approved invoices in Precoro will have this status in Xero.
- Awaiting Payment — an invoice gets this status in Xero after a person in charge approves it.
- Paid — assigned after an invoice was received and paid.
- Repeating — in case you wish to schedule a repeated payment.
- Voided — an invoice canceled after approval gets this status.
What Data Is Sent
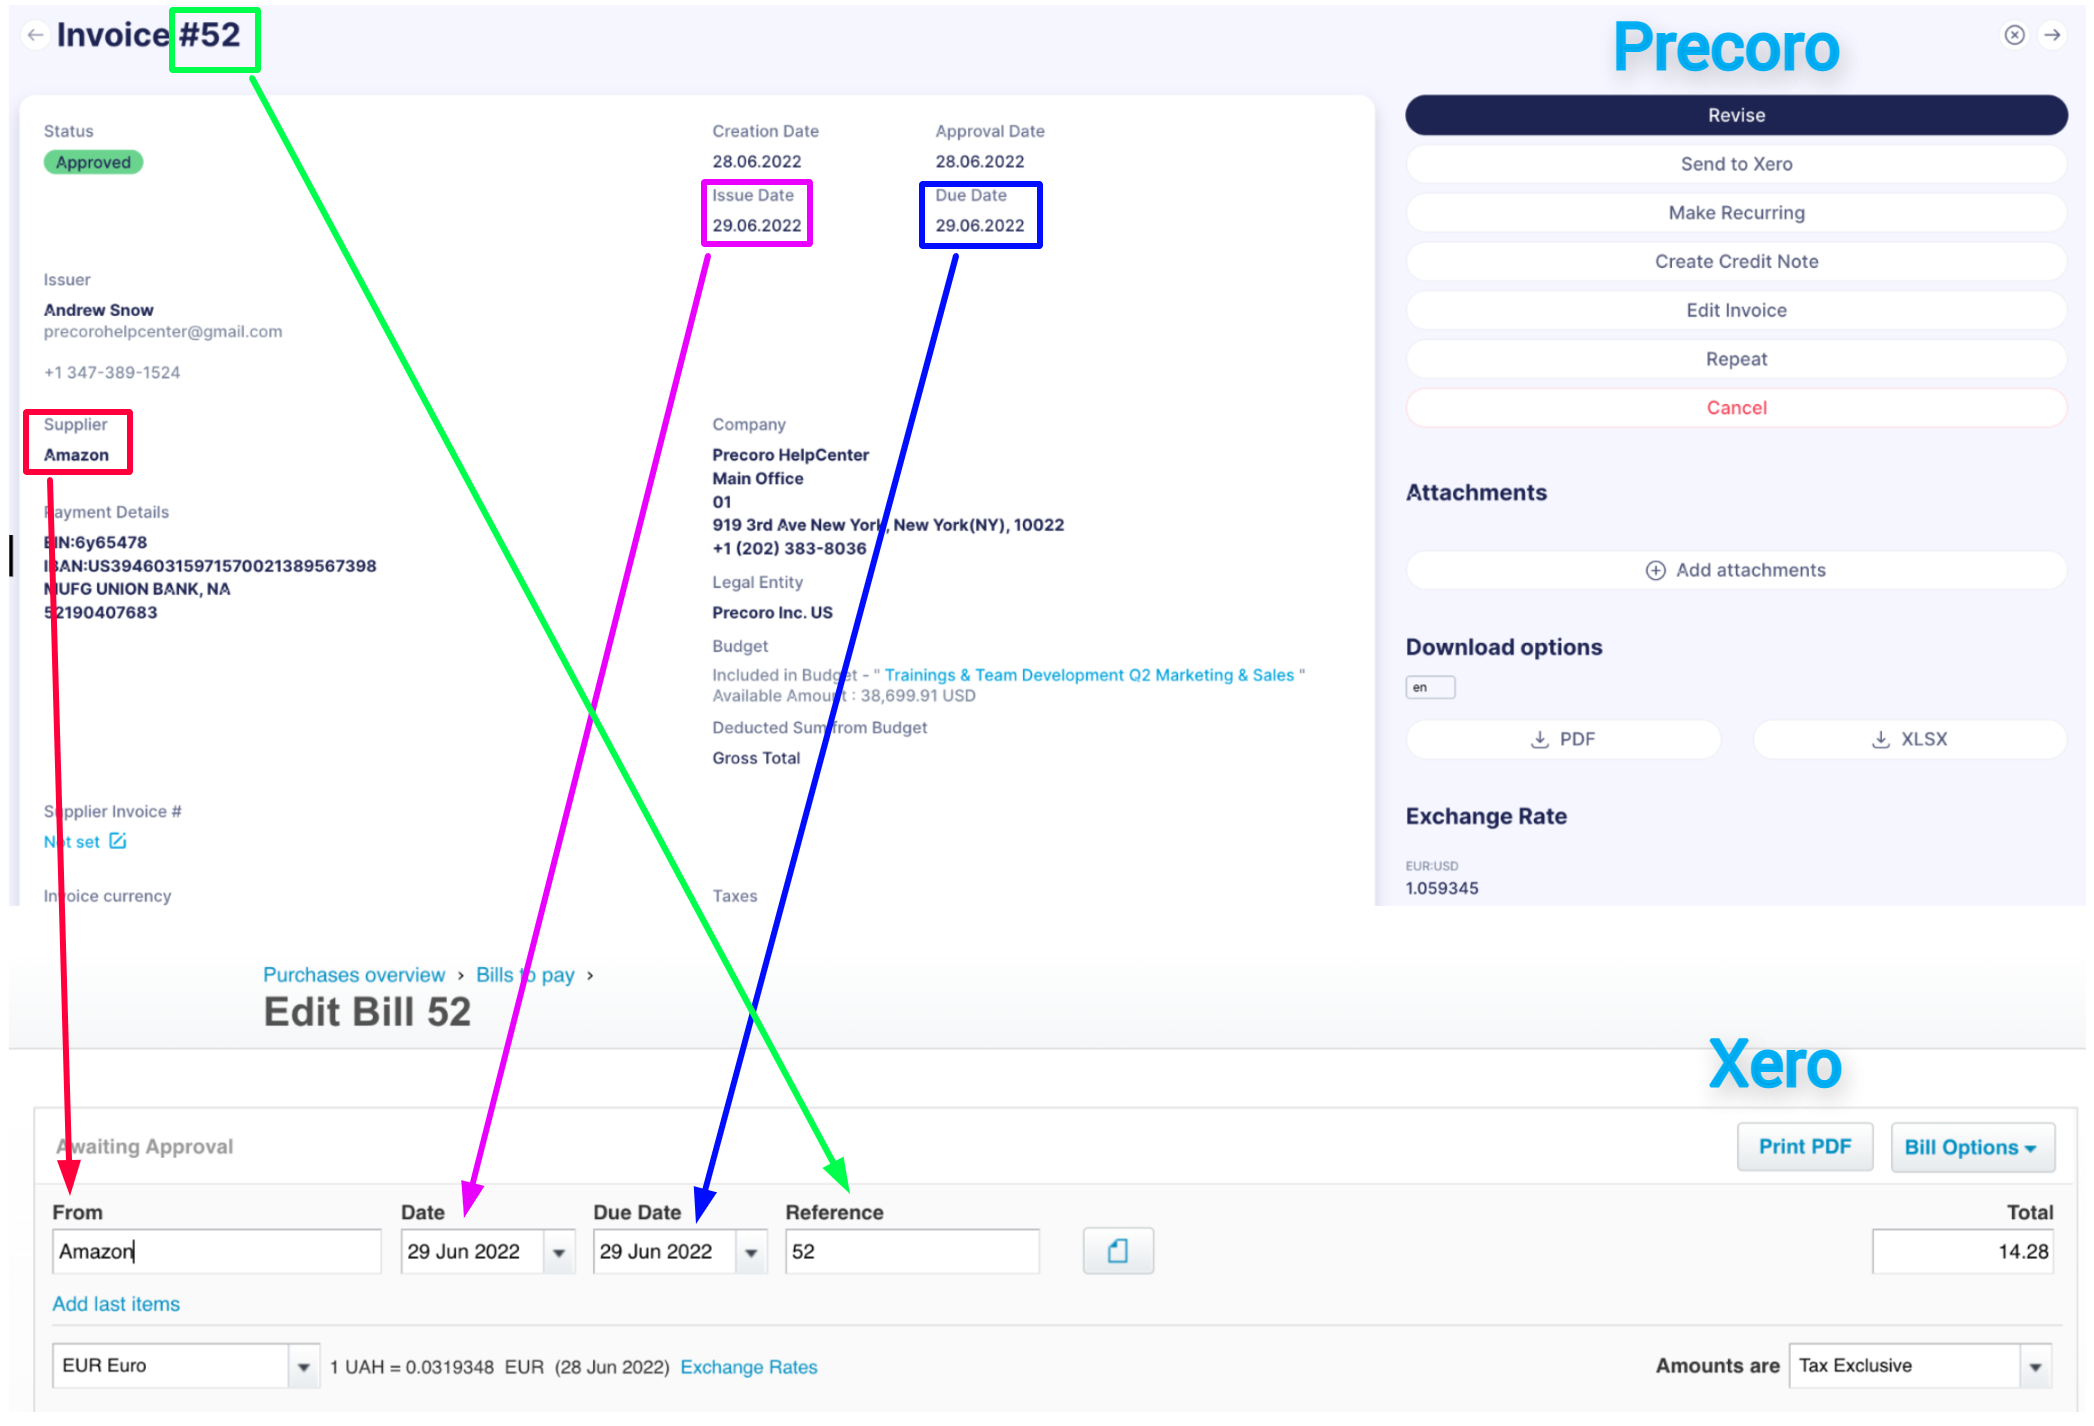
- General Invoice information
| Precoro System | Xero System |
| Invoice # | Reference |
| Supplier | From |
| Issue Date | Date |
| Due Date | Due Date |
| Invoice currency | Currency name |
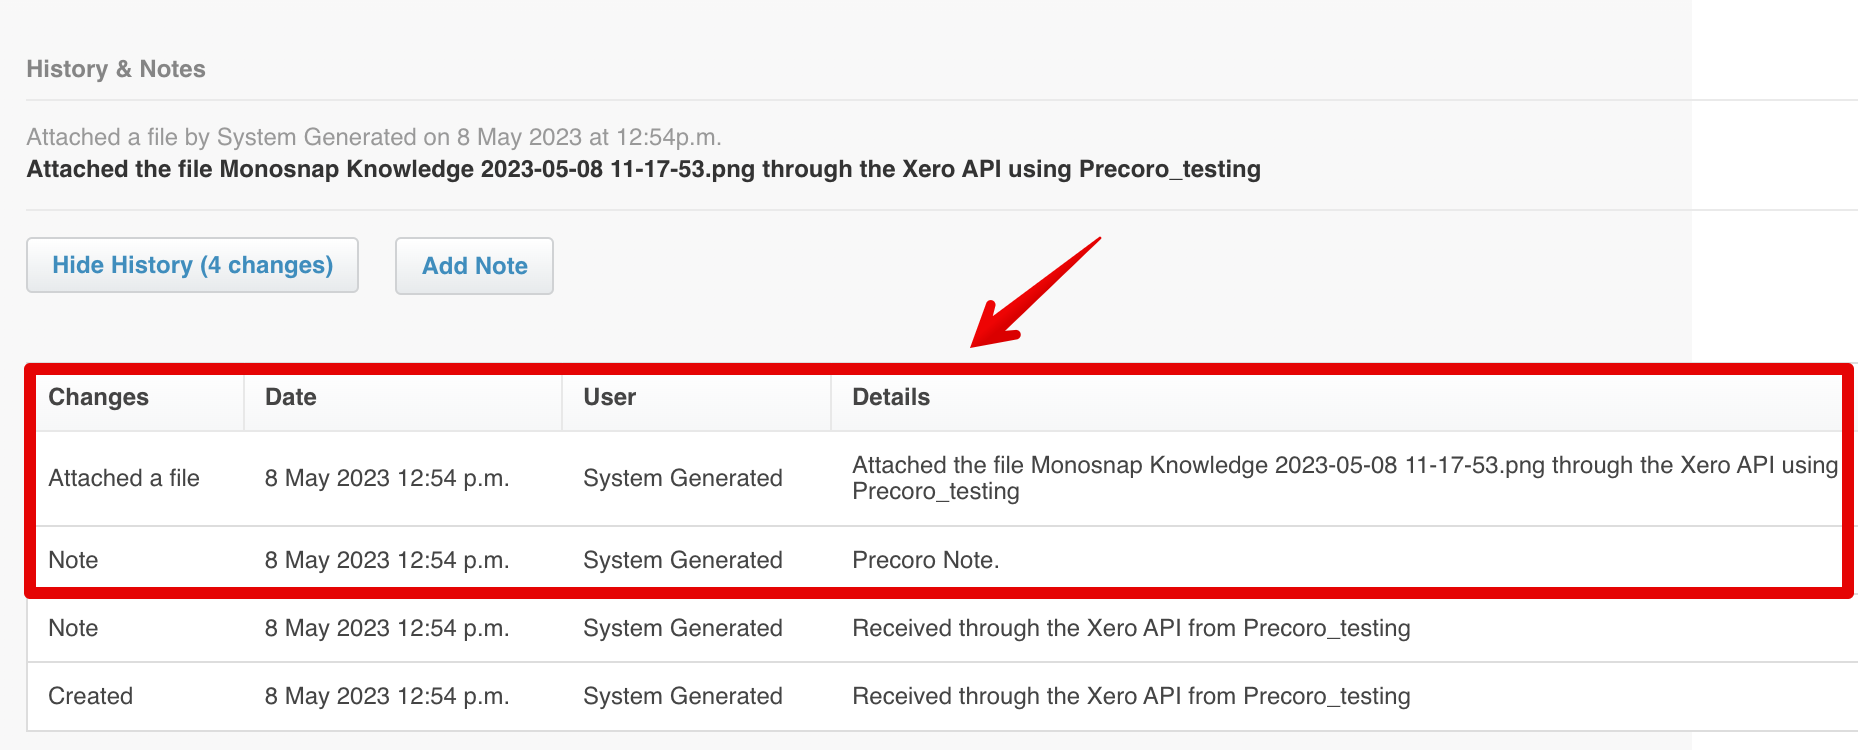
- Notes and Attachments
All this information will be available in Xero in the History & Notes section.
The Notes and information on the Attached files from Precoro will be displayed in the Details field. Also, you will see additional information such as the Date once it is uploaded and the User, which will be System Generated by default if the information was imported from Precoro.
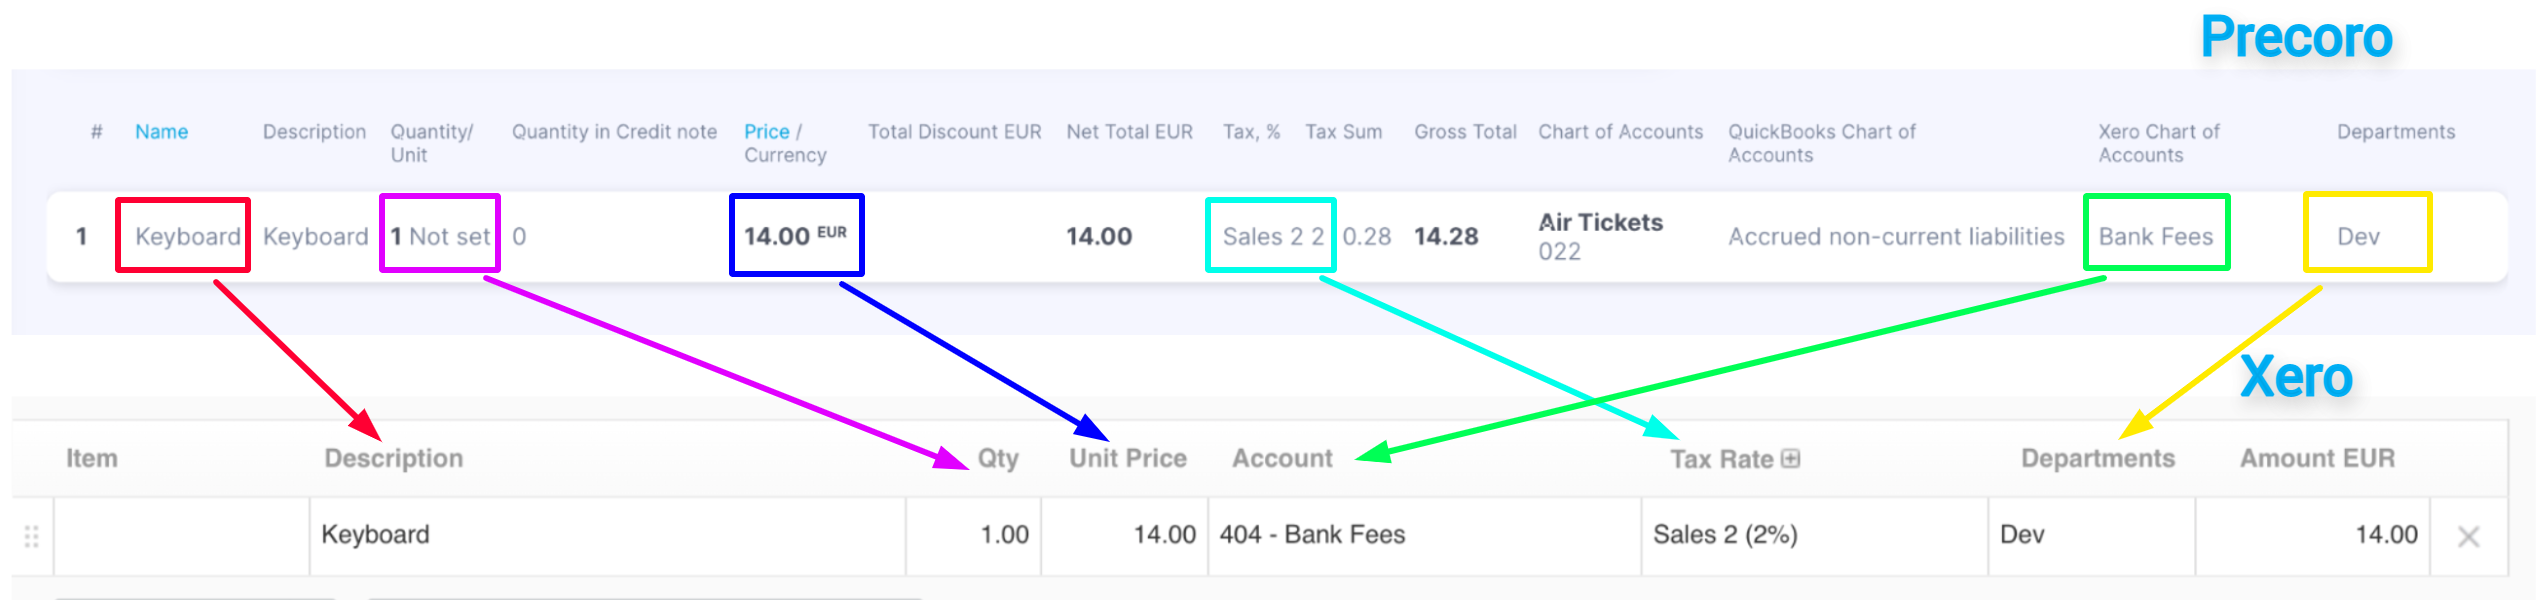
- Items
| Precoro System | Xero System |
| Name | Description |
| Quantity/Unit | Qty |
| Price | Unit price |
| Tax,% | Tax rate |
| Departments | Departments |
| Xero Chart of Accounts | Account |
Please note that you should use the same Rounding Settings in both systems. In Xero, the Rounding is set to two digits after the comma by default.
Consider reading this article to learn more about Rounding Settings in Precoro.
How to Find the Not Sent to Xero Invoices
To view all invoices and credit notes that haven't been sent to Xero, find the “Sent to Xero” filter and set the value to No. You will see the complete list of documents regardless of their other statuses.
To view all documents you can still send, use the “Not Sent to Xero” infocard. It filters only invoices that were not exported due to a possible error and have the Approved status.
To make sure that all documents are up-to-date in Xero, you need to:
1. Filter the Invoices using an infocard.
2. Determine the cause of an error in the Integrations logs.
3. Correct the error. Find more information on how to fix different errors here.
4. Resend the Invoice to Xero.
Editing or Revising the Invoice
The changes you make in Precoro can only be applied to those Invoices that have not yet been approved and have the Awaiting approval status.
If you make changes and send them to the already approved Xero document, they will not be imported.
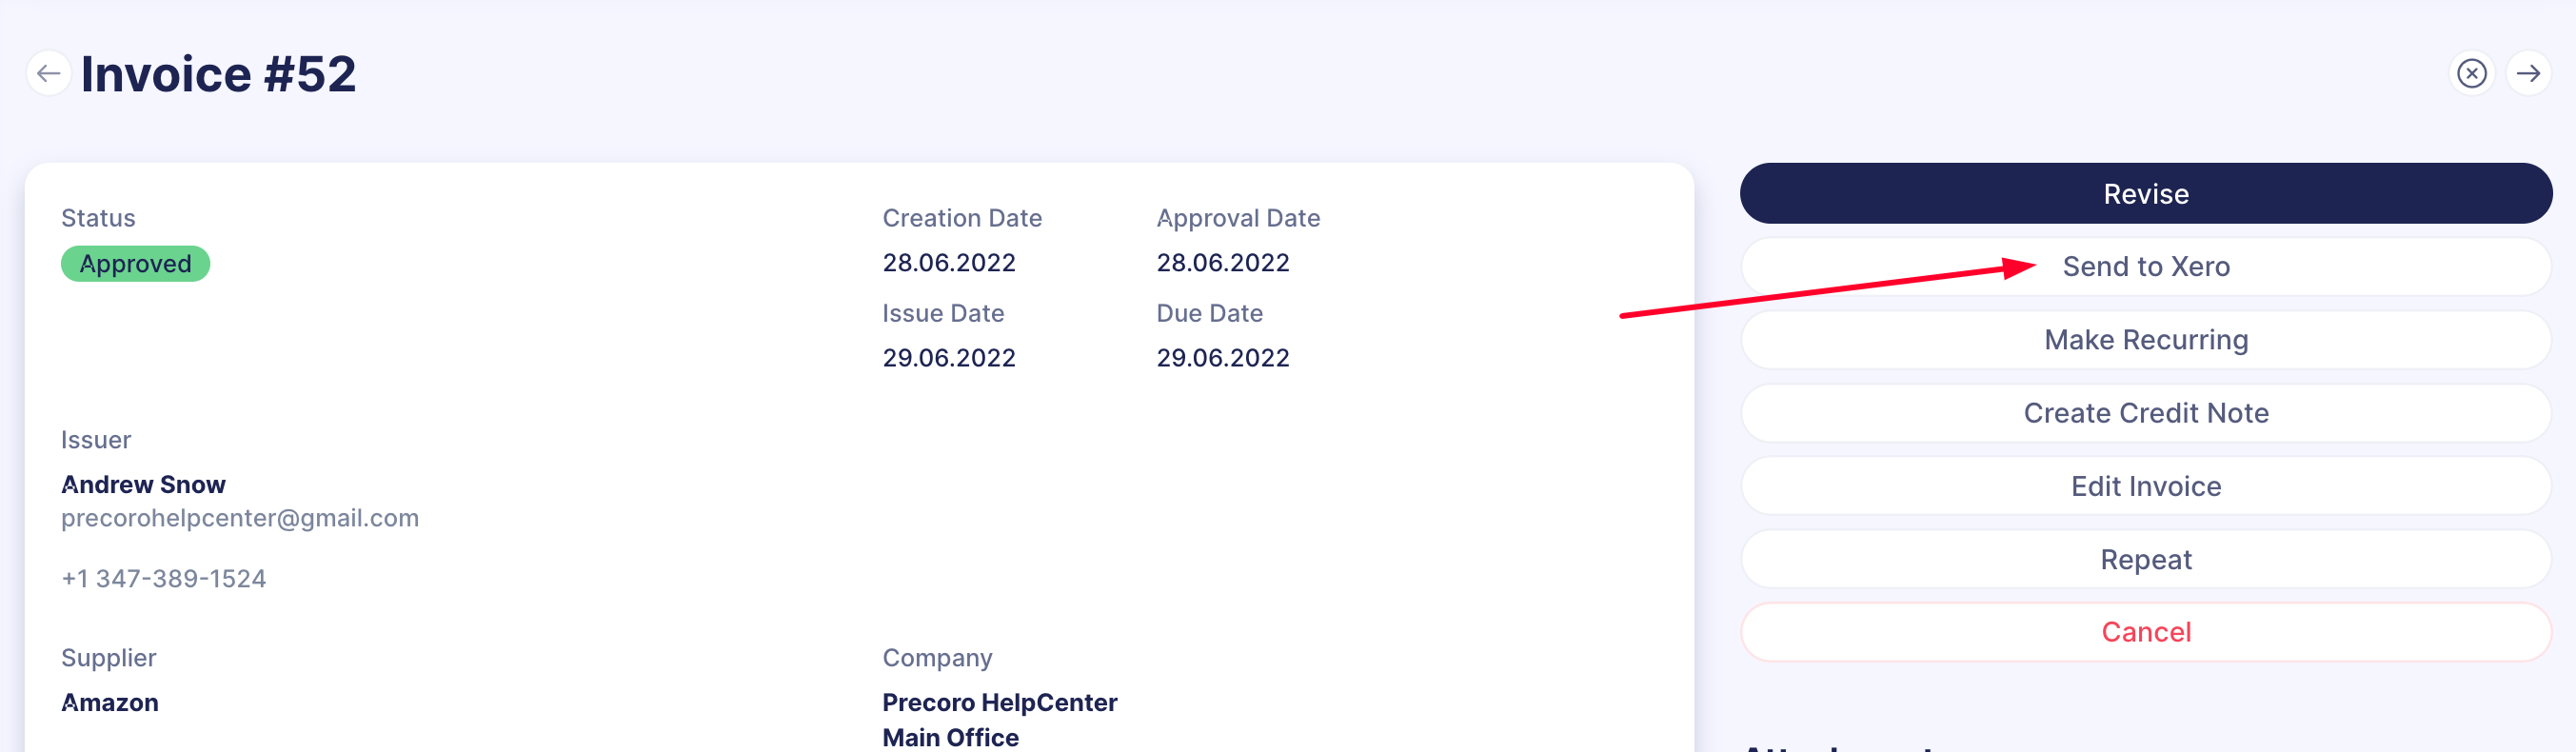
You can Edit or Revise an Invoice in Precoro using the standard system logic. To send the made changes to Xero, please use the corresponding button:
Find more information on how to work with Invoices in Precoro here.
Invoice Cancellation
To cancel an Invoice in both systems, go to Precoro and Cancel the selected document there.
Documents in Draft or Awaiting Approval status will be deleted upon cancellation. However, if your document was approved in Xero, it will gain Voided status when canceled in Precoro.