The Document Custom Forms feature will help you build your own tailored document layouts in Precoro. In this article, you can learn how to create and use the Forms.
TABLE OF CONTENTS
Please note that this functionality is in the BETA mode and we are still improving its work.
What Are Custom Forms
Create as many Custom Forms as your company’s process needs for the Purchase Orders, Purchase Requisitions, Invoices, and Expenses types of documents.
- Build your own tailored document layouts in Precoro.

- Appoint which fields will be required to fill in by your employees.
- Configure dependencies between the fields in a form to make the workflow even more automated.
How to Set Up and Use Custom Forms
Users with Configuration Roles can create new forms.
To start using Custom Forms, you should first:
- Decide on the type of document you wish to adjust.
- Go to Documents Custom Fields and create new fields for adding to the forms.
Find more information on working with Documents Custom Fields in Precoro here.
To create a new Form:
1. Go to the Configuration → Custom Form Settings.
2. Press the New Custom Form button and enter the required information:
- Custom Form Name — this name will be displayed on the document page, so it should be evident to a user what kind of form this is.
- Custom Form Type — you need to select for which type of document you want to configure a new form.
3. You will see the list of all the Documents Custom Fields available for the chosen type of document. What you can do with those fields is:
- Make them Required, which means that users need to fill out those fields to be able to submit the form.
Fields marked required in the form are mandatory throughout the company and they are a part of the Approval Workflow, you cannot make them unrequired.
- Make them Dependent On the other fields. This setting will determine when the specific field will be triggered.
Please see more information on how to work with dependencies in this article:
You can also see the Fields you can include in the Request tab that contains the list of other Document Fields available for adding to the form.
Drag and drop the added fields, they will be displayed in the document depending on how you set their positions.
4. Press the Create button in the top right corner after setting up the form.
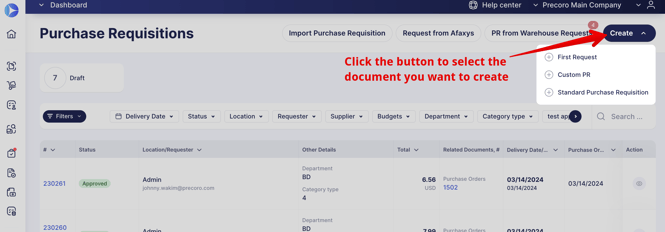
To create any type of document, Standard or Custom, you must click the Create button and select the necessary option from the drop-down list.
To create a Standard document, please select the corresponding option from the list.
Dependency Types and How to Set Them
When setting dependencies, the following options are available:
Please note that you cannot make the mandatory throughout the company fields dependent on any triggers as they are required in the Configurations and can be involved in the document’s approval workflow.
- Selected Option — Field A will be triggered when the needed set option is selected in field B. For example, you can display and ask for information in the field Service Purpose if the Request Type is Service.
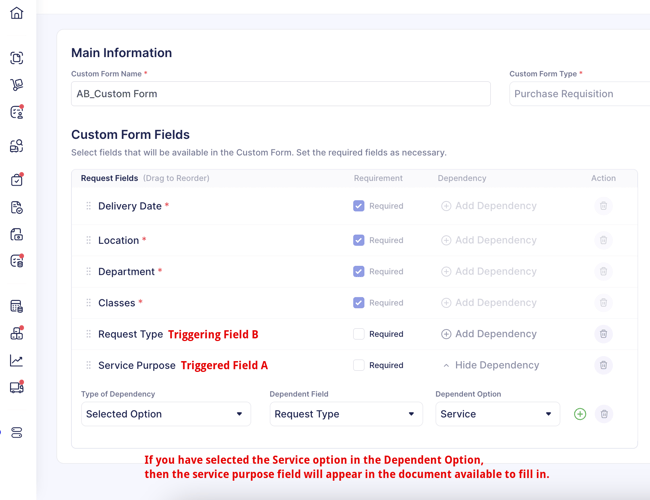
Let’s see how it works in the document:
- Completed Field — field A will be triggered when Field B is filled out with any value (without focus on a specific option, unlike the Selected Option type).
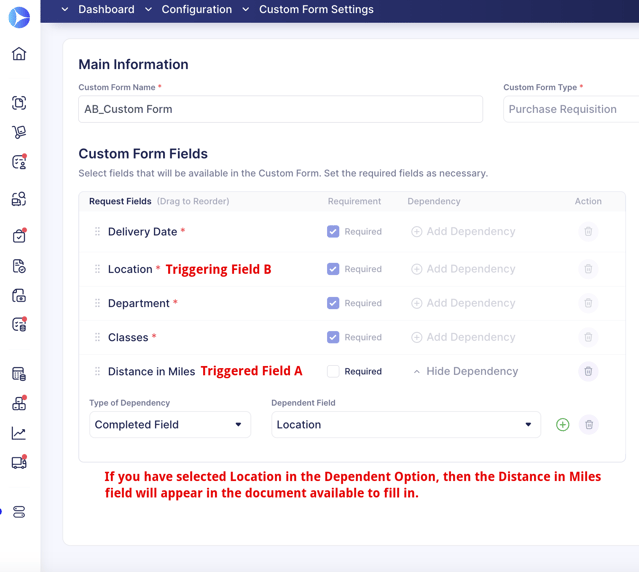
Let’s see how it works in the document:
- New Supplier Added — the chosen field will be triggered if a new supplier is requested. For example, if the user requests a new supplier in a document, the field New contract or existing one? — will be triggered. In this case, you must make sure that the Supplier field is added to the form as well, so the users can make a request.
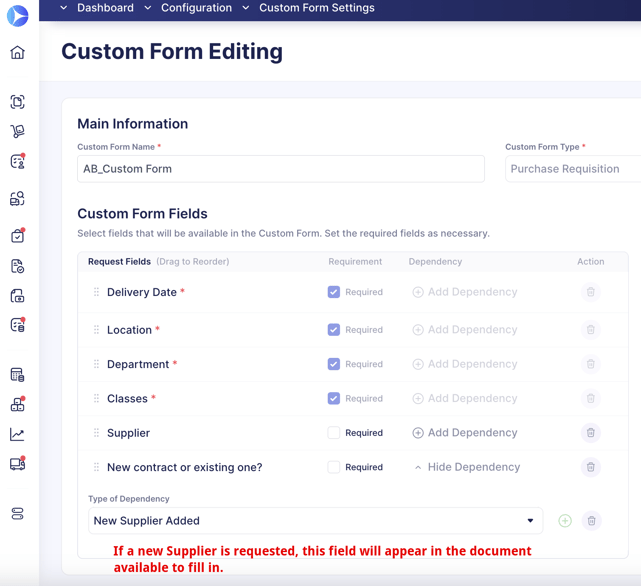
Let’s see how it works in the document:
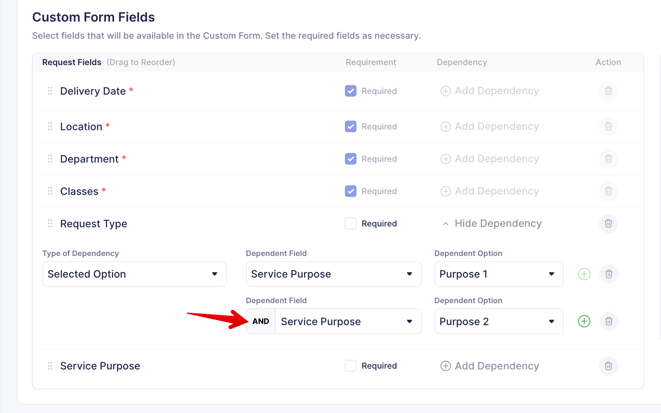
How to Apply And/Or Choice Filters
You can add multiple dependent fields by using the And/Or choice filters:
- And — if you need the chosen conditions fulfilled IN ALL the selected fields.
- Or — if you need the chosen conditions fulfilled In AT LEAST ONE of the selected fields.
For example, you want both fields to be filled out for the user to see the third one. In that case, use the And choice filter. If you want either field to be filled out (at least one from the selected), use the Or choice filter.
What Actions Can Be Done With Custom Forms
To make your work with Custom Forms more convenient and simple, you can do the following actions with them:
- Preview — to see the relevant information, you can open it in the preview without opening the form itself.
- Copy — to eliminate manual work, you can make a copy of the existing form and edit it as you need.
- Edit — adjust the settings and make changes to the created form.
- Delete — you can delete only those forms that have not been used for creating documents.
If there are documents already created from your Custom Form, you cannot delete the form. Alternatively, you can Deactivate it.
- Active toggle — the blue-colored toggle means that the form is active. To deactivate it, press the toggle for it to turn grey.
How to Create a Supplier Custom Form From the Document
You can create a Supplier Form Type and select the forms needed in the document when requesting a new Supplier.
Follow the steps described below:
1. Open the Custom Form Settings and press the New Custom Form button.
2. Enter the Name and select the Supplier option in the Form Type field.
3. Edit the Form according to your specifications and click the Create button in the top right corner.
4. Create the document of your choice, either Purchase Order, Purchase Requisition, or Invoice. Click on the Supplier field and press the Add New Supplier button.
5. You will see the selection field "What type of Supplier Request do you want to create?" where you are able to see the list of all available Supplier Custom Forms. By default, users also can see and select the Standard Supplier Request. Select the needed Form and click the Next button.
Please note that the "What type of Supplier Request do you want to create?" field will only be displayed if you have previously created the Supplier Custom Form, so the users will be able to select one.
6. After selecting the Form, the user proceeds to fill out all the required fields and places a new request by pressing the Request button below.